Archives for November 2008

chocolate truffles

copy-of-img_1354

You know how at the end of every month, you think to yourself some variation of “December already?! What happened to November?!” I have a trick for making the days of the month crawl by: make a commitment to write a blog entry every day for a month. Instead, you’ll be thinking “only a third of the way done? There’s still 20 more blog entries to write!” and “yes, only four more days!”

copy-of-img_1330

In all honesty though, this was a valuable experience. My primary goal of cleaning out my “To Blog” folder was achieved. But, not because everything got put into the blog. On the contrary, a lot of recipes were moved into the “Probably Not” folder. If I couldn’t find anything to say about a recipe after considering it every day for a month, it’s time to admit that it isn’t worth writing about.

copy-of-img_1334

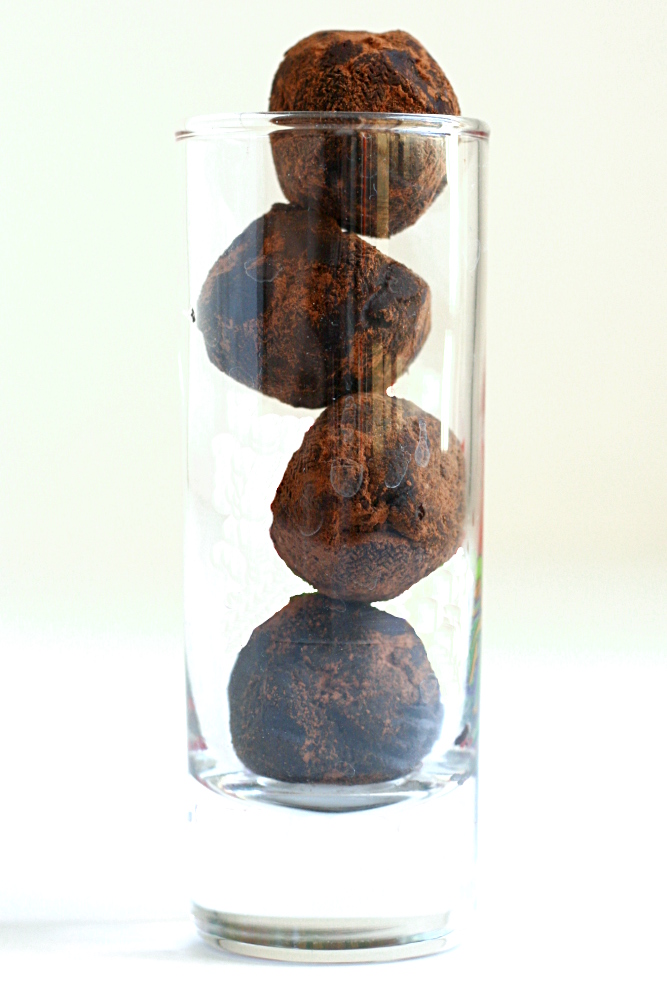
I started the month with a recipe that’s languished on my hard drive for several months before I finally blogged about it, and I’ll end it the same way. I first made Robert Linxe’s truffles in February. They were good, but what really caught my eye about the recipe was his insistence that it be made with Valrhona chocolate. I’m all about using the best ingredients that are available and affordable, but generally I think the choice of ingredients should be left up to the baker. Insisting on a certain expensive hard-to-find brand of chocolate seems unnecessarily snobby.

copy-of-copy-of-img_1328

So I set out to determine how big a factor chocolate quality really is. My plan was to get four chocolates of widely different quality and compare truffles made with each. I was thinking of using Baker’s Chocolate, Ghirardelli, Scharffen Berger, and Valrhona, or possibly using Hershey’s or Nestlé instead of the Sharffenberger. That plan did not work out. I needed to keep the bitterness of each chocolate approximately the same to make sure we were comparing chocolate brand instead of level of sweetness. That limited my options, and I ended up with the following brands – El Rey, Ghirardelli, Nestlé, Scharffen Berger. I was too lazy to make the extra trip to Williams-Sonoma for Valrhona.

copy-of-img_1335

What I found was that the favorite brand was largely a matter of personal preference. I had seven people tasting the truffles, and we discussed the differences between each as we tasted. I also found that it’s much easier to detect small differences in flavor when you’re focused completely on the food. As soon as my family decided we were done tasting and ready to just eat, I stopped paying attention to the subtle flavors of the chocolates.

copy-of-img_1358

Scharffen Berger had a fruity taste and was the favorite of my mom and brother. Ghirardelli was a little metallic at first and was more bitter than Scharffen Berger. The Nestle was similar to Ghirardelli but with a hint of fruit and a little waxiness. It was the favorite of my dad and sister. El Rey was a bit grainy and was more bitter than the others. It was Dave’s favorite, but my brother didn’t like it much. (I didn’t record my favorite or my brother-in-law’s, and this was months ago so I don’t remember. D’oh!)

Really, I think you could use any chocolate that you like. If Valrhona is your favorite, go for it, but you’ll make some delicious truffles with good ol’ Ghirardelli, or even a fancy bar of Nestlé.

copy-of-img_1365

Robert Linxe’s Chocolate Truffles (from Gourmet via Smitten Kitchen)

Makes about 60 truffles (Linxe says not to double the recipe)

I have not found that this makes anywhere near 60 truffles. I tend to make the truffles small, about ¾-inch diameter, and I only get about 30 with this recipe. I noticed some of the reviewers on epicurious had a similar result.

I skipped the 3 ounces of chocolate for the pre-cocoa coating, because I didn’t want to mix the chocolates, and I was only making ¼ of each recipe, and that would have meant I needed melt ¾ ounces of chocolate, and that sounded like a hassle.

11 ounces Valrhona chocolate (56% cacao)
⅔ cup heavy cream
Valrhona cocoa powder for dusting

Finely chop 8 ounces of the chocolate and put in a bowl.

Bring heavy cream to a boil in a small heavy saucepan. Make sure your pan is small, so you’ll lose the least amount of cream to evaporation, and heavy, which will keep the cream from scorching. Linxe boils his cream three times – he believes that makes the ganache last longer. If you do this, compensate for the extra evaporation by starting with a little more cream.

Pour the cream over the chocolate, mashing any big pieces with a wooden spoon.

Then stir with a whisk in concentric circles (don’t beat or you’ll incorporate air), starting in the center and working your way to the edge, until the ganache is smooth.

Let stand at room temperature until thick enough to hold a shape, about 1 hour, then, using a pastry bag with a 3/8-inch opening or tip, pipe into mounds (about ¾ inch high and 1 inch wide) on parchment-lined baking sheets. When piping, finish off each mound with a flick of the wrist to soften and angle the point tip. Freeze until firm, about 15 minutes.

Meanwhile, melt 3 more ounces of the same Valrhona and smear some on a gloved hand. Gently rub each chilled truffle to coat lightly with chocolate. The secret to a delicate coating of chocolate is to roll each truffle in a smear of melted chocolate in your hand. Linxe always uses gloves.

Toss the truffles in unsweetened Valrhona cocoa powder so they look like their namesakes, freshly dug from the earth. A fork is the best tool for tossing truffles in cacao. Shake truffles in a sieve to eliminate excess cacao.

Store truffles in the refrigerator.
caramel cake

copy-of-img_9678

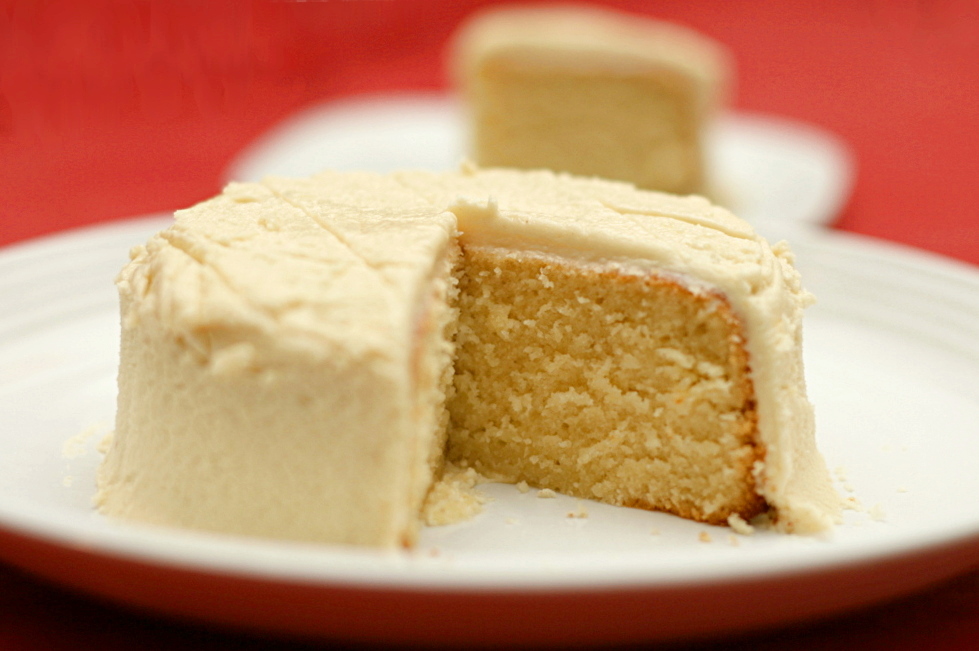
This will be my last Daring Baker entry. I’ve enjoyed being a member for the past year, and I learned something useful from every single recipe I’ve made for the group. However, between Tuesdays with Dorie and the Daring Bakers, the assigned baking recipes are starting to overwhelm me. I came really close to not making this cake, simply because I had pumpkin pie left from Thanksgiving, plus four types of cookies and two types of cupcakes in the freezer. I just couldn’t justify putting much time into making a dessert that we really didn’t need.

copy-of-img_9650

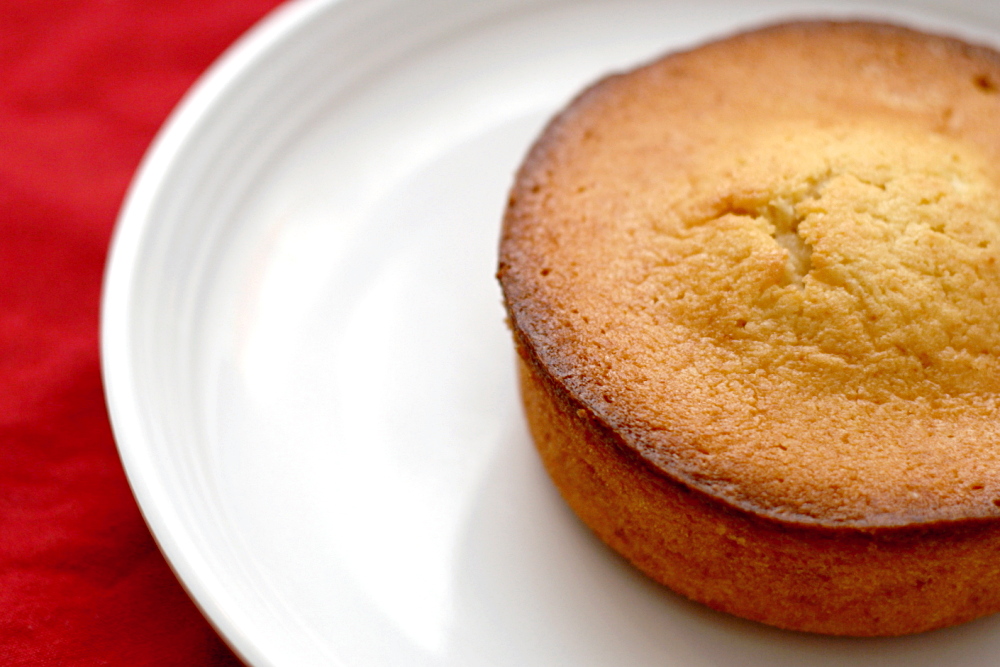
However, Erin convinced me that the recipe wasn’t difficult, and that I should be able to scale it back without adverse affects. (Based on warnings from this month’s hosts, Dolores, Alex, and Jenny, I was concerned that the recipe was going to be finicky.) She was right. This cake required only a little more time than an average cake recipe.

copy-of-img_9654

Plus a little extra effort for me, because I screwed up the caramel syrup the first time. The only times I have ever had a problem with caramel are this cake and the filbert gateau – I don’t know what it is with Daring Baker recipes and crystallized caramel. The second time I made the syrup, I doubled the amount of water I added with the sugar and tweaked the cooking method just a little. I left the amount of water at the end the same, under the assumption that all of the water that’s added with the sugar evaporates before the sugar starts to caramelize. This time I made a nice smooth caramel.

copy-of-img_9665

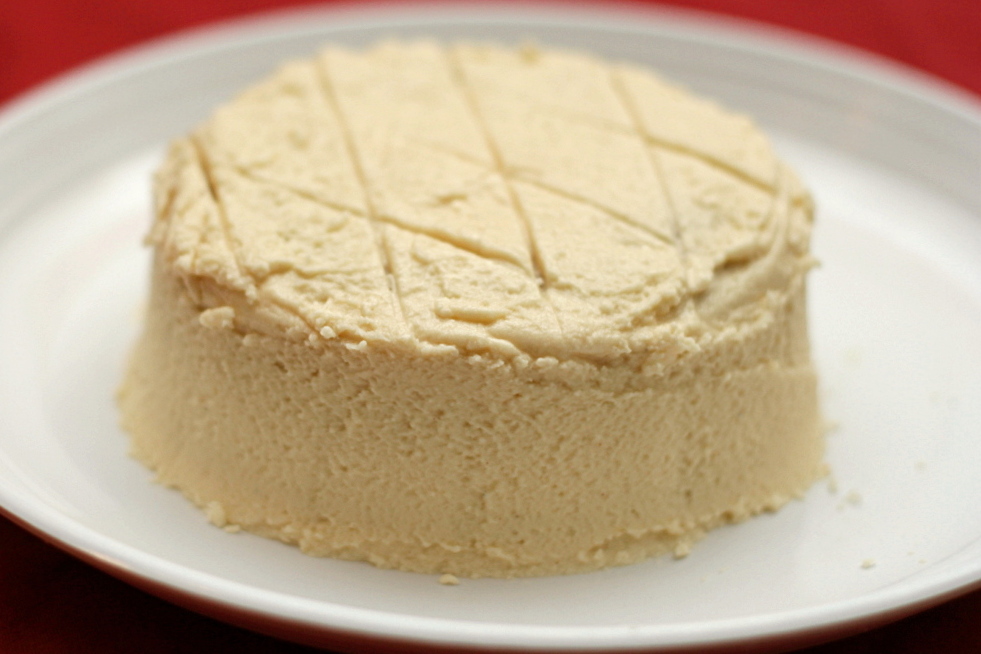
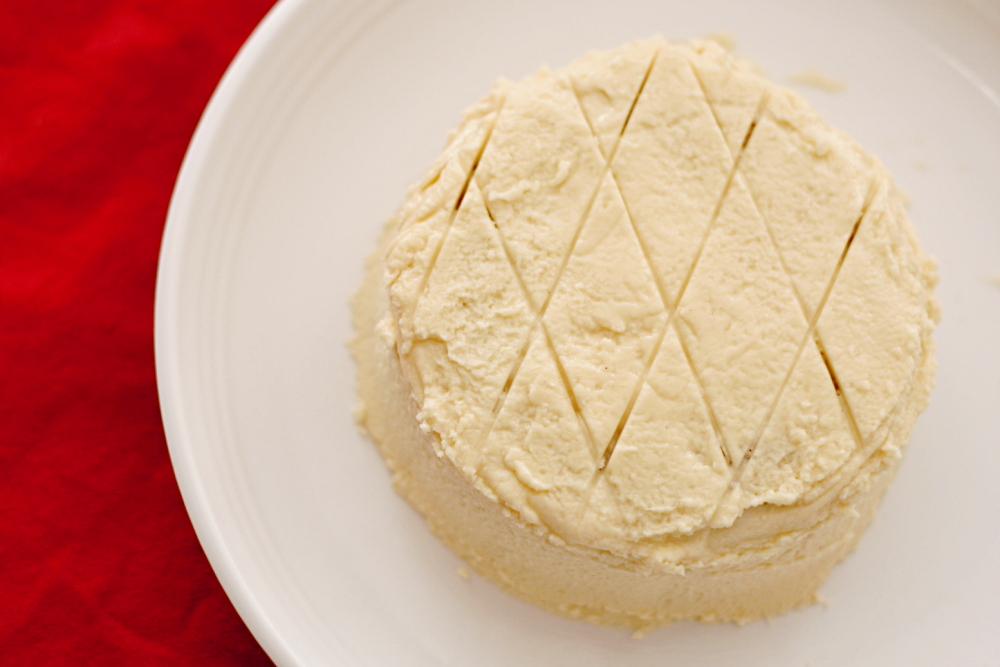
I considered skipping the frosting, but I don’t have much experience with browned butter, so I wanted to try it. It was interesting – it had an unusual texture. I didn’t add all of the powdered sugar, and I found that no amount of the caramel syrup was going to give me the smoothness I was hoping for, so I ended up adding a fair amount of heavy cream. Even then, the frosting was kind of dry and greasy at the same time. I couldn’t seem to spread it on the cake; I ended up using my fingers to pat it down.

copy-of-img_9671

The cake was great. A nice fluffy, even texture, with a flavor reminiscent of my favorite pound cake. The frosting wasn’t bad, although it just didn’t seem quite right. Still, I’m glad I took the time to make this cake, and I’m glad I was a member of the Daring Bakers for the previous year. It was a fun and valuable experience.

copy-of-img_9674

Caramel Cake with Caramelized Butter Frosting (adapted slightly from Shuna Fish Lydon for Baking Bites)

Makes 12 servings

Caramel Syrup:
2 cups sugar
1½ cup water, separated

1. In a small stainless steel saucepan with tall sides, mix ½ cup water and sugar until mixture feels like wet sand. Brush down any stray sugar crystals with wet pastry brush. Turn on heat to highest flame. Cook until dark amber and smoking slightly.

2. Very carefully pour in remaining 1 cup of water. Caramel will jump and sputter about.

3. Whisk over medium heat until it has reduced slightly and feels sticky between two fingers.

Note: For safety reasons, have ready a bowl of ice water to plunge your hands into if any caramel should land on your skin.

Caramel Cake:
10 tablespoons unsalted butter at room temperature
1¼ cups granulated sugar
½ teaspoon kosher salt
1/3 cup Caramel Syrup (recipe follows)
2 each eggs, at room temperature
splash vanilla extract
2 cups all-purpose flour
½ teaspoon baking powder
1 cup milk, at room temperature

1. Preheat oven to 350F. Butter one tall (2 – 2.5 inch deep) 9-inch cake pan. Sift flour and baking powder.

2. In the bowl of a stand mixer fitted with a paddle attachment, cream butter until smooth. Add sugar and salt & cream until light and fluffy. Slowly pour room temperature caramel syrup into bowl. Scrape down bowl and increase speed. Add eggs/vanilla extract a little at a time, mixing well after each addition. Scrape down bowl again, beat mixture until light and uniform. Turn mixer to lowest speed, and add one third of the dry ingredients. When incorporated, add half of the milk, a little at a time. Add another third of the dry ingredients, then the other half of the milk and finish with the dry ingredients. Take off mixer and by hand, use a spatula to do a few last folds, making sure batter is uniform. Turn batter into prepared cake pan.

3. Place cake pan on cookie sheet or half-sheet pan. Set first timer for 30 minutes, rotate pan and set timer for another 15-20 minutes. Bake until sides pull away from the pan and skewer inserted in middle comes out clean. Cool cake completely before icing it.

Caramelized Butter Frosting:
12 tablespoons unsalted butter
1 pound confectioner’s sugar, sifted
4-6 tablespoons heavy cream
2 teaspoons vanilla extract
2-4 tablespoons caramel syrup
Kosher or sea salt to taste

1. Cook butter until brown. Pour through a fine meshed sieve into a heatproof bowl, set aside to cool.

2. Pour cooled brown butter into mixer bowl. In a stand mixer fitted with a paddle or whisk attachment, add confectioner’s sugar a little at a time. When mixture looks too chunky to take any more, add a bit of cream or caramel syrup. Repeat until mixture looks smooth and all confectioner’s sugar has been incorporated. Add salt to taste. (Caramelized butter frosting will keep in fridge for up to a month. To smooth out from cold, microwave a bit, then mix with paddle attachment until smooth and light.)

copy-of-img_9666

country-style sourdough bread

copy-of-img_4391

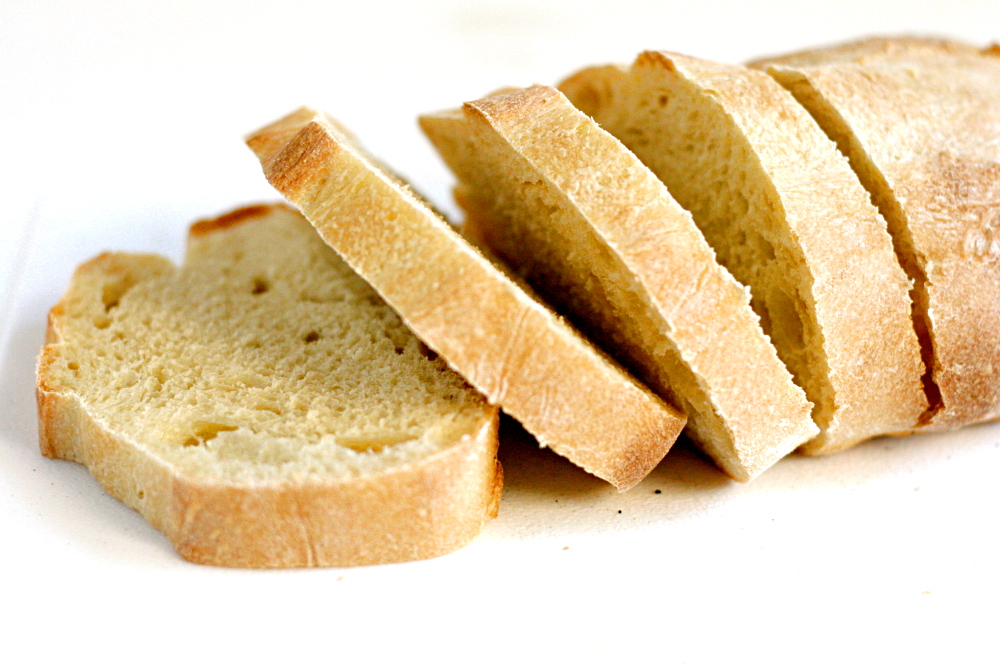
One baking threshold I have not crossed is sourdough. Peter Reinhart gives detailed instructions for developing a starter in The Bread Baker’s Apprentice, but I’m intimidated by what seems like a detailed feeding schedule. Also, I’m put off by the idea of throwing away half the developing mixture several days in a row. Unfortunately, I’m getting the idea that there’s no getting around either of these issues. I scanned through the method in The King Arthur Flour’s Bakers Companion, and it was very similar to Reinhart’s.

copy-of-img_4138

Instead of following the seemingly complex no-yeast method for making sourdough starter, I tried a shortcut method that is essentially a dilute bread mixture, including commercial yeast. This is easy – just mix up the ingredients (I skipped the vitamin C) and leave it overnight. The longer you leave it, the more sourdoughy your bread will be.

copy-of-copy-of-img_4319

The problem is that I never got a strong sourdough flavor from the bread I made with this mixture. I tried the recipe that goes with the starter, and it made some really tasty bread, but I had to use my imagination to taste any sourdough flavor. I tried it shortly after making the starter, and a few weeks later, and there was very little difference.

copy-of-img_4192

Trying to determine if the problem was the starter or the bread recipe, I also used my starter with Reinhart’s basic sourdough bread recipe. Same result – very little sourdough flavor, although otherwise a very nice loaf of bread. I’m visiting my mom next week and she usually keeps some sourdough starter in the fridge, which I’m almost sure is made with commercial yeast, so I might try to make a loaf of bread with that and see how sour it tastes. If it still has only very weak (if any) sourdough flavor, I’m going to have to admit that I need to do a real sourdough starter, without using commercial yeast.

copy-of-img_4330

Has anyone tried this? Is it easier than I’m making it out to be? I’m worried less about making the starter than I am about taking care of it afterwards. It sounds complicated and rigid, and I’m not sure I’m ready for the commitment. On the other hand, I want super tasty homemade sourdough bread!

copy-of-img_4357

One year ago: Tomato Soup and Grilled Cheese. Possibly my favorite meal ever.  Except for sushi.

Proto-Dough (from Alton Brown for Bon Appétit)

Makes about 1 quart

1⅔ cups bread flour
1 teaspoon instant or rapid-rise yeast
1 teaspoon sugar
½ 500-mg vitamin C pill (not chewable), crushed
2 cups warm filtered or spring water (105°F to 115°F)

Sift first 4 ingredients into medium bowl. Place 2 cups warm water in large clean sealable container. Add dry ingredients; whisk vigorously to combine. Cover container with lid slightly ajar; let stand in warm draft-free area 24 hours.

Alton Brown’s tips for using proto-dough:
Afer 24 hours, you can use the proto-dough in a recipe. Or you can develop with flavor by adding a cup each of warm water and bread flour, letting it stand, uncovered, at room temperature until foamy (about 2 hours) and stashing it, covered, in the fridge for at least 3 weeks. An alcohol-rich liquid will rise to the surface every few days; just whisk it back in. “Feed” the proto-dough every time you take some to use in a recipe. For every cup taken add a cup each of water and bread flour, let foam, and return to the fridge. Proto-dough can last for years, as long as you keep taking and feeding. To use proto-dough in a regulr yeast recipe, replace the dry yeast and every cup of liquid (including dissolving liquid) with ½ cup of proto-dough, 5 ounces liquid, and ½ teaspoon instant yeast.

Country-Style Sourdough Bread (from Alton Brown for Bon Appétit)

AB note: The longer you wait to use the proto-dough, the tangier the bread will be.

Makes 2 loaves

1 cup warm filtered or spring water (105°F to 115°F)
¾ cup Proto-Dough
¼ cup buttermilk
¾ teaspoon instant or rapid-rise yeast
3⅓ cups (or more) bread flour, divided
2 teaspoons salt
Nonstick vegetable oil spray
Cornmeal

Mix first 4 ingredients in bowl of heavy-duty mixer. Add 2 cups flour; stir to blend. Cover bowl with kitchen towel. Let rise in warm draft-free area until doubled in volume, about 1½ hours.

Using dough hook, mix in 1⅓ cups flour and salt at lowest setting. Increase speed slightly; knead dough 5 minutes, adding more flour by tablespoonfuls if dough sticks to sides of bowl. Let dough rest 15 minutes. Knead on low 5 minutes. Scrape dough from hook into bowl. Remove bowl from stand. Coat rubber spatula with nonstick spray. Slide spatula under and around dough, coating dough lightly. Cover bowl with kitchen towel. Let dough rise until doubled in volume, about 1 hour.

Turn dough out onto floured surface and fold over on itself several times to flatten. Divide in half. Shape each half into 4×8-inch rectangle. Make 1 shallow lengthwise slash down each.

Sprinkle large rimmed baking sheet with cornmeal. Space loaves on sheet 3 inches apart. Dust tops with flour. Cover with plastic; let rise in warm draft-free area until doubled in volume, about 1 hour.

Place 13x9x2-inch metal baking pan on bottom of oven. Position rack at lowest level of oven; preheat to 500F. Place bread in oven. Quickly pour ½ cup water into metal pan; close oven door. Bake 5 minutes. Add ½ cup water to pan. Quickly close door; reduce oven temperature to 425F. Bake loaves until puffed and golden, about 20 minutes. Transfer to rack; cool 15 minutes. Serve warm or at room temperature.

copy-of-img_6739

thanksgiving 2008

copy-of-img_9602

How did your Thanksgiving turn out? Did you have any mishaps? Did you finish cooking at the time you’d planned? Was there any drama?

copy-of-img_9592

Dave and I are spending Thanksgiving by ourselves for the first time this year, and we went for the traditional dinner. We decided we should eat at 4:00, so I scheduled the cooking so we’d eat at 3:30, giving myself some contingency time, and we ended up eating 4:45. So typical for me. But, other than that and an unfortunately large span of time between the green beans being done and the carrots being done, everything came together smoothly and was quite tasty.

copy-of-img_9627

The most dreaded part of the meal for me, even more so than rinsing a 12-pound turkey in a too-small sink, was carving the turkey. I am not at all good at it. The short instructional video I watched made it seem so easy, and said that the carved turkey could be displayed just as nicely as the whole bird. Well, that certainly didn’t happen. My “carved” thigh meat was ready to be put straight into turkey salad sandwiches.

copy-of-img_9621

But it tasted good – the turkey had picked up a wonderful bit of allspice flavor from its brine. The stuffing was great even though I left it in the oven far too long, and the rolls were buttery and sweet, although weirdly flaky. The green beans and carrots were delicious, the potatoes were pleasantly tangy from the buttermilk, and gravy, oh, the gravy. I want to pour it over everything. Now, we’re finishing up a nice Pinot Noir, and I, for one, am thinking about pie. I’ve been thinking about pie all day.

copy-of-img_9598

multigrain pancakes

copy-of-img_9455

This is one of those recipes that’s unabashedly multigrained. The multigrains aren’t sneaking in, trying to pretend this is a regular pancake recipe that just happens to be a little healthier. No, these pancakes are multigrain all the way.

copy-of-img_5792

They’re also, possibly, my favorite pancakes ever. I’m finding that I really enjoy recipes that have whole grain as the primary flavor.

copy-of-img_9452

The ingredient list is a little long for pancakes, and the food processor has to be used to grind up the muesli. I won’t lie that I think that’s a hassle, so what I’ve started doing is grinding the whole box of muesli at once (minus the small portion that’s added to the pancakes unground). That makes the effort involved with making these similar to a regular pancake recipe.

copy-of-img_5804

I don’t always serve these with the apple topping; they’re just as good with maple syrup. But it’s November and apples and cranberries and nuts just seem appropriate. Not only does the topping make these pancakes even more delicious and special than they already are, but it adds a nice serving of fruit to an already fiber-rich breakfast. You can’t beat that.

copy-of-img_5815

Multigrain Pancakes (from Cooks Illustrated November 2006)

Serves 4 to 6.

CI note: Familia-brand no-sugar-added muesli is the best choice for this recipe. If you can’t find Familia, look for Alpen or any no-sugar-added muesli. (If you can’t find muesli without sugar, muesli with sugar added will work; reduce the brown sugar in the recipe to 1 tablespoon.) Mix the batter first and then heat the pan. Letting the batter sit while the pan heats will give the dry ingredients time to absorb the wet ingredients, otherwise the batter will be runny. Unless you have a pastry brush with heatproof bristles, a paper towel is the best means of coating the pan surface with oil. Pancakes will hold for 20 minutes when placed on a greased rack set on a baking sheet in a 200-degree oven. Serve with maple syrup or Apple, Cranberry, and Pecan Topping.

4 teaspoons fresh lemon juice
2 cups whole milk
1¼ cups no-sugar-added muesli (6 ounces), plus an additional 3 tablespoons
¾ cup unbleached all-purpose flour (3¾ ounces)
½ cup whole wheat flour (2¾ ounces)
2 tablespoons brown sugar (light or dark)
2¼ teaspoons baking powder
½ teaspoon baking soda
½ teaspoon table salt
2 large eggs
3 tablespoons unsalted butter, melted and cooled
¾ teaspoon vanilla extract
Vegetable oil

1. Whisk lemon juice and milk together in medium bowl or 4-cup measuring cup; set aside to thicken while preparing other ingredients.

2. Process 1¼ cups muesli in food processor until finely ground, 2 to 2½ minutes; transfer to large bowl. Add remaining 3 tablespoons unground muesli, flours, brown sugar, baking powder, baking soda, and salt; whisk to combine.

3. Whisk eggs, melted butter, and vanilla into milk until combined. Make well in center of dry ingredients in bowl; pour in milk mixture and whisk very gently until just combined (few streaks of flour and lumps should remain). Do not overmix. Allow batter to sit while pan heats.

4. Heat 12-inch nonstick skillet over medium-low heat for 5 minutes. Add 1 teaspoon oil and brush to coat skillet bottom evenly. Following instructions below, add 1 tablespoon batter to gauge temperature of pan. Pour ¼ cup batter onto 3 spots in skillet, using bottom of ladle to spread batter smooth if necessary. Cook pancakes until small bubbles begin to appear evenly over surface, 2 to 3 minutes. Using thin, wide spatula, flip pancakes and cook until golden brown on second side, 1½ to 2 minutes longer. Serve immediately. Repeat with remaining batter, brushing surface of pan lightly with oil between batches and adjusting heat if necessary.
Apple, Cranberry, and Pecan Topping for Pancakes (from Cooks Illustrated November 2006)

Serves 4 to 6.

CI note: The test kitchen prefers semifirm apples such as Fuji, Gala, or Braeburn for this topping. Avoid very tart types like Granny Smith and soft varieties like McIntosh.

3½ tablespoons cold unsalted butter
3 sweet apples (medium), peeled, cored, and cut into ½-inch pieces (about 4 cups) (see note above)
Pinch table salt
1 cup apple cider
½ cup dried cranberries
½ cup maple syrup
½ teaspoon vanilla extract
1 teaspoon fresh lemon juice
¾ cup pecans, toasted and chopped coarse

Melt 1½ tablespoons butter in large skillet over medium-high heat. Add apples and salt; cook, stirring occasionally, until softened and browned, 7 to 9 minutes. Stir in cider and cranberries; cook until liquid has almost evaporated, 6 to 8 minutes. Stir in maple syrup and cook until thickened, 4 to 5 minutes. Add vanilla, lemon juice, and remaining butter; whisk until sauce is smooth. Serve with toasted nuts.

copy-of-copy-of-img_9461

thanksgiving twofer pie

copy-of-img_8894

Laurie, the administrator for TWD, gave us the option of blogging about the Thanksgiving Twofer Pie, a combination of pecan and pumpkin pie, on Thursday instead of Tuesday, under the assumption that some of us would be making it for Thanksgiving. I tried to imagine my family’s reaction if I offered something so untraditional after the turkey. My mom would raise her eyebrows, loudly, if such a thing is possible, and eat maybe half a piece. My dad would eat his portion and proclaim it good but not as good as Libby’s pumpkin pie. My brothers and sister are more easygoing, and they might actually enjoy it for what it is – something different, god forbid.

copy-of-img_8812

I admit to being a little apprehensive about the pie myself, not being a big fan of pecan pie, or even pecans, for that matter. But I’m generally game for something new, so I followed the recipe almost exactly. I did toast the pecans before adding them to the pie, and I ran out of corn syrup and substituted maple syrup for almost half of the corn syrup.  I also used a different pie crust recipe.

copy-of-img_8827

The recipe came together smoothly for me, although I will admit to a twinge of regret when I added the pecans to the wonderfully pure pumpkin pie filling. The only problem I had was that my crust became incredibly difficult to cut through after baking. I am not exaggerating when I say that I ate my pie with a steak knife. I don’t know what happened – my only guess is that the sugary pecan pie filling made its way down to the crust and crystallized. I haven’t seen anyone else mention this problem, but there was nothing unusual about the pie crust I made. Maybe the maple syrup caused the problem?

copy-of-img_8842

I was surprised by how much I really enjoyed this pie. I’m so glad that I added some maple syrup, because that flavor was really noticeable, and it was fantastic. I did think the pie was sort of, um, ugly, once sliced. I wish the layers had stayed separate. That’s okay though, it was still tasty.

copy-of-copy-of-img_8869

Vibi, who’s actually from France and therefore has no interest in Thanksgiving, was kind enough to choose this dessert for all of us American TWD members. The recipe is posted on her blog (in both English and French – just scroll down for the English version).

copy-of-copy-of-img_8896

roasted brussels sprouts

copy-of-img_9499

I know that diets don’t work – that it’s all about getting into a healthy routine and establishing healthy habits. But I find that sometimes the healthy routine could use a little kickstart. And I like to name the kickstart.  A few years ago, I undertook Pudge Eradication. I spent a few months counting calories and increasing my workouts, eradicated some pudge, and kept up the healthy eating routine for a few years. Until I moved and was unemployed for the better part of a year, and then my eating habits went downhill fast. Now that I’m working part-time, I find that I eat so much healthier on the days that I work than I do on the days at home. I’ve decided that it’s time for another healthy routine kickstart. I shall be calling it “Stop Being a Fatass, You Idiot.”

copy-of-img_9484

And so I roasted my Brussels sprouts instead of braising them in cream. It really isn’t a big sacrifice – while they’re absolutely amazing braised in cream, they’re fantastic roasted as well.

copy-of-img_9488

Since Ina’s recipe for roasted carrots was so simple and great, I figured I’d stick with her for roasted Brussels as well. The second time I made these, I had larger sprouts, so I cut them in half. I think I like them halved better – there’s a flat side that browns nicely because it lies right on the pan.

copy-of-img_9494

And hey, just a little olive oil to make some delicious vegetables, served alongside Deb’s mustard roasted potatoes topped with an egg. It’s not super-duper crazy healthy, but the goal is easy – just don’t be a fatass. This qualifies.

copy-of-img_9505

Roasted Brussels Sprouts (adapted slightly from Ina Garten)

Serves 6

1½ pounds Brussels sprouts, halved if large
3 tablespoons good olive oil
¾ teaspoon kosher salt
½ teaspoon freshly ground black pepper

Preheat oven to 400F.

Cut off the ends of the Brussels sprouts and pull off any yellow outer leaves. Mix them in a bowl with the olive oil, salt, and pepper. Transfer them to a sheet pan and roast for 35 to 40 minutes, until crisp outside and tender inside. Shake the pan from time to time to brown the Brussels sprouts evenly. Sprinkle with more kosher salt and serve hot.

hershey’s perfectly chocolate chocolate cake

copy-of-img_9477

It’s my blog’s first birthday. A year ago, I don’t think I knew how much having a food blog would improve my cooking. By reading other blogs, I’m constantly hearing about new methods, ingredients, and ideas. I also find that I’m forced to choose a variety of recipes from a variety of sources to keep my blog balanced. Taking photos of my food has encouraged me to think more about presentation. And being a member of Tuesdays with Dorie and the Daring Bakers has greatly increased my confidence in baking – not only because I’m baking so often, but I’m always making something new. There are far fewer tasks in the kitchen that intimidate me now compared to a year ago.

copy-of-img_9414

And I hear about other popular recipes. People often recommend Hershey’s Perfectly Chocolate Chocolate Cake when someone asks for a great chocolate cake recipe. I already have a favorite chocolate cake, and I had my doubts that the Hershey’s one could live up to it, especially because it uses cocoa as the only source of chocolate, plus it calls for oil instead of butter. Of course the only way to really figure out which is best is to eat them side by side.

copy-of-img_9466left – Hershey’s; right – Cooks Illustrated

Hershey’s Cake is certainly easier to make. The dry ingredients are mixed, some wet ingredients are added, the batter is beaten for a couple of minutes, and then boiling water is stirred in. The result was a very liquidy batter. It was weird. The Cooks Illustrated recipe is a little more complicated, but isn’t by any means difficult.

copy-of-img_9471

The cakes tasted surprisingly similar. Hershey’s is a little sweeter, but CI’s has a subtly stronger chocolate flavor. The textural differences were more noticeable. The Hershey’s cake had a crust on the top (and I pretty much guarantee that I didn’t overbake it), which I didn’t care for. Cooks Illustrated’s cake had a more even texture, and it was lighter and fluffy. You can see in the picture above that the Hershey’s cake is much denser, especially on the bottom. Both cakes were moist, but I think the Hershey’s cake was more so.

The difference between the two cakes wasn’t as dramatic as I was expecting. Both were good, although I’ll stick to the Cooks Illustrated recipe. Both make for a good blog birthday cake!

copy-of-img_9481

I’m adding a “One Year Ago” feature, copied straight from Smitten Kitchen. It seems like a great reminder for old recipes that are too good to be forgotten.

One year ago: Cream Cheese Chocolate Chip Cookies

For Cooks Illustrated’s Old-Fashioned Chocolate Layer Cake, click here.

Hershey’s “Perfectly Chocolate” Chocolate Cake (from Hershey’s Chocolate)

2 cups sugar
1¾ cups all-purpose flour
¾ cup Hershey’s cocoa
1½ teaspoons baking powder
1½ teaspoons baking soda
1 teaspoon salt
2 eggs
1 cup milk
½ cup vegetable oil
2 teaspoons vanilla extract
1 cup boiling water

1. Heat oven to 350F. Grease and flour two 9-inch round baking pans.

2. Stir together sugar, flour, cocoa, baking powder, baking soda and salt in large bowl. Add eggs, milk, oil and vanilla; beat on medium speed of mixer 2 minutes. Stir in boiling water (batter will be thin). Pour batter into prepared pans.

3. Bake 30 to 35 minutes or until wooden pick inserted in center comes out clean. Cool 10 minutes; remove from pans to wire racks. Cool completely.

european-style hearth bread

copy-of-img_9375

I’ve gotten to the point where I refuse to buy bread. If there was a nice bakery in the area, I think I’d be okay with buying bread there, but, even though I generally love my grocery store, I know that I can make better bread than they sell. Plus, it gives me a chance to bake something that isn’t horribly unhealthy.

copy-of-img_9354

I decided I needed to deviate from the two bread books I have, which end up being the only sources I use for bread recipes. I’d heard that King Arthur Flour had a nice variety of bread recipes, so it seemed time to give one a try. I was looking for something rustic to go along with the chanterelle and Speck salad, and I wanted to avoid recipes that were already on my list to try from other sources (like ciabatta; I’ve been itching to try Peter Reinhart’s since I got his book several years ago). I chose European-Style Hearth Bread because it sounded like a good, basic rustic bread.

copy-of-img_9361

Except I’m not sure I really made European-Style Hearth Bread, since I didn’t use the European-style bread flour that the recipe calls for. I’m finding that the King Arthur website is all about the product placement in its recipes; I guess that’s the price you pay for such an extensive list of recipes available for free. But hey, at least I did use King Arthur regular bread flour!

copy-of-img_9369

The bread is just a little easier than most of Peter Reinhart’s recipes, because while both recommend making a pre-ferment the day before the bread is baked, this one doesn’t require kneading, while most of Reinhart’s do. The rest of the recipe is fairly straightforward, although the rising times are a little longer than most.

copy-of-img_9374

In fact, I think the rising times may be off a bit. The recipe calls for essentially the same amount of yeast as most other bread recipes, but somehow calls for much longer rising times. That doesn’t make sense to me, and indeed, my loaves reached the required “three-quarters of the way to doubled” in far less time than the recipe indicated.

In the end though, this made some very good bread – chewy and flavorful and very attractive. I’m finding that I have just as little self-control around freshly baked bread as I do around cookies.

copy-of-img_9386

European-Style Hearth Bread (from King Arthur Flour)

Makes 2 small loaves

Bridget note: I found that the second rise took only about an hour instead of the 2 hours recommended in the recipe. I baked my loaves on a pizza stone. I did not cool the bread in the oven; I don’t usually like a super crisp crust.

Poolish
⅓ cup (2⅝ ounces) cool water (about 65F)
½ cup (2⅛ ounces) European-Style Artisan Bread Flour
1/16 teaspoon (a pinch) instant yeast

Dough
All of the poolish (above)
¾ cup (6 ounces) cool water, about 65F
2½ cups (10 ¾ ounces) European-Style Artisan Bread Flour
1 teaspoon instant yeast
1¼ teaspoons salt

The poolish: In a medium-sized bowl, combine all of the poolish ingredients, mixing just till a cohesive dough forms. Allow the poolish to rest, covered, for 12 to 16 hours at room temperature. When the poolish is ready to use, it will be filled with large holes and bubbles.

The dough: Add the water to the poolish, and mix till smooth. Add the flour, mix till just combined, cover the bowl, and allow the mixture to rest for 20 minutes. This rest period (autolyse, in French) allows the flour to absorb the liquid and the gluten to start its development, making kneading easier and more effective. Add the yeast and salt, and knead the dough till it’s fairly smooth but not necessarily elastic, about 5 to 7 minutes by hand, 5 minutes by electric mixer, or 5 to 7 minutes in a bread machine. (The gluten will continue to develop as the dough rises, so you don’t want to develop it fully during the kneading process.)

Place the dough in a lightly greased bowl, cover the bowl, and allow the dough to rise, at room temperature, for 1 ½ hours. To help develop the gluten, distribute the yeast’s food, and expel any excess carbon dioxide, turn the dough every 30 minutes during the rising time: gently fold all four sides into the middle, and turn the dough over.

Transfer the dough to a lightly greased work surface, divide it in half, shape each half into a rough log, cover them, and let them rest for 15 to 20 minutes. Again, this gives the gluten a chance to relax. Shape the logs into batards (shorter and fatter than traditional French baguettes) or Italian-style loaves – tapered ovals about 12″ long. Place them on a lightly greased or parchment-covered baking sheet, cover them with an acrylic dough cover, or gently with lightly greased plastic wrap, and allow them to rise, at room temperature, for about 2 hours; they should rise about three-quarters of the way to doubled. If they rise too much they’ll lose their shape in the oven, so be sure they don’t over-rise.

Using a sharp knife or razor, and holding it parallel to the dough*, make four slashes in each loaf. These should be more nearly vertical (running down the loaf) than horizontal (running crosswise), each stretching about one-third the length of the loaf. Spray the loaves with warm water.

Preheat your oven to 425F, making sure you give it plenty of time to heat; this bread needs to go into a HOT oven. Bake the bread for 30 to 35 minutes, or until it’s a deep, golden brown. Note: European-style loaves are generally baked longer than American loaves; if you’re uncomfortable with a very dark crust, reduce the baking time a bit. Turn off the oven, crack the door open about 4 to 6 inches, and allow the bread to cool in the oven; this will help it retain its crunchy crust.

*The blade shouldn’t descend into the dough at a 90° angle; rather it should slice under the surface at about 10° to 20°. This will allow the loaf to rise in a more attractive fashion as its baking.

chanterelle salad with speck and poached eggs

copy-of-img_9413

I don’t know if there could be a less appetizing name for a more delicious food than there is for Speck. When I hear Speck, I think of Star Trek or maybe dust particles – I do not think of spicy smoked ham.

copy-of-img_9404

I almost dismissed the Speck in this recipe entirely. I figured that proscuitto or pancetta, both of which I can get at my regular grocery store, would make a convenient substitute. But then I was right near an Italian butcher, and it was no big thing to go in and grab some Speck. I’m glad I did, because I love the stuff. I wish I’d had some proscuitto to taste alongside it, because I feel like I liked the Speck more than I normally do proscuitto, but I haven’t eaten enough proscuitto to really remember.

copy-of-img_9390

After my first uncertain egg on salad experience, I seem to have become somewhat enamored with the idea. In this salad, I really enjoyed the warm savory egg on the tart dressed greens. The Speck, sautéed until crispy, was of course delicious. I wasn’t crazy about the cooked chanterelles in the salad – they seemed a little too chewy to fit in with the other ingredients. Dave really liked them though.

copy-of-img_9393

I didn’t follow the recipe exactly – I had just made fresh bread, so I skipped the toasting step. I also made a different dressing. As if one hard-to-find ingredient in the recipe wasn’t enough, you’re also supposed to reduce Vin Santo, an Italian dessert wine, for the vinaigrette, and mix it with walnut oil. I made a simple balsamic vinaigrette and was happy with it.

copy-of-img_9409

Notwithstanding the chewy mushrooms, this salad was very good. This was a nice, light meal that left me plenty of room to eat some of the chocolate chip cookies that I have coming out the wazoo.

copy-of-img_9411

Warm Chanterelle Salad with Speck and Poached Eggs (from Bon Apetit December 2008 )

6 tablespoons olive oil, divided
4 fresh thyme sprigs
3 garlic cloves, divided
1 pound fresh chanterelles, cleaned, cut into ⅓-inch thick slices
nonstick cooking spray
4 ounces ⅛-inch-thick slices Speck, rind trimmed
6 ¾-inch-thick slices ciabatta or pain rustique
½ teaspoon salt
6 large eggs
2 small heads butter lettuce, coarsely torn (about 11 cups)
6 cups mâche or arugula (3½ ounces)
Vinaigrette

Preheat oven to 500F. Combine 4 tablespoons oil and thyme in large bowl. Press 2 garlic cloves into oil with garlic press; whisk to blend. Add chanterelles and toss to coat. Sprinkle with salt and pepper.

Spray rimmed baking sheet with nonstick spray. Spread mushroom mixture on sheet. Roast mushrooms until tender, stirring occasionally, about 6 minutes.

Cut Speck crosswise into ¼-inch-thick strips. Heat 1 tablespoon oil in small skillet over medium-high heat. Add Speck; sauté until crisp, 4 minutes. Drain on paper towels.

Toast ciabatta slices until golden; rub with remaining garlic clove. Drizzle with 1 tablespoon oil. Halve each slice lengthwise.

Fill large skillet with water and bring to boil. Add ½ teaspoon salt. Crack eggs, 1 at a time, into custard cup, then slide egg from cup into water; reduce heat to low. Poach eggs until whites are set and yolks are softly set, 3 to 4 minutes.

Meanwhile, toss lettuce and mâche with enough vinaigrette to coat. Mound salad on 6 plates. Using slotted spoon, remove eggs from water, dab with paper towels to absorb excess liquid, and place atop salads. Garnish with mushrooms and Speck. Place ciabatta fingers around salad and serve immediately.

Balsamic Vinaigrette (from Cooks Illustrated)

Serves 4

¼ cup balsamic vinegar
2 tablespoons sherry vinegar , or wine vinegar
½ teaspoon table salt
¼ teaspoon ground black pepper
⅔ cup olive oil

Whisk first 2 ingredients with salt and pepper in a small bowl. Gradually whisk in oil, so the vinaigrette emulsifies. Serve.