
Someone must have told me “if at first you don’t succeed, try, try again” at a particularly impressionable age. Either that, or I’ve struggled through learning enough new subjects that I recognize the value of practice. Or maybe I’m just obsessive.
This was my first time making croissants, and it wasn’t perfect, which immediately sparked my desire to try a bunch of other croissant recipes. (Not side-by-side, mind you. My head spins just thinking about it.) The thing is that I can’t figure out exactly where I went wrong. I’m hoping that by gaining experience with different recipes, I’ll become more familiar with the process and pick up some nice tips along the way.
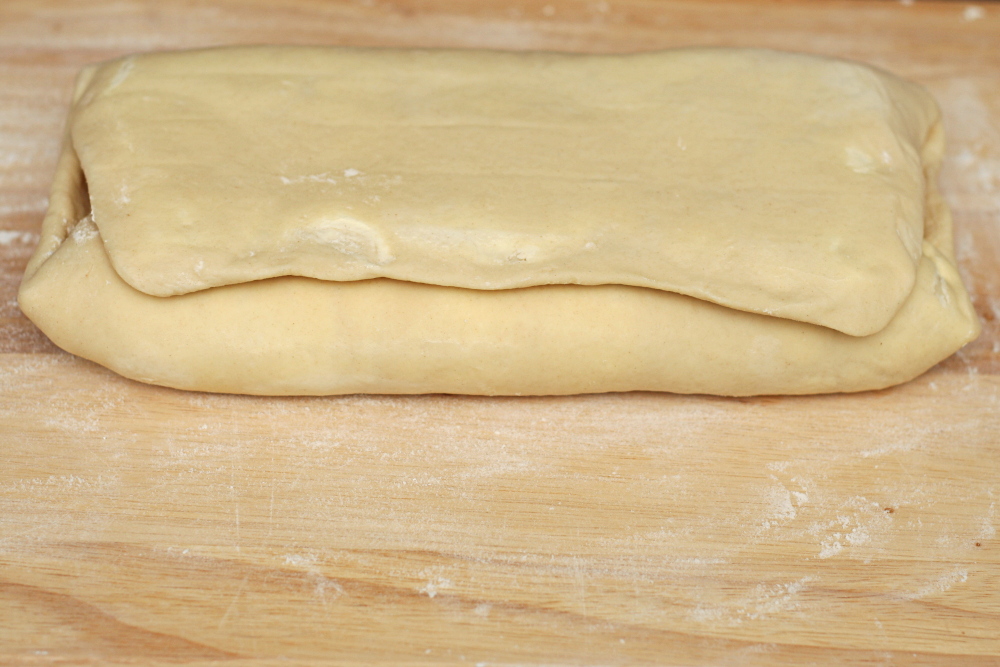
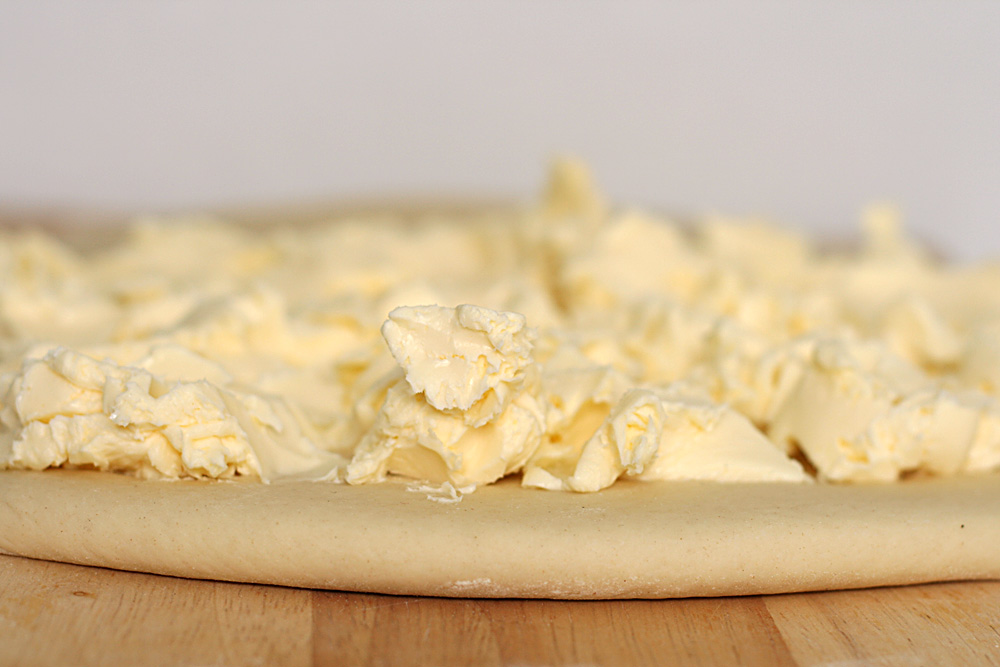
Of the recipes I’ve considered trying, this one is the most complex. First, a pre-ferment is made, two days before you want to bake the croissants. That gets turned into croissant dough the next day, and from there, most recipes are the same. Knead a little, then roll it out with a bunch of butter and fold it like a letter. Chill, then repeat the folding twice. Chill overnight. Roll out, cut, shape, rise, bake.
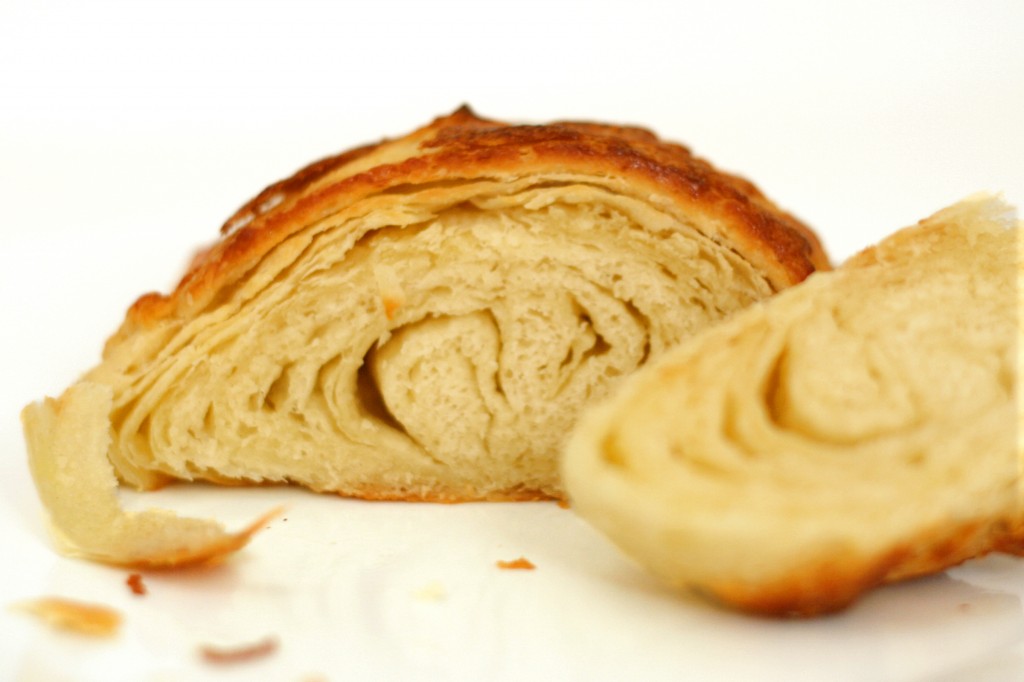
The author of the recipe, Elisabeth Prueitt, gives a lot of detail, turning my 60-word summary of the recipe into 5 pages of instructions, tips, and advice. She does not mention that the dough will be so elastic that it will fight you every time you have to roll it out, which makes me think I did something wrong. (Overkneading is my guess.) She also does not say anything about a huge pool of butter left behind in the baking pan after the croissants are removed from the oven. And I’m guessing the yeasty flavor of the croissants isn’t right either. And clearly they’re not supposed to look like this:

The croissants were still way better than edible – flaky, light, buttery delicious – but clearly my technique needs some refining. After I made this recipe, I was chomping at the bit to try another, and in fact, I have a handful of recipes I want to try. (Although one of them was the recipe that the Daring Bakers made a few years ago – which I just realized is this one. So never mind that one.) Expect to see reviews of one croissant recipe after another as I attempt to master this pastry.
One year ago: Snickery Squares
Croissants (from Tartine by Elisabeth M. Prueitt and Chad Robertson)
Preferment:
¾ cup non-fat milk (6 ounces/150 ml)
1 tablespoon active dry yeast (15ml)
1⅓ cup all-purpose flour (6¼ ounces/175g)
Dough:
1 tablespoon + 1 teaspoon active dry yeast (20ml)
1¾ cup whole milk (14 ounces/425 ml)
6 cups all-purpose flour (28 ounces/800g)
⅓ cup sugar (2½ ounces/70g)
1 tablespoon + 1 teaspoon salt (20 ml)
1 tablespoons unsalted butter (15ml)
Roll-in butter:
2¾ cup unsalted butter (22 ounces/625 g)
Egg wash:
4 large egg yolks (2 ounces/60 ml)
¼ cup heavy cream
pinch salt
To Make the Preferment:
In a small saucepan, warm the milk to take the chill off (between 80° to 90 °F). Pour the milk into a mixing bowl, sprinkle the yeast over the milk, stir to dissolve the yeast with a wooden spoon, and then add the flour, mixing with a wooden spoon until a smooth batter forms. Cover the bowl with cheesecloth and let the mixture rise until almost double in volume, 2 to 3 hours at moderate temperature or overnight in the refrigerator.
To Make the Dough:
First measure out all your ingredients and keep them near at hand. Transfer the preferment and then the yeast to the large bowl of a stand mixer fitted with the dough hook. Mix on low speed until the yeast is incorporated into the preferment batter, which will take a minute or two. Stop the mixer as needed and use a spatula to clean the bottom and sides of the bowl, folding the loosened portion into the mixture to incorporate all the elements fully. When the mixture has come together into an even, well-mixed mass, increase the speed to medium, and mix for a couple of minutes. Slowly add half of the milk and continue to mix until the milk is fully incorporated.
Reduce the speed to low, add the flour, sugar, salt, melted butter, and the rest of the milk, and mix until the mass comes together in a loose dough, about 3 minutes. Turn off the mixer and let the dough rest for 15 to 20 minutes. This resting period helps to shorten the final mixing phase, which comes next.
Engage the mixer again on low speed and mix until the dough is smooth and elastic, a maximum of 4 minutes. If the dough is very firm, add a little milk, 1 tablespoon at a time. Take care not to overmix the dough, which will result in a tough croissant that also turns stale more quickly. Remember, too, you will be rolling out the dough several times, which will further develop the gluten structure, so though you want a smooth dough, the less mixing you do to achieve that goal, the better. Cover the bowl with cheesecloth and let the dough rise in a cool place until the volume increases by half, about 1½ hours.
Lightly flour a work surface. Transfer the dough to the floured surface and press into a rectangle 2 inches thick. Wrap the rectangle in plastic wrap, or slip it into a plastic bag and seal closed. Place the dough in the refrigerator to chill for 4 to 6 hours.
To Make the Roll-in butter:
About 1 hour before you are ready to start laminating the dough, put the butter that you will be rolling into the dough in the bowl of the mixer fitted with the paddle attachment. Mix on medium speed until malleable but not warm or soft, about 3 minutes. Remove the butter from the bowl, wrap in plastic wrap, and place in the refrigerator to chill but not resolidify.
Laminating the dough:
Lightly dust a cool work surface, and then remove the chilled dough and the butter from the refrigerator. Unwrap the dough and place it on the floured surface. Roll out the dough into a rectangle 28 by 12 inches. With the long side of the rectangle facing you, and starting from the left side, spread and spot the butter over two-thirds of the length of the rectangle. Fold the uncovered third over the butter and then fold the left-hand third over the center, as if folding a business letter. The resulting rectangle is known as a plaque. With your fingers, push down along the seams on the top and the bottom to seal in the plaque.
Second turn:
Give the plaque a quarter turn so the seams are to your right and left, rather than at the top and bottom. Again, roll out the dough into a rectangle 28 by 12 inches, and fold again in the same manner. Wrap in plastic wrap or slip into a plastic bag and place in the refrigerator for 1½ to 2 hours to relax the gluten in the dough before you make the third fold, or “turn”.
Third turn:
Clean the work surface, dust again with flour, and remove the dough from the refrigerator. Unwrap, place on the floured surface, and again roll out into a rectangle 28 by 12 inches. Fold into thirds in the same manner. You should have a plaque of dough measuring about 9 by 12 inches, about the size of a quarter sheet pan, and 1½ to 2 inches thick. Wrap in plastic wrap or slip into the plastic bag, place on a quarter sheet pan, and immediately place in the freezer to chill for at least 1 hour. If you intend to make the croissants the next morning, leave the dough in the freezer until the evening and then transfer it to the refrigerator before retiring. The next morning, the dough will be ready to roll out and form into croissants, proof, and bake. Or, you can leave the dough in the freezer for up to 1 week; just remember to transfer it to the refrigerator to thaw overnight before using.
Making the croissant:
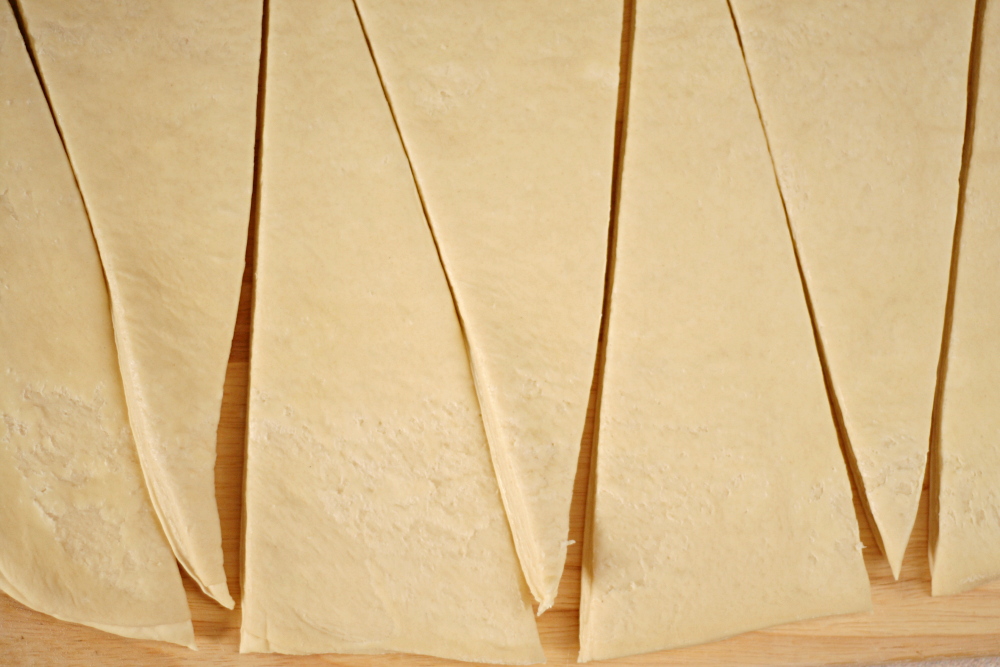
When you are ready to roll out the dough, dust the work surface again. Roll out the dough into a rectangle 32 by 12 inches and 3/8 inches thick. Using a pizza wheel or chef’s knife, cut the dough into long triangles that measure 10 to 12 inches on each side and about 4 inches along the base.
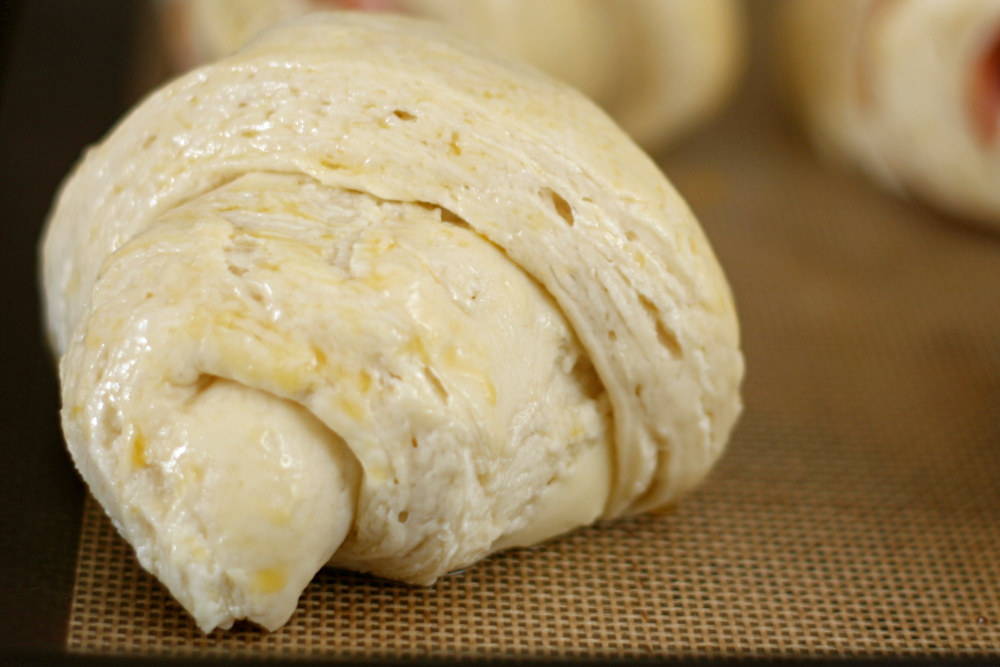
Line a half sheet pan (about 13 by 18 inches) with parchment paper. To shape each croissant, position a triangle with the base facing you. Positioning your palms on the two outer points of the base, carefully rolling the base toward the point. To finish, grab the point with one hand, stretching it slightly, and continue to roll, tucking the point underneath the rolled dough so that the croissant will stand tall when you place it on the sheet pan. If you have properly shaped the croissant, it will have 6 or 7 ridges.
As you form the croissants, place them, well-spaced, on the prepared half-sheet pan. When all the croissants are on the pan, set the pan in a draft-free area with relatively high humidity, and let the pastries rise for 2 to 3 hours. The ideal temperature is 75 °F. A bit cooler or warmer is all right, as long as the temperature is not warm enough to melt the layers of butter in the dough, which would yield greasy pastries. Cooler is preferable and will increase the rising time and with it the flavor development. For example, the home oven (turned off) with a pan of steaming water placed in the bottom is a good place for proofing leavened baked items. To make sure that no skin forms on the pastries during this final rising, refresh the pan of water halfway through the rising.
During this final rising, the croissants should at least double in size and look noticeably puffy. If when you press a croissant lightly with a fingertip, the indentation fills in slowly, the croissants are almost ready to bake. At this point, the croissants should still be slightly “firm” and holding their shape and neither spongy nor starting to slouch. If you have put the croissants into the oven to proof, remove them now and set the oven to 425 °F to preheat for 20 to 30 minutes.
About 10 minutes before you are ready to bake the croissants, make the egg wash. In a small bowl, whisk together the egg yolks, cream, and salt until you have a pale yellow mixture. Using a pastry brush, lightly and carefully brush the yolk mixture on the pastries, being careful not to allow the egg wash to drip onto the pan. Let the wash dry slightly, about 10 minutes, before baking.
Place the croissants into the oven, immediately turn down the oven temperature to 400 °F, and leave the door shut for the first 10 minutes. Then working quickly, open the oven door, rotate the pan 180 degrees, and close the door. This rotation will help the pastries to bake evenly. Bake for 6 to 10 minutes longer, rotating the pan again during this time if the croissants do not appear to be baking evenly. The croissants should be done in 15 to 20 minutes total. They are ready when they are a deep golden brown on the top and bottom, crisp on the outside and light when they are picked up, indicating that the interior is cooked through.
Remove the croissants from the oven and place them on a wire rack to cool. As they cool, their moist interiors will set up. They are best if eaten while they are still slightly warm. If they have just cooled to room temperature, they are fine as well, or you can rewarm them in a 375°F oven for 6 to 8 minutes to recrisp them before serving. You can also store leftover croissants in an airtight container at room temperature for 1 day, and then afterward in the refrigerator for up to 3 days. If you have stored them, recrisp them in the oven before serving.


My croissant dough tends to fight me – I just let it relax a bit and it works a bit better. As for the butter melting out the sides, it sounds like the recipe called for too much butter to be laminated in there. If you don’t like the yeastiness (I do though!), I’d just get rid of the preferment; it might help lower the dough strength a bit too. You get a LOT of gluten development when you use a preferment. Good luck with your quest!
I have never made croissant so even though your croissants did not turn out how you were hoping, I am still impressed!
Hah! It’s 30C this evening here, and at that temp any croissant dough will come alive and say, “Dream on.” Sorry it didn’t work out perfectly, but I suppose anything with this much butter will indeed be better than edible. You are the queen of comparisons, so I look forward to your other croissant posts (and hope you give this a try again someday!).
Still looks good Bridget!! 😉 I haven’t gotten the courage to try making a croissant yet… so keep on posting!
I think they look great! I have never attempted croissants because I know I would mess them up, so I’m always impressed by anyone who makes them 🙂
They still look great. I’m sure you will master croissants in no time 🙂
Your croissants look just perfect! Great job!
Those are gorgeous – my first attempt at croissants used the same recipe, and I was so unprepared for all of the melted butter that I used an UNRIMMED baking sheet. The butter melted out, ran off the sheet into the bottom of the oven, and proceeded to smoke like mad. My house reeked, my smoke alarms all went off, I had to open the windows on a cold night, and I didn’t get a single fully-baked croissant out of it. After that, I wondered how they would turn out if they had to sit and “stew” in the butter for a bit, but yours look completely edible. That’s very encouraging!
I have to give you a lot of brioche points for attempting to make croissant at home. It looks like it’s well worth every bit of sweat you put into it. Your croissant looks lovely 🙂
Never made croissants, but I’ve made danish several times. I use cold butter and slice it thinly with a cheese slicer. Works fine and saves a step.
I think it’s wonderful that you tried to tackle this! I love “Tartine” but the croissant recipe just makes me want to run away and hide. I bet they tasted amazingly and I look forward to all the tips you will impart along the way!
Well you definitely succeeded! Those croissants are a thing of beauty:)
Your croissants look so perfect! Nicely done. Found you on tastespotting. 🙂
Gorgeous! Great job!
Great job and glad you are encouraged to try again after this experience.
I’ve always wanted to make these but am scared silly to try it. I am glad you did and will be looking forward to seeing your results from the othere recipes although I really don’t see a darn thing wrong with this one!! I looks wonderful!!
I made the same recipe and alas had the same problem with the butter running all over Perhaps the recipe calls for too much butter. I have not tried it again.
You made croissants. I am impressed. They look way better than mine ever would.
Great job. There is no trick to laminated doughs. You just have to have practice and experience, so keep at it! This stuff is always so worth the work 🙂
Croissants are on my list of things to make this week. I can’t wait! Yours look beautiful! What a wonderful pastry to try and perfect!
I too have tried various croissant recipes; I’ve had the most success with ones from Rose Levy-Berenbaum’s “Pie and Pastry Bible” and from “Baking with Julia”. I found the Tartine recipe to be overly complicated (and I’m not one to shy away from complicated recipes) and to produce too large a quantity of dough. Good luck and keep at it!
I just found your blog, and although this was posted a few months ago, I would like to give you some tips:
1) make sure the edges are sealed when you originally put the butter in, that makes ALL the difference.
2) The refrigerator is your friend. Cold dough is soooo much better than warm dough.
3) Watch how much flour you add when you are folding the dough. You really don’t need that much, and the more flour that is added, the tougher the dough becomes.
Hope this helps in the future!
not bad for a first attempt, haha proud of you
here are just some pointers to take note
– do not need to knead the dough that much once ingredients come together that is it. as the rolling process also will work the gluten
– work fast with the folding
– keep the rolling pin very cold ( trust me it helps!)
– always use french all purpose flour
– add a little vinegar ( it helps lighten the dough)
– try to find french butters cause most of them are beurre sec
Would I be wrong in saying that Croissant dough is essentially the same as a puff pastry dough with yeast added. I have made puff pastry but never croissants… I have been thinking about it and think ill give it a try now. Thanks.
richard – They are similar, but in my experience, puff pastry is easier. Since croissant dough is kneaded, it has more gluten development, and so the dough is more elastic. When you roll puff pastry dough out, it pretty much stays rolled out, but croissant dough springs back.
I have made croissants many times (I’m a professional pastry chef), and I can tell you that the above recipe is missing at least one turn. All the recipes I’ve ever read (and I’ve tried several) call for either three or four turns (*not* counting the initial fold to enclose the butter block.) So I’m sure you’d have a better final product if you rolled and folded the dough out one more time. If you only fold the dough three times total, including the first to enclose the butter, you will only end up with nineteen layers of dough (and eighteen layers of butter.) In culinary school they had us fold three times after the butter enclosure, and in two other recipes I’ve tried it was four times. Three folds would give you fifty-five layers of dough, and four would give you 163 layers. Try this and see if you get a better croissant. Also, the proofing method makes a big difference in the butter-oozing-out problem. A cool proof might solve this.
Hi! I’m coming to this blog long after the original post, but I just made Tartine croissants at home, with some adjustments, and mine turned out pretty different. I put pictures on my blog: http://www.aprilgoldman.com/?p=950. Probably the biggest difference in my process is that I did NOT mix the butter for 3 minutes with the paddle. Instead, I pounded the butter out, basically following this video I found on YouTube: http://www.youtube.com/watch?v=RxCE963K-FY.
Hope that is helpful!
-April
I too have come to this blog long after the original posting. I also had the problem of the butter oozing out of these croissants, although I did not have some of the other problems. I believe this is an issue with the recipe, not with the baker. This recipe calls for far more butter proportionally than any other croissant dough recipe that I have found; 625/975 equals about 64% by weight of butter to the weight of flour. That is higher than the recipe I used to use from Julia Child’s “Mastering the Art of French Cooking,” and also the richest one that Bernard Clayton offers in “The Breads of France” (from the S.S. France: about 45%). I intend to try it again with less butter. I found that keeping the dough cold (and using my professional heavy-weight rolling pin) helped with rolling the dough out. I did note that the recipe only called for 3 vs. 4 turns, but suspected that it might be made up for in the rather excessive lengths of the croissant triangles, and how many layers are created simply by rolling up a triangle of that length to create the final croissant roll shape.
Jay Paul – Interesting! However, I’ve now made two other croissant recipes, and those both oozed butter in the oven too, so I think it’s just a feature of croissants.
At least twice now I have tried the morning bun recipe from Tartine which uses the croissant dough recipe from their cookbook. Both attempts ended in utter failure. The bun recipe calls for an additional stick of butter that you then tack onto the laminated dough. I’ve had the morning bun from the Tartine bakery and, trust me, it looked nothing like what emerged from my oven. I too have found other croissant dough recipes online which seems considerably less complicated and don’t call for near the amount of butter. I’m not anti-butter, but I think the recipe is off. I’ve written a note in my Tartine cookbook (not a plug; don’t feel you need to buy it) to use less butter next time around . . . which won’t be soon. My ego is still hurt. Thanks for giving me a venue in which to complain.
kevin – No worries, I already have the book. 🙂 I haven’t made Tartine’s morning bun recipe, but now I’m curious! I’ve made a few other croissant recipes since this, and they all have about the same ratio of flour to butter, so I don’t think the Tartine recipe uses an exceptional amount. Maybe the extra melted butter in the morning bun recipe put it over the edge!
I know this is an old post but I just wanted to say THANK YOU for posting the Tartine croissant dough recipe! With it, I baked their infamous morning buns this past Saturday and they turned out fabulously. Happy Baking!
I think using the pre-ferment adds to the yeasty taste. As to the melting butter, I’ve never had that problem. It does tend to ooze out while they’re baking but they suck it right back up once you let them cool for a bit, and in any case the amount that comes out is negligible. I’ve used Peter Reinhart’s recipe (from Artisan Breads Every Day), and they’ve been perfect every time. You have to let the dough do a slow ferment in the fridge overnight prior to laminating with the butter. The key to the dough is patience. Everything needs to be at room temperature and you have to give the dough time to relax. After making 4 batches or so with 3 letter folds, I’ve started doing 4 folds (so 243 layers, as opposed to 81). The result is incredible, even airier and fluffier that before. Just have patience and be gentle with the dough and they’ll turn out great!
I made the croissant dough using this recipe, for the first time. I was using it for the tartine “morning bun”. Everything turned out beautifully. I will say though that the 5 sticks of butter struck me as overkill. I recently watched Mind of a Chef episode featuring the Tartine bakery and it didn’t look like they were putting THAT much butter. So I reduced it to 2 sticks in this recipe… and as I’ve said, it turned out delicious. Crispy and flaky tops, moist inside. Judging by the picture I would guess that your oven wasn’t hot enough – a definite problem for any dough that has this much butter in it – and the pool of butter in the pan is a sign of just that. Also, if you look at tartine’s croissant pics, you will see that they are much more browned than yours – another important aspect.