blogher food 2012

market sign

When Brady approached me about collaborating on a proposal to speak at the BlogHer Food conference in Seattle, I didn’t think twice – because I didn’t think there was a chance in hell that two small-time bloggers like us would ever be chosen to speak. When I got the much-exclamation-pointed text message from her that we’d been accepted, it became a whole new ballgame, one requiring booking flights, splitting hotel rooms, and using precious vacation time, not to mention hours spent preparing for our session. I was interested to attend the conference, but not quite as excited as I felt I should be.

clams

What I felt instead was anxious. Even now, I can’t pinpoint why. Of course public speaking is nerve-wracking, but I’ve done it loads before and was confident in myself. Traveling alone is extra hassle but not entirely unpleasant. I think, if I had to choose one thing that was stressing me out, it would be three days of constant socializing. From rooms full of strangers to sharing a hotel room with someone I’d met in person only once before, it sounded exhausting.

crab

And it was. It was also the most fun I’ve had in ages. It was nonstop talk about food and photography and websites, nonstop exchanging of business cards, nonstop twitter updates, nonstop sightings of people you’d previously only seen on a computer screen. It was learning and teaching and eating, and yes, constant socializing.

storytelling session

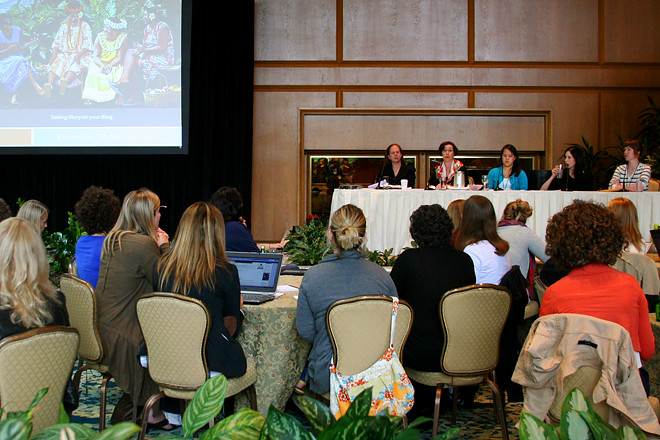
I solidified some friendships and began others. “Internet friends” became “IRL friends”. I met representatives from some of my favorite companies. I discovered new blogs and found people I’d like to work with in the future. I kissed a fish.

fish
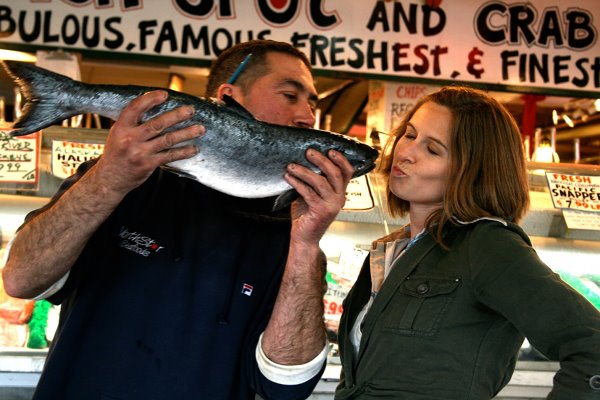
thanks, Brady, for letting me use this picture!

I picked up some food styling tricks and was reminded that I need to get a backup set up for my blog (asap!). I realized that shooting a video will take a lot more equipment than I have now. I was encouraged to think more about what I write compared to what I like to read. I discovered that Brady and I make a great team well beyond planning and delivering a session on the post processing of food photos. And most importantly, I left feeling like a socializing superstar, confident and happy and eager to apply all of the lessons of the weekend. But exhausted nonetheless.

before closing party
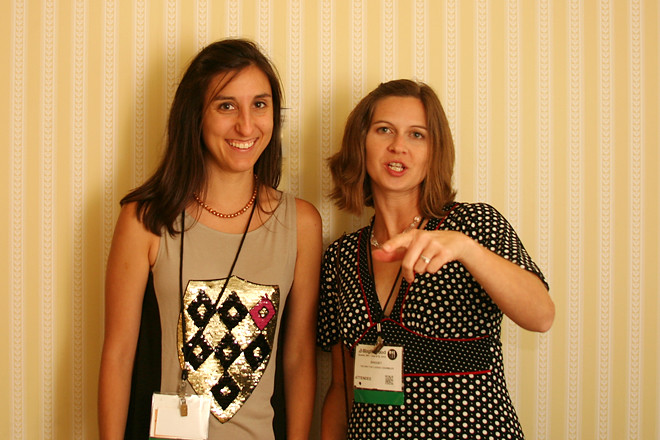
brady on the left, me on the right being bossy – it’s what I do best

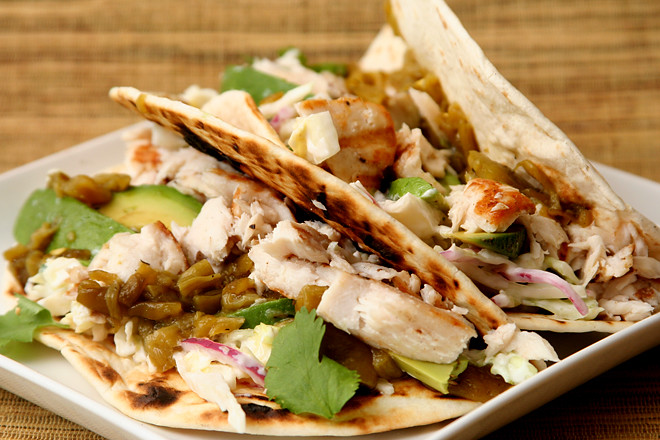
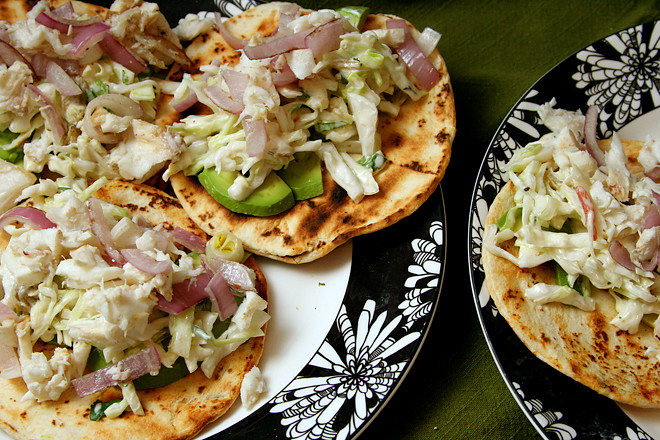
One year ago: Chicken Gyros
Two years ago: Raisin Swirl Bread
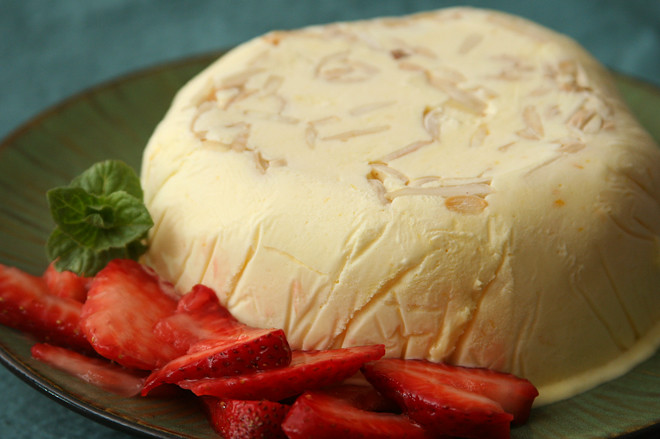
Three years ago: Strawberry Cake (comparison of two recipes)
Four years ago: Poached Eggs over Arugula with Polenta Fingers

roasted rhubarb jam

rhubarb jam 7

One of the things I’m trying to do with my rhubarb surplus this year is not mix it with strawberries. (Please disregard this statement when my next post is strawberry rhubarb pie.) It isn’t that I have anything against strawberries and rhubarb together. Those two are often paired up for reasons beyond their aligned seasons. Sweet strawberries are a natural match for sour rhubarb.

rhubarb jam 3

But now that I’m starting to realize how much I enjoy rhubarb for its own merit, I want to use it more often by itself. Mixing it into batter for muffins was a good start, but a simple mostly-hands-off jam is an even more direct way to enjoy rhubarb. All it takes is cutting it up, mixing it with sugar, and giving it a few stirs while the oven softens and sweetens the stalks.

rhubarb jam 4

I used a spatula to mash up the roasted rhubarb, but if you wanted something smoother, you could puree it in a food processor or press it through a food mill. The chunky version would go wonderfully with tart plain yogurt, especially with some crunchy granola on top. And I can guarantee that it makes the perfect topping for brown rice pudding – along with some sliced strawberries, of course.

rhubarb jam 9

One year ago: Grapefruit Honey Yogurt Scones
Two years ago: Croissants (Martha Stewart’s recipe)
Three years ago: Rhubarb Scones
Four years ago: La Palette’s Strawberry Tart

Printer Friendly Recipe
Roasted Rhubarb Jam (from hogwash)

2 pounds rhubarb, cut into 1-inch pieces
½ cup (3.5 ounces) sugar
Pinch salt

Adjust a rack to the middle position and heat the oven to 400 degrees. In a 9-by-13-inch dish, mix the ingredients. Bake them, uncovered and stirring occasionally, until the rhubarb is soft enough to mash into a spread, about 1½ hours.

rhubarb jam 8

brown rice pudding

brown rice pudding 5

I’ve taken to eating pudding for breakfast. It was Deb’s idea, and it’s a very good one. After all, if we regularly heat one whole grain with milk to make oatmeal, why not do the same with rice? Somehow, oatmeal feels like winter food. Rice pudding seems lighter, more appropriate for warm temperatures and topping with strawberries.

brown rice pudding 1

This might seem obvious at first – you usually eat oatmeal warm and pudding cold. Except so far, I’ve been eating the rice pudding warm, so it’s more like rice porridge I suppose. But if I was organized enough, I think making it the night before and chilling it would not only save time in the morning, but make a great cool breakfast for the 100+ degree days we’ve been having around here.

brown rice pudding 2

Eating dessert for breakfast isn’t anything new – who hasn’t indulged in a slice of leftover cake with their morning coffee? But that isn’t what this is about. By using brown rice instead of white and reducing the sugar, rice pudding is actually full of fiber and protein instead of empty calories. Rice pudding has never been my favorite dessert, but it’s starting to become one of my favorite breakfasts.

brown rice pudding 3

One year ago: Brown Sugar Blueberry Plain Cake
Two years ago: Tender Shortcakes
Three years ago: Cappuccino Muffins
Four years ago: Baba Ghanoush, Falafel, and Hummus

Printer Friendly Recipe
Brown Rice Pudding
(adapted from Joy the Baker)

Serves 4 to 6

This is a basic recipe that you can add all sorts of goodies to, from dried fruit and nuts to spices or a swirl of jam.

If you plan to serve this for dessert instead of breakfast, double both the sugar and the honey.

1 cup brown rice, rinsed
½ teaspoon salt
4 cups whole milk
1 tablespoon sugar
1 tablespoon honey
½ vanilla bean, split open (or 1 teaspoon vanilla extract)

1. Bring 4 cups of water to a boil over high heat. Add the rice and salt; reduce the heat to medium and simmer, partially covered, for 30 minutes. Drain the rice in a strainer and return it to the pot, off the heat. Cover tightly and let set for 10 minutes.

2. Add the milk, sugar, honey, and vanilla bean to the pot with the rice. (If you’re using vanilla extract, add it just before serving.) Bring the mixture to a simmer over medium-high heat, then reduce the heat to medium-low. Simmer until the milk is reduced and the rice is creamy, about 30 minutes. If you’re using vanilla extract, stir it in now. If you’re planning to eat the pudding warm, serve it now. If you’re planning to eat it cold, transfer it to serving dishes to chill.

brown rice pudding 4

rhubarb muffins

rhubarb muffins 4

Year after year, rhubarb shows up at the grocery store, and I take note to come up with a recipe so I have a reason to buy it next time I’m at the store. And then I forget, and I see it at the store, and I swear that next time I’ll remember – and so it goes on, until rhubarb season is over. Not this year. This year, I am buying rhubarb every time I see it at the store and figuring out what to do with it later. And since I go there at least twice a week, that’s a lot of rhubarb.

rhubarb muffins 1

Now that rhubarb is a basically a staple around here, I’m free to try all sorts of recipes with it, from coffee cake to jam to pie to muffins. The coffee cake and the muffins were too similar to share both, and while my coworkers certainly seemed to appreciate the cake, I think the muffins were even better. Best of all, at least when you really want to soak up your brief opportunity for rhubarb, it’s a simple muffin with no distractions. It’s moist but craggy, like a muffin – not a cake – should be. The Greek yogurt (or sour cream) adds a zip of tang, just the right complement to the tart pockets of rhubarb.

rhubarb muffins 2

As good as the muffins are though, I can guarantee I won’t be making them again this year, not when I’ve already found several other tempting rhubarb recipes. Plus I still need to make my favorite rhubarb scones. Fortunately, with as much rhubarb as I’m buying this year, I might actually get to all the recipes I want to make.

rhubarb muffins 8

One year ago: Caramel Pots de Crème
Two years ago: Eggs in Tomato Sauce
Three years ago: Anadama Bread
Four years ago: French Chocolate Brownies

Printer Friendly Recipe
Rhubarb Muffins (slightly adapted from Fine Cooking)

Healthy tricks I almost always use with quick breads: Replace half of the white flour with whole wheat pastry flour. Replace sour cream with Greek yogurt. Replace 4 tablespoons of the butter with 2 tablespoons of oil, which keeps the bread moist (but leaving 4 tablespoons of butter in the recipe keeps it tasting great).

Usually I assume 4.8 ounces (by weight) per cup of flour, but the original recipe included weight measurements with flour at 4.5 ounces per cup. As always, if you can measure by weight, do it.

9 ounces (2 cups) all-purpose flour
2½ teaspoons baking powder
½ teaspoon baking soda
½ teaspoon table salt
½ teaspoon cinnamon
2 large eggs
¾ cup (5.25 ounces) granulated sugar
1 cup sour cream
8 tablespoons (1 stick) unsalted butter, melted and cooled slightly
1 teaspoon pure vanilla extract
1½ cups (7.25 ounces) ¼-inch-diced rhubarb

1. Position a rack in the center of the oven and heat the oven to 400 degrees. Line a 12-cup muffin tin with paper or foil baking cups.

2. In a large mixing bowl, combine the flour, baking powder, baking soda, cinnamon, and salt and whisk to blend. In a medium bowl, whisk together the eggs, sugar, sour cream, melted butter, and vanilla until smooth. Lightly stir the sour cream mixture into the dry ingredients with a spatula until the batter just comes together; do not overmix. Gently stir in the diced rhubarb. The batter will be thick.

3. Divide the batter among the muffin cups, using the back of a spoon or a small spatula to settle the batter into the cups. The batter should mound a bit higher than the tops of the cups.

4. Bake the muffins until they’re golden brown, spring back most of the way when gently pressed, and a pick inserted in the center comes out clean, 18 to 22 minutes. Transfer to a rack and let the muffins cool in the pan for 5 to 10 minutes. Carefully lift the muffins out of the pan—if necessary, loosen them with the tip of a paring knife—and let them cool somewhat. Serve warm.

rhubarb muffins 5

focaccia

focaccia 7

I’ve made focaccia before, years ago, but since Peter Reinhart claims so assertively that his recipe is superior to most focaccia found in America, I thought I’d better give it a try. It has a lot of good things going for it, like herb-scented oil poured on top and a cold overnight fermentation – always a sign of good flavor to come in yeast breads.

focaccia 3

It’s fun to make too. The mixer (if you have one) does most of the messy work, but you still get to play with the soft and stretchy dough to shape it. Then you stick your fingers in the oiled dough to create dimples and spread it into the pan. After that, you throw it in the fridge until you’re ready for it, which is always a good trick for convenience.

focaccia 4

It was definitely good bread, soft in the middle, just a little crisp and almost flaky on top, scented with herbs and olive oil. But – I’m not sure it was the height of focaccia perfection, despite Reinhart’s usually well-deserved swagger. For me, adding a touch more salt or a spoonful of sugar would have given the bread a welcome flavor boost. On the plus side, this gives me the perfect excuse to make more focaccia.

focaccia 5

One year ago: Tartine Country Bread
Two years ago: Spinach Artichoke Pizza
Three years ago: Tofu Mu Shu
Four years ago: Crockpot Pulled Pork

Printer Friendly Recipe
Focaccia (slightly reworded from Peter Reinhart’s Bread Baker’s Apprentice)

For the herb oil:
½ cup olive oil
4 tablespoons chopped fresh herbs (any combination of basil, parsley, rosemary, sage)
¾ teaspoon coarse salt
¼ teaspoon ground black pepper
1 garlic clove, minced

For the bread:
5 cups (22.5 ounces) high-gluten or bread flour
2 teaspoons salt
2 teaspoons instant yeast
2 cups water, at room temperature
6 tablespoons olive oil
½ cup herb oil
Extra olive oil for the pan

1. For the herb oil: Warm the olive oil to about 100 degrees. Add the remaining ingredients; let steep while you prepare the dough.

2. For the bread: In the bowl of a stand mixer, stir together the flour, salt, and yeast. Add the water and oil; mix on low speed with the paddle attachment until all the ingredients form a wet, sticky ball. Switch to the dough hook and mix on medium speed for 5 to 7 minutes, or as long as it takes to create a smooth, sticky dough. The dough should clear the sides of the bowl but stick to the bottom of the bowl. You may need to add additional flour to firm up the dough enough to clear the sides of the bowl, but the dough should still be quite soft and sticky.

3. Sprinkle enough flour on the counter to make a bed about 6 inches square. Using a scraper or spatula dipped in water, transfer the sticky dough to the bed of flour and dust liberally with flour, patting the dough into a rectangle. Let the dough relax for 5 minutes.

4. Coat your hands with flour and stretch the dough from each end to twice its size. Fold it, letter style, over itself to return it to a rectangular shape. Loosely cover with plastic wrap and let it rest for 30 minutes. Repeat the stretching, folding, and resting twice more. After the last (third) fold, cover the dough and let it ferment at room temperature for 1 hour. It should swell but not necessarily double in size.

5. Oil an 18-by-13-inch pan and line with parchment paper. Use a pastry scraper and lightly oiled hands to lift the dough off the counter and transfer it to the prepared pan, maintaining the rectangular shape as much as possible.

6. Spoon half of the herb oil over the dough. Use your fingertips to dimple the dough and spread it to fill the pan simultaneously. Try to keep the thickness as uniform as possible across the surface. If the dough becomes too springy, let it rest for about 15 minutes and then continue dimpling. Don’t worry if you are unable to fill the pan perfectly, especially the corners. As the dough relaxes and proofs, it will spread out naturally. Use more herb oil as needed to ensure that the entire surface is coated with oil.

7. Loosely cover the pan with plastic wrap. Refrigerate the dough overnight (or for up to 3 days).

8. 3 hours before baking, remove the dough from the refrigerator and drizzle the remaining herb oil over the surface; dimple it in. This should allow you to fill the pan completely with the dough to a thickness of about ½-inch. Cover the pan with plastic and proof the dough at room temperature for 3 hours, or until the dough doubles in size, rising to a thickness of nearly 1 inch.

9. Preheat the oven to 500 degrees.

10. Place the pan in the oven. Lower the oven temperature to 450 degrees and bake for 10 minutes. Rotate the pan 180 degrees and continue baking the focaccia for another 5 to 10 minutes, or until it begins to turn a light golden brown. The internal temperature of the dough should register above 200 degrees (measured in the center).

11. Remove the pan from the oven and immediately transfer the focaccia out of the pan onto a cooling rack. Allow the focaccia to cool for at least 20 minutes before slicing or serving.

focaccia 8

watermelon agua fresca

watermelon agua fresca 7

This is the first watermelon I’ve ever bought. The thing is, I don’t actually like watermelon. Because it tastes like water. And if I want water, I’ll just drink some; no need to eat faintly sugary overly soft fruit.

watermelon agua fresca 1

But, I see now – sugary water, isn’t that the perfect base for a drink? It isn’t quite enough on its own; after all, watermelon is bland. But with some tart lime juice to brighten it up and maybe some mint, now we’re talking. Basically, think of the most supremely refreshing ingredients you can, then blend them up and serve them over ice.

watermelon agua fresca 3

This is so good that Dave had to verify with me that there was no alcohol in it. Yes, a refreshing summer citrusy drink without tequila or rum! I will be buying many, many more watermelons.

watermelon agua fresca 8

One year ago: Strawberry Cream Cake
Two years ago: Turkey Burgers
Three years ago: Potato Galette
Four years ago: Pecan Honey Sticky Buns

Printer Friendly Recipe
Watermelon Agua Fresca (adapted slightly from sunny vegan)

6 servings

8 cups cubed, seeded, peeled watermelon (about a third of a medium watermelon)
6 tablespoons lime juice
4 sprigs mint (optional)
ice
sparkling water

In a blender or food processor, puree the watermelon, lime juice, and mint. Pour the mixture into a fine-mesh strainer (or a colander lined with a single layer of cheesecloth); set aside for 30 minutes for the liquid to drain, stirring occasionally. Discard the solids in the strainer. Serve the remaining liquid over ice, topped off with sparkling water.

watermelon agua fresca 6

lemon ricotta cookies

lemon ricotta cookies 6

Due to the knee injury that’s kept me from working out at my normal intensity for four months (and counting), I mostly gave up baking for a while. Most of the baking I’ve done recently has been to use up the surplus of organic lemons I keep ending up with as a result of buying them in bags in the Big City. I hoard them until the week before I plan to head back to the Big City, and then I figure that I’d better get rid of them so I can justify buying more.

lemon ricotta cookies 1

I’m not sure my coworkers have noticed the prevalence of lemon treats I’ve brought in to share. It started with the pound cake, and then, weeks later (a departure from the once a week or so I used to bring stuff in), there were these cookies. Next week, it’ll be lemon cream tartelettes.

lemon ricotta cookies 2

I don’t think anyone has minded, considering that several people came by to tell me that these might be the best thing I’ve shared yet. (Questionable.) More tiny glazed cake than cookie, I definitely understand the popularity. But now that I’m almost back to my normal workouts, my coworkers better brace themselves for something besides lemon – by which I mean chocolate, of course.

lemon ricotta cookies 3

One year ago: Basic Coleslaw
Two years ago: Quinoa Tabbouleh
Three years ago: Croissants
Four years ago: Ricotta Spinach and Tofu Ravioli

Printer Friendly Format
Lemon Ricotta Cookies with Lemon Glaze (slightly adapted from Giada DeLaurentiis via Apple a Day)

Cookies:
2½ cups (12 ounces) all-purpose flour
1 teaspoon baking powder
8 tablespoons (1 stick) unsalted butter, softened
2 cups (14 ounces) granulated sugar
zest of 1 lemon
1 teaspoon table salt
2 large eggs
1 (15-ounce) container ricotta cheese
3 tablespoons lemon juice

Glaze:
1 cup (4 ounces) powdered sugar
3 tablespoons lemon juice
zest of 1 lemon

1. Preheat the oven to 375 degrees. Line 2 baking sheets with parchment paper or silicone mats. In a medium bowl, combine the flour and baking powder. Set aside.

2. Place the sugar, salt, and lemon zest in the bowl of a stand mixer fitted with the paddle attachment (or a large mixing bowl if you’re using a hand-held mixer). Beat on medium-low speed until the sugar looks slightly moist. Add the butter and continue beating on medium-low until the mixture is light and fluffy, about 2 minutes, scraping the sides of the bowl as needed. With the mixer running, add the eggs, one at a time. Add the ricotta and lemon juice, then continue mixing on medium speed for about 1 minute. Reduce the mixer speed to low and gradually add the flour mixture, mixing just until evenly combined.

3. Spoon the dough (about 1 tablespoon for each cookie) onto the baking sheets. Bake for 8-11 minutes, until slightly golden at the edges. Remove from the oven and let the cookies rest on the baking sheet for 15 minutes.

4. For the glaze: Combine the powdered sugar, lemon juice, and lemon zest in a small bowl and stir until smooth. Spoon about ½ teaspoon onto each cookie and use the back of the spoon to gently spread. Let the glaze harden for about 2 hours before serving.

lemon ricotta cookies 5

fish tacos

fish tacos 7

For a while there, I made fish tacos more than any other meal. That might only be once a month or so, but for this household, once a month is considered heavy rotation. Unsurprisingly, with that much iteration, the original recipe has gone through some modifications.

fish tacos 1

In fact, I now have two versions that I alternate between, an easy weeknight version cooked on the stove, plus a smokier grilled option using a firmer fish. The indoor recipe is similar to the original, except now I like to combine all of the toppings – cabbage, red onion, yogurt-based cilantro-lime sauce – into one slaw before building the tacos, which distributes the flavors better along with taming the onion’s bite and weighing down the cabbage – so you can fit more of it into each taco. The other important tweak is a squeeze of lime juice after the fish cooks, which refreshes the flavor of the marinade.

fish tacos 2

When I have more time, I’ll (have Dave) heat the grill, and we’ll cook the fish outside. I like thin tilapia filets for cooking on the stovetop, but something firmer, like halibut, is required for the grill. And if the grill is already hot, I’m definitely going toast the tortillas on there, and I might consider grilling the onions as well.

fish tacos 3

Sadly, I don’t make fish tacos as often anymore, because I realized that the tilapia available in my town isn’t sustainably produced. Halibut, my favorite variety for grilling, isn’t sold at all here, so I only get to make that when I buy it in the Big City.  But, catfish is readily available here, and it seems like it would make excellent tacos.  I’ll have to test that out with one – or both – of my new and improved fish taco recipes.

fish tacos 4
And if you run out of fish, this recipe works great with shrimp too!

One year ago: Lemon Bars (comparison of 3 recipes)
Two years ago: Cream Cheese Spritz
Three years ago: Strawberry Lemon Sorbet
Four years ago: Snickery Squares

Printer Friendly Recipe
(Grilled or Pan-Seared) Fish Tacos with Cilantro Lime Slaw

Serves 4

Marinade:
¼ cup lime juice (from 3-4 limes)
1 tablespoon olive oil
1 teaspoon salt
¼ teaspoon ground cumin
2 cloves garlic, peeled and smashed
¼ cup minced cilantro, stems and leaves
6 (4 to 5-ounce) tilapia filets if pan-searing; 4 (6-ounce) halibut filets if grilling

Slaw:
2 tablespoons lime juice (from 1-2 limes)
½ small red onion, quartered lengthwise and thinly sliced
¼ teaspoon table salt
⅛ teaspoon ground black pepper
¾ cup Greek yogurt (or a mixture of yogurt and mayonnaise)
¼ cup minced cilantro
½ cabbage, cut into quarters, cored, and sliced thin

For the tacos:
1 tablespoon olive oil (if pan-searing)
1 tablespoon lime juice
8 (5-inch) flour tortillas
other possible toppings: green chile, avocados, cheese, salsa

1. In a medium bowl, combine all of the marinade ingredients, including the fish. Refrigerate 15 minutes.

2. Meanwhile, make the slaw by combining the 2 tablespoons lime juice, red onion, ¼ teaspoon salt, pepper, and yogurt in a large bowl. Add the ¼ cup cilantro and cabbage, folding to evenly coat.

3. To pan-sear the fish: Heat 1 tablespoon of oil in a large nonstick skillet over medium-high heat. Add the fish and cook, without moving, until browned, about 3 minutes. Flip the fish and continue to cook until evenly flaky, an additional 2-3 minutes. To grill the fish: Heat a grill to medium-high. Oil the grill grate; grill the fish for about 8 minutes, turning once halfway through cooking.

4. Using two spoons, shred the fish into bite-size pieces. Pour the remaining lime juice over the fish; toss to combine.  Build the tacos by layering fish, slaw, and desired toppings on tortillas.

fish tacos 6

meyer lemon semifreddo

semifreddo 4

I traveled to Santa Fe last month for work, and while I didn’t love the day-long meetings all week, it was worth it to eat at Santa Fe restaurants and shop at Santa Fe grocery stores. I stopped at Whole Foods before I even checked in to my hotel, picking up some healthy snacks for the week and some sushi for dinner. I got pizza the next night (pizza – good pizza! – that I didn’t make myself!), but it was back to sushi the third night. The last day, after only six hours of meetings instead of the usual eight, I drove home, but not before making stops at both Whole Foods (where I got, you guessed it, more sushi to snack on during the drive home) and Trader Joe’s.

semifreddo 3

Whole Foods had what must have been the last Meyer lemons of the season, and I couldn’t resist buying a few, even though I already had a bag of organic regular lemons in my cart. I could not, however, decide what to make with them. Like the last time I bought Meyer lemons, well over four years ago, I wanted something that would showcase their flavor so I could figure out just how much different they are from regular lemons.

semifreddo 2

I diluted the flavor only slightly by mixing it with heavy cream, sugar, and egg yolks to make semifreddo. And if you’re paying attention while eating this dessert, the flavor has a little extra something, even beyond the sweeter orange hint of Meyer lemons. However, if you’re distracted by the light and airy texture that comes from freezing whipped heavy cream, I won’t blame you. And this indulgent dessert with a popular but elusive ingredient is all thanks to a week of meetings; traveling for work has its advantages.

semifreddo 5

One year ago: Barbecued Pulled Pork
Two years ago: Grilled Artichokes
Three years ago: Basic Lentil Soup
Four years ago: Asparagus and Arugula Salad with Cannellini Beans and Balsamic Vinegar

Printer Friendly Recipe
Meyer Lemon Semifreddo (from Bon Appétit via epicurious)

Serves 8 to 10

While the recipe indicates that you can use Meyer or regular lemons interchangeably, Meyer lemons are significantly less sour than regular lemons. I used Meyer, but if you use regular, you should probably increase the sugar.

I used a round pan instead of a loaf pan, but other than that, followed the recipe exactly.

½ cup sliced almonds, toasted
1¾ cups chilled heavy whipping cream
1¼ cups (8.75 ounces) plus 2 tablespoons sugar
7 large egg yolks
½ cup fresh Meyer lemon juice or regular lemon juice
1 tablespoon plus 2 teaspoons finely grated Meyer lemon peel or regular lemon peel
¼ teaspoon salt
4 cups mixed fresh berries (such as raspberries, blackberries, blueberries, and quartered hulled strawberries)

1. Line a 9-by-5-inch metal loaf pan with plastic wrap, leaving a generous overhang. Sprinkle almonds evenly over the bottom of the pan. Using an electric mixer, beat the whipping cream in a large bowl until soft peaks form. Refrigerate the whipped cream while making the custard.

2. Whisk 1¼ cups sugar, the egg yolks, lemon juice, lemon peel, and salt in a large metal bowl to blend. Set the bowl over a large saucepan of simmering water and whisk constantly until the yolk mixture is thick and fluffy and instant-read thermometer inserted into the mixture registers 170°F, about 4 minutes. Remove the bowl from over the simmering water. Using an electric mixer, beat the mixture until cool, thick, and doubled in volume, about 6 minutes. Fold in the chilled whipped cream. Transfer the mixture to the prepared loaf pan; smooth the top. Tap the loaf pan lightly on the work surface to remove air pockets. Fold the plastic wrap overhang over top to cover. Freeze the semifreddo until firm, at least 8 hours or overnight. (Semifreddo can be made 3 days ahead. Keep frozen.)

3. Gently mix the berries and remaining 2 tablespoons sugar in a large bowl. Set aside for 30 minutes.

4. Unfold the plastic wrap from the top of the semifreddo; invert onto a platter and remove the plastic wrap. Dip a heavy large knife into hot water; cut the semifreddo crosswise into 1-inch-thick slices. Transfer to plates; spoon the berries alongside and serve.

california roll burgers

sushi burgers 7

I am not the most effusive of food bloggers. I’m not much for “OMG OMG make this ASAP” types of statements. I understand that we all have different tastes, different health requirements, different time constraints; what is a perfect recipe for me might not seem so to you. But, most importantly, those types of statements need to be saved for the really special recipes.

sushi burgers 2

This is a really special recipe. If you consider the best burger I’ve ever eaten to be really special, that is. And I think it is, because I have eaten some pretty fantastic burgers, starting with the classic green chile cheeseburger, including lamb burgers with feta and tzatziki, and not to mention the fancy schmancy fig-glazed burger with onion jam.

sushi burgers 3

All are wonderful, and I don’t plan on giving them up, but this one is my new favorite burger. Admittedly, this is coming from a sushi lover who lives over 150 miles from the nearest sushi restaurant, so I’m always excited when I can get sushi flavors without requiring raw fish or hours of rolling.

sushi burgers 4

I thought at first that mild turkey burgers would work better with the light shellfish and vegetable toppings, but it turned out that the turkey was too timid, and I could hardly taste it over the king crab, avocado, and wasabi. It was still the best burger I’d ever had though. But I tried again, this time using hearty ground beef instead of turkey and pasteurized lump crab (soaked in milk for 20 minutes to null fishy odors, as per Cook’s Illustrated’s recent crab cake recipe) instead of king crab. And then that was the best burger I’d ever had.

sushi burgers 5

And next time, I’ll get the best of both worlds by using ground beef and king crab, and then that will be the best burger I’ve ever had. This small-town desert girl has figured out how to get her sushi fix, and that’s worth getting excited about.

sushi burgers 6

One year ago: Chocolate Chip Bundt Cake
Two years ago: Stuffed Butterflied Leg of Lamb
Three years ago: Fresh Strawberry Scones
Four years ago: Hash Browns with Sautéed Vegetables and Poached Eggs

Printer Friendly Recipe
California Roll Burgers (adapted from Use Real Butter)

6 burgers

The fish sauce replaces salt in this burger recipe, while also providing a dose of umami. I’ve tried it with regular burgers and didn’t notice any difference, but I like it here because the flavor matched the toppings I used for this burger. If it isn’t something you keep around, use ¾ teaspoon salt instead.

If you prefer, you can replace the Greek yogurt with additional mayonnaise.

1 pound ground beef (no leaner than 90%)
2 tablespoons fish sauce
¼ teaspoon sugar
¼ teaspoon black pepper
6 ounces shelled crab (from 2 king crab legs, or use pasteurized lump crab)
¼ cup mayonnaise, divided
2 sheets nori, cut into strips
¼ cup Greek yogurt
1-2 tablespoons powdered wasabi
1 tablespoon soy sauce
6 burger buns, halved horizontally
2 avocadoes, peeled, seeded, and sliced
1 cucumber, sliced thinly
sesame seeds

1. In a large bowl, combine the ground beef, fish sauce, sugar, and pepper. Form into 6 patties, about ½-inch thick and 4 inches wide. In a medium bowl, combine the crab, 2 tablespoons mayonnaise, and nori. In a small bowl, combine the remaining 2 tablespoons mayonnaise with the Greek yogurt, wasabi powder, and soy sauce.

2. Prepare a medium-hot grill. Using a paper towel, grease the grate with vegetable oil. Grill the beef patties for 5 minutes; flip, and continue grilling another 5 minutes. Meanwhile, toast the burger buns on the hottest part of the grill.

3. Spread the wasabi mayonnaise on both sides of the buns. Top with slices of avocado, a burger patty, the crab salad, cucumber slices, and a sprinkle of sesame seeds. Serve immediately.

sushi burgers 9