sugar cookies – star wars characters

star wars cookies 1

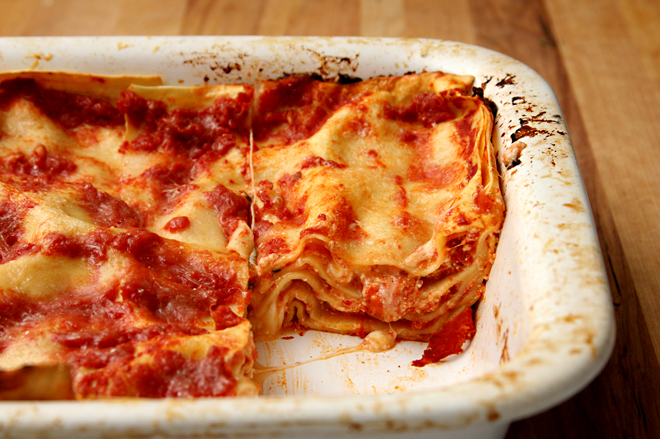
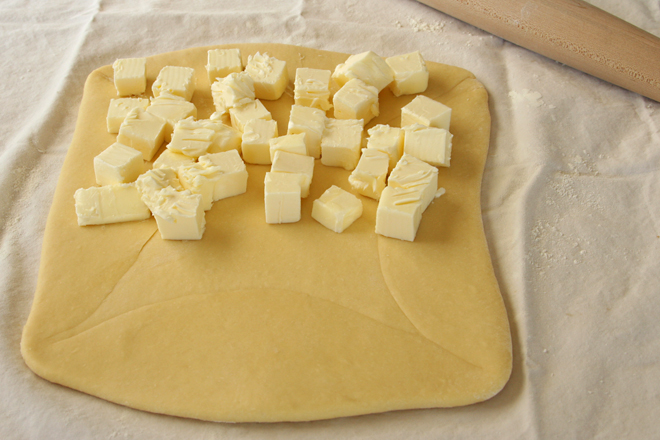
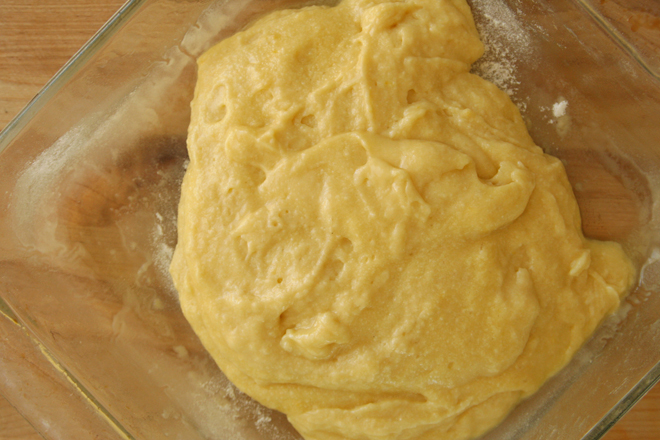
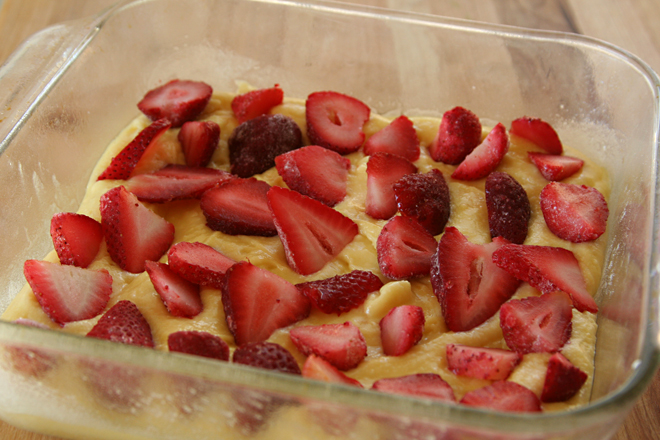
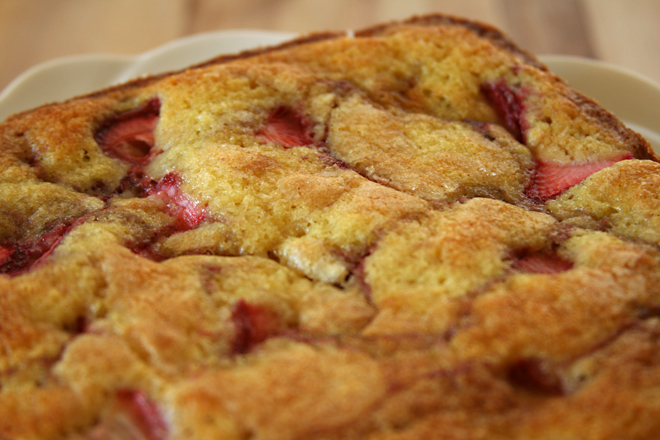
I recently overheard people talking about a dessert I’d baked, and they said something to effect that probably anyone could do something like that with the right equipment. I mostly agree with them; there are no sneaky tricks up my sleeve. I followed a recipe, with a few tweaks to get the flavors I wanted and with the experience to know what pitfalls I might encounter. (Not that that ever stops me from finding new mistakes to make.)

star wars cookies 6

But they are wrong in one important aspect, and that is that what sets some bakers apart is a high capacity for tedium. Sugar cookies decorated with royal icing are the best example. The whole process takes forever.

star wars cookies 2 vader

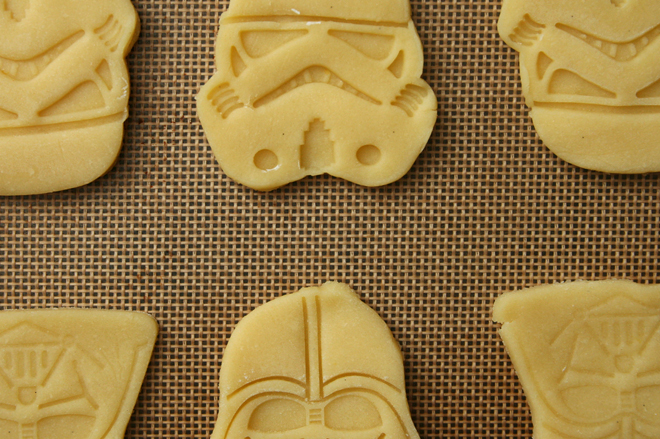
I prefer to divide the work up between four different days, mixing up the dough on one, rolling the dough and cutting shapes on another, then the big day of baking, outlining, and flooding, and finally adding the details after the flooded icing has dried. This time, I only had a few days between receiving these Star Wars cutters as a gift and having dinner with a couple of young Star Wars fans.

star wars cookies 5 stormtrooper

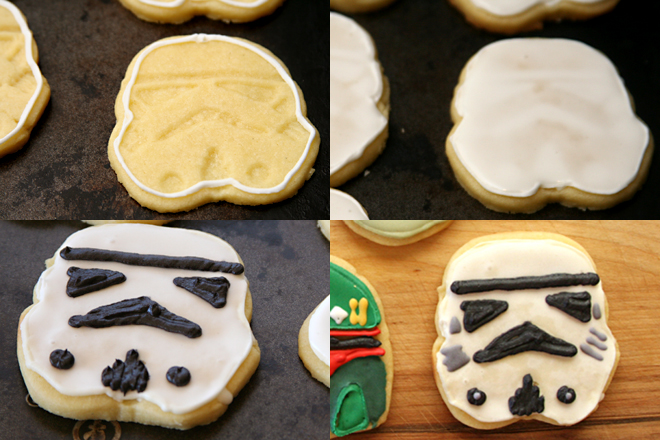
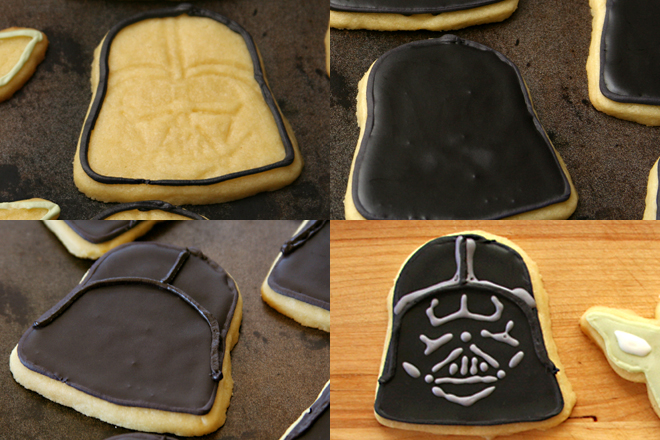
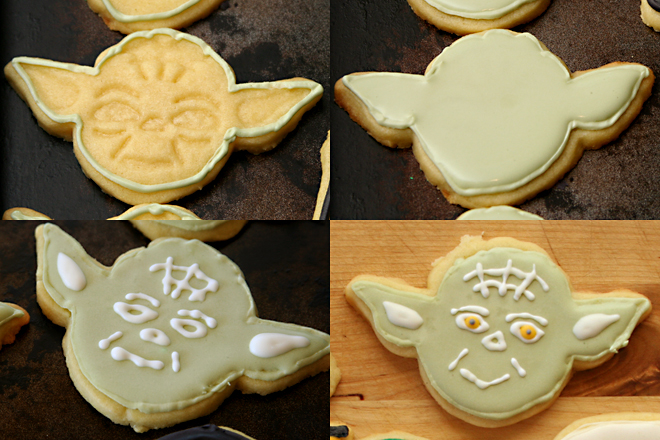
I’ve used royal icing a handful of times previously, but so intermittently that I wasn’t learning from my mistakes. I have found that it’s imperative that I draw a map of my plan for each shape – first the outline color, then the flooding, then each layer of detail. Maybe more experienced decorators don’t need this, but for a newbie like me, it makes the process less intimidating. (Each photo set shows essentially what my hand-drawings do, as far as the steps to decorate each cookie.)

star wars cookies 4 yoda

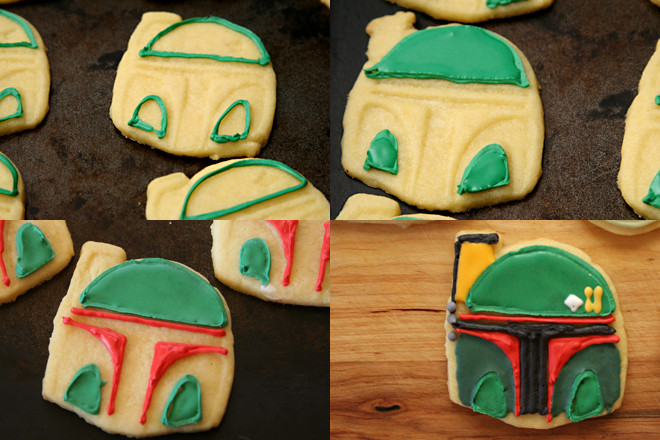
This was probably my most successful attempt at royal icing – and the most time-consuming, because there was a lot of detail in these designs. I did learn a few things along the way, and I can only hope that it will make me better at this in the future. Still, I suspect that this is one of those baking endeavors that will always require a generous tolerance for tedium – and that, for better or worse, is something I have.

star wars cookies 3 yoda

One year ago: Cream Cheese Pound Cake
Two years ago: Roll-out Sugar Cookies (comparison of 4 recipes) (coincidence, I swear!)
Three years ago: Roasted Kale
Four years ago: Rice Pudding

I used the first recipe listed in my sugar cookie comparison.  I’m not confident enough in my royal icing skills to offer any sort of tutorial. At this stage, I’m still referencing Annie’s tutorial for instructions.

star wars cookies 8

tomato and four cheese lasagne

four cheese lasagna 5

Lasagna recipes are like chocolate chip cookie recipes for me – I already have several that I love, but I can’t resist a new one. I have no loyalties about béchamel versus ricotta, meaty versus vegetarian, seafood or chicken. I love them all, and I’m a sucker for a new version.

four cheese lasagna 1

A recent article in Fine Cooking, which prompted me to subscribe to the magazine, showcased three recipes – the braised beef and porcini one Josie posted, a butternut squash and goat cheese lasagna I can’t wait to make, and this classic tomato and cheese lasagna. Boring, maybe, but I can never get enough of the basic combination of pasta, cheese, and tomatoes.

four cheese lasagna 3

I always like to make my own lasagna noodles, because I’m all about creating more work for myself. (Also it’s fun.) But this time I went a step further and made my own ricotta. Combined with a lightly spiced tomato sauce and three other favorite Italian cheeses, this lasagna is in the running for my favorite – if I could ever choose a favorite lasagna.

four cheese lasagna 4

One year ago: Shrimp Canapes a la Suede
Two years ago: Mediterranean Pepper Salad
Three years ago: Chocolate Whiskey Cake
Four years ago: Banana Walnut Pancakes

Printer Friendly Recipe
Four Cheese and Tomato Lasagne (slightly adapted from Fine Cooking)

8 servings

To chop the tomatoes, just stick kitchen shears in the can and snip away. Canned tomatoes that are already diced won’t break down into the sauce like whole tomatoes will.

If you make your own ricotta, you’ll need to start with 8 cups of milk (and/or cream).

To boil and rinse the pasta, follow the instructions in this recipe through step 4.

2 tablespoons olive oil
4 medium cloves garlic, smashed and peeled
¼ teaspoon crushed red pepper flakes
2 (28-ounce) cans whole plum tomatoes, chopped (see note)
kosher salt
6 large basil leaves, torn by hand into ½-inch pieces
2 cups (15 ounces) whole-milk ricotta
2½ cups (10 ounces) grated fresh mozzarella
2 cups (8 ounces) grated fontina
1¾ cups (3.5 ounces) finely grated Parmigiano-Reggiano
1½ recipes fresh pasta, boiled and rinsed (see note)

1.Heat the oil, garlic, and red pepper flakes in a 4- to 5-quart pot over medium heat. Cook until the garlic is golden-brown, about 3 minutes. Discard the garlic. Add the tomatoes and 2 teaspoons salt; simmer gently, uncovered, adjusting the heat as needed, until the tomatoes begin to break down, about 45 minutes. Stir in the basil; season to taste with salt if necessary.

2.Position a rack in the center of the oven and heat the oven to 350°F. Set aside 1¼ cups of the sauce and mix the remaining sauce with the ricotta in a medium bowl. Mix the mozzarella, fontina, and 1 cup (2 ounces) of the Parmigiano in another medium bowl.

3. Spread ½ cup of the reserved tomato sauce on the bottom of a 9×13-inch baking dish. Cover the sauce with a slightly overlapping layer of cooked noodles, cutting them as needed to fill any gaps. Evenly spread 1½ cups of the ricotta mixture over the noodles. Sprinkle 1 rounded cup of the grated cheese evenly over the ricotta. Add another layer of noodles, and repeat the layers as instructed above, to make a total of 4 ricotta-and-cheese layers and 5 pasta layers. Spread the remaining ¾ cup plain sauce evenly over the top noodle layer. Sprinkle with the remaining ¾ cup of Parmigiano-Reggiano.

4. Cover the baking dish with foil and bake for 40 minutes. Remove the foil and bake until the top is browned and bubbly, 15 to 20 minutes. Let cool for at least 10 minutes before serving.

four cheese lasagna 6

pear almond danishes and lemon ricotta danishes

danish 14

I went through a baking drought early this year that lasted a few weeks, maybe a month. I couldn’t explain it, but I just wasn’t interested in baking for the first time in years. I was kind of worried – how long would this last? When would my drive to bake come back?

danish 1

Oh it’s back. It crept back in, but it’s in full force now. The last few weeks, in particular, I’ve taken on some ambitious projects. It started with these danishes, made for a brunch potluck that was in the evening after work. The very next day, I stayed up until midnight flooding sugar cookies with royal icing. A week after that, I made two batches of fancy cupcakes for a bridal shower. I breathed a sigh of relief when that was over, but mixed up another batch of sugar cookie dough just one day later. I’ll decorate those sugar cookies this week, plus make a double batch of tiramisu for my friend’s rehearsal dinner on Friday.

danish 5

Baking projects that are for an event in the evening after work are particularly complicated, especially if the event is toward the end of the week instead of shortly after the weekend. It requires careful balancing of chilling time, lunch hours, and evening schedules. Of course it’s worth it when you’re sitting around with your friends, drinking bellinis and eating eggs Benedict and buttery, flaky danishes on Thursday evening after work. Not just worth it, but so enjoyable that I did it again a week later with cupcakes, and a week after that I’m sure it will be something else. My baking obsession is back.

danish 12

One year ago: Chocolate Pots de Creme
Two years ago: Toasted Coconut Custard Tart
Three years ago: Lemon Cream Cheese Bars
Four years ago: Raspberry Bars

Printer Friendly Recipe
Danishes (adapted from Martha Stewart’s Baking Handbook)

I made 18 danishes from this batch of dough, and they were about 3-inches on a side after baking. Bigger danishes are probably easier to work with; many of mine unfolded when the dough expanded during baking, particularly the square shape with the corners folding in.

½ cup warm milk
2 teaspoons instant yeast
10 ounces (about 2 cups) all-purpose flour
3 tablespoons sugar
1 teaspoon table salt
2 sticks butter, room temperature
1 large egg
1 batch of filling (recipes follow)
egg wash (1 egg mixed with ⅛ teaspoon salt and 1 teaspoon water)

1. In a small measuring cup, stir the yeast into the milk. In the bowl of a stand mixer fitted with the paddle attachment, combine the flour, sugar, and salt. Add 2 tablespoons of butter; mix until evenly combined. Pour in the yeast and milk; mix until the dough starts to look shaggy. Switch to the dough hook; add the egg and knead until the dough just starts to look smooth, 2-3 minutes. Wrap the dough in plastic wrap and refrigerate for at least 2 hours or overnight.

2. On a lightly floured surface, roll the dough out to a 12-inch by 8-inch rectangle, about ¼ inch thick. Distribute the softened butter over two-thirds of the dough, leaving a short end free of butter. Fold the non-buttered third over the middle, then fold the last third over the middle, like folding a letter. Pinch the edges to seal. Roll the dough out to a 12-by-8-inch rectangle again, then fold it in thirds again. Rewrap the dough in plastic wrap; chill 1 hour.

danish 3
(see here for an explanation of the creases on the dough)

3. After the dough has chilled, roll it out and fold it in thirds twice more, then chill another hour, and roll and fold twice more. Wrap tightly and refrigerate for at least four hours or overnight. (This is a good point to freeze the dough too; thaw in the refrigerator overnight.)

4. Roll the dough out to a 12-by-18-inch rectangle about ⅛-inch thick. If the dough becomes too elastic and springs back, cover it and place it in the refrigerator for at least ten minutes, then try rolling again. Be patient; the rolling and chilling could take up to an hour. Cut 12 to 18 squares (see note).

5. For pinwheels: Cut from each corner halfway to the center of each square. Dab about ¼ teaspoon of filling into the center of each square, then fold every other corner toward the center, pressing to seal. Top with one (for smaller danishes) to two (for the larger size) tablespoons of filling.

danish 8

For squares with folded corners: Spoon one (for smaller danishes) to two (for the larger size) tablespoons of filling into the center of each square. Fold each corner to the middle of the dough; press to seal.

danish 9

6. Transfer the danishes to a baking sheet lined with parchment paper or a silicone mat. Cover and either chill overnight or set aside to rise. Heat the oven to 400 degrees. When the danish dough is about doubled in height and is starting to look puffy, brush the danishes with the egg wash. Bake one baking sheet at a time until the danishes are golden brown, 20-25 minutes. Transfer the pan to a wire rack; let the danishes cool on the pan for a few minutes before transferring them to cooling racks to cool to room temperature. Serve within a day.

danish 10

Cheese Danish Filling

Makes enough for 1 batch of danishes

1 cup ricotta cheese
6 tablespoons (2.6 ounces) sugar
⅛ teaspoon salt
1 tablespoon lemon zest
1 large egg
2 teaspoons vanilla
2 tablespoons unsalted butter, melted and cooled

Combine all ingredients. Chill.

danish 11

Pear Almond Danish Filling (rewritten from Martha Stewart’s Baking Handbook)

Makes enough for 1 batch of danishes

⅔ cup slivered almonds, toasted and cooled completely
2 tablespoons flour
½ cup (3.5 ounces) sugar, plus 1 tablespoon
¼ teaspoon salt
2 tablespoons butter
1 large egg
2 pears, peeled, cored, diced finely
¼ cup lemon juice

1. In a food processor, grind the almonds, flour, ½ cup sugar, and salt; add the butter and egg; chill.

2. Heat the pears, lemon juice, and 1 tablespoon sugar in a medium nonstick skillet over medium heat, stirring occasionally, until the pears caramelize, 8-10 minutes. Chill.

danish 15

butterscotch peanut butter chocolate rice krispy treats

rice krispie treats 8

I did something very, very stupid with this recipe. It calls for 1½ bags of butterscotch chips. The thing is, I don’t like butterscotch chips very much, so I didn’t want half a bag leftover that I would feel obligated to keep around indefinitely, where it would take up valuable cabinet space. I only bought one bag, deciding to wing it (always trouble) for the remainder.

rice krispie treats 3

I started regretting this shortly after leaving the store. Because obviously I could have just dumped that half bag of chips into a batch of chocolate chip cookies and they would be hardly noticeable. Or, heaven forbid, I could just throw a handful of butterscotch chips away if I didn’t plan to use them.

rice krispie treats 12

Instead of making an extra trip back to the store, I forged ahead. Things looked bad from the beginning when I measured out my single bag of butterscotch chips and it was even less than I was expecting. I still forged ahead, adding in a couple tablespoons of butter and another couple tablespoons of corn syrup to make up for the fat and sugar I was missing from the extra chips. I knew I was in bad shape when I poured in the entire box of cereal, and it filled my pot to the brim. I thought about shoveling some of the cereal out before mixing it into the melted butterscotch and peanut butter mixture but stubbornly forged ahead instead.

rice krispie treats 7

No one is surprised that my rice krispy bars were a crumbly mess, are they? There simply wasn’t enough glue to hold together all that cereal. They tasted good, like that classic combination of peanut butter and chocolate, but, while I did manage to cut a few clean squares, they’re so delicate that they crumble as soon as they’re touched. Of course I ate them anyway, because they’re butterscotch peanut butter chocolate rice krispy bars. Crumbles aside, what’s not to love? But next time, I’ll follow the directions, half bag of extra chips be damned.

rice krispie treats 10

One year ago: Strawberry Buttercream
Two years ago: Bacon-Wrapped Stuffed Dates
Three years ago: Beer-Battered Fish
Four years ago: Julia Child’s French Bread

Printer Friendly Recipe
Butterscotch Peanut Butter Chocolate Rice Krispy Treats (slightly adapted from Cara’s Cravings)

About 32 tall bar cookies

3 cups (1½ to 2 11-ounce bags) butterscotch chips
1½ cups (13½ ounces) creamy peanut butter
salt
1 (12-ounce) box crisp rice cereal
4 cups (2 12-ounce bags) semi-sweet chocolate chips
8 tablespoons (1 stick) butter, cut into ½-inch cubes
1½ cups (6 ounces) confectioners’ sugar
¼ cup water

1. Spray a 9-by-13 inch pan with cooking spray.

2. In a large (at least 5-quart) pot over medium-low heat, melt the butterscotch chips with the peanut butter and ¼ teaspoon salt. When the mixture is smooth, which will take 8-10 minutes, add the cereal and stir to thoroughly coat the cereal with the peanut butter mixture.

3. Meanwhile, bring 1-inch of water to a simmer in a saucepan. Place the chocolate, water, 1/8 teaspoon salt, and butter in a heatproof bowl and set it over the simmering water. Stir occasionally until the chocolate is melted and smooth, 6-8 minutes. Stir in the powdered sugar.

4. Transfer half of the cereal mixture to the prepared pan; use a rubber spatula or greased hands to pat the mixture into an even layer, pressing lightly to compact. Spread the chocolate mixture evenly over the cereal in the pan. Top with the remaining cereal mixture. Cover lightly with plastic wrap and refrigerate until set, about 2 hours.

rice krispie treats 9

Normally I wouldn’t waste your time describing such a mistake, but this recipe was on my list of 2012 goals for February.

ranch dressing

ranch dressing 6

I’ve made ranch dressing a few times before but hadn’t found the perfect recipe. One was too chunky; minced vegetables like red peppers don’t cling to dippers. Another time, I couldn’t put my finger on the problem, but it just wasn’t right. But now I’ve got it.

ranch dressing 1

Combining Greek yogurt and mayonnaise creates a rich creamy base with the balance of the yogurt’s tart flavors and mayo’s sweeter notes. On their own, that would be a little thick for salad dressing, so buttermilk loosens the consistency. Lemon juice brightens and mustard deepens.

ranch dressing 2

You don’t need a wide variety of herbs, but the ones you choose are key. The absolute essential one is chives, which gives the mixture onion flavor without raw onion’s sharp bite. Parsley fills in the bitter edge, and those are the only two that are necessary for a simple, but still great, ranch dressing. I had some dill around and added just a sprinkle, but even that was too much, because the dill tends to dominate.

ranch dressing 3

It seems like something as ubiquitous as ranch dressing should be more complicated. There’s nothing much here beyond a creamy base, a few flavor tweaks, and a handful of herbs. But it’s another recipe I’ve been wanting to perfect that has been checked off the list.

ranch dressing 5

One year ago: Braised White Bean with Zucchini, Tomatoes, and Potatoes
Two years ago: Roasted Garlic Balsamic White Bean Dip
Three years ago: Caramel Crunch Bars
Four years ago: Challah

Printer Friendly Recipe
Ranch Dressing

Makes about 1½ cups

To toast the garlic, heat a small unoiled not-nonstick skillet over medium heat. Add the unpeeled garlic. When the peel blackens, turn the clove over and toast a second side. This takes the bite out of the raw garlic, which can be overpowering in dressings.

If you want your dressing to be smoother, put it through the blender (or take an immersion blender to it).

½ cup Greek yogurt
½ cup mayonnaise
½ cup buttermilk
1 teaspoon lemon juice
½ teaspoon dijon mustard
1 clove garlic, toasted
¼ cup minced fresh chives
2 tablespoons minced fresh parsley
⅛ teaspoon paprika
½ teaspoon salt
⅛ teaspoon black pepper

Whisk everything together. If you can make it a couple hours in advance, the flavors will have a chance to meld a little.

ranch dressing 4

wine braised beef

wine braised beef 7

I don’t really consider myself a team player. I’ve never been excited about sharing or compromise (which makes me really fun to live with, as you can imagine). And yet, in the last several months, two good friends have asked me to collaborate with them on big projects.

wine braised beef 1

The first was a dinner party for twenty women. It didn’t need to be fancy or involved, except that we wanted it to be. Through a long series of emails, discussing the merits of lasagna versus baked stuffed chicken versus braised meat, we finally decided on a “deconstructed stew” theme, with glazed carrots, mashed potatoes, and beef slow-cooked in a pot of simmering wine and broth. And then just for kicks, we added pesto palmiers, cheese and crackers, mushroom farro soup, orange cream tarts, truffles, and cranberry bliss bars to the menu. Also mulled wine and flavored waters.

wine braised beef 3

Around this time, the call for proposals to present at the BlogHer Food conference was released, and Brady had asked me if I was interested in submitting a proposal with her about free photo post-processing software programs. Of course I was! Brady and I got our proposal accepted, and so we’re traveling to Seattle the second week of June to talk about editing photos, and, most importantly, doing it using free software.

wine braised beef 4

Surprisingly, to myself at least, both projects have been unqualified successes. The dinner party was great fun, to plan, to prepare, to serve, and to eat, and my friend invited me to host with her again next year, so I couldn’t have been too hard to work with! Brady and I are still in the beginning stages of planning our presentation for the BlogHer Food conference, but just the fact that our proposal was accepted is a positive sign of our ability to work together. Maybe I’m not so bad to team up with after all.

wine braised beef 6

One year ago: Toasted Almond Scones
Two years ago: Honey Wheat Cookies
Three years ago: Honey Yogurt Dip
Four years ago: Green Chile Chicken Enchiladas

Printer Friendly Recipe
Wine-Braised Beef

Serves 4-6

The goal was that the main dish be stew-like without being stew. It was going to be served on plates, so it couldn’t be too saucy, but we wanted meltingly tender chunks of beef. A cheaper cut of meat so we could serve a crowd was definitely a bonus. It also doesn’t hurt that there’s no last-minute work and it can be made in advance and actually improves with being stored overnight.

I’m a big fan of Yellowtail’s wine for recipes like this. It’s cheap but pretty good. I used a Shiraz/Cabernet Sauvignon blend.

1 tablespoon canola oil
1 (3 to 3½-pound) boneless beef chuck roast, cut into 2-inch cubes
Salt and freshly ground black pepper
1 ounce pancetta, diced into ⅛-inch cubes
1 yellow onion, diced fine
1 medium carrot, diced fine
1 celery stalk, diced fine
3 cloves garlic, minced
1½ cups dry red wine
1½ cups chicken broth
1 (15-ounce) can diced tomatoes, with juice
1 sprig thyme
2 tablespoons butter, room temperature
2 tablespoons all-purpose flour
2 tablespoons chopped fresh parsley, for garnish

1. Heat the oil in a 5-quart Dutch oven over medium-high heat. Pat the meat dry, season it generously with salt and pepper, and arrange the pieces, without touching, in the Dutch oven. (You may need to do this in two batches.) Cook the meat, without stirring or flipping, for 2-3 minutes, until the bottoms are deeply browned. Turn the chunks of meat and brown a second side. Transfer the meat to a plate. Discard any fat in the pan (but leave the cooked-on brown bits).

2. In the same pot over medium heat, cook the pancetta until fat starts to render, 3-5 minutes. Add the onion, carrot, and celery; cook, stirring occasionally, until the edges of the onions start to brown, about 6 minutes. Add the garlic; cook and stir for about one minute. Pour the wine into the pot, scraping up the sticky brown bits on the bottom of the pot. Add the stock, tomatoes with their juice, thyme sprig, and reserved meat back to the pot. Increase the heat to medium-high and bring to a simmer. Once the liquid simmers, reduce the heat to low, partially cover the pot, and simmer slowly until the meat is tender, about 3 hours.

3. Mix the butter and flour in a small bowl until smooth. Remove the thyme sprig from the pot. Whisk the butter/flour paste into the sauce. Increase the heat to medium to medium-high and simmer, uncovered, until the sauce is thickened. Serve, topping each portion with a sprinkling of parsley.

wine braised beef 5

strawberry buttermilk cake

strawberry buttermilk cake 6

I woke up yesterday wanting cake. Not wanting to eat cake, so much, although that part is nice, but wanting to watch butter and sugar swirl in the mixer bowl and gradually turn into a smooth batter. This despite plans to make Danish dough, two Danish fillings, fajitas, grapefruit cookies (which didn’t happen because I’d gotten my mixer fix with the cake), and a batch of Tartine country bread dough to freeze (which didn’t happen because I ran out of flour). No one said anything about being practical.

strawberry buttermilk cake 3

I started poking around the internet for recipes, and chose this one because it uses buttermilk, which I have right now, and it wasn’t loaded with butter, which is always nice when you’re planning to eat cake for breakfast. I did not have any fresh berries, but I always keep strawberries in the freezer for our weekday smoothies. And it didn’t require an hour in the oven; key on a government holiday that included sleeping in.

strawberry buttermilk cake 4

The cake was everything I’d been craving. The most important part of the craving was my favorite mixing method of beating butter and sugar until fluffy, whipping in an egg and vanilla, and alternating the additions of buttermilk and dry ingredients. But cake for breakfast doesn’t hurt either.

strawberry buttermilk cake 5

One year ago: Eggplant Rollatini
Two years ago: Pasta with Baked Ricotta and Sweet Tomato Sauce
Three years ago: Vegetarian Chili
Four years ago: Salmon Cakes, Flaky Biscuits, Hashed Brussels Sprouts

Printer Friendly Recipe
Berry Buttermilk Cake (rewritten but not changed from Gourmet via Smitten Kitchen)

Serves 6

Two things: The original recipe calls for fresh raspberries, which are probably a better choice than the (frozen) strawberries I used. Strawberries are juicier than other berries, so my cake was a little wetter than is probably ideal. I also thought it was too sweet, which could be because strawberries aren’t as tart as raspberries, but still, next time I’ll only use ½ cup of sugar.

1 cup (4.8 ounces) all-purpose flour
½ teaspoon baking powder
½ teaspoon baking soda
¼ teaspoon salt
½ stick unsalted butter, room temperature
⅔ cup (4.67 ounces) plus 1½ tablespoons sugar, divided
1 teaspoon grated lemon zest
½ teaspoon pure vanilla extract
1 large egg
½ cup well-shaken buttermilk
1 cup (5 ounces) fresh raspberries (or other berries)

1. Adjust a rack to the middle position and heat the oven to 400 degrees. Butter and flour a 9-inch round cake pan. In a small bowl, whisk together the flour, baking powder, baking soda, and salt.

2. In a stand mixer fitted with the paddle attachment (or in a medium bowl using a hand mixer), beat the butter, sugar, and lemon zest (if using) on medium-high speed until pale and fluffy, about 2 minutes. Add the egg and vanilla, beating until combined. Reduce the mixer speed to low; add one-third of the flour mixture, then half of the buttermilk. Continue alternating the dry ingredients and buttermilk, ending with the dry ingredients.

3. Scrape the batter into the prepared pan, smoothing the top. Scatter the berries evenly over the top, then sprinkle with the remaining 1½ tablespoons sugar. Bake until the cake is golden and a toothpick inserted into the center comes out clean, 25 to 30 minutes. Transfer the cake to a cooling rack; cool for 10 minutes. Remove the cake from the pan and cool another 10-15 minutes before serving.

strawberry buttermilk cake 7

black bean quinoa salad with tomatillo salsa

black bean quinoa 7

A few weeks ago, I was skiing, and I was having fun, but I felt stale. I felt like I was doing the same things I always do when I ski, back and forth across the slope, not too fast, just nice and comfortable. After a morning of this, I was getting impatient with myself – why are you so timid, I asked myself? Go faster, mix it up, challenge yourself, get out of that comfort zone. So I did, and I fell, and I twisted my knees, had to sit in the lodge and read a book the next day while my friends skied, and I couldn’t run or progress in my weightlifting routine for three weeks (and counting*).

black bean quinoa 1

My weeknight dinner routine has felt stale lately too. So many grain salads, so many beans. It seems like I always use quinoa the same way, in some sort of salad. And how many different ways can I possibly combine black beans, chiles, and avocadoes?

black bean quinoa 3

On the other hand, maybe I’m in this rut because it works – it’s healthy, it’s fast, and it’s good. Sometimes it’s better to stick with what works. Quinoa salads work. Black beans and cilantro works. And avocado works on everything. This was one of the best meals I’ve made lately. Mixing it up is overrated.

black bean quinoa 4

*Eventually, I decided that if resting wasn’t helping my knees heal, I might as well run. (Impeccable logic, right?) A couple runs in, my knees feel better than they have in weeks. Crossing my fingers to start weightlifting again this weekend!

black bean quinoa 6

One year ago: Chocolate Frosting (comparison of 3 recipes)
Two years ago: Dorie Greenspan’s Best Chocolate Chip Cookies
Three years ago: Devil’s Food White Out Cake
Four years ago: Cream Cheese Brownies

Printer Friendly Recipe
Black Bean Quinoa Salad with Tomatillo Salsa (adapted slightly from Cate’s World Kitchen)

Serves 3-4

I substituted about 4 ounces of roasted peeled Hatch green chiles for one of the jalapenos.

1 cup quinoa, rinsed
salt
4 tomatillos, papery skins removed
3 cloves garlic, unpeeled
2 jalapenos, stemmed and seeded
¾ cup cilantro, divided
juice of 1 lime
1 (15-ounce) can black beans, rinsed and drained
1 cup grape tomatoes, halved
1 avocado, diced

1. In a medium saucepan over high heat, bring 1 cup water, ¼ teaspoon salt, and the quinoa to a boil. Cover the pot, reduce the heat to low, and simmer for 15 minutes. After 15 minutes, remove the pot from the heat and let sit, still covered, for 10 minutes.

2. Meanwhile, adjust an oven rack to the upper-middle position and heat the broiler. Broil the tomatillos and garlic until the tomatillos are browned, 5-8 minutes. Peel the garlic; transfer it to a blender with the tomatillos, ½ teaspoon salt, jalapenos, and ½ cup cilantro. Puree.

3. Transfer the quinoa to a large bowl. Stir in the lime juice. Once the quinoa cools to slightly warmer than room temperature, add the beans, tomatoes, avocado, remaining ¼ cup cilantro, and salsa. Serve.

black bean quinoa 5

pasta with salmon in pesto cream sauce

salmon pesto pasta 3

I never know what to do about Valentine’s Day. On the one hand, I’m not interested in the traditional stuff; I don’t want gifts or chocolate or a heart-covered card with a canned message. I’ll never say no to flowers, although I don’t love the responsibility of keeping the cat from eating them. On the other hand, Valentine’s Day is hard to ignore, because the rest of the world is definitely into it. I’m not one to scoff at something because it’s mainstream; I’d rather join in on the fun.

salmon pesto pasta 1

I thought that, at the very least, I’d make a nice meal. But Valentine’s Day is on a Tuesday this year, so I couldn’t get too ambitious. Dave’s favorite meal, salmon pesto pasta, would have fit the bill perfectly. It hardly takes longer to cook than it takes pasta to boil, assuming that your pesto is already prepared.  For all that it’s so easy, the finished dish is deserving of being Dave’s all-time favorite dinner, with generous bites of salmon held to pasta by a sauce that’s creamy but not too heavy, since it’s made from evaporated milk instead of heavy cream.

salmon pesto pasta 2

But, we’ve been having salmon pesto pasta a lot lately, trying to use up last year’s surplus of pesto before this year’s basil starts growing. I decided it wasn’t special enough for Valentine’s Day, even my lazy attitude toward the holiday, so instead we’re having prosciutto-wrapped salmon, farro risotto, and roasted Brussels sprouts. Dave will be so disappointed, but it will be short-lived, because salmon pesto pasta is so easy that we can just have it next week for a non-holiday.

salmon pesto pasta 5

One year ago: Chocolate Oatmeal Drops
Two years ago: Jalapeno Baked Fish with Roasted Tomatoes and Potatoes
Three years ago: Pot Roast
Four years ago: Apple Galette

Printer Friendly Recipe
Pasta and Salmon with Pesto Cream Sauce

Serves 4

I usually make half of this recipe to serve two people, and the smaller 5-ounce can of evaporated milk is perfect.  I tried using more, so that the full recipe would use a whole 15-ounce can of evaporated milk, but all the dairy blunted the other flavors.

12 ounces pasta, preferably a short shape (rotini, penne, farfalle, orechiette)
salt
2 (6 to 8 ounce) salmon filets
10 ounces evaporated milk
½ lemon
½ cup pesto
parmesan, for serving

1. Adjust a rack to the upper position and heat the broiler. Line a baking sheet with foil.

2. Bring about 4 quarts of water to a boil over high heat. Once the water boils, add the pasta and 1 tablespoon of salt. Cook the pasta until it is slightly undercooked, about 1 minute less than the package indicates the pasta will be done. Drain.

3. Meanwhile, place the salmon, skin-side down, on the prepared baking sheet. Season it liberally with salt. Broil until the salmon is lightly browned on top and flakes easily with a fork, 6-10 minutes. Set aside to cool slightly.

4. Return the empty pasta-cooking pot to medium-high heat. Add the evaporated milk and ¼ teaspoon salt. Simmer, scraping the bottom of the pot often to prevent sticking, until the milk is reduced to about ⅓ cup, about 5 minutes. Add the pasta to the milk, and cook, stirring constantly, for about one more minute, until the pasta is al dente.

5. Use two spoons to break up the salmon into bite-sized pieces. Squeeze the lemon juice over the flaked salmon. Add the salmon and pesto to the pasta; stir gently to combine and serve immediately, topping with parmesan.

salmon pesto pasta 4

This is an update from a earlier blog entry. For a meal we love as much as this one, I thought a new entry was worthwhile.

yogurt hollandaise

yogurt hollandaise 4

I am totally fascinated by emulsions, those silky mixtures of water-based liquids and fat. I’d love to claim this has something to do with my chemistry background and an interest in immiscible liquids and amphiphilic molecules, but, in truth, I think it’s because I like the creamy rich mixtures that result. I love mayonnaise, an emulsion of oil and vinegar; vinaigrettes, in which mustard holds the oil and vinegar together, although not as well as the egg yolks in mayonnaise; and even cake batters, in which a few egg yolks work to hold the butter and milk (or whatever liquid) together, and have such trouble doing it that the ingredients need to be as close in temperature as possible to prevent curdling.

Hollandaise, an emulsion of butter and lemon juice, again held together by egg yolks (the kitchen’s favorite emulsifier), isn’t my thing though. It isn’t that I don’t like it – what isn’t to like, other than blowing your entire day’s worth of calories for breakfast? It’s just that I don’t see the point, when my old favorite pretend-fattening ingredient, Greek yogurt, does such a good job of mimicking the richness of traditional hollandaise.

yogurt hollandaise 1

You still add egg yolks to make the sauce silky smooth, and this yogurt-based sauce has all the same flavorings as a full-fat version, with the lemon juice, salt, and spice (hot sauce here instead of cayenne powder). A pinch of sugar and tiny squeeze of mustard round out the flavors. And in the spirit of being healthier but maybe not perfectly healthy, I usually stir some tiny cubes of butter into the sauce to add richness.

yogurt hollandaise 3

There’s no question that the main advantage of this sauce over traditional hollandaise is that you’re not pouring nearly pure butter over your eggs. But it doesn’t hurt that it’s easier and less finicky either, requiring nothing more than a quick whisk over a double boiler, with no worries about the emulsion breaking. I guess I like fake emulsions just as much as real ones.

yogurt hollandaise 2

One year ago: Yellow Cake (comparison of 3 recipes)
Two years ago: Rich Katz’s brownies for Julia Child
Three years ago: Red Velvet Cake (comparison of 5 recipes)
Four years ago: Salmon Pesto Pasta

Printer Friendly Recipe
Yogurt Hollandaise (adapted from Fine Cooking and A Food Centric Life)

Enough for 6 servings of eggs benedict

You can use any fat level of Greek yogurt you like. I always use low-fat, because that’s the easiest to find where I live.

Sometimes I also add a tablespoon of butter, cut into small cubes, and heat it with the other ingredients.

I didn’t make traditional eggs Benedict; I topped my English muffins with green chile, avocado, poached eggs, and hollandaise.

¾ cup plain Greek yogurt
1 tablespoon fresh lemon juice
3 egg yolks
½ teaspoon Dijon mustard
¼ teaspoon sea salt
¼ teaspoon granulated sugar
pinch of white pepper
dash hot Tabasco sauce

1. In the top of a double boiler or a heatproof bowl set over a saucepan of simmering water, whisk together the yogurt, lemon juice, egg yolks, mustard, salt, sugar, pepper and Tabasco sauce.

2. Cook over simmering water, stirring constantly, until the sauce is thick enough to coat the back of a spoon, 6 to 8 minutes. (The sauce can be set aside at room temperature for up to 1 hour; reheat gently in double boiler.)

yogurt hollandaise 5