banana peanut butter muffins

Conversely, I think I’d like bananas more if they weren’t so cheap, convenient, and healthy. It’s just that I eat so many bananas. For years, every weekday, a banana. I had to start mixing the bananas with other things to make them palatable. In the spring, strawberries make a wonderful accompaniment. And if I want something more filling, peanut butter works perfectly. Now I eat peanut butter with my banana everyday, and I’m hoping that it’s a tasty enough combination that I don’t get sick of it anytime soon.

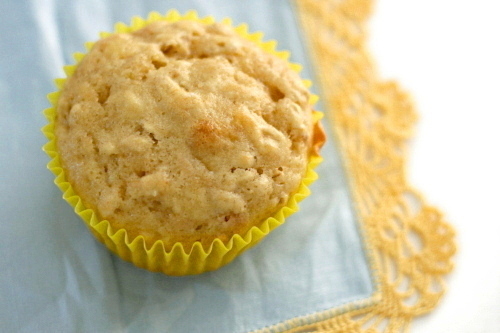
If bananas are better with peanut butter, it stands to reason that banana bread is better with peanut butter too, right? Or banana muffins, as the case may be. And it turns out, yes, peanut butter is a wonderful addition, and so is oatmeal, to make banana muffins more fun and interesting. It’s just too bad that muffins don’t work as a healthy replacement to my normal daily banana.

One year ago: Farmer’s Market Salad with Spiced Goat Cheese Rounds
Two years ago: Tuscan-Style Couscous Salad

Printer Friendly Recipe
Peanut Butter Banana Oatmeal Muffins (from Baking Bites via Annie’s Eats)

I used oil instead of applesauce, because I always have oil around and never have applesauce around.

1½ cups (7.2 ounces) all-purpose flour
1 cup old-fashioned oats
1 teaspoons baking powder
½ teaspoons baking soda
½ teaspoons salt
2 tablespoons applesauce
¾ cup (5.25 ounces) light brown sugar
2 large eggs
1 cup mashed banana (about 3 bananas)
6 tablespoons creamy peanut butter
1 cup low-fat buttermilk

1. Preheat the oven to 350˚ F. Line 18 muffin cups with paper liners.

2. In a medium mixing bowl, combine the flour, oats, baking powder, baking soda and salt. In a large mixing bowl, whisk together the applesauce, brown sugar, eggs, banana, peanut butter and buttermilk until smooth. Pour the dry ingredients into the bowl with the wet ingredients and mix just until incorporated and fully blended.

3. Divide the batter between the prepared muffin cups. Bake 18-20 minutes, or until a toothpick inserted in the center comes out clean. Allow to cool in the pan for 5-10 minutes, then transfer to a wire rack to cool completely.

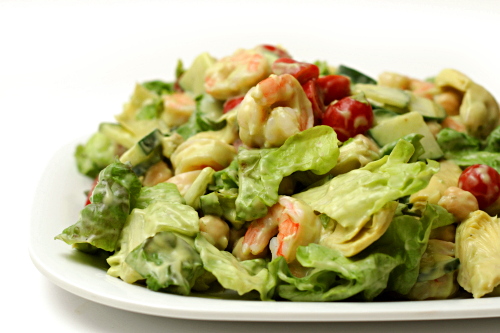
green goddess salad

I am not a fan of those recipes that try to hide vegetables in foods where they clearly don’t belong. For one thing, “deceptive” is not a word I want applied to any of my relationships. For another, I strongly believe that if you cook vegetables correctly, they’re so tasty that there’s no reason to avoid them. I also strongly believe that if you’re an adult who is still picky about vegetables, then you need to stop being such a big baby, grow up, and eat your damn vegetables. I am bossy.

Anchovies, on the other hand, I am comfortable sneaking into dishes without telling Dave. Dave unfairly maligns anchovies based on years of delivering pizza, disregarding my claims that anchovies aren’t meant to be dumped whole onto pizza anymore than garlic cloves are. There are people who enjoy their pizzas being overwhelmed by one strong flavor, but for most of us, both garlic and anchovies are better as accents.

Anchovies should in general be treated like garlic – minced, used judiciously, and added to the recipe early so that the flavor permeates the dish in a soft, subtle way. Or, in this case, blended into a dressing. Anchovies add not just salt to a dish, but a nice meatiness. If it makes your food tastes like fish, you’re using the wrong brand of anchovies.

I snuck one anchovy into this dressing the first time, two the second time. Dave didn’t notice. I didn’t tell him. Next time, it’ll be three anchovies, and maybe then the flavor will be strong enough to add more complexity to this already fresh-tart-rich-healthy-delicious mix of ingredients. My goal isn’t to deceive Dave; it’s to convince him that, when used correctly, anchovies are wonderful – just like vegetables.

One year ago: Clafoutis
Two years ago: Filbert Gateau with Praline Buttercream

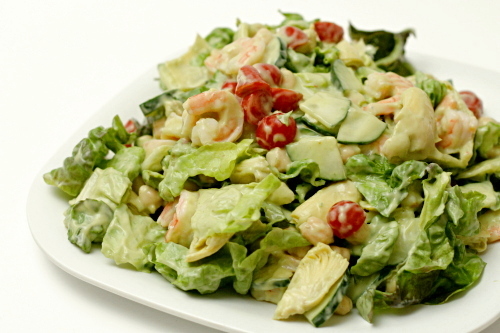
Green Goddess Salad (adapted from Eating Well)

Serves 2 as a main dish; 4 as a side dish

I skipped the celery, because otherwise I’ll buy a bunch, use one stalk and forget about the rest in the fridge until it’s suitable only for compost.

If at all possible, do not use chickpeas that are cooked without salt. You’ll end up with little flavor voids.

½ avocado, peeled and pitted
½ cup buttermilk
2 tablespoons chopped fresh herbs, such as tarragon, sorrel, and/or chives
2 tablespoons lemon juice
2-3 anchovy fillets
8 cups bite-size pieces green leaf lettuce
12 ounces peeled and deveined cooked shrimp (21-25 per pound)
½ cucumber, sliced
1 cup cherry or grape tomatoes, halved
1 cup canned chickpeas, rinsed
1 cup canned artichoke hearts, rinsed, dried, and quartered
½ cup chopped celery

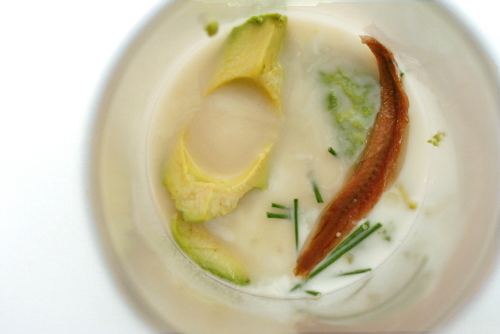
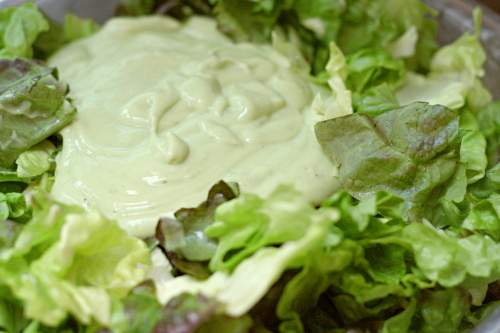
1. Puree the avocado, buttermilk, herbs, lemon juice, and anchovies in a blender until smooth.

2. Divide the lettuce among 4 plates. Top with the shrimp, cucumber, tomatoes, chickpeas, artichoke hearts, and celery. Drizzle the dressing over the salads.

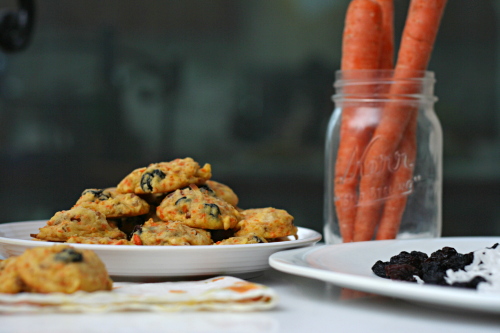
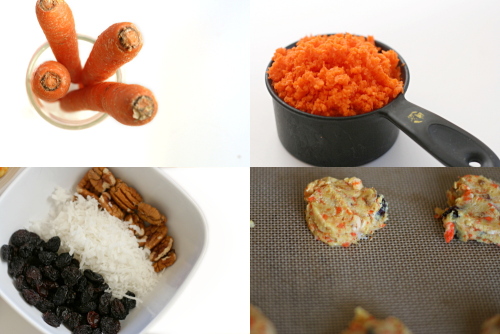
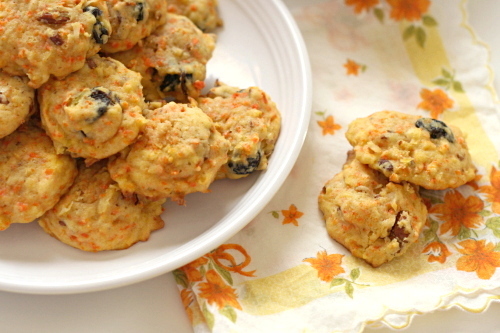
gingered carrot cookies

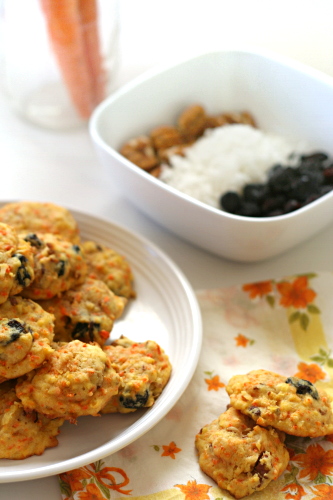
I was complaining to my sister about these cookies, all, wwahhh! I don’t like carrot desserts! when she told me that her husband had made carrot-raisins-nut-coconut muffins that day, and her 4-year-old refused to eat them. “I don’t like the carrot muffins”, he claimed.

Great, I have the tastes of a 4-year-old.

On the other hand, cookies than contain vegetables are clearly acceptable for breakfast and thus the perfect detour from my no-dessert-before-beach-trip rule. And judging by how many of these I ate, I do not, in fact, have the tastes of a four-year-old. I’m not sold on carrot cake, but carrot cookies, apparently, I can do.

Natalia chose these for Tuesdays with Dorie, and she has the recipe posted.

One year ago: Banana Bundt Cake
Two years ago: Black and White Banana Loaf

yogurt-marinated lamb kebabs

I actually made this back in February, but I figured most of the world was covered in snow in February and thus, not doing much grilling. Haha, suckers, grilling season lasts year round in the desert!

Well, year round unless there’s an extra dose of heat in the summer, in which case you’re huddled inside cozied up with your air conditioner. The spring isn’t so good either, because you have to dodge the shingles that the wind blows off the neighbor’s roof. And when it does rain in the summer, it tends to be right at dinner time. So maybe the desert isn’t any better for grilling than anywhere else.

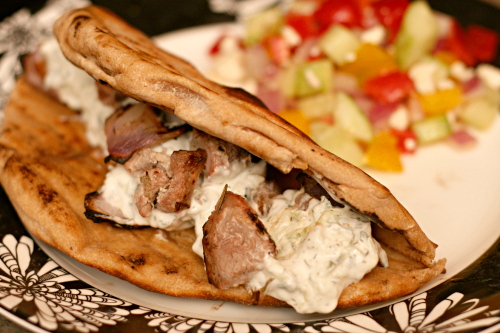
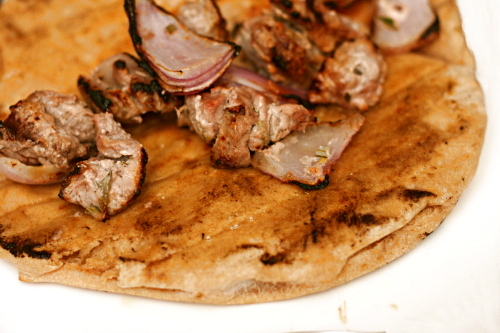
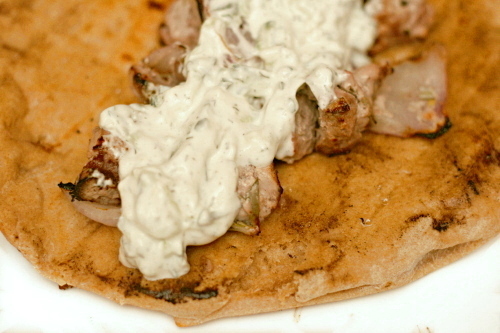
But the heat, rain, and wind are worth it, because you get meals like this. You just can’t do this with a broiler. The lamb is so tender and flavorful, tzatziki makes everything better, and pita cooked right on the grill is becoming one of my favorite things ever. Forget perfect grilling weather – this meal is worth grilling in the snow for.

One year ago: Experiments with chocolate chip cookies
Two years ago: Comparison of three white cake recipes

Printer Friendly Recipe
Yogurt-Marinated Lamb Kebabs (from Ina Garten via Smitten Kitchen)

1 pound plain yogurt (regular or lowfat)
¼ cup olive oil, plus more for brushing grill
1 teaspoon lemon zest
¼ cup freshly squeezed lemon juice (2 lemons)
5 tablespoons fresh whole rosemary leaves, chopped
1 teaspoon kosher salt
½ teaspoon freshly ground black pepper
2 pounds top round lamb
1 red onion

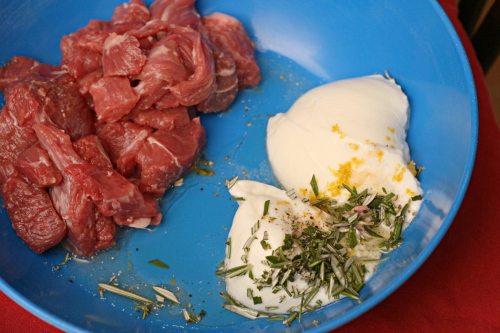
1. Combine the yogurt, olive oil, lemon zest and juice, rosemary, salt, and pepper in a large, non-reactive bowl. Cut the lamb in 1½-inch cubes and add it to the yogurt, making sure it is covered with the marinade. Cover the mixture with plastic wrap and refrigerate overnight or for up to two days.

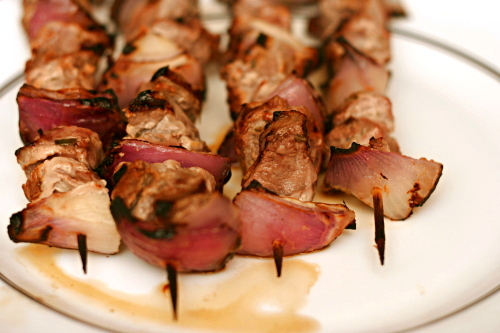
2. Prepare a medium-hot grill. Cut the red onion into 8 pieces and separate each piece into three or four sections. Loosely thread three or four pieces of lamb onto skewers alternately with sections of onion. Sprinkle both sides of the lamb cubes with salt and pepper. Place the skewers on the hot grill and cook for 10 to 15 minutes, turning two or three times, until the lamb is medium-rare. Serve with grilled pitas and tzatziki.

Tzatziki (adapted more liberally from Ina Garten and Smitten Kitchen)

1 hothouse cucumber, unpeeled, seeded, shredded
1 teaspoon kosher salt
14 ounces Greek yogurt
2 tablespoons freshly squeezed lemon juice
1 tablespoon white wine vinegar
1 tablespoon minced fresh dill
1½ teaspoons minced garlic
½ teaspoon freshly ground black pepper

1. Place the cucumber in a strainer set over a medium bowl and add the salt. Set aside for at least 15 minutes to drain. Transfer the cucumber to a clean kitchen towel and squeeze dry.

2. Combine the cucumber, yogurt, lemon juice, vinegar, dill, garlic, and pepper.

grilled potato and vegetable salad

Last year I said, “You know what always makes me twitchy? Hearing people talk about how they just have sooo many zucchini or tomatoes or whatever from their garden.”

Squeeeee!!!! And now I am one of those people! I am I am I am I am!!!

Okay, sort of. I have hundreds of tomatoes growing, but they won’t. turn. red. Aaargh! I only had enough green beans for one meal, but it looks like there will be a steady supply of jalapenos and chile peppers starting soon. I wouldn’t say that I get more zucchini than I know what to do with – my single plant offers about one squash per week (after being suitably sexed up of course), which is just right for us.

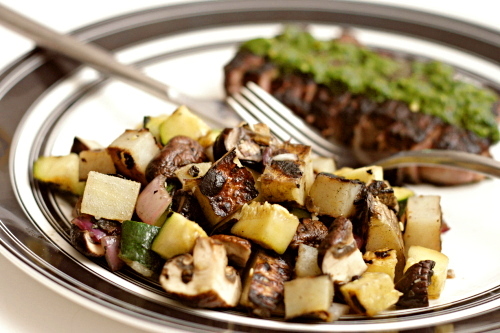
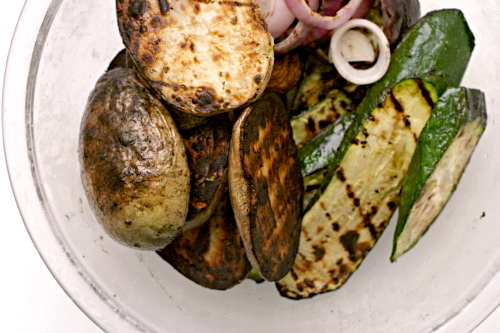
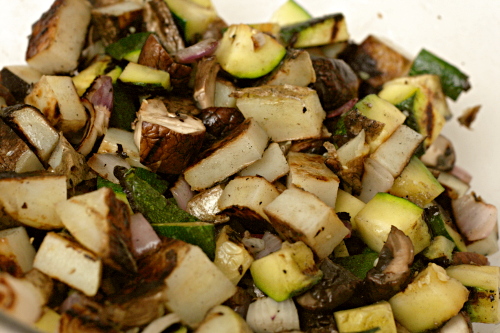
And it’s just right in this dish. When I’m cooking something on the grill, it always makes more sense to me to make the whole meal on the grill. It can be difficult to find interesting grilled side dishes though. I had made grilled potatoes and grilled vegetables many times before, but mixing the two together and adding dressing to make a salad was more fun than eating them separately. It’s a perfect side for so many meat dishes, and it’s the perfect way to use my one zucchini per week.
One year ago: Tortellini Soup with Carrots, Peas, and Leeks
Two years ago: Summer Rolls

Printer Friendly Recipe
Grilled Potato and Vegetable Salad (adapted from Bon Apetit via epicurious)

Serves 4 to 6

You can also try microwaving the oiled potatoes in a covered bowl for a few minutes before grilling, if you’re concerned about the centers cooking all the way through. Sometimes I do this; sometimes I don’t.

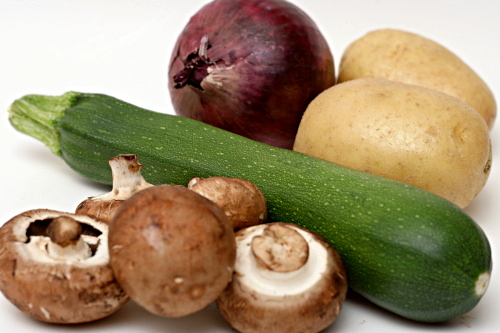
2 pounds asparagus, red onions, mushrooms, summer squash, and/or red peppers
8 ounces Yukon Gold potatoes, unpeeled, sliced ½-inch thick
salt and freshly ground black pepper
2 tablespoons olive oil
3 tablespoons fresh lemon juice
1 shallot, minced
1 tablespoon fresh herbs (such as parsley, chives, and/or basil)
3-4 tablespoons extra virgin olive oil

1. Prepare the vegetables – trim the asparagus; cut the onions into ½-inch slices, keeping the rings together; leave the mushrooms whole; cut the squash on a bias into half-inch slices; cut the bottom and top off the peppers and cut the middle section in half length-wise. Season the vegetables and potatoes with salt and pepper and brush with olive oil.

2. Whisk the lemon juice, shallot, herbs, and a pinch of salt and pepper in a small bowl. Gradually whisk in the extra virgin olive oil.

3. Prepare a grill to medium heat. Lay the vegetables in a single layer on the rack and grill until browned and tender, about 8 minutes per side for potatoes, 6 minutes per side for peppers and onions, 4 minutes per side for mushrooms and squash.

4. Chop the cooked vegetables and potatoes into ½-inch cubes; place them in a large bowl. Add the vinaigrette and toss to combine. Serve warm or at room temperature.

chewy, chunky blondies

I’m putting myself on a diet. And by diet, I do mean a change in my eating habits that I have no intention of making permanent. Beach Trip is in two weeks, and it’s time to buckle down. My normal eating and exercise habits keep me healthy and slim enough to feel good most of the time. But most of the time, I’m not wearing a bathing suit.

So, for two weeks, I’m eliminating dessert. Sigh. At least Tuesdays with Dorie gives me a bit of an escape clause. I’m required to bake for this group, right? And while I can give the treats away, I am most definitely not going to give away something I haven’t tried myself.

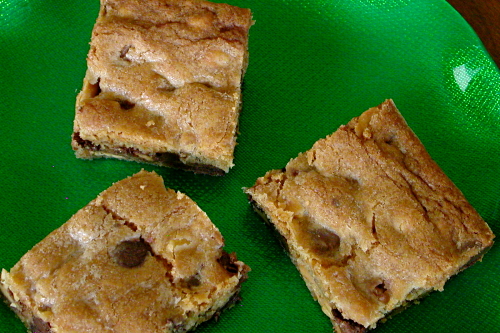
And so I did eat one square of blondie. One little square. One teeny, tiny square. And that one square of thick, chewy, peanut buttery, chocolately cookie will have to hold me over until next week’s TWD recipe. Beach Trip can’t get here soon enough.

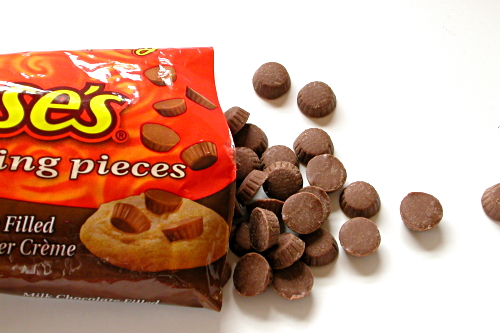
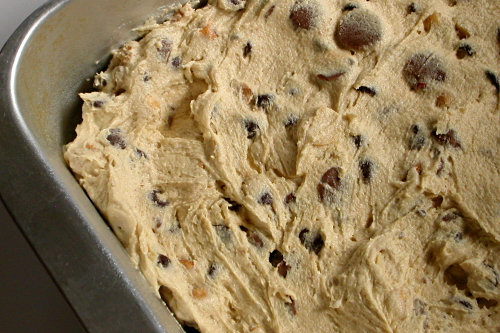
Nicole chose this, and she has the recipe posted. For the mix-ins, I used 1 cup (6 ounces) chocolate chips, 1½ cups (8 ounces) miniature peanut butter cups, and 1 cup (5 ounces) peanuts. I also decreased the brown sugar from 1½ cups to 1 cup and used salted instead of unsalted butter.

One year ago: Dorie’s Vanilla Ice Cream
Two years ago: Summer Fruit Galette

lemon curd tart

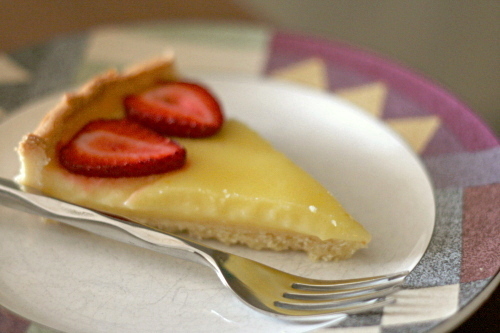
After the lemon cream tart, I was pretty sure I was done with lemon cream. With thirty tablespoons of butter in the whole tart, there is no reasonably sized serving. And then there’s my favorite lemon tart, which uses the whole lemon, peel and all. But I was making this for my mom, and I had a feeling she wouldn’t enjoy the pucker of that one quite as much as I do. There’s a third option for lemon tarts, probably the most classic version, and that is filled with lemon curd.

The ingredients in all three are the similar – there are eggs, lemons, sugar, and butter, but the ratios and the method for combining the ingredients differ. Only the tartest lemon tart includes heavy cream, but the most important difference between the recipes aside from that is the amount of butter – 21 tablespoons in the filling for the lemon cream and 8 tablespoons in the tartest make the four tablespoons here (plus what’s in the crust of course) seem downright skimpy.

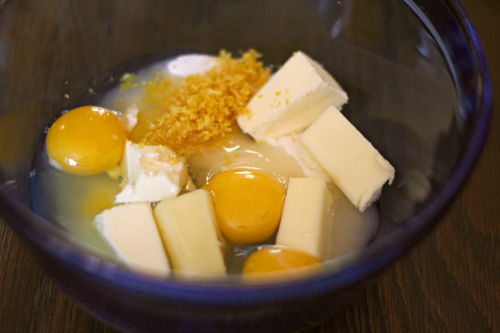
The lemon cream manages to hold 21 tablespoons of butter in only 4 eggs and ½ cup of lemon juice because it’s emulsified when the butter is slowly added to the other ingredients.  The tartest tart is the simplest, in that the ingredients are just thrown together and blended, then baked, like lemon squares. For the curd, the ingredients are mixed in a double boiler. (I seem to have added all the ingredients at once instead of slowly stirring the butter in after the other ingredients heated. It apparently worked.)

This curd reminds me of why lemon cream, to me, isn’t worth it. Yes, it’s smooth and balanced and so, so good, but this lemon curd tart is so, so good too. It’s different from the cream, yes, but not worse. My favorite lemon tart is still the tartest though – I love that bitter hint from the lemon peel. This, however, is a crowd pleaser.

One year ago: Casatiello
Two years ago: Soba Salad with Feta and Peas

Printer Friendly Recipe
Lemon Curd Tart
(adapted from Joy of Baking)

Serves 6 – 8

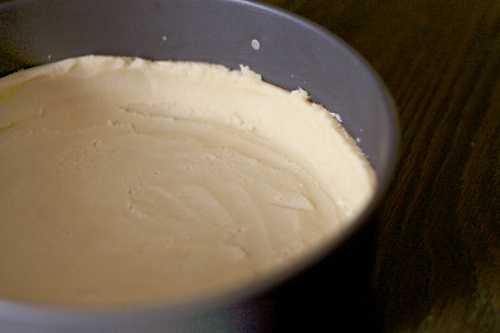
tart crust for a 9-inch pan, completely baked and cooled (I used Dorie Greenspan’s)
3 large eggs
⅓ cup fresh lemon juice (2-3 lemons)
¾ cup (5.25 ounces) granulated white sugar
4 tablespoons (2 ounces) unsalted butter, at room temperature and cut into small pieces
1 tablespoon lemon zest

1. In a stainless steel bowl placed over a saucepan of simmering water, whisk together the eggs, sugar, and lemon juice until blended. Cook, whisking constantly (to prevent it from curdling), until the mixture becomes pale in color and quite thick (like a hollandaise sauce or sour cream) (160 degrees F or 71 degrees C on a thermometer). This will take about 10 minutes.

2. Remove from heat and immediately pour through a fine strainer to remove any lumps. Cut the butter into small pieces and whisk into the mixture until the butter has melted. Add the lemon zest, cover, and let cool to room temperature before filling the pastry crust. (Note: The lemon curd will continue to thicken as it cools. Covering the lemon curd with plastic wrap prevents a skin from forming on the surface.) Serve plain or with softly whipped cream and fresh berries.

stuffed squash flowers

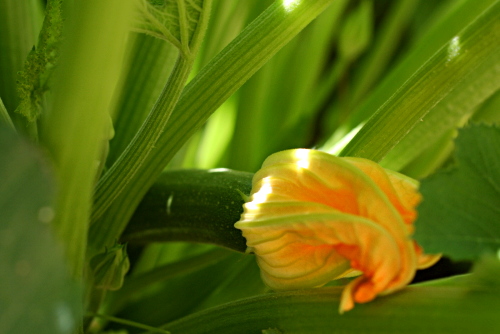
I didn’t realize how sexual plants were until I started growing zucchini. Concerned that my plants weren’t being pollinated, I did some research and found that to hand-pollinate zucchini, all you have to do is rub the male flower’s pistil on the female’s stigma.

Kinky.

But how to tell the difference between male and female flowers? Well, you learned this when you were five – boys and girls have, ah, visibly different parts, and the zucchini flowers’ parts are surprisingly similar to humans’. Or maybe I just have a dirty mind. You be the judge.

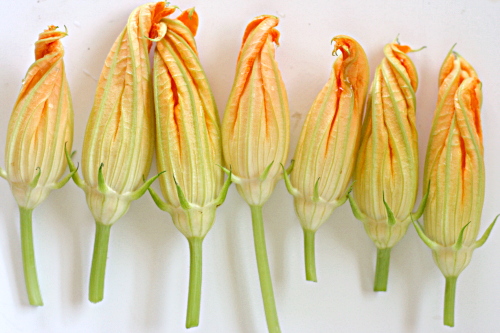
Pistils and stigmas aside, female flowers have a mini zucchini as a stem, and males have a normal stem. This is important, because if you’re going to fry zucchini flowers, and you should if you have them available, you want to fry the males of course, and leave the females behind to form zucchini. But not before sacrificing a male to rub over the female, in a deliberate act of zucchini rape.

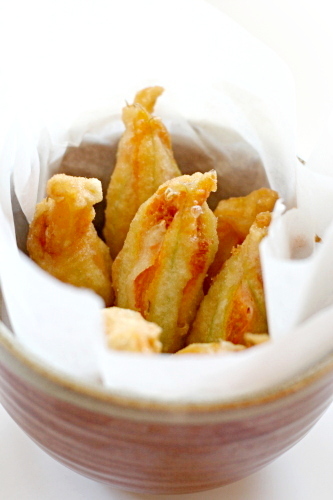
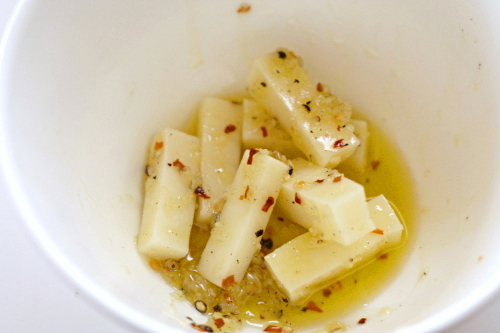
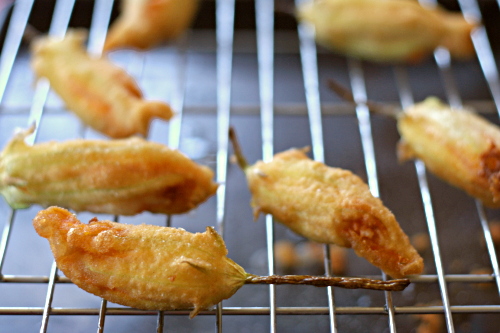
To further abuse your zucchini flowers, cut the males off (ouchy), pry them open, stuff them with cheese, batter, and fry them. It’s kind of like mozzarella sticks, except even crisper and more flavorful because the mozzarella was marinated in garlicky olive oil. It’s almost better than sex – at least zucchini sex.

One year ago: Puff Pastry Dough
Two years ago: Pain a l’ancienne

Stuffed Zucchini Flowers (adapted from How to Read a French Fry, by Russ Parsons)

I used regular (not fresh) mozzarella because it’s all I had. It worked just fine, but I definitely think fresh would be even better.

8 ounces fresh mozzarella, cut into 24 pieces
2 garlic cloves, minced or pressed through a garlic press
¼ teaspoon crushed red pepper
2 teaspoons extra virgin olive oil
salt and freshly ground black pepper
2 cups (9.6 ounces) all-purpose flour
½ – 1 cup water
2 quarts vegetable oil for deep-frying
24 zucchini flowers (about 1 pound), washed and dried

1. In a medium bowl, combine the cheese, garlic, crushed red pepper, olive oil, and a healthy pinch of both salt and pepper. Set aside.

2. In another medium bowl, whisk together the flour and enough water to form a thin, smooth batter with the thickness of heavy cream.

3. In large pot, heat the vegetable oil to 375 degrees. While the oil heats, use a finger to pry open each flower; stuff a piece of mozzarella inside, then twist the petals together to close the flower around the cheese.

4. Dip the blossoms in the batter; let excess batter drip off, then place the blossoms in the hot oil. Fry until golden brown on both sides, 4-5 minutes. Fry only 4-6 blossoms at a time, carefully monitoring the oil temperature so it remains between 350 and 375 degrees. Drain the fried blossoms on a paper towel-lined plate. Salt lightly and serve immediately.

lots of ways banana cake

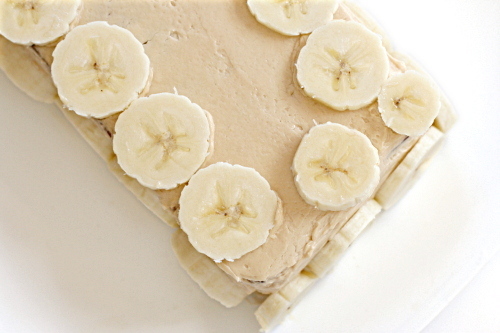
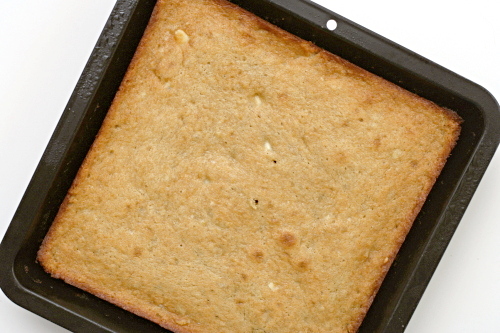
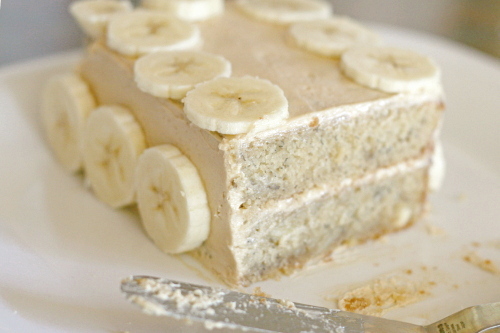
Dorie calls this a cake, and I was determined to make it a cake and not bread. I baked it in a flat square with the intention of cutting the square in half to make a layered rectangular cake filled with frosting. Much later I realized that I’d confused the issue by forming a perfectly bread-shaped cake. Oops.

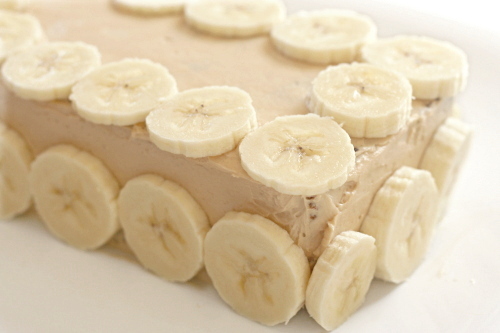
Not only that, but I don’t love the brown sugar swiss meringue buttercream I used. I think I would have enjoyed this more without the frosting, as something more similar to, well, banana bread. Oops.

Or you know what sounds really good, is mixing chocolate chips into the batter and then topping the cake (we’re back to cake and away from bread again) with chocolate ganache. Except I didn’t have any chocolate. Oops.

I’m sure there are lots of ways I could love this cake (or bread), and Kimberly, who chose the recipe for Tuesdays with Dorie, has the original – a rum and coconut version – posted.

One year ago: Blancmanger
Two years ago: Cherry Rhubarb Cobbler

tacos al pastor

I try not to be picky. I like to call myself ‘particular’ – about the quality of ingredients and the care put into the preparation of a dish; Dave calls it persnickety. But eliminating whole categories of food from my diet because of a random childhood prejudice seems like a perfect way to cheat myself out of great food; not to mention how annoying pickiness is to the people around you. I’ve known people who wouldn’t eat hot liquids, eggs, anything with vinegar, seafood, mushrooms, you name it. I will eat pretty much anything – even green peppers, if I have to.
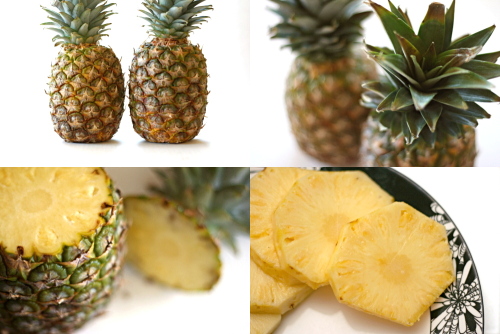
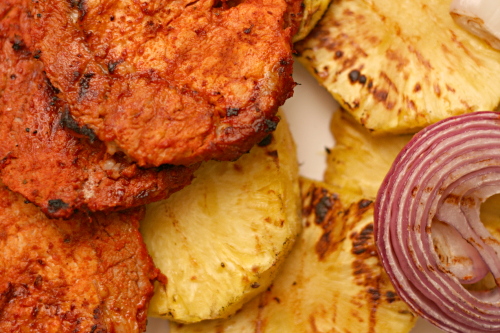
But there are some things I have trouble with (even besides green peppers), and fruit with meat is one of them. Those chicken salads with grapes in them don’t sound appetizing at all, and other than the occasional strawberry and spinach salad, fruit with lettuce doesn’t tempt me. But pineapple with pork is a combination I can hardly get enough of, especially when the pineapple is prepared to its maximum potential – grilled.

There is one thing to beware of when it comes to pineapple and meat though. Pineapple makes meat mushy. It has an enzyme in it that doesn’t just tenderize meat, it nearly dissolves it. The original recipe recommended marinating the pork for up to a day, but I, and the epicurious reviewers, knew better. I left the pineapple out of the marinade until we started heating up the grill. It was perfect, resulting in pork so tender it reminded me of dark chicken meat, but without even a hint of mush.

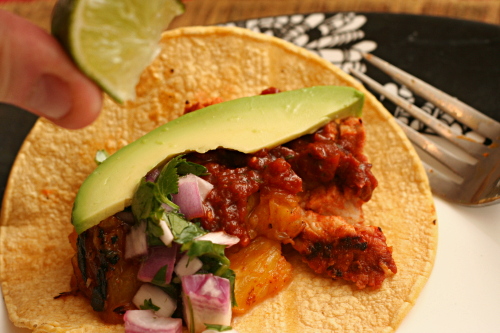
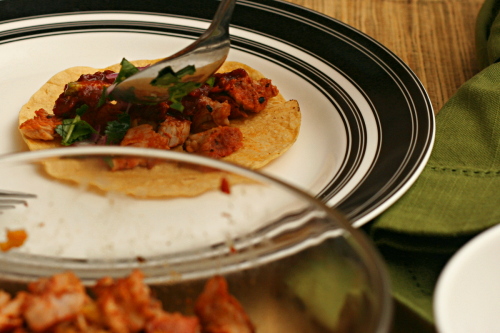
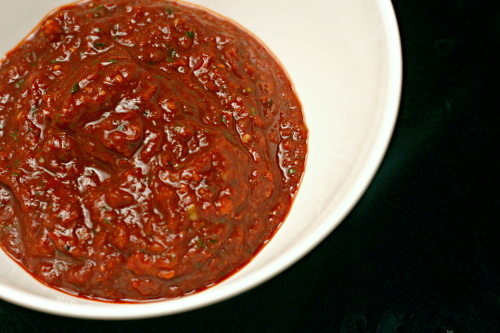
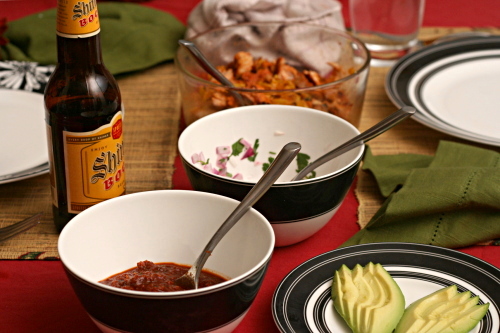
With a smorsgasbord of toppings, each bite of taco hit every flavor note: sweet pineapple-marinated pork, spicy salsa, tart onions, creamy avocado, all combined on corn tortillas, because everything is better on a tortilla – even meat and fruit mixtures.

One year ago: Crockpot Chicken Broth
Two years ago: Chicken with Forty Cloves of Garlic

Printer Friendly Recipe
Tacos al Pastor
(adapted slightly from Bon Apetit via epicurious)

I can never get corn tortillas to be soft and malleable enough to fold into tacos without deep-frying them. Heating them on the grill made them soft enough to fold, but they were too chewy. Maybe if I wrapped them in foil and heated them in the grill? Or brushed them with oil before heating them? Enlighten me.

1 pineapple, peeled, cut crosswise into ½-inch-thick rounds
1 large onion, halved
½ cup fresh orange juice
¼ cup distilled white vinegar
¼ cup guajillo chile powder
3 garlic cloves, halved
2 teaspoons coarse kosher salt
1 teaspoon dried oregano (preferably Mexican)
1 teaspoon ground cumin
1 large or 2 small chipotle chiles and 1 to 2 teaspoons adobo from canned chipotle chiles in adobo
2½-to 3-pounds boneless pork loin, cut into ½-inch slices

Garnishes:
½ red onion, finely chopped
2 tablespoons lime juice from 1-2 limes
½ cup minced cilantro
Smoky Two-Chile Salsa (recipe follows)
1 avocado, sliced, mashed (with salt and lime juice), or diced
corn tortillas
lime wedges

1. Coarsely chop 2 pineapple slices, removing core; thoroughly puree in a blender. Pour the pineapple juice into a storage container and chill until ready to use. Cover and chill the remaining pineapple.

2. Coarsely chop half the onion; place chopped onion in blender. Add the orange juice, vinegar, chile powder, garlic, salt, oregano, cumin, and chipotle chiles; puree marinade until smooth. Place the sliced pork in a large resealable plastic bag. Add the marinade and the seal the bag, releasing excess air. Chill at least 4 hours and up to 1 day. About half an hour before the grill is ready, add the reserved pineapple juice to the marinating meat.

3. Mix the onion and lime juice; set aside. Just before serving, stir in the cilantro.

4. Heat a grill to medium-high heat. Grill the pineapple slices until warm and slightly charred, 4 to 6 minutes per side. Grill the pork, with some marinade still clinging to it, until it’s slightly charred and cooked through, 2 to 4 minutes per side. Grill some onion until charred. Transfer the pineapple and pork to a work surface; chop pineapple into ½-inch cubes, discarding cores. Chop (or shred) the pork. Transfer the pork and pineapple to a platter or serving bowl; toss to combine. Grill the tortillas until warm and slightly charred, about 10 seconds per side.

5. Serve the pork and pineapple with the pickled onion mixture, Smoky Two-Chile Salsa, avocado, warm tortillas, and lime wedges.

Smoky Two-Chile Salsa

8 large dried guajillo chiles or New Mexico chiles, stemmed, seeded, coarsely torn
2 cups hot water
½ medium onion, halved lengthwise through core end
3 garlic cloves, peeled
1 teaspoon adobo from canned chipotles in adobo
¼ cup chopped fresh cilantro
2 teaspoons fresh lime juice from 1 lime
coarse kosher salt

1. Place the torn chiles in a bowl. Add the hot water and soak for at least 2 hours or overnight. Drain the chiles, reserving the soaking liquid.

2. Heat a small nonstick skillet over medium heat. Add the onion and garlic to the dry skillet; cook until browned in spots, about 6 minutes for garlic and 10 minutes for onion. (I grilled the onion instead of browning it in a skillet, which I recommend as long as you have time to make the salsa right before serving.) Trim the core from the onion; place the onion and garlic in a blender. Add the drained chiles, 1 cup soaking liquid, 1 chipotle chile, 1 teaspoon adobo, cilantro, and lime juice; puree until smooth. Transfer to a bowl, seasoning to taste with coarse salt.