rice and peas

Side dishes aren’t my strong suit. I often find myself googling dorky things like “what to serve with Jamaican jerk chicken?” Rice and peas kept coming up, and I kept bypassing it. Who wants green peas mixed with plain white rice?

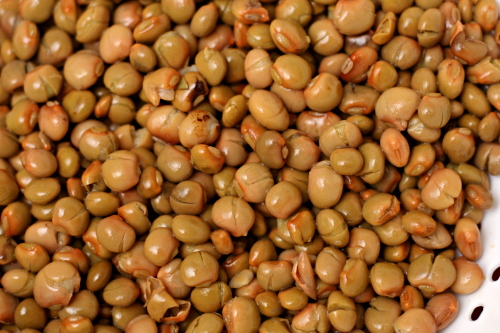
It turns out, of course, that rice and peas is nothing of the sort. Peas, in the Jamaican way, are beans. I was fortunate enough to find pigeon peas at my store (another reason to stop complaining about my grocery store), but red beans work too.

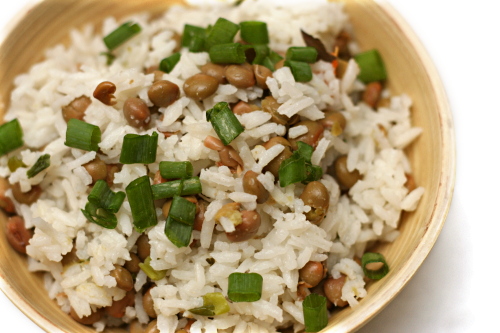
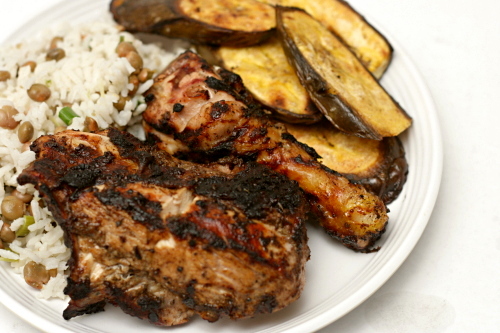
Rice and peas, then, is rice and beans cooked in coconut milk with thyme, green onions, and a spicy chile. The chile isn’t minced and eaten; it’s left whole and removed after cooking, so it adds just a hint of heat, which really does make this the perfect side dish for spicy jerk chicken. Thanks, Google!

Two years ago: Croque Madame

Printer Friendly Recipe
Rice and Peas

1 tablespoon vegetable oil
1 cup long-grained white rice
1 clove garlic, minced
½ cup coconut milk
1 cup water
½ teaspoon salt
½ teaspoon dried thyme
1 (15-ounce) can pigeon peas (or red beans), drained and rinsed
1 habanero chile, whole
2 green onions, chopped, plus extra for garnish

1. In a medium heavy-bottomed saucepan, heat the oil over medium heat until shimmering. Add the garlic and rice; cook, stirring constantly, until the rice is translucent at the edges and the garlic is fragrant, about 1 minute. Add the remaining ingredients. Stir once, increase the heat to medium-high, and bring to a simmer. Once the mixture simmers, reduce the heat to the lowest heat.

2. Cook for 15 minutes, then, without removing the lid or moving the pot, turn off the heat and let the rice sit for another 15 minutes. Remove the chile pepper, fluff the rice with a fork, and serve, topping with additional green onions.

jamaican jerk chicken

Sometimes (most times) I get cranky after going to the grocery store here. It isn’t a bad little store, but it just doesn’t have the selection I had in Philadelphia. I’m spoiled. I miss good seafood and more cheese options than I know what to do with and organic produce and looseleaf tea.

One thing I do have available now, in my southern New Mexican town, is good tortillas, half an aisle dedicated to salsa, dependably perfect avocados, and a selection of fresh chiles. (Okay, so here’s another reason why I get cranky at the grocery store. They were out of Scotch Bonnets, and I had to go to Walmart, and I hate going to multiple stores, and I hate Walmart. Stop being out of stuff, grocery store.)

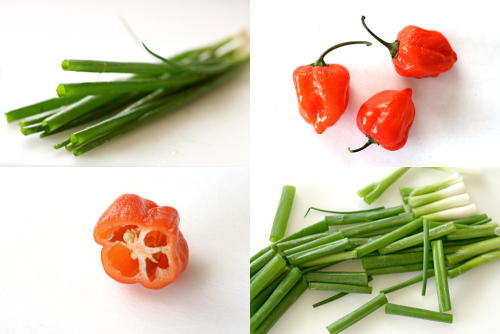
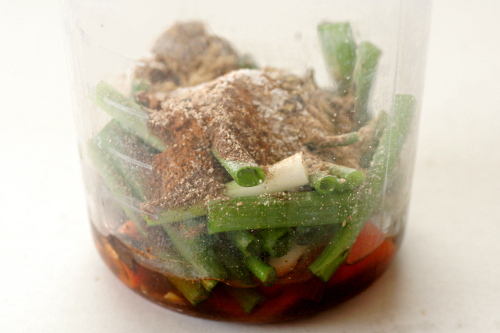
Not that jerk sauce has many chiles in it – when you’re talking about Scotch bonnets, you’ll only be needing a couple, even if they are tiny. They pack a powerful heat punch, and when combined with all sorts of other flavorful ingredients – rum, malt vinegar, onions, garlic thyme fall spices sugar pepper – they make one heck of a flavorful sauce.

The combination of ingredients was new for me, so I was excited. And I think that’s something I need to keep in mind when I get frustrated about how I don’t have the variety of food choices I used to – that even if I can’t find some ingredients and I can’t make some dishes as a result, there are still an infinite amount of great meals I can make by mixing up the food I can find in different ways. Jerk chicken is a perfect example of a dish that uses readily available ingredients to make something that is not only restaurant-quality good, but is interesting and fun as well.

One year ago: Mushroom Salad
Two years ago: Pigs in a Blanket

Printer Friendly Recipe
Jamaican Jerk Chicken (from Bon Apetit, but really epicurious)

8 servings

3 tablespoons dark rum
2 tablespoons water
½ cup malt vinegar
10 green onions, chopped
4 garlic cloves, peeled, chopped
2 tablespoons dried thyme
2 Scotch bonnet chiles or habanero chiles with seeds, chopped
2 tablespoons vegetable oil
4 teaspoons ground allspice
4 teaspoons ground ginger
4 teaspoons ground cinnamon
2 teaspoons ground nutmeg
2 teaspoons salt
2 teaspoons ground black pepper
2 teaspoons dark brown sugar
1 cup ketchup
3 tablespoons soy sauce
about 6 pounds bone-in, skin-on chicken parts
½ cup fresh lime juice

1. Boil rum and 2 tablespoons water in a small saucepan for 3 minutes.

2. Transfer the rum mixture to a blender; add the vinegar, green onions, garlic, thyme, chiles, oil, spices, salt, pepper, and sugar; blend until almost smooth. Transfer 2 tablespoons of the jerk seasoning to a small bowl; mix in the ketchup and soy sauce to make the sauce. (Jerk seasoning and sauce can be made 1 day ahead; cover separately and refrigerate.)

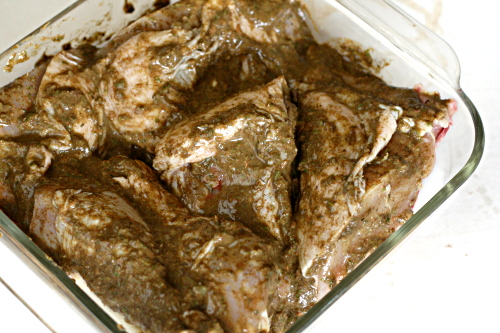
3. Arrange the chicken in a large roasting pan or baking dish. Pour the lime juice over the chicken; turn to coat. Spoon the jerk seasoning over the chicken and rub it into the chicken. Cover and refrigerate for at least 4 hours, turning occasionally. (Can be prepared 1 day ahead. Keep refrigerated.)

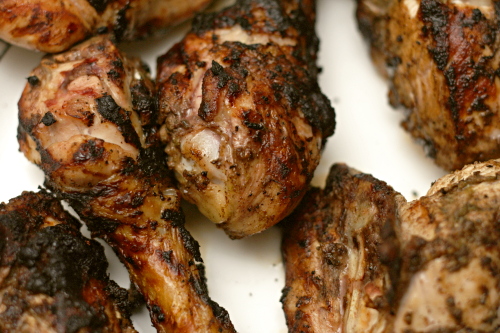
4. Prepare a two-level grill (more coals on one side than the other). Remove the chicken from the jerk seasoning marinade; sprinkle with salt and pepper. Place the chicken, skin side down, on the hot side of the grill; grill for about 2 minutes, until seared. Move the chicken to the cooler side of the grill and continue to cook, turning occasionally, for about 15 minutes, until the breasts measure 160 degrees on an instant read thermometer and the legs and thighs read 165 degrees. Serve with the jerk sauce.

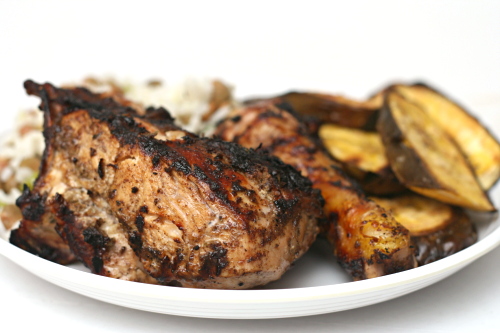
I was excited to find plantains when I made this, so maybe I should stop complaining about my grocery store. I sliced and grilled them, unpeeled. They were fantastic dipped in the jerk sauce – kind of like dipping French fries in ketchup, only more…more everything.  More good.

raisin swirl bread

Dave has recently encountered an enviable problem. After starting to exercise a few months ago for the first time in years, he started losing weight too fast.

Losing weight. Too fast.

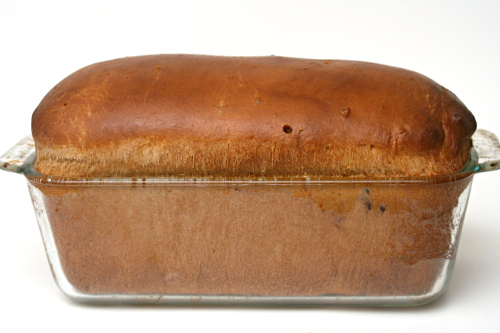
So now we’re trying to come up with ways to get him more healthy calories that don’t create much more work. Hard-boiled eggs, peanut butter, protein shakes, and bread. Making a loaf of bread every couple of weeks for him to eat at work does require more effort, but it isn’t work, because I like making bread.

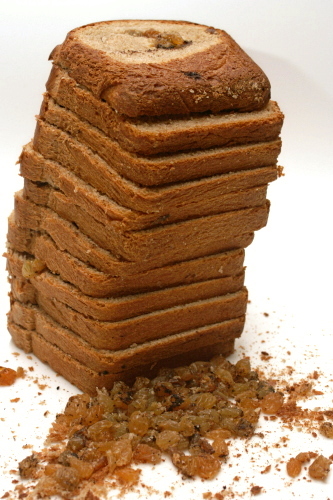
I haven’t bought bread since moving to New Mexico last winter, and I haven’t made pure white bread since discovering I could adapt any recipe to be at least partially whole wheat with no detriment to flavor or texture. It worked just as well with this bread as it has in the past, giving me a light, tender loaf of bread made a little more special with a spiral of raisins and sugar and cocoa. Not that I got to eat more than a slice, since most of this loaf went to He Who is Super Annoying Because He Gets to Eat Twice as Much Food as Me.

Susan chose this bread for Tuesdays with Dorie, and she has the recipe posted. I mixed 2 cups (9.6 ounces) of whole wheat flour with ¾ cup of the milk and ½ teaspoon of the salt and let it sit overnight before combining it with the rest of the ingredients. And for whatever reason, 1 cup of raisins was way too much for me and they all fell out when I cut into the bread. But no one else had this problem, so apparently I’m just a weirdo. Still, next time, ½ cup of raisins.

One year ago: Honey Peach Ice Cream
Two years ago: Cappuccino Cream Puff Rings

croissants 3 (martha stewart)

I worked in a lab for years, but I never absolutely loved it. You’d think I would have, considering that I basically mixed up ingredients and baked them, but I guess without that crucial eating-the-batter – sorry, of course I mean that eating-the-result step, it just wasn’t as fun.

Plus I could never get the hang of keeping good records in the lab. My notebook seemed to be both unorganized and lacking crucial information. I took detailed notes on the amount and type of ingredients used and the baking temperature and time, but whenever I needed to look up details of the result, I was left with a few marginally descriptive words.

In the kitchen, it’s the opposite. The result, now that’s memorable, especially in this case – slightly sweet, intensely flaky, dark golden brown, impossible to resist, always leaving me wanting another.

The path to that result isn’t as memorable, particularly in the amount of instant dry yeast I used. Probably I should have written that down somewhere. I’m going to hypothesize – remember, hypothesizing is not the same thing as guessing! It’s an educated guess, which is to say, don’t skip out on this recipe just because the fresh yeast called for in the original recipe is dumb and I’m bad at note-taking, because the chances are very good that my estimate of the amount of yeast I used isn’t too terribly terrible, and anyway, it’s yeast and yeast always does its job eventually.

Anyway. I’m going to hypothesize that I used about one packet of yeast. Please accept my apologies for not taking thirty seconds to write it down. This must be why I now have an office job instead of a lab job.

One year ago: Anadama Bread
Two years ago: Baba Ghanoush and Falafel

Printer Friendly Recipe
Croissants (adapted from Martha Stewart’s Baking Handbook)

Makes 12

1 cup cold milk
1 tablespoon honey
14 ounces (about 3 cups) all-purpose flour
¼ cup (1.75 ounces) sugar
2¼ teaspoons salt
2¼ teaspoons (1 packet) instant yeast
20 tablespoons (2½ sticks) unsalted butter, cold
1 large egg, lightly beaten with a pinch of salt and a dribble of water or milk

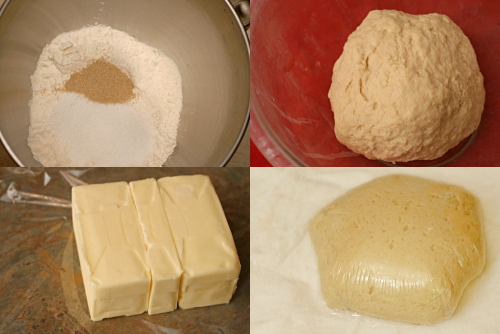
1. Make the dough package: Pour the milk and honey into a 2-cup liquid measuring cup, and stir to combine; set aside. In the bowl of an electric mixer fitted with the dough hook, stir together 12 ounces (about 2¾ cups) of the flour, the sugar, yeast, and salt; stir to combine. Add the milk mixture and mix on low speed until the dough just comes together, 2 to 3 minutes.

2. Turn out the dough onto a lightly floured work surface; gently knead to form a smooth ball, about 45 seconds. Wrap in plastic and refrigerate at least 1 hour or overnight.

3. Make the butter package: Lay the butter sticks side by side on a piece of plastic wrap, and sprinkle with the remaining 1 ounce (about 2 tablespoons) flour. Pound with a rolling pin until the flour is incorporated; roll into a 4- by 3-inch rectangle. Wrap tightly and refrigerate for at least 1 hour or overnight.

4. Remove the dough package from the refrigerator; place on a lightly floured work surface. Roll out to an 8-by-10-inch rectangle, about ½ inch thick, with a short side facing you. Remove the butter package from the refrigerator; place on the bottom half of the dough; fold the top half of the dough over the butter, and pinch the edges to seal.

5. Roll out the dough to a 10-by-10-inch square about ½ inch thick; keep the corners as square as possible. Remove any excess flour with a dry pastry brush. Starting at the far end, fold the square in thirds, as you would a business letter. This completes the first of three turns. Wrap in plastic and refrigerate for 1 hour.

6. Repeat rolling and folding as above two more times, starting with the flap opening on the right, as if it were a book, and refrigerate at least 1 hour between turns. To help you remember how many turns have been completed, mark the dough after each: Make one mark for the first turn, two for the second, and three for the third. After the third, wrap the dough in plastic, and refrigerate 6 to 8 hours, or overnight.

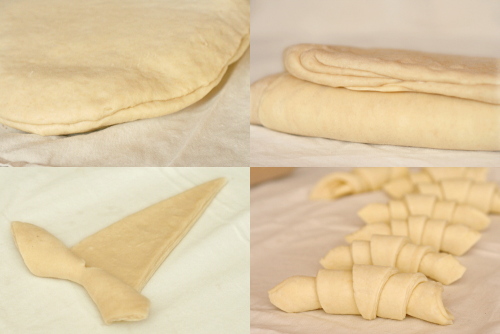
7. Turn out the chilled dough onto a lightly floured work surface. Roll out the dough to a 30-by-8-inch rectangle. (If the dough becomes too elastic, cover with plastic wrap, and let rest in the refrigerator for 10 minutes.) Using a pizza wheel, cut the dough into triangles, each with a 4-inch base (you will have scraps of dough at both ends). Cut a 1-inch slit in the center of the base of each triangle. Place triangles in a single layer on a clean work surface.

8. To shape the croissants, stretch the two lower points of each triangle to enlarge the slit slightly. Fold the inner corners formed by the slit toward the outer sides of the triangles, and press down to seal. Using your fingertips, roll the base of each triangle up and away from you, stretching the dough slightly outward as you roll; the tip should be tucked under the croissant. Pull the two ends toward you to form a crescent. Transfer the crescents to a parchment-lined baking sheets, 2 inches apart. Cover loosely with plastic wrap, and let rise in a warm place until very spongy and doubled in bulk, 45 to 60 minutes.

9. Preheat the oven to 400ºF, with a rack in the middle position. Lightly brush the crescents with the beaten egg. Bake until the croissants are puffed and golden brown, about 15 to 20 minutes. Transfer the sheet to a wire rack to cool. Serve warm or at room temperature.

tender shortcakes

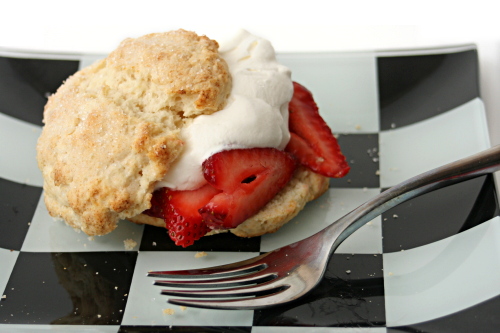
Dave and I ate dessert first this weekend, but not in the fun-loving, live life to its fullest, carefree kind of way. More in the ‘it’s too hot outside to grill dinner until the sun goes down’ kind of way. 110 degrees, people. I told you I live in the desert.

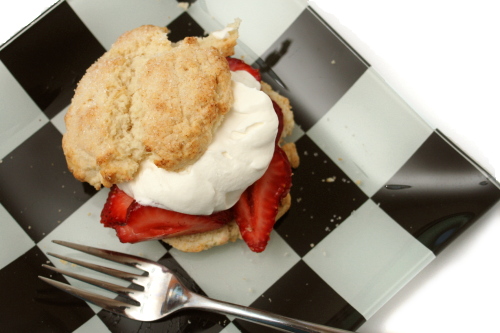
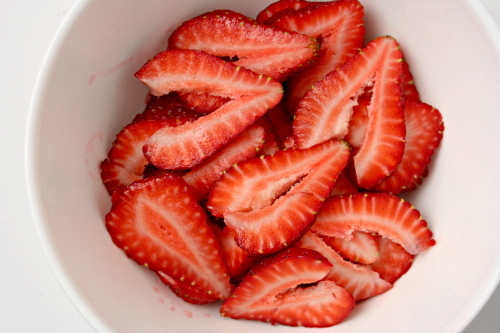
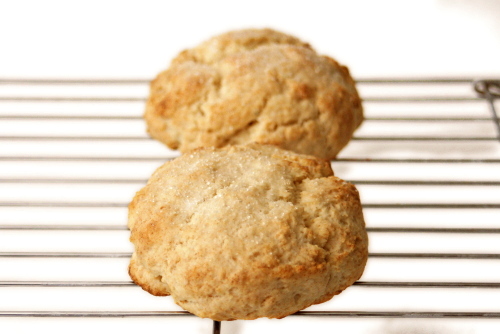
But whatever, I got to eat strawberry shortcake for dinner, so I’m not complaining. With a tender biscuit, sweet berries, and silky whipped cream, what is there to complain about? Especially since we have air conditioning. Otherwise I have a feeling I’d be doing a lot of complaining, shortcakes for dinner or not.

Cathy chose this recipe for Tuesdays with Dorie, and she has it posted. I used cake flour for half of the flour and doubled the salt.

One year ago: Parisian Strawberry Tartlets
Two years ago: Strawberry Tart

I see a pattern here…

eggs in tomato sauce

Back in Dave’s bachelor days, “pasta and red” was one of his standard dinners. He’d cook and drain pasta, put the pasta back in the pot, dump jarred tomato sauce over it, and stir it all up until it was warmish. Pasta and red.

These days, I’m always insisting that ‘pasta and red’ is not a phrase that should be associated with actual home-cooked tomato sauce. Whether I’m quickly sautéing some garlic to make a simple sauce with canned diced tomatoes, mixing up vodka sauce, or simmering a slow-cooked bolognese, Dave wants to call them all pasta and red. No! A 5-hour bolognese should not be compared to oversweetened overcooked jarred sauce.

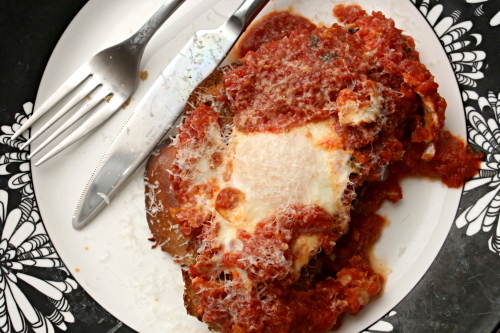
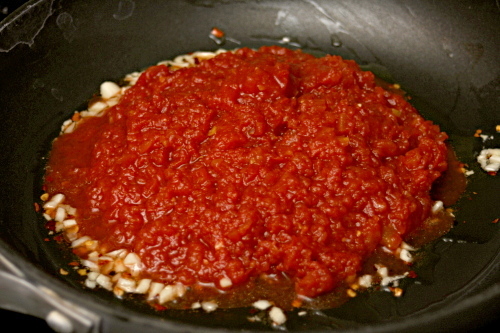
I like all types of tomato sauces, even jarred ‘red’, but when I smelled this simmering pan of tomatoes and garlic and realized that I was basically making spaghetti sauce to serve with eggs for breakfast, I started to worry – yes, I like tomato sauce with pasta, but would it translate to eggs and breakfast?

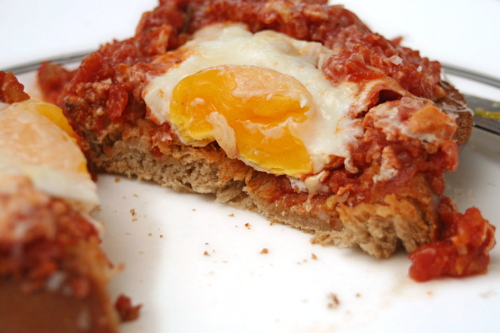
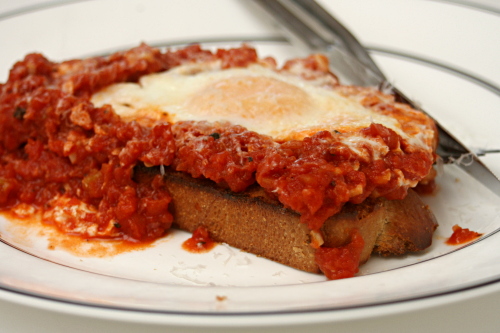
Yup. The rich egg balances the acidic tomato sauce, and the thick slice of whole wheat challah on the bottom soaked up every bit of flavor. Eggs and red – it works.

One year ago: Tofu Mu Shu
Two years ago: Crockpot Pulled Pork

Printer Friendly Recipe
Poached Eggs in Tomato Sauce
(adapted from Smitten Kitchen)

If you just want to coarsely chop your tomatoes, stick a pair of scissors into the opened can of tomatoes and snip away.

Serves 4

1 tablespoon olive oil
2 cloves garlic, minced
pinch of crushed red pepper flakes
2 tablespoons red or white wine (optional)
1 (28-ounce) can whole tomatoes, drained and chopped or pureed
pinch sugar
½ teaspoon salt
ground black pepper
4 large eggs
4 slices toasted country bread
freshly grated Parmesan cheese

1. In a medium skillet, heat the oil, garlic, and pepper flakes over medium heat until the garlic and pepper is sizzling. Add the wine and let it simmer until it becomes syrupy, about 2 minutes. Stir in the tomatoes, sugar, salt and pepper. Reduce the heat to medium-low and simmer until thickened, 12 to 15 minutes.

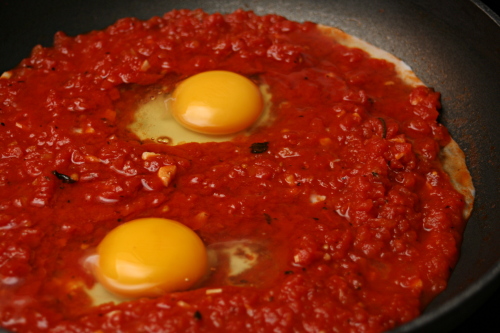
2. Break the eggs into individual small cups. Make wells or indentations in the sauce, and gently transfer the eggs from the cups to the wells; season the eggs with salt and pepper. Cover the pan and cook over medium-low heat for 5 to 7 minutes, or until the whites are set.

3. Spoon a portion of sauce with an egg over toasted bread. Top with a generous sprinkling of parmesan cheese and serve immediately.

white chocolate brownies

With the pace of life picking up as it has been lately, I haven’t had many opportunities to bake desserts. Nearly all of my baking lately has been associated with Tuesdays with Dorie. Making a dessert that someone else chooses for you is fine when it’s one recipe in many, but when it’s all that you ever get to bake…well, it’s tempting to tweak the recipe to something that’s more fun for you, whether the fun is in the eating or the making.

For these white chocolate brownies, it meant skipping the meringue, raspberries, orange zest, and ground almonds for various reasons, most having to do with laziness. It certainly sounds like I was trying to make these as bland as possible, doesn’t it? To play up the mild sweet flavor of white chocolate, I used vanilla sugar instead of regular sugar. I also used cake flour instead of regular, thinking that the lower gluten content of cake flour would mimic the combination of higher gluten all-purpose flour and no-gluten ground almonds.

After baking, I couldn’t decide if I wanted to present this as a cake or as brownies. The white chocolate flavor is subtle, although you can find it if you’re looking. The texture is light and fluffy and moist, just like a perfect vanilla cake. In the end, I defaulted to laziness again. Brownies don’t require any additional topping like a cake would, so these are brownies. Good brownies, in a light fluffy cakey kind of way. Plus, if I ever need a white chocolate cake recipe, I’m good to go!

Marthe chose this recipe, and she has it posted. Other than the changes listed above, I doubled the salt. A lot of TWD members had problems with their brownies coming out of the oven undercooked after the recommended baking time, but since I skipped the meringue and made a quarter of the recipe, the baking time in the book wasn’t relevant to me anyway.

One year ago: Cappuccino Muffins
Two years ago: French Chocolate Brownies

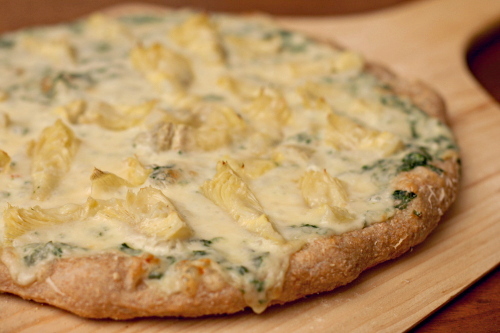
spinach artichoke pizza

I learned a fun fact at work the other day. The word bikini comes from Bikini Atoll, where a nuclear test bomb had recently been dropped. The designer of the bikini expected his new fashion to be “explosive”, and nuclear anything was all the rage back then. Yes, only sixty years ago, bikinis were nonexistent.

Now that they are available, I have a few, and they’re cute, and I want to wear them. So spinach artichoke dip, always tempting me from restaurant menus, generally has to be avoided. Dipping bread into a bubbling pot of cream cheese, mayonnaise and mozzarella will have me exploding right out of my bikini.

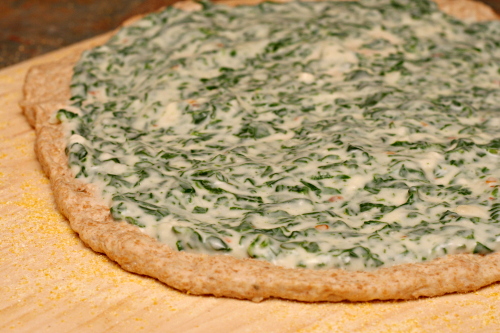
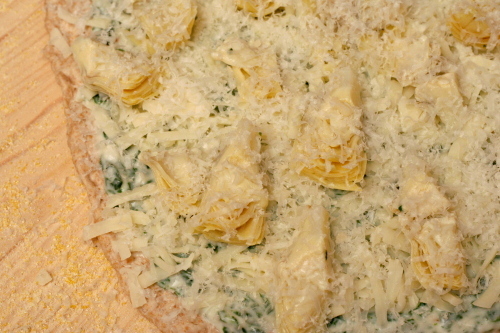
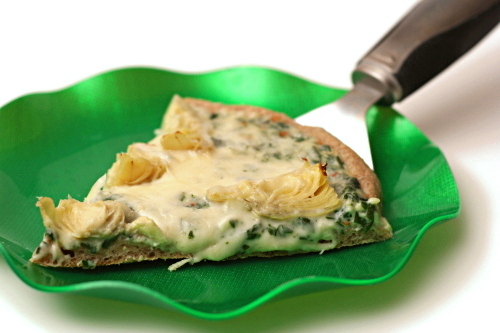
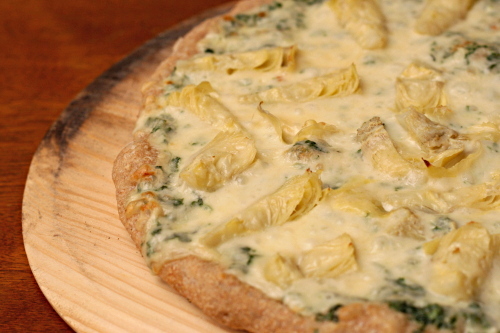
The flavors, however, are a natural for pizza. Keep the bread, but make it whole wheat with my favorite whole wheat adaptation trick. Replace the cream cheese and mayonnaise with a thick béchamel, and the rest of the ingredients – spinach, artichoke, mozzarella, parmesan – are reasonably healthy and adapt perfectly for pizza.

Okay, so here’s the problem with my “make healthier food –> wear bikini” philosophy. If the healthy food is this good, I’m going to end up eating more of it than I should! I mean, bread topped with cheese, artichokes and spinach? Of course that was irresistible. Of course I’m going to need several slices to be satisfied, and of course I’ll still look longingly at the leftovers. Okay, so maybe I’ll end up looking longingly at my bikinis this summer, but at least I’ll be satisfied with my one-pieces suits.

One year ago: Potato Galette
Two years ago: Orange Vanilla Opera Cake

Printer Friendly Recipe
Spinach Artichoke Pizza

Makes 2 12-inch pizzas or about 6 servings

You can use frozen artichokes instead (they’re not available in my town), although I’ve never been sure if those need pre-cooking before they’re added to pizza. If you used canned artichokes, I recommend rinsing them, because they’re canned in citric acid, and the acidity was a little distracting.

Of course you can make pizza without a pizza stone. Just use a baking sheet (possibly preheated). However, if you make pizza or rustic breads often, a pizza stone is a small investment for a large increase in perfectly crisp crusts.

2 tablespoons butter
2 cloves garlic, minced
½ teaspoon crushed red pepper flakes
2 tablespoons flour
1½ cup milk (any fat content)
¼ teaspoon salt
½ ounce (¼ cup) parmesan plus 1 ounce (½ cup)
7 ounces fresh spinach, washed and roughly chopped
½ recipe (whole wheat, if you want) pizza dough or 1 pound of your favorite pizza dough
6 ounces (1½ cup) shredded mozzarella (skim works great)
1 (14-ounce) can artichokes, drained, rinsed and dried, quartered

1. Place a pizza stone on the bottom rack of the oven and preheat the oven to 525ºF.

2. In a medium heavy-bottomed saucepan, melt the butter over medium heat. When the foaming subsides, add the garlic and red pepper flakes; cook, stirring constantly, until fragrant, 30 to 60 seconds. Add the flour; continue cooking and stirring for 2 minutes. Gradually whisk in the milk. Bring the mixture to a simmer over medium-high heat, stirring frequently, then reduce the heat to medium-low. Continue to simmer, stirring occasionally for about 5 minutes. Stir in the salt and ¼ cup (½ ounce) of the parmesan.

3. Meanwhile, add the spinach (if the spinach isn’t damp from being washed, also add a couple tablespoons of water) to a medium saucepan set over medium-high heat. Cook and stir until the spinach just wilts, about 1 minute. Remove the spinach from the pan and place it in a clean kitchen towel. Squeeze the spinach as dry as possible, then add it to the béchamel from step 1.

4. Divide the dough and shape each portion into a ball. Let the balls of dough relax for 10-30 minutes. Work with one ball of dough at a time on a lightly floured surface. Flatten the dough, then pick it up and gently stretch it out, trying to keep it as circular as possible. Curl your fingers and let the dough hang on your knuckles, moving and rotating the dough so it stretches evenly. If it tears, just piece it together. If the dough stretches too much, put it down and gently tug on the thick spots.

5. Dust a pizza peel (or the back of a large baking sheet) generously with cornmeal and transfer the round of dough to the peel. Rearrange the dough to something reasonably circular; stab it several times with a fork. Spread ½ of the spinach mixture over the dough, then top with half of the mozzarella, half the artichokes, and half of the remaining parmesan.

6. Transfer the pizza to the hot baking stone, and bake for about 6-10 minutes, until the cheese is bubbling and the crust is spotty brown. Let the pizza cool on the peel for about 5 minutes before slicing and serving. Repeat with the remaining ingredients.

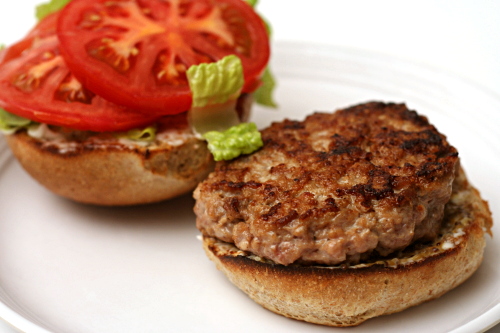
turkey burgers

Working full-time sure is…time-consuming, isn’t it? I haven’t figured out yet what has to give. (First choice – chores!) Cooking, blogging, photography, gardening, exercising…sleeping. It’s hard to balance everything. It’s possible that I should cut down on meals that require grinding your own meat, huh?

Well, I would consider that, except that these burgers were so perfect. I made beef burgers a week later (also with home-ground meat – stop the insanity!), and I enjoyed the turkey burgers so much more. And I love beef, so it wasn’t a prejudice.

But once you add good buns and your various toppings, the turkey burgers don’t taste significantly different from beef burgers. These have about half the fat of good beef burgers, so that’s another advantage, although what I mostly care about is that I thought their texture was smoother and more cohesive, and their taste was at least as good.

Grinding your own meat isn’t as hard as it might sound, and you almost definitely have the equipment. All you have to do is cut your meat into chunks, freeze it until it’s firm, and process it in the food processor. Then you mix in a few tasty additions, sear them up in a pan and enjoy a perfect burger. Make some extra to freeze, just in case Future You has a rough day at work and needs an easy meal.

One year ago: Croissants (Tartine)
Two years ago: Franks and Beans

Printer Friendly Recipe
Turkey Burgers (not really adapted from Cooks Illustrated)

Cooks Illustrated recommends 6 ounce burgers; I prefer mine significantly smaller. If you do too, don’t forget to reduce the cooking time.

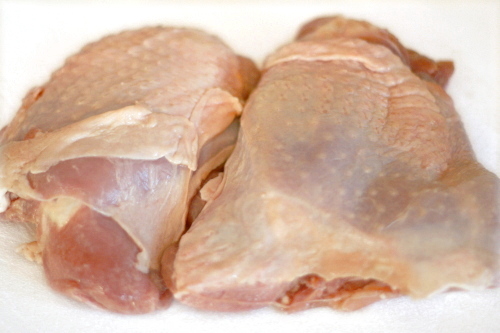
2 pounds skin-on, bone-in turkey thighs or 1½ pounds skinless, boneless thighs
½ teaspoon salt
½ teaspoon black pepper
2 teaspoons Worcestershire sauce
2 teaspoons Dijon mustard
1 tablespoon vegetable or canola oil

1. If using skin-on, bone-in turkey thighs, remove the meat from from the skin and bones. Cut the thighs into 1-inch chunks and arrange in a single layer on a baking sheet. Freeze until somewhat firm, about 30 minutes.

2. Working in 3 batches, place the semifrozen turkey chunks in a food processor fitted with the steel blade; pulse until the largest pieces are no bigger than 1/8-inch, twelve to fourteen 1-second pulses.

3. Transfer the ground meat to a medium bowl. Stir in the salt, pepper, Worcestershire sauce, and mustard until blended and divide the meat into 4 portions. Lightly toss one portion from hand to hand to form a ball, then lightly flatten the ball with your fingertips into a 1-inch-thick patty. Repeat with the remaining portions.

4. Heat a large, heavy skillet (preferably cast iron or stainless steel with an aluminum core) over medium heat until very hot, 4 to 5 minutes. Swirl the oil in the pan to coat the bottom. Add the burgers and cook over medium heat without moving them until the bottom of each is dark brown and crusted, about 5 minutes. Turn the burgers over; continue to cook until the bottom is light brown but not yet crusted, 4 to 5 minutes longer. Reduce the heat to low, position the cover slightly ajar on the pan to allow steam to escape, and continue to cook 5 to 6 minutes longer, or until the center is completely opaque yet still juicy or an instant-read thermometer inserted from the side of the burger into the center registers 160 degrees. Remove from the pan and serve immediately. (Alternatively, grill the burgers over a medium-low fire (you can hold your hand about 5 inches above the grill surface for 5 seconds) until dark spotty brown on the bottom, 7 to 9 minutes. Turn the burgers over; continue grilling 7 to 9 minutes longer.)
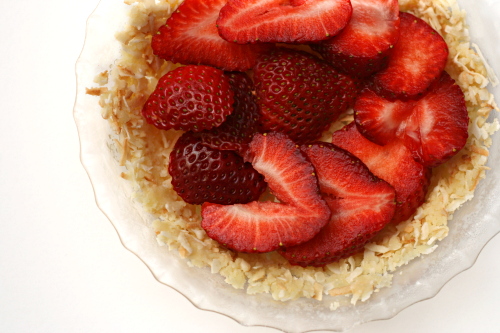
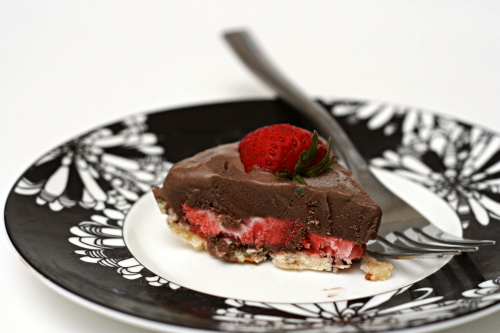
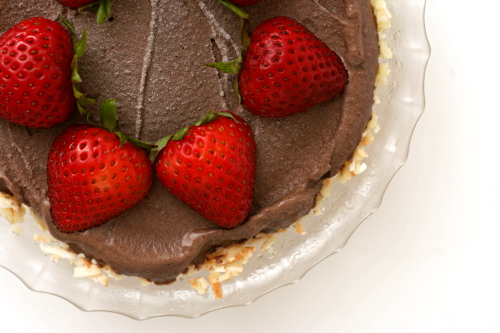
strawberry chocolate ice cream pie

The rest of the country (hemisphere, I suppose) is gearing up for summer. Here in the desert though, we’ve been there for a while. This weekend Dave and I hiked over seven miles in 90 degree weather. It’s a dry heat though! (Actually, the hike wasn’t bad at all – it was either shady or windy the whole time, so although we were hot, we weren’t dying. And the dry heat does make a difference.)


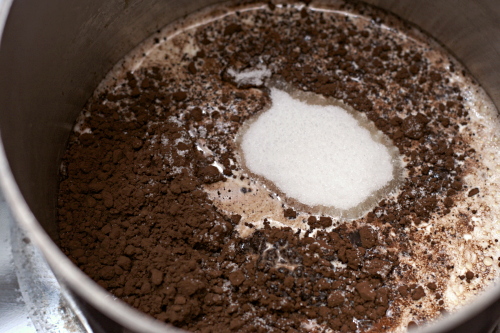
the beginning of homemade chocolate ice cream

Ice cream pie is perfect for the weather we’ve been having. The specific ingredients called for here aren’t perfect for me though. I eat so many bananas as snacks that the idea of adding them to chocolate ice cream for dessert didn’t sound appealing. Strawberries, however, can be added to most any dessert.

Oh, except maybe not one that’s going to be stored in the freezer like this. Sliced strawberries between the crust and the ice cream turned into ice cubes in the freezer; I should have given them a dip in vodka before freezing them to keep them from freezing so solidly. Other than that, what’s not to love about this dessert? I don’t need to tell you that chocolate ice cream and strawberries are a tempting combination – especially when it’s a hundred degrees out.

Spike chose this recipe for Tuesdays with Dorie, and she has the recipe posted.

One year ago: Chipster-Topped Brownies
Two years ago: Pecan-Honey Sticky Buns