masa pancakes with chipotle salsa and poached eggs

After buying four and a half pounds of masa harina for a recipe that used, oh, about a cup of it, I completely messed up the recipe I was making. While I learned quite a bit about the chemistry of cooking beans (hint: don’t add tomatoes at the beginning), I have a feeling I won’t be trying that recipe again. Yes, I know it would be much better if I tried that  following-the-directions idea, but the whole thing left me a bad taste in my mouth. Literally.

It also left me with about 4.45 pounds of masa harina. Fortunately, masa is seriously good stuff. It kind of reminds me of Dave’s jokes – intensely corny. Hey, speaking of intensely corny jokes! Anyway, my point is that it’s good, and I was hoping to find something easier than tamales to make with it. (Although I plan on making tamales as well.)

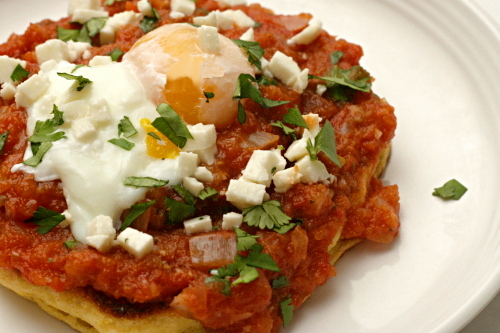
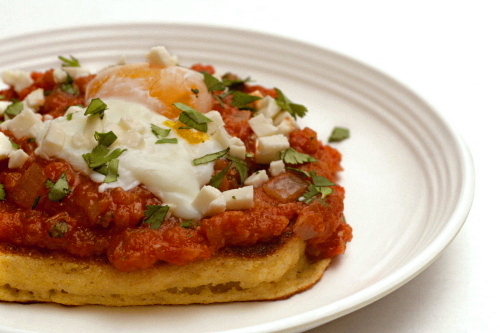
Fortunately, the internet exists, and epicurious had all sorts of fun masa recipes to choose from, like masa pancakes topped with homemade chipotle salsa, poached eggs, and fresh cheese. I thought the recipe had the potential to be complicated, but it’s really just pancakes, sauce, eggs, and some garnish.

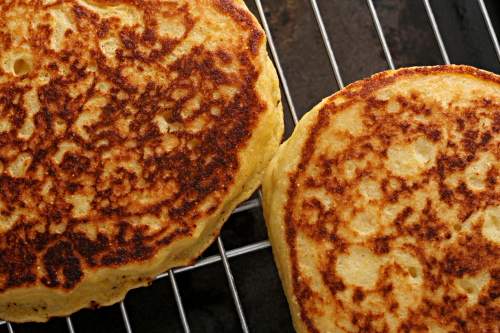
The masa pancakes seemed more like pan-fried cornbread than pancakes, and if there’s anything that sounds better than masa pancakes, well, it’s pan-fried cornbread. No, it’s pan-fried cornbread topped with warm chipotle salsa, eggs, and cheese. Only, let’s see, about 4.40 pounds of masa left to use up! I better get to making more pancakes!

One year ago: Orange Berry Muffins
Two years ago: Rice Pudding

Printer Friendly Recipe
Masa Pancakes Topped with Poached Eggs and Chipotle Ranchera Salsa (adapted from Bon Appétit via epicurious.com)

Serves 6

The poached egg directions that I’ve included here are pretty much directly from the original recipe, and they are…shall we say, vague (or I might just call them crap if I wasn’t trying to be diplomatic). I would offer my own set of instructions for poaching eggs, but I have lost my egg-poaching mojo lately. Instead, I will direct you here. Or I would just fry the damn eggs using my foolproof method (add a bit of water to the skillet after the eggs start to set and cover the pan; no flipping and you can get away with using less oil!). I’m also curious to try cooking the salsa in a skillet and then poaching the eggs right in the finished salsa.

¾ cup masa harina (corn tortilla mix)
½ cup (2.4 ounces) all purpose flour
½ cup yellow cornmeal
1 teaspoon sugar
1 teaspoon salt
1 teaspoon baking powder
½ teaspoon baking soda
1½ cups buttermilk
2 large eggs
3 tablespoons corn oil, plus more for cooking the pancakes
12 large eggs + vinegar + salt
Chipotle Ranchera Salsa (recipe follows)
¼ cup chopped fresh cilantro
¼ cup crumbled queso fresco or shredded Monterey Jack cheese

1. Adjust a rack to the middle position and heat the oven to 350°F. Spread masa harina on a heavy baking sheet and bake until fragrant and golden, stirring often, about 15 minutes. Cool completely. Place a baking sheet lined with a cooling rack in the oven and reduce the oven temperature to 200°F.

2. Whisk masa, flour, cornmeal, sugar, salt, baking powder, and baking soda in a large bowl. Whisk the buttermilk, 2 eggs and 3 tablespoons oil in a medium bowl to blend. Add the buttermilk mixture to the dry ingredients and whisk just until blended (the batter will be thick).

3. Lightly coat a griddle or 9-inch nonstick skillet with oil. Heat over medium heat. Working in batches, spoon scant ½ cup batter onto the griddle. Using a spoon, spread the batter to a make 4-inch-diameter pancake. Cook until the bottom is golden, about 4 minutes. Turn and cook until the second side is golden, about 3 minutes. Transfer to the baking sheet in the oven to keep warm. Repeat to make 6 pancakes total, brushing the griddle with oil as needed.

4. Meanwhile, bring a large skillet of salted vinegary water to a simmer. Working in batches, crack 12 eggs into the skillet. Simmer until the eggs are softly poached, about 3 minutes. Remove the eggs from the water; drain.

5. Divide the pancakes among plates. Top each pancake with salsa and 2 poached eggs and sprinkle with cilantro and cheese. Serve immediately.

Chipotle Ranchera Salsa (adapted from Bon Appétit via epicurious.com)

2 tablespoons corn oil
1 onion, chopped course
4 garlic cloves, minced
1 jalapeno, minced
1 28-ounce can diced tomatoes in juice
¼ teaspoon salt
1 chipotle chili in adobo, minced
¼ cup chopped fresh cilantro

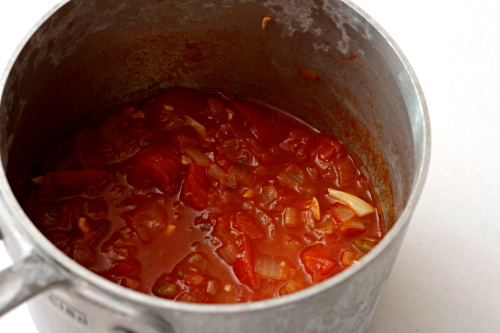
1. Heat the oil in a heavy medium saucepan over medium-high heat. Add the onions and sauté until they begin to soften, about 5 minutes. Add the garlic and jalapeno and cook, stirring continuously, until fragrant, about 30 seconds. Add the tomatoes with their juice, the salt, and the chipotle. Bring to a boil, then reduce the heat to medium-low. Cover and simmer 15 minutes to blend the flavors, stirring occasionally.

2. Puree 1 cup of the salsa in a blender (or blend with an immersion blender). Return to the saucepan and stir in the cilantro. Adjust the salt if necessary. (Can be made 1 day ahead. Cover and chill. Rewarm over medium heat.)

how to adapt any bread recipe to be whole wheat

As much as I love Peter Reinhart’s Whole Grain Breads, I’ve only made a few recipes from the book. Instead, I’ve been busy using his techniques to adapt my old favorite bread recipes to whole wheat versions. While you can, in general, simply substitute up to half of the flour in a bread recipe with whole wheat, I guarantee that you’ll have better results if you use Reinhart’s trick.

Reinhart uses the same method for most of the breads in his book – about half of the whole wheat flour is combined with salt and liquid and the other half is combined with yeast and liquid. Both mixtures sit overnight before they’re mixed and kneaded into the dough. The resting time breaks down the long bran molecules, making the bread smoother, lighter, and sweeter – in short, more like a white bread.

The 100% whole wheat breads that I’ve tried from Reinhart’s book are truly exceptional. However, I guess I’m sort of a wimp about whole grains. I do like the flavor and texture of white bread, but of course I prefer the health factor of whole grain bread. Plus, I’m still interested in bread recipes outside of Reinhart’s book.

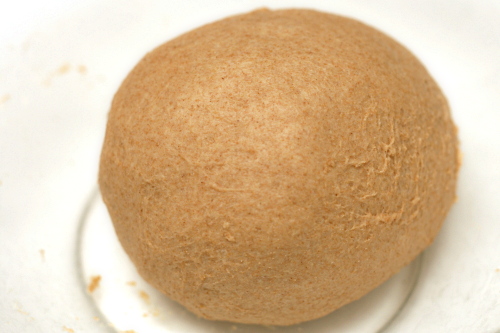
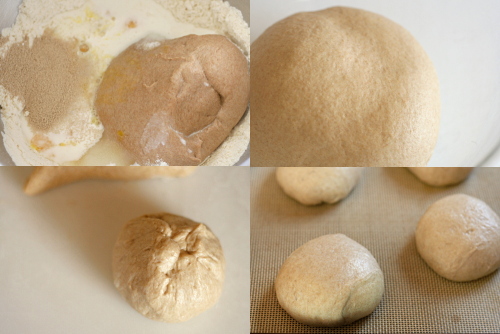
(the pre-dough before resting)

The solution is to mix up just one of Reinhart’s mixtures with whole wheat flour and let that rest overnight (or for around 8 hours), then continue with the recipe as written, mixing in the pre-dough. I’ve done this with all sorts of bread recipes – English muffins, pain ordinaire, light brioche buns, country crust bread, pizza crust.

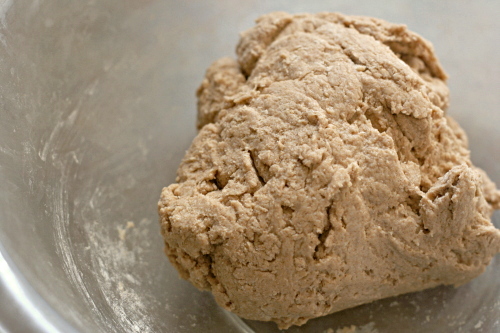
(the pre-dough after resting and a bit of kneading)

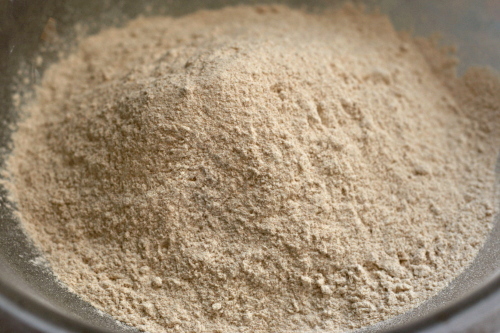
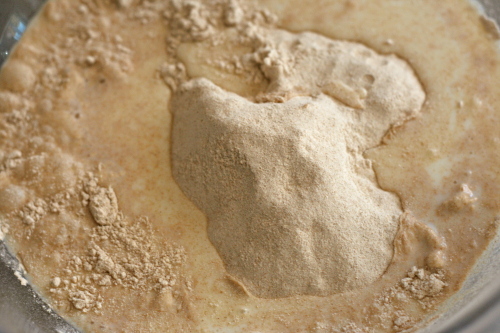
In all cases, I take half of the flour in the recipe and mix it with ¼ teaspoon salt for every 4 ounces of flour. Then I mix in enough liquid – whatever liquid the recipe calls for – to moisten the flour until it forms a dough. Most bread recipes call for about 16 ounces flour total, so the pre-dough is simply 8 ounces of whole wheat flour, ½ teaspoon of salt, and ¾ cup of water (or whatever liquid the recipe calls for).  When the final dough is mixed, those ingredients are subtracted from the original recipe.

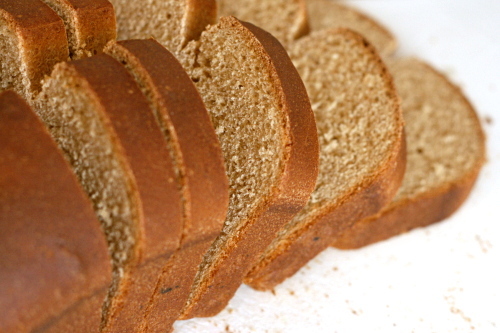
And every time, the result is essentially identical to an all-white version – the dough is smooth, elastic, and easy to work with. The bread is light and flavorful. And, I still get to play with an entire world of bread recipes. Win win win!

One year ago: Roasted Kale
Two years ago: Banana Walnut Pancakes

Printer Friendly Recipe
Whole Wheat Light Brioche Burger Buns (adapted from Smitten Kitchen and Peter Reinhart’s Whole Grain Breads)

Makes 8 buns

Pre-dough:
1¾ cups (8 ounces) whole wheat flour
½ teaspoon salt
¾ cup water

1. Mix all of the soaker ingredients together in a bowl for about 1 minute, until all of the flour is hydrated and the ingredients form a ball of dough.

2. Cover loosely with plastic wrap and leave at room temperature for 12 to 24 hours. (If it will be more than 24 hours, place the soaker in the refrigerator; it will be good for up to 3 days. Remove it 2 hours before mixing the final dough to take off the chill.)

Dough:
8 ounces (about 1⅔ cups) bread flour
1 teaspoon salt
2½ tablespoons unsalted butter, softened
pre-dough
¼ cup warm water
3 tablespoons warm milk
2 teaspoons instant yeast
2½ tablespoons sugar
1 large egg
extra flour or water for adjustments
egg wash: 1 tablespoon milk or 1 egg white or whole egg beaten with 1 tablespoon water
sesame seeds

1. If mixing with a stand mixer: Add the flour and salt to mixer bowl fitted with paddle attachment. Mix on low just to combine. Add the butter and mix on medium-low speed until the mixture resembles crumbs. Cut the pre-dough into about 12 pieces and add them to the flour mixture, tossing the pieces to coat (to keep them from immediately sticking back together). Replace the paddle attachment with the hook. Add the water, milk, yeast, sugar, and egg to the mixer bowl and mix on medium-low until combined, then continue kneading until smooth and elastic, 6-8 minutes. The dough should be just a bit loose and sticky; add flour if necessary.

If mixing by hand: In a large bowl, whisk flours with salt. Add butter and rub into flour between your fingers, making crumbs. Cut the pre-dough into about 12 pieces and add them to the flour mixture, tossing the pieces to coat (to keep them from immediately sticking back together). Add the water, milk, yeast, sugar, and egg and stir with a rubber spatula until a dough forms. Scrape dough onto clean, well-floured counter and knead, scooping dough up, slapping it on counter and turning it, until smooth and elastic, 8 to 10 minutes. The dough will be on the sticky side so it can be a bit messy, but keep in mind that the more flour you knead in, the tougher the buns will get. Try to leave them tackier than you would a round loaf.

2. Spray a bowl with nonstick spray; shape dough into a ball and place it in bowl. Cover bowl with plastic wrap or a damp towel and let rise in a warm place until doubled in bulk, one to two hours.

3. Line a baking sheet with parchment paper or a silicone mat. Divide dough into 8 equal parts. To shape each portion into an even round, gently pull the edges toward a pucker and pinch them together. Gently roll each into a ball and arrange them two to three inches apart on the prepared baking sheet. Cover loosely with a piece of plastic wrap lightly coated in nonstick spray (or a damp towel) and let buns rise in a warm place for about one hour.

4. Preheat oven to 400 degrees with rack in center. Brush egg wash on buns and sprinkle with sesame seeds. Bake, turning sheet halfway through baking, until tops are golden brown and an instant-read thermometer reads at least 185 degrees, about 15 minutes. Transfer to a rack to cool completely.

Printer Friendly Recipe
Whole Wheat Pain Ordinaire (adapted from Eric Treuille and Ursula Ferrigno’s Ultimate Bread and Peter Reinhart’s Whole Grain Breads)

Makes 1 loaf

Pre-dough:
1¾ cups (8 ounces) whole wheat flour
½ teaspoon salt
¾ cup water

1. Mix all of the soaker ingredients together in a bowl for about 1 minute, until all of the flour is hydrated and the ingredients form a ball of dough.

2. Cover loosely with plastic wrap and leave at room temperature for 12 to 24 hours. (If it will be more than 24 hours, place the soaker in the refrigerator; it will be good for up to 3 days. Remove it 2 hours before mixing the final dough to take off the chill.)

Dough:
1¾ cups (9½ ounces) all-purpose or bread flour
pre-dough
2 teaspoons instant yeast
⅔ cup water, room temperature
¾ teaspoon salt

1. Add the flour to a mixer bowl fitted with hook attachment (or a large bowl if mixing by hand). Cut the pre-dough into about 12 pieces and add them to the flour, tossing the pieces to coat (to keep them from immediately sticking back together). Add the water, yeast, and salt to the mixer bowl and mix on medium-low until combined (or stir with a rubber spatula), then continue kneading until smooth and elastic, 6-8 minutes (8-10 minutes if by hand). The dough should be soft but not sticky; add flour if necessary.

2. Lightly oil a large bowl and transfer the dough to the bowl, rolling it to coat with the oil. Cover the bowl with plastic wrap or a damp towel. Let rise until doubled in size, about 1½ to 2 hours.

3. Gently pat the dough into a rough rectangle. Fold the bottom third of dough, letter style, up to the center and press to seal, creasing surface tension on the outer edge. Fold the remaining dough over the top and use the edge of your hand to seal the seam closed and to increase the surface tension all over. Press evenly with the palms of both hands and roll the dough backward and forward until it is 10 inches in length. Line a pizza peel baking parchment. Place the loaf on the peel and lightly dust with flour. Cover loosely with plastic wrap or a damp towel.

4. Proof at room temperature for about 1 hour, or until the loaf has grown to about twice its original size. About half an hour into the second rise, place a baking stone on the bottom rack of the oven and preheat the oven to 500 degrees.

5. Using a very sharp knife or a serrated bread knife, cut 5 diagonal slashes, each about ¼ to ½-inch deep, across the top of the loaf. (Alternatively, cut one long slash that extends for the length of the loaf.)

6. Transfer the dough on the parchment to the baking stone. Close the oven and reduce the temperature to 450 degrees. Bake until golden brown and the temperature is at least 200 degrees at the center. Transfer the loaves to a cooling rack and cool for at least 1 hour before slicing and serving.

Printer Friendly Recipe
Whole Wheat Country Crust Bread (adapted from Betty Crocker and Peter Reinhart’s Whole Grain Breads)

Makes 1 sandwich loaf

Pre-dough:
1¾ cups (8 ounces) whole wheat flour
½ teaspoon salt
¾ cup water

1. Mix all of the soaker ingredients together in a bowl for about 1 minute, until all of the flour is hydrated and the ingredients form a ball of dough.

2. Cover loosely with plastic wrap and leave at room temperature for 12 to 24 hours. (If it will be more than 24 hours, place the soaker in the refrigerator; it will be good for up to 3 days. Remove it 2 hours before mixing the final dough to take off the chill.)

Dough:
1¾ cups (9½ ounces) unbleached flour
1 teaspoon table salt
¼ cup water, warm (110 degrees)
1 egg
2 tablespoons vegetable oil or unsalted butter, melted
¼ cup (1.75 ounces) granulated sugar
2 teaspoons instant yeast

1. Add the flour to mixer bowl fitted with hook attachment (or a large bowl if mixing by hand). Cut the pre-dough into about 12 pieces and add them to the flour, tossing the pieces to coat (to keep them from immediately sticking back together). Add the salt, water, egg, oil, sugar, and yeast to the mixer bowl and mix on medium-low until combined (or stir with a rubber spatula), then continue kneading until smooth and elastic, 6-8 minutes (8-10 minutes if by hand). The dough should be soft but not sticky; add flour if necessary.

2. Lightly oil a large bowl and transfer the dough to the bowl, rolling it to coat with the oil. Cover the bowl with plastic wrap or a damp towel. Let rise until doubled in size, about 1½ to 2 hours.

3. Form dough into loaf by gently pressing the dough into a rectangle, one inch thick and no wider than the length of the loaf pan. Next, roll the dough firmly into a cylinder, pressing with your fingers to make sure the dough sticks to itself. Turn the dough seam side up and pinch it closed. Finally, place dough in greased 9-by-5-by-3-inch loaf pan and press it gently so it touches all four sides of the pan.

4. Cover with plastic wrap or a damp towel; set aside in warm spot until dough almost doubles in size, about 45 minutes. Heat oven to 350 degrees.

5. Remove plastic wrap from loaf pan; place pan in oven. Bake until instant-read thermometer inserted at angle from short end just above pan rim into center of loaf reads 195 degrees, about 40 to 50 minutes. Remove bread from pan, transfer to a wire rack, and cool to room temperature. Slice and serve.

thumbprints for us big guys

I don’t how I managed to go this long without complaining about the grocery store situation in my new little town. There are three grocery stores here – a Walmart, a food thrift store, and a regular store. I know some Walmarts have a good selection, but this one certainly does not. I had high hopes for the regular grocery store at first, but it seems that the longer I shop there, the more frustrated I get.

Today was the last straw. Brisket – I have to buy the whole brisket. What am I going to do with 15 pounds of brisket?! (I know, I’m going to freeze most of it. Still.)

My days of rack of lamb are over. Wheat berries? Fresh fish? Currants? Loose-leaf tea? Please. I couldn’t even find hazelnuts.

Fortunately, these cookies are just as delicious with walnuts instead of hazelnuts. And I guess that’s what it all comes down to – adapting to my new situation and making the best of it. And being grateful for all of the great salsa and green chile that’s available to me now.

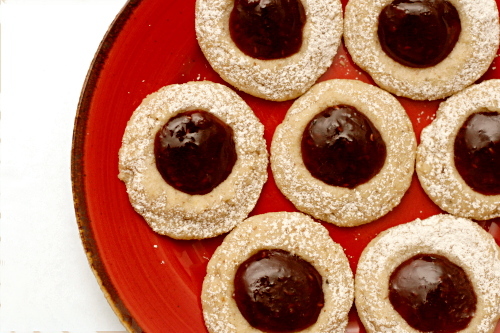
Mike from Ugly Food Dude chose these cookies for Tuesdays with Dorie. I added 1 teaspoon of salt to the dough, and with that small change, I’d say that these are one of my favorite recipes from Dorie’s book. They were so soft and tender with wonderful contrasting nut and tart jam flavors.  I loved them.

One year ago: Chocolate Whiskey Cake (another TWD favorite!)

roll-out sugar cookie comparison

You know those people who decorate sugar cookies so beautifully it’s hard to believe those works are art are edible? Yeah, I am not one of them. I haven’t made sugar cookies in months, and you know why? It’s a pain in the butt, and the results of my decorating are never up to my standards.

You know what’s even more of a pain in the butt? Making five different recipes! On the other hand, if I’m going to go through the trouble of mixing, rolling, baking, and decorating cookies, I want to be sure I’m using the best recipe I can, and it’s hard to know that without making a bunch and comparing. So that’s what I did.

I asked around to see what recipes people recommended and settled on this one from Annie’s Eats, this one from Ashlee’s Year in the Kitchen, this one from Martha Stewart, and the version I’ve been using for the last year or so, an adaptation of this one. (That’s only four recipes and I said I made five – I messed one up and had to remake it.) Because it’s easy to adapt the flavorings to personal preference, I used the same amount of vanilla, almond extract, and lemon zest in each recipe.
What I’m looking for in a sugar cookie is full flavor – some are bland – and tenderness without being too delicate. It needs to hold its shape of course, although I’m not opposed to a slight puff in the oven. I think a few flecks of lemon zest give sugar cookies a more balanced flavor without making them noticeably lemony. I am not particularly interested in recipes that do not require an overnight rest, as they tend to require too much flour, resulting in a bland, tough cookie. This actually makes sugar cookies a convenient comparison post because I could divide the tasks into separate days – making the dough, rolling it out, baking it, and decorating the cookies.

I thought all of the recipes were equally easy to mix up and roll out. I thought they all held their shape adequately during baking, although Ashlee’s cookies puffed a bit more than the others, while Annie’s were on the other extreme, retaining perfectly straight sides in the oven.

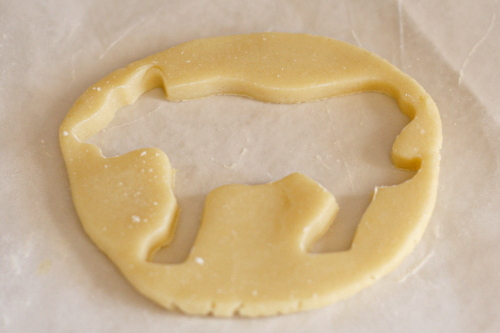
After tasting, the two favorite recipes were mine and Ashlee’s. The cookies from my recipe (the gorillas) were described as soft, chewy and flavorful. Ashlee’s (the tigers) were puffy, fluffy, and soft – tasters like the texture better but there was a slight preference for the flavor of my recipe.

Annie’s cookies (the elephants) were soft, although not chewy, but they were powdery and not as flavorful. Because this recipe uses only powdered sugar with no granulated sugar, the powdery texture is not a surprise. I’m sure this all relates to how well they hold their shape during baking as well, in addition to the lack of any chemical leavener. The universal least favorite was Martha Stewart’s recipe (the hippos), which was too hard, too chewy, and too dense, perhaps because it uses less butter than any of the others.


(I would just like to clarify that Dave outlined the hippo and gorilla. I was happy for his help, and I think he might even have had a little bit of fun.)

Which will I choose in the future? Oh, who knows. Probably my recipe, because it’s a classic sugar cookie recipe. There are no tricks up its sleeve; it just happens to have just the right ratio of ingredients. And for the record, the one thing that all of my tasters agreed on after I made them compare the cookies pre-frosting was that buttercream makes sugar cookies that much better.

One year ago: Lemon Cream Cheese Bars
Two years ago: Raspberry Bars (these are wonderful)
Printer Friendly Recipe
Roll-out Sugar Cookies

2½ cups (12 ounces) all-purpose flour
1 teaspoon baking powder
1 egg
½ teaspoon vanilla extract
¼ teaspoon almond extract
16 tablespoons (2 sticks) unsalted butter, room temperature
½ teaspoon salt
1 cup (7 ounces) granulated sugar
¼ teaspoon lemon zest

1. In a medium bowl, mix the flour and baking powder. In a one-cup measuring cup, lightly beat the egg with the extracts.

2. In the bowl of a standing mixer (or in a large bowl with a handheld mixer), beat the butter and salt on medium speed until smooth. With the mixer running, gradually pour in the sugar; add the lemon zest. Beat on medium until fluffy, about 1 minute. With the mixer running, pour in the egg mixture and continue beating until incorporated. Scrape down the sides of the mixer bowl. With the mixer on low, gradually add the flour and mix just until evenly blended.

3. Lightly knead the dough to form a ball, press it into a disk 1-inch thick, and wrap tightly in plastic wrap. Refrigerate for 2 hours or overnight.

4. Line a baking sheet with parchment paper or a silicone baking mat. Adjust a rack to the middle position and heat the oven to 375F. If you’ve chilled the dough overnight, it’ll need to sit at room temperature for half an hour or so to soften slightly. On a very lightly floured sheet of wax paper with a sheet of plastic wrap on top of the dough, roll the dough out to ¼-inch thick. Cut cookies using a floured cookie cutter. Re-roll scraps, always using as little flour as necessary.

5. Bake the cookies, one sheet at a time, for 5-9 minutes, until they no longer look wet on top. The baking time will depend on the size of the cookies you’ve cut. You don’t want the bottoms to be browned, except for maybe just a bit on the edges. Let the cookies rest for a couple minutes on the sheets before transferring them to cooling racks to finish cooling. Decorate as desired.


(The snakes are a mixture of the last dough scraps from all five recipes.)

Printer Friendly Recipe
Ashlee’s Famous Sugar Cookies (rewritten from Ashlee’s Year in the Kitchen)

For my comparison, I used the same amount of vanilla, almond extract, and lemon zest for each recipe. This was significantly less lemon zest than Ashlee’s recipe calls for. A full tablespoon will give the cookies a distinct lemon flavor.

Ashlee indicates that the dough can be rolled and cut right after mixing, but I have my doubts. I chilled overnight just for convenience, but it was a very soft dough, and I think it would be difficult to cut and transfer cookies while the dough is room temperature.

24 tablespoons (3 sticks) unsalted butter, room temperature
1½ cups (10.5 ounces) granulated sugar
½ cup (2 ounces) powdered sugar
4 eggs
1 teaspoon vanilla
½ teaspoon almond extract
1 tablespoon lemon zest
5 cups (24 ounces) all-purpose flour
2 teaspoons baking powder
1 teaspoon salt

1. Adjust a rack to the middle position and heat the oven to 400F. Line a baking sheet with parchment paper or a silicone baking mat.

2. In the bowl of a standing mixer (or in a large bowl with a handheld mixer), beat the butter and sugars on medium speed for 5 minutes. Add the eggs one at a time, mixing until each is incorporated before adding the next. Add the extracts and lemon zest and beat for 10 seconds. Add the baking powder and salt and beat until combined. With the mixer on low, add the flour 1 cup at a time, mixing for 15 seconds between each addition.

3. Wrapped tightly in plastic wrap, the dough can be refrigerated for up to a week, or it can be rolled and cut right away (see note). Roll out to a thickness of ¼-inch and use a floured cookie cutter to cut desired shapes.

4. Bake on the prepared sheet for about 7 minutes, until light golden brown on the bottom edges.

Printer Friendly Recipe
Ella’s White Sugar Cookies (rewritten from Annie’s Eats)

16 tablespoons (2 sticks) unsalted butter, room temperature
1 cup (4 ounces) powdered sugar
1 egg, beaten
1½ teaspoon almond extract
1 teaspoon vanilla
1 teaspoon salt
2½ cups (12 ounces) all-purpose flour

1. In the bowl of a standing mixer (or in a large bowl with a handheld mixer), beat the butter on medium speed until smooth. Add the powdered sugar and continue mixing until evenly blended. With the mixer running, pour in the egg, extracts, and salt and continue beating until incorporated. Scrape down the sides of the mixer bowl. With the mixer on low, gradually at the flour and mix just until evenly blended.

2. Refrigerate for 2 hours or overnight.

3. Line a baking sheet with parchment paper or a silicone baking mat. Adjust a rack to the middle position and heat the oven to 375F.

4. Roll to ¼-inch thickness on a well-floured surface. Cut with floured cookie cutters. Place on prepared cookie sheets. Bake at 375°F for 8-10 minutes. Cookies should not brown. Transfer to wire racks to cool completely.

Printer Friendly Recipe
Sugar Cookie Cutouts (from Martha Stewart)

4 cups sifted all-purpose flour
1 teaspoon baking powder
½ teaspoon salt
1 cup (2 sticks) unsalted butter, room temperature
2 cups granulated sugar
2 large eggs
2 teaspoons pure vanilla extract

1. Sift flour, baking powder, and salt into a bowl.

2. Put butter and sugar in the bowl of an electric mixer fitted with the paddle attachment. Mix on medium speed until pale and fluffy. Mix in eggs and vanilla. Reduce speed to low. Gradually mix in flour mixture. Divide dough into quarters; flatten each quarter into a disk. Wrap each in plastic. Refrigerate until firm, at least 1 hour or overnight.

3. Preheat oven to 325 degrees with racks in upper and lower thirds. Let one disk of dough stand at room temperature just until soft enough to roll, about 10 minutes. Roll out dough between two pieces of plastic wrap to ¼-inch thickness. Remove top layer of plastic wrap. Cut out cookies with a 4-to-5-inch cookie cutter. Transfer cookie dough on plastic wrap to a baking sheet. Transfer baking sheet to freezer, and freeze until very firm, about 15 minutes. Remove baking sheet from freezer, and transfer shapes to baking sheets lined with nonstick baking mats. Roll out scraps, and repeat. Repeat with remaining disk of dough.

4. Bake, switching positions of sheets and rotating halfway through, until edges turn golden, 15 to 18 minutes. Let cool on sheets on wire racks.

And – this is what happens when you add baking soda to your sugar cookies instead of baking powder.  They puff and turn yellow.   The tiger is the recipe made correctly, with baking powder; the giraffe has baking soda.

mediterranean pepper salad

When my friend Ramie visited me last spring, it was the first time I’d seen her in eight years. I wanted to cook a great meal for her on her first night, but we’d lost touch for a lot of those eight years, and I wasn’t sure what kind of eater she was. I knew she used to be a vegetarian and wasn’t anymore.

I thought a hodgepodge of Middle Eastern dishes would be perfect – most of it could be made in advance, it was fairly light in case she was a health nut (uh, apparently not), it was vegetarian in case she was picky about meat, it went with either red or white wine in case she didn’t care for one, it could sit out for nibbles while we sat and chatted, and, of course, it was delicious. I made hummus, fresh pita, falafel, and tabbouli, but got stuck when it came time to plan a salad.

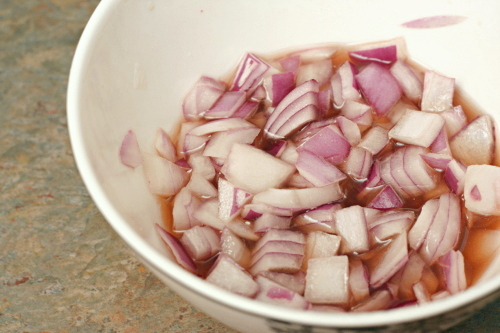
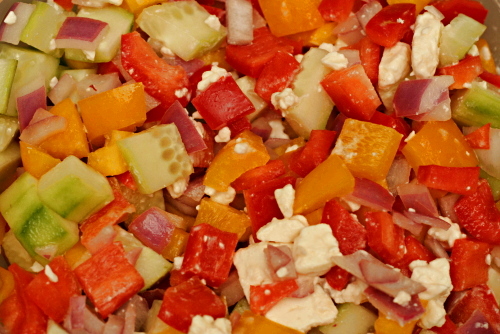
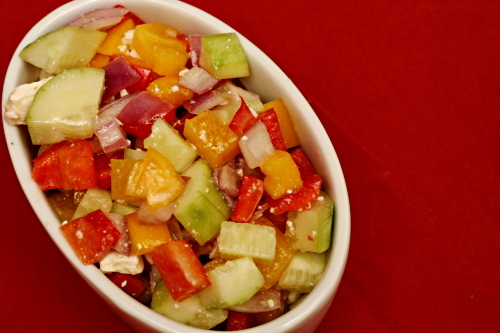
I ended up making a cucumber-tomato salad, which was fine but uninspired. I wish I had known about this pepper salad then. This salad is most definitely inspired. I particularly love the idea of a quick pickle for the red onions to tame their bite.

Peppers are one of the many foods I used to be picky about and now like quite a bit, but I was a little hesitant about a salad that starred them. However, everything in this salad came together perfectly. The sweet peppers were balanced by the tart dressing was balanced by the creamy feta was balanced by the fresh cucumber. I need someone else whose eating habits I’m not familiar with to come visit now that I can make their welcoming meal that much more perfect.

One year ago: Beer-Battered Fish
Two years ago: Green Chile Chicken Enchiladas

Printer Friendly Recipe
Mediterranean Pepper Salad (adapted slightly from Smitten Kitchen)

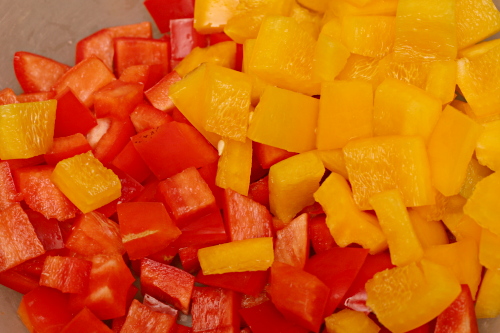
Cut the peppers, cucumbers, and tomatoes while the onion rests in the vinegar solution.

I left out the olives because Dave is not a fan and the tomatoes because…eh, I just wasn’t in a tomato mood.

As much as I loved this salad, it was a little salty for our tastes. For that reason, I’ve decreased the kosher salt in the onion pickling solution from 1 tablespoon (3 teaspoons) to 2 teaspoons. I’ve also increased the feta slightly, as Dave and I felt that the feta really brought everything together.

¼ cup red wine vinegar
¼ cup cold water
2 teaspoons kosher salt
2 teaspoons sugar
½ medium red onion, cut into a ½-inch cubes
3 bell peppers, your choice of colors, cut into ½-inch cubes
1 cucumber, cut into ½-inch cubes
1 cup grape tomatoes, halved
6 ounces firm feta cheese, crumbled
¼ to ½ cup pitted kalamata olives
¼ cup extra virgin olive oil
Salt and pepper to taste

1. Stir together the red wine vinegar, water, kosher salt and sugar in a small bowl until the salt and sugar are dissolved. Add the red onion and set aside for at least 15 minutes.

2. Combine the vegetables, cheese, olives, and drained onions in a large bowl. Pour a quarter cup of the vinegar mixture leftover from the onions over the salad, then drizzle with the olive oil. Adjust the seasonings to taste and either serve immediately or refrigerate for up to one day.

toasted-coconut custard tart

I used to not like coconut. That was dumb. I used to not like a lot of ingredients that are actually very good – ingredients that I’m not sure I’d actually tried. That was also dumb.

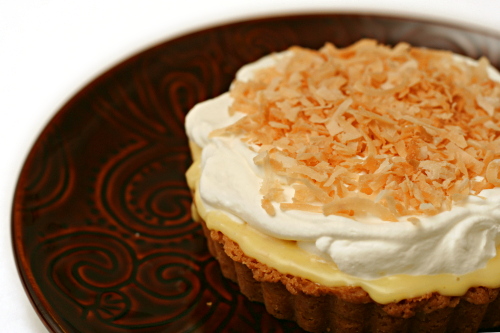
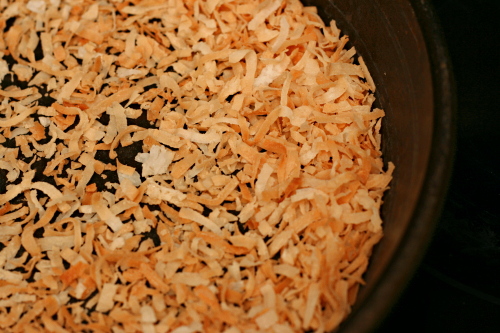
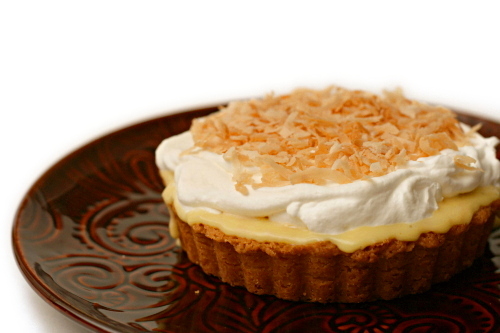
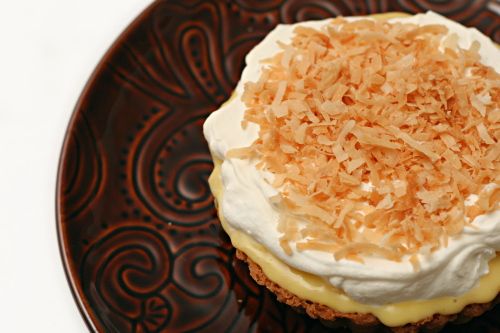
Although I think I would have liked this tart even back in my coconut-adverse days. There’s toasted coconut both in the pastry cream itself and sprinkled over the top of the tart, but it seemed to affect the texture of the tart more than the flavor.

It was good either way, but I wish I’d added a drop of coconut extract to the filling. Or maybe used coconut milk instead of regular milk in the pastry cream? Does that work? It sounds delicious.

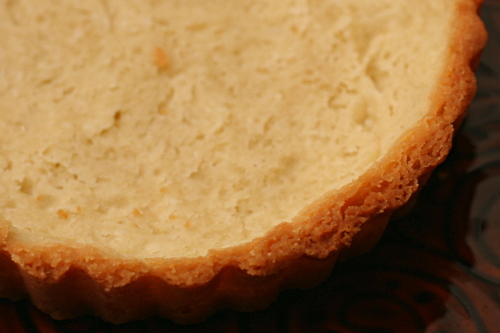
However you make it, you can’t go wrong with crisp tart crust, smooth pastry cream, and light whipped cream topped with crunchy toasted coconut. Beryl chose this tart for Tuesdays with Dorie, and she has the recipe posted.

One year ago: Caramel Crunch Bars

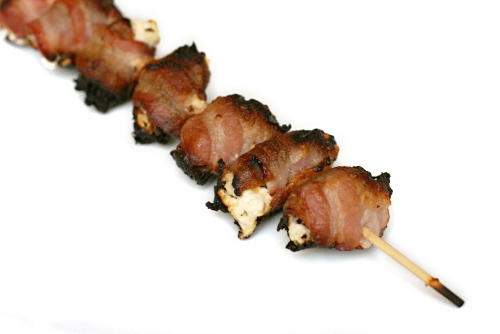
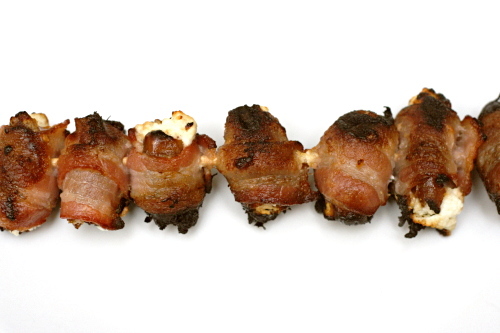
bacon-wrapped goat-cheese-and-almond-stuffed dates

Stuffed dates are part of one my favorite days recently – one of those that, for whatever reason, just ended up being particularly awesome. Some great friends visited us in Philadelphia shortly before we moved. After walking around the famous historical sites and before seeing one of my favorite musicians play; before walking up the famous steps to the art museum and much before eating cheesesteaks at 2am, we ate dinner at Alma de Cuba.

While we all loved our entrees, our drinks, and the ceviche, the star of the show was the bacon-wrapped almond-stuffed dates. Is transcendent too over-the-top a description? It seems appropriate for something that caused each of us to close our eyes and exclaim with every bite.

I had kind of assumed that my bacon-wrapped almond-stuffed date days were behind me when we moved from Philadelphia. I don’t know why it never occurred to me that I could make them myself. I certainly never thought it would be so easy.

And just as good! I mean, it’s missing the friends-visiting, concert-going, downtown-exploring mystique, but it retains other important things – salty bacon, sweet dates, tangy goat cheese, crunchy almonds. And now it isn’t a once in a lifetime treat, like those standout days are.

One year ago: Honey Yogurt Dip
Two years ago: Salmon Cakes with Hashed Brussels Sprouts and Flaky Biscuits

Printer Friendly Recipe
Bacon-Wrapped Goat-Cheese-and-Almond-Stuffed Dates (rewritten from Beantown Baker)

Makes 32 appetizers

32 dates, pitted
4 ounces goat cheese
32 almonds (about ⅓ cup)
16 slices (about 1 pound) bacon, halved lengthwise

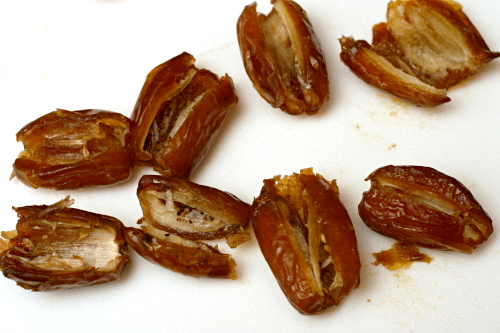
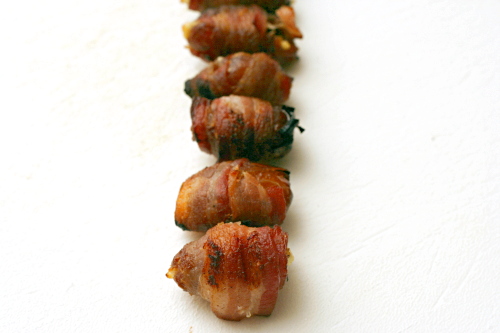
1. With a paring knife, cut through one long edge of each date; unfold the dates to open them up. Use your fingers to stuff both sides of the date with goat cheese. Push an almond into the goat cheese; close up the dates. Wrap each stuffed date with a piece of bacon and secure with a toothpick or skewer.

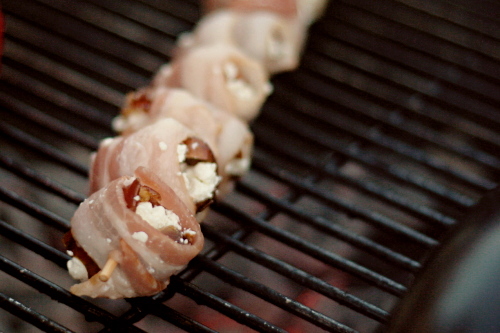
2. If you’re broiling the dates, put them on a rimmed baking sheet. Grill the dates over medium-hot coals or broil them 5 inches from the heating unit until the bacon is cooked through, about 5 minutes per side. Serve immediately or at room temperature.

roasted garlic balsamic white bean dip

No matter how hard I try, I can’t get excited about the Thanksgiving feast. Turkey, stuffing, cranberries – I don’t know, they’re all just fine, but Thanksgiving isn’t the eat-until-you-pop day for me that it is for a lot of people. I do love the idea of a free for all food day though. I also love football, so the Super Bowl tends to be my big overeating event.

But even a day of unapologetic binging requires some vegetables. Besides the ubiquitous salsa and guacamole, that is. Since I was already treating myself, I suppose I could have made a delicious mayonnaise and sour cream based dip, but I wanted to leave plenty of belly space for the brownies, meatball sliders, and that guacamole, so I stuck to a light bean dip for the vegetables.

The problem with bean dip is that it’s always a battle between how healthy it is and how much flavor it has. If you don’t want to add cream cheese or butter or nut butters, it can be difficult to find ingredients to bump up the flavor.

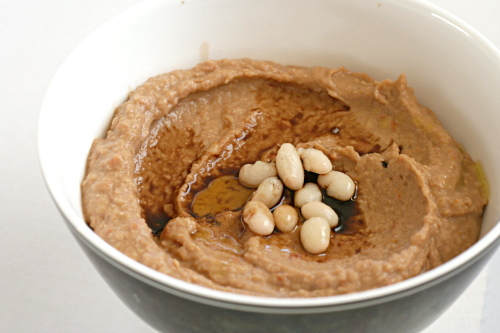
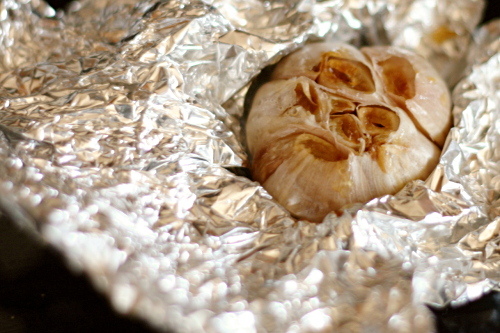
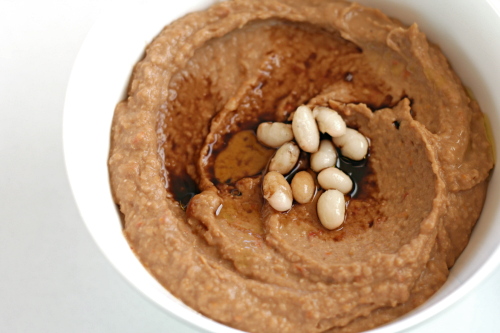
Three strong flavors help make this white bean dip interesting – roasted garlic, sun-dried tomatoes, and balsamic vinegar. The result? A bean dip worth filling up on.

One year ago: Vegetarian Chili
Two years ago: Salmon Pesto Pasta

Printer Friendly Recipe
Roasted Garlic White Bean Balsamic Dip (adapted substantially from Bon Appetit via epicurious)

1 head of garlic, outer papery skin removed
½ teaspoon extra virgin olive oil
4 sun-dried tomatoes packed in oil
¼ teaspoon kosher salt
1 (15-ounce) can white beans (cannellini, navy, great northern), drained and rinsed
pinch black pepper
1 tablespoon balsamic vinegar plus extra for drizzling
1 tablespoon oil from jar of sun-dried tomatoes

1. Adjust an oven rack to the middle position and heat the oven to 400ºF. Cut ¼-inch off of the top of the bulb of garlic. Place the bulb in an 8-inch square of foil and drizzle with ½ teaspoon of the oil. Wrap the garlic in the foil and roast until soft, about 40 minutes.

2. When the garlic is cool enough to handle, squeeze the cloves from their peels and put them in the bowl of a food processor. Add the tomatoes and salt; process until smooth. Add the beans and pepper and continue processing. With the machine running, pour in the balsamic vinegar and sun-dried tomato oil. Adjust the seasonings if necessary, and serve, drizzling with more balsamic vinegar.

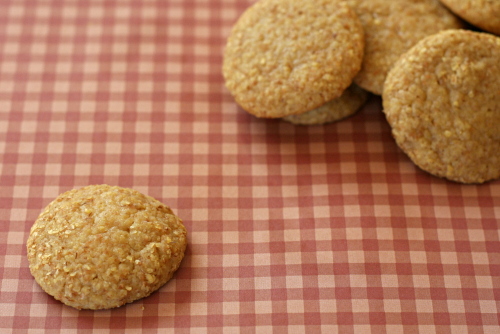
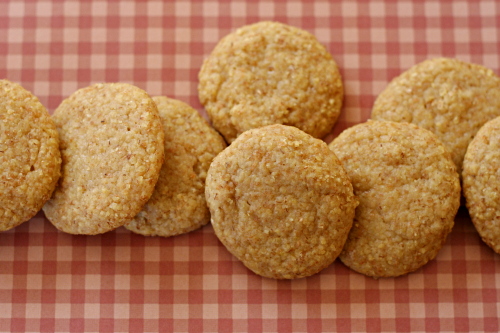
honey-wheat cookies

The problem with wheat germ cookies is that my mind focuses on the wheat germ part instead of the cookie part. So then these are healthy and therefore perfectly acceptable to eat with my tea – before breakfast. Wheat germ, people! Whole grains! Cookie schmookie.

Plus – they’re so good! No joke. I had my doubts too, especially after several weeks of baking delicious chocolate treats for Tuesdays with Dorie. Wheat germ in cookies? But the texture is so perfectly soft and chewy. The lemon was evident but somewhat subtle. The wheat germ added just a taste of bitterness. I was surprised to find that the honey was the strongest flavor, which I love because often the flavor of natural sugars gets lost in the oven.

Michelle chose these great cookies for TWD. She has the recipe posted.

One year ago: Devil’s Food White Out Cake

pasta with baked ricotta and sweet tomato sauce

I’m all about taking water out of ingredients. Zucchini, eggplant, cabbage, tomatoes, tofu, even bread for French toast. Water doesn’t contribute flavor, so if it isn’t improving texture, I have no use for it.

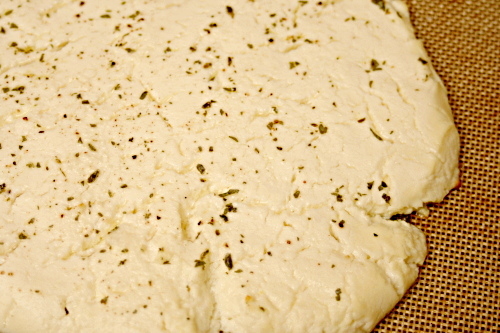
In this recipe, ricotta is drained in cheesecloth for several hours, then baked. What I thought would happen is the cheese would lose a small but significant portion of water during the draining stage, and then it would brown a little in the oven.

I was wrong. My ricotta actually gave off no liquid during straining, and I’m thinking now that the baking isn’t so much to brown the ricotta as to concentrate flavor by evaporating even more liquid.

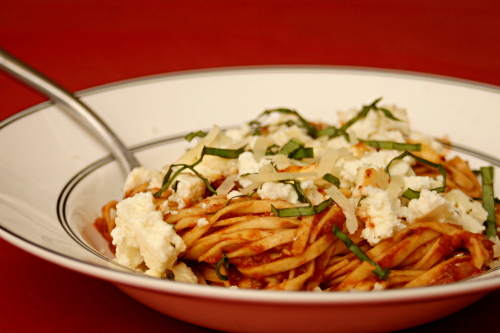
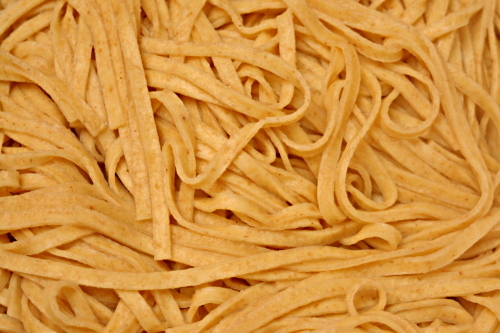
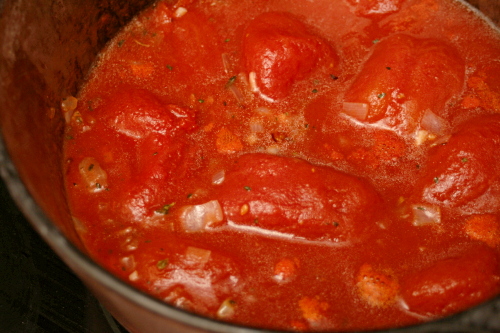
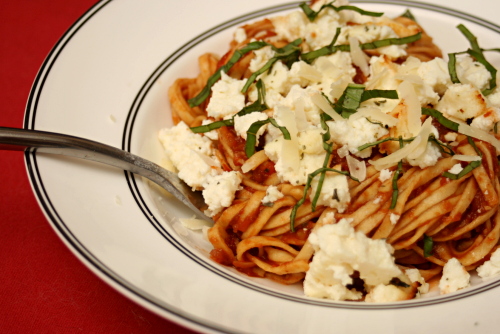
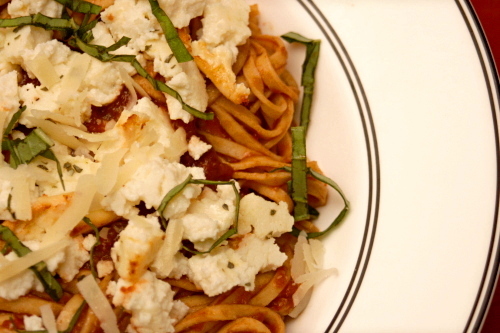
The sauce to accompany the baked ricotta is a simple tomato sauce that is sweetened with balsamic vinegar. I used fresh pasta, which when topped with the sauce, ricotta, a handful a parmesan and a sprinkling of basil, made for a great adaptation of a classic pasta and tomato sauce dish.

One year ago: Pot Roast
Two years ago: Comparison of 4 Vanilla Frosting

Printer Friendly Recipe
Pasta with Sweet Tomato Sauce and Baked Ricotta (adapted from Jamie Oliver via Cate’s World Kitchen)

I used one pound of (store-bought) fresh pasta instead of dried pasta, and it was so good that I think I’ll stick with fresh pasta for this recipe in the future as well.

Serves 4-6

1 (15-ounce) container ricotta
1 teaspoon plus 1 tablespoon olive oil, divided
salt and pepper
½ teaspoon dried oregano, divided
2 large shallots, finely chopped
2 cloves garlic, finely chopped
1 (28-ounce) can whole tomatoes in juice
3 tablespoon balsamic vinegar
1 pound wide pasta, such as pappardelle or fettucine
a handful of fresh basil, torn
½ cup (1 ounce) freshly grated parmesan

1. Line a fine-mesh strainer with several layers of cheesecloth. Spoon the ricotta into the strainer and refrigerate for several hours or overnight.

2. Adjust a rack to the upper-middle position and heat the oven to 450 degrees F. Line a baking sheet with parchment paper or a silicone baking mat. Spread the ricotta onto the baking sheet in a 1-inch layer. Season the ricotta with ¼ teaspoon dried oregano and a generous pinch of both salt and pepper. Rub 1 teaspoon of the olive oil over the seasoned ricotta. Bake for 15 minutes, until dry and slightly browned at the edges.

3. Heat the remaining tablespoon of oil in an 8 to 10-inch skillet over medium heat. Add the shallots and sauté, stirring occasionally, until the edges just start to brown, 6-8 minutes. Stir in the garlic and ¼ teaspoon oregano, and cook, stirring constantly, until fragrant, about 30 seconds. Add the tomatoes and ½ teaspoon salt; bring to a simmer, then lower the heat to medium-low and simmer, stirring occasionally, for 15 minutes. Use a spoon to crush the tomatoes, of, if you’d like a smooth sauce, transfer the mixture to a blender or use an immersion blender to puree the sauce. Stir the balsamic vinegar into the sauce.

4. Meanwhile, bring a large pot of water to a boil. Add 1 tablespoon salt and the pasta to the boiling water and cook according to the package instructions. Drain the pasta, reserving about a cup of the cooking water.

5. Combine the pasta and sauce, thinning the mixture with pasta cooking water if necessary. Fold in the basil and ricotta and top with the parmesan.