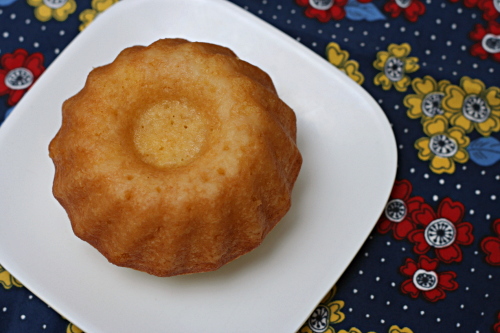
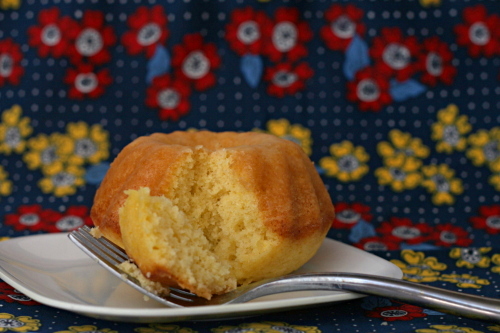
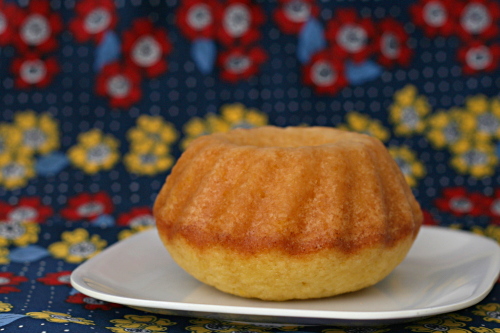
rum-drenched vanilla cake

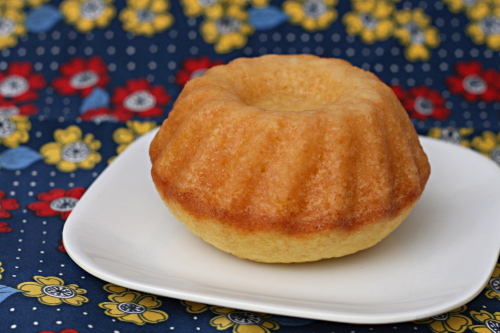
Someone brought a rum bundt cake into work last week, and oh my god, was it good. Tender, extremely moist, and intensely rummy, I could hardly resist grabbing one wedge after another. My officemate, who apparently has far better self-control than I, cut herself a piece and set it aside until the end of the day, six or seven hours later. She regretted the wait as soon as she bit into it and realized that, by then, the rest of the cake was gone. Clearly we needed to get the recipe.

It turns out that the recipe is a doctored cake mix, which just proves that of all the types of prepared, processed foods, cake mix is probably the best at imitating, and in some cases perhaps surpassing, the completely homemade version. And although I can hardly believe this cake I had could be improved upon, and I don’t think the chemicals in one boxed cake mix recipe is going to knock me dead, I’m still too stubborn to use a boxed mix.

A web search yielded nothing but that same recipe, cake mix and oil and rum, over and over. I started thinking of what cake recipe of mine I’d adapt to imitate the recipe I was finding, resigning myself to doing some experimenting.

It took me five days to make the connection that I was searching for a from-scratch rum cake, and I was planning to make rum-drenched vanilla cakes over the weekend. I’m not so smart.

My first impression was that Dorie’s cakes weren’t as moist or tender, although they were fluffy and light with plenty of rum flavor.  Two days later, the cake had ripened, and its texture was very similar to the one I’d eaten at work.  In the future, I might replace the melted butter in the cake with oil, which I think makes cakes moister, but other than that, I think I have my from-scratch rum bundt cake recipe, and I didn’t even have to experiment.

Wendy chose these cakes for Tuesdays with Dorie, and she has the recipe posted. I doubled the salt.

One year ago: Comparison of three white cake recipes
Two years ago: Apple Cheddar Scones
vodka gimlet

Why should food be the only thing I think I can make better than most restaurants? Let’s move on to cocktails!

Vodka gimlets are a good, basic drink, and they’ve come in handy for me a number of times – at a wedding with a terrible wine selection, at another wedding with inexperienced bartenders (“…a gimlet…what’s in that again?”), at cheap bars where the beer isn’t worth drinking.  Oh hi! I’m a snob about alcohol!

At its most basic, a vodka gimlet is simply vodka and Rose’s lime juice. (A gimlet – no ‘vodka’ qualifier – is made with gin instead of vodka.) Rose’s lime juice is bottled sweetened lime juice. This is what makes it such a great drink for when there are limited alcohol choices – there are only two ingredients and the strong lime flavor drowns out the taste of cheap alcohol.

But why use cheap alcohol when I can just as easily – if not as, ahem, cheaply – use the good stuff? And why would I use bottled lime juice when I’m committed to using the freshest ingredients possible in everything I make, whether it be food or drink?

Rose’s lime juice just needs to be replaced by fresh-squeezed limes and simple syrup. That means there are three ingredients instead of two to get in balance in order to make the perfect drink, but I was happy to do some trial and error. Then when I bought a new type of vodka, I found that I needed to tweak my ratios a bit. Both vodkas had the same alcohol content, but the new brand (Ciroc) was apparently a bit smoother than the previous one (Effen).

Both vodkas make one heck of a drink. Be warned: with high quality vodka, you need a fair amount of it to balance the sour lime. Don’t drink this like you would beer or even wine. But definitely do drink it, because it is oh so good. I’m so glad it’s Friday afternoon and I’ve only got a few hours to go before I can mix myself up one of these!

One year ago: Black Bean Squash Burritos
Two years ago: Blueberry Poppy Seed Brunch Cake

Printer Friendly Recipe
Vodka Gimlet

This is the ratio I use with Ciroc vodka. With Effen vodka, I found it was best to use slightly less vodka. I like my drinks to be strong, both in alcohol flavor and in acidity. You might end up tweaking the ratios slightly to get a drink that’s perfect for you. (Trust me that good alcohol does actually taste good. Don’t equate it with the crap you got drunk on in college. Okay, the crap your friends got drunk on. You were far too mature for those shenanigans.)

4 parts good vodka
2 parts freshly squeezed lime juice
1 part simple syrup (recipe below)
ice

Combine all ingredients in a cocktail shaker, attach the lid and shake shake shake. Strain into a glass. Sip slowly or pay the price.

Simple Syrup

½ cup water
½ cup granulated sugar

Combine water and sugar in a small saucepan and heat over medium-high heat until boiling, stirring until the sugar melts. Remove from the heat and cool completely before using. Store in the refrigerator indefinitely.

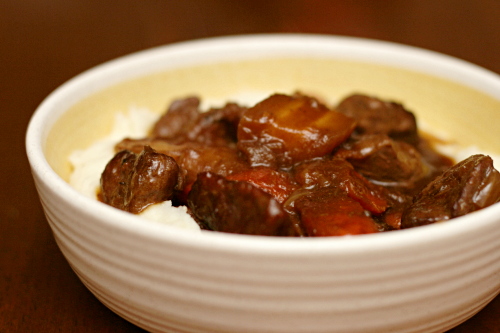
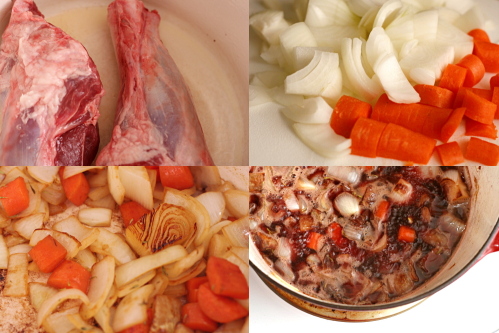
lamb stew

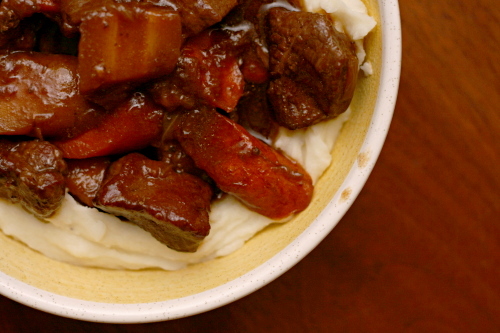
Whenever I eat lamb, my first whiff of it always seems a little…off. Is lamb like feety cheese – stinky, but in a good way? Or am I just attuned to beef, and I’m surprised when the lamb smells different? Whatever, I’ve decided that I officially like lamb. Stinky or not.

This stew is not any sort of authentic ethnic lamb stew – not Morrocon or Irish or whatever. It’s just lamb stew. It’s what I was in the mood for at the time – chunks of lamb, onions, root vegetables, thyme, and dark rich beer.

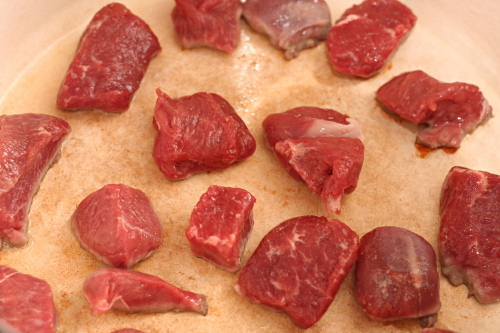
My only uncertainty was which type of lamb meat to use. I usually use beef chuck roast for stew, but what is that equivalent to for lamb? Certainly not sirloin, which was one of my few options. I also didn’t want to use expensive rib chops. Leg? Too big. Shanks? Dur…I don’t know. I went with a combination of sirloin meat and loin chops. I think blade chops would be a great option, but my store didn’t have them.

Whatever I did must have worked though, because the stew was just great. So rich and hearty and comforting. And distinctively…lamby. Which is a good thing.

One year ago: German Apple Pancake

Printer Friendly Recipe
Lamb Stew

The type of lamb to use is ill-defined, because a variety of lamb cuts might not be available and a number of different cuts will work. If you can find them, go for blade chops. I used a combination of loin chops and a sirloin steak, and it worked out very well. If the cut you use contains bones, use the higher amount of meat (around 3 pounds); otherwise, use around 2 pounds of meat.

I served this over mashed potatoes, which I really enjoyed. You can also replace the parsnips with potatoes if you want something a little more like traditional stew.

Serves 6

3 tablespoon vegetable oil
2-3 pounds lamb meat, fat trimmed and cut into 1-inch chunks, bones reserved (see note)
salt
3 onions, chopped course
1 (12-ounce) bottle of stout
2 cups water
½ teaspoon black pepper
1 teaspoon dried thyme (or 2 sprigs fresh)
12 ounces carrots, halved lengthwise and sliced on a slight bias about ½ inch thick
12 ounces parsnips, halved lengthwise and sliced on a slight bias about ½ inch thick
¼ cup minced parsley

1. Adjust a rack to the lower-middle position and heat the oven to 325 degrees. Heat 1 tablespoon of the oil in a 5-quart Dutch oven over medium to medium-high heat. Add half of the meat, with pieces spaced about one inch apart. Cook without stirring for 2-3 minutes, until the first side is dark brown. Turn each piece to another flat side and cook for another 2-3 minutes, until the second side is dark brown. Continue cooking and turning the pieces until all sides are dark brown, about 10 minutes. Remove the lamb from the pot and place it on a plate. Repeat with another tablespoon oil and the remaining lamb. (If you use a 7-quart Dutch oven instead of a 5-quart, you might be able to fit them all in one batch.)

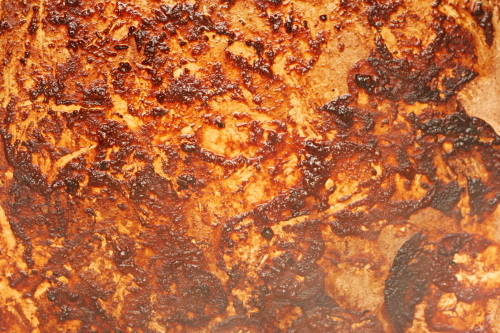
2. Reduce the heat to medium. Add the last tablespoon of oil to the empty, unrinsed pot, then add the onions and a pinch of salt. Sauté the onions, scraping the browned bits from the bottom of the pot and stirring occasionally, for 8-10 minutes, until the onions are softened and browned around the edges.

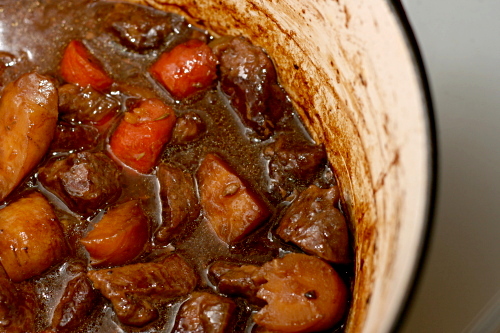
3. Add the browned meat, lamb bones, beer, water, 1½ teaspoons salt, pepper, and thyme to the pot with the onions. Bring to a simmer over medium-high heat, then cover the pot and place it in the oven. Cook for one hour, uncovered.

4. Add the carrots and parsnips to the stew and cook for another hour, or until the meat is tender and the vegetables are softened. Remove the lamb bones, stir in the parsley, adjust the salt and pepper if necessary, and serve.

bourbon pound cake

Copy of IMG_1180

Sometimes it’s the recipes that seem the simplest that can give us the most trouble. I can’t tell you how many times I’ve heard people lamenting about their chocolate chip cookies. We think that because the recipe is ubiquitous that we should all do it well, but truthfully, many cookies are finicky – if your butter is too warm, or your flour measurements are off slightly, or your oven temperature isn’t stable, your cookies can end up flat or greasy or burned.

Copy of IMG_0585

Pound cake, with only a few ingredients, is often even more fussy. Those ingredients need to be combined just right to produce a light, moist, buttery cake. In fact, I think pound cake is the perfect recipe to teach yourself the particulars of baking, because every detail counts – the eggs should be room temperature, the butter needs to be soft but not too soft, the sugar and eggs have to be gradually added to the butter mixture, the flour must be sifted and gently folded into the batter. These steps can make or break a traditional pound cake, and following them carefully will also improve your cookies and layer cakes.

Copy of IMG_0566

Fortunately, this recipe makes it easy on you by separating the eggs, beating the whites until they’re fluffy and light, and folding the meringue mixture into the dough at the end. The light egg whites provide insurance against a dense cake without making it dry.

Copy of IMG_1166

Also, bourbon. Is good.  I suppose you can leave it out if you’re not into alcohol or you just want a great classic pound cake, but the bourbon is great in this because the flavor really stands out. Primarily because the bourbon’s mild smokiness compliments the other flavors, but also because that’s just a heck of a lot of bourbon to add to a cake.

Copy of IMG_1172

I used to think this other recipe was my favorite pound cake, but not anymore. This one is not only more dependable, it’s just better. It rises higher, plus? It tastes like bourbon.

Copy of IMG_1173

If you’ve been directed here from the Intelligencer and would like to see the cookies also discussed in the article, click here.

Printer Friendly Recipe
Bourbon Pound Cake

12-16 slices

It’s easier to separate eggs when they’re cold, but they behave better in baking when they’re at room temperature. I suggest separating them when you take the butter out of the fridge to warm, then leaving them at room temperature for about an hour, until you’re ready to bake.

The easiest way to sift ingredients if you don’t have a sifter is to put them in a fine-mesh strainer and shake and tap the pan over the bowl that you’re sifting into.

You can also double this recipe and bake it in a tube pan for about 90 minutes.

4 eggs, separated
1¼ cup (8¾ ounces) sugar, divided
16 tablespoons (2 sticks) unsalted butter, softened
½ teaspoon salt
3 tablespoons bourbon
1 teaspoon vanilla extract
1½ cup (6 ounces) cake flour

1. Adjust an oven rack to the middle position and heat the oven to 350ºF. Butter and flour (or spray with baking spray) a 9-by-5-inch loaf pan.

2. In a stand mixer fitted with the whisk attachment (or in a medium-sized mixing bowl with a hand-held mixer), beat the egg whites on medium-high speed until foamy. Increase the speed to high and continue beating until they form soft mounds. With the mixer on medium-high speed, gradually add ½ cup (3.5 ounces) of sugar. Increase the speed to high and beat until the mixture is glossy and holds stiff peaks. If you’re using a stand mixer and only have one bowl, transfer the egg white mixture to another bowl and rinse and dry the mixer bowl.

3. Fit the mixer with the paddle attachment and add the butter to the mixer bowl (or a large mixing bowl with a hand-held mixer). Beat on medium-low speed until the butter is soft and creamy, about 1 minute. Add the salt, then, with the mixer running, slowly pour in the remaining ¾ cup (5.25 ounces) sugar. Continue mixing on medium speed until the mixture is light and fluffy, 2-3 minutes. Meanwhile, whisk the egg yolks with the bourbon and vanilla extract in a small measuring cup. With the mixer running, slowly pour in the egg yolk mixture. Once the eggs are in, stop and scrape the sides of the bowl, then continue beating for another 2-3 minutes.

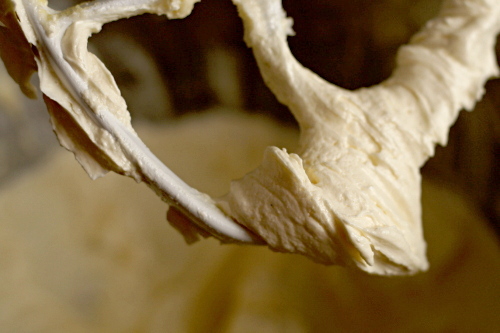
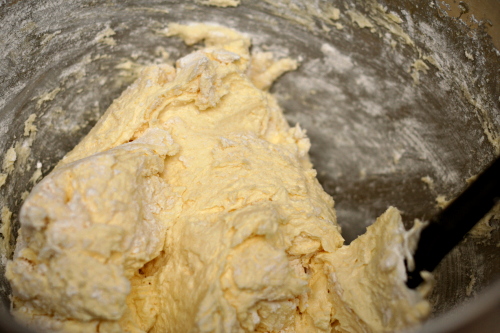
4. Sift one-third of the flour over the butter/egg mixture. Using a large rubber spatula, gently fold in the flour until it’s evenly dispersed but not completely mixed in (as shown in the fourth photo). Add half of the beaten egg whites and continue folding until evenly dispersed. Repeat with another third of the flour, then the rest of the egg whites. Sift the remaining flour into the batter and fold until it’s completely mixed in and there are no pockets of dry flour.

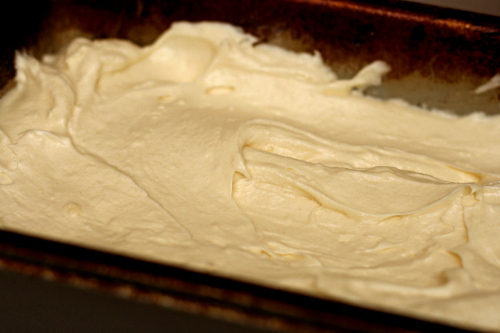
5. Scrape the batter into the prepared pan and smooth the top. Bake until golden brown and a toothpick inserted into the center of the loaf comes out clean, 45-60 minutes. If the top of the cake is getting too dark before the center is baked, lay a sheet of aluminum foil loosely over the cake. Cool the cake in the pan on a wire rack for 15 minutes, then use a thin knife or spatula to loosen the cake from the edges of the pan. Invert the pan onto the wire rack, then turn it right-side up to continue cooling. Serve the cake at room temperature.

Copy of IMG_0631

I compared this cake made with cake flour (left) and all-purpose flour (right).  The version made with cake flour rose higher and was lighter and fluffier, but the cake made with all-purpose flour was still very good.

brioche raisin snails

Copy of IMG_6438

I’m very comfortable cutting recipes in half. Some people say that they don’t like to deal with the math, but I come from a family of three engineers and a math teacher, so I can handle math. Plus, I’m cooking for just two people now, and I lived alone for six years before that, so my options are either to make half-recipes, throw a lot of food away, or eat the same thing for weeks. Given those choices, I take fractions all the way.

Copy of IMG_6424

Even if a recipe specifically recommends making the full recipe because smaller amounts are harder to work with – eh. Whatever. I usually cut it in half anyway. Cakes, caramel, bread dough, whatever. You’d be surprised what you can get away with, although you might, as in this case, have to split the occasional egg in half.

Copy of IMG_6425

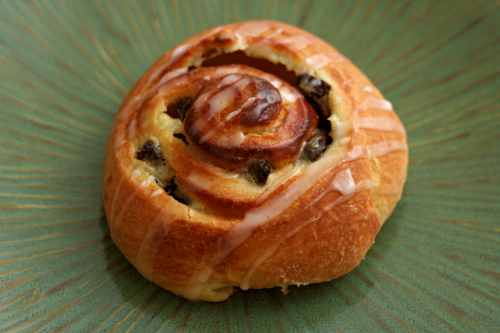
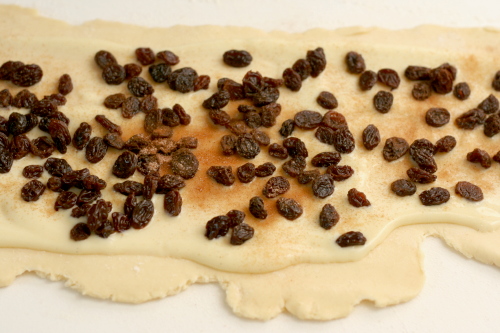
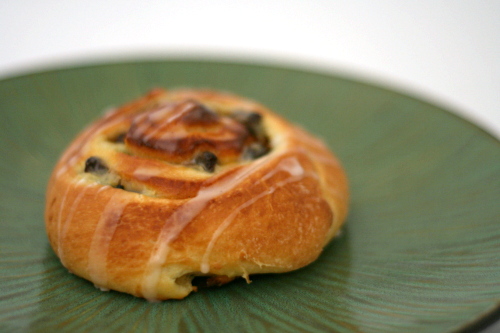
Dorie’s brioche raisin snails are a rich yeast dough with pastry cream and flambéed raisins rolled into it. It probably sounds like quite a bit of work, and frankly, it is, but it’s a nice change from cinnamon rolls if you find yourself making those often.

Copy of IMG_6426

If you follow the recipe exactly, you’ll end up with twice as much brioche as you need for the snails, so you can always make some of Dorie’s fantastic sticky buns too. Or, just cut the brioche recipe in half like I did. Does anyone really need two different kinds of buttery tender breakfast breads tempting them at once?

Copy of IMG_6429

One year ago: Pumpkin Ginger Muffins

Printer Friendly Recipe
Brioche Raisin Snails
(from Dorie Greenspan’s Baking: From My Home to Yours)

Makes about 12 snails

You’ll only need half of the brioche dough, and while Dorie recommends making the full recipe and saving half for later (the dough takes well to freezing), I found that I could successfully make half the recipe if I used a faster mixing speed than the recipe recommends. If you find that there isn’t enough dough for the dough hook to work effectively, knead with the paddle attachment, switching to the dough hook for just the last few minutes of kneading. The full recipe is presented below.

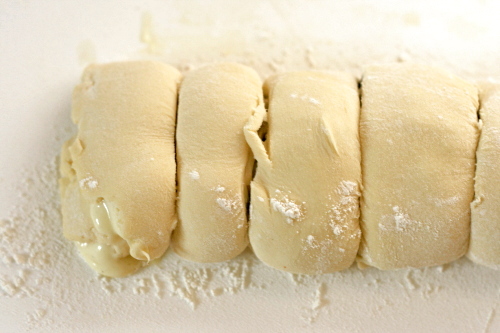
You can shape the rolls into a log and then wrap the log well and freeze it. When you’re ready to bake, let the log defrost in the refrigerator overnight, then cut the rolls and let them rise at room temperature.

Brioche:
2 packets (4½ teaspoons) instant yeast
⅓ cup warm water
⅓ cup warm milk
3¾ cups (27.6 ounces) all-purpose flour
2 teaspoons salt
3 large eggs, at room temperature
¼ cup sugar
24 tablespoons (3 sticks) unsalted butter, at room temperature but still slightly firm

Pastry cream:
1 cup whole milk
3 large egg yolks
¼ cup (1.75 ounces) sugar
2½ tablespoons cornstarch, sifted
¾ teaspoon pure vanilla extract
1½ tablespoons unsalted butter, at room temperature, cut into bits

Assembly:
1 cup moist, plump raisins
3 tablespoons dark rum
1½ teaspoons sugar
Scant ¼ teaspoon ground cinnamon

Glaze:
¾ cup confectioners’ sugar
about 1 teaspoon water
drop of pure vanilla extract

For the brioche: Put the yeast, water, and milk in the bowl of a stand mixer and, using a wooden spoon, stir until the yeast is dissolved. Add the flour and salt, and fit the mixer with the dough hook, if you have one. Toss a kitchen towel over the mixer, covering the bowl as completely as you can – this will help keep you, the counter and your kitchen floor from being showered in flour. Turn the mixer on and off in a few short pulses, just to dampen the flour (yes, you can peek to see how you’re doing), then remove the towel, increase the mixer speed to medium-low and mix for a minute or two, just until the flour is moistened. At this point you’ll have a fairly dry, shaggy mass.

Scrape the sides and bottom of the bowl with a rubber spatula, set the mixer to low and add the eggs, followed by the sugar. Increase the mixer speed to medium and beat for about 3 minutes, until the dough forms a ball. Reduce the speed to low and add the butter in 2-tablespoon-size chunks, beating until each piece is almost incorporated before adding the next. You’ll have a dough that is very soft, almost like a batter. Increase the speed to medium-high and continue to beat until the dough pulls away from the sides of the bowl, about 10 minutes.

Transfer the dough to a clean bowl (or wash out the mixer bowl and use it), cover with plastic wrap and leave at room temperature until nearly doubled in size, 40 to 60 minutes, depending upon the warmth of your room.

Deflate the dough b lifting it up around the edges and letting it fall with a slap into the bowl. Cover the bowl with plastic wrap and put it in the refrigerator. Slap the dough down in the bowl every 30 minutes until it stops rising, about 2 hours, then leave the covered dough in the refrigerator to chill overnight.

Divide the dough in half, reserving half for another use.

For the pastry cream: Bring the milk to a boil in a small saucepan.

Meanwhile, in a medium heavy-bottomed saucepan, whisk the yolks together with the sugar and cornstarch until thick and well blended. Still whisking, drizzle in about 2 tablespoons of the hot milk – this will temper, or warm, the yolks so they won’t curdle. Whisking all the while, slowly pour in the remainder of the milk. Put the pan over medium heat and, whisking vigorously, constantly and thoroughly (making sure to get into the edges of the pot), bring the mixture to a boil. Keep at a boil, still whisking, for 1 to 2 minutes, then remove the pan from the heat.

Whisk in the vanilla extract. Let sit for 5 minutes, then whisk in the bits of butter, stirring until they are fully incorporated and the pastry cream is smooth and silky. Scrape the cream into a bowl. You can press a piece of plastic wrap against the surface of the cream to create an airtight seal and refrigerate the pastry cream until cold or, if you want to cool is quickly, put the bowl into a larger bowl filled with ice cubes and cold water, and stir the pastry cream occasionally until it is thoroughly chilled, about 20 minutes.

To assemble: Line one large or two smaller baking sheets with parchment or silicone mats.

Put the raisins in a small saucepan, cover them with hot water and let them steep for about 4 minutes, until they are plumped. Drain the raisins, return them to the saucepan and, stirring constantly, warm them over low heat. When the raisins are very hot, pull the pan from the heat and pour over the rum. Standing back, ignite the liquor. Stir until the flames go out, then cover and set aside. (The raisins and liquor can be kept in a covered jar for up to 1 day.)

Mix the sugar and cinnamon together.

On a flour dusted surface, roll the dough into a rectangle about 12 inches wide and 16 inches long, with a short end toward you. Spread the pastry cream across the dough, leaving 1-inch strip bare on the side farthest from you. Scatter the raisins over the pastry cream and sprinkle the raisins and cream with the cinnamon sugar. Starting wit the side nearest you, roll the dough into a cylinder, keeping the roll as tight as you can. (At this point, you can wrap the dough airtight and freeze it up to 2 months; see Storing for further instructions. Or, if you do not want to make the full recipe, use as much of the dough as you’d like and freeze the remainder.)

With a bread knife or unflavored floss, trim just a tiny bit from the ends if they’re ragged or not well filled, then cut the log into rounds a scant 1 inch thick. Put the snails on the lined baking sheet(s), leaving some puff space between them.

Lightly cover the snails with wax paper and set the baking sheet(s) in a warm place until the snails have doubles in volume – they’ll be puffy and soft – about 1 hour and 30 minutes.

When the snails have almost fully risen, preheat the oven: depending on the number of baking sheets you have, either center a rack in the oven or position the racks to divide the oven into thirds and preheat the oven to 375ºF.

Remove the wax paper, and bake the snails for about 25 minutes (rotate the sheets, if you’re using two, from top to bottom and front to back after 15 minutes), or until they are puffed and richly browned. Using a metal spatula, transfer the snails to a cooling rack.

Copy of IMG_6434

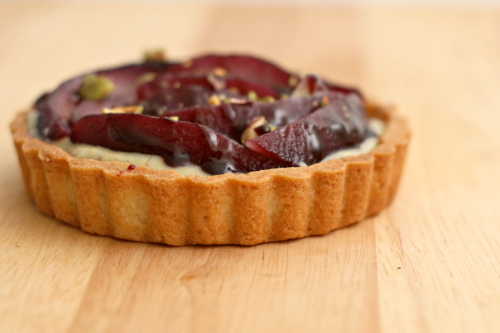
rosy poached pear and pistachio tart

Copy of IMG_1364

I’m not really good with pears. I don’t know much about them, so I never buy them. And, of course, because I never buy them, I don’t learn much about them. Which types are best for baking and for eating? When are they in season? How do I know when they’re ripe? How long do they take to ripen after you buy them?

Copy of IMG_1336

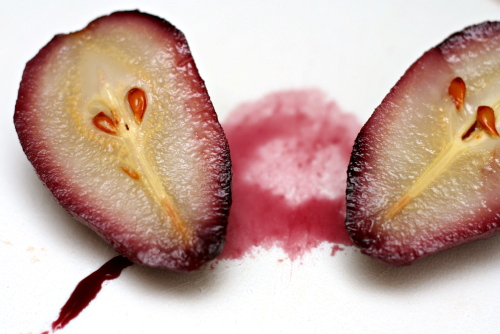
Due to my lack of pear knowledge, I was a little worried about how my tart would come out. I should have looked up what kind of pear to use, plus I forgot to buy mine early so it would have time to ripen before I needed to make the tart.

Copy of IMG_1352

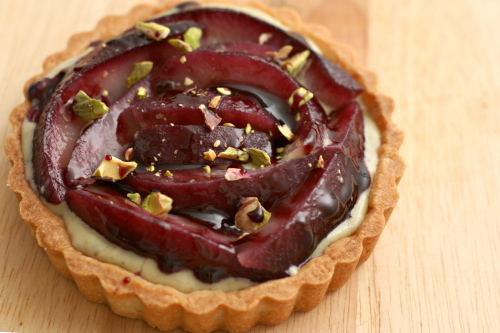
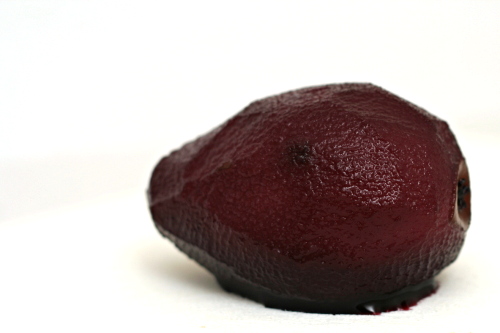
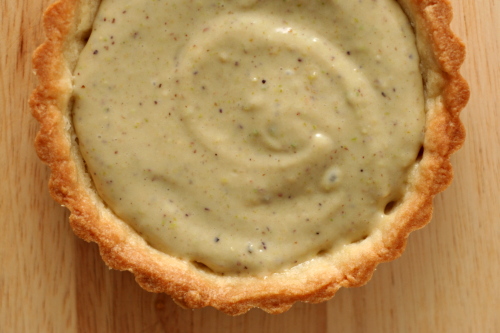
It probably would have been a little better if my pear had been softer, but, as it was, this was a pretty darn good tart. I mean, the pear is cooked in wine for over half an hour – how could that be bad? Plus, pastry cream is just delicious, although pistachio pastry cream resembles split pea soup a little too closely for my comfort. Good thing it’s covered by that beautiful purple poached pear!

Copy of IMG_1355

Lauren chose this for Tuesdays with Dorie and she has the recipe posted.

One year ago: Linzer Sablés

Copy of IMG_1361

herbed lamb chops with pinot noir sauce

Copy of IMG_0741

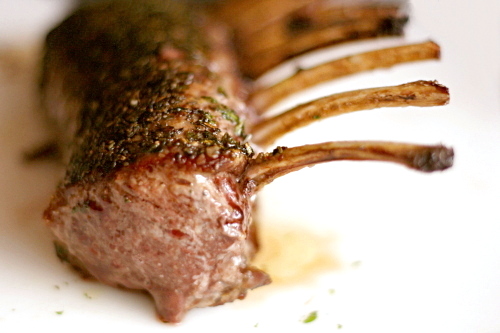
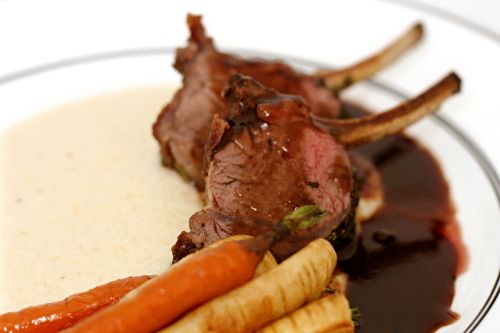
I don’t even know how to describe to you how awesome this lamb was. I think Dave and I spent the whole meal exclaiming over it. We’d sat down to eat, thinking, sure, dinner, yum, should be good. We each poured ourselves a glass of the wine that was leftover from making the sauce, we were actually going to eat at the table, we had some music playing. It was nice.

Copy of Copy of IMG_0675

And then we started eating and realized that this meal wasn’t “nice.” This meal was amazing. We decided that the wine wasn’t rich enough to compliment the food and opened a different bottle. We ate seconds. We drank more wine. We started dancing in the living room. It wasn’t just the meal that went from nice to amazing when we started eating; it was the entire night.

Copy of Copy of IMG_0709

In retrospect, duh. If you’re making lamb broth from scratch for the base of the wine sauce that you’re serving over rack of lamb, it better knock some socks off. It did.

Copy of IMG_0724

One year ago: Caramel Cake

Printer Friendly Recipe
Herbed Lamb Chops with Pinot Noir Sauce (from Bon Appétit through epicurious.com)

Serves 8

I couldn’t find any of the lamb parts suggested for the sauce and used shank instead, which isn’t the same thing at all, but worked nonetheless.

Sauce:
1 tablespoon vegetable oil
3 pounds lamb neck stew meat or lamb riblets
1 pound onions, coarsely chopped
1 large carrot, chopped
4 large garlic cloves, chopped
1 tablespoon herbes de Provence
4⅓ cups Pinot Noir or other dry red wine
3 cups low-salt chicken broth
1 tablespoon butter, room temperature
2 teaspoons all-purpose flour

Lamb:
1 cup finely chopped fresh Italian parsley
¼ cup finely chopped fresh thyme
¼ cup finely chopped fresh rosemary
¼ cup finely chopped fresh sage
1 tablespoon ground black pepper
5 tablespoons olive oil, divided
3 1½-pound well-trimmed 8-rib racks of lamb, preferably frenched

1. For the sauce: Heat the oil in a heavy large pot over medium-high heat. Add the lamb and sauté until deep brown, turning occasionally, about 18 minutes. Using tongs, transfer the lamb to a bowl. Add the onions, carrot, garlic, and herbes de Provence to the pot. Sauté until the vegetables are deep brown, about 8 minutes. Add the wine and broth to the pot; return the lamb and any accumulated juices to the pot. Bring to a boil, reduce the heat to medium-low, and simmer uncovered 1½ hours. Strain into a large bowl, pressing on the solids in the strainer to release all of the stock. Spoon off any fat from the surface of the stock; return the stock to the same large pot. Simmer until reduced to 1⅓ cups, about 15 minutes.

3. Mix the butter and flour in a small bowl to a smooth paste. Whisk the paste into the stock. Simmer the sauce until it’s slightly thickened and smooth, whisking constantly, about 1 minute longer. Season with salt and pepper. (Can be prepared 1 day ahead. Transfer to a small saucepan, cover, and chill. Rewarm before using.)

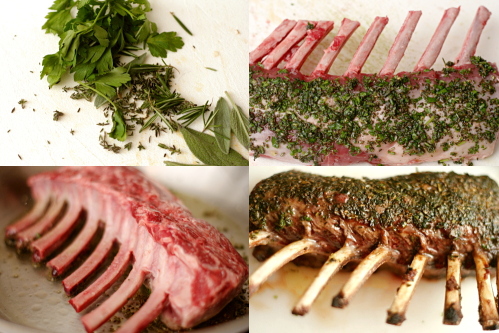
4. For the lamb: Stir the fresh herbs and pepper in a medium bowl to blend. Add 2 tablespoons oil and mix until the herbs stick together. Sprinkle the lamb racks with salt. Firmly press ⅓ of herb mixture over the rounded side of each rack to cover. (Can be prepared 1 day ahead. Place on large rimmed baking sheet. Cover; chill.)

5. Preheat the oven to 350°F. Heat 3 tablespoons oil in a large nonstick skillet over medium-high heat. Add 1 lamb rack to the skillet, herbed side down. Sauté until browned, about 4 minutes. Turn the rack over and sauté until browned, about 3 minutes more. Place the rack, herbed side up, on a rimmed baking sheet. Repeat, fitting the remaining racks on the same sheet.

6. Roast the lamb until a thermometer inserted into the center registers 135°F for medium-rare, about 25 minutes. Let the lamb rest on the sheet for 15 to 20 minutes. Cut the lamb between the bones into individual chops. Arrange 3 chops on each plate. Drizzle with sauce and serve.
Copy of IMG_0687

This would make a great main dish for a nice dinner party, not only because it’s so good, but because so much of the recipe can be completed in advance. I suggest serving the lamb over Soft and Sexy Grits with roasted root vegetables on the side. A rich red wine like cabernet sauvignon is a great accompaniment to the lamb; we found that the pinot noir used in the sauce simply couldn’t stand up to the powerful flavors.
bacon-wrapped scallops with port reduction

Copy of IMG_0154

I don’t consider myself a picky eater, but I’m been having some problems with shellfish lately. And I hate that it’s a textural issue, because then I know it’s all in my head. With scallops, I think to myself that if it’s so soft, it must be undercooked, right? And then I spend the whole meal worrying about it.

Copy of IMG_0105

Which, geez, people eat scallops raw, I think I can handle them medium-rare, you know? Plus overcooked scallops are terrible, so it’s better to err on the side of less cooked.

Copy of IMG_0132

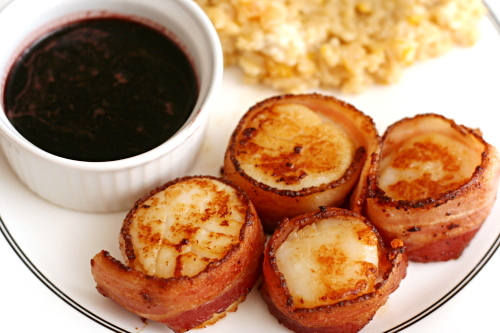
But while I sat and squirmed while I ate my scallops, trying not to think about whether they could have used a few more minutes on the stove, Dave gushed over them. Dave loves scallops. And bacon.

Copy of IMG_0146

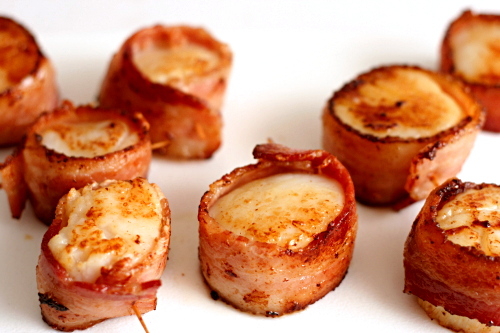
Fortunately, the flavors really are fantastic. The subtle sweetness of the scallops goes nicely with the salty bacon, and the rich port sauce is a perfect accompaniment. The sauce is intense, so I liked to dip just the smallest corner of a scallop into it. Mmm. Especially tasty on the crispy browned bites. Because those are the only ones that I trust are cooked enough.

Copy of IMG_0149

One year ago: Roasted Brussels Sprouts

Printer Friendly Recipe
Bacon-Wrapped Scallops with Port Reduction (adapted from Gourmet, but really epicurious)

8 first-course servings or 4 main-course servings

I had a lot of random extra bacon scraps, because the scallops were too big for half a piece of bacon to wrap around each and too small for a full piece.

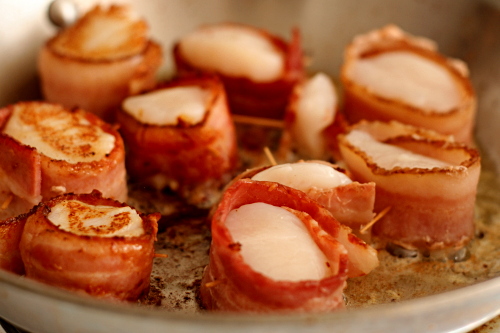
You see how some of my bacon strips are taller than the scallops? You don’t want that. Trim the edges of the bacon if you need to, because otherwise the scallop doesn’t sit against the pan evenly and it doesn’t get as nicely browned.

The scallops can be wrapped in bacon 4 hours ahead and chilled, covered. Sauté just before serving. The port reduction can be made 1 day ahead and chilled, covered. Reheat before serving.

Port reduction:
2 cups ruby port
½ cup granulated sugar
1½ teaspoons whole black peppercorns
1 sprig rosemary

Scallops:
16 thin slices (about 16 ounces) bacon
16 sea scallops (about 1 pound), tough side muscle discarded if attached
1 tablespoon extra-virgin olive oil
2 tablespoons unsalted butter

1. For port reduction: Bring port, sugar, peppercorns, and rosemary to a simmer in a 2-quart saucepan over moderately low heat, stirring until sugar is dissolved. Remove from heat, then carefully ignite port with a kitchen match, letting flames die down (this will take a few minutes). Simmer over moderately low heat until sauce is thickened and reduced to about ½ cup, about 30 minutes.

2. For scallops: Heat a 12-inch heavy skillet over moderate heat, then cook the bacon until some fat has rendered and the edges of the bacon start to brown, about 1½ minutes per side. Transfer the bacon to paper towels to drain.

3. Pat the scallops dry and season them with salt and pepper. When the bacon is cool enough to handle, wrap a piece of bacon around each scallop and pierce scallop with a toothpick to secure.

4. Heat the oil and butter in a clean skillet over moderately high heat until hot but not smoking. Sauté the scallops, turning them once, until the bacon is browned and the scallops are opaque, about 5 minutes total. Transfer to a plate and serve with port reduction for dipping.

risotto with swiss chard

Copy of IMG_6075

Although I think that adding green pepper is the easiest way to ruin otherwise perfectly good pizza, I’m not in general a picky eater. There are no common ingredients that I refuse to eat, I’m game to try just about anything, and I think even green pepper has its place. (Caveat: margarine and the like – gross. But that stuff doesn’t count.)

On the other hand, sometimes I do have problems wrapping my mind around certain things. For example, I love sushi, love it, and make an opportunity to eat it once every week or two, but somewhere, in the back of my mind, when I eat tuna sashimi, I’m still thinking “ew, raw fish.”

Copy of IMG_6060

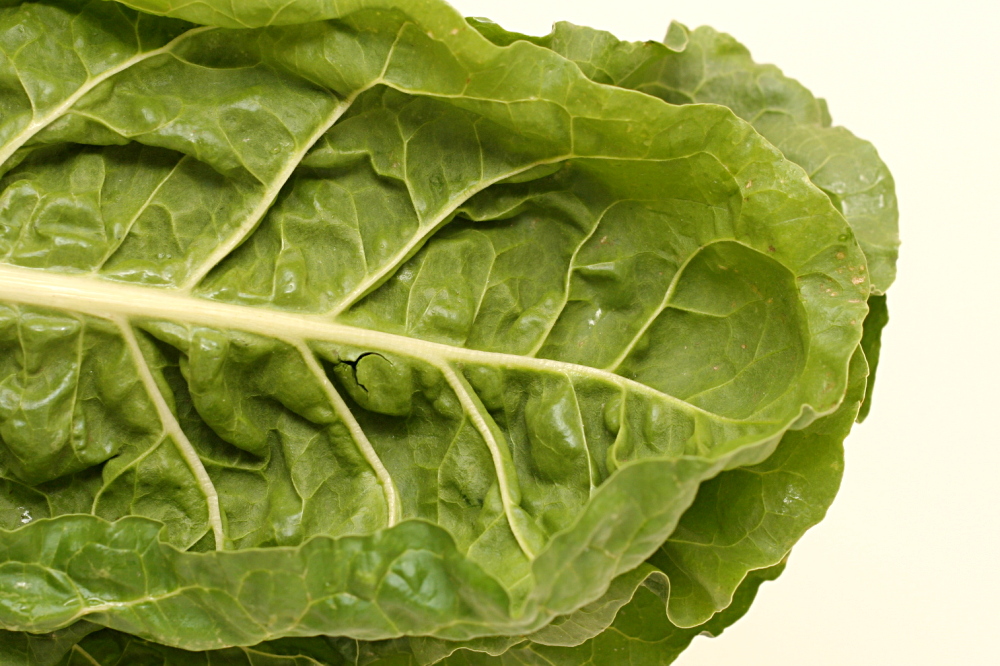
A year or two ago, I realized that I really like kale, and you might think that would lead me to believe I’d also enjoy other hearty greens, like swiss chard. But I had it in my head that swiss chard would be bitter and mushy. It took me a long time to convince myself to try it.

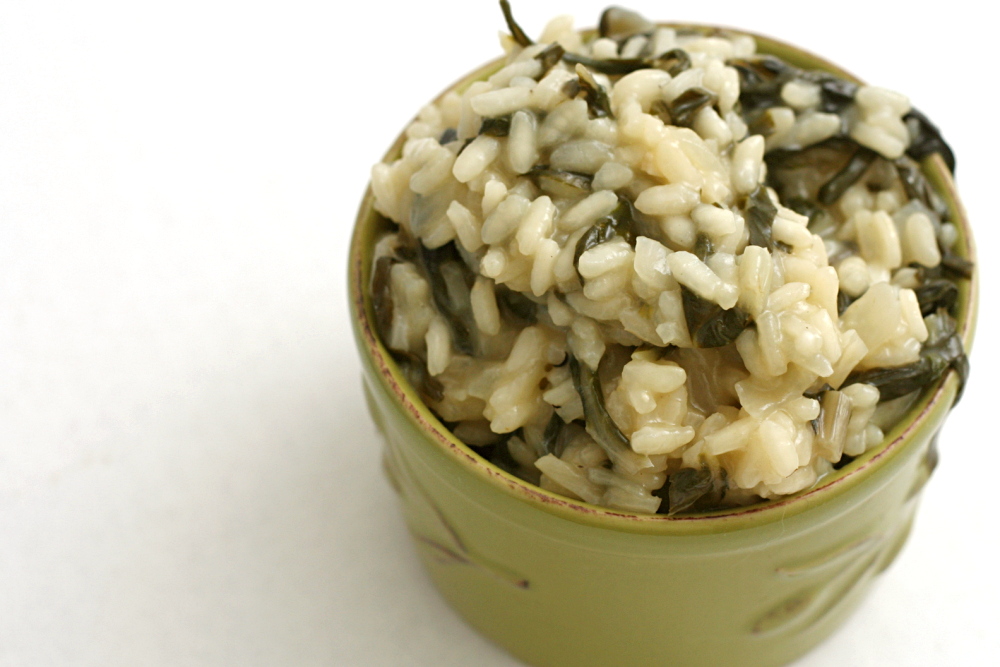
Risotto is a really good way to introduce new vegetables. For one thing, it’s so freakin’ good on its own, and the flavors go with a lot of different ingredients. For another, it makes a convenient side dish to a nice piece of meat, because it often incorporates both a starch and vegetables, so you only need to make one side instead of two.

Copy of IMG_6064

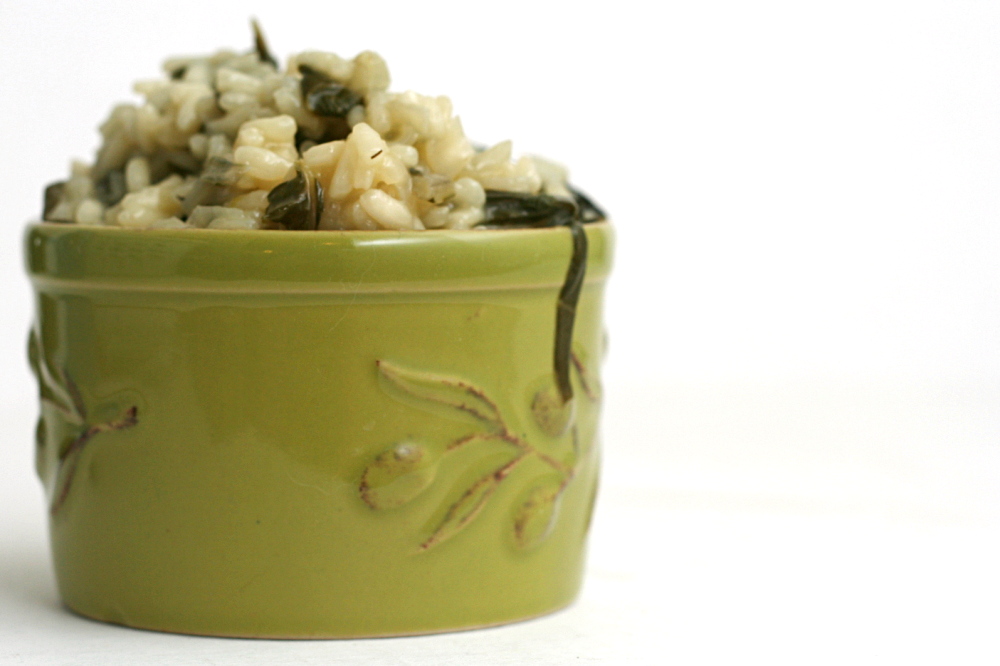
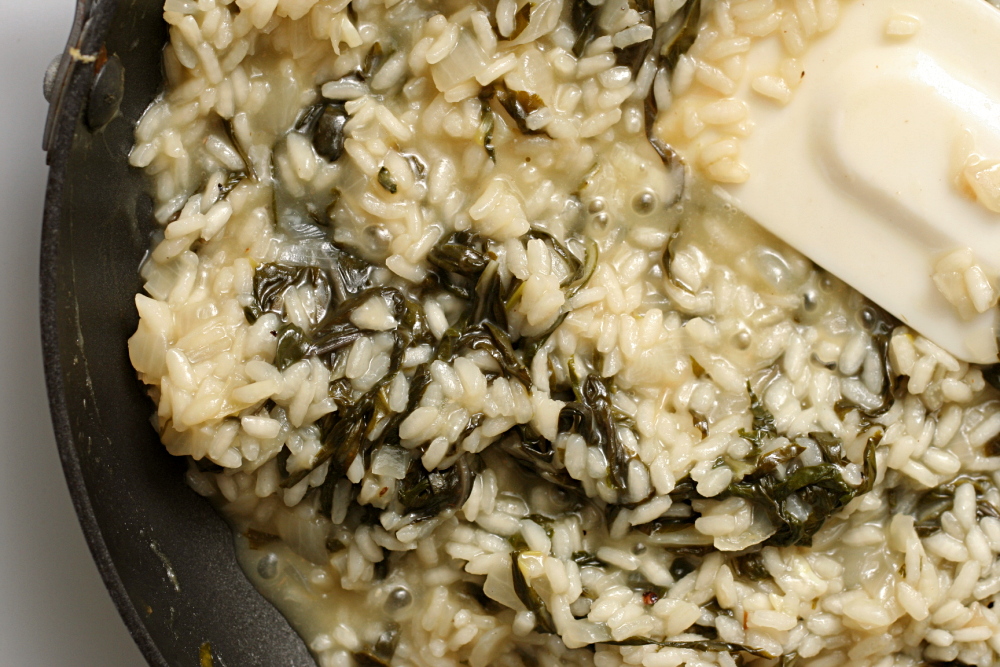
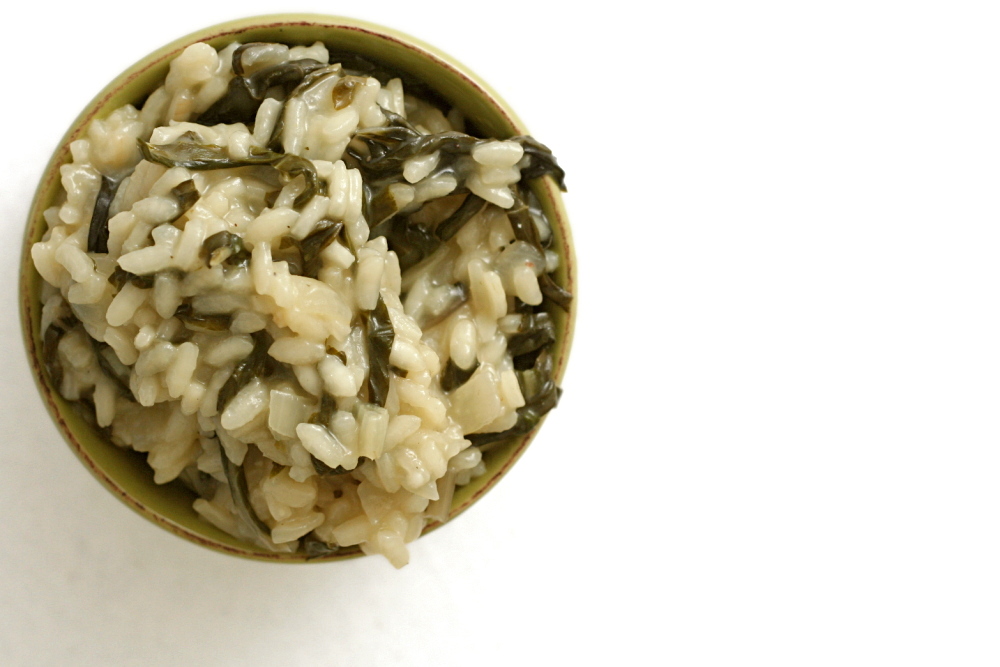
I did look at a recipe for risotto with swiss chard, but ultimately decided to just add chard to my standard risotto recipe. I tried adding it with the rice at first, but I was worried that it was overcooking, and even though the final result was actually very good, I had hoped to hold on to the bright green color that the chard turns midway through cooking. I tried again, this time adding the greens later, with the broth. And it made no difference that I could tell. Once cooked, chard turns a dark olive green, and there’s no getting around it.

Copy of IMG_6074

The earthiness of swiss chard goes really well with risotto. And one thing that’s satisfying about eating hearty greens like this is that they lose so much volume during cooking that I feel like it’s easy to eat a whole lot of greens! As usual, I’m glad I tried and managed to accept a new ingredient. Maybe raw oysters will be next?

Copy of IMG_6080

One year ago: Gazpacho

Printer Friendly Recipe
Risotto with Swiss Chard

6 servings

3½ cups low-sodium chicken broth
3 cups water
2 tablespoons olive oil
1 medium onion, diced fine
2 cloves garlic, minced
salt
2 cups Arborio rice
1 large bunch swiss chard, coarsely chopped (4-5 cups)
1 cup dry white wine
2 ounces (1 cup) parmesan cheese
pepper

1. Bring the broth and water to a simmer in a medium saucepan over medium-high heat. Cover; turn the burner off but keep the pot on the burner.

2. Heat the olive oil over medium heat until the foaming subsides. Add the onion and sauté until softened, about 5 minutes. Add the garlic and cook until fragrant, about 30 seconds. Add the rice, chard, and 1 teaspoon salt and cook, stirring constantly, until the rice is opaque, about 2 minutes. Add the wine and cook, stirring until the rice nearly completely absorbs all the liquid, about 1 minute.

3. Add 2 cups of the hot stock and stir occasionally until it’s mostly absorbed (the spoon will leave a trail on the bottom of the pan), about 6 minutes. Continue to add stock, 1 cup at a time, stirring frequently, until each addition is absorbed. Cook until rice is creamy but still somewhat firm in center (add more water in ½ cup increments if broth/water mixture runs out), 10 to 12 minutes longer.

4. Stir in the cheese. Season with salt and pepper, if necessary. Serve.

Copy of IMG_6079

amaretto cheesecake

Copy of IMG_5299

My brother became known as the family cheesecake maker early on. I think we were still teenagers when he started getting cheesecake cookbooks. In one of those, there was a recipe for amaretto peach cheesecake that became a family favorite.

Copy of IMG_5223

I’m guessing it’s a Kraft recipe that’s widely available on the internet, but, frankly, I think I can do better than Kraft these days. Okay, fine, I think Dorie Greenspan can do better than Kraft, and I can add a bunch of amaretto to her Tall and Creamy Cheesecake recipe.

Copy of IMG_5216

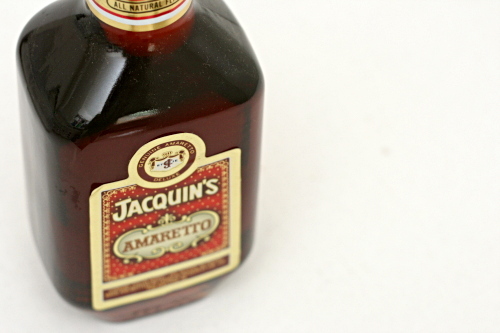
The ratio of the main ingredients – the cream cheese, eggs, and sugar – is the same as Dorie’s recipe. I used heavy cream this time instead of sour cream because I didn’t want anything to fight with the almond flavor of the amaretto. I dumped in as much amaretto as I thought the batter could take, then added a teaspoon of almond extract to bump up the flavor even more. I used a sugar cookie crust instead of a graham cracker crust, again, so as not to fight with the almond flavor. Something sweet and subtle was more in line with my goals.

Copy of IMG_5219

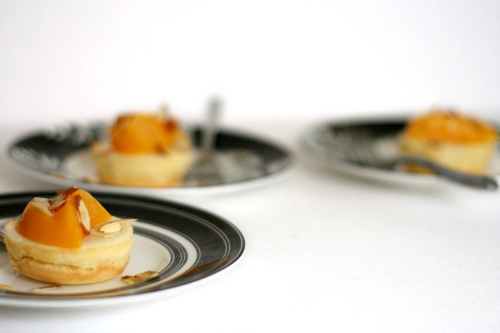
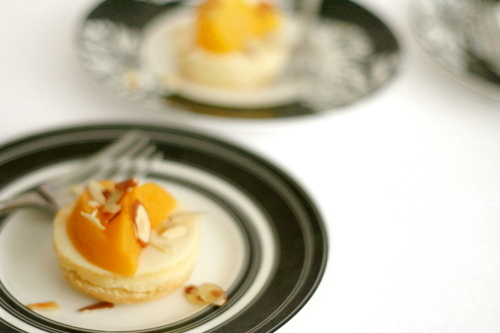
The peach part of the picture was an afterthought in my case. I considered somehow adding it directly to the cream cheese mixture, but, I couldn’t figure out how to make this work. In the end, I think I’m happier with keeping the almond and peach parts separate anyway. I had wanted to make a peach coulis to top the cheesecake, but I ran out of time. Instead, I thinly sliced some peaches (canned, as this was several months before peach season) and sprinkled the tops with toasted almonds.

Copy of IMG_5226

And – yum. I was worried that the amaretto flavor would be too subtle, but I thought it was perfectly balanced. The texture was smooth and creamy, just what you want from cheesecake. It wasn’t quite as light as some cheesecakes, since I didn’t use much heavy cream, but it wasn’t overly dense either. The peaches and almond are such a great combination. I still think a light peach coulis would be perfect, but there’s certainly nothing bad about almond-scented cheesecake, sliced peaches, and toasted almonds. Who’s the family cheesecake maker now? 😉

Copy of IMG_5243

One year ago: Fruit Bruschetta

Amaretto Cheesecake

To make a full cheesecake instead of miniatures, use a 9-inch springform pan; bake the crust for 10 minutes and cook the cheesecake in a water bath for 90 minutes, keeping the same temperatures noted below.

Crust:
3 tablespoons butter
⅓ cup (2.33 ounces) sugar
pinch salt
1 egg
¾ cup (3.6 ounces) unbleached all-purpose flour

Cheesecake:
4 (8-ounce) boxes cream cheese, room temperature
1⅓ cup (10.5 ounces) granulated sugar
½ teaspoon salt
4 eggs, room temperature
½ cup heavy cream
¼ cup amaretto
2 teaspoons lemon juice
1 teaspoon almond extract

1. Adjust an oven rack to the middle position and preheat the oven to 350 degrees. Spray a muffin pan with nonstick spray. (You could also line the muffin tin with cupcakes liners.)

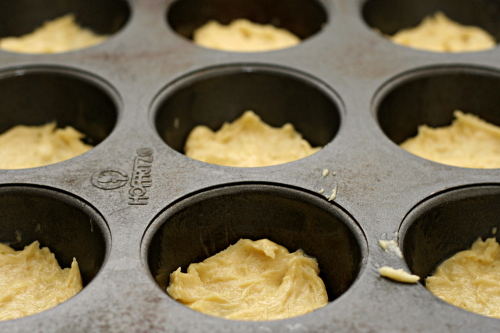
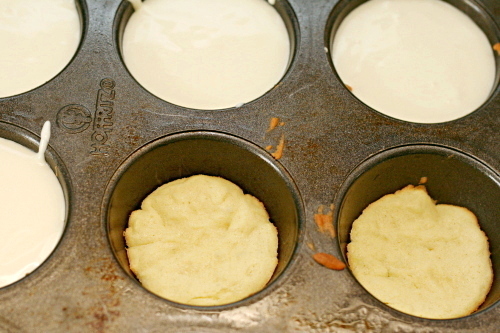
2. For the crust: Beat the butter on medium speed until smooth. Add the sugar and salt and continue beating until the mixture is light and fluffy. Add the egg, mixing until thoroughly integrated. Gradually add the flour, mixing just until combined. Divide the batter evenly between 24 muffin cups and spread over just the bottom of each tin. Bake 7-10 minutes, until the crusts are firm and just slightly browned around the edges. Cool on a wire rack. Reduce the oven temperature to 325 degrees.

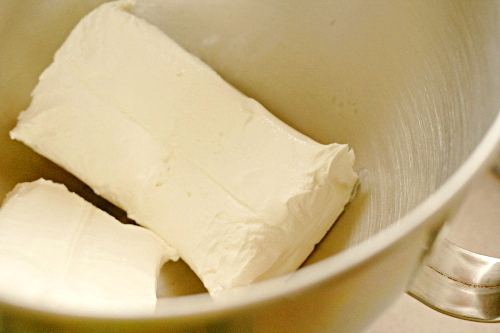
3. Meanwhile, beat the cream cheese in the bowl of a standing mixer fitted with the paddle attachment until soft and smooth. (Of course, you can also use a hand mixer for this.) Add the sugar and salt and continue beating until smooth and light. Add the eggs, one at a time, beating for about 1 minute between each addition. Add the cream, amaretto, lemon juice, and almond extract and beat until combined.

4. Pour the batter into the crust-lined muffin cups. It won’t rise significantly, so feel free to fill the cups. Bake in the preheated oven for 25-30 minutes, until an instant-read thermometer inserted into the center of a cheesecake measures 150 degrees.

5. Let the cheesecakes cool on a wire rack until they’re at room temperature. Use a thin-bladed knife or offset spatula to remove the cheesecakes from the pan. (If you can’t seem to get them to budge without breaking them, try putting the pan in the freezer for 15 minutes first.) Refrigerate for several hours, until cool. Top with something peachy and lightly toasted sliced almonds, if desired.

Copy of IMG_5303