crepe manicotti with ragu and bechamel

crepe manicotti 5

As we adjust to life with a toddler, I’m finding myself tending toward simpler meals, not weekend projects. Which is to say, I made these manicotti months ago, when that toddler was a baby who couldn’t move and therefore didn’t follow me around in the kitchen emptying all the cabinets. It’s too bad for her, because she’d love these.

crepe manicotti 1

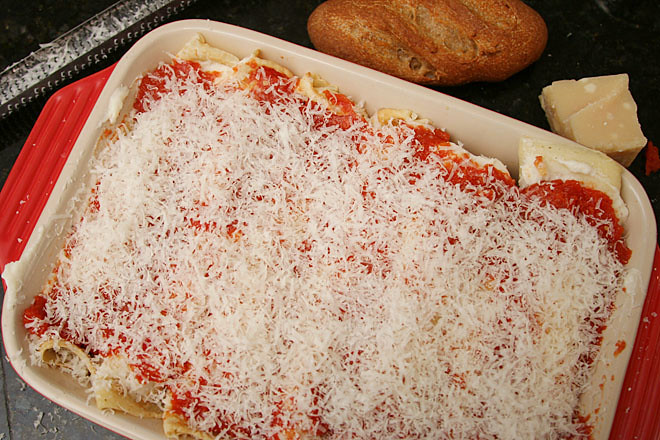
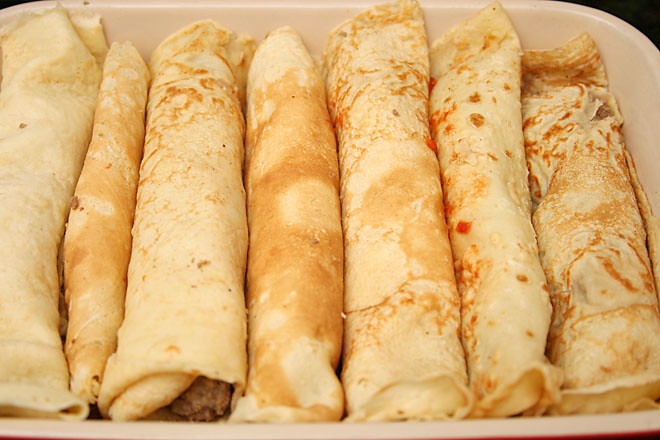
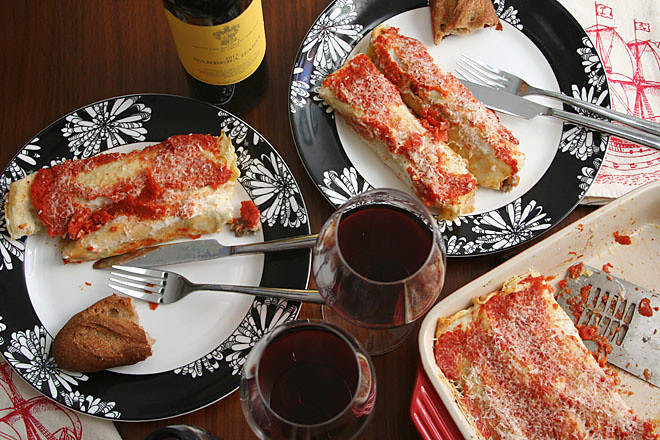
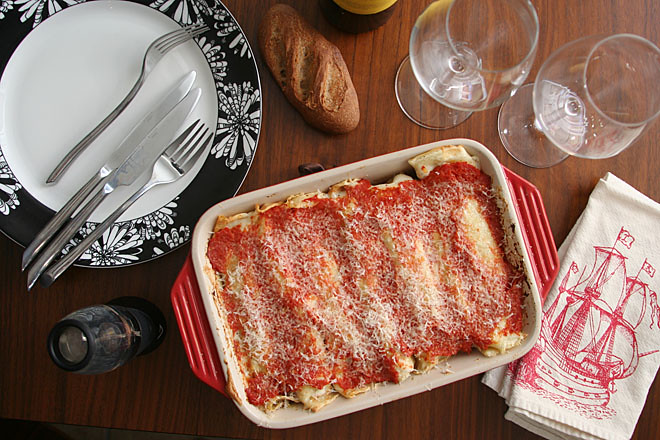
Instead of stuffing a meatball-like mixture into a pasta tube, these are crepes filled with a meat sauce mixed with thick bechamel. It’s rich and creamy, holding its shape without being dry or chewy. There’s no mozzarella, but between the bechamel and the crepes, there’s plenty of dairy. A generous grating of flavorful parmesan tops the dish.

crepe manicotti 4

As delicious as these were, I do think they’d benefit from more sauce, which I’ve indicated in the recipe below. I’d also put all of the bechamel inside the crepes instead of leaving a portion for spreading between the stuffed crepes and the tomato sauce. For better or worse, it’ll be a while before I get a chance to make these again with those changes. In the meantime, I’ll be putting all my storage containers back in the cabinets.

crepe manicotti 3

Printer Friendly Recipe
Crepe Manicotti with Ragu and Bechamel (adapted from Serious Eats)

I don’t remember what meat I used for this, but I’m sure it wasn’t the veal recommended in the original recipe. It was probably pure beef.

For the Ragù:
2 tablespoons extra-virgin olive oil
1 large onion, diced fine
1 medium carrot, diced fine
4 cloves garlic, minced
2 pounds ground beef, divided
Kosher salt and freshly ground black pepper
1 cup dry white wine
1 cup whole milk
1 bay leaf
2 fresh rosemary sprigs

For the Crepes:
2 cups (10 ounces) all-purpose flour
4 large eggs
2½ cups whole milk
salt
2 tablespoons unsalted butter, melted

For the Béchamel:
4 tablespoons unsalted butter
4 tablespoons all-purpose flour
2 cups whole milk
Kosher salt and freshly ground black pepper
Pinch freshly grated nutmeg

To Assemble:
3 cups tomato sauce
parmesan cheese

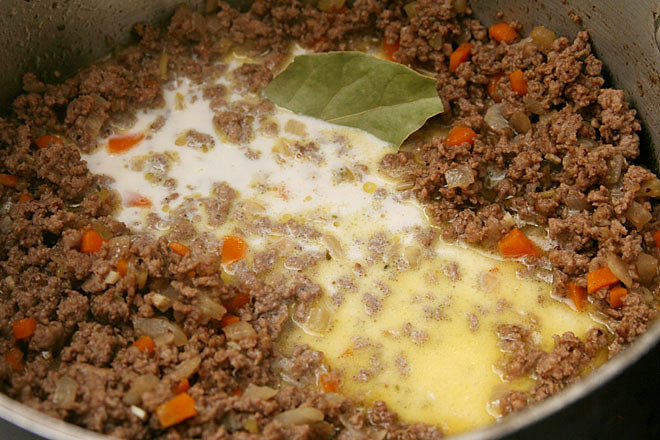
1. For the ragu: In a large Dutch oven over medium heat, heat the olive oil. Add the onions and carrots; cook, stirring occasionally, until softened but not browned, about 6 minutes. Add the garlic; cook, stirring constantly, until fragrant, about 1 minute. Add half of the ground beef and ½ teaspoon salt; cook, stirring frequently to break the meat into small pieces, until well browned, 8 to 10 minutes. Add the remaining meat; stirring to break up the meat, cook just until no longer pink, about 5 minutes. Add the wine; simmer until the wine is syrupy, about 5 minutes. Add the milk, bay leaf, and rosemary; bring the liquid to a simmer, then reduce the heat and simmer, stirring occasionally, until the ragu is thick and the meat is tender, about 30 minutes. Discard the bay leaf and rosemary. If necessary, season with additional salt and pepper.

2. For the crepes: Add the flour, egg, milk, and ¼ teaspoon salt to a blender canister; blend until smooth. Heat a 9-inch nonstick skillet over medium heat. Brush the pan with a thin layer of melted butter. Pour about ¼ cup of batter into the pan; swirl to evenly coat the bottom of the pan. Cook until the top looks dry, about 1 minute. Flip the crepe and continue to cook until the second side is dry, about 30 seconds. Transfer to a plate. Repeat with the remaining batter, brushing the pan with butter each time, stacking the cooked crepes on a plate.

3. For the bechamel: In a medium saucepan over medium heat, melt the butter. When the foaming subsides, add the flour and cook, stirring constantly, for 1 minute. Whisking constantly, slowly add the milk. Increase the heat to medium-high and bring to a simmer, whisking constantly. When the mixture simmers, reduce the heat to medium-low, add the salt, pepper, and nutmeg, and simmer 5 minutes. Combine with the meat sauce.

4. To assemble: Cover the bottom a 9-by-13-inch baking dish with 1 cup of tomato sauce. Divide the meat mixture evenly between the crepes; roll the crepes and place seam-side down over the sauce in the pan. Spread the remaining tomato sauce evenly over the manicotti. Top with a generous layer of grated parmesan. Bake until lightly browned, about 25 minutes. Let rest for 10 minutes before serving.
crepe manicotti 6

Save

julia child’s boeuf bourguignon

boeuf bourguignon 6

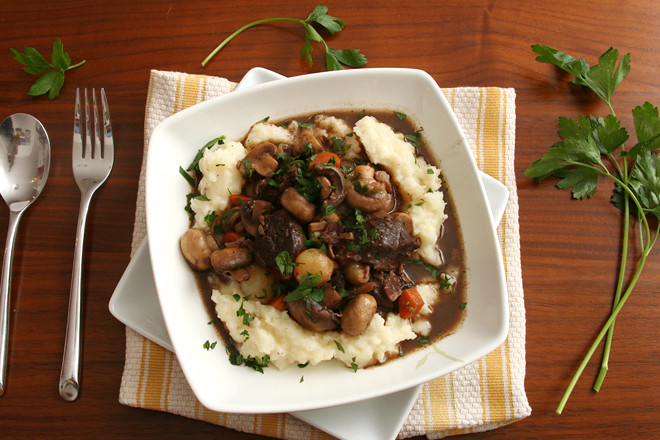
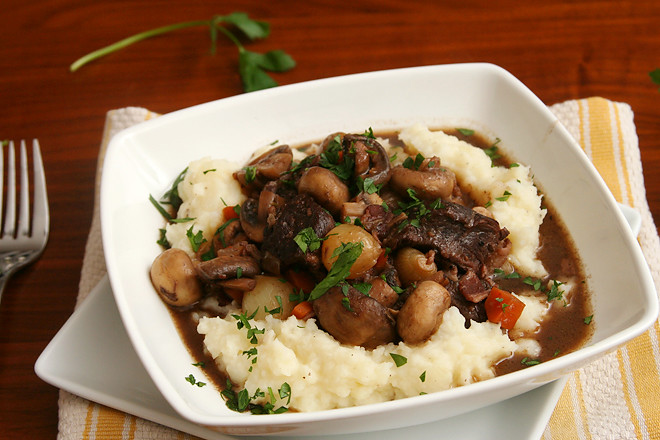
I wanted winey beef stew. I knew there were easier recipes out there, and maybe even better recipes, but Julia Child’s boeuf bourguignon is a bucket list recipe for me. I guess sometimes I can’t resist using every pot and skillet I own just to make one dish.

boeuf bourguignon 3

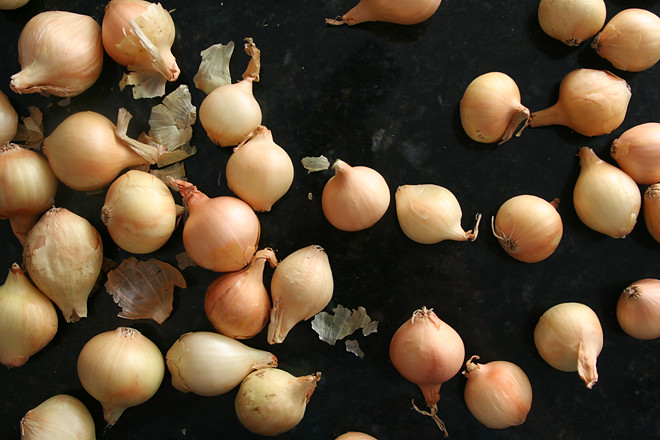
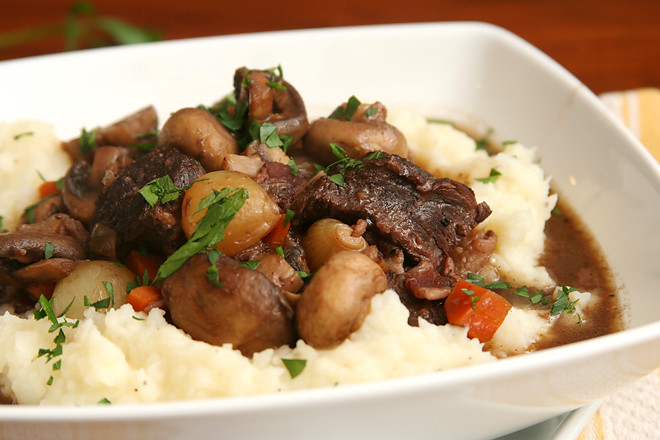
But it was worth it for one single thing I learned from this recipe: how to enjoy pearl onions. The French seem to love using them in their fancy braises, but I’ve never liked their texture in the coq au vin or other beef burgundy recipes I’ve tried. Instead of the quick saute most recipes call for, Julia braises them in broth for almost an hour. At the end, they’re meltingly tender – okay, maybe they’re mushy. But that’s a lot better than the feeling that there are crunchy eyeballs in my stew. They also soak up meaty flavor from the broth, which doesn’t hurt matters.

boeuf bourguignon 1

Other than that, the stew was very good, but probably not any better than my favorite pot roast recipe. Am I allowed to say that about one of Julia Child’s most famous recipes? It’s not that it wasn’t good, because I always really enjoy braising beef in wine. It’s just that I also enjoy using one pot for that braise. But now I can check this one off the bucket list, and that, plus those soft pearl onions, makes this a win.

boeuf bourguignon 7

Julia Child’s Boeuf Bourguignon (adapted from Mastering the Art of French Cooking)

Serves 4

I liked the onions a lot, but I would have preferred the mushrooms cooked until they were drier and browner.

6 ounces (about 6 slices) bacon, sliced ¼-inch thick
2 tablespoons vegetable oil, divided
3 pounds chuck roast, trimmed, cut into 2-inch cubes
salt
1 large or 2 small carrots, cut into ½-inch dice
1 medium onion, diced
ground black pepper
2 tablespoons flour
1 (750-liter) bottle medium red wine, such as pinot noir, cotes du rhone, or chianti
2 cups beef broth, plus ½ cup to cook the onions
1 tablespoon tomato paste
2 cloves garlic, smashed
1 bay leaf
4 tablespoons butter, divided
24 pearl onions, peeled (or frozen)
1 sprig fresh thyme
1 small bay leaf
4 sprigs parsley, plus more for garnish
1 pound mushrooms, halved or quartered in large

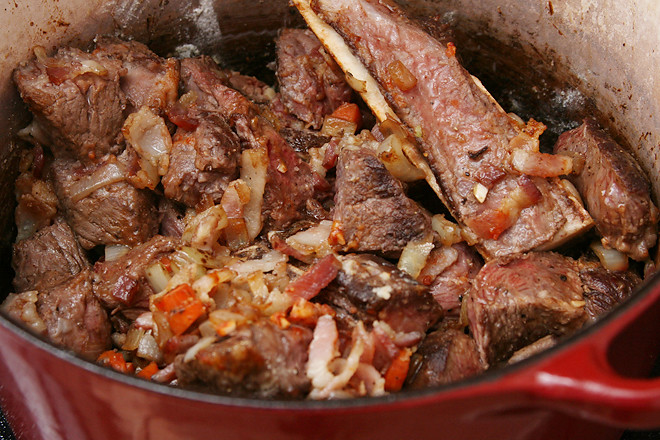
1. Heat the oven to 450 degrees. In a medium saucepan over high heat, bring the bacon and 6 cups of water to a simmer. Reduce the heat to medium and simmer for 10 minutes. Drain and dry the bacon. In a 5-quart Dutch oven over medium heat, cook the bacon until it’s slightly browned, 2 to 3 minutes. Use a slotted spoon to remove it from the pot, leaving the rendered fat in the pot; set the bacon aside.

2. Add 1 tablespoon of oil to the pot with the bacon fat and heat over medium-high heat until just smoking. Season the beef generously with salt. Add half of the beef in a single layer, leaving space between each piece. Cook without moving until the bottom side is browned, about 2 minutes. Rotate each piece, searing and rotating until all sides are browned. Transfer to a plate and repeat with the remaining beef.
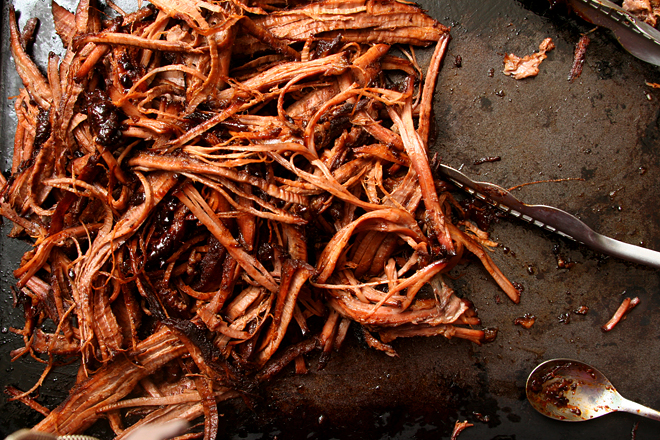
3. Add the carrots and diced onion to the pot and cook until lightly browned, about 2 minutes. Return the beef and bacon to the pot with the vegetables; add 1 teaspoon salt and ¼ teaspoon ground black pepper; stir to combine. Sprinkle the flour evenly over the mixture; stir to evenly distribute the flour. Transfer the pot to the oven and cook for 4 minutes. Stir, then cook in the oven for an additional 4 minutes. Transfer the Dutch oven back to the stove. Reduce the oven temperature to 325 degrees.

4. Add the wine and 2 cups of broth to the pot with the beef and vegetables. Add the tomato paste, garlic, and herbs. Bring to a simmer over medium-high heat. Cover the pot, transfer it to the oven, and cook until the meat is tender, 2½ to 3 hours, stirring about once an hour.

5. Meanwhile, in a medium skillet over medium heat, melt 2 tablespoons butter. Add the pearl onions and cook, stirring frequently, until they’re browned. Add ½ cup of broth, the thyme, bay leaf, parsley, and a generous sprinkling of salt, then cover the skillet, reduce the heat to low, and cook until the onions are very tender, about 40 minutes. If there is any liquid left in the pan at this point, let it evaporate. Set aside.

6. In a medium skillet over high heat, heat 2 tablespoons butter and the oil. Add the mushrooms and cook, stirring constantly, until they are lightly browned, 4 to 5 minutes. Set aside.

7. Remove the Dutch oven from the oven. Strain the liquid into a separate saucepan, returning the beef and bacon to the Dutch oven or a serving dish. Add the mushrooms and onions to the beef. Skim the liquid in the saucepan of fat and simmer until it’s reduced to about 2½ cups and is thick enough to lightly coat a spoon. Pour the reduced sauce over the meat and vegetables. Serve, topped with minced parsley.

boeuf bourguignon 8

beef satay with spicy mango dip

beef satay 5

People keep giving me venison. I have friends who enjoy hunting but have families that don’t love the flavor of venison. I have another friend who doesn’t prefer the front shoulder, so I’ve turned several into barbacoa (and then gave him the recipe, and that was the end of my venison front shoulder donations). I don’t even know how I ended up with the prized backstrap, a cut similar to the tenderloin, but I’m not complaining.
beef satay 1

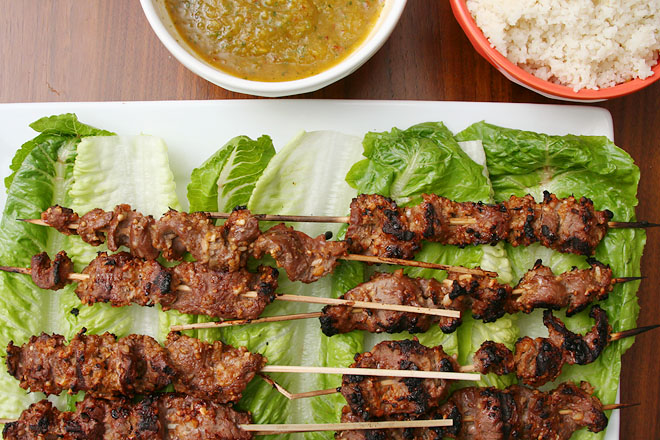
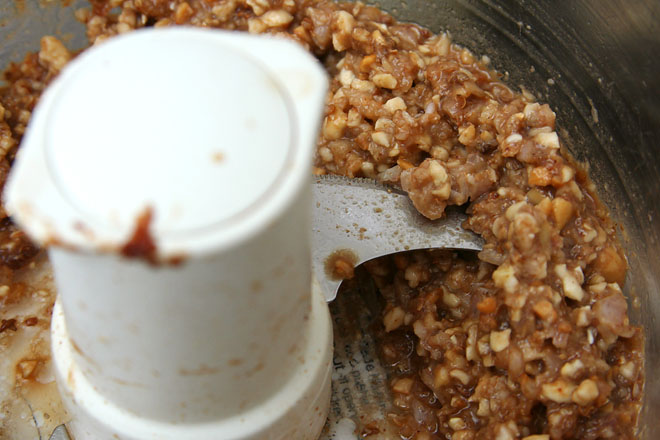
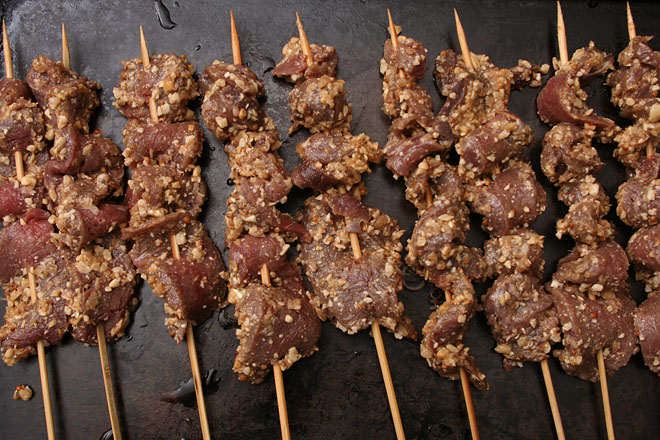
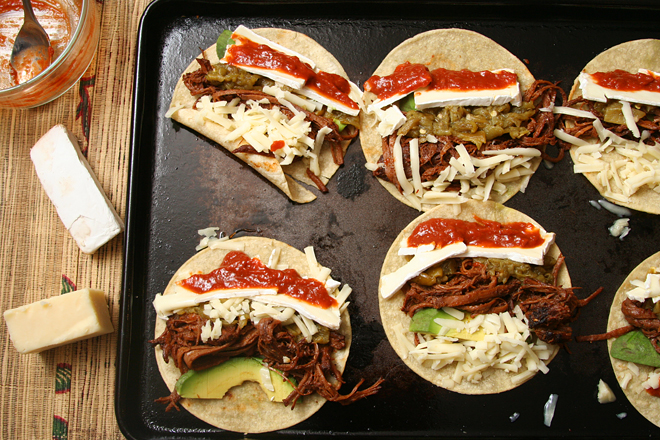
Rather than search for venison-specific recipes, I consider venison interchangeable with beef or sometimes pork. My brother sent me this recipe, and while I didn’t have the right cut of beef, I did have venison backstrap. It’s an interesting recipe, with a marinade that includes ground cashews. It ends up as more of a paste, which sticks to the meat as it cooks.

beef satay 2

It may be unusual, but it works. Dave and I made the full recipe, which supposedly feeds four, and we had no leftovers. Someone needs to give me more venison backstrap so I can make this again immediately – and this time I won’t share the recipe.

beef satay 3

Printer Friendly Recipe
Beef Satay with Spicy Mango Dip
(rewritten from Linda Doeser’s Chinese: The Essence of Asian Cooking)

The recipe recommends serving with salad greens, but I mostly considered those garnish, while rice was important to soak up the sauce.

I made tamarind sauce the same way I do for pad Thai, by soaking tamarind paste in hot water, then straining out the solids and using the liquid in the recipe. You might also be able to find tamarind concentrate. If not, it won’t ruin the recipe to leave it out.

For the satay:
1 pound sirloin steak, thinly sliced across the grain and skewered
1 tablespoon coriander seeds
1 teaspoon cumin seeds
½ cup raw cashews
1 tablespoon vegetable oil
2 shallots or 1 small onion, finely chopped
½-inch piece fresh ginger, finely chopped
1 clove garlic, crushed
2 tablespoons tamarind sauce
2 tablespoons dark soy sauce
2 teaspoons sugar
1 teaspoon rice vinegar or white wine vinegar
Salad greens, to serve

For the spicy mango dip:
1 ripe mango, peeled and seeded
1 to 2 fresh red chiles, seeded and finely chopped
1 tablespoon fish sauce
Juice of 1 lime
2 teaspoons sugar
2 tablespoons chopped fresh cilantro
½ teaspoon salt

1. Heat a small not-notstick skillet over medium-high heat. Add the coriander and cumin seeds; toast, stirring constantly, until fragrant, about 30 seconds. Immediately transfer to a mortar and pestle or spice grinder. Let cool completely before grinding.
2. In the bowl of a food processor, combine the ground spices, cashews, oil, shallots, ginger, garlic, tamarind sauce, soy sauce, sugar, and vinegar. Process until the cashews are finely chopped. Coat the meat with the cashew mixture; cover and chill for at least 30 minutes or up to 8 hours.
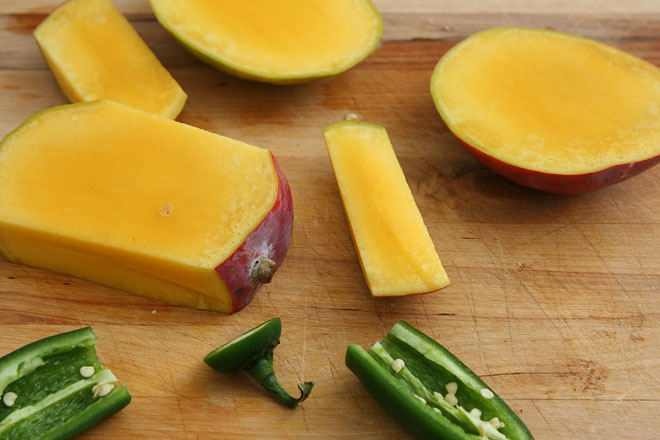
3. For the dip: Process the mango, chiles, fish sauce, lime juice, sugar, cilantro, and salt in the food processor until smooth.

4. Prepare a medium-hot grill. Cook the skewers directly over the heat until browned and cooked through, 3-4 minutes per side. (Alternatively, cook for the same amount of time as close to the broiler element as possible.) Serve with the sauce and greens.
beef satay 4

meatball-stuffed zucchini

meatball zucchini 8

I joke about not being good at gardening, but the truth is, it’s no joke. I am not good at it. Every year, at least half of what I plant is a failure. This year, in fact, in one raised bed, it’s exactly half, with two tomato plants and one pepper plant doing quite well, and two tomato plants and one pepper plant not doing much of anything at all.

meatball zucchini 2

This year, I’m having more success with my zucchini plant than ever before. (Keeping with the theme, the beans in the same bed aren’t producing at all.) Maybe the disgusting and destructive squash bugs will move in eventually, but so far, so good. I get about three zucchinis each week, which has been just right for making old favorites like these enchiladas and this pasta, while also providing an opportunity to try a new favorite.

meatball zucchini 3

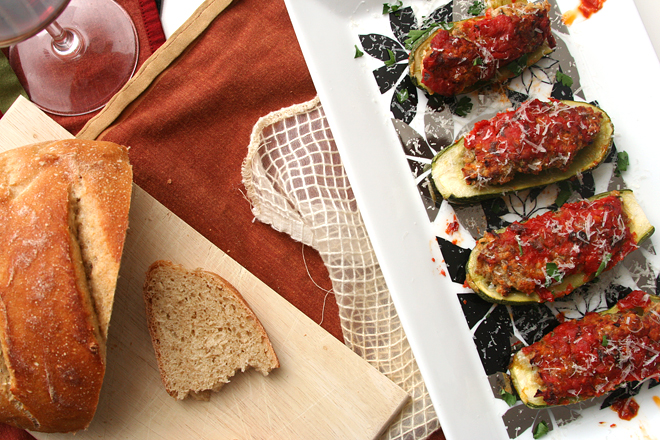
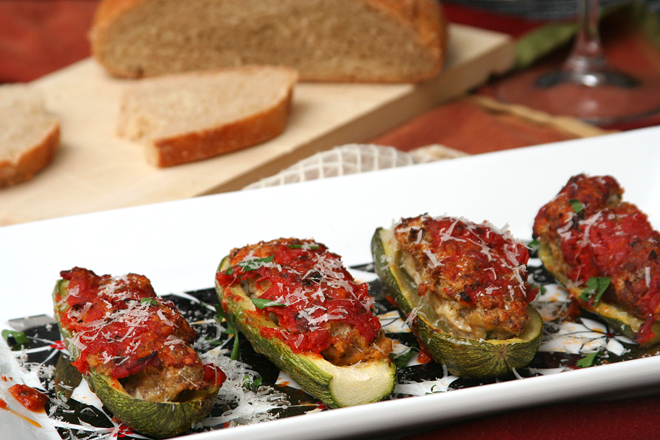
This has become my go-to zucchini recipe this summer. I like it as a first course, maybe with a pasta dish served afterward, but it would work well as a main dish too. If things keep going well with my zucchini plant – and in my garden, that’s not a guarantee – I might just make this once a week until the season is over.

meatball zucchini 4

Printer Friendly Recipe
Meatball-Stuffed Zucchini (adapted from Domenica Cooks and Cook’s Illustrated)

Makes 4-6 first course servings or 2 main course servings

I’ve used ground lamb for these (which is what the pictures show) because we love it, and I’ve used ground venison because someone gave us a bunch that we need to use up.

1 tablespoon olive oil
2 cloves garlic, minced, divided
1 (14-ounce) can whole tomatoes, chopped with scissors in the can
salt
1 slice white sandwich bread (crusts discarded), torn into small cubes
¼ cup buttermilk or 3 tablespoons plain yogurt thinned with 1 tablespoon milk
2 tablespoons grated Parmesan cheese, plus more for topping
1 tablespoon minced fresh parsley leaves
1 large egg yolk
pinch ground black pepper
½ pound ground beef or lamb
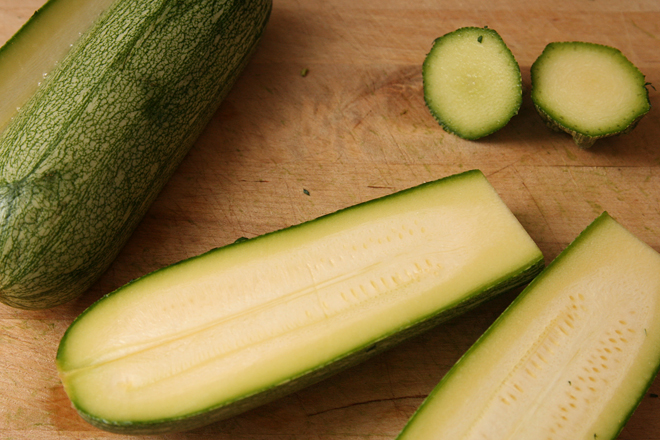
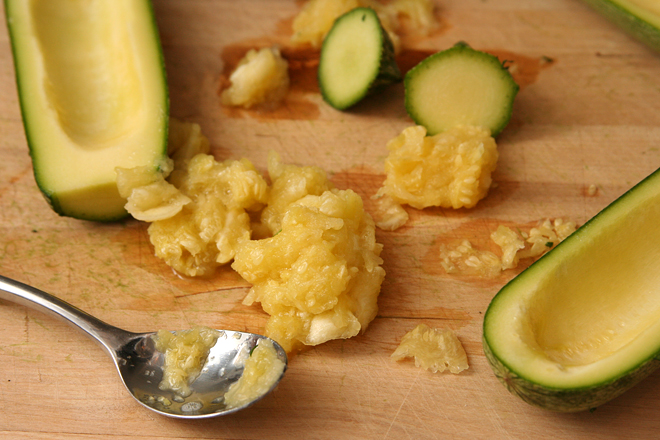
2 large or 3 small zucchini or summer squash, halved lengthwise, seeds scraped out and discarded

1. Heat the oven to 400 degrees. Add the oil and 1 clove of garlic to an 8-by-8-inch (or equivalent size) baking dish; transfer to the oven until the garlic is sizzling, 5-8 minutes. Stir the tomatoes and a pinch of salt into the oil; set aside.

2. In a medium bowl, combine the bread and buttermilk or yogurt and milk; set aside for 10 minutes for the bread to soften. Stir in the cheese, parsley, egg yolk, remaining garlic, ¼ teaspoon salt, and pepper. Using your hands, evenly mix in the ground meat.

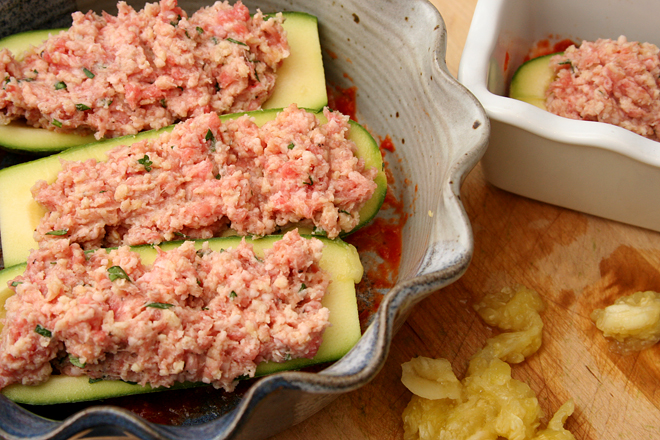
3. Divide the meat mixture evenly between the halved and cored zucchini. Arrange the stuffed zucchini in the baking dish. Transfer the dish to the oven and bake until the zucchini is softened and the meat is cooked through, 30-40 minutes. Let rest for 5-10 minutes. To serve, spoon the tomato sauce over the zucchini and top with parmesan cheese.

meatball zucchini 7

steak and egg green chile hash

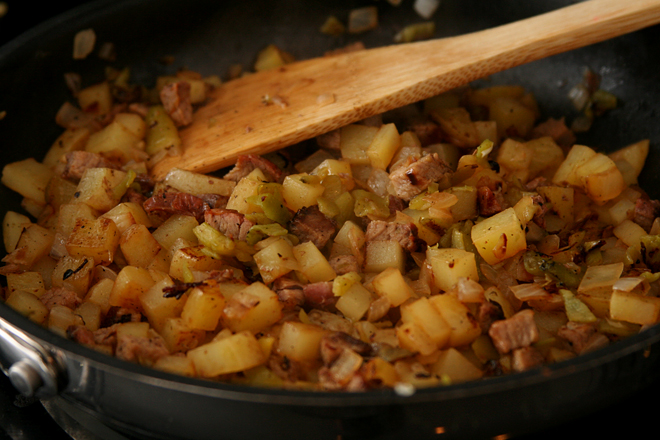
steak egg chile hash 5

Where was this Hatch green chile mania back when I lived on the opposite side of the country from New Mexico? Back then, I had to have my mom send me boxes of fresh green chiles from Albuquerque. She’d pack newspaper in the boxes to help keep the chiles dry, poke holes in the box, and pay out the wazoo for overnight shipping. (Clearly I owe my mom a drink or two.) When they’d arrive, I’d broil them in batches until the skins turned black, then peel, chop, and bag them up. One time I forgot about wearing gloves, resulting in the worst burn I’ve ever had, not from temperature, but from spice.

green chile 2013

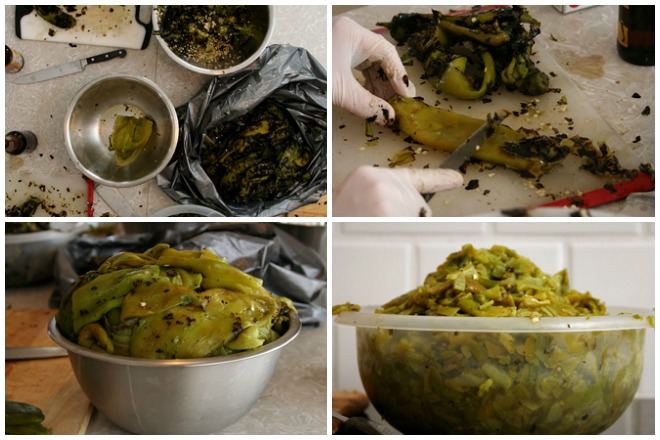
But that was years ago. Now I just head down to the local grocery store, buy 2 huge burlap sacks of fresh chiles, and bring it out to the guy roasting them in the parking lot. (Actually, I never do this; it’s become Dave’s errand.) Back at home, Dave and I put on latex gloves and start peeling, seeding, and stemming the chiles. At some point I’ll transition from peeling to chopping and bagging. The whole process takes about 4 hours, and at the end, we have a shelf in the freezer dedicated to our stash.

steak egg chile hash 1

I grew up in Albuquerque, and my family did this when I was a kid, as well. It’s only recently when anyone outside New Mexico could find Hatch green chiles. In fact, the “Hatch” title is a bit of a misnomer – Hatch is a place, not a variety of chile. Green chiles are grown in Hatch, but they’re also grown in the rest of the state. This year, Dave bought our green chiles from a farm in Artesia, so technically they’re not Hatch green chiles at all, but since people seem to recognize Hatch as a type of chile, we’ll stick with that title.

steak egg chile hash 2

Most New Mexicans don’t need a recipe for how to use their green chiles. They just add them to their favorite foods – there’s no Hatch chile macaroni and cheese, there’s just your favorite macaroni and cheese recipe with chiles stirred in. The same goes for cheeseburgers, pizza, grilled cheese sandwiches…are you seeing a pattern? Green chile is really good with carbs and cheese.

steak egg chile hash 3

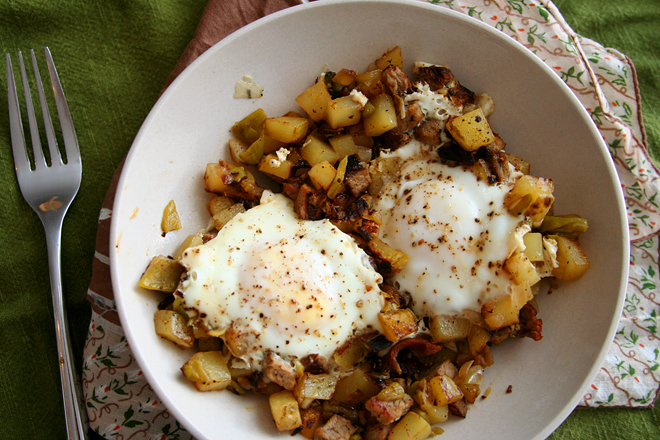
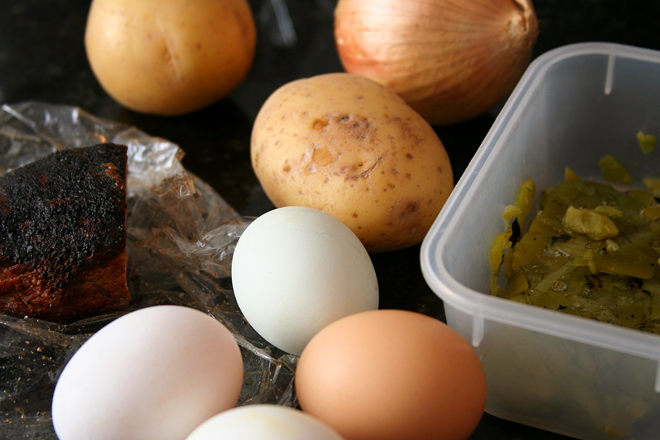
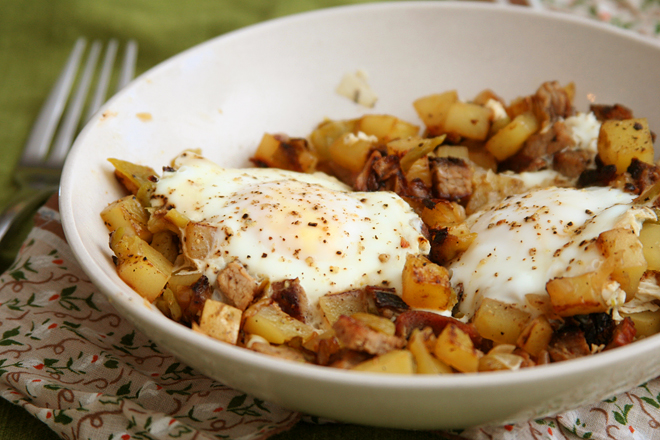
In this case, we don’t need cheese, just steak, leftover if you have it. Because green chiles are also really good for breakfast – migas and huevos rancheros are my favorite two breakfasts, and now this is up there too. And fortunately, now that “Hatch” green chiles are making their way to almost all corners of the country, you can actually make this for yourself. That is a very good thing.

steak egg chile hash 4

Printer Friendly Recipe
Steak and Egg Green Chile Hash

Serves 4

Depending on how hot your chiles are, you might want to use less (or more) than this.

Photos show a half recipe made in a 9-inch skillet.

12 ounces Yukon gold potatoes, diced into ¼- to ½-inch cubes
2 tablespoons olive or canola oil
salt
1 large onion, diced
8 ounces cooked steak, diced
½ cup Hatch green chiles, roasted, peeled, and chopped
8 eggs
ground black pepper

1. In a medium microwave-safe bowl, combine the potatoes, 1 tablespoon olive oil, and ½ teaspoon salt. Cover and microwave on high for 1 minute. Stir, then return to the microwave for another minute. Stir again, and if the potatoes are not softened to their centers, repeat the microwaving until they are; larger cubes will need more time.

2. In a 12-inch nonstick skillet over medium heat, heat the remaining 1 tablespoon of oil until it flows like water when the pan is tilted. Add the onion and a pinch of salt and cook, stirring occasionally, until translucent. Add the potatoes and steak and cook, without stirring, until the bottom is lightly browned, about 2 minutes. Stir and cook for another 2 minutes without stirring. Stir in the green chiles. Taste for seasoning and add salt if necessary.

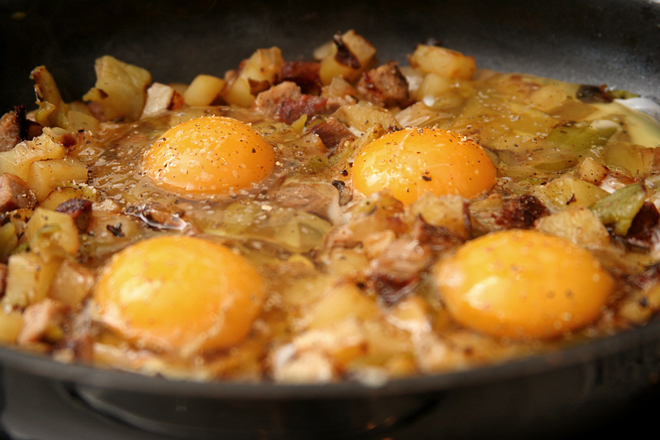
3. Using the back of a spoon, create 8 wells in the hash. Break one egg into each well; season with salt and pepper. Cover the pan and cook, without stirring, until the white is set, about 6 minutes. Serve immediately.

beef barbacoa

barbacoa 8

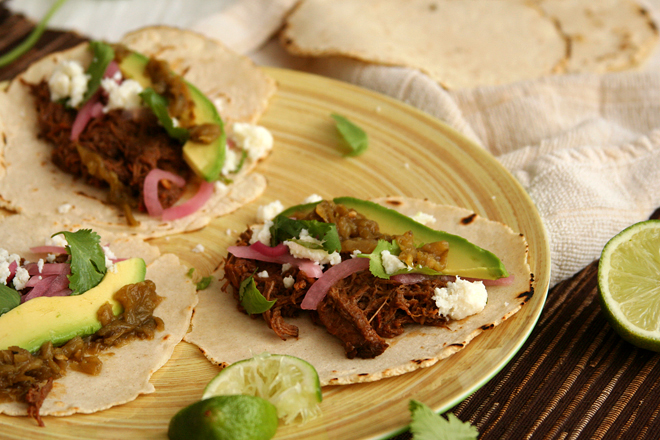
I am going through a taco phase, and it might have started out with these. Well, mostly I just really like tacos, because who doesn’t, but things have ramped up in recent weeks. We’ve had all sorts of tasty fillings recently, but it’s hard to beat barbacoa.

barbacoa 2

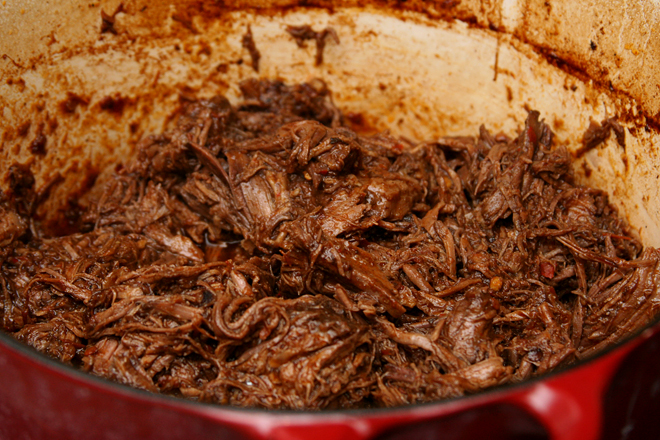
Barbacoa has so many satisfying flavors – it’s a little sweet, a little sour with a squeeze of lime juice, plenty meaty of course. It definitely has a spicy kick. It’s coated in a rich layer of sauce that delivers loads of flavor, with nothing left behind in the pot.

barbacoa 3

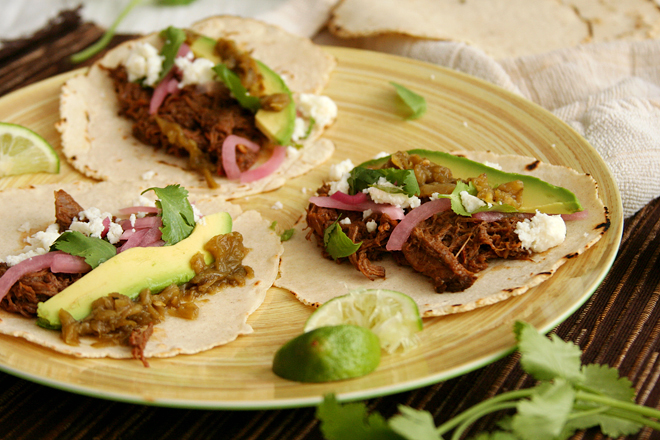
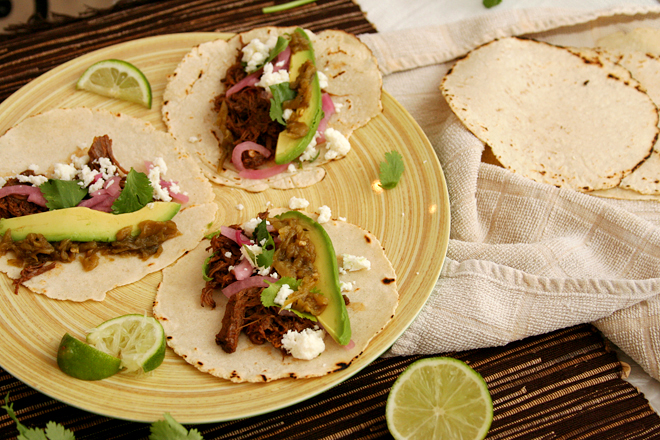
It only gets better with toppings. Avocado is arguably my favorite part of most tacos (not these; the barbacoa wins by a mile), and queso fresco is the perfect salty fresh compliment to the rich meat. Those two and a wedge of lime are my only requirements, but pickled onions and a smattering of cilantro are nice too.

barbacoa 4

This isn’t a hard recipe, although it’s far from fast. The long ingredient list looks worse than it is. There’s a lot of spices, chiles, and condiments, but nothing other than an onion and some garlic require a cutting board. Not even the beef needs to be sliced or cut into cubes. What I thought was going to be a significant project took me about half an hour.

barbacoa 6

Of course, you don’t actually get to eat until almost 5 hours layer, after the beef has become tender and rich and the broth has been reduced down to a sauce. It’s getting warm out and you might not want to leave your oven on for four hours while the beef cooks, but the result is worth some air-conditioning. Plus, it reheats great, maybe even better than it was the first day. I have to admit that I haven’t really been in a taco phase, just a barbacoa phase. I’ve got one more batch stored in the freezer, and I can’t wait.

barbacoa 9

One year ago: California Roll Burgers
Two years ago: Basic Coleslaw
Three years ago: Quinoa Tabbouleh
Four years ago: Fresh Strawberry Scones
Five years ago: Ricotta Spinach and Tofu Ravioli

Printer Friendly Recipe
Beef Barbacoa
(very slightly adapted from The Food Lab on Serious Eats)

About 6 servings

I think the crockpot is a definite possibility here, but it’ll take you a lot longer to reduce the liquid to a sauce after the cooking time.  You’ll still need to brown the oxtails and onions beforehand, because that adds tons of flavor.  That’s an easy tradeoff to save 4 hours of oven use when the weather’s warm!

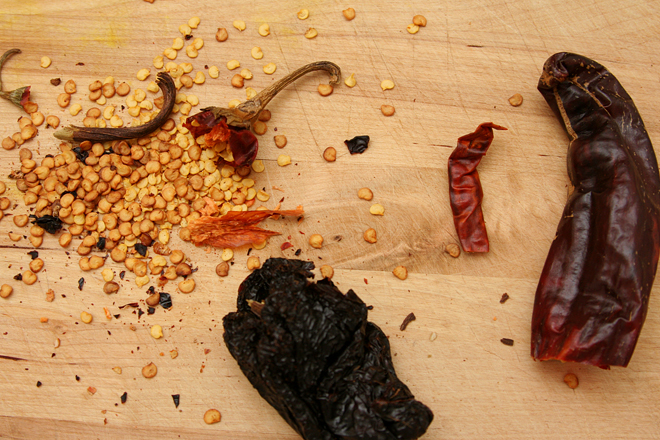
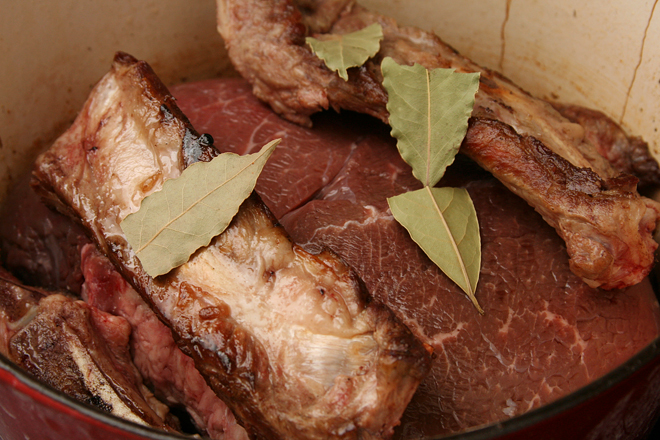
If you can’t find these exact types of chiles, any combination of mild, fruity and bright-tasting chiles will do, such as guajillo or Colorado.  I used a New Mexico, an ancho, and an arbol chile.  I couldn’t find oxtails either, so I used beef ribs.

1 whole dried New Mexico, costeño, or choricero chili, seeds and stem removed
1 whole chile ancho or pasilla, seeds and stem removed
1 whole chile negro, seeds and stem removed
4 cups low-sodium chicken stock, divided
3 tablespoons vegetable or canola oil, divided
1 pound oxtails
1 small onion, diced
6 medium cloves garlic, peeled and smashed
2 teaspoons ground cumin
½ teaspoon ground cloves
2 teaspoons dried oregano
4 chipotle chiles packed in adobo, chopped, with 2 tablespoons adobo sauce
¼ cup apple cider vinegar
2 teaspoons fish sauce
1 whole chuck roast (about 4 pounds)
Kosher salt and freshly ground black pepper
2 whole bay leaves
Kosher salt
Warm corn tortillas, avocados, queso fresco, pickled onions, cilantro, salsa, limes, and other condiments for serving

1. Adjust an oven rack to the lower-middle position and preheat the oven to 275 degrees. Place the dried chiles in the bottom of a large Dutch oven and heat over high heat. Cook, turning the chiles with tongs occasionally, until fragrant and toasted, about 3 minutes. Transfer the chiles to a small saucepan and cover with 2 cups of chicken broth. Bring to a boil over high heat, reduce to a simmer, and cook until chiles are completely tender, about 15 minutes. Set aside.

2. Meanwhile, heat 1 tablespoon of oil in the now-empty Dutch oven over high heat until shimmering. Cook the oxtails until they’re well-browned on all sides, about 8 minutes total. Remove the oxtails and set aside. Reduce the heat to medium.

3. Add the remaining two tablespoons oil and heat along with the onions and garlic, and cook, stirring frequently, until deep brown and just starting to burn, about 10 minutes. Add the cumin, cloves, and oregano, and cook, stirring constantly until fragrant, about 30 seconds. Add the chipotle chiles, vinegar, and remaining chicken broth. Scrape up the browned bits from the bottom of the pan, simmer until reduced by about half, then transfer the entire contents to the jar of a blender.

4. Add the soaked chiles and their liquid to the blender along with the fish sauce. Start the blender on low (be careful of blowups!) and slowly increase the speed to high. Puree until smooth, about 1 minute. Set aside.

5. Place the beef roast in the Dutch oven. Add the browned oxtails, 2 teaspoons salt, 1 teaspoon black pepper, the bay leaves, and the sauce. Bring to a boil over high heat. Place the lid on the pot, slightly cracked, then transfer to the oven. Cook, turning the beef occasionally, until completely tender and a cake tester or metal skewer inserted into the meat shows little to no resistance, about 4 hours. Discard the bay leaves and oxtails (meat from oxtails can be eaten if desired). Transfer the chuck to a large plate. Return the Dutch oven to the stovetop, and cook, stirring frequently, over medium-high heat until the liquid is reduced to about 1½ cups, about 5 minutes.

6. Beef can be shredded and served immediately or transferred to a sealed container along with the liquid and refrigerate up to five days. When ready to serve, shred into large chunks with your fingers or two forks. Return the beef to a pot along with the sauce. Bring to a simmer and cook, gently stirring and folding until the beef is hot, tender, and coated in sauce. Season to taste with salt. Serve immediately, piling the beef into warm corn tortillas with onions, queso fresco, avocados, cilantro, salsa, limes, or other condiments as desired.

barbacoa 10

brisket and brie tacos

brisket tacos 5

My stubbornness knows no bounds or logic, as was evident in the cooking of this brisket. First, I refused to buy Dr. Pepper to use as a braising liquid. Dave and I don’t drink soda, and I’m not really into the whole high fructose corn syrup thing, so I didn’t want to buy a bottle only to use a fraction of it. Beer and honey would provide all the acidity and sweetness the brisket needed.

brisket tacos 2

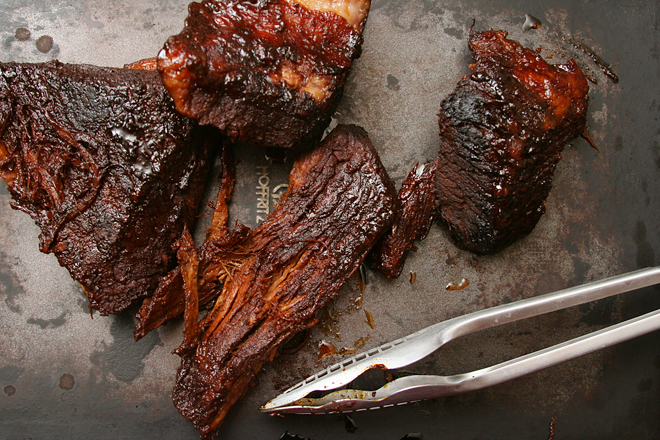
I’m also not all that into the crockpot. I like it for certain things, particularly broth, but if I’m home anyway, usually I like the firmer texture and added browning of braising meats in the oven. This has always worked great for pot roast and stews, but I’m not sure it was the best method for much leaner brisket, which can more easily dry out.

brisket tacos 4

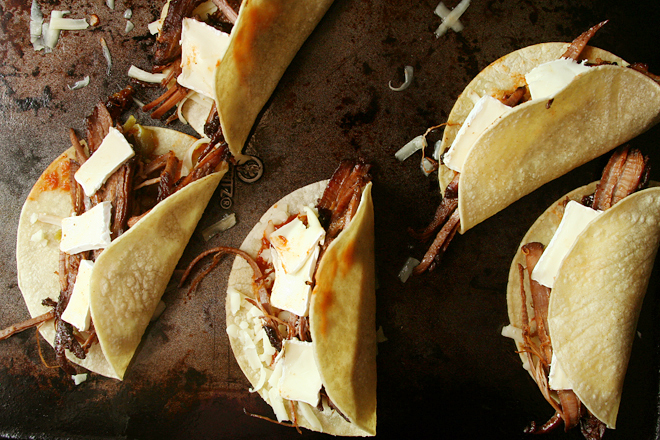
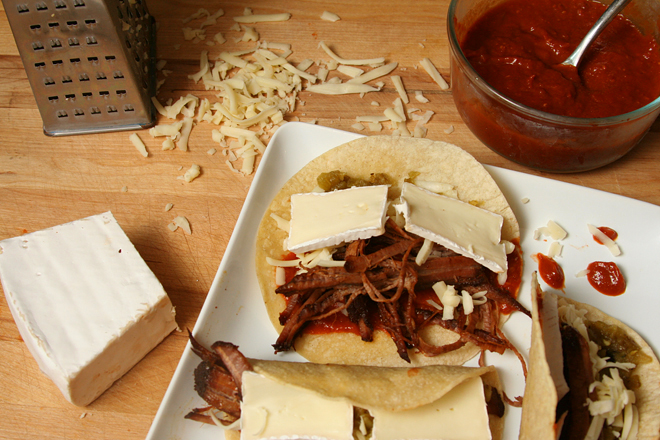
Not that I have any complaints though. Topping the tacos with brie certainly solves any potential problems the low fat content of the meat might have introduced. With a sweet and spicy barbecue sauce, stretchy Monterey jack cheese, and slices of creamy avocado, these tacos had plenty going on, despite or because of my stubborn changes.

brisket tacos 9

One year ago: Pizza with Prosciutto, Goat Cheese, and Roasted Tomatoes
Two years ago: Strawberry Daiquiri Ice Cream
Three years ago: Chicken Fajitas
Four years ago: Pasta with Roasted Red Pepper Sauce
Five years ago: Blueberry Poppy Seed Brunch Cake

Printer Friendly Recipe
Brie and Brisket Tacos (adapted from Rebecca Rather’s Pastry Queen via Confections of a Foodie Bride)

Serves 4, with leftover brisket

No one seems to brown brisket. I don’t know why that is, but I browned mine.

Brisket:
1 tablespoon canola or vegetable oil
1 (3-pound) brisket
salt
ground black pepper
1 tablespoon chili powder
3 cloves garlic, minced or pressed through a garlic press
1 (12-ounce) medium-dark beer
2 tablespoons honey

Raspberry chipotle barbecue sauce:
1 tablespoon olive oil
1 medium yellow onion, chopped
2 cloves garlic, minced or pressed through a garlic press
½ cup ketchup
1 chipotle chile in adobe sauce, minced
2 tablespoons lemon juice
¼ cup raspberries, fresh or frozen
1½ tablespoons Worcestershire sauce
1½ teaspoons dijon mustard
½ teaspoon salt
¼ teaspoon black pepper

Toppings:
12 corn tortillas, warmed
4 ounces brie, thinly sliced
1 cup (4 ounces) Monterey jack cheese

1. For the brisket: Heat the oven to 325 degrees. Heat the oil in a 5-quart Dutch oven over medium-high heat. Pat the meat dry, season it generously with salt, pepper, and the chili powder. Transfer the brisket to the Dutch oven and cook, without moving, for about 3 minutes, until deeply browned. Flip and brown the second side. Transfer the meat to a plate. Discard any fat in the pan (but leave the cooked-on brown bits).

2. Add the garlic to the pan and cook, stirring constantly, until fragrant, about 30 seconds. Pour the beer into the pot, scraping up the sticky brown bits on the bottom of the pot. Stir in the honey, then add the meat. Bring to a simmer over medium-high heat. Cover the Dutch oven and transfer it to the oven. Cook for 3 hours, turning every hour or so.

3. For the sauce: In a medium saucepan over medium heat, heat the oil until it runs like water when the pan is tilted. Add the onion; cook, stirring occasionally, until it just starts to brown around the edges, about 8 minutes. Add the garlic and cook, stirring constantly, until fragrant, about 30 seconds. Add the ketchup, chile, lemon juice, raspberries, Worcestershire sauce, mustard, salt, and pepper. Bring to a simmer, then reduce the heat to low, cover, and cook for 10 minutes. Puree, either with an immersion blender in the saucepan or by transferring the sauce to a blender.

4. When the brisket is tender, either slice it or shred it, leaving behind large chunks of fat. Layer brisket, sauce, brie, and Monterey jack cheese in the tortillas (plus Hatch green chile and avocado if you can’t imagine tacos with them). Serve immediately.

brisket tacos 6

manchego cheese and garlic hot dogs

garlic hot dogs 5

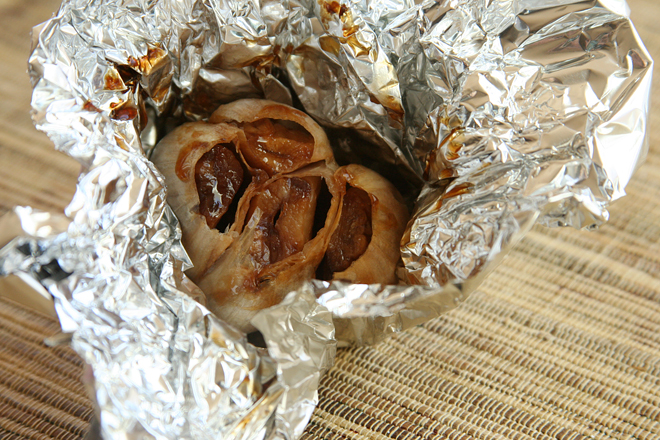
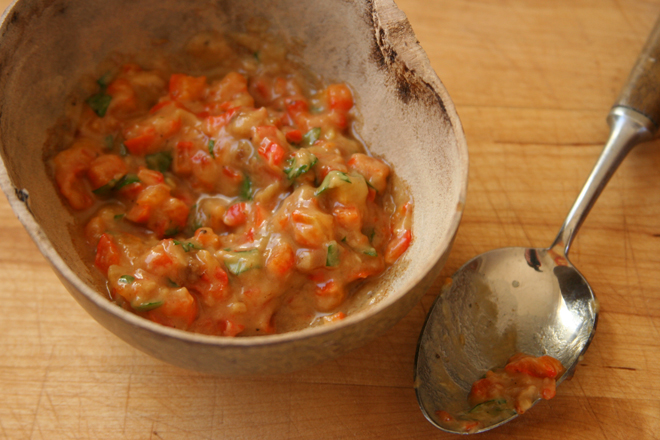
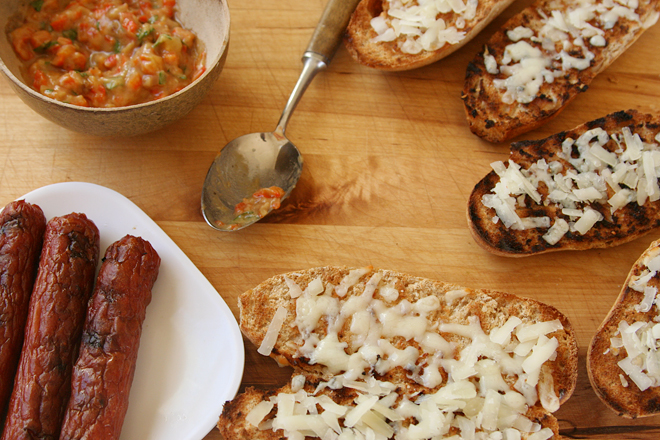
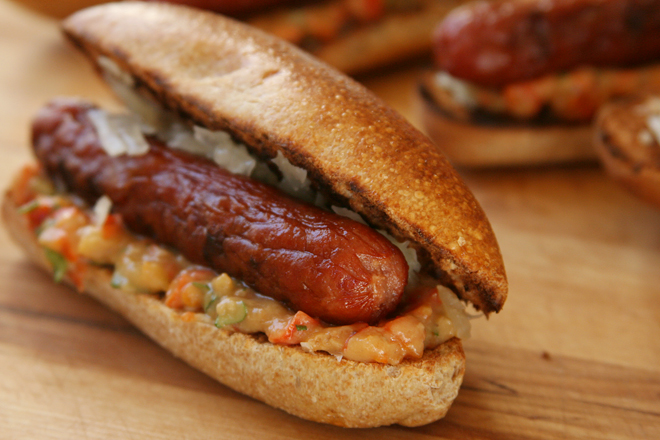
Maybe I shouldn’t play favorites between four fun and delicious hot dog recipes, but this one had roasted garlic, so…it’s my favorite.

garlic hot dogs 1

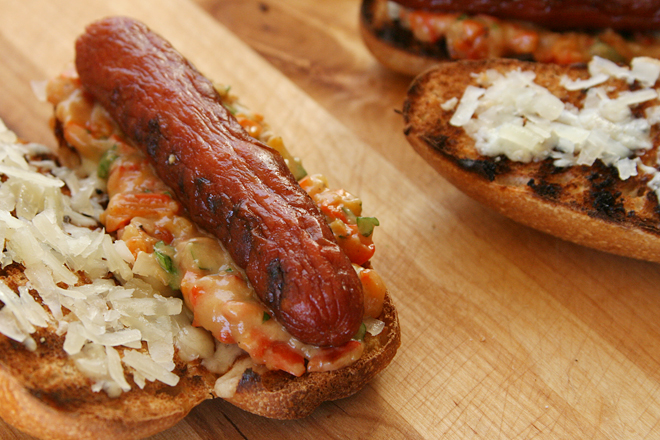
One thing I found through making four types of hot dogs in four days was that most hot dogs benefit from being topped with something vinegary to cut through the fat of the meat. Mustard and pickle relish are the traditional choices. In this recipe, it’s sherry vinegar, mixed into a relish of roasted garlic and roasted red peppers.

garlic hot dogs 3

Roasted garlic is always sweet and creamy and delicious, and a hot dog was just as good as a vehicle for serving it as my other favorite – plain rustic bread. It’s no wonder this ended up my favorite of the hot dogs from our Hot Dog Week. The roasted garlic made it a shoo-in.

garlic hot dogs 2

One year ago: Pasta with Salmon in Pesto Cream Sauce
Two years ago: Chocolate Frosting (comparison of 3 recipes)
Three years ago: Bacon-Wrapped Goat Cheese and Almond-Stuffed Dates
Four years ago: Honey Yogurt Dip
Five years ago: Green Chile Chicken Enchiladas

Printer Friendly Recipe
Manchego Cheese and Garlic Hot Dogs (adapted from Bon Appétit via Annie’s Eats)

Makes 6 hot dogs

Relish:
2 large heads of garlic, top ½-inch cut off
5 teaspoons extra-virgin olive oil, divided
½ cup diced drained roasted red peppers
1 tablespoon chopped fresh parsley
Coarse kosher salt
Ground black pepper
Sherry wine vinegar or balsamic vinegar

Hot dogs:
6 grilled hot dog buns
6 grilled all-beef hot dogs
2 ounces Manchego cheese, grated

1. For the relish: Heat the oven to 400 degrees. Place each head of garlic, cut side up, in the center of a square of foil; drizzle each with 1 teaspoon of oil; enclose the garlic in the foil. Place the packets on the oven rack; roast until the garlic is tender, about 45 minutes. Open the packets; cool 15 minutes.

2. Squeeze the garlic cloves into a small bowl; mash. Mix in 3 teaspoons oil, the red peppers, and parsley. Season with salt, pepper, and sherry vinegar.

3. For the hot dogs: Arrange the buns on plates. Top each with a grilled hot dog, then cheese and garlic relish. Serve immediately.

garlic hot dogs 6

argentinian hot dogs

argentinian hot dogs 3

Dave and I had an impromptu get-together last fall, the same day I made cupcakes for a wedding. I already had these hot dogs planned for dinner that night, and without time to plan and shop for anything new, I had to accept that hot dogs would be the first thing I would ever cook for some of these friends. But at least they were fancy hot dogs.

argentinian hot dogs 1

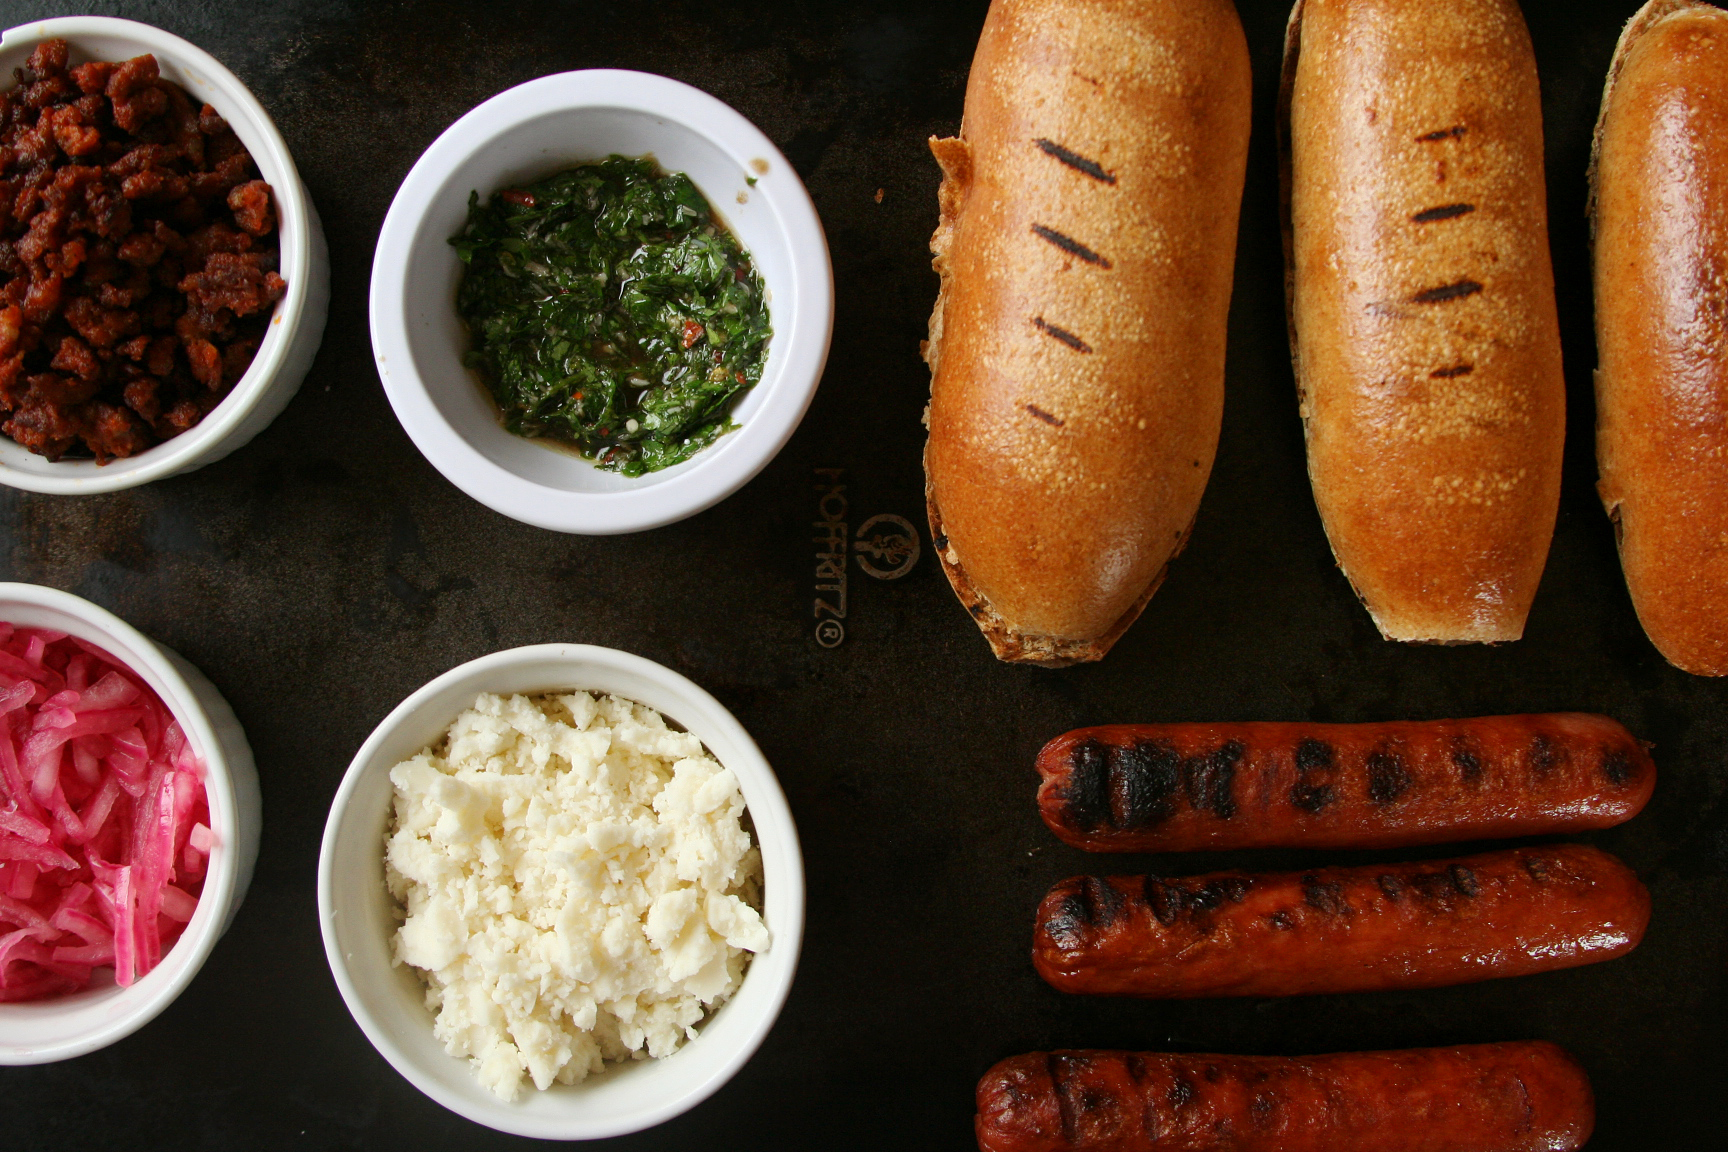
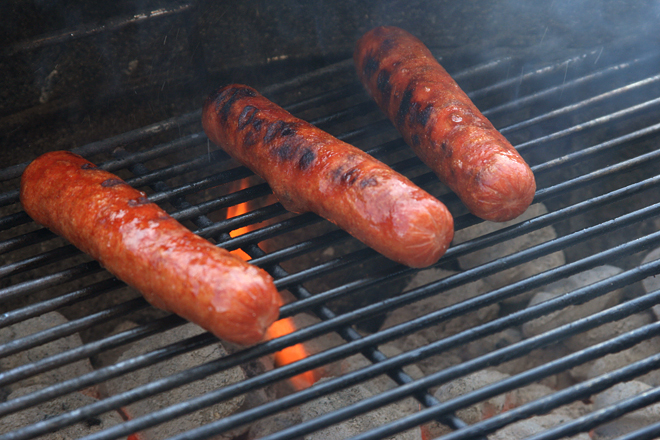
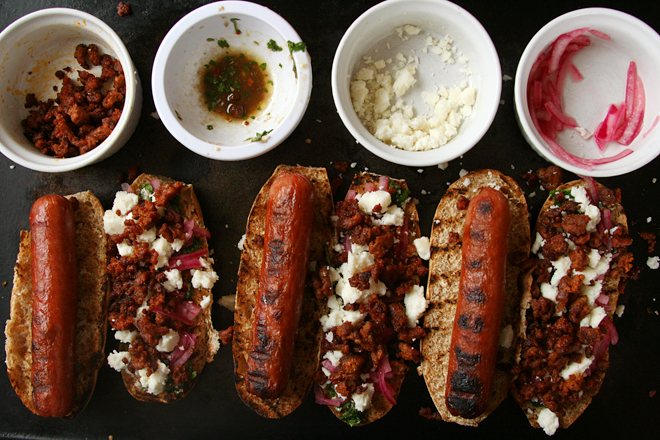
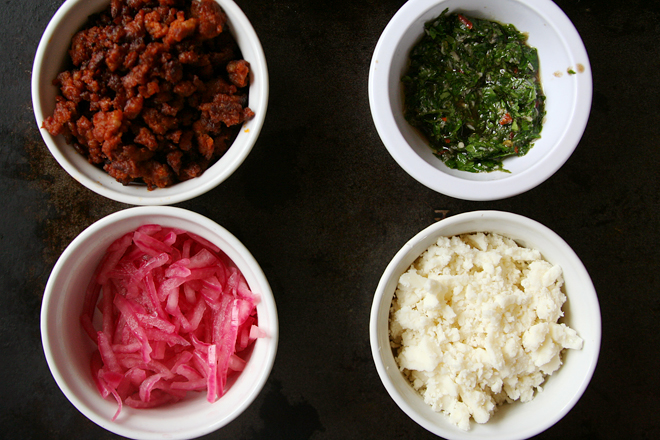
They were one topping less fancy than when Dave and I made these recently during what was basically Hot Dog Week, because I simply ran out of time and energy to make chimichurri. But homemade buns, all-beef dogs, chorizo, pickled onions, Hatch green chile, and queso fresco were plenty of toppings. These were declared the fanciest hot dogs anyone had eaten. The chorizo stole the show, as it usually does.

argentinian hot dogs 5

But it’s too bad I didn’t get to the chimichurri the first time I made these, because it really does add a nice green element to the sandwich, which balances all the fat in the meats and cheese. Chorizo on its own makes one heck of a great hot dog topper, and I know one of our guests that day won’t make hot dogs at home without it now, but I love my hot dogs with something intensely vinegary, and this is even better because it has two different ways of drawing that flavor in, the onions and the chimichurri.  The only disadvantage is that this is so much stuff to fit into a hot dog bun that you’re bound to lose some of it on the plate, but serving hot dogs with a fork to scoop up extra goodies is a small price to pay.

argentinian hot dogs 4

One year ago: Marinated Roasted Tofu
Two years ago: Pasta e Fagioli
Three years ago: Oatmeal Pancakes
Four years ago: Crispy Bagel Sushi Roll
Five years ago: Olive Oil Bread

Printer Friendly Recipe
Argentinian Hot Dogs (from San Jose Mercury News via Oishii)

Makes 8 sandwiches

For the pickled onions:
1 red onion, halved and thinly sliced
¼ cup white wine or champagne vinegar
¼ teaspoon salt
½ teaspoon sugar

For the chimichurri:
2 cloves garlic, peeled
1 bunch parsley leaves
¼ cup extra virgin olive oil
1 small lemon
2 tablespoons red wine vinegar
½ teaspoon red pepper flakes
⅛ teaspoon salt

To assemble:
8 grilled beef hot dogs
8 buns
8 ounces ground chorizo, cooked
8 ounces queso fresco , crumbled

1. For the onions: In a small bowl, combine the onion, vinegar, salt, and sugar. Set aside for at least 15 minutes.

2. For the chimichurri: Add the garlic to a food processor; process until minced. Scrape down the sides of the bowl; add the parsley and process until chopped. Add the remaining ingredients; process to combine.

3. Heat a grill to medium-high heat. Grill the hot dogs until they are browned and heated through, about 5 minutes. Toast the buns on both sides. Transfer the buns and hot dogs to plates. Fill each bun with a hot dog, chorizo, queso fresco, pickled onions, and chimichurri. Serve immediately.

argentinian hot dogs 2

bolognese hot dogs

italian hot dogs 6

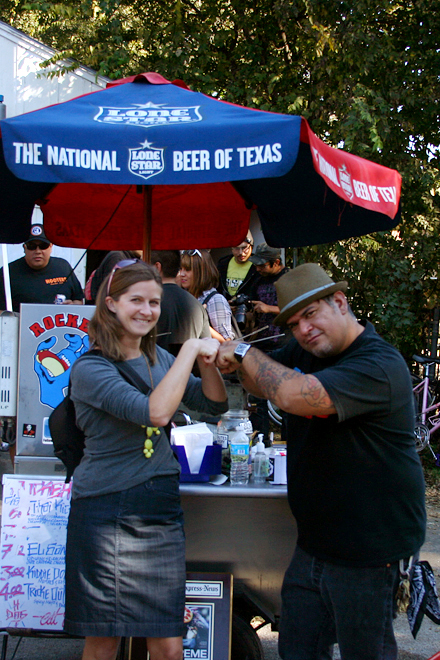
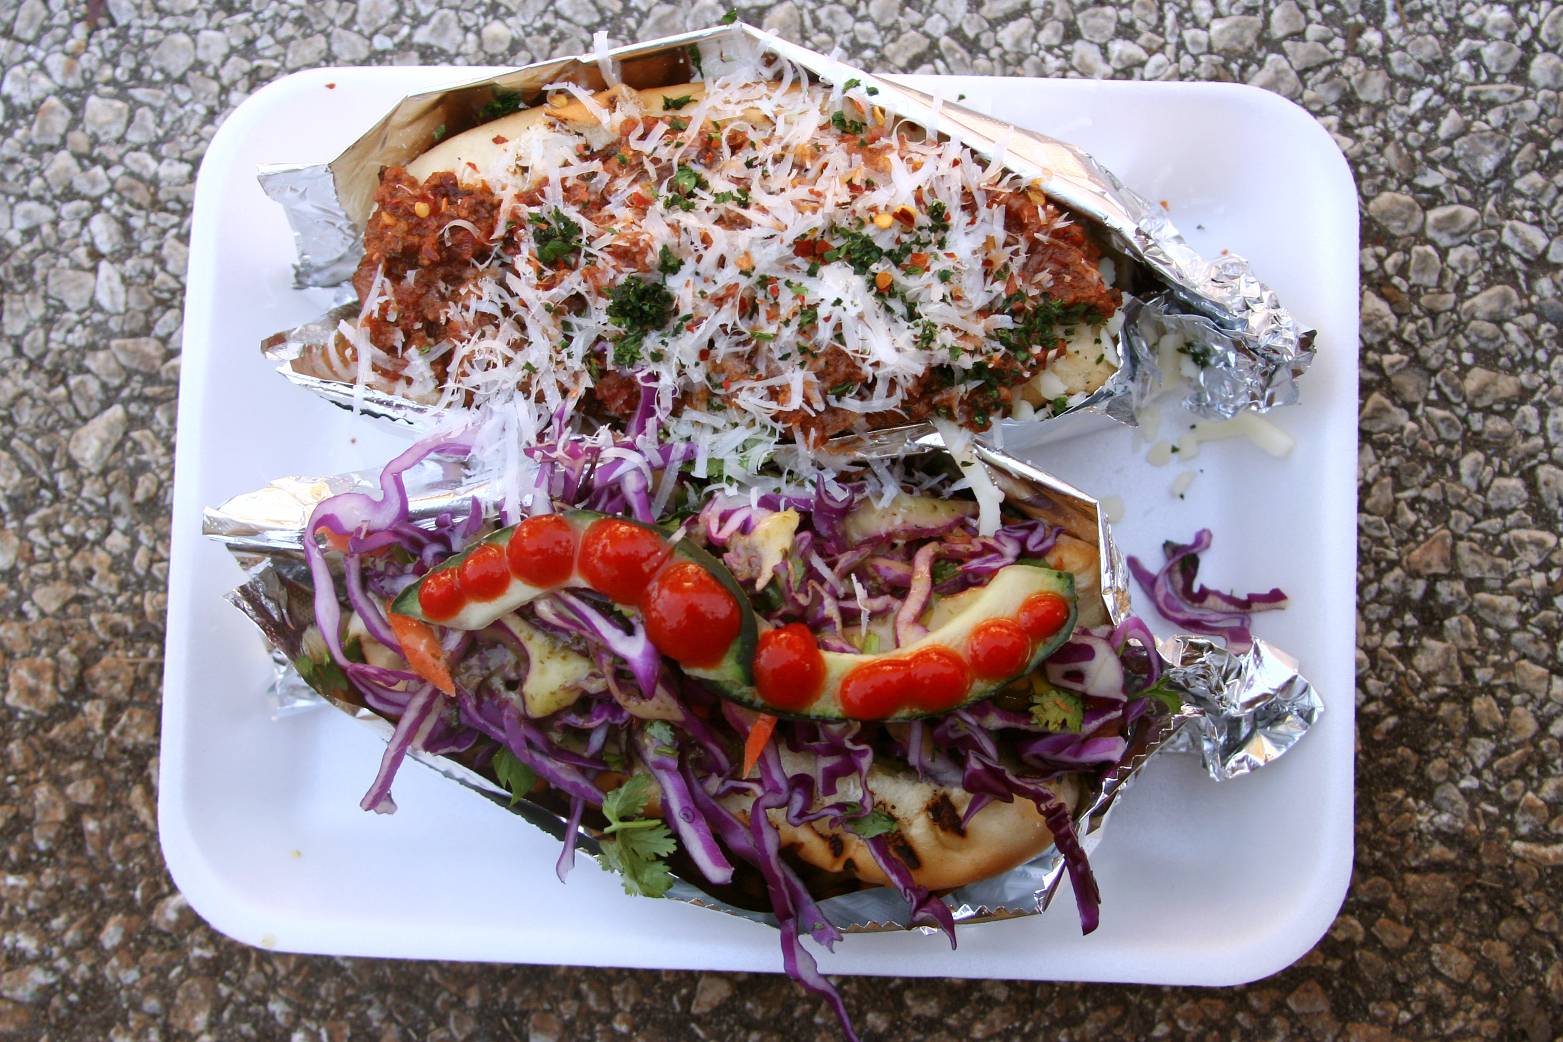
Having my picture taken with the RockerDogz hot dog truck guy in San Antonio might be one of the dorkiest things I’ve done in my life. I did walk over two miles (in ballet flats – ouch!) to his truck, which already pretty well establishes that I’m an oddball. But when I was looking into where we should eat on our weekend in San Antonio last fall, this hot dog cart got more positive – raving really – reviews than any real restaurant. I was determined to eat there.

italian hot dogs 1

Once I had, I was then determined to steal all of his ideas to copy at home. Probably the best of the hot dogs we had from there were the Thai Kick Boxers, with a cabbage slaw, pickled Serrano peppers, cucumbers, and artfully applied sriracha. The dog topped with carne guisada was a delicious mess, and I was expecting the same from the Bolognese-topped sandwich, but not a drip was dropped.

italian hot dogs 2

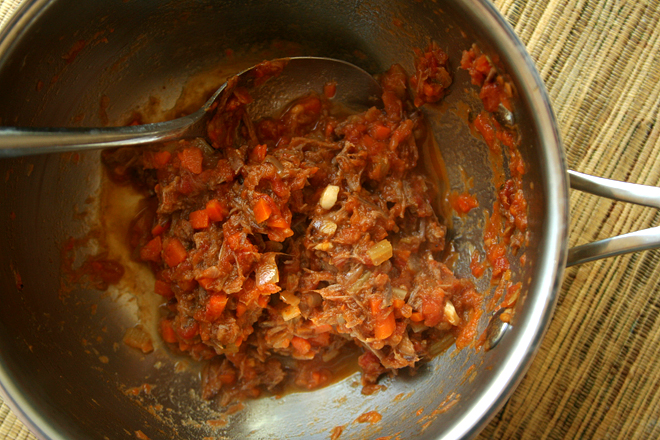
And that one, at least, was easy to mimic at home. At least it would be if you had leftover Bolognese sauce lying around. I didn’t, but I did have pot roast pappardelle, so I finely shredded some beef into the sauce and then simmered the mixture until it was thick (and resembled something regurgitated, but let’s bypass that aspect of it).

italian hot dogs 3

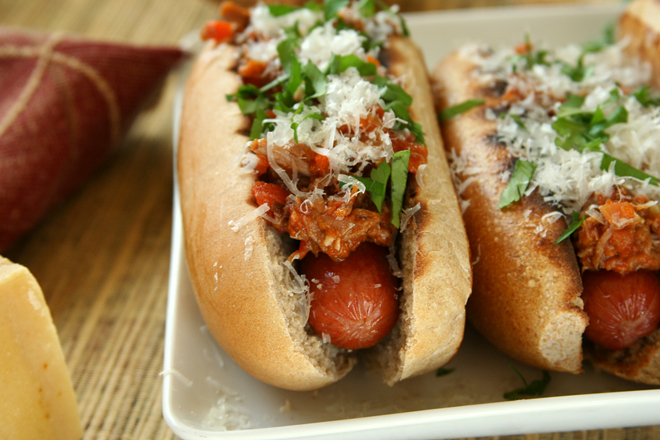
The pot roast sauce was, as I said before, a little lighter in flavor than a red wine-braised roast or regular Bolognese would be, and the sweet all-beef sausage almost overpowered it. It was still really good though, and not nearly as messy as you might think; just like in San Antonio, we managed to eat our sandwiches without napkins or drips, so using a thick Bolognese (or whatever meaty Italian sauce you happen to have around) really makes a difference. It was just as delicious as the one we had in San Antonio, but this time, acquiring a tasty and creative hot dog didn’t give me any blisters.

italian hot dogs 5

One year ago: Lentil Salad with Squash and Goat Cheese
Two years ago: Lemon Poppy Seed Muffins
Three years ago: Chocolate Oatmeal Almost Candy Bars
Four years ago: Caramel-Topped Flan
Five years ago: Country Crust Bread

Printer Friendly Recipes
Bolognese Hot Dogs

Makes 8 sandwiches

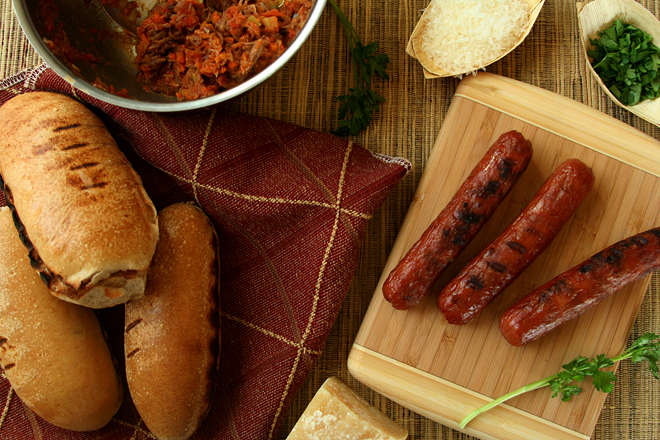
8 all-beef hot dogs
8 hot dog buns, split
4 cups Bolognese sauce, warm
½ cup (1 ounce) grated parmesan cheese
¼ cup fresh parsley, minced

Heat a grill to medium-high heat. Grill the hot dogs until they are browned and heated through, about 5 minutes. Toast the buns on both sides. Transfer the buns and hot dogs to plates. Fill each bun with a hot dog, then divide the bolognese sauce evenly between the sandwiches.  Top with parmesan and parsley; serve immediately.

italian hot dogs 7