apple cheddar scones (twd)

Apple and cheddar is a combination of flavors that I’ve heard about often but had never tried, so I was happy that Karina’s choice of Apple-Cheddar Scones for this week’s TWD recipe would give me that chance. Also, while I’m not sure if this is supposed to be a sweet or savory recipe, I served it with soup for dinner, which means I actually got to choose my own dessert to make last week! How exciting.

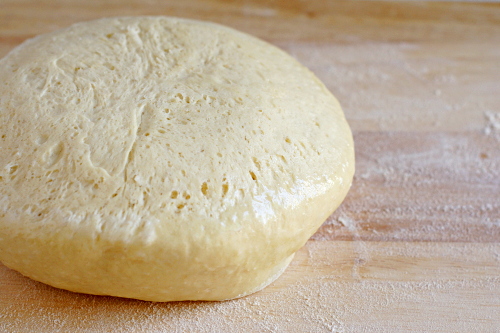
I made the full recipe, a rarity for me, and froze most of the shaped scones. The recipe came together with no hitches, although the dough was a bit stickier than I was expecting.

Although we ate these for dinner twice last week, situations beyond my control prevented me from enjoying one fresh from the oven. However, they were great even at room temperature. They were very light and tender.

That being said, I’ll tweak the recipe a bit for the next time I make it. Most importantly, I double the salt, because I kept hoping for just a bit more flavor from each bite, and this recipe calls for significantly less salt than most other biscuit recipes. I’d also cut the cheese into tiny squares instead of grating it, because I think the flavor almost gets lost when it’s evenly mixed in with the flour. I want little bursts of cheddar flavor. And I might increase the apples a bit, because I didn’t get as much apple flavor as I wanted either.

But they were still really good. I’m glad I have four more in the freezer. I’m also more interested in other apple-cheddar recipes now.

Karina has posted the recipe.

danish braids (daring bakers)

Wow, who knew making Danish dough would be so easy? I’d previously considered making some sort of laminated dough, Danish or croissants or the like, but the number of steps involved with those recipes made me think that it would be an intense project requiring the better part of a day.

Not so. While the dough needs some babysitting, each step of rolling the dough flat and folding it into thirds, repeated three times, takes only a minute or two.

And good thing, because I made two separate Danish doughs. After I quickly scanned the recipe near the beginning of the month, I started thinking about what I wanted to fill my Danishes with. I settled on a savory and a sweet version, and it wasn’t until a few days before the posting date, when I looked closer at the recipe, that I realized that the dough itself was sweet and might not be a good match for the red pepper, Italian sausage, and parmesan I’d planned to fill it with. So I made the dough twice, once as written (except leaving out the cardamom, orange zest, and vanilla bean due to laziness) to be filled with cherries and almonds, and another time, reducing the sugar, increasing the salt, replacing the orange juice with water, and eliminating the vanilla extract.

I was very happy with both the sweet and the savory breads. I thought the dough might be flakier than it was, but perhaps this was due to the heat in my kitchen when I was working with the dough. Maybe the butter melted into the dough instead of remaining as separate layers. Or maybe that’s just how this dough is. Regardless, it was very tender. I did think that it needed a bit more salt, and this is something I’ll take into account in the future.

Overall, this was a great learning experience. Now that I know what’s involved with making a laminated dough, I feel much more confident trying similar recipes, like croissants and puff pastry.

Danish Braids

This is the recipe as I made it. You can find the original recipe at this month’s hosts’ sites.

Sweet Danish Dough:
¾ teaspoon active dry yeast
2 tablespoons whole milk
1½ tablespoons sugar
½ teaspoon vanilla extract
½ large eggs, chilled
1 tablespoon fresh orange juice
4 ounces all-purpose flour
¼ teaspoon salt

Savory Danish Dough:
¾ teaspoon active dry yeast
2 tablespoons whole milk
1 teaspoon sugar
½ large eggs, chilled
1 tablespoon water
4 ounces all-purpose flour
1/3 teaspoon salt

For the butter block (Beurrage)
8 tablespoons (1 stick) cold unsalted butter
2 tablespoons all-purpose flour

For the dough: Combine yeast and milk in the bowl of a mixer fitted with the paddle attachment and mix on low speed. Slowly add sugar, vanilla extract, egg, and orange juice. Mix well. Change to the dough hook and add the salt with the flour, 1 cup at a time, increasing speed to medium as the flour is incorporated. Knead the dough for about 5 minutes, or until smooth. You may need to add a little more flour if it is sticky. Transfer dough to a lightly floured baking sheet and cover with plastic wrap. Refrigerate for 30 minutes.

For the butter block: Combine butter and flour in the bowl of a mixer fitted with a paddle attachment and beat on medium speed for 1 minute. Scrape down the sides of the bowl and the paddle and then beat for 1 minute more, or until smooth and lump free. Divide in two and set aside at room temperature.

2. After the dough has chilled 30 minutes, turn it out onto a lightly floured surface. Roll the dough into a rectangle approximately 9 x 6.5 inches and ¼ inch thick. The dough may be sticky, so keep dusting it lightly with flour. Spread the butter evenly over the center and right thirds of the dough. Fold the left edge of the dough to the right, covering half of the butter. Fold the right third of the rectangle over the center third. The first turn has now been completed. Mark the dough by poking it with your finger to keep track of your turns, or use a sticky and keep a tally. Place the dough on a baking sheet, wrap it in plastic wrap, and refrigerate for 30 minutes.

3. Place the dough lengthwise on a floured work surface. The open ends should be to your right and left. Roll the dough into another approximately 6.5 x 9 inch, ¼-inch-thick rectangle. Again, fold the left third of the rectangle over the center third and the right third over the center third. No additional butter will be added as it is already in the dough. The second turn has now been completed. Refrigerate the dough for 30 minutes.

4. Roll out, turn, and refrigerate the dough two more times, for a total of four single turns. Make sure you are keeping track of your turns. Refrigerate the dough after the final turn for at least 5 hours or overnight. The Danish dough is now ready to be used. If you will not be using the dough within 24 hours, freeze it. To do this, roll the dough out to about 1 inch in thickness, wrap tightly in plastic wrap, and freeze. Defrost the dough slowly in the refrigerator for easiest handling. Danish dough will keep in the freezer for up to 1 month.

Cherry filling:
1 can cherries, drained, ¼ cup juice reserved
1.5-2 tablespoons sugar
½ tablespoon cornstarch
pinch salt
drop almond extract
¾ teaspoon brandy
toasted almonds

Stir sugar, cornstarch, and salt together in saucepan. Whisk in reserved cherry juice and wine. Cook, whisking frequently, over medium-high heat, until mixture simmers and thickens. Stir in almond extract and cherries. Cover and refrigerate until ready to use. Add to braid along with toasted almonds.

Sausage filling:
¼ pound sausage
½ red pepper, diced

Put sausage and ¼ cup water in medium-large skillet. Cook over medium-high heat until water evaporates and sausage cooks through and browns, about 7 minutes, breaking up large pieces. Remove sausage with slotted spoon. Add enough oil so that amount in skillet equals about 1 tablespoon. Add peppers and sauté until softened slightly, about 5 minutes. Season to taste with salt and pepper. Remove and set aside. Add to braid along with grated pecorino and parmesan cheese.

DANISH BRAIDS:
2 sets of Danish Dough
½ cup of each filling

Beat 1 large egg for egg wash

1. Line a baking sheet with a silicone mat or parchment paper. On a lightly floured surface, roll the Danish Dough into a 10 x 15-inch rectangle, ¼ inch thick. If the dough seems elastic and shrinks back when rolled, let it rest for a few minutes, then roll again. Place the dough on the baking sheet.

2. Along one long side of the pastry make parallel, 4-inch-long cuts with a knife or rolling pastry wheel, each about ¾ inch apart. Repeat on the opposite side, making sure to line up the cuts with those you’ve already made.

3. Spoon the filling you’ve chosen to fill your braid down the center of the rectangle. Starting with the top and bottom “flaps”, fold the top flap down over the filling to cover. Next, fold the bottom “flap” up to cover filling. This helps keep the braid neat and helps to hold in the filling. Now begin folding the cut side strips of dough over the filling, alternating first left, then right, left, right, until finished. Trim any excess dough and tuck in the ends.

Egg Wash
Lightly coat the braid with the egg wash. Spray cooking oil onto a piece of plastic wrap, and place over the braid.

Repeat with remaining braid and filling.

Proofing and Baking
1. Proof at room temperature or, if possible, in a controlled 90 degree F environment for about 2 hours, or until doubled in volume and light to the touch.

2. Near the end of proofing, preheat oven to 400 degrees F. Position a rack in the center of the oven. Brush braids with egg wash again.

3. Bake for 10 minutes, then rotate the pan so that the side of the braid previously in the back of the oven is now in the front. Lower the oven temperature to 350 degrees F, and bake about 15-20 minutes more, or until golden brown. Cool and serve the braid either still warm from the oven or at room temperature. The cooled braid can be wrapped airtight and stored in the refrigerator for up to 2 days, or freeze for 1 month.

yeasted waffles with vanilla butter, sliced bananas and candied macadamia nuts

I try to resist having too many kitchen gadgets squeezed into my apartment’s small galley-style kitchen, but somehow I ended up with two waffles irons. One for flatter, traditional waffles and then one of those huge Belgian waffle makers that you see in hotel complementary breakfast line-ups.

Yikes. That’s a big waffle maker. But I figure the more I use it, the more justification I have for owning it. Danielle recently described a breakfast she had in a restaurant as a “dance in your seat meal” – sourdough waffles with candied walnuts and sliced bananas, served with vanilla butter. Hmm…yum.

I was pretty sure I could recreate it with just a few adjustments. I don’t have sourdough starter, but one of the recipes that came with my waffle iron uses yeast. It’s an easy recipe to put together, and in fact, most of it is done the night before, which I always like with breakfast recipes. The waffles ended up tasting fairly sourdoughy actually, plus they were wonderfully crisp on the outside and tender on the inside.

I didn’t have walnuts, but I sugared macadamia nuts using the same method used for the peanuts in the Snickery Squares recipe. For the vanilla butter, I mixed softened butter with my homemade vanilla extract and just a little powdered sugar. I considered using a real vanilla bean, but I got lazy.

Overall, it was great! I wasn’t crazy about the banana, either because it was too ripe, or because I eat bananas so much that I’m just not interested in them in a weekend breakfast. But the nuts were great, and it was nice not having to slather everything in maple syrup. The real find of this meal was the waffle recipe, which is the best I’ve ever made, and will certainly be my standard recipe in the future.

Good Night Waffles (adapted from the Waring Pro Belgian Waffle Maker instruction booklet)

I reduced the butter in this recipe from 8 tablespoons to 6 tablespoons since I knew I’d be topping the waffles with vanilla butter. Because the waffles seemed so good with the lower amount of butter, I figured I might as well stick with it.

½ cup water
1 tablespoon granulated sugar
2¼ teaspoons (one packet) instant dry yeast
2 cups whole milk
6 tablespoons unsalted butter, melted and cooled
1 teaspoon salt
2 cups all-purpose flour
2 large eggs, lightly beaten
2 teaspoons vanilla extract
¼ teaspoon baking soda

1. The night before, or at least 8 hours before baking, combine the warm water, granulated sugar, yeast, milk, melted butter, and salt. Beat in the flour until smooth (this may be done using a hand mixer on low speed). Wrap bowl tightly with plastic wrap and let stand overnight (or for 8 hours) on the countertop – do not refrigerate.

2. When ready to bake, preheat your waffle maker on your preferred setting. While the waffle maker is heating, stir the eggs, vanilla extract, and baking soda into the batter. Measure out enough batter for your waffle maker and pour into the preheated waffle maker. Use a heat-proof spatula to spread the batter evenly over the grids. Close lid and bake the Belgian waffle in the waffle maker until it indicates the waffle is done.

3. Remove waffle and repeat until the desired number of Belgian waffles has been made. Cover remaining batter and place in the refrigerator for up to 3 days. Waffles may be kept warm in an oven at low-heat (200°F). Place Belgian waffles on a cookie sheet on a rack in the warm oven.

This made 6 waffles for me. I served it with 3 sliced bananas, 1 cup sugared macadamia nuts, and 3 tablespoons vanilla sugar. Vanilla sugar was made by mixing 3 tablespoon butter with 1 teaspoon vanilla extract and 2 tablespoons powdered sugar.

pigs in a blanket

Dave’s co-workers tease him about how he always gets to eat gourmet food. “So she makes gourmet lunches for you to bring to work, and then you go home and eat gourmet dinners, and before bed have a gourmet dessert.” Um. Not always. I wonder what they’ll have to say about the leftovers from this meal?

I wasn’t sure what to do with the hot dogs leftover from the franks and beans. In my opinion, the only good way to eat hot dogs is crispy and a bit blackened from a grill or fire, preferably topped with chili. Since I don’t have a grill, my options were limited. Boiled (or worse – microwaved) hot dogs didn’t sound appetizing.

copy-of-img_1739Updated 3/20/09: Also good in mini!

Lemontartlet inspired me to wrap them in bread and bake them. It solves the problem of how to cook the hot dogs indoors, and I guarantee that my homemade bread is far tastier than a storebought hot dog bun. (Lemontartlet used biscuit dough, but I made a yeast bread.)

I based the bread recipe on a recipe for Parker House rolls, thinking that the butter in the recipe would give make it nice and tender, while the sugar would provide the flavor I wanted. It was a perfect match. The bread did expand more than I was expecting when I baked it, and I might (if such a thing is possible) have ended up with too much bread per dog. I’ll adjust the recipe and give better proportions below.

I found that the best method for rolling out the dough was to use my fingertips to flatten the dough balls a bit, and then roll in only one direction. I was using Nathan’s Beef Franks (recommended by Cooks Illustrated and definitely the best hot dogs I’ve had), which I think are a little shorter than most. Most of my rolls ended up just the right width to almost-but-not-quite coat the whole dog.

If you’re a perfectionist and want your pigs perfectly wrapped in those blankets, which I did but I didn’t figure out this trick until the last one, you can roll the bread dough out a little wider than the dog, then fold in the edges and roll a few times in the other (long) direction. You’ll have a more perfect rectangle, which will more perfectly coat your hot dog and evenly distribute your bread. And look a teensy bit better.

Either way, these are super fun, and other than roasting them over a fire until they’re slightly blackened, this has to be my favorite way to eat hot dogs!

Pigs in a Blanket (bread recipe adapted from Ultimate Bread, by Eric Treuille and Ursula Feriggno)

This is enough bread dough for 10 hot dogs.  If your package only has 8, you can make dinner rolls out of the remaining dough.

Bread dough:
3 tablespoons unsalted butter
¾ cup milk
1½ tablespoons sugar
2 eggs
3½ cups (17½ ounces) unbleached flour
1½ teaspoons instant yeast
1½ teaspoons salt

10 hot dogs
2 tablespoons milk

1. Heat butter in small saucepan over medium heat until just melted. Add ¾ cup milk and sugar. If butter re-solidifies, heat until it’s completely melted. Remove from the heat and beat in the eggs.

2. Mix flour, salt, and yeast in bowl of standing mixer fitted with dough hook. Turn machine to low and slowly add milk mixture. When dough comes together, increase speed to medium (setting number 4 on a KitchenAid mixer) and mix until dough is smooth, shiny, and elastic, stopping machine two or three times to scrape dough from hook if necessary, about 8 minutes. Knead in extra flour, 1 tablespoon at a time, if the dough is too sticky. The dough should be not be dry, but soft. Turn dough onto lightly floured work surface; knead to form smooth, round ball, about 15 seconds. (Alternatively, you can knead by hand for 10 minutes.)

2. Place dough in very lightly oiled bowl, rubbing dough around bowl to lightly coat. Cover bowl with plastic wrap; place in warm, draft-free spot until dough doubles in size, about 1-1½ hours.

3. Divide the dough into 10 pieces. Shape each piece into a smooth ball. Let rest 10 minutes. Line baking pan with silicon baking mat or parchment paper.

4. Flatten each piece into a rough rectangle using the tips of your fingers. Roll in one direction until dough is ¼-inch thick. Roll in opposite direction (across shorter width) a few times, then fold in long edges to make perfect rectangle. Roll in long direction until dough is 1/8-inch thick. Place 1 hot dog near a short end, then tightly roll, keeping the tips of the hot dog exposed. Place seam side down on prepared baking pan. Repeat with remaining dough and hot dogs.

5. Cover with plastic wrap and let rise until dough is slightly inflated, about 30 minutes. Meanwhile, heat oven to 375 degrees.

6. Brush the dough with milk. Bake for 20-25 minutes, until golden. Let cool 15 minutes before serving.

pita

Pita is one of those things that is just so much better when made at home than bought from the grocery store. Or at least this recipe, which is the only pita I’ve made, is. The bread is more tender and of course flavorful than what I buy.

Pita isn’t any harder to make than other homemade bread. The dough is kneaded and allowed to rise, like other bread recipes. It’s then shaped into balls, left to rest a few minutes, and rolled into a thin oval. Like most kneaded doughs, this one doesn’t like to be rolled out and will probably need to rest half way through to let the gluten strands relax. Otherwise it’ll be like trying to roll out a giant rubber band.

Only the baking process differs substantially from other breads. Pita is baked on a pre-heated surface, which I’m guessing is what produces the characteristic pocket. I’ve seen recipes that use a pizza stone for this, but I’ve always just preheated a flour-coated baking pan. As much as I love my pizza stone, the baking pan seems a little easier.

These pita were a fantastic addition to the Middle Eastern feast I made a few weeks ago. But my lunch of leftovers the next day was at least as good as the dinner – hummus, falafel, and vegetables stuffed into the pita’s pocket made for an incredibly satisfying mid-day meal.

Pita (adapted from Ultimate Bread, by Eric Treuille and Ursula Feriggno)

UB note: The staple bread of the Middle East, called Khubz in Arabic, is more commonly known by its Greek name, Pita, in the west. Its soft, chewy crust, absorbent crumb, and hollow pouch make it the most versatile of breads, ideal to scoop up, dip in, wrap around, or be filled with all manner of food. Best served warm, Pita can be easily reheated: sprinkle lightly with water and warm in the oven. Keep Pita in a sealed plastic bag to prevent dryness.

Bridget note: The only things I’ve changed from the original recipe are adapting it for instant yeast and for a stand mixer.

Makes 8 breads

3½ (17.5 ounces) cups unbleached flour
2 teaspoons instant dry yeast
½ teaspoon sugar
1 teaspoon salt
1¼ cups water
1 tablespoons olive oil

1. Mix flour, salt, sugar, and yeast in bowl of standing mixer fitted with dough hook. Mix water and olive oil in 1-quart Pyrex liquid measuring cup. Turn machine to low and slowly add liquid. When dough comes together, increase speed to medium (setting number 4 on a KitchenAid mixer) and mix until dough is smooth, supple, and elastic, stopping machine two or three times to scrape dough from hook if necessary, about 10 minutes. Initially, the dough will be quite stiff. It will soften and stretch as you continue kneading. Turn dough onto lightly floured work surface; knead to form smooth, round ball, about 15 seconds. (Alternatively, you can knead by hand for 15 minutes.)

2. Place dough in very lightly oiled bowl, rubbing dough around bowl to lightly coat. Cover bowl with plastic wrap; place in warm oven until dough doubles in size, about 1½ hours.

3. Preheat oven to 425 degrees.

4. Divide the dough into 8 pieces. Shape each piece into a smooth ball. Let rest 10 minutes.

5. On a lightly floured work surface, roll out each ball to form an oval, 9 inches long and ¼ inches thick. Cover with a dish towel and proof until slightly risen, about 20 minutes.

6. Dust two baking sheets with flour and preheat in the oven for 5 minutes. Place the dough ovals on the hot baking sheets and return immediately to the oven. Bake for 5 to 10 minutes, until puffy. Wrap in a clean, dry cloth to keep the crusts soft and to prevent drying out.

I think these are the last of the pictures from my old camera. Woohoo!

kaiser rolls

I said recently that my health nut phase didn’t last long, and while I no longer stress about eating white rice or refined sugar, I do feel a little guilty buying white bread. There are some breads, mostly artisanal, that I prefer made with all white flour, but usually I like the flavor and nutrition of at least a portion of whole wheat flour.

I love Kaiser rolls for sandwiches, and Peter Reinhart’s Bread Baker’s Apprentice has some enticing pictures accompanying his recipe. The recipe follows Reinhart’s standard method of using a portion of pre-fermented dough to maximize the flavor of the final product.

The result, of course, was very good. But, there are a few changes I want to make. Mostly I want them to be a little sweeter. The only sugar in the recipe is just a bit of barley malt syrup. In the future, I’ll add honey or granulated sugar. Also, Reinhart’s photo looks like he used an egg wash or something, which he doesn’t call for in the recipe. His are so shiny and pretty, I think I might use an egg wash, or at least milk, next time.

Overall though, these were good, and fun. And with the whole wheat flour I added, just a bit healthier than what I would have got from the grocery store.

Kaiser Rolls (from Peter Reinhart’s Bread Baker’s Apprentice)

Makes 6 large rolls or 9 smaller rolls (I made 8 rolls and thought they were pretty big)

Bridget note: Next time, I’ll add 2 tablespoons honey or 3 tablespoons granulated sugar to the dough. I’ll also brush the rolls with milk just before baking.

1½ cups (8 ounces) pate fermentée
1¼ cups (10 ounces) unbleached bread flour
¾ teaspoon plus a pinch (0.2 ounce) salt
1 teaspoon (0.11 ounce) instant yeast
1 large egg, slightly beaten
1½ teaspoons (0.33 ounce) barley malt syrup
1½ tablespoons (0.75 ounce) vegetable oil or shortening, melted
10 tablespoons to ¾ cup (5 to 6 ounces) water lukewarm

1. Take the paté fermentée out of the refrigerator 1 hour before making the dough. Cut it up into about 10 small pieces with a pastry scraper or serrated knife. Cover it with a towel or plastic wrap and let sit for 1 hour to take off the chill.

2. Stir together the flour, salt, and yeast in a 4-quart bowl (or in the bowl of an electric mixer). Add the pate fermentée, egg, barley malt syrup, oil, and 10 tablespoons water. Stir (or mix on low speed with the paddle attachment) for 1 minute, or until the ingredients form a ball. If there is still some loose flour, add the remaining 2 tablespoons water.

3. Lightly dust the counter with flour, transfer the dough to the counter, and begin kneading (or mix on medium speed with the dough hook). Knead for about 10 minutes (6 minutes by machine), adding flour, if needed, to make a dough that is soft and supple, tacky but not sticky. The dough should pass the windowpane test and the internal temperature should register 77 to 81 degrees. Lightly oil a large bowl and transfer the dough to the bowl, rolling it to coat with the oil. Cover the bowl with plastic wrap.

4. Ferment at room temperature for 2 hours, or until the dough doubles in size. If the dough doubles in size before 2 hours have elapsed, remove it, knead it lightly to degas it, and return it to the bowl to continue fermenting until doubled from original size or until 2 hours have elapsed.

5. Remove the dough from the bowl and divide it into 6 to 9 equal pieces (4 ounces for large rolls, 2⅔-ounce pieces for smaller rolls). Form the pieces into rolls. Mist the rounds lightly with spray oil, cover with a towel or plastic wrap, and let the dough relax for 10 minutes. Meanwhile, line a sheet pan with baking parchment, lightly mist it with spray oil, and then dust with semolina flour or cornmeal.

6. Prepare the individual rolls by cutting them with a Kaiser rolls cutter or knotting them. To knot them, roll out a round of dough into a 12-inch strand (shorter for smaller rolls). Tie a simple knot. Loop the two ends through the center of the knot a second time (see pictures) Place the rolls, cut side down, on the parchment, mist lightly with spray oil, and loosely cover the pan with plastic wrap of a food-grade plastic bag.

7. Proof the rolls for 45 minutes at room temperature, then flip them over so the cut or folded side is facing up. Mist again with spray oil, cover the pan, and continue proofing for another 30 to 45 minutes, or until the rolls are double their original size.

8. Preheat the oven to 425 degrees with the oven rack on the middle shelf. Uncover the rolls and prepare them for baking. If you want seeds on your rolls, mist them with water and sprinkle poppy seeds over the top. If not, just mist them with water.

9. Place the pan in the oven, spray the oven walls with water, and close the door. After 10 minutes, rotate the pan for even baking and lower the oven setting to 400 degrees. Continue baking until the rolls are a medium golden brown and register approximately 200 degrees in the center. This will take 15 to 20 minutes for large rolls, or less for smaller rolls.

10. Remove the rolls from the pan and transfer to a cooling rack. Wait at least 30 minutes before serving.

Pate fermentée

This is twice what you need for one recipe of Kaiser rolls.

1 1/8 cups (5 ounces) unbleached all-purpose flour
1 1/8 cups (5 ounces) unbleached bread flour
¾ teaspoon salt
½ teaspoon instant yeast
¾ cup to ¾ cup plus 2 tablespoons (6 to 7 ounces) water

1. Stir together the flours, salt, and yeast in a 4-quart bowl (or in the bowl of a standing mixer). Add ¾ cup of the water, stirring until everything comes together and makes a coarse ball (or mix on low speed for 1 minute with the paddle attachment). Adjust the flour or water, according to need, so that the dough is neither too sticky nor too stiff. (It is better to err on the sticky side, as you can adjust easier during kneading. It is harder to add water once the dough firms up.)

2. Sprinkle some flour on the counter and transfer the dough to the counter. Knead for 4 to 6 minutes (or mix on medium speed with the dough hook for 4 minutes), or until the dough is soft and pliable, tacky but not sticky. The internal temperature should be 77 to 81 degrees.

3. Lightly oil a bowl and transfer the dough to the bowl, rolling it around to coat it with oil. Cover the bowl with plastic wrap and ferment at room temperature for 1 hour, or until it swells to about 1½ times its original size.

4. Remove the dough from the bowl, knead it slightly to degas, and return it to the bowl, covering the bowl with plastic wrap. Place the bowl in the refrigerator overnight. You can keep this in the refrigerator for up to 3 days, or freeze it in an airtight plastic bag for up to 3 months.

I’m out of town this week, walking along the ocean and hiking around a lake. I’ll be back next week to catch up on comments and other blogs!

pecan honey sticky buns (twd)

My experience with sticky buns is limited; I guess we were more of a cinnamon roll family. Madam Chow’s TWD choice for this week would be something new for me then.

Dorie is insistent that you don’t cut the brioche dough in half. But, I did anyway. (Actually, I made a third of the recipe.) It would have been the same amount of effort to make the whole thing, and it freezes well, but do I really need this incredibly buttery bread dough to be conveniently at my fingertips? Nah. I admit I had to get a little creative with my mixer since I was making such a small amount – I mixed with the paddle for a while after adding the butter, then switched to the dough hook for the last few minutes of kneading.

I had the same problem that a number of other TWD members did with this recipe – 2 hours of rising in the morning, plus putting the rolls together and baking makes for a long wait until breakfast. I think it would work to form the rolls the night before, put them in the fridge overnight, and let them rise in a warmed oven the next morning. That should cut the waiting time in half.

The brioche made for a really light and airy base for sticky buns. But, I wonder if all that butter is worth it once it’s drowned in glaze? I’m thinking my base for cinnamon rolls would work just fine, with only about a third of the butter.

Overall, I thought these were great. The bread was light and tender, the glaze wasn’t too sweet, and they weren’t nearly as sticky as I was expecting. I almost wish I had made some extra to store in the freezer!

Pecan Honey Sticky Buns (from Dorie Greenspan’s Baking: From My Home to Yours)

Makes 15 buns

For the Glaze:
1 cup (7 ounces) packed light brown sugar
1 stick (8 tablespoons) unsalted butter, cut into 4 pieces
¼ cup honey
1½ cups pecans (whole or pieces)

For the Filling:
¼ cup (1.75 ounces) sugar
3 tablespoons (packed) light brown sugar
1 tablespoon ground cinnamon
3 tablespoons unsalted butter, at room temperature

For the Buns:
½ recipe dough for Golden Brioche loaves (see below), chilled and ready to shape (make the full recipe and cut the dough in half after refrigerating it overnight)

Generously butter a 9 by 13-inch baking pan (a Pyrex pan is perfect for this).

To make the glaze: In a heavy-bottomed saucepan, bring the brown sugar, butter, and honey to a boil over medium-low heat, stirring frequently to dissolve the sugar. Pour the glaze into the buttered pan, evening it out as best you can by tilting the pan or spreading the glaze with a heatproof spatula. Sprinkle over the pecans.

To make the filling: Mix the sugars and cinnamon together in a bowl. If necessary, in another bowl, work the butter with a spatula until it is soft, smooth and spreadable.

To shape the buns: On a flour-dusted work surface, roll the chilled dough into a 16-inch square. Using your fingers or a pastry brush, spread the softened butter over the dough. Sprinkle the dough with the cinnamon sugar, leaving a 1-inch strip bare on the side farthest from you. Starting with the side nearest you, roll the dough into a cylinder, keeping the roll as tight as you can. (At this point, you can wrap the dough airtight and freeze it for up to 2 months . . . . Or, if you want to make just part of the recipe now, you can use as much of the dough as you’d like and freeze the remainder. Reduce the glaze recipe accordingly).

With a chef’s knife, using a gentle sawing motion, trim just a tiny bit from the ends of the roll if they’re very ragged or not well filled, then cut the log into 1-inch thick buns. (Because you trim the ragged ends of the dough, and you may have lost a little length in the rolling, you will get 15 buns, not 16.) Fit the buns into the pan cut side down, leaving some space between them.

Lightly cover the pan with a piece of wax paper and set the pan in a warm place until the buns have doubled in volume, about 1 hour and 45 minutes. The buns are properly risen when they are puffy, soft, doubled and, in all likelihood, touching one another.

Getting ready to bake: When the buns have almost fully risen , center a rack in the oven and preheat the oven to 375 degrees F.

Remove the sheet of wax paper and put the pan on a baking sheet lined with parchment or a silicone mat. Bake the sticky buns for about 30 minutes, or until they are puffed and gorgeously golden; the glaze will be bubbling away merrily. Pull the pan from the oven.

The sticky buns must be unmolded minutes after they come out of the oven. If you do not have a rimmed platter large enough to hold them, use a baking sheet lined with a silicone mate or buttered foil. Be careful – the glaze is super-hot and super-sticky.

Golden Brioche Loaves

2 packets active dry yeast (each packet of yeast contains approx. 2 1/4 teaspoons)
1/3 cup just-warm-to-the-touch water
1/3 cup just-warm-to-the-touch whole milk
3 1/3 cups all-purpose flour
2 teaspoons salt
3 large eggs, at room temperature
1/4 (1.75 ounces) cup sugar
3 sticks (12 ounces) unsalted butter, at room temperature but still slightly firm

What You’ll Need for the Glaze (you would brush this on brioche loaves, but not on the sticky buns):
1 large egg
1 tablespoon water

To Make The Brioche: Put the yeast, water and milk in the bowl of a stand mixer and, using a wooden spoon, stir until the yeast is dissolved. Add the flour and salt, and fit into the mixer with the dough hook, if you have one. Toss a kitchen towel over the mixer, covering the bowl as completely as you can – this will help keep you, the counter and your kitchen floor from being showered in flour. Turn the mixer on and off a few short pulses, just to dampen the flour (yes, you can peek to see how you’re doing), then remove the towel, increase the mixer speed to medium-low and mix for a minute or two, just until the flour is moistened. At this point, you’ll have a fairly dry, shaggy mess.

Scrape the sides and bottom of the bowl with a rubber spatula, set the mixer to low and add the eggs, followed by the sugar. Increase the mixer speed to medium and beat for about 3 minutes, until the dough forms a ball. Reduce the speed to low and add the butter in 2 tablespoon-sized chunks, beating until each piece is almost incorporated before adding the next. You’ll have a dough that is very soft, almost like batter. Increase the speed to medium-high and continue to beat until the dough pulls away from the sides of the bowl, about 10 minutes.

Transfer the dough to a clean bowl (or wash out the mixer bowl and use it), cover with plastic wrap and leave at room temperature until nearly doubled in size, 40 to 60 minutes, depending upon the warmth of your room.

Deflate the dough by lifting it up around the edges and letting it fall with a slap to the bowl. Cover the bowl with the plastic wrap and put it in the refrigerator. Slap the dough down in the bowl every 30 minutes until it stops rising, about 2 hours, then leave the uncovered dough in the refrigerator to chill overnight. (After this, you can proceed with the recipe to make the brioche loaves, or make the sticky buns instead, or freeze all or part of the dough for later use.)

The next day, butter and flour two 8½ by 4½-inch pans.

Pull the dough from the fridge and divide it into 2 equal pieces. Cut each piece of the dough into 4 equal pieces and roll each piece into a log about 3½ inches long. Arrange 4 logs crosswise in the bottom of each pan. Put the pans on a baking sheet lined with parchment or a silicone mat, cover the pans lightly with wax paper and leave the loaves at room temperature until the dough almost fills the pans, 1 to 2 hours. (Again, rising time with depend on how warm the room is.)

Getting Ready To Bake: Center a rack in the oven and preheat the oven to 400 degrees F.
To Make the Glaze: Beat the egg with the water. Using a pastry brush, gently brush the tops of the loaves with the glaze.

Bake the loaves until they are well risen and deeply golden, 30 to 35 minutes. Transfer the pans to racks to cool for 15 minutes, then run a knife around the sides of the pans and turn the loaves out onto the racks. Invert again and cool for at least 1 hour.

caesar salad

I almost never make salads. Not because I don’t like them, but because I don’t like them as a side dish. To me, salad doesn’t coordinate well with other dinner items. I do like when it’s served before a meal, or as a meal.

I went the route of serving Caesar salad as a meal the day that I made the peanut butter torte. I figured that if I was going to eat peanut butter and cream cheese and oreos and chocolate and whipped cream for dessert, something was going to have to give.

In one of Alton Brown’s first Good Eats episodes (um, before the show was very good), he discussed the original Caesar salad recipe, which was built tableside at a restaurant by chef Cesar Cardini. The recipe starts with a thin coating of oil on the lettuce, then salt, pepper, more oil, lemon juice, and a coddled egg. I’m not all about this method. I like to at least attempt to emulsify my salad dressing ingredients, and I also think that putting oil directly on the leaves keeps the other ingredients from flavoring the lettuce. Instead, I whisked the dressing ingredients thoroughly, then dressed the leaves with the mixture.

The only ingredient in this recipe that struck me as unusual was the coddled egg. Coddled eggs are cooked in boiling water for about one minute, so, yeah, they’re still mostly raw. I didn’t tell Dave about the raw-ish egg in the salad, and I tried not to think about it myself. I’m not worried about salmonella, I’m just grossed out by eating raw egg white. But I really don’t think the salad would have been as good without it. The egg gives the dressing not only smoothness and body, but a pleasant rich, but not overwhelmingly eggy, flavor.

Alton’s croutons are really exceptional. I had my doubts that grinding the garlic into the oil and then straining the oil to toast the bread in would add enough garlic flavor, but they were extremely garlicky and delicious.

Because I’m a flake, and I forgot while planning this meal that one of the key parts of Caesar salad is the croutons, I made Deb’s pizza bianca to go with the salad. I used my pizza dough recipe instead of the one she gives (although they’re very similar) and followed the directions in the recipe for forming the dough. (Keep in mind that Deb rolled her dough out much thinner.) Also, because Peter Reinhart’s constant reminders that a slow rise is better for artisan breads has stuck with me, I made the dough the day before (with less yeast) and let it rise in the refrigerator overnight. The next day I took it out and let it come to room temperature, then shaped it and put it back in the fridge until I wanted to bake it. It was very good. The only thing I’ll change next time is to use less olive oil on the top, because “Oh my god, there’s a fire in the oven!” aren’t words Dave likes to hear from me when I’m cooking.

Hail Caesar Salad (from Alton Brown’s Good Eats)

Bridget note: I made a few changes to the recipe. I dried the bread as slices instead of cut up into bite-size pieces, because they were easier to cut once they were dried. I didn’t use kosher salt. I found 2 cups of water to be far too little to be able to cover the eggs. I probably used a bit more Worcestershire sauce and Parmesan cheese.

1 loaf day old Italian bread
3 garlic cloves, mashed
9 tablespoons extra virgin olive oil
¼ teaspoon plus 1 pinch kosher salt
2 eggs
2 heads romaine lettuce, inner leaves only
7 grinds black pepper
1 lemon, juiced
6 drops Worcestershire sauce
¼ cup grated Parmesan cheese

Heat oven to 350 degrees.

Cut ½ to ¾-inch croutons from the loaf of bread and place on a baking sheet and put into the oven until dry but not browned.

Use a mortar and pestle to mash the garlic with 4 tablespoons of oil and 1/4 teaspoon kosher salt. Strain the oil into a skillet over medium heat. Add the dried croutons and fry, tossing constantly until all of the oil is absorbed and the croutons turn gold. Set aside.

Bring 2 cups water to a boil in a small saucepan. Add the eggs and cook for 1 minute. Chill in ice water to halt cooking. Set aside.

In a very large bowl, tear lettuce and toss with 3 tablespoons of olive oil. Sprinkle with the remaining kosher salt and the black pepper. Add the remaining olive oil. Toss well. Add the lemon juice and Worcestershire sauce. Break in the eggs. Toss until a creamy dressing forms. Toss in Parmesan cheese and serve with croutons.

cinnamon rolls

On one of my first trips to meet Dave’s family, his mom mentioned her plan to buy cinnamon rolls from the grocery store, and Dave insisted that I make fantastic cinnamon rolls that she needed to try. We were staying with friends, I didn’t have the recipe or any ingredients or equipment, but I didn’t want to pass up this chance to impress my boyfriend’s parents. I made the cinnamon rolls, and the in-laws were duly impressed. Six years later, my mother-in-law still talks about how good they were.

But I make better cinnamon rolls now. I’ve tried a few recipes and taken my favorite parts of each, and now I can say for certain that this is the best cinnamon roll that I have ever eaten. Dead serious.

Most cinnamon roll recipes are similar. The original recipe I used, the one that Dave’s mom raved about, is one my mother taught me. It’s the dough for country crust bread with softened butter and cinnamon sugar spread over the flattened dough and a simple powdered sugar glaze on top of the baked rolls. I used this recipe for years and can’t complain – it’s damn good.

But that didn’t stop me from trying new things. The next recipe I tried was published in the back of Knit One, Kill Two, a mystery novel about a knitter. I liked that the dough was richer, melted butter was spread over the dough instead of softened, and brown sugar was mixed with cinnamon for the filling instead of granulated. But the frosting in this recipe contained four ounces of cream cheese, and it was way too rich for me.

The next recipe I tried was Cooks Illustrated’s. Their dough is even richer, and the resultant rolls are therefore more tender. They don’t call for any butter in the filling, which I thought made the baked rolls too sticky. Their icing contains a whopping eight ounces of cream cheese, even though they refer to their rolls as “reserved” and “civilized”. Yikes. I also tried their Quick Cinnamon Buns, a recipe for chemically leavened cinnamon rolls. This recipe calls for a small amount of butter to be mixed in with the other filling ingredients. I like this method, as it reduces the amount of filling that spills out of the rolls when they’re rolled and cut, and it eliminates the stickiness I’d disliked in the other recipe without adding as much butter as my first two recipes had called for.

The recipe I currently use is hobbled together from all of these, although most of it comes from Cooks Illustrated. I follow their dough recipe almost exactly. I reduce the cinnamon in their filling recipe a bit because I found that the original amount was so spicy that it reminded me of Red Hots. I add a tablespoon of melted butter to the filling to hold the powder together. Rather than add more butter to an already decadent breakfast, I reduce the butter in the dough to compensate. For the glaze, I’ve gone back to my original powdered sugar and milk combination, with just one tablespoon of cream cheese mixed in to provide some extra flavor.

Like most bread recipes, cinnamon rolls require kneading, rising, shaping, proofing, baking, and cooling before they can be eaten. No one wants to wait for all this to happen before they can eat breakfast. Take heart – you can do everything up until the baking the night before. After the rolls are shaped and cut, put the pan in the refrigerator. In the morning, the rolls will need to warm up and they may need a bit more time to rise. You can speed this up by doing it in a warm oven. Heat your oven to its “warm” setting, then turn it off and put the rolls in the oven. They should be warm and ready to bake in half and hour or so. With minimal waiting time and almost no work at all, you can have a fantastic treat for breakfast.

Update 3/16/10: I’ve successfully used this method to make these cinnamon rolls whole wheat.  I made the pre-dough out of 10 ounces whole wheat flour, ½ teaspoon salt, and 7/8 cup (1 cup minus 2 tablespoons) water.  After letting that sit overnight, I mixed it with the rest of the ingredients – 2 tablespoons milk, 7 tablespoons unsalted butter, 2¼ teaspoons yeast, ¼ cup sugar, 1 egg and 2 yolks, 1 teaspoon salt, and about 10 ounces flour.

Cinnamon Rolls (adapted from Cooks Illustrated’s The New Best Recipe)

This was the first time I’ve used dental floss to cut the rolled and filled dough into rolls. It worked wonderfully, but a serrated knife will get the job done as well.

The pictures are showing a half recipe.

Dough:
½ cup milk
7 tablespoons unsalted butter
½ cup warm water (about 110 degrees)
1 envelope (2¼ teaspoons) yeast
¼ cup (1¾ ounce) sugar
1 large egg, plus 2 large egg yolks
1½ teaspoons salt
4-4 ½ cups (20 to 21¼ ounces) unbleached all-purpose flour, plus more for dusting the work surface

Filling:
¾ cup packed (5¼ ounces) light brown sugar
2 tablespoons ground cinnamon
1/8 teaspoon salt
1 tablespoon melted butter

Glaze:
1 cup (4 ounces) confectioners sugar, sifted to remove lumps
1 ounce cream cheese, softened
½ teaspoon vanilla extract
1-2 tablespoons milk

1. Heat the milk and butter in a small saucepan or in the microwave until the butter melts. Remove the pan from the heat and set aside until the mixture is lukewarm (about 100 degrees).

2. In the bowl of a standing mixer fitted with the paddle, mix together the water, yeast, sugar, egg, and yolks at low speed until well mixed. Add the salt, warm milk mixture, and 2 cups of the flour and mix at medium speed until thoroughly blended, about 1 minute. Switch to the dough hook, add another 2 cups of the flour, and knead at medium speed (adding up to ¼ cup more flour, 1 tablespoon at a time, if necessary) until the dough is smooth and freely clears the sides of the bowl, about 10 minutes. Shape the dough into a round, place it in a very lightly oiled large bowl, and cover the bowl with plastic wrap. Leave in a warm, draft-free spot until doubled in bulk, 1½ to 2 hours.

3. Mix together the filling ingredients in a small bowl. Grease a 13 by 9-inch baking dish.

4. After the dough has doubled in bulk, press it down and turn it out onto a lightly floured work surface. Using a rolling pin, shape the dough into a 16 by 12-inch rectangle, with a long side facing you. Mix together the filling ingredients in a small bowl and sprinkle the filling evenly over the dough, leaving a ½-inch border at the far edges. Roll the dough, beginning with the long edge closest to you and using both hands to pinch the dough with your fingertips as you roll. Moisten the top border with water and seal the roll. Lightly dust the roll with flour and press on it ends if necessary to make a uniform 16-inch cylinder. Cut the roll in 12 equal pieces and place the rolls cut-side up in the prepared baking dish. Cover with plastic wrap and place in a warm, draft-free spot until doubled in bulk, 1½ to 2 hours.

5. When the rolls are almost fully risen, adjust an oven rack to the middle position and heat the oven to 350 degrees. Bake the rolls until golden brown and an instant-read thermometer inserted into the center of one reads 185 to 188 degrees, 25 to 30 minutes. Cool for 10 minutes. Meanwhile, stir the glaze ingredients together until smooth. Glaze the rolls and serve.

bagels

15.jpg

I absolutely love bagels. If it made nutritional sense, I would eat them several times each day – with butter, with cream cheese, with jam, as a breakfast sandwich with egg and cheese, as a lunch sandwich with turkey and mayonnaise. As it is, I eat one every day, half with butter, the other half with cream cheese. It’s one of my favorite meals of the day, and it never gets old.

23.jpg

I’ve been making my own for years. The first recipes I tried were fairly standard bread recipes with the added step of boiling the bagels between the second rise and baking. Once I discovered retarding the bagels – replacing the second rise with an overnight stay in the refrigerator – my bagels improved dramatically. They became even better when I started using a pre-ferment.

33.jpg

Unfortunately, all of these steps make homemade bagels a fair bit of effort. I had to take a break from making my own when my wedding became imminent, and I was moving and finishing my PhD and starting a new job. After eating perfectly good grocery store bagels for the past several months, I had to ask myself why I had bothered to make my own.

44.jpg

52.jpg

Now I remember – because mine are better. And not only are they very tasty, I can add whole wheat flour to my heart’s desire and better control the portion size. I also get to enjoy one fresh from the oven, and nothing beats that.

62.jpg

Bagels (adapted from Peter Reinhart’s The Bread Baker’s Apprentice and Cooks Illustrated)

Make 12 small or 8 large bagels

Bridget notes: I’ve found that I get the best bagels when I use Cooks Illustrated’s ingredient list and Peter Reinhart’s methods. The recipes are similar; the biggest difference is that Cook’s Illustrated uses a firmer dough (i.e., more flour).

Both recipes call for high-gluten flour, which is difficult to find. You can make your own by adding some gluten flour to bread flour. Sometimes I do that. This time, I simply used about half white bread flour and half whole wheat flour.

Update 4.14.08 – I reduced the flour in the recipe to reflect more accurately how much I’m usually able to mix in before the dough gets too dry (from 11 ounces in the dough to 8 ounces).

Sponge:
½ teaspoon instant yeast
1¾ cup (9 ounces) bread flour
1¼ cup (10 ounces) water, room temperature

Dough:
¼ teaspoon instant yeast
1 3/4 cup (8 ounces) bread flour (approximately)
1 1/2 teaspoons salt
1 tablespoon barley malt syrup
1 tablespoon cornmeal

1. To make sponge, stir the yeast into the flour in the bowl of a stand mixer. Add the water, stirring only until it forms a smooth, sticky batter (like pancake batter). Cover the bowl with plastic wrap and leave at room temperature for approximately 2 hours, or until the mixture becomes very foamy and bubbly. It should swell to nearly double in size and collapse when the bowl is tapped on the countertop.

2. To make the dough, add the additional yeast to the sponge and stir. Then add most of the remaining flour and all of the salt and malt. Mix on low speed with the dough hook until the ingredients form a ball, slowly working in the remaining flour to stiffen the dough.

3. Knead at low speed for 6 minutes. The dough should be firm and stiff, but still pliable and smooth. There should be no raw flour – all the ingredients should be hydrated. If the dough seems too dry and rips, add a few drops of water and continue kneading. If the dough seems tacky or sticky, add more flour to achieve the stiffness required. The kneaded dough should feel satiny and pliable but not be tacky.

4. Immediately divide the dough into 8-12 equal pieces. Form the pieces into smooth balls.

5. Cover the balls with plastic wrap and allow them to rest for 20 minutes. Dust a baking sheet with the cornmeal.

6. Form each dough ball into a rope 9 inches long by rolling it under your outstretched palms. Do not taper the ends of the rope. Overlap the ends of the rope about 1 inch and pinch the entire overlapped area firmly together. If the ends of the rope do not want to stick together, you can dampen them slightly. Place the loop of dough around the base of your fingers and, with the overlap under your palm, roll the rope several times, applying firm pressure to seal the seam. The bagel should be roughly the same thickness all the way around.

7. Place each of the shaped pieces about an inch apart on the prepared pan. Cover loosely with plastic wrap. Let the pan sit at room temperature for about 20 minutes.

8. Check to see if the bagels are ready to be retarded in the refrigerator by using the ‘float test.” Fill a small bowl with cool or room-temperature water. The bagels are ready to be retarded when they float within 10 seconds of being dropped into the water. Take one bagel and test it. If it floats immediately return the tester bagel to the pan, pat it dry, cover the pan, and place it in the refrigerator overnight (it can stay in the refrigerator for up to 2 days). If the bagel does not float, return it to the pan and continue to proof the dough at room temperature, checking back every 10 to 20 minutes or so until a tester floats. The time needed to accomplish the float will vary, depending on the ambient temperature and the stiffness of the dough.

9. The following day (or when you are ready to bake the bagels), adjust the rack to the middle position and preheat the oven to 450 degrees. Bring a large pot of water to a boil (the wider the pot the better). Have a slotted spoon or skimmer nearby. Line a baking sheet with parchment paper.

10. Remove the bagels from the refrigerator and gently drop them into the water, boiling only as many as comfortably fit (they should float within 10 seconds). Stir and submerge bagels with Chinese skimmer or slotted spoon until very slightly puffed, 30 to 35 seconds. Remove rings from water; transfer to wire rack, bottom side down, to drain.

11. Transfer boiled rings, rough side down, to parchment paper-lined baking sheet. Bake until deep golden brown and crisp, about 12 minutes.

12. Remove the pans from the oven and let the bagels cool on a rack for 10-15 minutes before serving.

72.jpg