squash kale pizza

squash kale pizza 6

This recipe knocked me out of a months-long pizza rut. At about two homemade pizza dinners a month, that’s a lot of green chile-turkey pepperoni-mushroom pizza. Not that anyone around here was complaining.

squash kale pizza 1

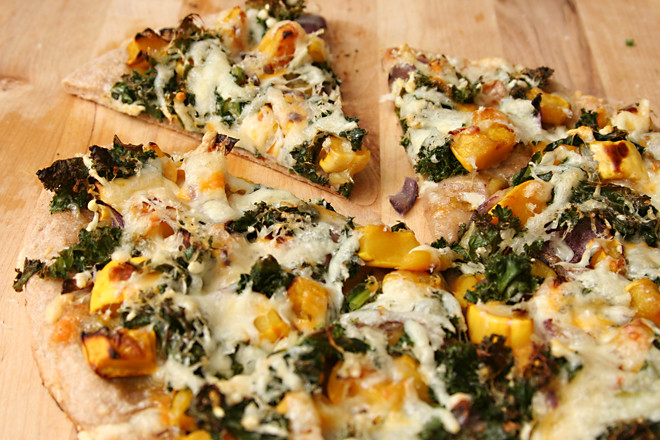
It’s the complimentary earthy flavor that squash and kale both have, combined with the contrasting sweetness of the squash and slight bitterness of the kale that make this pizza work so well. Onions with savory centers and caramelized tips bridge the gap, then the whole thing is topped with plenty of cheese, which is what really matters. I don’t know if it’s going to rival green chile-turkey pepperoni-mushroom for our next rut, but it was definitely a nice diversion.

squash kale pizza 3

One year ago: Beef in Barolo
Two years ago: Steak au Poivre
Three years ago: Red Velvet Whoopie Pies

Printer Friendly Recipe
Kale and Butternut Squash Pizza (from Bev Cooks via Cate’s World Kitchen)

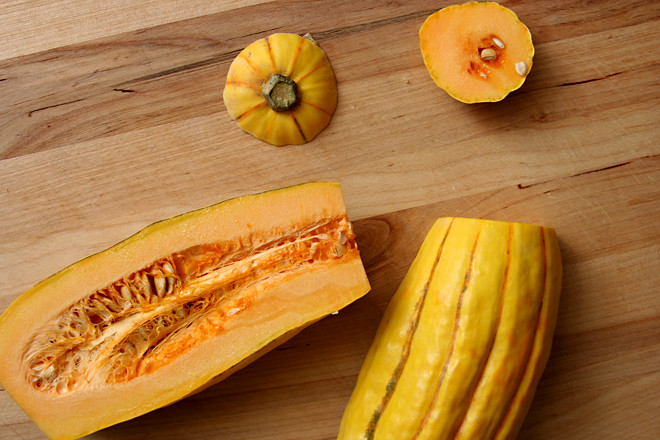
I used acorn squash the first time I made this and delicata squash the second time. So technically, I haven’t made butternut squash and kale pizza yet!

Dough for two 10-inch pizza crusts (half of this recipe)
1½ tablespoons olive oil, divided
salt and freshly ground pepper
1 medium butternut squash, peeled, seeded and cut into bite-sized cubes
2 small red onions, cut into wedges
3 cups kale (from about 1 bunch), cut in thin ribbons
2 garlic cloves, sliced
2 cups (8 ounces) shredded mozzarella cheese

1. Place a pizza stone on the bottom rack of the oven and preheat the oven to 400 degrees. Divide the dough in two and shape each portion into a ball. Set the balls of dough aside for 10 to 30 minutes, loosely covered, to allow the gluten to relax.

2. Transfer the squash and onions to a large baking sheet; season with a generous pinch of salt and pepper and coat with 1 tablespoon of oil. Bake, stirring once halfway through, until softened and browned, about 30 minutes.

3. Heat the remaining ½ tablespoon of oil with the garlic in a large skillet; add the kale and a pinch of salt; cook, stirring constantly, until wilted, about 2 minutes. Remove from the heat.

4. Work with one ball of dough at a time on a lightly floured surface or a damp cloth. Flatten the dough, then pick it up and gently stretch it out, trying to keep it as circular as possible. Curl your fingers and let the dough hang on your knuckles, moving and rotating the dough so it stretches evenly. If it tears, piece it together. If the dough stretches too much, put it down and gently tug on the thick spots. Transfer the round of dough to a large square of parchment paper; slide onto a pizza peel.

5. Top the dough with half of each of the roasted vegetables, kale, and cheese. Slide the pizza with the parchment onto the hot baking stone. Bake for 8-10 minutes, until the crust is browned around the edges. Transfer the pizza to a cooling rack without the parchment. Let the pizza rest for 5 minutes before serving. Repeat with the remaining ingredients.
squash kale pizza 4

spelt crackers

spelt crackers 5

I’ve had one of those weekends that make people say goofy things about how they need another weekend to recover from their weekend. I’m blaming the holidays, although not all of my extra projects are holiday-related. In particular, the dinner party I’m co-hosting on Thursday is dominating a lot of my kitchen time this week, since it’s on a weekday so everything I’m in charge of needs to be done in advance.

spelt crackers 1

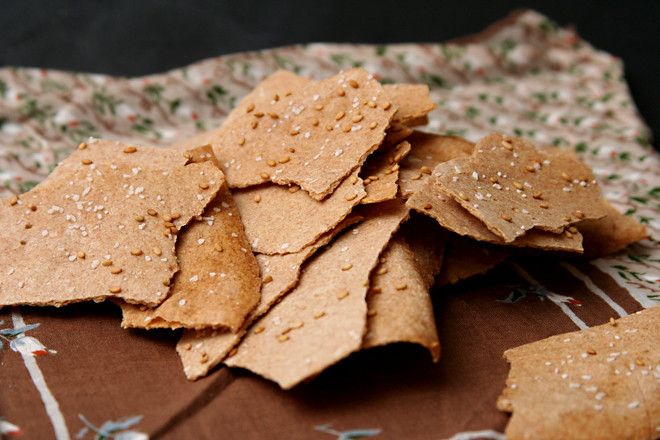
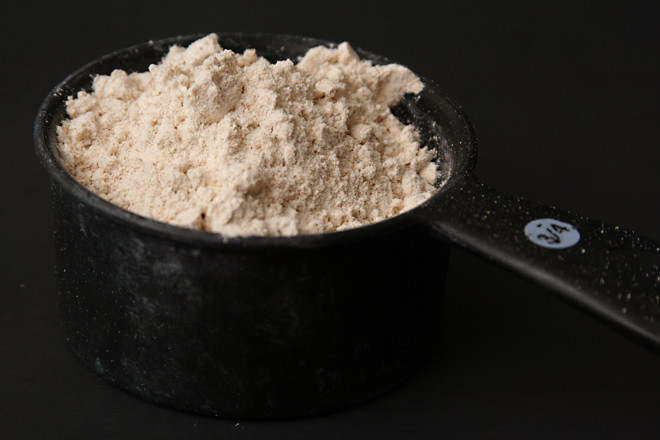
But I still managed to squeeze in time to make these crackers – twice. Not only do they only have three ingredients – water, salt, and fancy flour – those ingredients don’t require any complicated steps. There’s no kneading and no resting, just a quick stir before the dough is ready to be rolled out.

spelt crackers 3

Twenty minutes in the oven and just like that, you have crackers. Crackers so good that Dave said, “These are homemade? But they’re just like real crackers!” Fresh crisp crackers, baked brie topped with roasted red peppers and garlic, and a glass of wine make the perfect break from weekend chores.

spelt crackers 7

One year ago: Comparison of 3 Bolognese Sauce recipes
Two years ago: Bourbon Pound Cake

Printer Friendly Recipe
Spelt Crackers (barely adapted from The New York Times Magazine via Smitten Kitchen)

4-6 servings

The original recipe calls for white spelt flour, but I don’t know what I used. In fact, I bought my spelt flour in the bulk section at the same time I bought barley flour, and I mixed them up and don’t know which I used. The crackers turned out great regardless.

I didn’t flour the pan generously enough the first time and had some issues with the dough and then the baked crackers sticking. I tried spraying the pan with oil the second time instead of flouring, which made rolling a lot easier, but the crackers weren’t as crisp. From now on, I’ll stick with flour but be sure to use plenty of it.

¼ teaspoon salt
½ cup water
1½ cups spelt flour, plus more for flouring surface
Coarse sea salt, dried onion bits, poppy seeds and sesame seeds, or a seed combination of your choice

1. Adjust an oven rack to the middle position and heat the oven to 350 degrees.

2. Dissolve the salt in the water. Stir in the spelt flour until a ball forms.

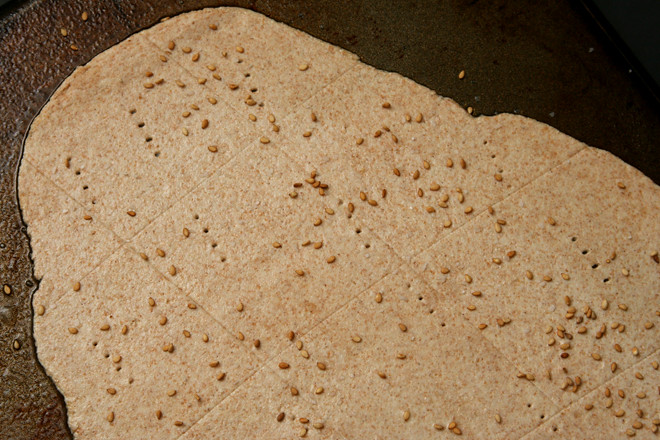
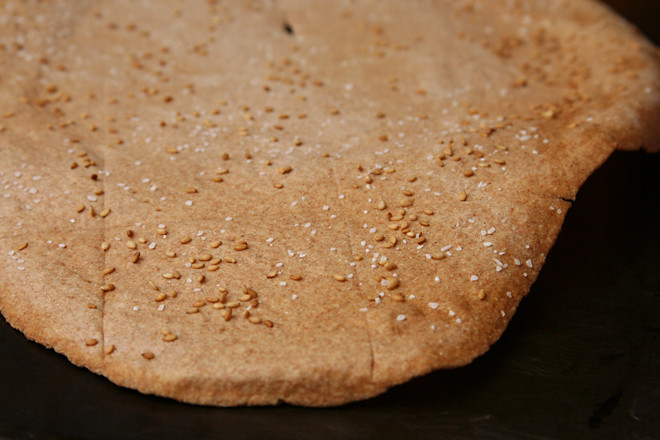
3. Generously flour an overturned 12-by-17-inch cookie sheet and roll out the dough on top of it, using as much flour as needed to prevent sticking, until the dough covers the sheet from edge to edge. Using a spray bottle filled with water, spray the dough to give it a glossy finish. Prick the dough all over with a fork. If you choose, sprinkle with sea salt or seeds. For neat crackers, score the dough into grids.

4. Bake until the dough is crisp and golden, 15 to 25 minutes. Break into pieces and serve.

spelt crackers 4

cheddar puffs with green onions

cheddar puffs 5

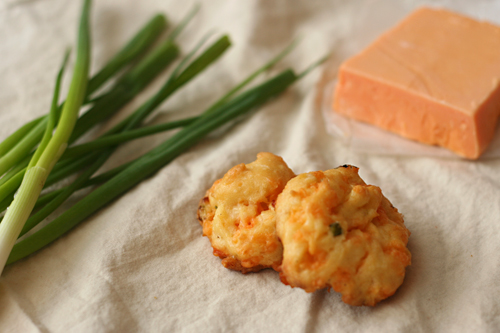
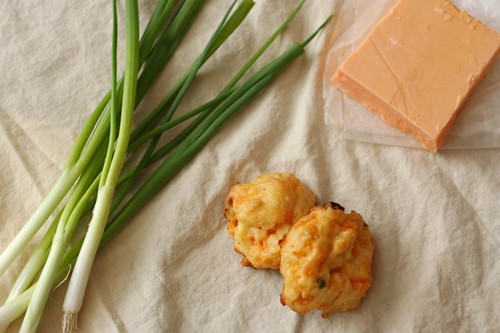
Are you afraid of yeast? Or at least resistant to adding complicated rising schedules to your already-stressful Thanksgiving to-do list? Try these puffs instead of yeast bread. They take about 10 minutes to put together, and you can shape the dough and freeze it until the big day. Then you just pop them in the oven while the turkey rests.

cheddar puffs 2

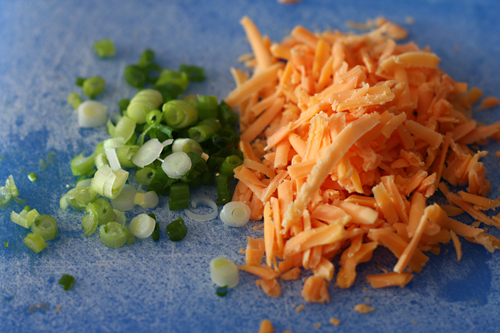
I admit that they don’t make the best gravy mop, but they have such great flavor on their own that you don’t really want to bury it anyway – even with this gravy. They resemble cream puffs, except instead of a sweet creamy filling, they’re full of onions bits and shredded cheese. They taste perfect with the turkey, and they fit perfectly into the turkey roasting schedule.

cheddar puffs 3

Two years ago: Croissants (Martha Stewart)
Three years ago: Asian Peanut Dip

Printer Friendly Recipe
Cheddar Puffs with Green Onions (adapted from Bon Appétit via epicurious)

Makes 24 puffs

½ cup water
2 tablespoon butter, cut into 4 pieces
¼ teaspoon salt
½ cup + 1 tablespoon (2.7 ounces) all-purpose flour
2 large eggs
3 ounces grated extra-sharp cheddar cheese
¼ cup minced green onions

1. Heat the oven to 375 degrees. Line 2 baking sheets with parchment paper.

2. Bring the water, butter, and salt to a boil in a heavy medium saucepan. Remove from the heat; mix in the flour. Stir over medium heat until the mixture becomes slightly shiny and pulls away from sides of the pan, about 3 minutes; transfer to a stand mixer fitted with the paddle attachment. Add the eggs one at a time, mixing well after each addition to form a sticky dough. Mix in the cheese and green onions.

3. Divide the dough into 24 equal portions; drop onto the baking sheet one inch apart. (Can be made ahead. Wrap in plastic, then foil. Refrigerate up to 2 days or freeze up to 2 weeks.)

3. Bake the cheese puffs until golden, about 30 minutes if at room temperature and 35 minutes if chilled or frozen. Serve immediately.

cheddar puffs 4

roasted root vegetable stuffing

root vegetable stuffing 6

When I was creating my Thanksgiving menu last year, it occurred to me that most of the traditional Thanksgiving courses are based on carbs – stuffing, potatoes, rolls. The only traditional non-carb sides are the green bean casserole that nobody likes and the sugar-laden cranberries. I have nothing against carbs, and I know all about splurging for a holiday, but I actually like vegetables. Plus, if you include lower calorie food in the menu, you can eat more before filling up!

root vegetable stuffing 1

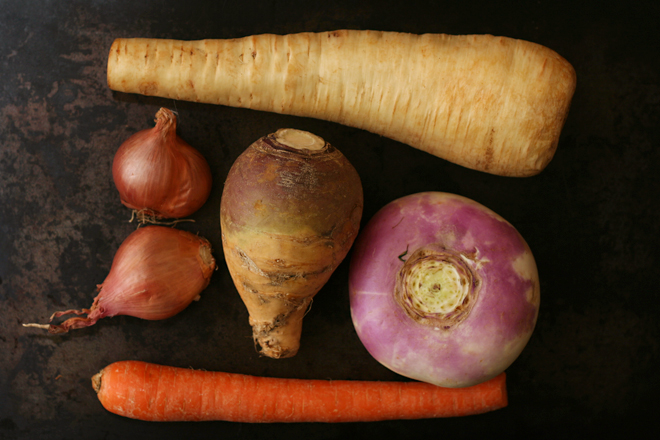
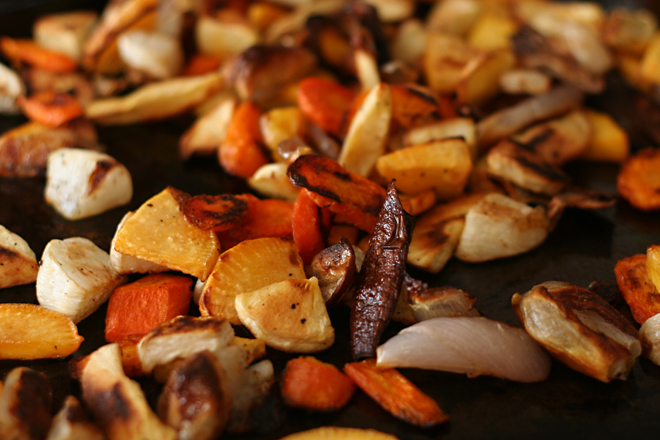
I would go so far as to almost call this healthy, although it depends on the cornbread you use. It’s mostly vegetables – vegetables whose natural sugars are intensified through roasting. The sweet earthy root vegetables meld perfectly with similarly flavored cornbread.

root vegetable stuffing 2

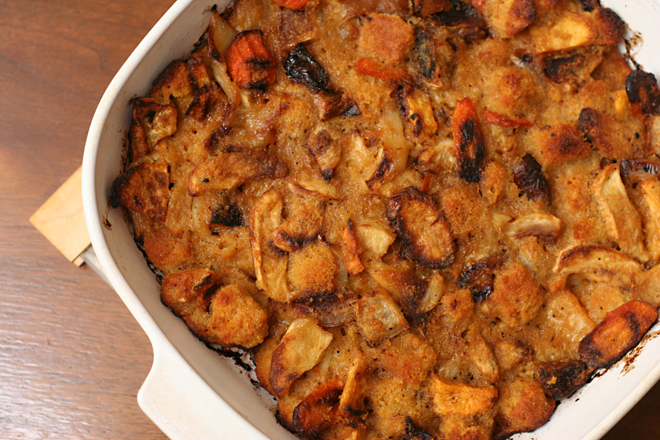
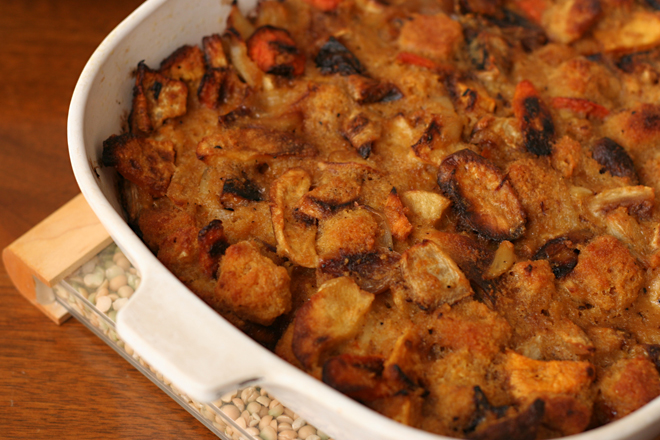
Beyond the parsnips and rutabaga, it’s a typical dressing recipe with eggs and broth binding the ingredients together before the mixture is baked until it’s crisp on top (but maybe not dry and burned like mine). The result is a dressing that’s almost too good to be topped with white wine gravy.

root vegetable stuffing 4

Two years ago: Glazed Lemon Cookies
Three years ago: Wheatmeal Shortbread Cookies

Printer Friendly Recipe
Cornbread Dressing with Roasted Root Vegetables (adapted from Bon Appétit via epicurious)

Serves 6

6 ounces shallots, peeled, halved if small, quartered if large
8 ounces carrots, sliced ¼-inch thick on the diagonal
8 ounces parsnips, sliced ¼-inch thick on diagonal
8 ounces rutabaga, cut into ½-inch cubes
salt and pepper
olive oil
4 large garlic cloves, unpeeled
1 tablespoon fresh thyme
1 tablespoon chopped fresh rosemary
2 teaspoons minced fresh sage
2 cups ½-inch cubes of cornbread
2 large eggs, lightly beaten
2 tablespoons unsalted butter, melted
1 cup low-salt chicken broth (or Golden Turkey Stock)

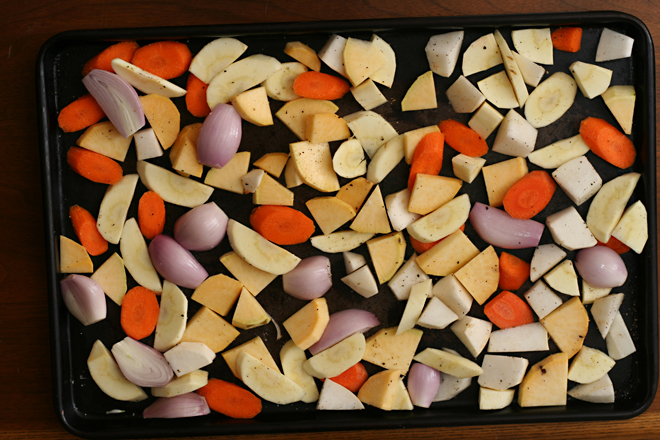
1. Preheat the oven to 425 degrees. Spread the shallots, carrots, parsnips, and rutabaga in a single layer on a rimmed baking sheet. Season with a generous sprinkling of salt and pepper and drizzle with just enough olive oil to coat. Roast for about 45 minutes, stirring every 15 minutes, until the vegetables are soft and browned around the edges. Add the garlic during last 15 minutes. Set the roasted garlic aside; transfer the other vegetables to a large bowl.

2. Spread the cornbread cubes over the now-empty baking sheet. Bake until dry, 10-15 minutes, stirring about halfway through the cooking time.

3. Spray a baking dish with nonstick spray. Mince the garlic; add it to the vegetables along with the herbs and cornbread cubes. In a medium bowl, whisk the eggs, then whisk in the broth and butter; pour the egg mixture over the vegetable mixture and gently fold to combine.

4. Transfer the mixture to the prepared baking dish. Cover the pan with foil; bake until heated through, about 30 minutes. Uncover and bake until browned and crisp, about 15 minutes longer.

root vegetable stuffing 5

honey nut scones

honey nut scones 6

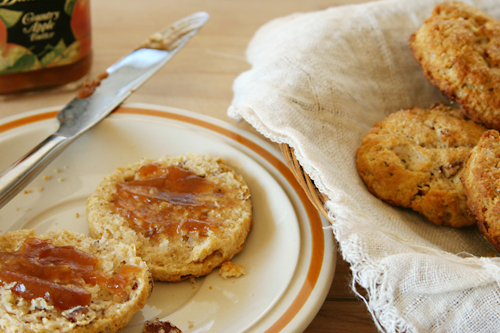
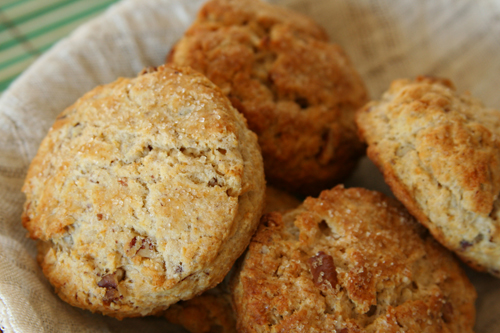
I made these for the first time almost three years ago, in the beginning of my scone phase, which has now become a scone way of life. While it is undeniably convenient to keep a stash of unbaked scones in the freezer that just need to be popped in the oven, my favorite part of scones is how easy they are to eat, not just to bake. A warm scone, a cup of coffee, and a food magazine make for a perfect weekend morning.

honey nut scones 1

I’m under no illusions that a smidgen of whole wheat flour in place of white makes these scones healthy; instead, the whole grains, plus the use of honey as the only sweetener, provides a wonderful earthiness to the scones, making them the ideal vehicle for jam or apple butter.  These are so good they might not even require a food magazine to make a perfect weekend morning – but the coffee is non-negotiable.

honey nut scones 3

Jeannette chose these scones for Tuesdays with Dorie, and she has the recipe posted.  The only change I made was to double the salt, since I like my baked treats saltier than Dorie usually recommends.

Two years ago: Sandwich Rolls
Three years ago: Phyllo Triangles with crawfish and mushroom fillings

honey nut scones 4

apple cider doughnuts

cider donuts 5

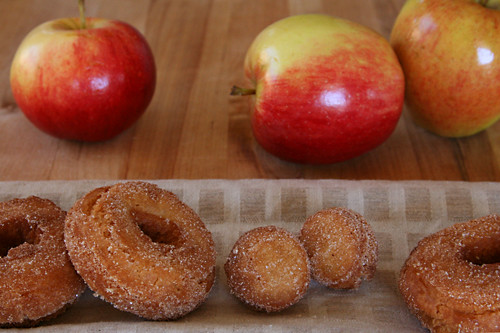
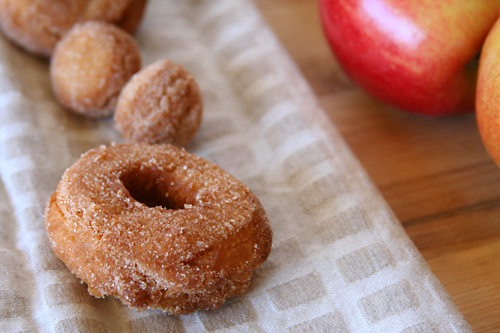
It’s going to be 95 degrees here today, but I’m trying to force it to feel like fall anyway. It isn’t just the temperature; there are no trees here to change colors, the air is always dry and crisp, and the only place to buy pumpkins and apples is the grocery store. I often prefer living in the desert, even with months of over 100-degree days in the summer, but every fall, I miss upstate New York.

cider donuts 2

I especially miss the cider mill I lived near when I was there, which was almost a fall festival of its own, every day. I loved stopping there and choosing one each of six different apple types, which made the best apple pies I’d ever eaten. In the weeks before Halloween, they’d cover most of the lot with pumpkins, not to mention the barrels of squash of every variety. Inside, you could watch them pulp the apples into cider on one side of the building, and on the other, they were frying doughnuts. Brushing fallen sugar off of our shirts after biting into fresh donuts became a yearly tradition.

cider donuts 3

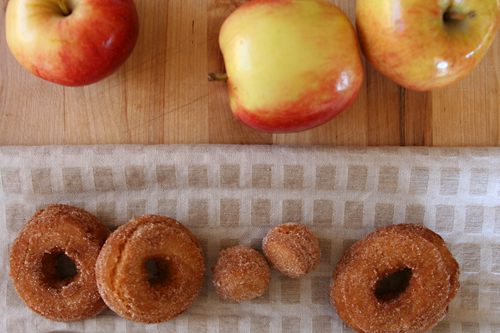
You can’t buy jugs of fresh cider here or the donuts made with it, but I can make my own doughnuts using pulpy storebought apple juice. By reducing the apple cider/juice until it’s syrupy, you can increase the apple flavor of the doughnuts without increasing the stickiness of the dough. Concentrating apple juice and frying apply donuts smells like fall, and, in a pinch, that will have to epitomize the season in the desert.

cider donuts 6

One year ago: Burritos
Two years ago: Green Chile Rellenos
Three years ago: Stuffed Mushrooms with Sun-Dried Tomatoes

Printer Friendly Recipe
Apple Cider Doughnuts (slightly adapted from The Hearth Restaurant via Smitten Kitchen)

Makes 18 doughnuts and 18 doughnut holes

Despite generally being anti-shortening, I tried it for frying this time. However, I wasn’t happy with it; it started smoking well before it reached proper frying temperature. The doughnuts also seemed to absorb more fat than usual.

1 cup apple cider
3½ cups (16.8 ounces) flour, plus additional for the work surface
2 teaspoons baking powder
1 teaspoon baking soda
½ teaspoon ground cinnamon
½ teaspoon salt
⅛ teaspoon ground nutmeg
4 tablespoons (½ stick) butter, at room temperature
1 cup (7 ounces) granulated sugar
2 large eggs
½ cup buttermilk
Vegetable oil or shortening for frying
Topping (optional): ½ cup granulated sugar + 2 teaspoons cinnamon

1. In a small saucepan over medium heat, bring the apple cider to a simmer. Reduce the heat and simmer, uncovered, until reduced to ¼ cup, about 20 minutes. Set aside to cool. Meanwhile, combine the flour, baking powder, baking soda, cinnamon, salt and nutmeg.

2. Using an electric mixer on medium speed (with the paddle attachment, if using a standing mixer), beat the butter and granulated sugar until smooth, 1-2 minutes. Add the eggs, one at a time; continue to beat until the eggs are completely incorporated. Reduce the speed to low and gradually add half of the reduced apple cider and buttermilk, then all of the dry ingredients, then the remaining liquid ingredients, mixing just until combined.

3. Flour two sheets of parchment or wax paper; turn the dough out onto one floured sheet and cover with the second sheet. Roll the dough out to a thickness of ½-inch. Transfer the dough to the freezer until it is slightly hardened, about 20 minutes.

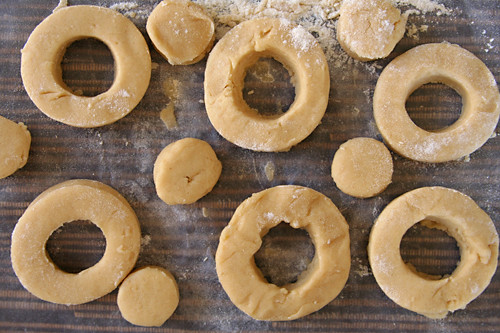
4. Using a floured 3-inch or 3½-inch doughnut cutter (or a round cutter plus a 1-inch round cutter or backside of a piping tip), cut out rings of dough. Place the cut doughnuts and doughnut holes onto one sheet of floured wax paper. Re-roll the scraps of dough, incorporating as little flour as possible. Refrigerate the doughnuts for 20 to 30 minutes.

5. Add oil or shortening to a deep-sided pan to measure a depth of about 3 inches. Heat over medium heat until the oil reaches 350°F. Place a wire rack over a baking sheet.

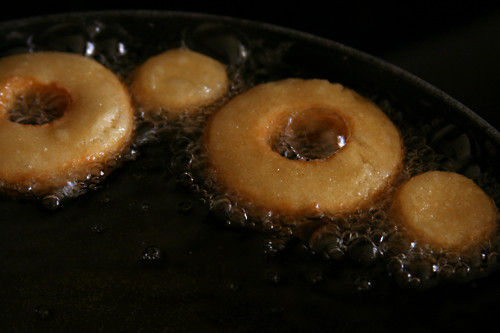
6. Carefully add three doughnuts and three holes to the oil; fry until golden brown, about 60 seconds. Flip the doughnuts and fry until the other side is golden, 30 to 60 seconds. Drain on the rack for one minute. Dip the top of the warm doughnuts into the cinnamon sugar mixture (if using) and serve immediately.

cider donuts 7

basic biscuits

flaky biscuits 2

I just got back from two weeks in Italy, which I spent eating: croissants for breakfast, baskets of bread for lunch and dinner (and not a whole grain in sight), wine with lunch and dinner, gelato at least once a day, and so on and so on and so on. And guess what? I came home exactly the same size I was when I left.

flaky biscuits 1

I wish I could use this as justification to throw all of my healthy eating ideals to the wind (I accidentally typed “wine” at first – I’m still in vacation mode) and just eat what I want to eat. And maybe I could, if I spent hours upon hours walking in my normal life, walking until my feet ached and then ached more, and then they kept aching hours after I’d stopped walking. Instead, I spend hours upon hours of my normal life sitting at a computer, both at work and at home, and that, my friends, is the difference.

flaky biscuits 5

Biscuits, and their buttery bready cousins croissants and scones, become a weekend treat. Usually I make biscuits to sandwich with eggs and ham for breakfast, but occasionally I serve them alongside crab cakes for dinner. But just occasionally. If only my normal life burned as many calories as my vacation life, I could – and would! – eat biscuits almost every day.

flaky biscuits 4

Jennifer chose these for Tuesdays with Dorie, and she has the recipe posted. I…made no changes? Maybe? I don’t know, I made these a while ago. It seems likely that I followed the recipe exactly, except I definitely used the cake flour option, because I love how light biscuits are when they’re made with cake flour.

One year ago: Fold-over Pear Torte
Two years ago: Split-Level Pudding
Three years ago: Lenox Almond Biscotti

flaky biscuits 3

croissants (tartine bread)

croissants tartine bread 20

My coworker seemed surprised when I told him I was going home at lunch to work on croissants. He wondered if all croissant recipes are so complicated. No. But I chose the most complicated one.

croissants tartine bread 4

I seem to have convinced myself that the recipe with the most steps must produce the best result. By no means is this rule always true, but in this case, it was. Spending my lunch break rolling and shaping buttery dough was a small price to pay for croissants this good.

croissants tartine bread 7

And that’s just the beginning (well, it’s the end of the recipe, but it’s the beginning of me telling you about the recipe). The process starts a couple days earlier, when you feed your starter. If you don’t have a starter, you should make one! It isn’t hard, and I’m more proud of my all wild-yeast bread than anything else I’ve accomplished in the kitchen this year.

croissants tartine bread 11

Once your starter is awake and you’ve mixed up another pre-dough with instant yeast, you’ll make your dough, but instead of kneading it, you’ll spend a minute or so fussing with it every half an hour for a few hours. Once it’s risen and chilled, you can roll it out and start working in the butter, and this process takes a few minutes of fussing over the course of several hours too. Then chill the dough some more. Then roll it out some more. Then, finally, you can shape your croissants! But then you have to let them rise for a couple hours before baking.

croissants tartine bread 16

I actually love recipes like this. I love getting to play with dough for just a few minutes at a time, and because the dough is chilled in between, it’s adaptable to my schedule. And in this case, all that fussing paid off with the best croissants I’ve made yet. My coworker grabbed two, and then he didn’t seem to doubt my lunchtime fussing at all.

croissants tartine bread 18

More experiments with croissants:
Tartine Bakery (the recipe in their first book is different than the recipe in their bread book)
Martha Stewart (using fresh yeast)
Martha Stewart (using instant yeast)

One year ago: Taco Pasta Salad
Two years ago: Green Chile Huevos Rancheros
Three years ago: Pan-Seared Steak with Red Wine Pan Sauce

Printer Friendly Recipe
Croissants (adapted from Tartine Bread)

Makes 16 croissants

I’ve shortened the instructions and added volume measurements. Keep in mind though, that the weight measurements are more precise, so if you have a scale, use it (as always).

The original recipe recommends an egg wash made from 2 egg yolks and 1 teaspoon of heavy cream, but I used a whole egg whisked with a pinch of salt (which loosens the protein structure of the egg) because I didn’t want 2 extra egg whites to use up.

I wouldn’t have minded the croissants being just a little bit sweeter. Next time I’ll increase the sugar to ½ cup (100 grams).

You don’t use all of the leaven, because the leftover leaven becomes the starter that you keep and feed and use in the future.

Poolish:
200 grams (1½ cups) all-purpose flour
200 grams (⅔ cup) water, room temperature
3 grams (1 teaspoon) instant yeast

Leaven:
1 tablespoon starter
220 grams (1⅔ cups) all-purpose flour
220 grams (¾ cup) water, room temperature

Dough:
450 grams (1¾ cup) whole milk, room temperature
300 grams leaven
400 grams polish (this is all of the poolish)
1000 grams (7 cups) bread flour
28 grams (4½ teaspoons) salt
85 grams (7 tablespoons) sugar
10 grams (1 tablespoon) instant yeast

400 grams (28 tablespoons, although I used a full pound (32 tablespoons)) unsalted butter
½ cup all-purpose flour
Egg wash

1. To make the poolish: In a small bowl, mix the flour, water, and yeast. Cover and let stand at room temperature for 3-4 hours or store overnight in the refrigerator.

2. To make the leaven: In a small bowl, mix the starter, flour, and water. Cover and let rise overnight.

croissants tartine bread 2

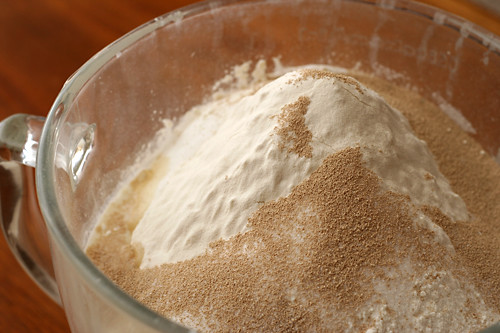
3. Add the milk, leaven, and poolish to a large mixing bowl; stir to break up the doughs. Add the flour, salt, sugar, and yeast; mix thoroughly until there are no bits of dry flour. Cover and let rest for 25-40 minutes. Fold the dough a few times by using a dough scraper to scoop up one side of the dough and drape it over the rest of the dough.

croissants tartine bread 3

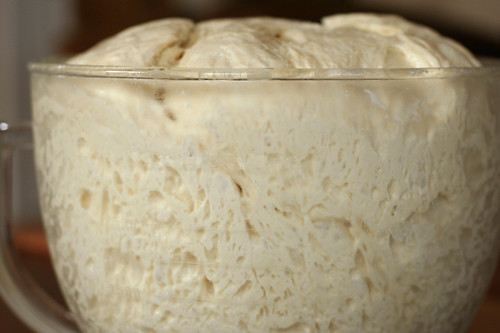
4. Allow the dough to ferment for 3 to 4 hours and give it another few turns every 30 minutes. This takes the place of kneading. Be more gentle with the turning toward the end of the rising time. The dough is ready when it’s slightly increased in volume and is full of air bubbles. Flatten the dough into a rectangle, wrap it in plastic wrap, and refrigerate for 2-3 hours.

croissants tartine bread 5

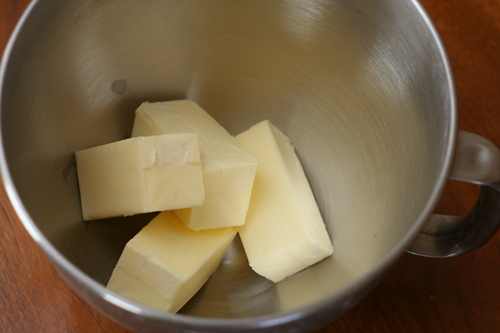
5. Just before rolling out the dough, cut the cold butter into cubes. Gradually adding the ½ cup flour, pound the butter with a rolling pin until it comes together into a cohesive mass. Alternatively, use a stand mixer fitted with the paddle attachment to mix the cold butter and flour. Mold the butter into a rectangle measuring 8 by 14 inches.

croissants tartine bread 6

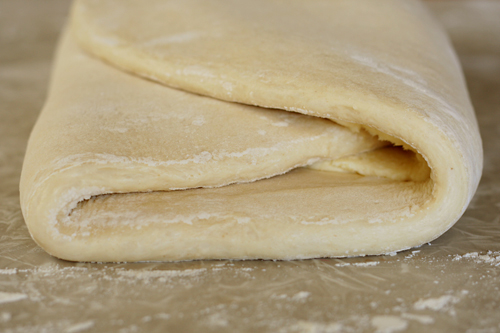
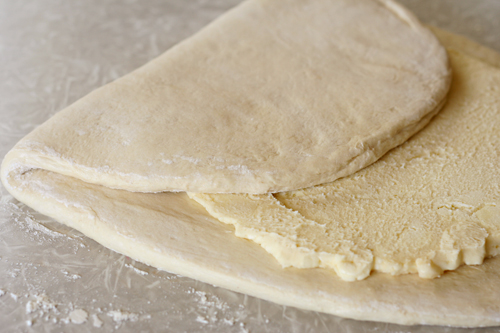
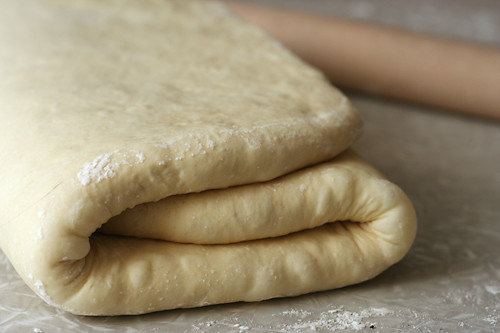
6. On a work surface dusted with flour, roll the dough out to a rectangle measuring 12 by 20 inches. Lay the butter block over the dough so that it covers about two-thirds of the dough. Fold the uncovered third of dough toward the center over the butter. Fold the other end of the dough, with the butter, over the center, as if you’re folding a letter. Turn the dough a quarter turn; roll it again into a 12 by 20-inch rectangle, then fold it in thirds. Wrap the dough in plastic wrap and refrigerate for 1 hour. (You can chill the dough longer, but you’ll need to let it warm up a few minutes before rolling so the butter isn’t too stiff.)

croissants tartine bread 10

7. Remove the dough from the refrigerator. Roll it out to a 12 by 20-inch rectangle, fold it in thirds, rotate it a quarter-turn, and repeat the rolling and folding. Chill for an hour. Repeat the rolling, folding, rotating, rolling and folding once more. Wrap the folded dough in plastic wrap and freeze it for 1-2 hours. If you don’t plant to finish the croissants until the next morning, transfer the dough to the refrigerator after a couple hours in the freezer. (You can store the dough in the freezer for several days at this point, letting it defrost overnight before using.)

croissants tartine bread 14

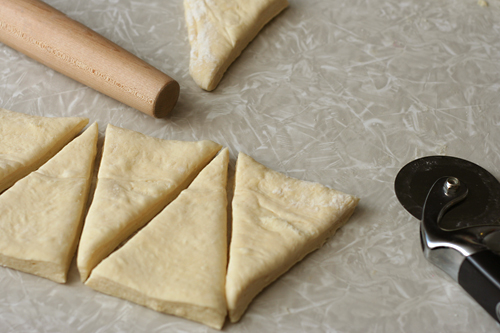
8. Roll the dough into a rectangle that is 18 by 24 inches and is about ½-inch thick. If the dough becomes very elastic, let it rest (preferably in the refrigerator) for several minutes before continuing the rolling. Cut the dough in half to form two 9 by 24-inch rectangles. Cut each rectangle into 8 triangles. Roll up each triangle, starting at the wide side. Transfer the croissants to a parchment-lined baking sheet, spacing them at least an inch apart. Cover them loosely and let rise until they are about 50 percent larger than their original size, about 2 hours. They will be firm, but puffed. (You can also refrigerate them overnight at this point, which is what I did.)

croissants tartine bread 15

9. Heat the oven to 425 degrees. Brush the croissants with the egg wash. Bake until they are deep golden brown, crisp, and flaky, about 30 minutes. Let cool slightly before serving.

croissants tartine bread 17

cooks illustrated’s ultimate banana bread

banana bread 6

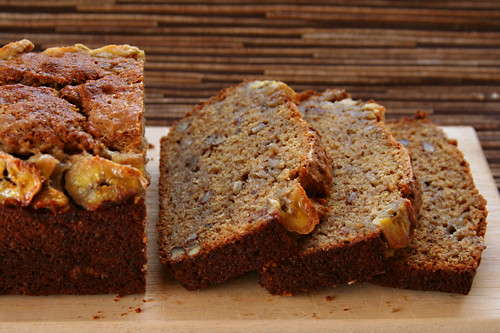
I’ve always wanted to do a banana bread comparison post, and I still plan to someday, but usually I make banana bread for one primary purpose: to use up old bananas. And this recipe is the best for that, because it uses five bananas (six if you include the garnish, which I usually don’t), which is about twice as many as most other banana bread recipes. Furthermore, this recipe actually works better with previously frozen bananas, which mine always are.

banana bread 1

It manages to fit so many bananas into one loaf because the liquid is extracted before the batter is mixed. I love sucking the liquid out of ingredients before using them in recipes, especially quick breads like this zucchini bread. But I have to admit that I hadn’t realized bananas contained so much water. With zucchini, it’s obvious because water droplets immediately appear on a newly cut surface, but bananas had always seemed relatively dry to me.

banana bread 2

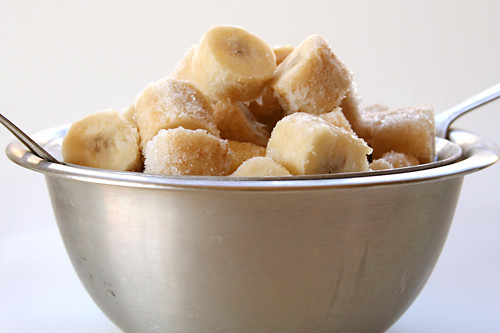
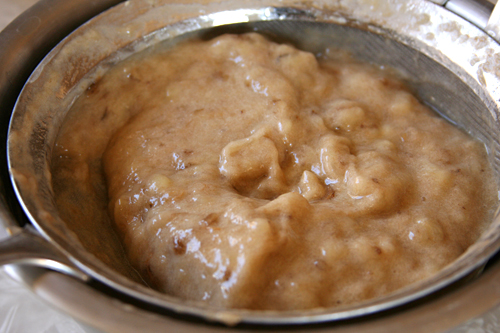
That’s until you freeze and then defrost them, when they turn into a pile of gross brown mush soaking in gross brown liquid. And this is perfect, because the mush is ready to mix right into the batter, and the liquid can be simmered down into a concentrated banana syrup, so not one bit of banana flavor is wasted. And if you don’t constantly have a bag of bananas taking up space in your freezer, of course you don’t need previously frozen bananas for this recipe – a quick trip to the microwave achieves the same effect.

banana bread 3

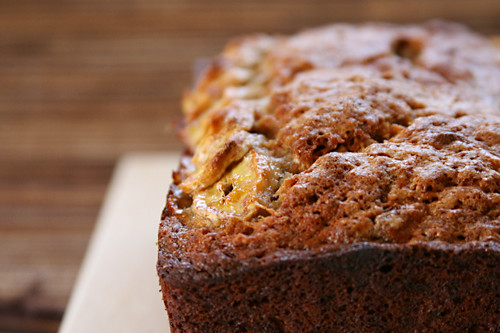
The end result is a banana bread that’s moist and tender, even if I go ahead and utilize my favorite quick bread tricks of subbing half whole wheat pastry flour and reducing the fat by 25% by replacing some of the butter with oil. Plus I figure that all that extra fruit in there contributes more fiber and nutrients. It’s not over-the-top banana-y either, despite containing so much more banana than most loaves. It’s so good that it’s actually worth making just for the sake of eating it, not just to use up the ingredients!
banana bread 4

One year ago: Pappa al Pomodoro
Two years ago: Risotto with Swiss Chard
Three years ago: Gazpacho

Printer Friendly Recipe
Ultimate Banana Bread (from Cooks Illustrated)

I’ve reproduced Cooks Illustrated’s recipe exactly below. However, I don’t particularly care for the sliced bananas on top. They’re pretty, but they’re too sweet and candy-like (which really doesn’t sound like me, come to think of it).

You can slightly healthy up this recipe by replacing half of the flour with whole wheat pastry flour, and using 4 tablespoons butter plus 2 tablespoons canola oil instead of 8 tablespoons butter. The oil helps keeps the loaf moist, and of course leaving all that butter in contributes flavor.

1¾ cups (8¾ ounces) unbleached all-purpose flour
1 teaspoon baking soda
½ teaspoon table salt
6 large very ripe bananas (about 2¼ pounds), peeled
8 tablespoons (1 stick) unsalted butter, melted and cooled slightly
2 large eggs
¾ cup packed (5¼ ounces) light brown sugar
1 teaspoon vanilla extract
½ cup walnuts, toasted and coarsely chopped (optional)
2 teaspoons granulated sugar

1. Adjust an oven rack to the middle position and heat the oven to 350 degrees. Spray an 8½ by 4½-inch loaf pan with non-stick cooking spray. Whisk the flour, baking soda, and salt together in a large bowl.

2. Place 5 bananas in a microwave-safe bowl; cover with plastic wrap and cut several steam vents in the plastic with a paring knife. Microwave on high power until the bananas are soft and have released liquid, about 5 minutes. Transfer the bananas to a fine-mesh strainer placed over a medium bowl and allow to drain, stirring occasionally, for 15 minutes (you should have ½ to ¾ cups liquid).

3. Transfer the liquid to a medium saucepan and cook over medium-high heat until it’s reduced to ¼ cup, about 5 minutes. Remove the pan from the heat, stir the reduced liquid into the bananas, and mash with a potato masher until fairly smooth. Whisk in the butter, eggs, brown sugar, and vanilla.

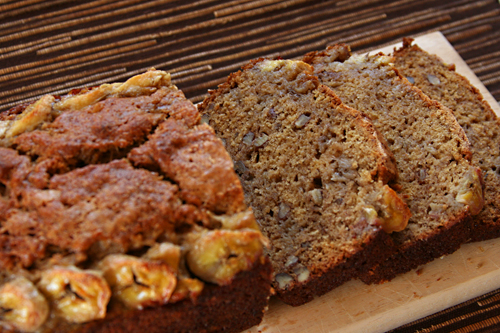
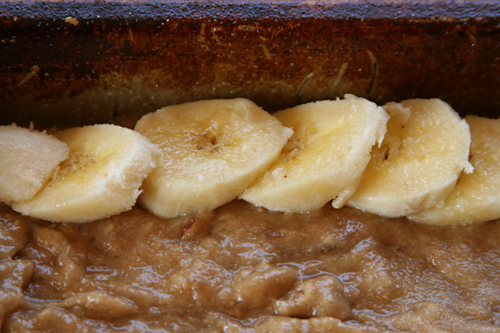
4. Pour the banana mixture into the flour mixture and stir until just combined with some streaks of flour remaining. Gently fold in the walnuts, if using. Scrape the batter into the prepared pan. Slice the remaining banana diagonally into ¼-inch-thick slices. Shingle the banana slices on top of both sides of the loaf, leaving a 1½-inch-wide space down the center to ensure an even rise. Sprinkle the granulated sugar evenly over loaf.

5. Bake until a toothpick inserted in the center of the loaf comes out clean, 55 to 75 minutes. Cool the bread in the pan on a wire rack for 15 minutes, then remove the loaf from the pan and continue to cool on a wire rack. Serve warm or at room temperature.

banana bread 5

cornmeal and bacon loaf

bacon cornbread 4

It’s impossible to get burned out on food fads in smalltown southeastern New Mexico. There are no cupcake shops (heck, there isn’t any kind of bakery), no restaurants topping their food with foam, and bacon stays where it belongs – next to eggs, not in desserts.
bacon cornbread 3

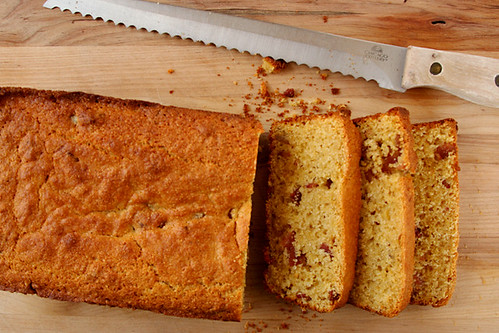
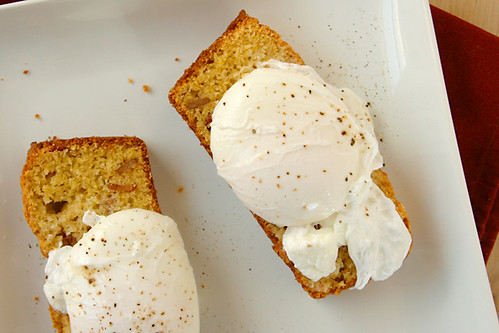
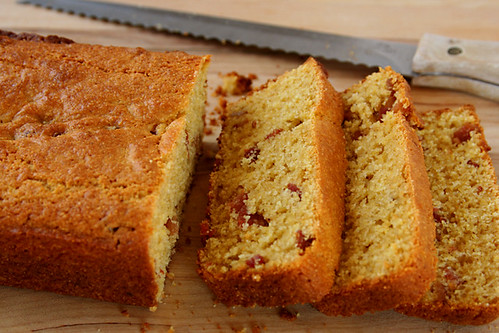
Not that adding bacon to cornbread is particularly trendy, but I naively fell for the naming trickery of this bread and didn’t realize until I was eating it that “cornmeal loaf” is cornbread. In this case, cornbread with bacon and without any fruit, as I didn’t want to confuse the issue of whether this was a dessert or breakfast. With a poached egg on top and savory bits of bacon mixed in, this is classic breakfast all the way.
bacon cornbread 7

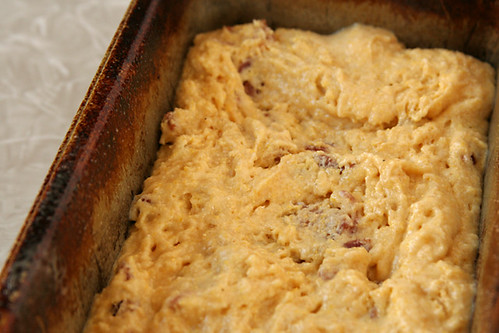
Caitlin, who evidently can’t resist the combination of fruit and cornmeal, chose this for Tuesdays with Dorie, and she has the full recipe posted. I substituted whole wheat pastry flour for half of the whole wheat flour, left out the fruit, reduced the sugar to ⅓ cup, and added 6 strips of cooked chopped bacon, as recommended by Dorie in her savory variation.

One year ago: Espresso Chocolate Shortbread
Two years ago: Lime Meringue Pie
Three years ago: Chunky Peanut Butter and Oatmeal Chocolate Chipsters

bacon cornbread 8