stromboli

If you roll your dough and toppings into a spiral instead of keeping them flat, it’s a whole new recipe and totally different from the normal Friday night pizza routine!

Friday evenings are pretty much my favorite part of the week. It’s one of the only times I just STOP. I don’t worry about chores, or exercise, or even hobbies. I just hang out in the kitchen with a beer, rolling out dough, shredding cheese, slicing toppings.

I’m not too interested in varying from this routine. I’m occasionally willing to get takeout sushi instead of make pizza, and, sometimes, I might really get wild and change the shape of the pizza. Usually that means calzones and this time it was stromboli, but let’s face it, it’s all basically the same thing.

You can certainly roll anything you want up in pizza dough, but sometimes I like to let other people do the thinking for me, so I follow a specific recipe. Emeril’s stromboli has three kinds of pork, green peppers (gross!), and jalapenos, so I was pretty sure I could get away with some paring down of ingredients. With only two kinds of meat and one type of pepper, plus three types of cheese, there were still plenty of flavors for me. Oh Friday. How I love your carbs, cheese, and freedom.

One year ago: Maple Oatmeal Scones
Two years ago: Twice-Baked Potatoes with Broccoli, Cheddar, and Scallions
Three years ago: Country Crust Bread

Printer Friendly Recipe
Stromboli (adapted from Emeril)

Serves 6

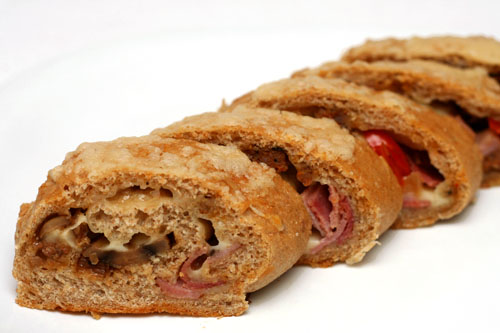
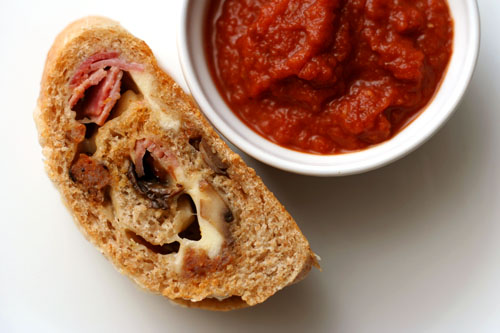
Based on the pictures, it appears I sautéed some sliced mushrooms with the peppers. Yum!

1 recipe pizza dough
1 tablespoon milk
⅛ teaspoon salt
¼ teaspoon sugar
8 ounces hot Italian sausage, removed from casings and crumbled
8 ounces ham, diced
1 large red onion, chopped fine
1 red pepper, diced small
4 cloves garlic, minced
8 ounces (2 cups) provolone, shredded
8 ounces (2 cups) mozzarella, shredded
2 ounce (1 cup) finely grated Parmesan

1. Preheat the oven to 375 degrees F. Line two large baking sheets with parchment paper or silicone mats. In a small bowl, mix the milk, salt, and sugar; set aside.

2. In a large skillet, cook the sausage over medium-high heat until it’s browned and the fat is rendered, about 5 minutes. Remove with a slotted spoon. Discard all but 1 tablespoon of fat from the pan. Add the ham, onions, and bell peppers; cook, stirring occasionally, until very soft and slightly browned, 5 to 8 minutes. Add the garlic and cook, stirring constantly, for 1 minute. Remove from the heat and cool.

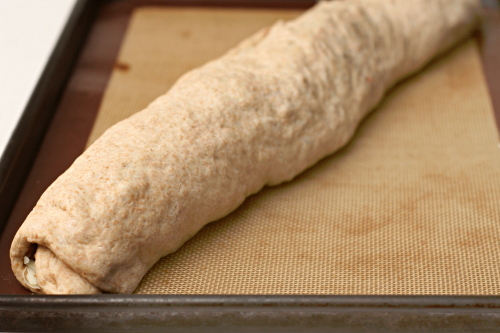
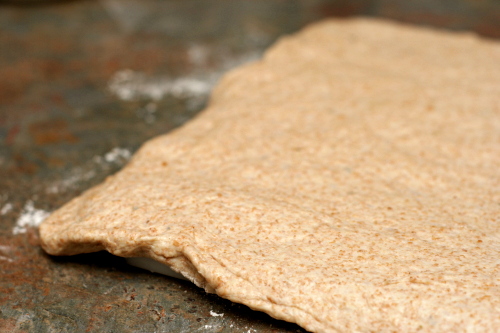
3. Divide the dough in half. On the prepared baking sheet, stretch out one half of the dough to a large rectangle, about 10 by 14 inches. (If it becomes too elastic, let it rest for a few minutes, lightly covered.) Spread half of the cooled sausage mixture across the dough, leaving a 1-inch border. Top with half of each of the mozzarella and provolone. Using a pastry brush, paint the border of a long edge with the milk mixture. Starting at the other long end, roll up the dough into a cylinder, pinching the edges to seal. Repeat with the remaining ingredients. Let the dough rise for 20 to 30 minutes.

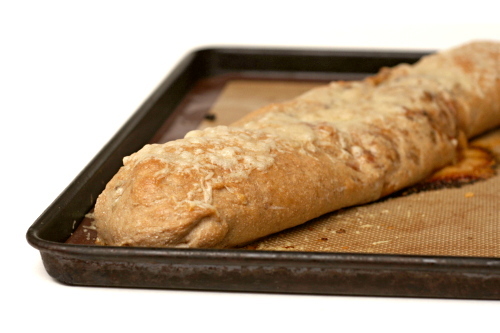
4. Brush the top of each stromboli with the milk mixture. Bake, one at a time, until nearly completely golden brown and starting to crisp, about 20 minutes. Sprinkle the stromboli with parmesan cheese and return to the oven until the cheese is melted and the dough is golden brown, about 5 minutes.

5. Remove from the oven and let stand 10 minutes. Slice thickly and serve with your favorite sauce.
lemon poppy seed muffins

In winter, when berries and melons aren’t even on the horizon and you’ve had all you can take of apples and pears, it’s all about citrus. What’s more, the bright flavors and colors of citrus mimic the sunshine we’re missing.

Well, the sunshine you’re missing. Here in southern New Mexico, it was 80 degrees yesterday, and I used some of that winter citrus for something quintessentially summery – a margarita.

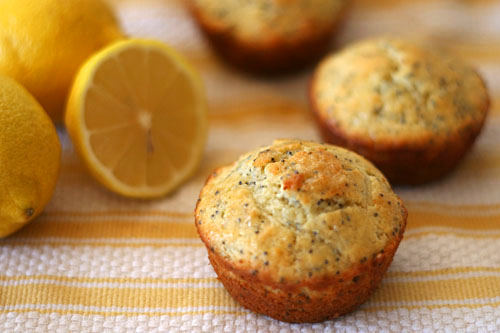
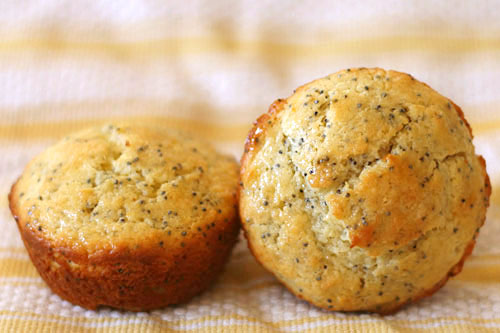
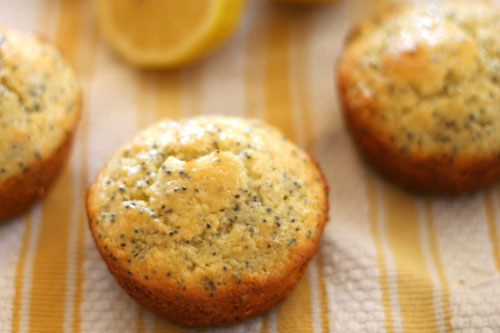
But the occasional warm day in January doesn’t mean we have fresh-picked strawberries and peaches for sale, so lemons are still a good bet for muffins, not to mention that it’s one of my favorite flavors. Combined with the crunch of poppy seeds, these little treats will be perfect any time of the year – but maybe not as an accompaniment to that margarita.

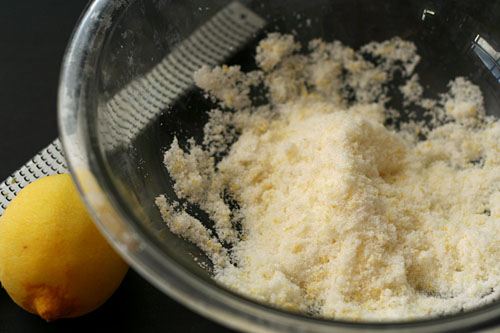
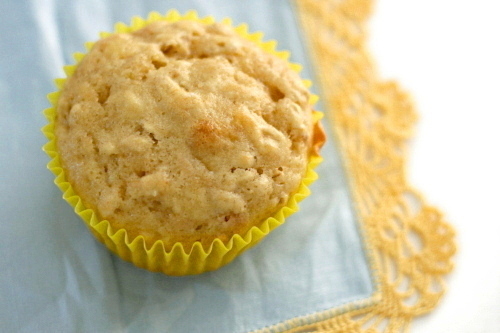
Betsy chose this for Tuesdays with Dorie, and she has the recipe posted. I doubled the salt (as usual).  I also skipped the glaze (because frosting on muffins = cupcakes).  Instead, I brought a mixture of lemon juice and granulated sugar to a simmer, then brushed that on the warm muffins.

One year ago: Chocolate Oatmeal Almost Candy Bars
Two years ago: Berry Surprise Cake

pumpkin cinnamon rolls

The problem with the internet is that you don’t get to believe, even for a minute, that you were the first to come up with an idea. First there was sushi bowls, most recently it was eggnog martinis, and last month there were pumpkin cinnamon rolls. I thought I was a genius. Pumpkin and cinnamon! A classic combination! I could just take pumpkin bread dough, roll it out, spike the cinnamon filling mixture with cloves and nutmeg, and top it with a cream cheese glaze. It’s the perfect combination of pumpkin and accents! I deserve accolades! Awards! At the very least, lots of blog hits!

Oops, never mind. Many many people have done this before. Still. I’m convinced that my pumpkin cinnamon rolls are better than theirs. It’s all about balance – cinnamon rolls should be decadent treat worth the splurge, but you might as well save the calorie-dense ingredients for where they’re going to make the most impact.

I’m convinced that a super rich dough for cinnamon rolls isn’t worth the calories. Once the dough is filled with a sugary spiced filling and topped with a creamy glaze, extra fat in the dough just gets lost. If you don’t notice it, why bother with it? On that same note, I used oil in the dough instead of butter. You can use butter if you prefer, but again – the taste of butter will be overpowered by the filling and glaze, but the added tenderness of oil compared to butter will not go unnoticed.

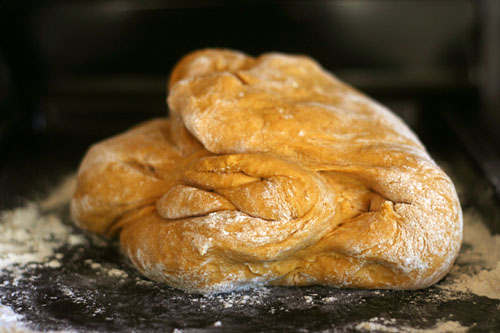
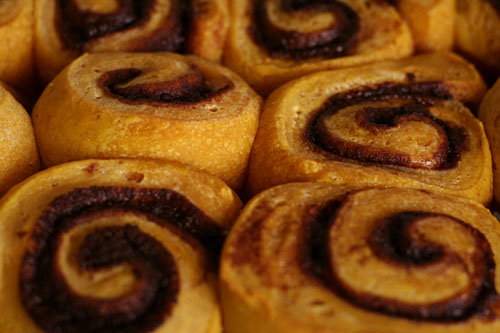
Pumpkin, cinnamon, cream cheese, and sugar – for breakfast! The dough part is light, soft, and orange; the filling is sweet and spice and everything nice; and the glaze, well, it has cream cheese. I told you I was a genius.

One year ago: Twice-Baked Potatoes
Two years ago: White Chocolate Lemon Truffles, Pumpkin Seed Brittle, Vanilla Bean Caramels

Pumpkin Cinnamon Rolls

You can chill the rolls after they’re shaped, rolled, and cut, but before rising. They’ll still need several hours in the morning to finish rising, bake, and cool, although you can speed the rising along by giving them a very warm place to get started.

A riskier method to get cinnamon rolls at a reasonable breakfast hour is to adjust the amount of yeast. I used ½ teaspoon yeast instead of 2 teaspoons. Your first rise will take several hours. Then you can roll, cut, and chill the dough (or freeze it and defrost in the refrigerator). Take the prepared, chilled rolls out of the fridge before you go to bed and they should be perfectly risen and ready to bake when you wake up.

Dough:
4-4 ½ cups (20 to 21¼ ounces) unbleached all-purpose flour
2 teaspoons instant yeast
⅓ cup (2.33 ounces) sugar
1½ teaspoons salt
2 eggs
1 (15-ounce) can pumpkin
4 tablespoons vegetable oil

Filling:
¾ cup packed (5¼ ounces) light brown sugar
1 tablespoon pumpkin pie spice (or a mixture of mostly cinnamon with some cloves, nutmeg, and ginger)
⅛ teaspoon salt
1 tablespoon melted butter

Glaze:
1 cup (4 ounces) confectioners sugar, sifted to remove lumps
1 ounce cream cheese, softened
½ teaspoon vanilla extract
1-2 tablespoons milk

1. Stand mixer: Mix the flour, yeast, sugar, and salt in the bowl of a stand mixer fitted with the dough hook. In a large measuring cup, lightly beat the eggs; whisk in the pumpkin and oil. With the mixer on low speed, gradually add the liquid ingredients. Continue mixing on medium-low until the dough is elastic and supple, about 8 minutes. You may need to add a little more flour or water to get the correct consistency – soft but not sticky.

By hand: Mix the flour, yeast, sugar, and salt in a large bowl. In a large measuring cup, lightly beat the eggs; whisk in the pumpkin and oil. Make a well in the middle of the dry ingredients and pour in the liquid ingredients. Stir the mixture until the dough comes together. Transfer it to a floured board or countertop and knead, incorporating as little flour as possible, for about 10 minutes, until the dough is elastic and supple. You may need to add a little more flour or water to get the correct consistency – soft but not sticky.

2. Mix together the filling ingredients in a small bowl. Grease a 13 by 9-inch baking dish.

3. After the dough has doubled in bulk, press it down and turn it out onto a lightly floured work surface. Using a rolling pin, shape the dough into a 16 by 12-inch rectangle, with a long side facing you. Sprinkle the filling evenly over the dough, leaving a ½-inch border at the far edges. Roll the dough, beginning with the long edge closest to you and using both hands to pinch the dough with your fingertips as you roll. Using unflavored dental floss or a serrated knife, cut the roll into 12 equal pieces and place the rolls cut-side up in the prepared baking dish. Cover with plastic wrap and place in a warm, draft-free spot until doubled in bulk, 1½ to 2 hours.

4. When the rolls are almost fully risen, adjust an oven rack to the middle position and heat the oven to 350 degrees. Bake the rolls until golden brown and an instant-read thermometer inserted into the center of one reads 185 to 188 degrees, 25 to 30 minutes. Cool for 10 minutes. Meanwhile, stir the glaze ingredients together until smooth. Glaze the rolls and serve.

coffee break muffins

I wasn’t in the mood for these the day I made them. What I was in the mood for was the Chocolate Chunk Muffins a couple pages later. If you’ve flipped through Dorie’s book, you must have seen the ones I’m talking about – dark, rich muffins studded with big chunks of bittersweet chocolate. They’re not breakfast, but I bet they’re delicious.

They are, however, not this week’s Tuesdays with Dorie recipe. This week’s recipe is espresso muffins. But I got to thinking about how coffee enhances the flavor of chocolate and wondered if the reverse were true. Could I add just a bit of chocolate to give these another flavor dimension?

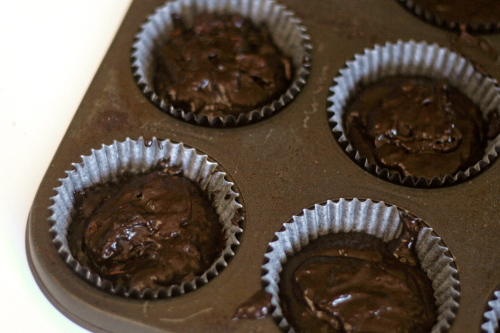
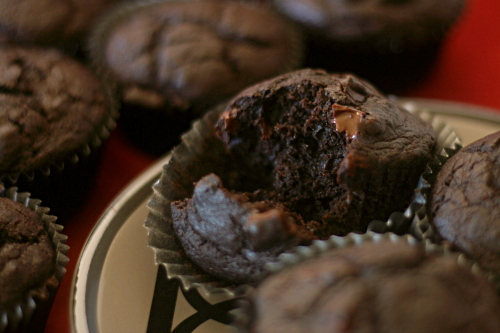
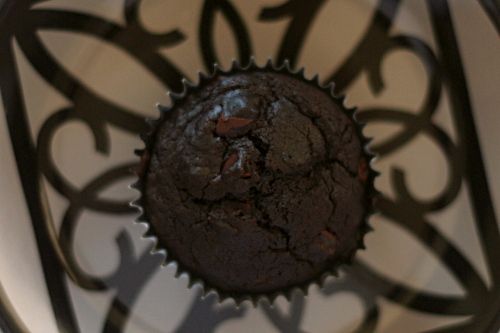
I replaced a quarter of the flour with cocoa powder, and, to just a few of the muffins, stirred in some chopped semisweet chocolate. And I was surprised that these ended up tasting just how I’d imagined the double chocolate muffins I’d been craving in the first place. The espresso flavor was timid, hiding behind the dominant chocolate. More chocolate flavor isn’t going to get any arguments from me, but now I’m curious about how the non-chocolate, pure espresso version would be. Next time I’ll have to try harder to resist my urge to eat chocolate for breakfast.

Rhiani chose these muffins, and she has the recipe posted. I replaced ½ cup of the flour with cocoa and added a few chocolate chips.

One year ago: Flaky Apple Turnovers
Two years ago: Dimply Plum Cake

pappa al pomodoro

My dad called Marlena de Blasi’s A Thousand Days in Venice “the most unrealistic true story [he’s] ever read.” He has a point – life-changing decisions based on love at first sight and all – but I still enjoyed Marlena’s attitude. It’s all about soaking up the good stuff, not sweating the small stuff, living life to the fullest – all of the things we know we should be doing, but too often let the rest of life get in the way.

(I can’t resist telling you that I used an excerpt from this book as a reading in our wedding. “As a couple there is some sense about us that feels like risk, like adventure, like the tight, sharp bubbles of a good champagne.” <romantic gushy sigh>)

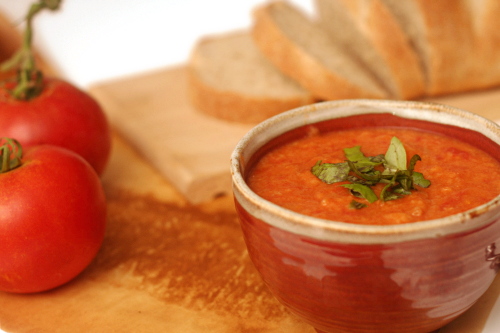
She also has recipes in the book, all of which are about soaking up the good stuff, not sweating the small stuff, tasting food to the fullest. I’ve always remembered in particular the pappa al pomodoro, because it combines so many of my favorite things: fresh tomatoes, bread, tomato soup.

Well, I didn’t use her recipe. There are so many variations, and I’m sure they’re all traditional in one sense or another, so I chose the one that seemed the most fun for me. Because that’s what this is all about, right?

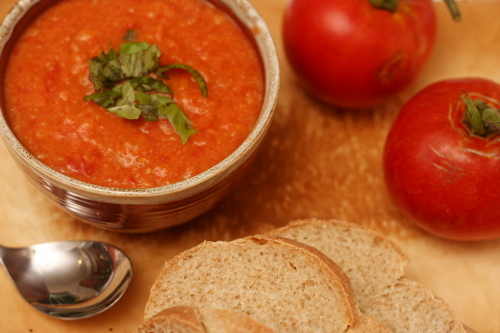
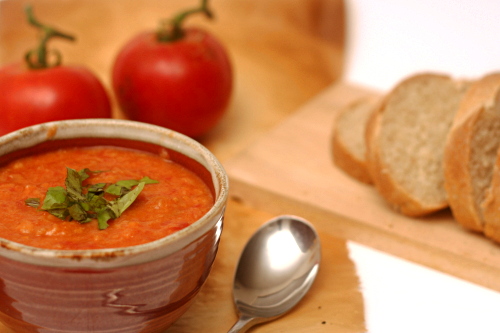
Pappa al pomodoro tastes equally of summer tomatoes and of good bread. Although I should stop calling it soup, because it isn’t. It’s porridge, thick and homey and comforting. When food tastes like this and is as much fun as this was to make, you can’t help but focus on what life is really about.

One year ago: Zucchini Bread
Two years ago: Shrimp, Roasted Tomato, and Farmers Cheese Pizza

Printer Friendly Recipe
Pappa al Pomodoro
(adapted from The Zuni Cafe Cookbook via Orangette)

Serves 4-6

When my mom made this, she used a potato masher to break up the bread and tomatoes, which seems to me like the perfect way to get the mushy but not pureed texture of pappa al pomodoro.

2 pounds tomatoes
2 tablespoons olive oil
1 medium yellow onion, diced
salt
3 cloves garlic, chopped
1 (4-8 inch) sprig fresh basil, leaves removed and torn into pieces
3 cups broth (any kind) or water
pinch sugar
8 ounces stale (or dried in an oven) rustic bread, cut into 1-inch pieces
freshly ground black pepper
extra virgin olive oil for serving

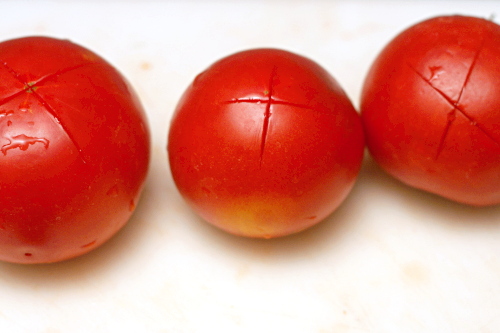
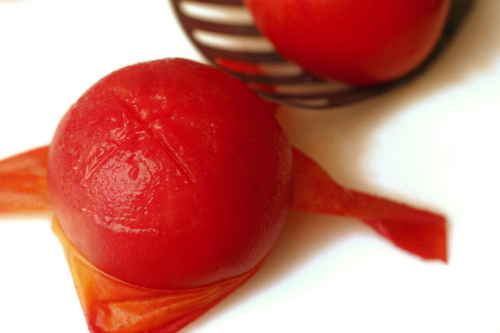
1. Bring a medium saucepan of water to a boil over high heat. Meanwhile, score a small ‘X’ on the underside of each tomato, cutting just through the skin. Dip the tomatoes in the boiling water for 10-15 seconds, until the skin around the X starts to curl. Remove the tomatoes from the water. Peel the tomatoes by pulling the skin back from the X; core and roughly chop the tomatoes.

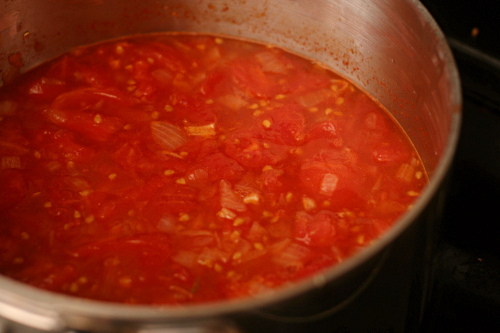
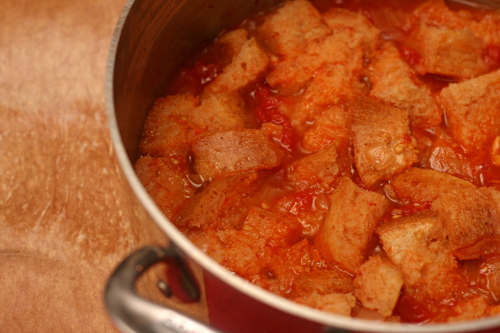
2. In a large pot, heat the olive oil over medium heat. Add the onions and a pinch of salt; cook, stirring occasionally, until the onions are soft and just starting to brown at the edges, about 8 minutes. Add the garlic and cook, stirring constantly, for about 30 seconds, then add the chopped tomatoes. Cook and stir until they start to release their liquid, 2-3 minutes, then add the basil stem (not the leaves), ½ teaspoon salt, and the broth. Taste and add a pinch of sugar if the soup seems too acidic. Bring to a simmer over medium-high heat, then lower the heat to maintain a slow simmer and cook for 10 minutes. Stir in the bread, turn off the heat, and let the mixture set for 15 minutes.

3. When ready to serve, either stir the soup to break up the bread chunks, or, if you’d like a smoother mixture, process it lightly with an immersion blender. Taste for seasoning, stir in the basil leaves, and top with freshly ground black pepper and extra virgin olive oil. Serve.

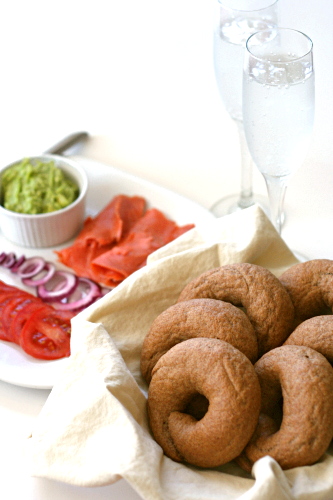
whole wheat bagels

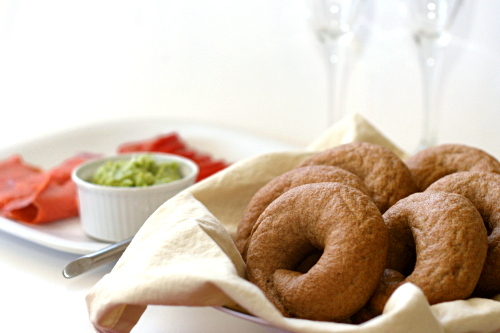
It’s possible that bagels are my favorite food. Yes, more so than tomato soup, than macaroni and cheese, even more so than chocolate chip cookie dough! And so I eat one almost everyday. It’s basically my lunch break and it’s a happy little time for me with my bagel, my black tea, and my Google Reader.

But here’s the thing – if I’m going to be eating a bagel every single day, I better make sure it’s healthy. For years, I made bagels with half white and half whole wheat flour, and I felt like that was a nice compromise between delicious and nutritious. Bagels with no white flour would be like hockey pucks, right? And they would taste like whole wheat. The horror!

I know I’m becoming a broken record, but the answer, of course, is in Peter Reinhart’s Whole Grain Breads. All it takes is a little overnight soak, and those whole grains act like refined white flour – they taste sweeter, form supple doughs, and bake into tender, light breads.

Not that it was smooth-sailing from the beginning with this bagel recipe. The problem I was having with this is that it’s too simple. Most bagel recipes need an overnight retardation in the refrigerator before they can be boiled and baked. This recipe doesn’t require that, and in fact, doesn’t need much time for a second rise at all. I’ve had the hardest time getting this through my stubborn head, and so over and over, I was making over-risen, sunken, ugly bagels.

A year after I started using this recipe, I think I’ve finally nailed it. You know what I did? I followed the recipe closer. My happy little bagel break just got a little happier.

One year ago: Pasta with No-Cook Tomato Sauce and Fresh Mozzarella
Two years ago: Country Egg Scramble

Printer Friendly Recipe
Whole Wheat Bagels (adapted from Peter Reinhart’s Whole Grain Breads)

Makes 8 large bagels or 12 small bagels

There are a few shortcuts in this compared to Reinhart’s original recipe. I make it every couple of weeks, so the faster I can get it done, the better!

I’ve played with the timing of this recipe quite a bit. The original results in fresh bagels 5-6 hours after you start (the second day). But I usually want them in the morning. You can refrigerate the dough in two places – either after the bagels are formed (in which case you should decrease the yeast slightly to prevent the bagels from over-rising) or right after kneading. The last time I refrigerated it after kneading, it rose overnight in the fridge, and in the morning, I immediately shaped the bagels and boiled them shortly afterward.

Pre-dough 1:
8 ounces whole wheat flour
¼ teaspoon instant yeast
6 ounces (¾ cup) water

Pre-dough 2:
2 tablespoons barley malt syrup
5 ounces water
8 ounces whole wheat flour
½ teaspoon salt

Final dough:
both pre-doughs
1 tablespoon water
2 teaspoons yeast
¾ teaspoon salt
7 tablespoons flour, plus more if necessary
1 tablespoon baking soda (for boiling)

1. In the bowl of a stand mixer fitted with the dough hook, mix all of the ingredients in Pre-dough 1 on medium-low speed until combined. Set aside for 5 minutes. Meanwhile, in a 1-cup measuring cup, stir together the barley malt syrup and the 5 ounces of water in Pre-dough 2. Set aside, stirring occasionally, until the barley malt syrup dissolves into the water. Return to Pre-dough 1 and knead on low speed for 1 minute. Transfer to a small bowl and cover with plastic wrap or a damp kitchen towel. Refrigerate overnight. Add the flour and salt for Pre-dough 2 to the empty mixer bowl; with the mixer on low speed, pour in the water-syrup mixture. Mix on medium-low just until combined. Cover the mixer bowl with plastic wrap or a damp kitchen towel and set aside at room temperature for at least 8 hours or overnight.

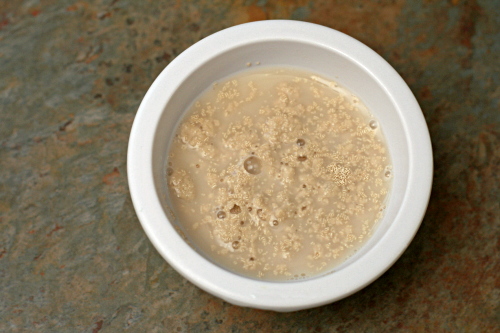
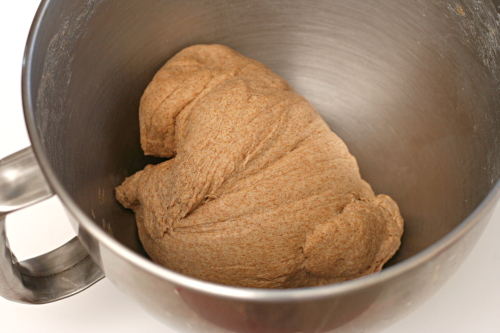
2. The following day, transfer the refrigerated Pre-dough 1 to room temperature for a couple hours to warm slightly. When you’re ready to make the final dough, stir together the 1 tablespoon water and the yeast. In the bowl of a stand mixer fitted with the dough hook, mix both pre-doughs, the water and yeast, and the salt on low speed until combined. While the mixer is running, add in the flour, 1 tablespoon at a time, until it’s fully absorbed by the dough. Knead on low speed for 5-6 minutes, adding more flour or water if necessary to form a smooth, firm dough. It shouldn’t be sticky.

3. Let the dough rise at room temperature until it increases to about 1½ times its original size, 1-2 hours.

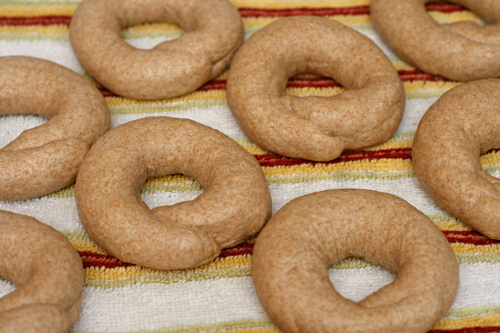
4. Divide the dough into 8-12 pieces. Shape each piece into a smooth ball, then roll each piece into a rope about ¾-inch thick (slightly thicker for larger bagels). Bring the ends of the rope together and gently roll them on a flat surface to seal. Set aside for about 20 minutes.

5. Meanwhile, preheat the oven to 500 degrees, line a baking sheet with parchment paper or a silicone mat, and bring at least three inches of water to a boil in a large pot over high heat. Add 1 tablespoon baking soda, reduce the heat to medium-high and gently drop 2-4 bagels (as many as will fit without crowding) into the water. Boil for 1 minute, flipping the bagels halfway through.

6. Place the boiled bagels on the prepared baking sheet. Transfer the sheet to the oven, reduce the oven temperature to 450 degrees, and bake until the bagels are browned and feel hard, 13 minutes for small bagels and slightly longer for larger bagels. (The bagels will soften as they cool.) Cool completely before serving. (I can only fit one baking sheet, holding half a batch of bagels, in my oven at once, so I refrigerate the remaining unboiled bagels until the first pan is almost done baking, then boil and bake them.)

oatmeal breakfast bread

I finally admitted defeat this weekend. For the first time this year, I bought bread. I also bought pre-chopped vegetables, hummus, and pre-washed lettuce. Why do I force myself to do all these things from scratch? Preparing my snacks and lunches for the work week has been seriously cutting into my favorite Sunday activity (sitting outside with a margarita and a book, of course). The only things I’m still making from scratch are hard-boiled eggs and muffins for Dave.
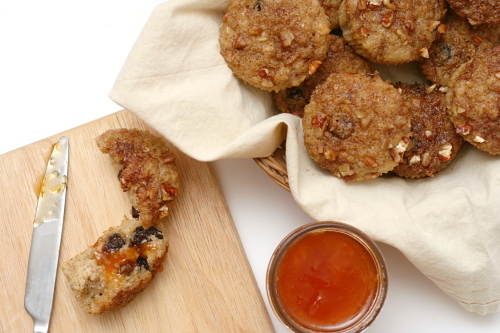
I’m lucky that so far the quick bread chapter in the Tuesdays with Dorie cookbook has been seriously overlooked, so I can double task lunch prep and TWD. (The celebration cake chapter is DONE, which, for me, is cause for celebration.) It also helps that muffins are so easy and bake quickly.

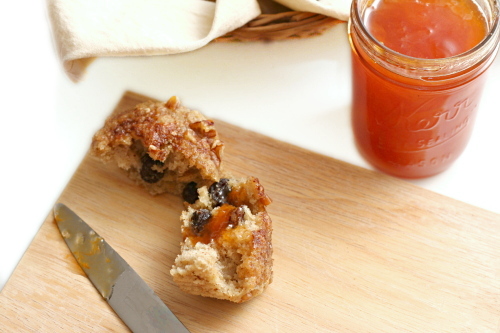
These are a perfect example of why I can’t bring myself to buy muffins. These aren’t perfectly healthy, but they’re certainly better for you than anything storebought – not to mention how sweet and tender and soft they are as well. I’m definitely willing to sacrifice a bit of Sunday margarita time to make muffins like this.

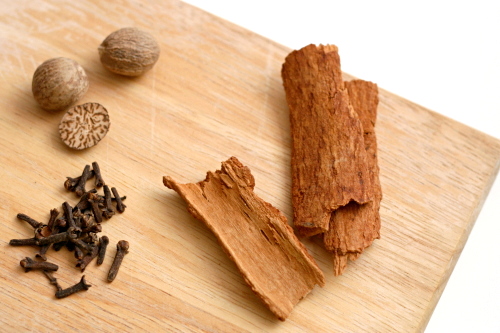
Natalie chose this recipe, and she has it posted on her site. I used raisins for the dried fruit, but these were so perfectly spiced for fall that I wish I’d used dried apples instead.

One year ago: Applesauce Spice Bars
Two years ago: Granola Grabbers

baked french toast

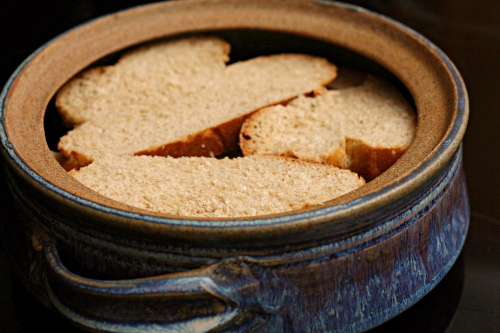
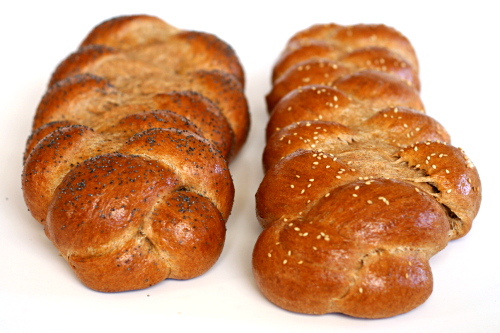
I need to stop doing things like making a complicated braided loaf of bread just to cut it up and put in a casserole. Especially considering that Deb specifically calls for supermarket bread, clarifying that there is no need for super fancy stuff. No! Everything must be fancy! This is why I have no time to clean my house.

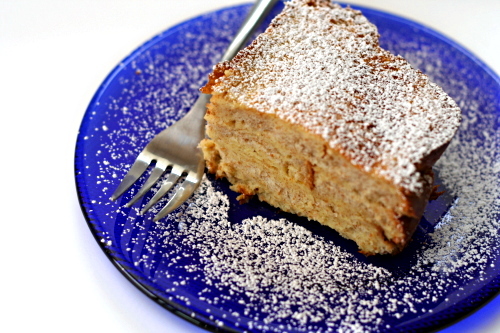
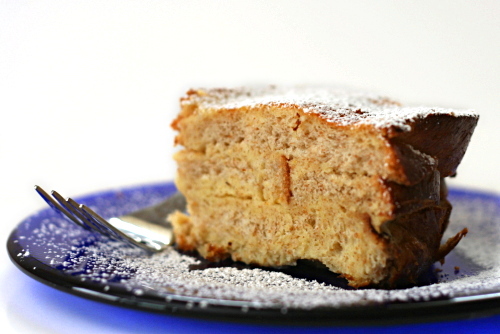
Deb suggests a range of flavoring options, but the first time I made this, I happened to have a grapefruit around, so I went a citrus direction, with grapefruit zest and triple sec. I also added vanilla to make, essentially, creamsicle French toast. Highly – highly – recommended.

Like most breakfast casseroles, the big advantage here (besides that it tastes like a creamsicle) is that you can make it in advance and then just bake it in the morning. Furthermore, it’s a simple, easy recipe, with just a few ingredients and simple mixing method. Which is very good thing, because you can spend the time you save making the casserole baking an impractically beautiful and fresh loaf of bread.

One year ago: Vegetable Curry
Two year ago: Grits Cheese and Onions Soufflés

Printer Friendly Recipe
Boozy Baked French Toast (rewritten from Smitten Kitchen)

Serves 6

This recipe is infinitely adaptable. Use whole milk for extra richness or lowfat milk to cut calories. Mix and match your liqueurs and your add-ins. Skip the liqueur entirely and use a couple teaspoons of an extract.

1 loaf challah, sliced 1-inch thick
3 cups whole milk
3 eggs
3 tablespoons sugar
½ teaspoon salt
¼ cup liqueur (see note)
other flavorings – ½ cup toasted nuts, 1 teaspoon zest, ½ cup dried fruit

1. Grease a 9×13-inch baking dish. Arrange half of the bread in a tightly-packed layer in the pan. Add the nuts or dried fruit, if using. Place the remaining bread on top of the first layer.

2. Whisk together the milk, eggs, sugar, salt, liqueur, and zest, or flavorings of your choice and pour over the bread. Wrap tightly with plastic wrap and refrigerate overnight.

3. Bake at 425 degrees until puffed and golden, about 30 minutes. Cut into generous squares and serve with maple syrup, fresh fruit, powdered sugar or all of the above.

whole wheat challah

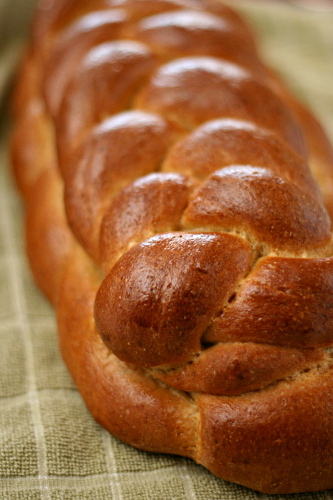
This is the third or fourth challah recipe I’ve tried and most certainly my favorite. Yes, the whole wheat version is the best challah I’ve made. I’m surprised too.

Maybe challah doesn’t seem like something that would adapt well to whole wheat? Whole wheat bread is often denser and drier than refined flour loaves, and challah should be light and fluffy and tender. Peter Reinhart knows this; you must trust Peter Reinhart.

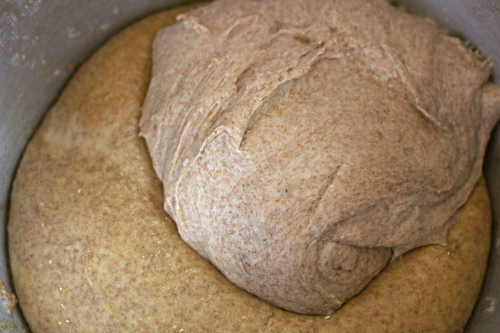
He uses his standard whole wheat trick of soaking the whole wheat flour overnight to break down the grains. In this case, one of the pre-doughs uses eggs instead of water as the soaking liquid. He uses oil instead of the butter many recipes require. Everyone loves the taste of butter, but I’m becoming more and more enamored with oil in baking, because it makes things so tender and moist.

I really don’t think I like whole wheat bread any more than the average person. I think it’s just that, using Reinhart’s recipes, I can make some exceptionally good whole wheat bread. This is perfect challah whether you’re a white bread or a wheat bread lover.

One year ago: Lemon Meringue Cake
Two years ago: Fried Egg and Sausage Ciabatta Breakfast Pizzas

Printer Friendly Recipe
Whole Wheat Challah (adapted slightly from Peter Reinhart’s Whole Grain Breads)

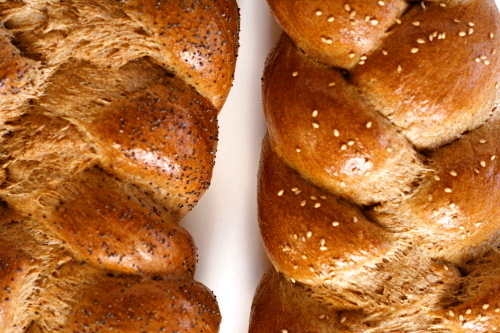
You can do more complicated braids with this if you prefer. Just do an internet search for instructions for 4-, 5-, and 6-strand braids.

Soaker:
1¾ cups (8 ounces) whole wheat flour, preferably fine grind
½ teaspoon salt
¾ cup water

Biga:
1¾ cups (8 ounces) whole wheat flour, preferably fine grind
¼ teaspoon instant yeast
½ cup water
2 tablespoons vegetable oil
1 large egg
4 large egg yolks

Final dough:
the soaker
the biga
7 tablespoons (2 ounces) whole wheat flour, plus more for adjustments
¾ teaspoon salt
2¼ teaspoons instant yeast
2 tablespoons sugar or brown sugar, or 1½ tablespoons honey or agave nectar
2 tablespoons vegetable oil

Toppings:
1 egg
1 tablespoon water
pinch salt
poppy seeds or sesame seeds (optional)

1. For the soaker: In a medium mixing bowl, mix all of the ingredients together. Cover and leave at room temperature for 12 to 24 hours, or refrigerate for up to 3 days. If the dough is refrigerated, leave it at room temperature for 2 hours before mixing the final dough.

2. For the biga: In a medium mixing bowl, mix all of the ingredients together. Knead for 2 minutes; the dough will feel very tacky. Let the dough rest for 5 minutes, then knead for 1 minute. Cover and refrigerate for at least 8 hours and up to 3 days. Leave it at room temperature for 2 hours before mixing the final dough.

3. For the final dough: Cut the soaker and biga into about 12 smaller pieces. Put the pieces in the bowl of a standing mixer fitted with the dough hook along with the 7 tablespoons flour, the salt, instant yeast, sugar, and oil. (Or mix by hand in a large bowl.) Mix on slow speed for about 1 minute, until the dough comes together, then increase the speed to medium-high and continue mixing and kneading for 6 minutes, adding flour if necessary, until the dough is soft and tacky, but not sticky. (Or knead by hand for 6-8 minutes.) Let the dough rest for 5 minutes, then resume kneading for 1 minute. Form the dough into a ball and place it in a greased bowl. Cover and let rise at room temperature for 45 to 60 minutes, until it is about 1½ times its original size.

4. Gently transfer the dough to a lightly floured work surface. Divide the dough into 6 evenly sized pieces for 2 smaller loaves or 3 evenly sized pieces for 1 large loaf. Roll each portion of dough into a rope about 10 inches long, letting the dough rest for 5 minutes if it’s very elastic. Braid the ropes.
5. Place the braid(s) on a sheet pan lined with parchment paper or a silicone mat. To make the egg wash, whisk the egg, water, and salt (listed above in Toppings) together. Brush the braids with the egg wash, cover, and let rise at room temperature for 30 minutes.

6. Brush the dough with the egg wash again, then top with poppy seeds or sesame seeds, if using. Leave the dough uncovered and let rise for 15 more minutes. Preheat the oven to 400 degrees.

7. Place the challah on the middle shelf, reduce the heat to 325 degrees, and bake for 20 minutes. Rotate the loaf 180 degrees and bake for another 20 minutes. Check the bread and rotate again if it is baking unevenly. Continue baking for an additional 10 to 15 minutes, until the bread is a rich brown all around, sounds hollow when thumped on the bottom, and registers at least 195 degrees at the center.

8. Transfer the bread to a cooling rack and let it cool for at least 1 hour before serving.

banana peanut butter muffins

Conversely, I think I’d like bananas more if they weren’t so cheap, convenient, and healthy. It’s just that I eat so many bananas. For years, every weekday, a banana. I had to start mixing the bananas with other things to make them palatable. In the spring, strawberries make a wonderful accompaniment. And if I want something more filling, peanut butter works perfectly. Now I eat peanut butter with my banana everyday, and I’m hoping that it’s a tasty enough combination that I don’t get sick of it anytime soon.
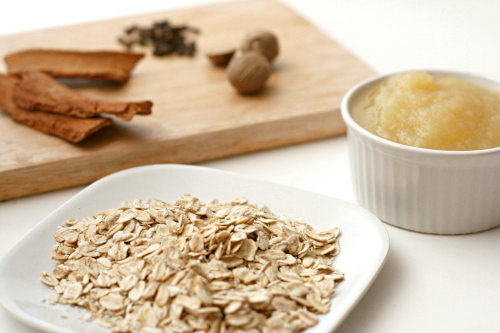
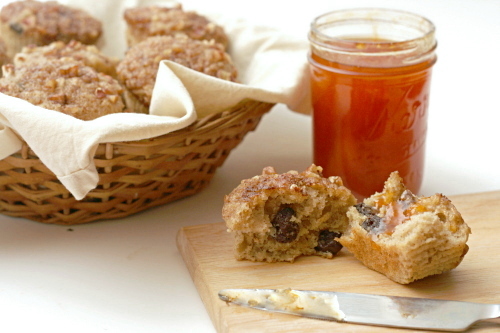
If bananas are better with peanut butter, it stands to reason that banana bread is better with peanut butter too, right? Or banana muffins, as the case may be. And it turns out, yes, peanut butter is a wonderful addition, and so is oatmeal, to make banana muffins more fun and interesting. It’s just too bad that muffins don’t work as a healthy replacement to my normal daily banana.

One year ago: Farmer’s Market Salad with Spiced Goat Cheese Rounds
Two years ago: Tuscan-Style Couscous Salad

Printer Friendly Recipe
Peanut Butter Banana Oatmeal Muffins (from Baking Bites via Annie’s Eats)

I used oil instead of applesauce, because I always have oil around and never have applesauce around.

1½ cups (7.2 ounces) all-purpose flour
1 cup old-fashioned oats
1 teaspoons baking powder
½ teaspoons baking soda
½ teaspoons salt
2 tablespoons applesauce
¾ cup (5.25 ounces) light brown sugar
2 large eggs
1 cup mashed banana (about 3 bananas)
6 tablespoons creamy peanut butter
1 cup low-fat buttermilk

1. Preheat the oven to 350˚ F. Line 18 muffin cups with paper liners.

2. In a medium mixing bowl, combine the flour, oats, baking powder, baking soda and salt. In a large mixing bowl, whisk together the applesauce, brown sugar, eggs, banana, peanut butter and buttermilk until smooth. Pour the dry ingredients into the bowl with the wet ingredients and mix just until incorporated and fully blended.

3. Divide the batter between the prepared muffin cups. Bake 18-20 minutes, or until a toothpick inserted in the center comes out clean. Allow to cool in the pan for 5-10 minutes, then transfer to a wire rack to cool completely.