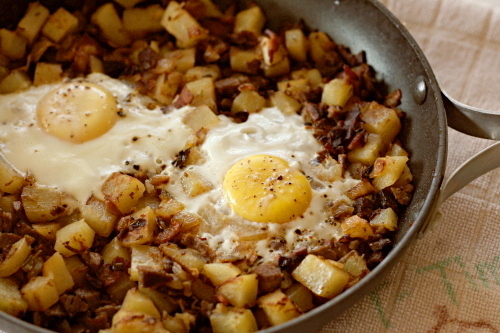
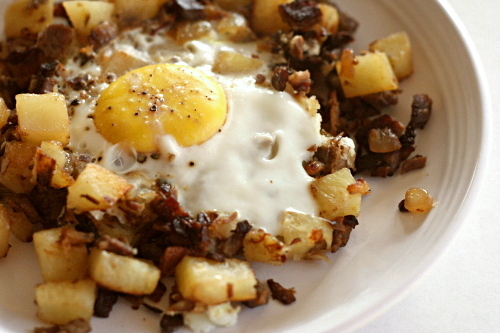
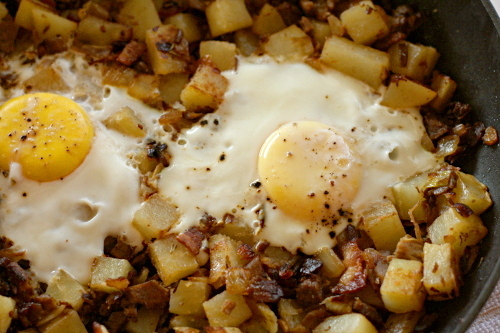
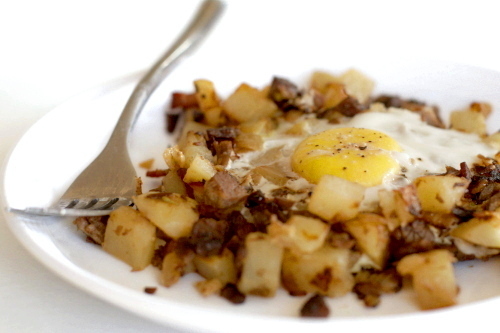
corned beef hash

One time at the zoo, I walked by the reindeer exhibit, but they weren’t out. Huh, I thought. Bummer. I would have liked to see the reindeer. But on the other side of the path, there was another animal to ooh and ahh over, and I moved on. When the reindeer came back out just a few minutes later, I overheard someone tell her friend that they could go see them now, and the lady said “Reindeer? I was excited about that 10 minutes ago!”

Reindeer lose their interestingness after 10 minutes apparently.

The moral of the story is this: No one cares about corned beef in May. You were excited about that 2 months ago. But, I am not the type of person to sit on an entry (or two, in this case) for 11 months until its season of popularity comes back, so if you’re not one to cook corned beef outside of March, you are missing out you can bookmark this post for next year.

And don’t forget about it! That would be sad, because this is not just the best way to use corned beef leftovers, it is one of the best breakfasts, ever. It’s bacon, browned onions, crispy potatoes, salty seasoned beef, drippy yolks. What more could you ask for for breakfast? I’m excited about corned beef hash all year.

One year ago: Orange-Oatmeal-Currant Cookies (This is the recipe that’s had me complaining about not being able to find currants. But I recently discovered that the flavors are perfect with dried cranberries too.)
Two years ago: Double (or Triple) Chocolate Cookies

Printer Friendly Recipe
Corned Beef Hash (from Cooks Illustrated)

You absolutely do not need corned beef leftovers to make this. I often make it with thick-sliced deli corned beef, and it’s still delicious. That being said, last time I made it, I par-boiled the potatoes in the liquid leftover from cooking the corned beef, and was that ever good!

I like to give Cooks Illustrated recipes exact, because they’re so nicely detailed. However, this is one of those recipes that I’ve made so often that I often cut corners now – skipping the hot sauce, which I never have around; leaving the corned beef in large chunks; using Yukon Gold potatoes so I don’t have to peel them; pouring in a bit of whatever milk I have around instead of using cream. As long as you have the same basic ingredients and everything is crisped and browned, you can’t go wrong here.

2 pounds russet potatoes, peeled and cut into ½-inch dice
salt
2 bay leaves
4 ounces (4 slices) bacon, diced
1 medium onion, diced
2 medium garlic cloves, minced or pressed through a garlic press
½ teaspoon minced fresh thyme leaves
1 pound corned beef, minced (pieces should be ¼-inch or smaller)
½ cup heavy cream
¼ teaspoon hot pepper sauce
4 large eggs
ground black pepper

1. Bring the potatoes, 5 cups water, ½ teaspoon salt, and the bay leaves to a boil in a medium saucepan over medium-high heat. Once the water boils, cook the potatoes for 4 minutes, drain, and set aside.

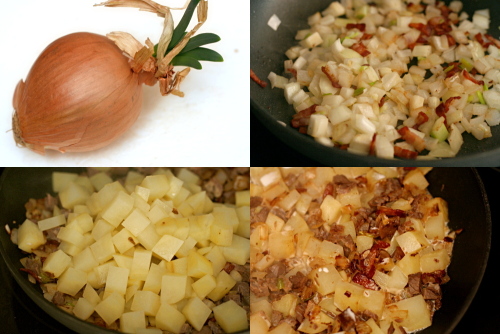
2. Place the bacon in a 12-inch nonstick skillet over medium-high heat and cook until the fat is partially rendered, about 2 minutes. Add the onions and cook, stirring occasionally, until the onion has softened and browned around the edges, about 8 minutes. Add the garlic and thyme and cook until fragrant, about 30 seconds. Add the corned beef and stir until thoroughly combined with the onion mixture. Mix in the potatoes and lightly pack the mixture into the pan with a spatula. Reduce the heat to medium and pour the heavy cream and hot pepper sauce evenly over the hash. Cook, undisturbed, for 4 minutes, then, with the spatula, invert the hash, a portion at a time, and fold the browned bits back into the hash. Lightly pack the hash into the pan. Repeat the process every minute or two until the potatoes are thoroughly cooked, about 8 minutes longer.

3. Make 4 indentations (each measuring about 2 inches across) equally spaced on the surface of the hash. Crack 1 egg into each indentation and season the egg with salt and pepper to taste. Reduce the heat to medium-low, cover the pan, and cook until the eggs are just set, about 6 minutes. Cut the hash into 4 wedges, making sure each has an egg, and serve immediately.
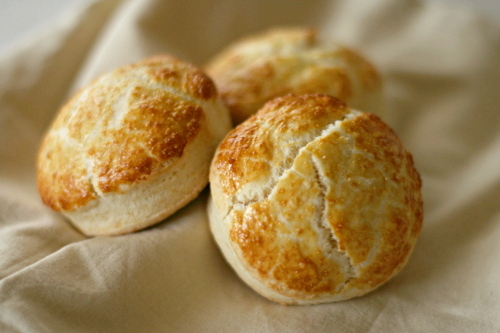
sweet cream biscuits

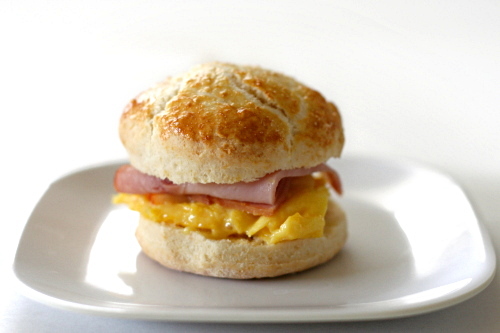
I was all set to make the tiniest portion of this recipe and serve little bitty biscuits with salad for dinner. And then Dorie mentioned ham sandwiches in the headnote and I started thinking about adding eggs and cheese to that and suddenly I was making extra dough to freeze. Breakfast sandwiches are on my Favorite Foods Ever List. (Let us not discuss how long that list is.)

There are all sorts of biscuits – flaky from cutting in butter, layered from multiple pastry turns, tender from stirring in cream – and I love them all. And they all make one mean breakfast sandwich.

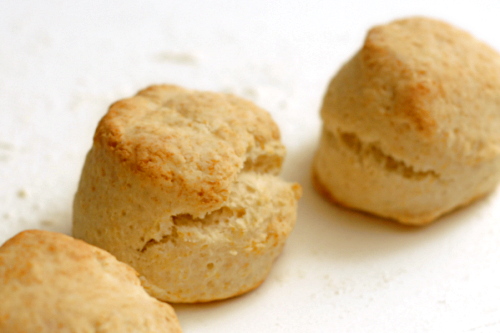
Melissa, who chose these biscuits for Tuesdays with Dorie, has the recipe posted on her site. You might be able to tell from the photos that my tiny biscuits rose higher than my bigger biscuits. I mixed, cut, and rolled the dough at the same time; the only difference is that the larger ones were baked straight from the freezer instead of right after the dough was made like the smaller ones. Also, I brushed the larger biscuits with an egg wash because I happened to have eggs available. It makes for a pretty biscuit, but they’re great either way.

One year ago: Chocolate Bread Pudding
Two years ago: Carrot Cake

whole wheat brioche

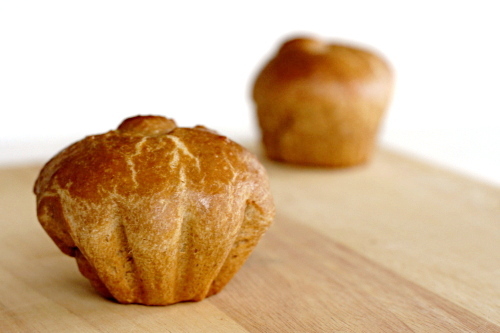
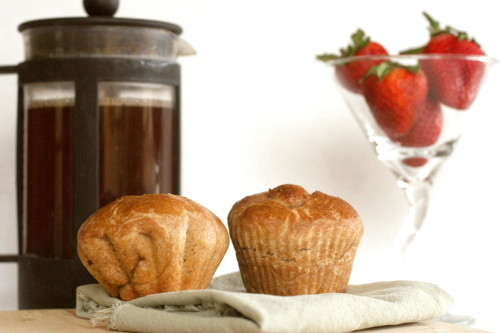
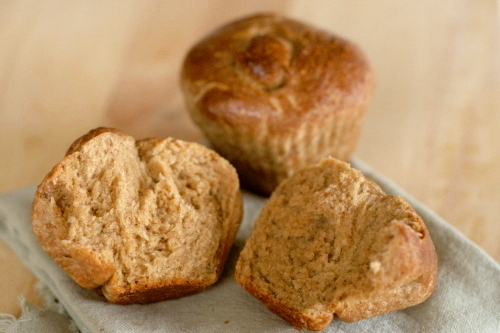
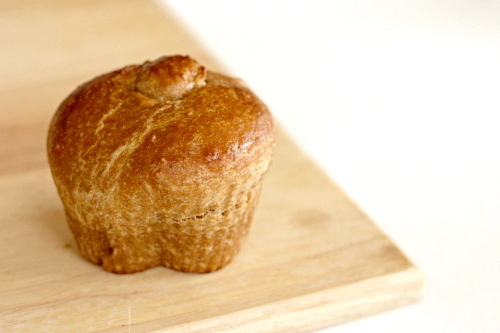
This recipe cracks me up. Each little brioche roll has 1¼ tablespoons of butter in it, so it doesn’t matter how much whole grain you use – these are not good for you.

They are, however, good. Of course they don’t have much in common with their white flour cousins, which, if we were talking about people, would be one of those unceasingly friendly people who always have something nice to say. The whole wheat version is more akin to a sarcastic friend who always manages to make you laugh, but sometimes at your own expense. Both are good! Just different.

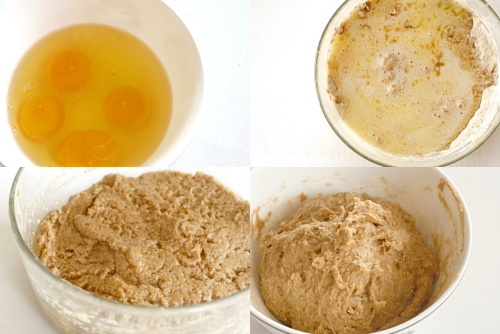
The whole wheat brioche is made along the same lines as the rest of Peter Reinhart’s Whole Grain Breads. What’s fun about this recipe is that the liquid used in one of the pre-doughs is melted butter, and in the other, it’s eggs. The one with the butter had a texture very different from the normal water-hydrated doughs – and not a particularly appetizing one, truth be told, as the best word to describe it would be ‘greasy’. Fortunately, after sitting in the fridge for several hours, the butter hardens and the mixture is more palatable – plus, of course, the liquid has had an opportunity to break down those bran fibers, which is the heart of Reinhart’s whole wheat bread method.

I tried a trick with this bread that was marginally successful. After the final dough is mixed and kneaded, it’s shaped immediately and then needs to rise again – for 3 to 4 hours. We tend to eat breakfast kind of late on weekends, but not that late!

So I reduced the yeast quite a bit, with the goal of extending the rising time to about 8 hours, or overnight. I wanted to wake up, heat the oven and throw the perfectly risen brioche rolls in to bake.

It turns out, though, that I decreased the yeast too much, and the poor little guys didn’t have enough strength to lift up that heavy dough. I still think the method is sound; I just need to use more yeast than I did. (The under-risen after 8 hours brioche were salvageable; I just had to give them an hour or so in a really warm environment before I could bake them.)

Usually my theory is that if food is supposed to be indulgent, then make it indulgent! Why worry about whole grains if you’re mainlining butter? But sometimes it’s just fun to make something weird, and whole wheat brioche is, indeed, weird.

One year ago: Pecan Sour Cream Biscuits
Two years ago: Chocolate Cream Pie

Printer Friendly Recipe
Whole Wheat Brioche (rewritten from Peter Reinhart’s Whole Grain Breads)

I reduced the yeast in the final dough to ½ teaspoon, hoping I could stretch the rising time to 8-10 hours, or overnight. This was too little, but I still think the method is worth trying, but with 1 teaspoon yeast.

I froze the brioche rolls after shaping, before rising. I let them defrost in the fridge for a few hours before moving them to room temperature to rise.

The melted butter kept leaking out of its pre-dough. Once the dough had chilled somewhat, I stirred it back in, so that the pre-dough would be homogeneous.

For the final cup of flour, after both pre-doughs are combined, I used white flour. I know that’s cheating, but I’ve had better results with Reinhart’s whole wheat bagels when white flour is used at the end, and I thought it was probably similar here. The rolls are still 80% whole wheat.

Pre-dough 1:
1¾ cups (8 ounces) whole wheat flour
½ teaspoon salt
½ cup whole milk, scalded and cooled
16 tablespoons (2 sticks) unsalted butter, melted

Mix all of the ingredients until thoroughly combined. Cover and refrigerate at least 8 hours and up to 3 days.

Pre-dough 2:
1¾ cups (8 ounces) whole wheat flour
¼ teaspoon instant yeast
4 large eggs, slightly beaten

Mix all of the ingredients until thoroughly combined. Using a rubber spatula or wet hands, knead the dough in the bowl for a couple minutes; it will be very tacky. Let the dough rest for 5 minutes, then knead again for 1 minute. Cover and refrigerate for at least 8 hours and up to 3 days.

Final dough:
Both pre-doughs
1 cup (4.5 ounces) whole wheat flour (see note)
¾ teaspoon salt
2¼ teaspoons instant yeast (see note)
3 tablespoons sugar

Egg wash:
1 egg beaten with 1 tablespoon water and a pinch of salt

1. Chop the chilled pre-doughs into to 12 pieces each. Combine the pre-doughs, flour, salt, yeast and sugar in the bowl of a standing mixer fitted with the dough hook (or a large bowl if mixing by hand). Mix on slow speed for 3 to 4 minutes, scraping the bowl as needed, (or knead with wet hands) until the pre-doughs are assimilated into each other. Add flour or water, as needed, to form a soft and slightly sticky dough. Knead (either with a mixer or by hand) for 3 to 4 minutes, until the dough is cold, firm, and slightly tacky. Let the dough rest for 5 minutes.

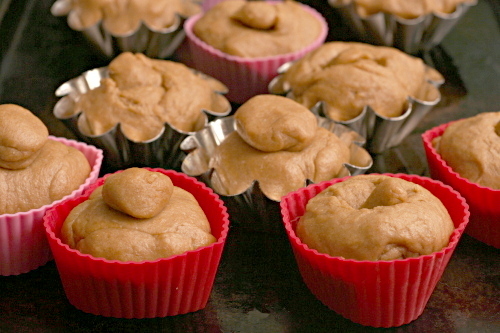
2. Divide the dough into 12 equal pieces and round each into a smooth ball. Spray 12 brioche molds or a 12-cup muffin pan with spray oil. To shape the brioche, roll each piece of dough into a cone; poke a hole through the larger end and slip the small end through the hole. (I also sometimes just formed a much smaller round from a small portion of the dough and stuck that on top of the larger round. I didn’t notice a difference in the baked versions of the two shaping methods.) Place the shaped rolls into the prepared pan and cover loosely with plastic wrap or a damp towel. Let rise at room temperature for 3 to 4 hours, until the dough has grown to about 1½ times its original size.

3. Adjust a rack to the middle position and heat the oven to 425 degrees. Brush the risen rolls with egg wash and place them in the oven, lowering the temperature to 400 degrees. Bake for 17 to 25 minutes, rotating the pan halfway through, until the brioche are dark golden brown, measure 195 degrees in the center, and sound hollow when tapped on the bottom (after one is removed from its pan).

4. Remove the rolls from their molds; cool on a cooling rack for at least 20 minutes before serving.

brown soda bread

Epicurious reviewers get a lot of flack for their “I made 8 million changes to the recipe and hated it” habit, but in general, I find them completely awesome. Without their unequivocal positive reviews, I wouldn’t have chosen this recipe at all, or I at least would have modified it.

I started to have doubts about the recipe when I was measuring out the ingredients. It’s a quick bread with just two little tablespoons of fat, plus all sorts of whole grains. I was sorely tempted to add another couple tablespoons of butter, but I put my faith in the reviewers who loved the recipe. Honestly, if I hadn’t already eaten two green velvet cupcakes that day, I’m sure I would have doubled the butter.

But I resisted, and it was the right decision. Why am I always surprised when healthy food tastes good? Not only is half of the flour whole wheat, but the recipe includes some wheat bran, wheat germ, and oats for good measure, not to mention that barely there amount of butter.

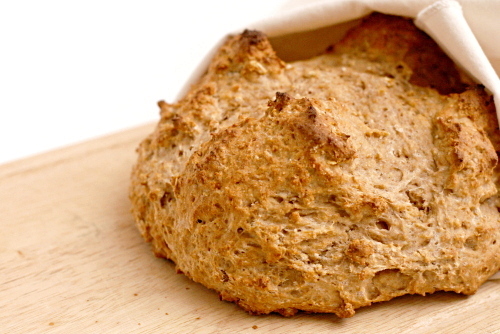
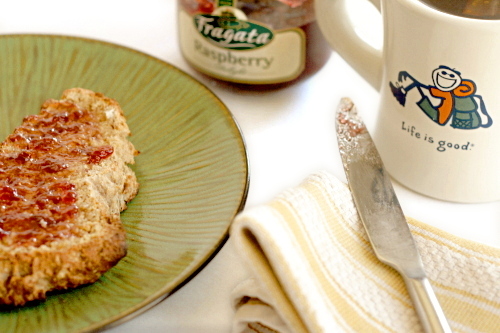
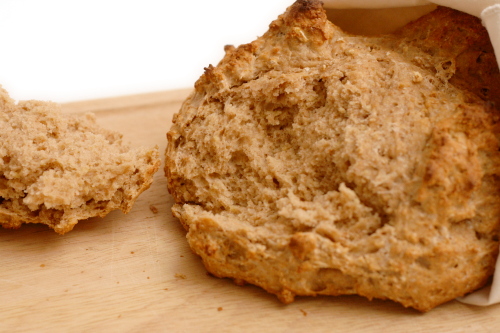
Somehow, with only 2 tablespoons of butter and nearly 4 cups of flour, over half of it whole grain, this bread wasn’t dry, dense, bitter, or bland. It was the slightest bit sweet, sturdy but soft, perfect smeared with butter and jam or dipped in the cooking liquid from corned beef and cabbage. Who knew that a low fat, whole grain quick bread could be so great? Fortunately for me, I guess those epicurious reviewers did.

One year ago: Chicken Artichoke Pesto Calzones
Two years ago: Spaghetti and Meatballs

Printer Friendly Recipe
Brown Soda Bread (adapted slightly from Bon Appetit via epicurious.com)

I toasted the wheat germ, wheat bran, and for good measure, the oats, in a small skillet over medium heat until they smelled nutty, which took just a couple of minutes.

1¾ cups (8.4 ounces) all-purpose flour
1¾ cups whole wheat flour
3 tablespoons toasted wheat bran
3 tablespoons toasted wheat germ
2 tablespoons old-fashioned oats
2 tablespoons (packed) dark brown sugar
1 teaspoon baking soda
1 teaspoon salt
2 tablespoons (¼ stick) chilled unsalted butter, cut into pieces
2 cups (about) buttermilk

1. Adjust a rack to the middle position and heat the oven to 425°F. Line a baking sheet with parchment paper or a silicone baking mat.

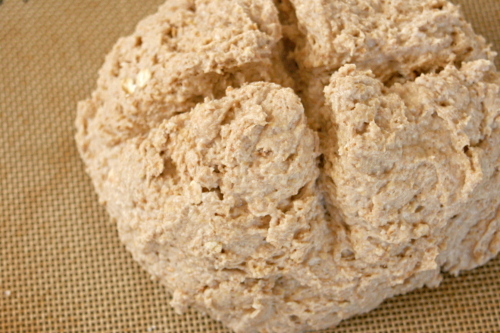
2. In a large bowl, combine the flours, bran, wheat germ, oats, brown sugar, baking soda, and salt. Rub the butter into the dry ingredients until the mixture resembles fine meal. Stir in enough buttermilk to form a soft dough. Knead the dough slightly to form a cohesive mass and transfer it to the prepared pan. Shape into a round, then, using a bread knife, cut two 1-inch-deep slashes into the dough, forming a cross.

3. Bake until the loaf is dark brown and a toothpick inserted into the center comes out clean, about 40 minutes. Remove the bread from the pan to a cooling rack and let it cool about 30 minutes before serving.

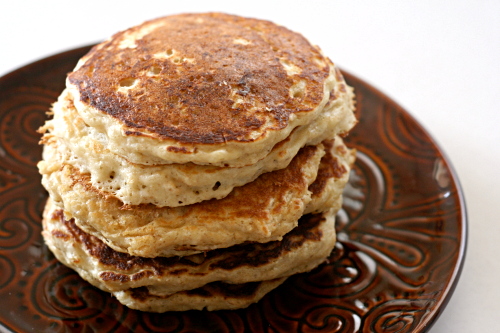
oatmeal pancakes

Dave gets a man magazine – not one with naked ladies, but one about fashion and supposedly culture and, I don’t know, other manly stuff. I know he’ll insist that I clarify that he doesn’t pay for it. Anyway, the last issue had an article about getting in shape in which the author claims that whole wheat gives guys man boobs. Instead, men should focus on grains like oats and quinoa.

Yes, it’s whole wheat that gives you man boobs, and not, you know, overeating. I suspect that eating too much quinoa without exercising would also result in man boobs.

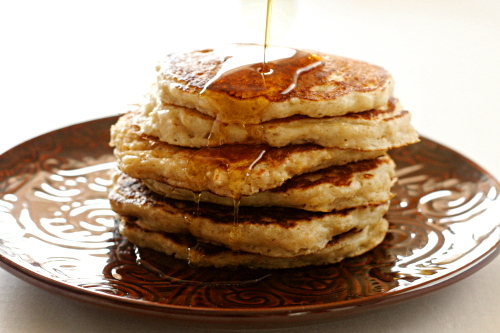
But hey, if you’re concerned about your man boob potential, these pancakes are perfect for you, because they are almost completely oats, with just a small amount of flour. Of course, they have a stick of butter in them, but hey, the problem is whole wheat, right, not fat.

Plus I cut the amount of butter in half and the pancakes were still perfect. I also substituted whole grain pastry flour for half of the flour in the recipe, my new favorite trick with quick breads. I increased the milk a little to make up for the lost liquid from the butter.

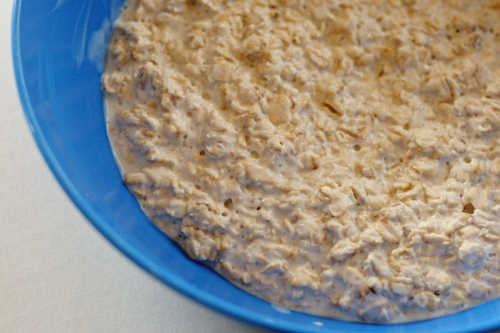
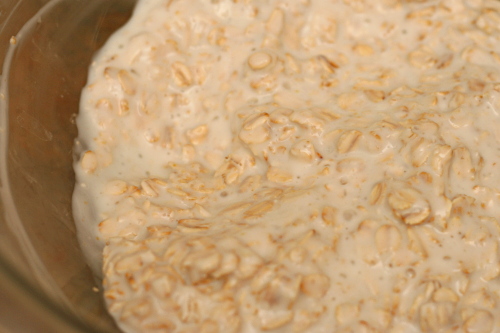
I’m loving the result of soaking oats before mixing them into batter. Once the oats are softened, they blend better with the rest of the ingredients. I’m also really eager to try toasting the oats before mixing them with the liquid, because I love the flavor that toasting gives oats. I’ll have to try that next time, which might be soon, since I don’t want to give Dave man boobs by making him regular pancakes.

One year ago: Tofu Croutons
Two years ago: Old-Fashioned Chocolate Layer Cake

Printer Friendly Recipe
Oatmeal Pancakes (adapted from Orangette, who adapted it from the Inn at Fordhook Farm in Doylestown, PA)

4 servings

I replaced ¼ cup of the flour with the equal amount of whole wheat pastry flour, a trick I’ve found very successful with pancakes and muffins.

2 cups old-fashioned oats
2 cups + ½ cup buttermilk
½ cup (2.4 ounces) all-purpose flour
2 tablespoons sugar
1 teaspoon baking powder
1 teaspoon baking soda
½ teaspoon table salt
2 large eggs, lightly beaten
4 tablespoons (½ stick) unsalted butter, melted but not hot
vegetable oil for the pan

1. Combine the oats and 2 cups of the buttermilk in a medium bowl. Cover with plastic wrap and refrigerate overnight.

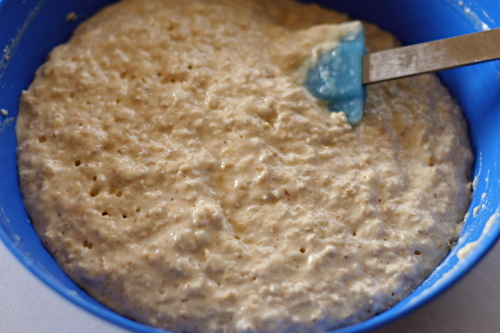
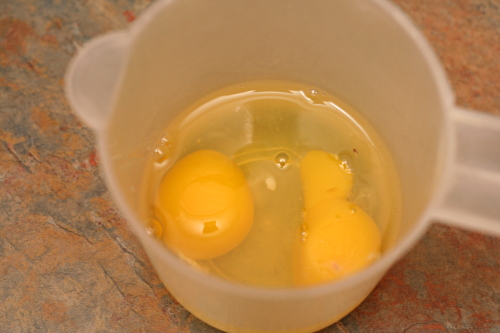
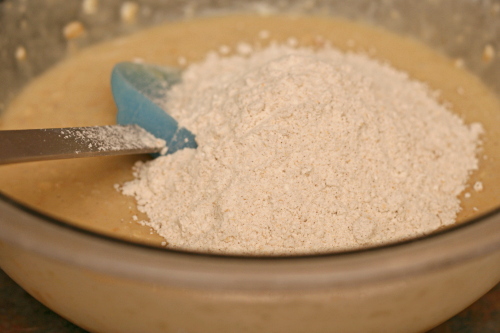
2. In a medium bowl, whisk together the flour, sugar, baking powder, baking soda, and salt. Whisk the remaining ½ cup buttermilk, the eggs, and then the butter into the oat mixture. Fold the flour mixture into the batter.

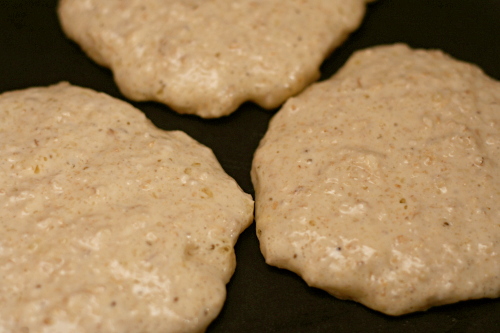
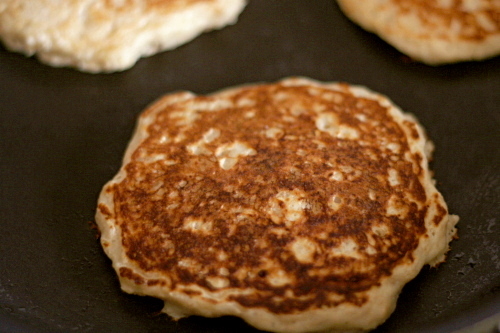
3. Brush a large nonstick skillet or griddle with vegetable oil; heat over medium heat. Spoon scant ¼ cups of the batter onto the pan. Cook until the sides of the pancakes start to look dry and the bottom is golden brown, 2-3 minutes. Flip, then continue to cook until the second side is also golden brown, about 2 minutes. Repeat with the remaining pancakes, adjusting the heat if necessary. If you’d like, you can keep the pancakes in a 200 degree oven on a cooling rack set over a baking sheet until the whole batch is cooked.

oatmeal raisin muffins

I must be growing up. Since when do I like raisins? At least I still think green peppers are blech. If that ever changes, I know I’ll be ready to pick up my cane and trade in my real teeth for the kind you take out at night to clean. Oh, and buy one of those plastic bag things to wrap around my head when it rains.

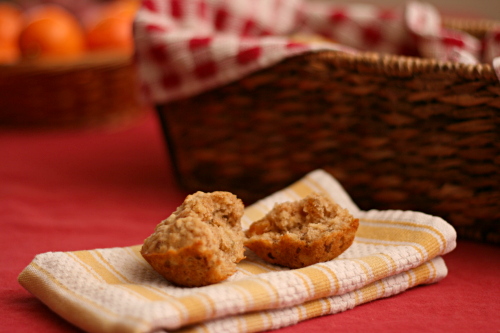
Granted, Dave pointed out that these are particularly good raisins. Even so, these muffins are wonderful – soft and fluffy and tender, and the raisins add some tartness and the pecans a bit of crunch, and all together, kinda sorta perfect actually!

They’re not too bad for you – oats are whole grains, right? I replaced a third of the flour with whole wheat pastry flour, a great trick with muffins. Let’s forget about the butter, okay? You have to pay a small price for muffins this good.

It seems inconceivable, but could oatmeal raisin cookies be my next favorite thing? I did buy yellow peppers for the fajitas we’re making for dinner tonight, instead of the green peppers called for in the recipe, so I feel safe there. Still young! (And picky, apparently.)

Two years ago: Potstickers

Printer Friendly Recipe
Oatmeal Raisin Muffins (adapted from Morning Food, by Margaret S. Fox and John B. Bear, via recipezaar)

Makes 12

I substituted ¼ cup whole wheat pastry flour for an equal amount of white flour, and the muffins were still wonderful.

1 cup old-fashioned oats
1 cup buttermilk
¾ cup (3.6 ounces) all-purpose flour
½ teaspoon baking powder
½ teaspoon salt
¾ teaspoon baking soda
1 teaspoon cinnamon
pinch nutmeg
½ cup pecans or walnuts, chopped
2 eggs, beaten lightly
⅓ cup (2.35 ounces) packed light brown sugar
6 tablespoons melted butter
½ cup raisins

1. Combine the oats and buttermilk and let stand 30 minutes. Adjust a rack to the middle position and heat the oven to 400ºF. Spray the bottoms only of a 12-cup muffin pan with nonstick spray or line with paper liners. Combine the flour, baking powder, salt, baking soda, cinnamon, and nutmeg.

2. Spread the nuts evenly on a baking sheet. Bake, shaking the pan every couple of minutes, until fragrant, about 5 minutes. Transfer the nuts to a small bowl. (If you leave them on the hot pan, they’ll continue to cook and might burn.)

3. Add the eggs to the oatmeal mixture one at a time, whisking thoroughly after each addition. Whisk in the sugar, then the butter. Switch to a rubber spatula and fold in the flour mixture. Once the flour is dispersed, but not completely moistened, gently stir in the raisins and nuts.

4. Divide the batter evenly between the muffin cups. Bake until a toothpick inserted into a muffin comes out clean, 13-18 minutes. Set the pan on a rack to cool slightly, about 5 minutes, then use a thin-bladed knife to remove the muffins from the pan.

coco-nana muffins

I made these, oh, a year and a half ago. And the file’s just been sitting around waiting for someone to choose them for Tuesdays with Dorie. Actually, it was the first recipe I ever made from Dorie Greenspan that was not specifically for TWD. I had told myself that I would only bake from the book with the group, but I realized that was stupid when I wanted to make muffins and happened to have all the ingredients for these.

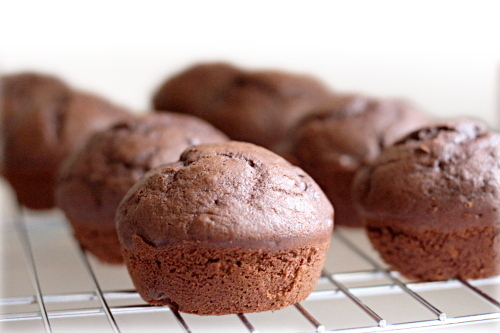
Obviously they’re not fresh in my mind, plus I usually just eat one muffin per batch. I freeze the rest and Dave takes one to work everyday. I do remember liking these though, and indeed, my notes say “good; great texture; mostly chocolate, hint of banana.” Sounds perfect to me.

Steph has the recipe posted.

One year ago: Fresh Ginger and Chocolate Gingerbread

maple oatmeal scones

I got scooped! I was just about to write an entry on these scones a few days ago and decided to go with the apple muffins instead. The next day Michelle posted about them. What are the chances?

Actually, considering that these first appeared on Barefoot Contessa Saturday morning, and by the time I baked them the next day there were already a handful of reviews on the Food Network’s site, the chances might not be so bad. Apparently I wasn’t the only one tempted by maple oatmeal scones.

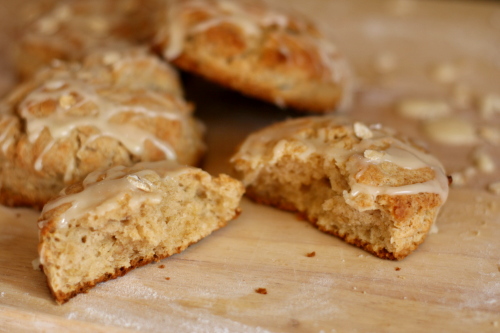
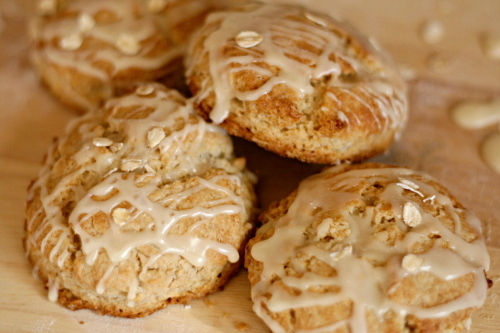
Maple seems like an underused ingredient, considering how delicious it is. Perhaps the problem is that it’s an easily overpowered flavor once it’s mixed into dough and baked. These scones overcome this problem by adding additional maple in the form of a glaze.

I often think that glazes on scones make them too sweet, but since the scones themselves are only lightly sweetened, these have just the right level of sweetness. They’re also light and tender inside and crisp on top, and really just the perfect way to start out a weekend morning. I can see why Michelle was so eager to post about them!

One year ago: Twice-Baked Potatoes with Broccoli, Cheddar, and Scallions
Two years ago: Lasagne Bolognese

Printer Friendly Recipe
Maple Oatmeal Scones (adapted just slightly from Barefoot Contessa)

I used traditional rolled oats, which worked just fine.

As always with scones, you can freeze the dough after shaping it, then bake the scones straight from the freezer.

Scones:
1¾ cups (8.4 ounces) all-purpose flour
½ cup whole wheat flour
½ cup quick-cooking oats, plus additional for sprinkling
1 tablespoon baking powder
1 tablespoon granulated sugar
1 teaspoon salt
16 tablespoons (2 sticks) cold unsalted butter, cut into ½-inch cubes
¼ cup cold buttermilk
¼ cup pure maple syrup
2 large eggs, lightly beaten

Glaze:
½ cup confectioners’ sugar
¼ cup pure maple syrup
½ teaspoon pure vanilla extract

1. Preheat the oven to 400 degrees. In the bowl of an electric mixer fitted with a paddle attachment, combine the flours, oats, baking powder, sugar and salt. Blend the cold butter in at the lowest speed and mix until the butter is in pea-size pieces. Combine the buttermilk, maple syrup and eggs and add quickly to the flour-and-butter mixture. Mix until just blended. The dough may be sticky.

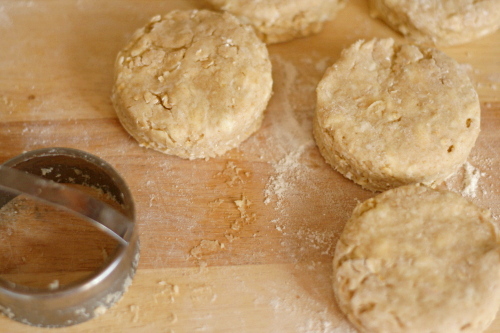
2. Dump the dough out onto a well-floured surface and be sure it is combined. Flour your hands and a rolling pin and roll the dough ¾ to 1 inch thick. You should see lumps of butter in the dough. Cut into 3-inch rounds with a plain or fluted cutter and place on a baking sheet lined with parchment paper. Lightly knead the scraps together and cut more scones.

3. Bake for 20 to 25 minutes, until the tops are crisp.

4. To make the glaze, combine the confectioners’ sugar, maple syrup and vanilla. When the scones are done, cool for 5 minutes, then drizzle each scone with 1 tablespoon of the glaze. For garnish, sprinkle a few uncooked oats on the tops of the scones.

apple muffins

I don’t know why I feel the need to state this every year, but, again, for the record: I am pro New Year’s Resolution. Yes, we all know that you can resolve to make changes any day of the year. So what? New Year’s Day is the official last day of holiday craziness. It’s the perfect day to start thinking about new routines.

Besides, this year, I also moved from the East Coast to the Southwest; from a suburb of one of the country’s largest cities to a very small, very isolated town; from an apartment to a house; from the subtropics to the desert. Dave is starting a new job; I’ll be starting one new job this week, plus interviewing for two others. I didn’t just make a New Year’s resolution; I made a resolution for this new life.

My goal is, in a nutshell, to be perfect. That sounds obtainable, right? More realistically, it’s to be a person I can be proud of. And, yes, part of that, the easier part actually, involves fitness.

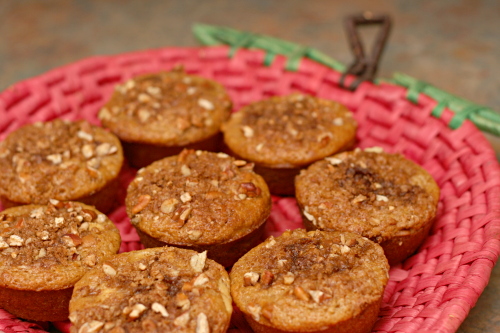
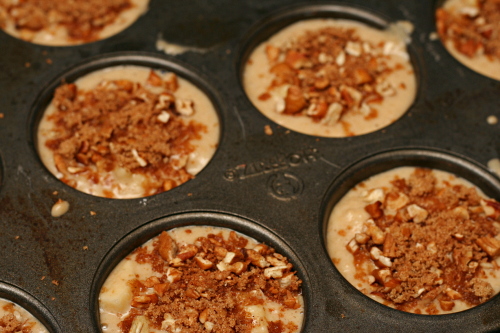
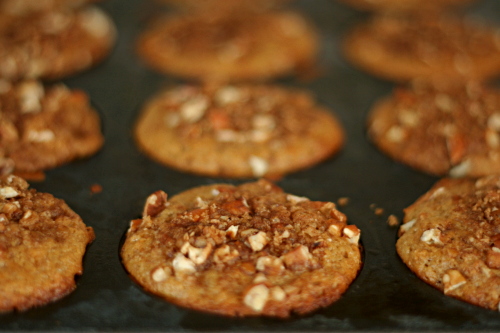
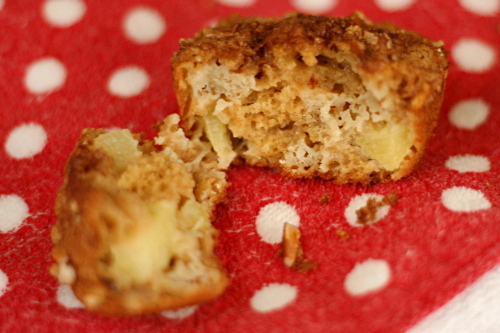
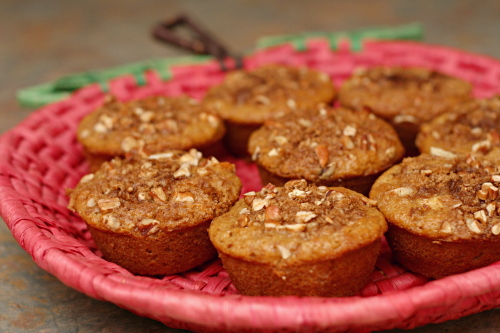
Fortunately, eating healthy isn’t a bit challenging when there are recipes like this one. Nothing about these indicates that they’re better for you than most muffins. But with whole wheat pastry flour substituting for half of the flour and applesauce taking the place of some of the fat, they’re downright wholesome. They’re also fluffy and light and delicious.

Muffins = one small step toward a more perfect me! Now I just need to keep it up for ever or so, plus be more productive, creative, organized, active, outgoing, focused, positive, motivated…

Two years ago: Macaroni and Cheese, Banana Cream Pie

Printer Friendly Recipe
Apple Muffins (from Ellie Krieger)

12-16 muffins

My batter seemed a little too liquidy. Next time I’ll reduce the buttermilk to ½ cup.

The original recipe says it makes 12 muffins, but I had extra batter.

cooking spray
¾ cup (5.25 ounces) plus 2 tablespoons packed brown sugar
¼ cup chopped pecans
½ teaspoon ground cinnamon
1 cup (4.8 ounces) all-purpose flour
1 cup whole-wheat pastry flour
1 teaspoon baking soda
½ teaspoon salt
¼ cup canola oil
2 large eggs
1 cup natural applesauce
1 teaspoon vanilla extract
¾ cup lowfat buttermilk
1 Golden Delicious apple, peeled, cored and cut into ¼-inch pieces

Preheat oven to 400 degrees. Coat a 12-capacity muffin pan with cooking spray.

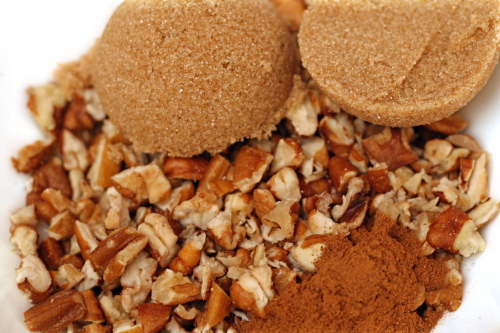
In a small bowl, mix together 2 tablespoons of the brown sugar, the pecans and cinnamon.

In a medium bowl, whisk together the all-purpose and whole-wheat flour, baking soda and salt.

In a large bowl, whisk the remaining ¾ cup sugar and oil until combined. Add the eggs, one at a time, whisking well after each addition. Whisk in the applesauce and vanilla.

Whisk in the flour mixture in two batches, alternating with the buttermilk. Whisk just until combined. Gently stir in the apple chunks.

Pour the batter into the prepared muffin pan and sprinkle with the pecan mixture. Tap the pan on the counter a few times to remove any air bubbles. Bake for 20 minutes or until a wooden pick inserted in center of one of the muffins comes out clean.

Let cool on a wire rack for 15 minutes. Run a knife around the muffins to loosen them and unmold. Cool completely on the rack.

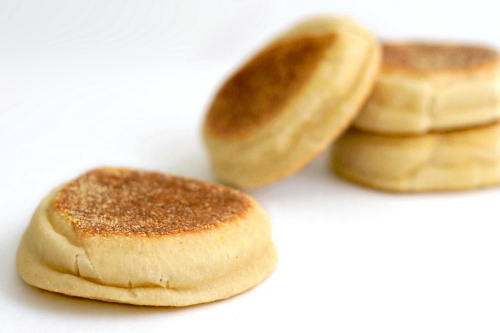
english muffins

Copy of IMG_1847

I always struggle with how to describe yeast bread dough precisely enough so that someone can reproduce the results I got. Almost every dough is elastic and smooth after kneading, so that doesn’t really help. Sticky and not-sticky are good, but each describes a wide spectrum.

Copy of IMG_1828

My first inclination is to compare it to a standard sandwich bread. Is it on the more-liquid looser side (like ciabatta), or the more flour-firmer side (like bagels)? That works great for experienced bread bakers, but what about everyone else?

Copy of IMG_1831

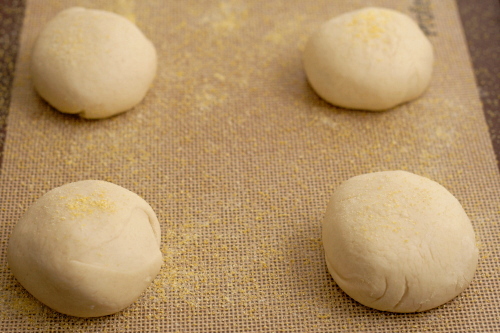
Apparently I’m not the only one with this problem, because Reinhart’s “soft and pliable, not stiff” description didn’t keep me from keeping this dough a little firmer that I think it was supposed to be. He later says that the rounds of dough should “swell both up and out”, which…well, no, that didn’t happen, although they did swell up nicely.
Copy of IMG_1838

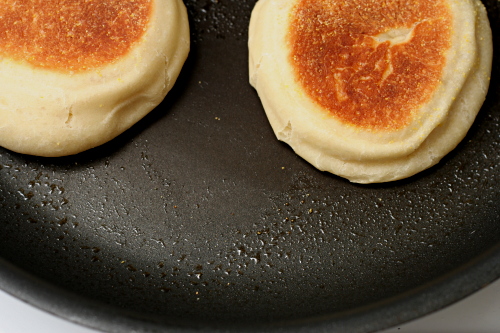
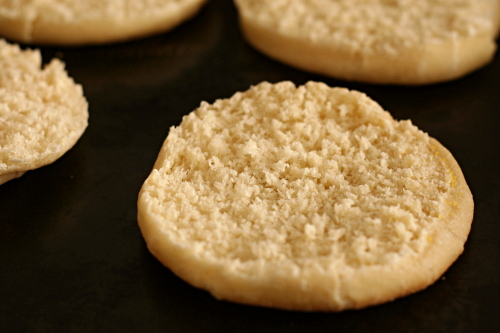
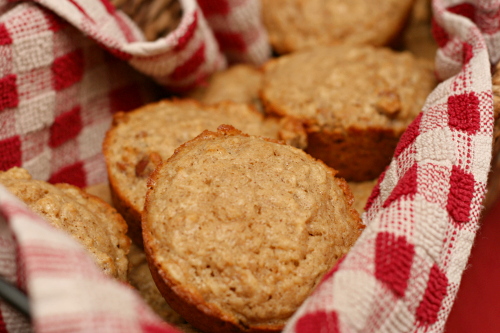
Fortunately, bread is a lot more forgiving than people often think, so just because I had to smoosh my muffins down in the skillet to flatten them doesn’t mean any real harm was done. They weren’t cratered with nooks and crannies as dramatically as I had hoped they’d be, but they will be next time. Because now I know: the dough should be just a bit softer than sandwich dough, but not wet enough to be sticky. Which is very helpful, but only if you know what sandwich bread  dough feels like.

Copy of IMG_1901

One year ago: Cranberry Orange Muffins
Two years ago: Braised White Beans with Potatoes, Zucchini and Tomatoes

Update 3/16/10: I’ve successfully used this method to make these English muffins whole wheat.  I made the pre-dough out of 5 ounces whole wheat flour, ¼ teaspoon salt, and ½ cup milk or buttermilk.  After letting that sit overnight, I mixed it with the rest of the ingredients – 5 ounces white bread flour, ½ teaspoon salt, 1¼ teaspoons instant yeast, ½ tablespoon granulated sugar, 1 tablespoon shortening or unsalted butter, and ¼ – ½ cup milk or buttermilk.

Printer Friendly Recipe
English Muffins (completely rewritten from Peter Reinhart’s The Bread Baker’s Apprentice, because his recipes are so darn long)

Makes 6

My dough was elastic, supple, and a little soft, but the rolls didn’t expand out so much as just up, so I pressed them down in the pan while they were cooking. This seems to work just fine, although my nooks and crannies were on the small side.

2¼ cups (10 ounces) unbleached bread flour
¾ teaspoon salt
1¼ teaspoons instant yeast
½ tablespoon granulated sugar
1 tablespoon shortening or unsalted butter
¾ to 1 cup milk or buttermilk, at room temperature
cornmeal for dusting

1. Stand mixer: Mix the flour, yeast, salt, and sugar in the bowl of a stand mixer fitted with the dough hook. With the mixer on low speed, add the butter and gradually pour in the milk. Continue mixing on medium-low until the dough is elastic and supple, 8-10 minutes. The dough should be soft, but not sticky.

By hand: Mix the flour, yeast, sugar, and salt in a large bowl.  Make a well in the middle of the dry ingredients and pour in the liquid ingredients. Stir the mixture until the dough comes together. Transfer it to a floured board or countertop and knead, incorporating as little flour as possible, for about 10 minutes, until the dough is elastic and supple. The dough should be soft, but not sticky.

2. Transfer the dough to a lightly oiled bowl and cover with plastic wrap or a damp dishtowel. Set the dough aside to rise until it has doubled in volume, about 1 to 1½ hours.

3. Turn the dough out onto a very lightly floured surface. Cut it into six equally-sized pieces and shape each into a ball. Transfer the balls of dough to a baking pan that’s been dusted with cornmeal; sprinkle more cornmeal over the top of the balls and cover with plastic wrap or a damp dishtowel. Set the dough aside to rise for 1 to 1½ hours; the balls will nearly double in size and should swell both up and out.

4. Adjust a rack to the middle position and heat the oven to 350°F. Line a baking sheet with parchment paper or a silicone mat.

5. Spray a large nonstick skillet (or a griddle) with spray oil and heat over medium heat (or 350°F). Place the balls of dough in the skillet with a least 1 inch between them. Cook until the bottoms are very dark brown, just short of burning, 5-8 minutes. Flip the rolls and cook the second side another 5-8 minutes, until it is also dark brown. If, after 5 minutes, the rolls are only golden brown, increase the heat slightly.
6. Transfer the rolls to the prepared pan and immediately bake them for 6 minutes to make sure the center is baked through. Repeat the pan-frying and baking with the remaining rolls.
7. Transfer the English muffins to a wire rack and allow them to cool for at least 30 minutes. For maximum nook-and-cranniness, use a fork to split the rolls instead of slicing them.

Copy of IMG_1844