butternut squash and pancetta phyllo cigars

I’m always a little disappointed that, living 300 miles away from my family and half a country away from Dave’s, we’ll always be traveling for Thanksgiving and I’ll never get to host. So when the grocery store offered me a free turkey just for doing my normal shopping, I got to thinking that maybe instead of donating it to a food bank or cooking it to shred for leftovers, I could make a full turkey dinner just for me and Dave. I had a grand ol’ time choosing recipes, and then I went through each and tweaked them until they hardly resembled the originals.

This one was originally a pizza, but I wanted cute little individual servings. Scallions didn’t seem like a good match for the squash, and when I thought on it more, neither did the crunch of red onions, but sweet caramelized onions sounded good.  Then I needed something tart to counter the sweetness, and goat cheese was the answer. I exchanged the bacon for pancetta because pancetta’s hint of fall spice would compliment the squash.

Obviously, the main reason I make turkey dinners just for the heck of it is because it’s fun. But it doesn’t hurt to get practice, because someday, one way or another, I know I will get a chance to host. And practice is important when you’re talking about cooking a huge finicky chunk of meat, and, speaking of finicky, how about phyllo. Phyllo takes practice, but, due to its association with lots of butter and with a delicious squash goat cheese pancetta filling, it is never bad; it is always very, very good.

One year ago: Sopaipillas, Cranberry Nut Dessert, Mashed Potatoes with Root Vegetables, Pumpkin Yeast Bread
Two years ago: Chocolate Chip Cookie comparison, Lime Meltaways, Chanterelle Salad with Speck and Poached Eggs (ugh, I’m trying not to dwell on the days when I was able to buy ingredients like chanterelles and speck – or when I had time to post every day for a month, for that matter), European-Style Hearth Bread

Printer Friendly Recipe
Butternut Squash and Pancetta Phyllo Cigars (adapted from Gourmet via epicurious)

Makes about 16 appetizers

6 ounces pancetta, diced into ¼-inch cubes
1 onion, chopped fine
1 small butternut squash, peeled, diced into ½-inch cubes
1 tablespoon fresh rosemary leaves, minced
4 ounces goat cheese
8 ounces phyllo, defrosted
6 tablespoons unsalted butter, melted
2 ounces (1 cup) parmesan, grated

1. Heat the oven to 425 degrees. Line a baking sheet with parchment paper or a silicone mat.

2. In a 12-inch nonstick skillet over medium heat, cook the pancetta until crisp, about 8 minutes. Using a slotted spoon, transfer the pancetta to a large bowl. Drain the fat in the pan into a small bowl. Transfer 1 tablespoon of fat back to the pan and add the onions. Cook, stirring occasionally, until the onions are lightly browned around their edges, about 8 minutes. Transfer the onions to the bowl with the pancetta. Add another 1 tablespoon reserved pancetta fat to the pan; add the squash. Cover the pan and cook, stirring occasionally, until the squash is browned and tender, about 15 minutes. Use a potato masher to lightly mash the squash, then transfer it to the bowl with the onions and pancetta. Add the rosemary and goat cheese to the bowl; stir to combine.

3. Unroll the phyllo and place it between two damp dishtowels. Lightly spray a second baking sheet with nonstick spray. Lay a sheet of phyllo on the oiled pan; brush lightly with butter and sprinkle with parmesan. Fold the phyllo in half parallel to the short end to form a 7-by 9-inch rectangle; spray with nonstick spray. Scoop 2 generous tablespoons of the squash filling onto the phyllo; spread the filling about 1 inch from the folded edge, leaving ½-inch free on either end. Roll the long end of the phyllo over the filling; fold the edges in; continue rolling to form a cigar shape. Transfer the cigar to the lined baking sheet. Repeat with the remaining phyllo and filling, including spraying the baking pan work surface with nonstick spray, spacing the cigars about 1-inch apart on the parchment-lined baking sheet.

4. Bake until golden brown and crisp, about 15 minutes. Let cool about 15 minutes before serving.

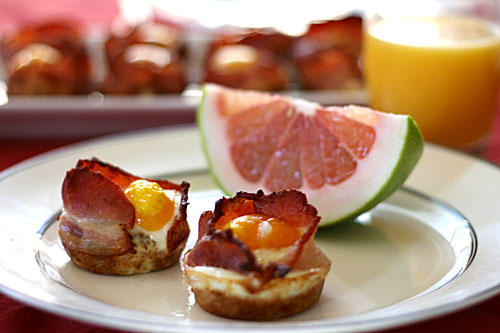
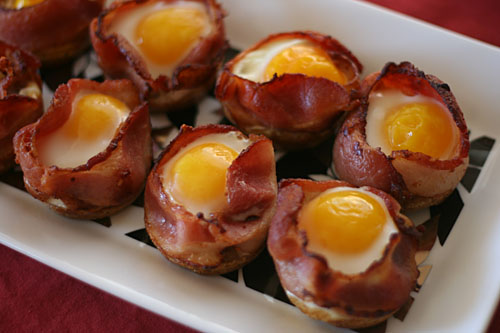
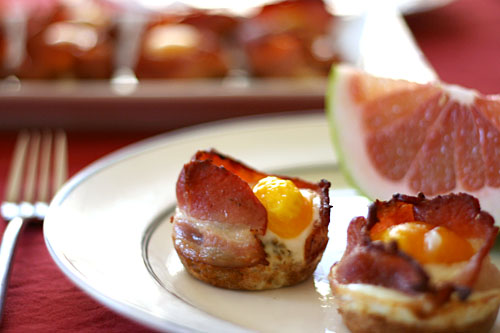
bacon egg toast cups

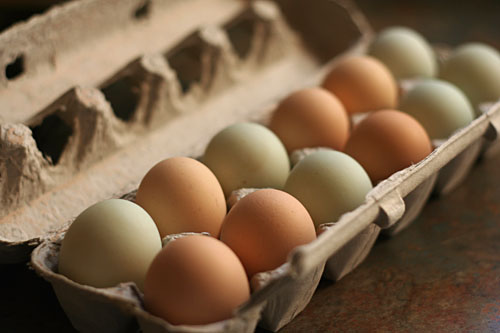
I came face to face with my pickiness last weekend. I’ve been buying eggs from a coworker of Dave’s, which is great because I can finally feel confident that the chickens that hatched my eggs weren’t grossly mistreated, for far cheaper than the supposedly cage-free eggs at the grocery store. When he had duck eggs to sell, I figured it would be a fun new thing to try. Plus, I knew I was making these bacon-egg-toast cups soon, and I mistakingly believed that duck eggs were smaller than chicken eggs, so they would fit perfectly into the muffin cups with all the other goodies.

Not only are duck eggs usually larger, not smaller, than chicken eggs, but they’re different in other ways. For one, the shells are thicker, so it takes a bit of hammering the egg on the counter to break through it. The whites are whiter. Have you ever noticed that the white of a chicken egg is actually kind of yellow? Not so a duck egg.

Also, the white is extremely stretchy; it really never breaks. That means that if you crack an egg into a small bowl and then move it to your muffin cup, bits of white will stick to the bowl and stretch across the counter, and basically your whole kitchen will be coated in egg white by the time you’re done.

But once you’re eating – who cares? Who cares what color the white was when you broke the egg? Who cares if it was extra super freakily stretchy? Once the eggs were cooked, I wouldn’t have known I was eating duck eggs if I hadn’t cracked them open myself. Because I did know, I noticed that the white was firmer. But who cares?

I tried not to, but I have two more duck eggs left, and yet I hard-boiled chicken eggs to bring to work this week. It’s so stupid, because there’s nothing worse about duck eggs compared to chicken eggs; they’re just different. If I was used to duck eggs and someone gave me chicken eggs, I’d think the white was too watery and yellow. The lesson here is one I think we all need reminded of occasionally: Pickiness is all in your head. Still, I’m not sure I’ll be buying duck eggs again anytime soon.

One year ago: Croissants, Pumpkin Biscotti, African Pineapple Peanut Stew, Apple Tart, Vegatarian LasagnaCarne Adovada
Two years ago: Bourbon Pumpkin Cheesecake, Pumpkin Ravioli, Mashed Potatoes, Stuffed Sandwich Rolls, Baked Eggs with Spinach and Mushrooms

Bacon-Egg-Toast Cups (adapted from The Noshery via Annie’s Eats)

I was making these for kids because I thought they’d have a good time with it, but instead they were all, “um, there’s egg on my toast; that’s where I put my jelly.” And then they ate nearly as much as the adults did.

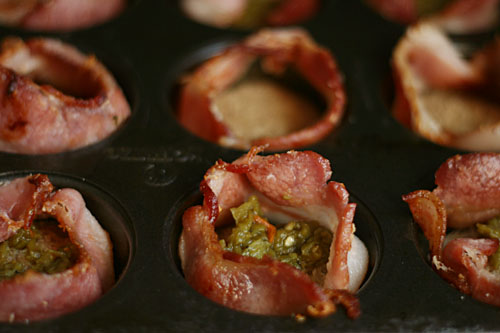
I skipped the cheese and added green chile. Because I live in New Mexico, and that is what we do.

I realized after the fact that I arranged my toast a little differently than the original recipe, by lining just the bottom of the muffin cup with toast instead of the sides as well. I liked my way, so I’ll provide that in the recipe.

Serves 6

6 slices of bread
12 slices of bacon (about 1 pound)
12 eggs
½ cup of shredded cheese (or other flavoring)
salt and pepper

1. Preheat oven to 400 degrees. Spray a 12-cup muffin pan with nonstick spray.

2. Heat a 12-inch skillet over medium-high heat. Arrange the bacon in the skillet in a single layer and cooked until its fat is mostly rendered but it’s still pliable, 4-5 minutes.

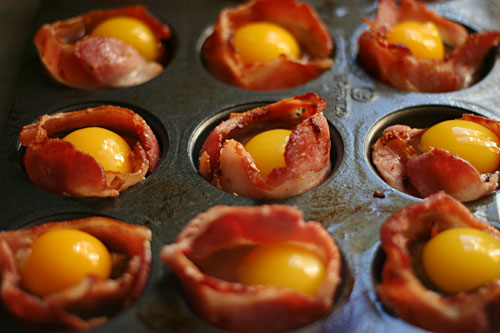
3. Using a cookie cutter, cut two 2-inch circles out of each slice of bread. Place a bread circle in the bottom of each muffin cup. Wrap a slice of bacon around the edge of each muffin cup; sprinkle cheese or other flavorings onto the bread in the space lined by the bacon. One by one, crack the eggs into a small bowl and transfer the yolk and some of the white on top of the cheese. (Unless you’re using small eggs, using all of the white will cause the eggs to overflow the muffin cups.) Season with salt and pepper.

4. Bake until the egg white is set, 8 – 10 minutes (longer if you like your yolks firm). Using a thin knife or offset spatula, remove the bacon-toast-egg cups from the pan. Serve warm.

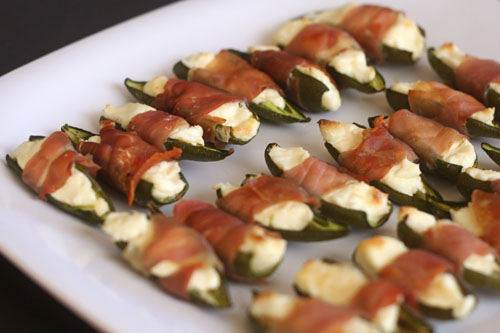
prosciutto-wrapped, neufchatel-stuffed jalapenos

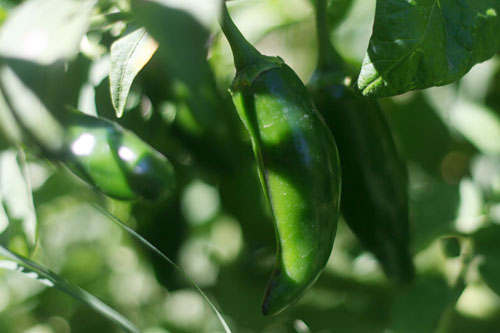
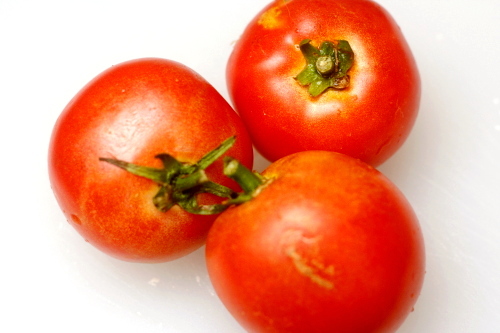
I think it’s about time to pack up my garden for the year. The last month has felt like borrowed time. Homegrown tomatoes on Halloween? Well, yes; in fact, the last few months have been the most successful in my garden because the grasshoppers who I’d been sharing my tomatoes with all summer have flown the coop. But our night lows are starting to drop to near freezing, so I’ll be lucky to get some nice red tomatoes for my burgers tonight.

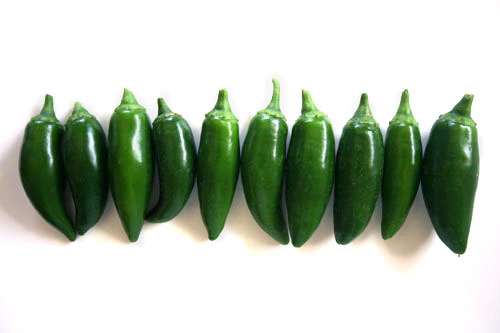
It’s no problem to use up tomatoes. If I found myself with more than I’d expected, I just made some sauce and froze it. But what easy solution is there for at least ten jalapenos per week? Jalapenos are rarely a primary flavor, and even a good batch of pico de gallo only uses a couple.

Bacon-wrapped cream cheese-stuffed jalapenos certainly use up the jalapeno bounty, but I can’t be eating a plate of cream cheese and bacon every week, even if there are vegetables hidden under all that fattening flavor. But is the fat necessary?

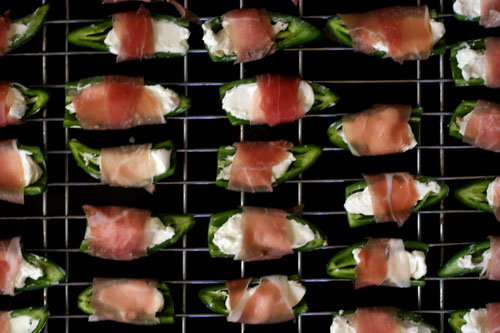
It turns out it isn’t. Well, some of it is, but by replacing the bacon with prosciutto and the cream cheese with (American, not French) Neufchâtel, these snacks lose a lot of fat but very little of the flavor. In fact, I preferred the prosciutto to the bacon; it’s easier to work with and bakes up crisper. I’m already looking forward to next year’s gardening season – and not just for the tomatoes this time!

One year ago: Pork Chops Loco Moco, Pumpkin Mushroom Soup, Cranberry Orange Scones, Buttermilk Scones, Pumpkin Scones
Two years ago: Chickpea and Butternut Squash Salad, Brown Sugar Apple Cheesecake, Gratin Dauphinois

Prosciutto-Wrapped, Neufchâtel-Stuffed Jalapenos

Makes 24 appetizers

If you keep gloves in the kitchen, use them when handling jalapenos.

12 jalapenos
4 ounces Neufchâtel
6 ounces prosciutto, sliced lengthwise into 24 strips

1. Adjust a rack to the middle position and heat the oven to 400 degrees. Place an oven-safe baking rack on a baking sheet.

2. Cut the stems off the jalapenos; slice them in half lengthwise and use a spoon to scoop out the seeds. Divide the cheese evenly between the jalapenos, then wrap strips of prosciutto around the jalapenos. Arrange the stuffed jalapenos on the prepared baking pan on the rack.

3. Bake for 20 minutes, until the cheese is browned in places and the prosciutto is crisp. Cool slightly before serving.
taco pasta salad

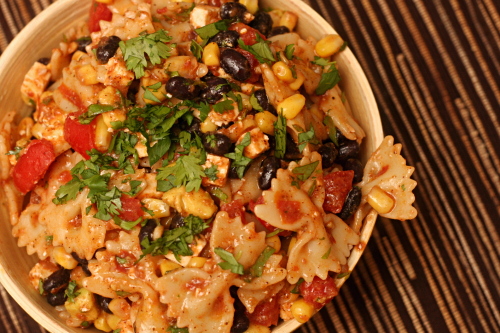
My inclination to overthink was very clearly exhibited with this recipe. I’ve heard approximately eight thousand raving reviews of this pasta salad. And still, I doubted. Salsa mixed with pasta? Cheddar cheese in pasta salad? I wasn’t convinced.

I asked Cara for advice. Really? Salsa? She said she never thinks twice about it, because this dish is always a hit. Shredded yellow cheese? Yes, she said. Stop asking questions and just go make it, she probably wanted to say.

I started slowly, adding only a third of the salsa called for, thinking I’d just mix in extra fresh tomatoes and some red onions and a jalapeno separately if I didn’t like the salsa. And then I realized – yes, salsa mixed with pasta. And I stirred in the rest of the salsa.

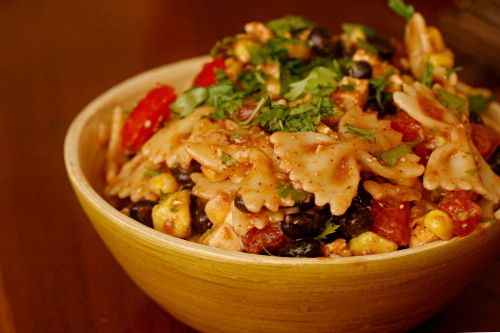
Right after those two ingredients were mixed is when I started nibbling. And then I added black beans… cilantro… avocado… tomatoes… cheese… corn… dressing… and I just kept nibbling and nibbling as I went. And the salad just kept getting better and better.  Forget instincts. I should just trust the recipe.
One year ago: Risotto with Swiss Chard
Two years ago: Gazpacho

Printer Friendly Recipe
Taco Pasta Salad (adapted slightly from Cara’s Cravings)

Serves 8-12

Apparently there’s no wagon wheel pasta in my little town. Bowties worked just fine.

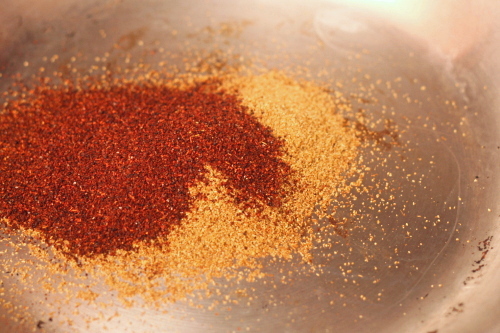
I toasted the spices before mixing them into the dressing. Just heat a small not-nonstick pan over medium heat for a few minutes, then add the spices and stir them around just until they start to smoke, no longer than a minute.
1 pound wagon wheel pasta
salt
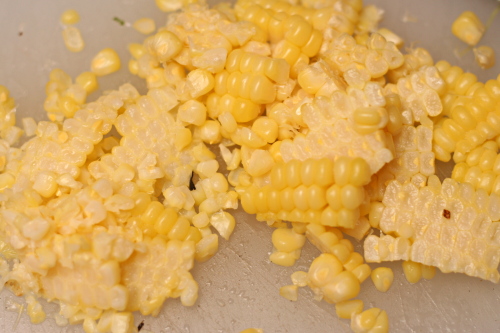
1 (10-ounce) package frozen corn
1½ cups salsa
1 (15-ounce) can black beans, drained and rinsed
2 medium tomatoes, diced
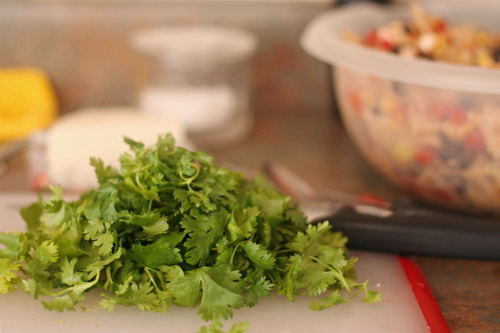
½ cup chopped fresh cilantro
8 ounces (2 cups) shredded cheddar cheese
3-4 tablespoons lime juice
1 large (or 2 small) avocado, peeled, seeded, and diced
1 tablespoon cumin
2 teaspoon chili powder
¼ teaspoon freshly ground pepper
2 garlic cloves, minced
¼ cup olive oil

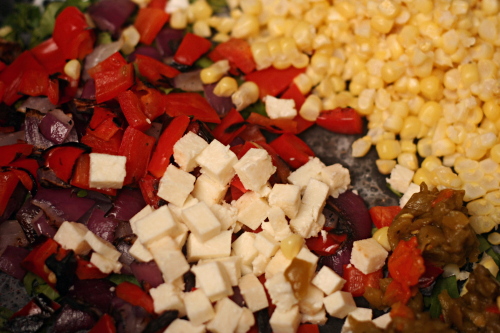
1. Bring a large pot of water to a boil. Add 1 tablespoon salt and the pasta. Cook according to the package directions. Drain; stir the frozen corn into the pasta to cool the pasta and defrost the corn. Stir the salsa into the pasta and corn, then add the beans, tomatoes, cilantro, and cheese.

2. Squeeze the lime juice into a small bowl and add the avocado; stir to coat the avocado. Remove the avocado from the lime juice and stir it into the pasta mixture. Add the spices, garlic, and ½ teaspoon salt to the lime juice, then slowly whisk in the oil. Stir the dressing into the salad. Serve immediately or chill for up to 1 day (longer if you don’t add the avocado).

cheesecake comparison

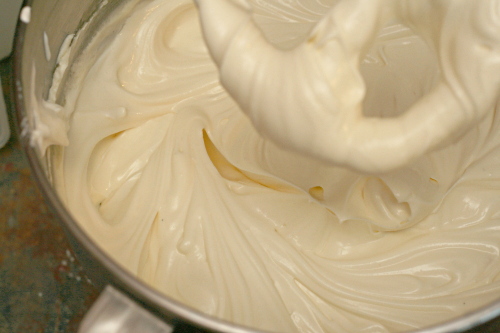
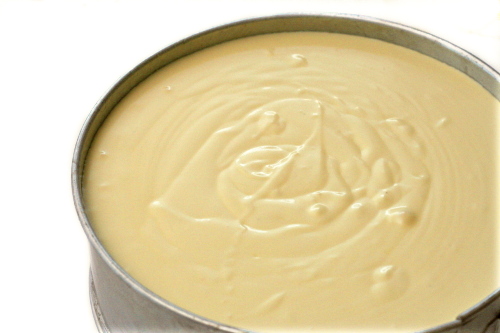
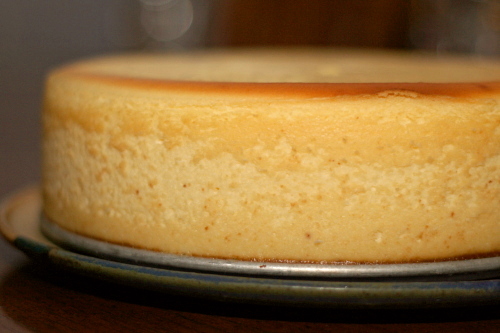
The problem with a cheesecake comparison is that so much of what makes a cheesecake perfect, especially a New York cheesecake, is its texture, and the texture depends so much on the baking technique, and the baking technique will vary depending on the pan size. So the only really fair comparison would be to make three full cheesecakes and use a thermometer to test doneness. But three cheesecakes makes for a ridiculous amount of cheesecake. Plus my instant-read thermometer was on vacation when I made two of these. I did my best.

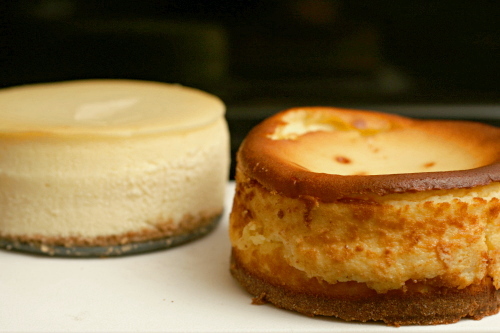
I baked the first cheesecake for a family holiday. Then I drove with it for four hours to my parents’ house, served half of it, drove back four hours with the remainder and stuck it in the freezer. I baked the other two a month later in a 5-inch springform pan. I overbaked one and underbaked the other. This is not my most comprehensive comparison post, I admit.

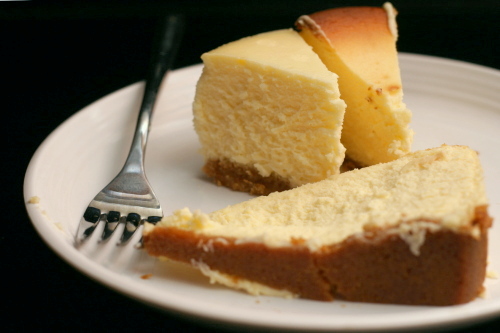
Still, I think we were able to draw some conclusions. Not that the opinions of my four tasters were aligned; that would be too easy. (Full disclosure: This comparison was actually done months ago, after cocktails. My notes have the cakes labeled as “brown”, “pale”, and “mess”; apparently one cake didn’t slice well.)

Mess, aka Cooks Illustrated’s New York Cheesecake: After the abuse of eight hours in the car, being half-eaten, frozen, and defrosted, is it any wonder it didn’t slice cleanly? Regardless, it was without question my favorite, as well as Dave’s. The texture ranges from solid and dry on the edge to soft and luscious in the center. The flavor is balanced between the cream cheese and the sweetness and the flavorings. In my opinion, this is cheesecake perfection.

Pale, aka Dorie Greenspan’s Tall and Creamy Cheesecake: I undercooked this one; still, this is one good cheesecake. While I liked Cooks Illustrated’s NY Cheesecake better, I almost feel like it’s an unfair comparison because they’re not meant to be similar cheesecakes. Dorie’s cheesecake is soft and melty with a good balance of sweet and tangy (if you use sour cream instead of the also suggested heavy cream). It isn’t the same style as a New York cheesecake, and there’s nothing wrong with that. It was my sister’s favorite. (My sister started this whole complicated comparison in the first place, by reminding me that cheesecake is one of her favorite foods and then visiting shortly afterwards.)

Brown, aka (Goumet via) Smitten Kitchen’s New York Cheesecake: I’m not a big enough person to take all of the responsibility for overcooking this one. Deb admits that the cooking times are risky – 500 degrees until the top begins to brown, then a far lower temperature. I don’t need to tell you that it didn’t work for me; you can see that overbrowned, blown-out top for yourself. Besides that, most of us felt that the citrus flavor was overbearing, even with the reduced amounts of zest that Deb recommends. With all of the stars aligned and with less zest, this might be a great cheesecake. But with other stars around, why bother with the struggle?

Overall, a flawed comparison, but I learned my preferences. For New York cheesecake, Cooks Illustrated. For non-New York cheesecake, Dorie Greenspan. But always, I just want cheesecake.

One year ago: 100% Whole Wheat Sandwich Bread
Two years ago: Lemon Pancakes with Blueberry Syrup

Printer Friendly Recipe
New York Cheesecake (from Cooks Illustrated)

For the crust:
5 tablespoons unsalted butter, melted, plus 1 additional tablespoon, melted, for greasing the pan
4 ounces (approximately 8 whole) graham crackers, broken into rough pieces and processed into fine, even crumbs
1 tablespoon sugar

For the cheesecake:
2½ pounds (5 8-ounce packages) cream cheese, room temperature
⅛ teaspoon salt
1½ (10.5 ounces) cups sugar
⅓ cup sour cream
2 teaspoons freshly squeezed lemon juice
2 teaspoons vanilla extract
2 large egg yolks plus 6 large eggs, at room temperature

1. To make the crust, adjust an oven rack to the lower-middle position and heat the oven to 325 degrees F. Brush the bottom and sides of a 9-inch springform pan with ½ tablespoon of the melted butter. In a medium bowl combine the graham cracker crumbs, 5 tablespoons melted butter, and sugar. Toss with a fork until the crumbs are evenly moistened. Transfer the crumbs to the springform pan and use the bottom of a ramekin to firmly press the crumbs evenly into the pan bottom. Bake until fragrant and beginning to brown around the edges, about 13 minutes. Cool on a wire rack while preparing the filling.
2. Increase the oven temperature to 500 degrees F. In the bowl of a stand mixer fitted with the paddle attachment, beat the cream cheese at medium-low speed to break up and soften it slightly, about 1 minute. Scrape the beater and the bottom and sides of the bowl well with a rubber spatula; add the salt and about half of the sugar and beat at medium-low speed until combined, about 1 minute. Scrape the bowl; beat in the remaining sugar until combined, about 1 minute. Scrape the bowl; add the sour cream, lemon juice, and vanilla. Beat at low speed until combined, about 1 minute. Scrape the bowl; add the egg yolks and beat at medium-low speed until thoroughly combined, about 1 minute. Scrape the bowl; add the remaining eggs 2 at a time, beating until thoroughly combined, about 1 minute, scraping the bowl between additions.

3. Brush the sides of the springform pan with the remaining ½ tablespoon melted butter. Set the pan on a rimmed baking sheet to catch any spills in case the pan leaks. Pour the filling into the cooled crust and bake 10 minutes; without opening the oven door, reduce the oven temperature to 200 degrees and continue to bake until the cheesecake reads about 150 degrees on an instant-read thermometer inserted in the center, about 1½ hours. Transfer the cake to a wire rack and cool until barely warm, 2½ to 3 hours. Run a paring knife between the cake and the springform pan sides. Wrap tightly in plastic wrap and refrigerate until cold, at least 3 hours.

4. To unmold the cheesecake, removed the sides of the pan. Slide a thin metal spatula between the crust and the bottom of the pan to loosen, then slide the cake onto a serving plate. Let the cheesecake stand at room temperature about 30 minutes, then cut into wedges and serve. (Use a long, thin, sharp knife that has been run under hot water and then dried for slicing. Wipe the blade clean and rewarm between slices.)

Printer Friendly Recipe
Tall and Creamy Cheesecake
(from Dorie Greenspan’s Baking: From my Home to Yours)

I prefer using sour cream instead of heavy cream.

Makes 16 servings

For the crust:
1¾ cups graham cracker crumbs
3 tablespoons sugar
pinch of salt
½ stick (4 tablespoons) unsalted butter, melted

For the cheesecake:
2 pounds (four 8-ounce boxes) cream cheese, at room temperature
1⅓ cups (9.67 ounces) sugar
½ teaspoon salt
2 teaspoons pure vanilla extract
4 large eggs, at room temperature
1⅓ cups sour cream or heavy cream, or a combination of the two

To make the crust:
Butter a 9-inch springform pan—choose one that has sides that are 2 ¾ inches high (if the sides are lower, you will have cheesecake batter leftover) — and wrap the bottom of the pan in a double layer of aluminum foil; put the pan on a baking sheet.

Stir the crumbs, sugar and salt together in a medium bowl. Pour over the melted butter and stir until all of the dry ingredients are uniformly moist. (I do this with my fingers.) Turn the ingredients into the buttered springform pan and use your fingers to pat an even layer of crumbs along the bottom of the pan and about halfway up the sides. Don’t worry if the sides are not perfectly even or if the crumbs reach above or below the midway mark on the sides—this doesn’t have to be a precision job. Put the pan in the freezer while you preheat the oven.

Center a rack in the oven, preheat the oven to 350°F and place the springform on a baking sheet. Bake for 10 minutes. Set the crust aside to cool on a rack while you make the cheesecake.

Reduce the oven temperature to 325°F.

To make the cheesecake:
Put a kettle of water on to boil.

Working in a stand mixer, preferably fitted with a paddle attachment, or with a hand mixer in a large bowl, beat the cream cheese at medium speed until it is soft and lives up to the creamy part of its name, about 4 minutes. With the mixer running, add the sugar and salt and continue to beat another 4 minutes or so, until the cream cheese is light. Beat in the vanilla. Add the eggs one by one, beating for a full minute after each addition—you want a well-aerated batter. Reduce the mixer speed to low and stir in the sour cream and/or heavy cream.

Put the foil-wrapped springform pan in the roaster pan.

Give the batter a few stirs with a rubber spatula, just to make sure that nothing has been left unmixed at the bottom of the bowl, and scrape the batter into the springform pan. The batter will reach the brim of the pan. (If you have a pan with lower sides and have leftover batter, you can bake the batter in a buttered ramekin or small soufflé mold.) Put the roasting pan in the oven and pour enough boiling water into the roaster to come halfway up the sides of the springform pan.

Bake the cheesecake for 1 hour and 30 minutes, at which point the top will be browned (and perhaps cracked) and may have risen just a little above the rim of the pan. Turn off the oven’s heat and prop the oven door open with a wooden spoon. Allow the cheesecake to luxuriate in its water bath for another hour.

After 1 hour, carefully pull the setup out of the oven, lift the springform pan out of the roaster—be careful, there may be some hot water in the aluminum foil—remove the foil. Let the cheesecake come to room temperature on a cooling rack.

When the cake is cool, cover the top lightly and chill the cake for at least 4 hours, although overnight would be better.

Serving:
Remove the sides of the springform pan— I use a hairdryer to do this (use the dryer to warm the sides of the pan and ever so slightly melt the edges of the cake)—and set the cake, still on the pan’s base, on a serving platter. The easiest way to cut cheesecake is to use a long, thin knife that has been run under hot water and lightly wiped. Keep warming the knife as you cut slices of the cake.

Storing:
Wrapped well, the cake will keep for up to 1 week in the refrigerator or for up to 2 months in the freezer. It’s best to defrost the still-wrapped cheesecake overnight in the refrigerator.

Printer Friendly Recipe
New York Cheesecake (adapted from Gourmet via Smitten Kitchen)

Crust:
8 ounces (15 4¾-by-2½-inch sheets) graham crackers
8 tablespoons (1 stick) unsalted butter, melted
½ cup (3.5 ounces) sugar
¼ teaspoon salt

Filling:
5 (8-ounce) packages cream cheese, softened
1¾ cups (12.25 ounces) sugar
3 tablespoons all-purpose flour
1 teaspoon finely grated lemon zest
1 teaspoon finely grated orange zest
5 large eggs
2 large egg yolks
½ teaspoon vanilla

1. For the crust: Stir together crust ingredients and press onto bottom and up the sides, stopping one inch shy of the top rim, of a buttered 9-inch (or 24 cm) springform pan. Put the crust in the freezer while you prepare the filling.

2. Filling: Preheat oven to 550 degrees. Beat together cream cheese, sugar, flour and zest with an electric mixer until smooth. Add vanilla, then eggs and yolks, one at a time, beating on low speed until each ingredient is incorporated. Scrape bowl down between additions.

3. Put the springform pan with the crust in a shallow baking pan (to catch drips). Pour the filling into the crust (the springform pan will be completely full) and bake in baking pan in the middle of the oven for 12 minutes or until puffed. Please watch your cake because some ovens will top-brown very quickly and if yours does too fast, turn the oven down as soon as you catch it. Reduce the temperature to 200 degrees and continue baking until the cake is mostly firm (center will still be slightly wobbly when pan is gently shaken), about one hour more.

4. Run a knife around the top edge of the cake to loosen it and cool the cake completely in the springform pan on a rack, then chill it, loosely covered, for at least 6 hours.

grilled corn salad

It’s green chile season! My sister recently told me that, for her, fall in New Mexico means green chiles roasting, the state fair, and the Balloon Fiesta. Fall isn’t so bad out here, even without rolling hills of trees that turn brown, red, pink, maroon, orange, yellow. I will miss the crisp air, pumpkins, apples, and chill days of fall on the East coast, but when I was out there, I missed green chile. So I win either way.

The only problem is that I tend to get into a hoarding pattern with my annual green chile supply. I buy them every fall when they come into season, roast them, and freeze them to last until the following September. And then, aside from the occasional huevos rancheros, I mostly ignore them, because what if I run out? This is a mindset I’m determined to get out of. Not only is that not the kind of life I want to lead, but, as Jen warns, they seem to get hotter as they’re frozen for longer periods.

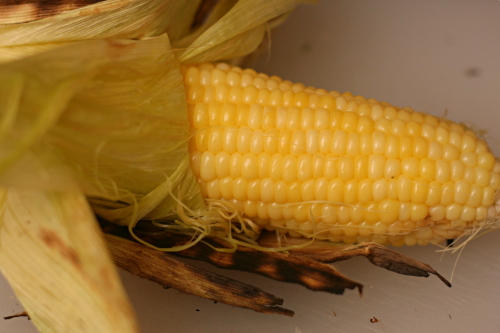
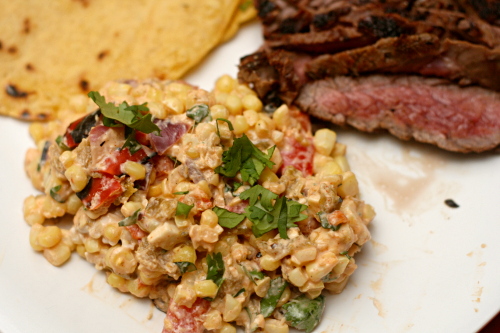
This corn salad doesn’t even call for green chile, but I had some leftover from the previous day’s burgers, so I went ahead and added them. They’ve been in the freezer for about a year, and maybe that’s why the dish ended up so, um, kind of painful to eat, actually. The heat was somewhat dulled by the dairy in the recipe, and once I smooshed the corn into a tortilla with some flank steak, it was downright edible. Not that the corn even needed extra flavor, what with having been grilled and mixed with chili powder, cilantro, lime juice and salty cotija. But I need to use up some of these chiles in my freezer to make room for the new crop!

One year ago: Pickled Coleslaw
Two years ago: Sausage and Red Pepper Hash

Printer Friendly Recipe
Grilled Corn Salad (from Bobby Flay via Savory Spicy Sweet)

I used a not-nonstick skillet on the stove instead of a cast iron pan on the grill, and I substituted greek yogurt for the crème fraiche. And I added an ounce or two of very spicy diced Hatch green chiles, plus some diced red pepper and red onion.

8 ears fresh corn, silks removed, husk on, soaked in cold water 30 minutes
canola oil
salt and freshly ground black pepper
¼ cup creme fraiche
2 limes, juiced and 1 zested
1 tablespoons ancho chili powder
¼ cup chopped fresh cilantro leaves
¼ cup grated cotija cheese

1. Heat grill to high. Grill corn until charred on all sides, 10 or so minutes. Take off the grill and remove the kernels with a sharp knife. While you are cutting the corn, put a cast iron skillet on the grill to heat.

2. Add the corn and the remaining ingredients to the hot pan and cook, stirring occasionally, until creamy and heated through. Serve.

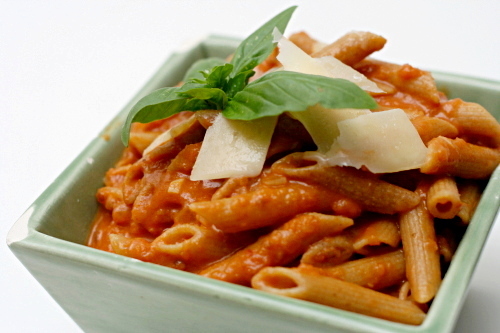
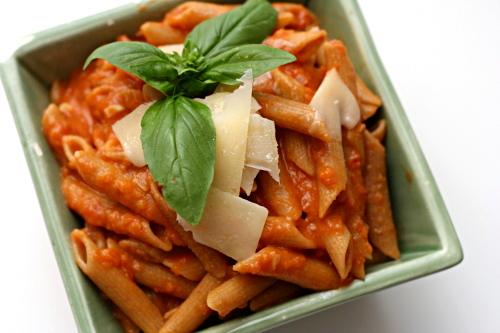
penne alla vodka

People keep asking me how my recent vacation was, and I can’t think of any response other “so, so good.” How else do you sum up a week of playing in the waves, drinking margaritas, snorkeling, baking cookies, swimming with sea lions, watching shooting stars, eating shrimp tacos, and just basically everything that is good. I didn’t even get sunburned. I want to go back.

At least I had an easy meal planned for my first night at home. This is my ‘just got back from vacation’ dish. After traveling all day, I don’t want to spend much time cooking. There’s no time to defrost anything. We haven’t been home, so there isn’t a lot of fresh food around. I’ve been eating out all week on vacation, so I don’t want to get takeout.

This dish solves all those problems. It takes as long to make as it takes pasta to cook. There are only a couple ingredients to chop. It’s fairly healthy. And it uses ingredients that I can buy before I leave and trust that they’ll keep until I get back – pasta, canned tomatoes, onion. And of course, it tastes great.

I bet it would taste even better on vacation. Everything is better on vacation.

One year ago: Potato Tomato Tart
Two years ago: Banana Coconut Muffins

Printer Friendly Recipe
Penne alla Vodka (from Cooks Illustrated)

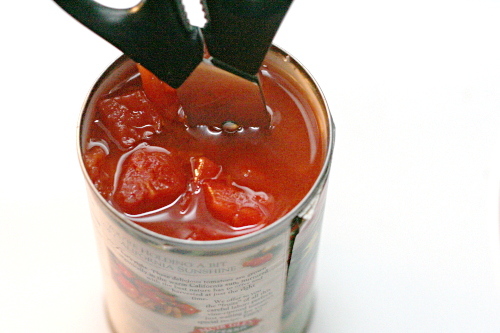
You can never go wrong following a Cooks Illustrated recipe precisely. I, however, don’t, in this case. Because I almost always make this after a day of traveling, I simplify it wherever possible. Instead of pureeing half of the tomatoes and dicing the rest, I simply stick a pair of kitchen shears in the tomato can and snip away. I don’t separate the liquid and the tomatoes in order to measure a certain amount; I just pour all of the liquid in to the sauce. I like to use 2 shallots instead of half an onion. If I don’t have cream, I use milk. If I don’t have milk, I skip the dairy. If I don’t have basil, I use parsley. If I don’t have parsley, I skip the herbs or use dried. It’s tomatoes, pasta, and alcohol; it isn’t going to be bad.

1 (28-ounce) can whole tomatoes, drained, liquid reserved
2 tablespoons olive oil
½ small onion, minced (about ¼ cup)
1 tablespoon tomato paste
2 medium garlic cloves, minced or pressed through a garlic press (about 2 teaspoons)
¼-½ teaspoon hot red pepper flakes
table salt
⅓ cup vodka
½ cup heavy cream
2 tablespoons finely chopped fresh basil leaves
fresh parmesan cheese, for serving

1. Puree half of the tomatoes in a food processor until smooth. Dice the remaining tomatoes into ½-inch pieces, discarding cores. Combine the pureed and diced tomatoes in a liquid measuring cup (you should have about 1⅔ cups). Add reserved tomato liquid to equal 2 cups.

2. Heat the oil in a large saucepan over medium heat until shimmering. Add the onion and tomato paste and cook, stirring occasionally, until the onions are light golden around the edges, about 3 minutes. Add the garlic and pepper flakes; cook, stirring constantly, until fragrant, about 30 seconds.

3. Stir in the tomatoes and ½ teaspoon salt. Remove the pan from the heat and add the vodka. Return the pan to medium-high heat and simmer briskly until the alcohol flavor is cooked off, 8 to 10 minutes; stir frequently and lower the heat to medium if the simmering becomes too vigorous. Stir in the cream and cook until hot, about 1 minutes.

4. Meanwhile, bring 4 quarts water to a boil in a large Dutch oven over high heat. Add 1 tablespoon salt and the pasta. Cook until just shy of al dente, then drain the pasta, reserving ¼ cup cooking water, and transfer the pasta back to the Dutch oven. Add the sauce to the pasta and toss over medium heat until the pasta absorbs some of the sauce, 1 to 2 minutes, adding reserved cooking water if sauce is too thick. Stir in the basil and adjust the seasoning with salt. Divide among pasta bowls and serve immediately, passing Parmesan separately.

stuffed squash flowers

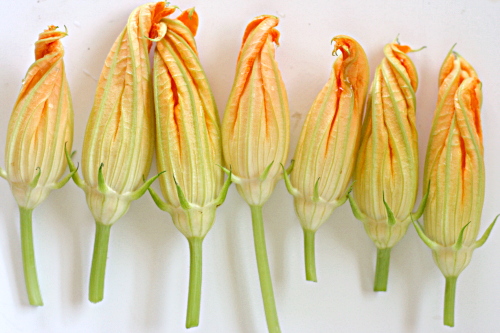
I didn’t realize how sexual plants were until I started growing zucchini. Concerned that my plants weren’t being pollinated, I did some research and found that to hand-pollinate zucchini, all you have to do is rub the male flower’s pistil on the female’s stigma.

Kinky.

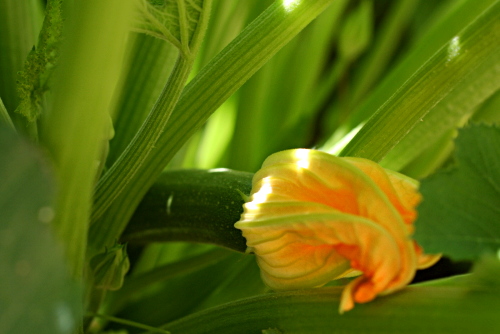
But how to tell the difference between male and female flowers? Well, you learned this when you were five – boys and girls have, ah, visibly different parts, and the zucchini flowers’ parts are surprisingly similar to humans’. Or maybe I just have a dirty mind. You be the judge.

Pistils and stigmas aside, female flowers have a mini zucchini as a stem, and males have a normal stem. This is important, because if you’re going to fry zucchini flowers, and you should if you have them available, you want to fry the males of course, and leave the females behind to form zucchini. But not before sacrificing a male to rub over the female, in a deliberate act of zucchini rape.

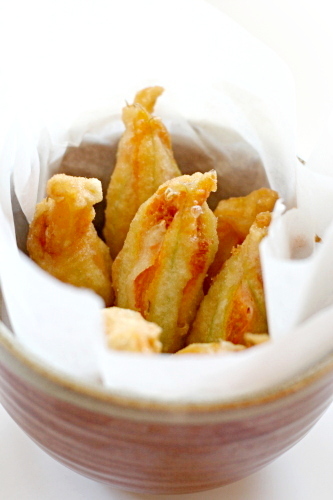
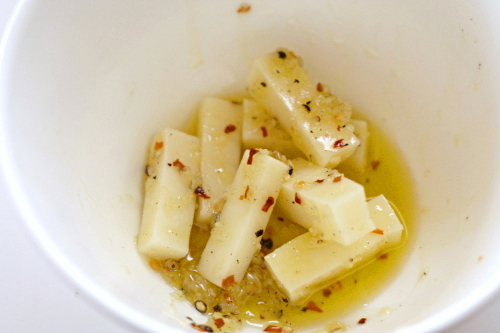
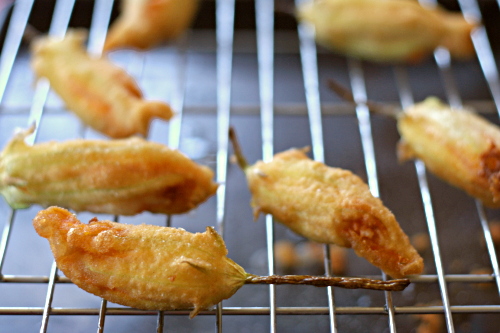
To further abuse your zucchini flowers, cut the males off (ouchy), pry them open, stuff them with cheese, batter, and fry them. It’s kind of like mozzarella sticks, except even crisper and more flavorful because the mozzarella was marinated in garlicky olive oil. It’s almost better than sex – at least zucchini sex.

One year ago: Puff Pastry Dough
Two years ago: Pain a l’ancienne

Stuffed Zucchini Flowers (adapted from How to Read a French Fry, by Russ Parsons)

I used regular (not fresh) mozzarella because it’s all I had. It worked just fine, but I definitely think fresh would be even better.

8 ounces fresh mozzarella, cut into 24 pieces
2 garlic cloves, minced or pressed through a garlic press
¼ teaspoon crushed red pepper
2 teaspoons extra virgin olive oil
salt and freshly ground black pepper
2 cups (9.6 ounces) all-purpose flour
½ – 1 cup water
2 quarts vegetable oil for deep-frying
24 zucchini flowers (about 1 pound), washed and dried

1. In a medium bowl, combine the cheese, garlic, crushed red pepper, olive oil, and a healthy pinch of both salt and pepper. Set aside.

2. In another medium bowl, whisk together the flour and enough water to form a thin, smooth batter with the thickness of heavy cream.

3. In large pot, heat the vegetable oil to 375 degrees. While the oil heats, use a finger to pry open each flower; stuff a piece of mozzarella inside, then twist the petals together to close the flower around the cheese.

4. Dip the blossoms in the batter; let excess batter drip off, then place the blossoms in the hot oil. Fry until golden brown on both sides, 4-5 minutes. Fry only 4-6 blossoms at a time, carefully monitoring the oil temperature so it remains between 350 and 375 degrees. Drain the fried blossoms on a paper towel-lined plate. Salt lightly and serve immediately.

pasta with asparagus and goat cheese

I feel like I used to have this room (my life), and it had some stuff in it; mostly stuff I liked (cooking, reading, teaching, gardening), although of course there were things I didn’t (cleaning). My main problem was that it was too empty. There was too much space, and I could never get it arranged in any pleasing way. It made me frustrated and unhappy, and I took less enjoyment even from the things I did like.

Then I added this huge, I don’t know, piece of furniture or some other room-dominating thing (a full-time job). And now the room is too full. I like it more overall, I just don’t know where to put everything. Some things I’m willing to give up (hours mindlessly spent searching the internet), but the rest I’m trying to rearrange. Where does exercise go? What about blogging? Keeping in touch with friends, spending quality time with my husband, learning new things? I know there’s room for them all, I just have to find out how to make it work.

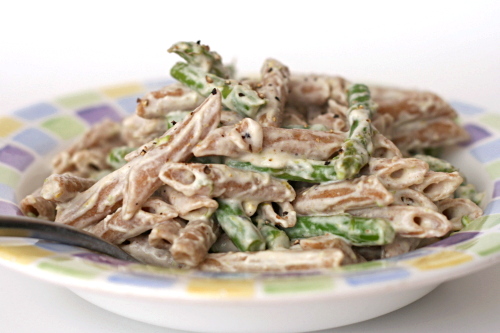
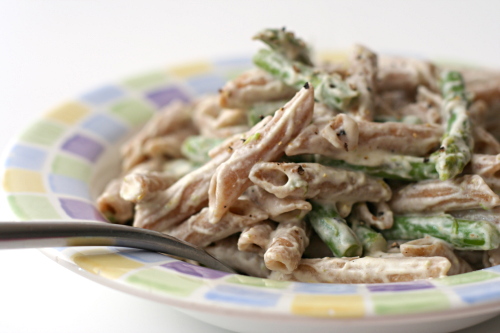
I’m not going to stop cooking, obviously. But I will change the way I cook most nights of the week, keeping things simple. This dish, with only a handful of ingredients and one ingredient to chop, is a perfect example of how easy meals can still be tasty meals. This meal definitely fits into my crowded new room, and it leaves me plenty of space for exercise, a full day of work, a long chat with a friend, and even a batch of brownies. A life too full is certainly better than a life too empty.

Two years ago: Kung Pao Shrimp

Printer Friendly Recipe
Asparagus, Goat Cheese and Lemon Pasta
(adapted from Smitten Kitchen)

Serves 6

16 ounces pasta
salt and pepper
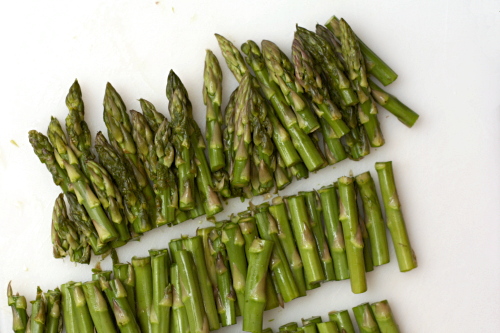
2 pounds slender asparagus spears, trimmed, cut into 1- to 1½-inch pieces
2 tablespoons extra virgin olive oil
1 lemon
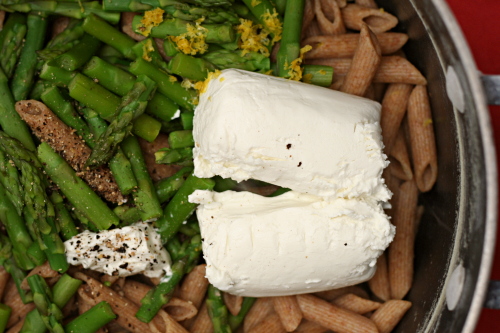
8 ounces soft goat cheese

1. Bring at least 6 quarts of water to a rolling boil over high heat. Add the pasta and 1 tablespoon of salt and cook the pasta until it is almost tender, about 2 minutes short of the package instructions. Add the asparagus and cook until it is crisp-tender, about 2 minutes. Reserving 1 cup of the pasta cooking water, drain the pasta and asparagus.

2. Return the pasta and asparagus to the pot and add the oil, zest from the whole lemon, juice from ½ the lemon, goat cheese, a generous grinding of pepper, and ½ cup pasta cooking water; stir until the goat cheese melts. Taste and add salt (you’ll probably need some), freshly ground black pepper, and more lemon juice if necessary. If the sauce becomes thick and sticky, stir in more pasta cooking water.

eggs in tomato sauce

Back in Dave’s bachelor days, “pasta and red” was one of his standard dinners. He’d cook and drain pasta, put the pasta back in the pot, dump jarred tomato sauce over it, and stir it all up until it was warmish. Pasta and red.

These days, I’m always insisting that ‘pasta and red’ is not a phrase that should be associated with actual home-cooked tomato sauce. Whether I’m quickly sautéing some garlic to make a simple sauce with canned diced tomatoes, mixing up vodka sauce, or simmering a slow-cooked bolognese, Dave wants to call them all pasta and red. No! A 5-hour bolognese should not be compared to oversweetened overcooked jarred sauce.

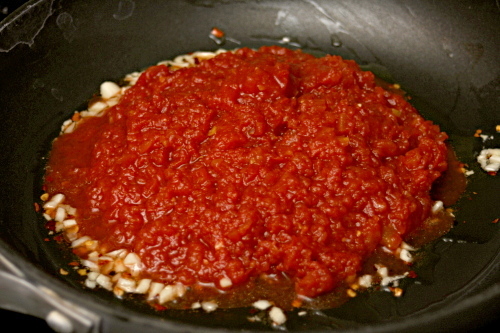
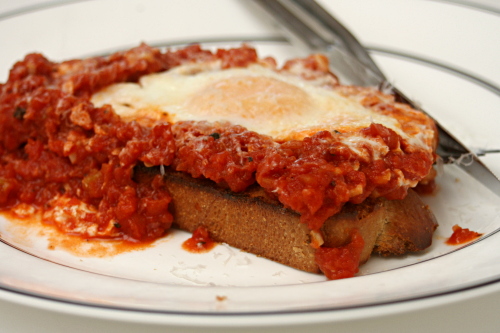
I like all types of tomato sauces, even jarred ‘red’, but when I smelled this simmering pan of tomatoes and garlic and realized that I was basically making spaghetti sauce to serve with eggs for breakfast, I started to worry – yes, I like tomato sauce with pasta, but would it translate to eggs and breakfast?

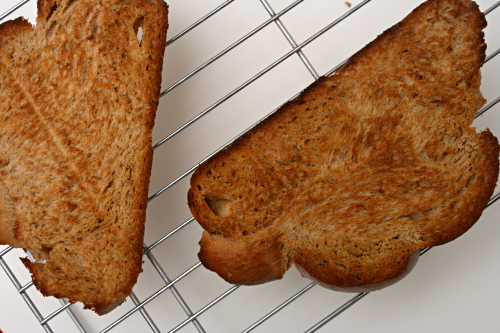
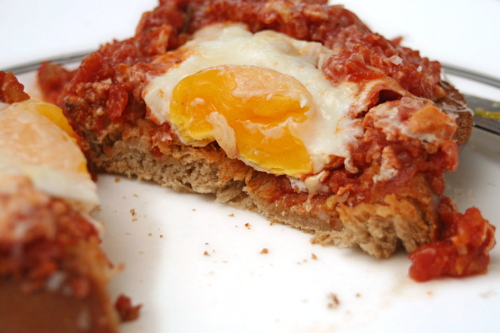
Yup. The rich egg balances the acidic tomato sauce, and the thick slice of whole wheat challah on the bottom soaked up every bit of flavor. Eggs and red – it works.

One year ago: Tofu Mu Shu
Two years ago: Crockpot Pulled Pork

Printer Friendly Recipe
Poached Eggs in Tomato Sauce
(adapted from Smitten Kitchen)

If you just want to coarsely chop your tomatoes, stick a pair of scissors into the opened can of tomatoes and snip away.

Serves 4

1 tablespoon olive oil
2 cloves garlic, minced
pinch of crushed red pepper flakes
2 tablespoons red or white wine (optional)
1 (28-ounce) can whole tomatoes, drained and chopped or pureed
pinch sugar
½ teaspoon salt
ground black pepper
4 large eggs
4 slices toasted country bread
freshly grated Parmesan cheese

1. In a medium skillet, heat the oil, garlic, and pepper flakes over medium heat until the garlic and pepper is sizzling. Add the wine and let it simmer until it becomes syrupy, about 2 minutes. Stir in the tomatoes, sugar, salt and pepper. Reduce the heat to medium-low and simmer until thickened, 12 to 15 minutes.

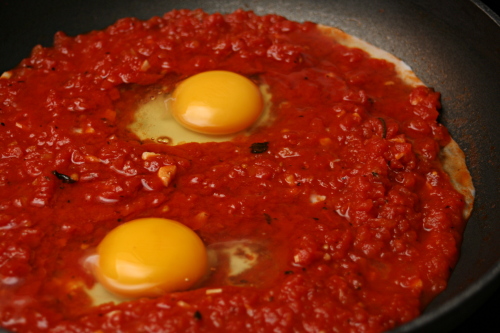
2. Break the eggs into individual small cups. Make wells or indentations in the sauce, and gently transfer the eggs from the cups to the wells; season the eggs with salt and pepper. Cover the pan and cook over medium-low heat for 5 to 7 minutes, or until the whites are set.

3. Spoon a portion of sauce with an egg over toasted bread. Top with a generous sprinkling of parmesan cheese and serve immediately.