mediterranean pepper salad

When my friend Ramie visited me last spring, it was the first time I’d seen her in eight years. I wanted to cook a great meal for her on her first night, but we’d lost touch for a lot of those eight years, and I wasn’t sure what kind of eater she was. I knew she used to be a vegetarian and wasn’t anymore.

I thought a hodgepodge of Middle Eastern dishes would be perfect – most of it could be made in advance, it was fairly light in case she was a health nut (uh, apparently not), it was vegetarian in case she was picky about meat, it went with either red or white wine in case she didn’t care for one, it could sit out for nibbles while we sat and chatted, and, of course, it was delicious. I made hummus, fresh pita, falafel, and tabbouli, but got stuck when it came time to plan a salad.

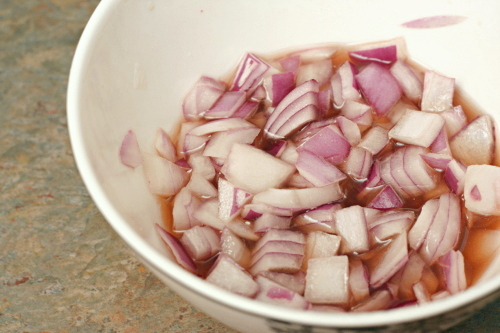
I ended up making a cucumber-tomato salad, which was fine but uninspired. I wish I had known about this pepper salad then. This salad is most definitely inspired. I particularly love the idea of a quick pickle for the red onions to tame their bite.

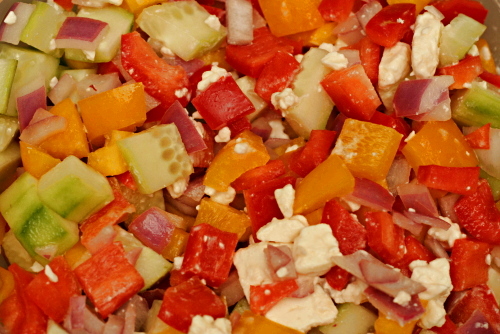
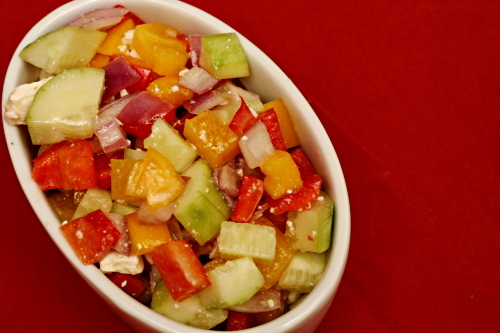
Peppers are one of the many foods I used to be picky about and now like quite a bit, but I was a little hesitant about a salad that starred them. However, everything in this salad came together perfectly. The sweet peppers were balanced by the tart dressing was balanced by the creamy feta was balanced by the fresh cucumber. I need someone else whose eating habits I’m not familiar with to come visit now that I can make their welcoming meal that much more perfect.

One year ago: Beer-Battered Fish
Two years ago: Green Chile Chicken Enchiladas

Printer Friendly Recipe
Mediterranean Pepper Salad (adapted slightly from Smitten Kitchen)

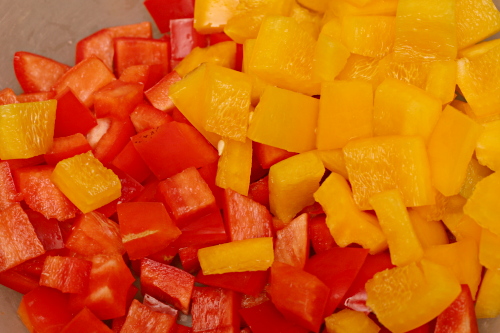
Cut the peppers, cucumbers, and tomatoes while the onion rests in the vinegar solution.

I left out the olives because Dave is not a fan and the tomatoes because…eh, I just wasn’t in a tomato mood.

As much as I loved this salad, it was a little salty for our tastes. For that reason, I’ve decreased the kosher salt in the onion pickling solution from 1 tablespoon (3 teaspoons) to 2 teaspoons. I’ve also increased the feta slightly, as Dave and I felt that the feta really brought everything together.

¼ cup red wine vinegar
¼ cup cold water
2 teaspoons kosher salt
2 teaspoons sugar
½ medium red onion, cut into a ½-inch cubes
3 bell peppers, your choice of colors, cut into ½-inch cubes
1 cucumber, cut into ½-inch cubes
1 cup grape tomatoes, halved
6 ounces firm feta cheese, crumbled
¼ to ½ cup pitted kalamata olives
¼ cup extra virgin olive oil
Salt and pepper to taste

1. Stir together the red wine vinegar, water, kosher salt and sugar in a small bowl until the salt and sugar are dissolved. Add the red onion and set aside for at least 15 minutes.

2. Combine the vegetables, cheese, olives, and drained onions in a large bowl. Pour a quarter cup of the vinegar mixture leftover from the onions over the salad, then drizzle with the olive oil. Adjust the seasonings to taste and either serve immediately or refrigerate for up to one day.

bacon-wrapped goat-cheese-and-almond-stuffed dates

Stuffed dates are part of one my favorite days recently – one of those that, for whatever reason, just ended up being particularly awesome. Some great friends visited us in Philadelphia shortly before we moved. After walking around the famous historical sites and before seeing one of my favorite musicians play; before walking up the famous steps to the art museum and much before eating cheesesteaks at 2am, we ate dinner at Alma de Cuba.

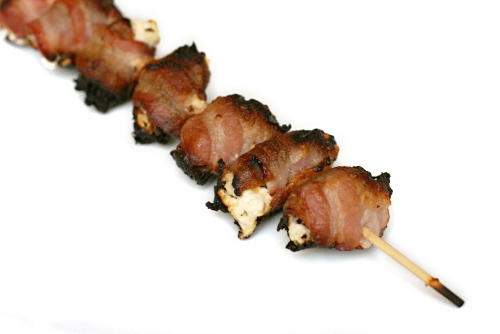
While we all loved our entrees, our drinks, and the ceviche, the star of the show was the bacon-wrapped almond-stuffed dates. Is transcendent too over-the-top a description? It seems appropriate for something that caused each of us to close our eyes and exclaim with every bite.

I had kind of assumed that my bacon-wrapped almond-stuffed date days were behind me when we moved from Philadelphia. I don’t know why it never occurred to me that I could make them myself. I certainly never thought it would be so easy.

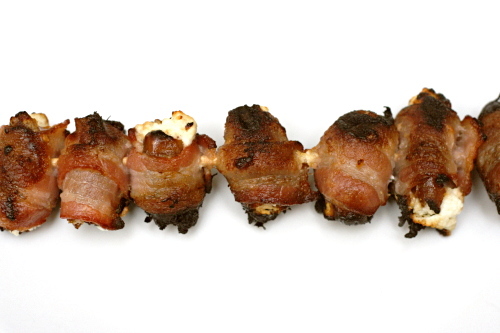
And just as good! I mean, it’s missing the friends-visiting, concert-going, downtown-exploring mystique, but it retains other important things – salty bacon, sweet dates, tangy goat cheese, crunchy almonds. And now it isn’t a once in a lifetime treat, like those standout days are.

One year ago: Honey Yogurt Dip
Two years ago: Salmon Cakes with Hashed Brussels Sprouts and Flaky Biscuits

Printer Friendly Recipe
Bacon-Wrapped Goat-Cheese-and-Almond-Stuffed Dates (rewritten from Beantown Baker)

Makes 32 appetizers

32 dates, pitted
4 ounces goat cheese
32 almonds (about ⅓ cup)
16 slices (about 1 pound) bacon, halved lengthwise

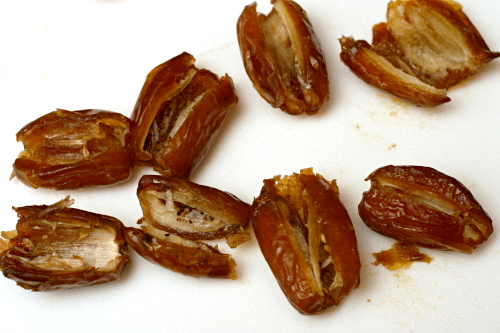
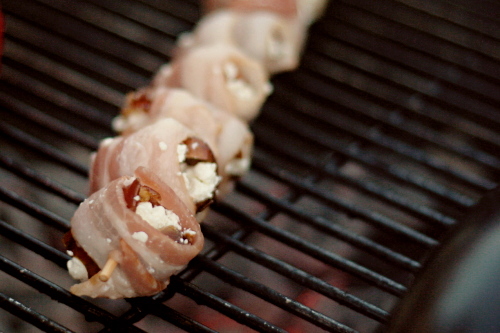
1. With a paring knife, cut through one long edge of each date; unfold the dates to open them up. Use your fingers to stuff both sides of the date with goat cheese. Push an almond into the goat cheese; close up the dates. Wrap each stuffed date with a piece of bacon and secure with a toothpick or skewer.

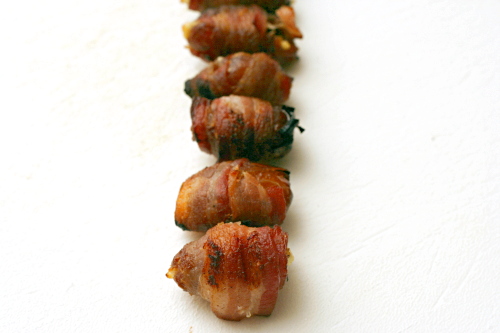
2. If you’re broiling the dates, put them on a rimmed baking sheet. Grill the dates over medium-hot coals or broil them 5 inches from the heating unit until the bacon is cooked through, about 5 minutes per side. Serve immediately or at room temperature.

pasta with baked ricotta and sweet tomato sauce

I’m all about taking water out of ingredients. Zucchini, eggplant, cabbage, tomatoes, tofu, even bread for French toast. Water doesn’t contribute flavor, so if it isn’t improving texture, I have no use for it.

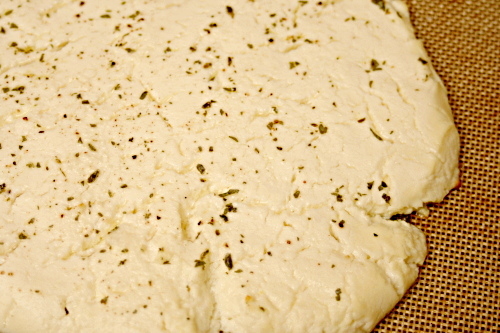
In this recipe, ricotta is drained in cheesecloth for several hours, then baked. What I thought would happen is the cheese would lose a small but significant portion of water during the draining stage, and then it would brown a little in the oven.

I was wrong. My ricotta actually gave off no liquid during straining, and I’m thinking now that the baking isn’t so much to brown the ricotta as to concentrate flavor by evaporating even more liquid.

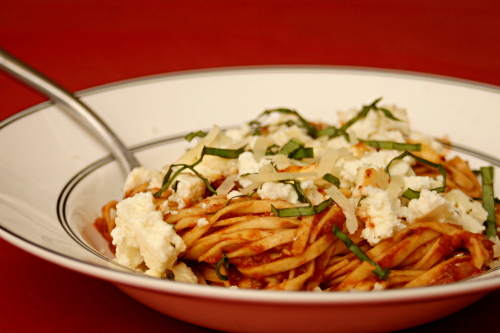
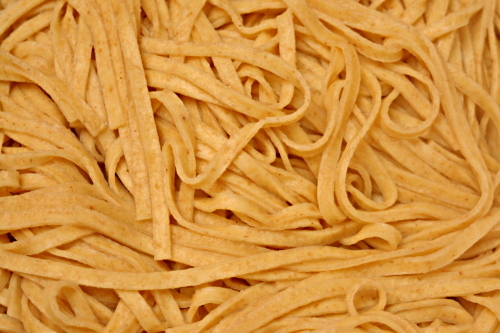
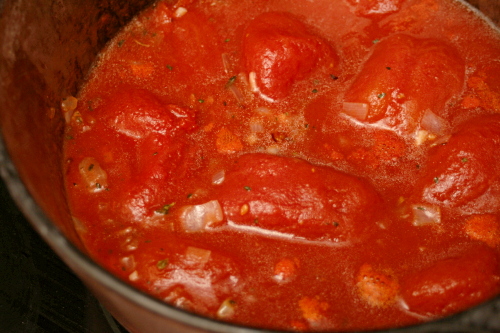
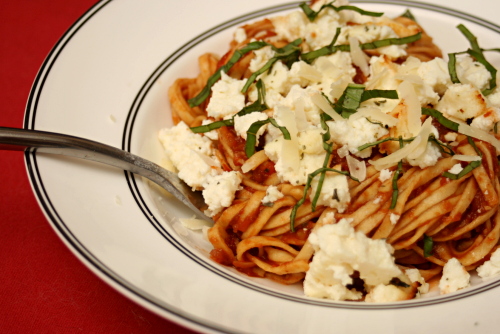
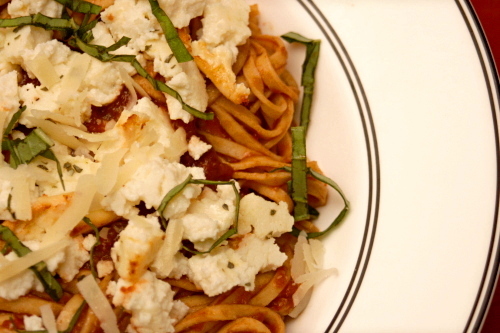
The sauce to accompany the baked ricotta is a simple tomato sauce that is sweetened with balsamic vinegar. I used fresh pasta, which when topped with the sauce, ricotta, a handful a parmesan and a sprinkling of basil, made for a great adaptation of a classic pasta and tomato sauce dish.

One year ago: Pot Roast
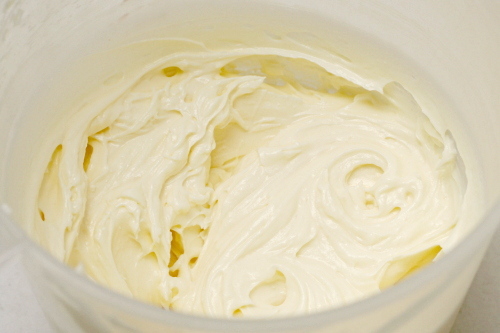
Two years ago: Comparison of 4 Vanilla Frosting

Printer Friendly Recipe
Pasta with Sweet Tomato Sauce and Baked Ricotta (adapted from Jamie Oliver via Cate’s World Kitchen)

I used one pound of (store-bought) fresh pasta instead of dried pasta, and it was so good that I think I’ll stick with fresh pasta for this recipe in the future as well.

Serves 4-6

1 (15-ounce) container ricotta
1 teaspoon plus 1 tablespoon olive oil, divided
salt and pepper
½ teaspoon dried oregano, divided
2 large shallots, finely chopped
2 cloves garlic, finely chopped
1 (28-ounce) can whole tomatoes in juice
3 tablespoon balsamic vinegar
1 pound wide pasta, such as pappardelle or fettucine
a handful of fresh basil, torn
½ cup (1 ounce) freshly grated parmesan

1. Line a fine-mesh strainer with several layers of cheesecloth. Spoon the ricotta into the strainer and refrigerate for several hours or overnight.

2. Adjust a rack to the upper-middle position and heat the oven to 450 degrees F. Line a baking sheet with parchment paper or a silicone baking mat. Spread the ricotta onto the baking sheet in a 1-inch layer. Season the ricotta with ¼ teaspoon dried oregano and a generous pinch of both salt and pepper. Rub 1 teaspoon of the olive oil over the seasoned ricotta. Bake for 15 minutes, until dry and slightly browned at the edges.

3. Heat the remaining tablespoon of oil in an 8 to 10-inch skillet over medium heat. Add the shallots and sauté, stirring occasionally, until the edges just start to brown, 6-8 minutes. Stir in the garlic and ¼ teaspoon oregano, and cook, stirring constantly, until fragrant, about 30 seconds. Add the tomatoes and ½ teaspoon salt; bring to a simmer, then lower the heat to medium-low and simmer, stirring occasionally, for 15 minutes. Use a spoon to crush the tomatoes, of, if you’d like a smooth sauce, transfer the mixture to a blender or use an immersion blender to puree the sauce. Stir the balsamic vinegar into the sauce.

4. Meanwhile, bring a large pot of water to a boil. Add 1 tablespoon salt and the pasta to the boiling water and cook according to the package instructions. Drain the pasta, reserving about a cup of the cooking water.

5. Combine the pasta and sauce, thinning the mixture with pasta cooking water if necessary. Fold in the basil and ricotta and top with the parmesan.

toasted vegetable subs

I wouldn’t say that I get tired of pizza, but with nothing to break our Friday night pizza routine lately, I thought a break might be in order. I considered some of my other favorite take-out options that I could make at home and decided, mm, big cheesy toasted sandwiches.

As much as I love a bunch of different spicy meats (my god, I cannot avoid the innuendos around here lately) on a sandwich, Dave and I had a lot of meat plans (ack) for the weekend already. Plus, I was pretty sure I could make a vegetarian sandwich every bit as good as my favorite carnivorous version.

Maybe you don’t need a recipe for a veggie sandwich – just put your favorite vegetables on bread, right – but I looked around for one anyway and found several. Most were based on eggplant and zucchini, which…eh. I don’t know. Maybe that’s a little too earnest for a Friday night. I wanted a meatier vegetarian sandwich.

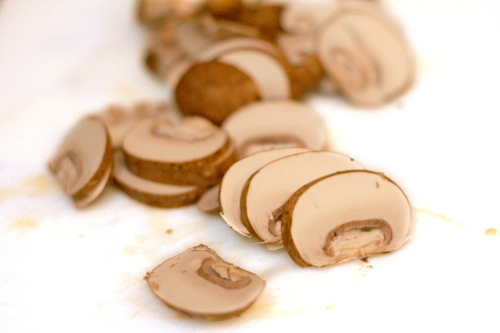
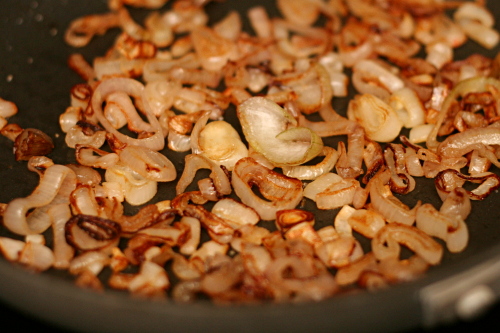
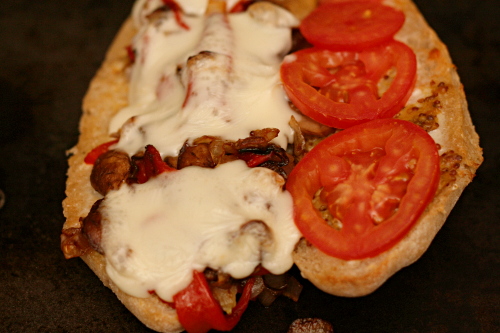
So mushrooms were in, of course, as well as caramelized shallots and roasted red peppers. I added the out-of-season mealy tomatoes simply because it seems traditional on a toasted sub, but I think chopped sun-dried tomatoes mixed with the other vegetables would be more flavorful.

Bread topped with melted cheese, tomatoes, and vegetables is the perfect way to take a break from pizza, isn’t it? But with a sandwich this good, I didn’t miss my normal Friday night pizza at all.

One year ago: Crispy Bagel Sushi Roll
Two years ago: Queso, Sun-Dried Tomato Dip

Printer Friendly Recipe
Toasted Vegetable Subs

Serves 4

2 red bell peppers
2 tablespoons olive oil
6 large shallots, peeled and sliced 1/8-inch thick
salt
8 ounces mushrooms, sliced 1/8-inch thick
ground black pepper
4 large sub/hoagie rolls, halved lengthwise
mayonnaise
mustard
1 roma tomato, sliced then or 8 sun-dried tomatoes, diced small
4 ounces sliced provolone

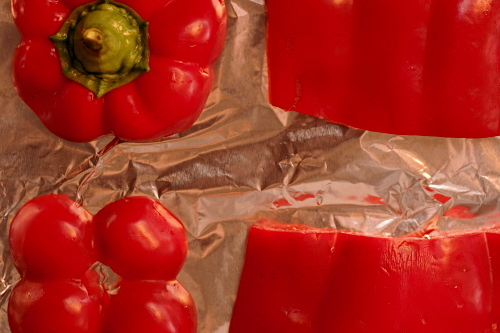
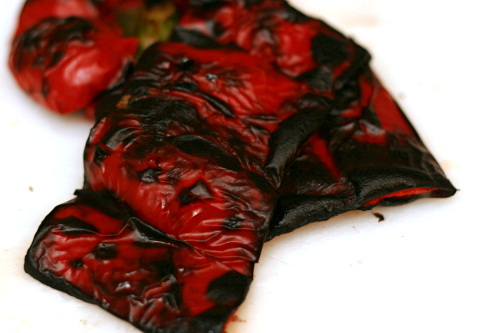
1. Adjust a rack to the upper-middle position and heat the broiler. Line a baking sheet with foil. Cut a ½-inch slice from the top and bottom of the red peppers. Remove the seeds; cut the middle section of the pepper in half from top to bottom; cut out the veins. Place the pepper skin-side up on the prepared baking sheet and broil until the skin is blistered and black, about 15 minutes. Remove the peppers from the oven and place them in a medium bowl. Cover the bowl and let the peppers steam for at least 10 minutes to loosen the skin. Leave the broiler on.

2. Meanwhile, heat 1 tablespoon oil in a medium nonstick skillet over medium-high heat. Add the shallots and ½ teaspoon salt; sauté, stirring constantly, until the shallots just start to brown. Reduce the heat to medium-low and continue to cook, stirring occasionally, until the shallots are golden to dark brown, about 15 minutes. Scrape them from the skillet to a medium bowl.

3. Heat the remaining 1 tablespoon oil in the same skillet (there’s no need to wash it) over medium-high heat. Add the mushrooms and ½ teaspoon salt and sauté, stirring constantly, until browned, about 3 minutes. Scrape them into the bowl with the shallots. Season the mixture with ground black pepper.

4. Peel the skin from the red pepper’s flesh and cut the flesh into 1/8-inch slices. Add it to the bowl with the mushrooms and shallots. If you’re using sun-dried tomatoes, add those to the bowl as well.

5. Spread a thin layer of mayonnaise, then mustard, over both sides of the rolls. Divide the vegetable mixture evenly between the bottom pieces of the rolls; top with the cheese. Arrange the slices of fresh tomato, if using, on the top piece of the sandwich bread. Place the sandwiches on a baking sheet, with the tomato and cheese facing up.

6. Broil until the cheese is melted and the bread is slightly toasted, 3-5 minutes. Let the sandwiches cool for a few minutes before serving.

butternut squash macaroni and cheese

I don’t think I do too badly with self-control. I can sit at home all day with banana cream pie in the fridge and not even think about it until it’s time for dessert and tea. I don’t drink alcohol on weekdays (those extra calories are saved for dessert), and it isn’t a struggle, even though we have plenty of it around.

But there are two foods that I have no control with – chocolate chip cookie dough and macaroni and cheese. No kidding, I can eat both until I’m feeling not so good, and even that won’t stop me from craving more as soon as I digest a bit. As a result, macaroni and cheese has been allocated to a once-in-a-blue-moon treat.

But…can I make a version of macaroni and cheese that is healthy enough to eat more often, but still worth craving?

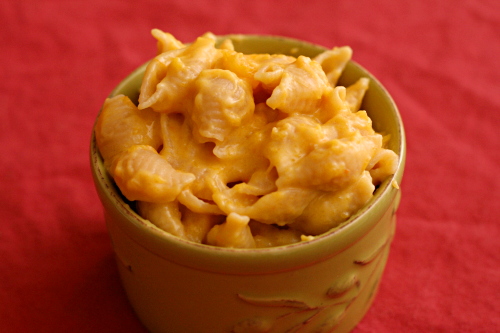
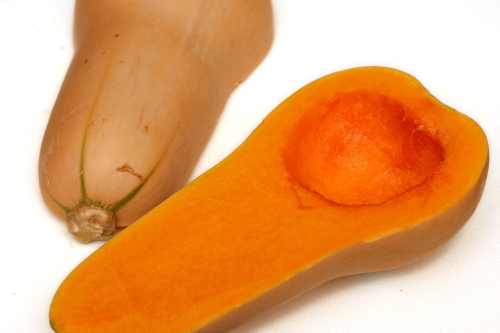
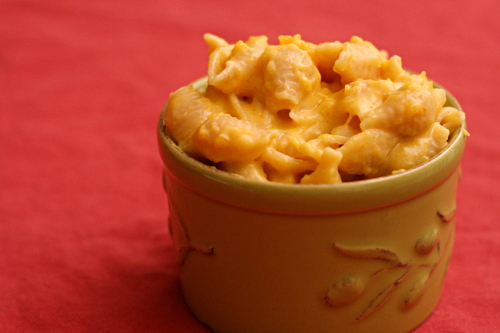
Apparently. I’m not saying that this is hardcore health food, but it’s not so bad nutrition-wise. The squash does an admirable job of replacing some of the cream sauce, and it isn’t just a “hide the vegetables” trick, because the flavor is surprisingly complementary. The final dish was sweeter than regular mac and cheese, but that wasn’t a bad thing. And it doesn’t hurt that the golden color of the squash makes the pasta look even cheesier.

I shouldn’t be shoveling this into my maw without abandon any more than I do regular macaroni and cheese, but at least it’s healthy enough to eat more than twice a year.  Tasty enough too.

One year ago: Fish Tacos

Printer Friendly Recipe
Butternut Squash Macaroni and Cheese (adapted from Branny Boils Over)

You can adapt this in a number of ways. The easiest is by changing the type of cheese, although if you can, using a combination of cheddar and a good melter will give you consistently great results. Branny adds in a couple ounces of cream cheese, which will make the sauce extra creamy, but I decided I could skip it and make this a little healthier.

Most homemade macaroni and cheese recipes call for a final baking step, which I’ve skipped here simply because I wanted to make this as easy as possible for a weeknight dinner. If you prefer your mac and cheese baked, I recommend pouring it into a broiler-safe 8-inch square pan, topping it with bread crumbs made from fresh bread, and heating it about 5 inches from the broiler for a couple of minutes.

Each serving has about 325 calories.

Serves 8

1 small butternut squash
12 ounces elbow macaroni
salt
2 tablespoons unsalted butter
2 tablespoons all-purpose flour
½ teaspoon powdered mustard
2 cups milk
4 ounces Monterey Jack cheese, shredded (1 cup)
4 ounces sharp cheddar cheese, shredded (1 cup)

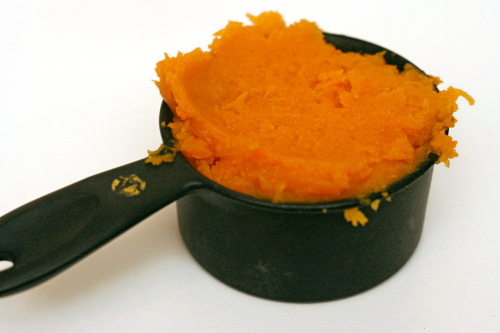
1. Adjust on oven rack to the middle position and heat the oven to 425 degrees. Cut the squash in half lengthwise, scoop out the seeds, and lay the halves cut side down on a parchment-lined baking sheet. Bake for 25-35 minutes, or until a butter knife inserted into the flesh meets no resistance. Scoop 2 cups of flesh from the squash and mash it with a fork, or, if you’re willing to put a bit more effort into it (I wasn’t), puree it in a blender or food processor.

2. Meanwhile, bring a large pot of water to a boil over high heat. Once it boils, add about a tablespoon of salt and the pasta. Cook the pasta until it’s tender. Drain and return the pasta to the pot.

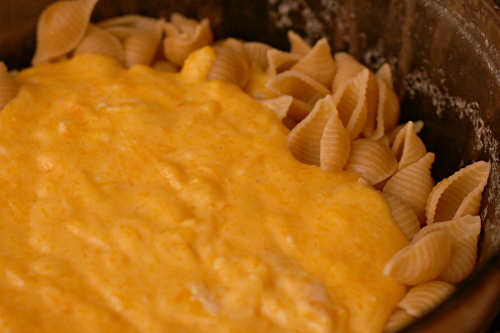
3. Melt the butter in a medium saucepan over medium heat. Once the foaming subsides, add the flour and mustard. Whisk constantly for 1 minute, then gradually whisk in the milk. Bring the mixture to a simmer over medium heat, whisking frequently, then lower the heat to medium-low and simmer for 5-6 minutes, until the mixture has the consistency of heavy cream. Add the cheeses, ½ teaspoon table salt, and the squash, stirring until the cheese melts.

4. Pour the sauce over the drained pasta and stir thoroughly. Serve immediately.

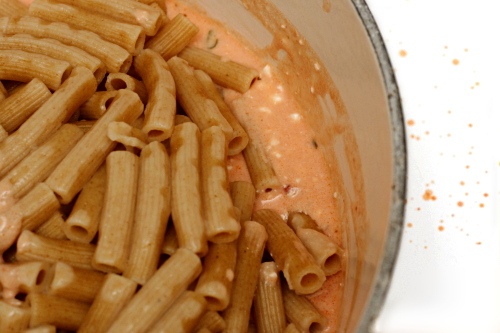
baked ziti

I am officially out of recipes to share. I am now raiding my “Probably Not” folder – the rejects that either didn’t taste good or didn’t photograph well. I’ll spare you that ones that didn’t taste good.

It seems like I could just make something new and blog about it, right? The thing is though, nothing is working quite right for me lately. My delicious banana cream pies keep coming out with a layer of candy armor over the crust; the southwestern pasta salad recipe I patched together was too similar to and probably not quite as good as this one; I never got the ratios right in my cocktail last weekend (despite many attempts), and I forgot to take final photos of my pesto.

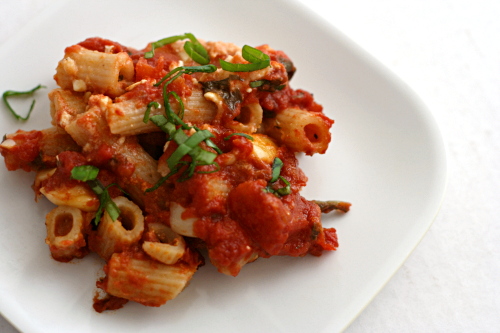
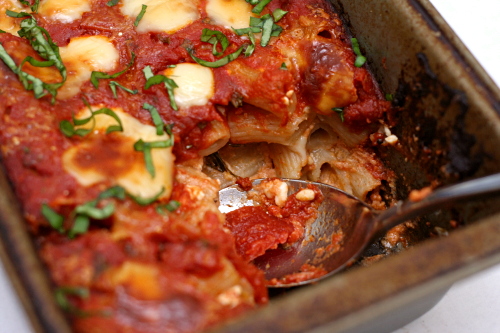
I’m just lucky that the photos of the baked ziti aren’t as ugly as I’d remembered. For this is not in the “didn’t taste good” category. With a mixture of pasta, tomatoes, cheese, and herbs, how could it not be delicious?

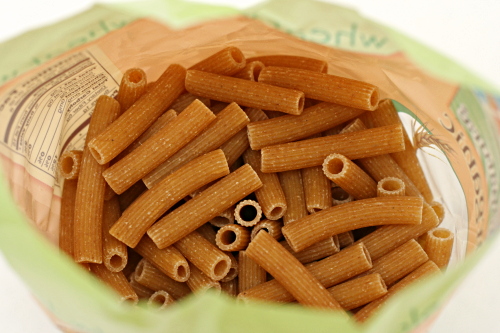
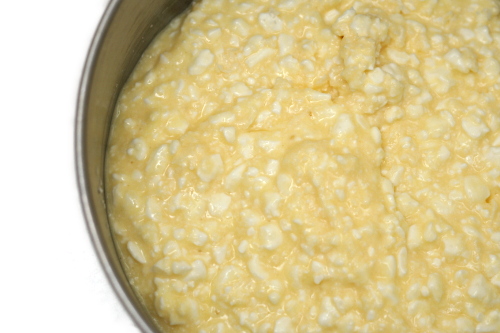
And although it’s hard to believe, you can make it halfway healthy without sacrificing much in the way of flavor or creaminess. In my experience, good whole wheat pasta (I like Bionaturae) is hardly different from refined versions. I’m perfectly happy with 1% cottage cheese and skim mozzarella. That just leaves the heavy cream to worry about, and with a slight increase in the cornstarch, you can get away with using milk instead.

And you can make it ahead, and it freezes well, and it reheats well, and heck, it isn’t half bad cold if you’re too impatient to bother heating it up. This is certainly worth pulling out of the reject file.

One year ago: Herbed Lima Bean Hummus
Two years ago: Country Crust Bread

Printer Friendly Recipe
Baked Ziti (from Cooks Illustrated)

Serves 8-10

Healthy tricks: Use 1% cottage cheese, whole wheat pasta, part-skim mozzarella, and 2 teaspoons cornstarch plus 1 cup milk instead of ¾ teaspoon cornstarch with 1 cup heavy cream.

1 pound whole milk or 1% cottage cheese
2 large eggs, lightly beaten
3 ounces parmesan cheese (about 1½ cups), grated
table salt
1 pound ziti pasta
2 tablespoons extra-virgin olive oil
5 medium garlic cloves, minced (about 5 teaspoons)
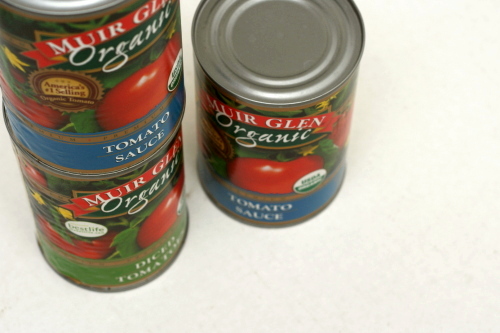
1 (28 ounce) can tomato sauce
1 (14.5 ounce) can diced tomatoes
1 teaspoon dried oregano
½ cup plus 2 tablespoons chopped fresh basil leaves
1 teaspoon sugar
black pepper
¾ teaspoon cornstarch
1 cup heavy cream
8 ounces low-moisture mozzarella cheese, cut into ¼ inch pieces (about 1½ cups)

1. Adjust oven rack to middle position and heat oven to 350°F. Whisk cottage cheese, eggs and 1 cup Parmesan together in medium bowl; set aside. Bring 4 quarts of water to boil in large Dutch oven over high heat. Stir in 1 tablespoon salt and pasta; cook, stirring occasionally, until pasta begins to soften but is not yet cooked through, 5 to 7 minutes. Drain pasta and leave in colander.

2. Meanwhile, heat oil and garlic in 12-inch skillet over medium heat until garlic is fragrant but not brown. Stir in tomato sauce, diced tomatoes, and oregano; simmer until thickened, about 10 minutes. Off heat, stir in ½ cup basil and sugar, then season with salt and pepper.

3. Stir cornstarch into heavy cream in small bowl, transfer mixture to Dutch oven set over medium heat. Bring to simmer and cook until thickened, 3 to 4 minutes. Remove pot from heat and add cottage cheese mixture, 1 cup tomato sauce and ¾ cup mozzarella, then stir to combine. Add pasta and stir to coat thoroughly with sauce.

4. Transfer pasta mixture to 13- by 9-inch baking dish and spread remaining tomato sauce evenly over pasta. Sprinkle with remaining ¾ cup mozzarella and remaining ½ cup Parmesan over top. Cover baking dish tightly with foil and bake for 30 minutes.

5. Remove foil and continue to cook until cheese is bubbling and beginning to brown, about 30 minutes longer. Cool for 20 minutes. Sprinkle with remaining 3 tablespoons basil and serve.

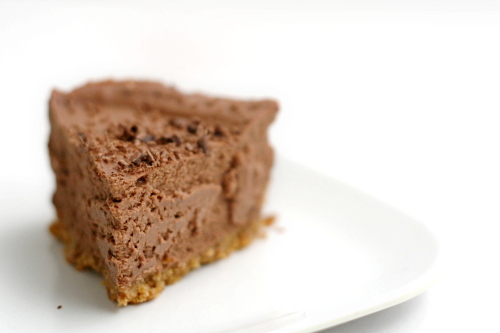
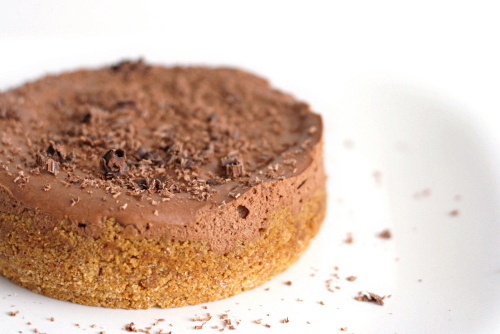
low and lush chocolate cheesecake

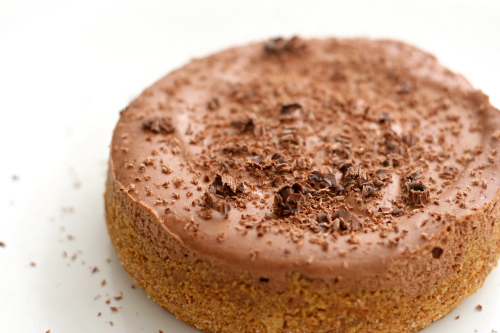
Back when my brother was the family cheesecake-maker, we didn’t eat a lot of chocolate cheesecakes. He didn’t like them. I always thought, what is there not to like? It’s chocolate, and it’s cheesecake. Seems like a good match.

But now I see his point. I like both chocolate and cheesecake, but the flavors don’t seem to compliment each other like other pairings do. Chocolate and peanut butter; cheesecake and pumpkin; chocolate and mint; cheesecake with berries – the individual flavors all improve their partners.

But cheesecake mixed with chocolate, somehow, the flavors seem to oppose instead of enhance each other. There’s the bitterness of the chocolate and the tang of the cheesecake, but there isn’t any middle ground where they mesh together to create something new.

Not that I’m complaining, mind you. After all, there is still distinctive cheesecake and chocolate flavors, and that’s enough to make me happy.

This was chosen for Tuesdays with Dorie by the Tea Lady, who has posted the recipe.

One year ago: Butterscotch Pudding

traditional pizza

Copy of IMG_0966

When it comes to cooking, I definitely have weaknesses. I’ve never cooked a perfect roast chicken. I can’t cook a steak with any sort of precision in doneness; if it’s somewhere between ‘moo’ and black, I consider it a success. And grilling? I’ve really never done it. Clearly there are holes in my culinary knowledge.

But pizza? Pizza, I know.

Copy of IMG_7570

I make pizza almost every week. I’ve tried all sorts of crusts, sauces, cheeses, and toppings. I’ve taken notes. And now, finally, I can make my perfect pizza. I’m not saying that my favorite will be your favorite; but it might give you somewhere to start and something new to try.

Copy of IMG_4671

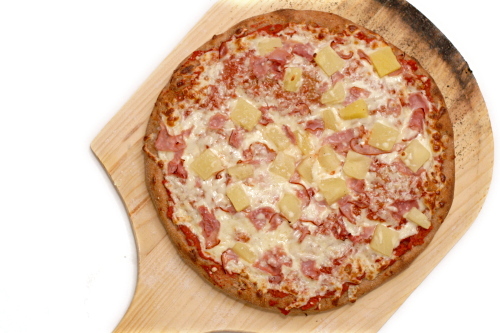
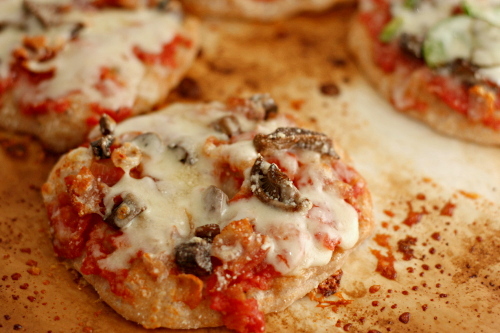
Toppings – I’m going to attack this from top to bottom, which has the advantage of progressing from the simplest decisions to the more complicated. I’m going to focus on traditional pizza – tomato sauce, Italian cheeses, toppings. Most any topping will work here. Use whatever toppings you want in whatever quantities you prefer. I vary it quite a bit, with my favorite combinations being ham and mushroom, as well as ham and pineapple.

Copy of IMG_3544

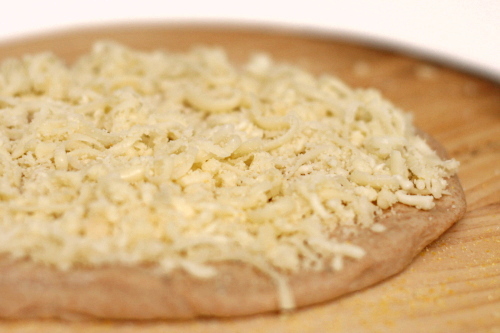
Cheeses – I like a ratio of 5 parts mozzarella to 1 part parmesan. If you have other cheeses around, cheddar or gouda or fontina, it can be fun to replace a portion of the mozzarella with those. I actually prefer part-skim mozzarella on pizza; it seems to melt more smoothly and it tastes just as good as whole milk cheese.

Copy of IMG_3676

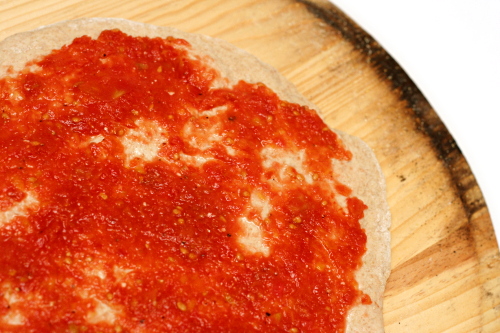
Sauce – My sauce is very (very very) simple, but you have to trust me that it’s just right. All I do is puree a drained can of diced tomatoes, strain them until they’re thick, then stir in salt and pepper. It’s easier than cooking a sauce, and I love the fresh flavor. It does complicate the addition of garlic and spices, but I get around that by adding the garlic as a topping and the herbs to the crust. (I don’t like raw garlic, so I toast the whole unpeeled cloves on the hot pizza stone for a few minutes.)

Copy of IMG_3554

Crust – I want a crust that is light and tender and flavorful, but, even more importantly, easy to work with. No one wants to fight with their pizza dough. This crust started with Cooks Illustrated’s popular pizza dough recipe, and then I started substituting white wine for a portion of the water, and after I made Peter Reinhart’s pizza dough, I became more committed to a cold overnight rise.

Copy of IMG_3550

Another important aspect of pizza crust is how you work with it. Be gentle with your dough. I need to stress that you really don’t want to use a rolling pin. Pull and stretch the dough. Pick it up, hanging the edges on your knuckles, and let gravity do the work. If it’s tearing or thinning unevenly, put it back down and just pull at the thicker parts. If it’s fighting you, walk away for five minutes to let it relax. (I use this technique when I fight with Dave too – ha!)

Copy of IMG_8407

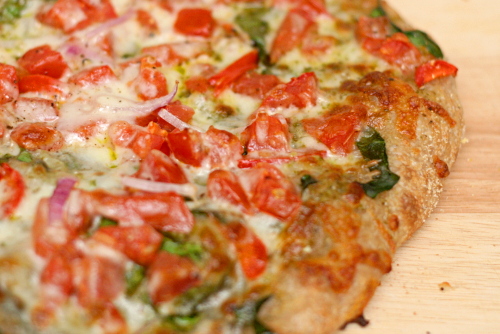
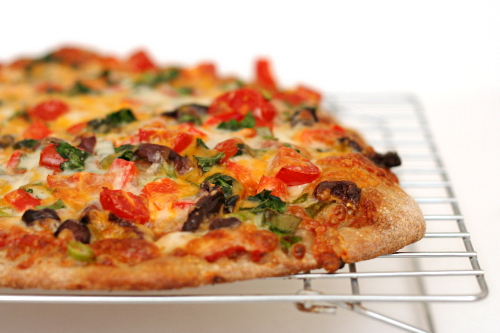
I’m sorry to be so braggy, but this pizza really is just great. Most of it comes down to the crust, which is thin, crisp, and light. I love the sauce too, because it tastes exactly like what it is – tomatoes. The combination of cheeses provides just the right amount of richness and flavor. I start out nearly every weekend by making this pizza, and I can’t think of a better way.

Copy of IMG_5293

Update 3/16/10: I’ve successfully used this method to make this pizza crust whole wheat.  I made the pre-dough out of 11 ounces whole wheat flour, ¾ teaspoon salt, and 1 cup water .  After letting that sit overnight, I mixed it with the rest of the ingredients – 2 tablespoons olive oil, ½ teaspoon dried oregano, 11 ounces white bread flour, 1 teaspoon salt, 2 teaspoons instant yeast, 1 teaspoon granulated sugar, ¼ cup white wine, and ½ cup water.

Printer Friendly Recipe
Traditional Pizza

You can substitute up to 7 ounces (about 1½ cups) of whole wheat flour for the white bread flour, but expect longer rising times and a more stubborn dough. But if you’re patient during shaping, your crust will be just as light and crisp as dough made completely with white flour.

Dough:
2 tablespoons olive oil
½ teaspoon dried oregano
22 ounces (4 cups) bread flour
1¾ teaspoons salt
1 teaspoon sugar
2 teaspoons instant yeast
1/4 cup white wine
1½ cups water
cornmeal for dusting

Sauce:
1 (28-ounce) can diced tomatoes, drained
salt and pepper

Assembly:
3 cloves garlic, unpeeled
10 ounces (2½ cups) part-skim mozzarella, shredded
2 ounces (1 cup) parmesan, grated
toppings of your choice

1. For the dough: Heat the oil and oregano in a small saucepan until fragrant. Mix in the water and wine.

2. In the bowl of a stand mixer fitted with the dough hook, mix the flour, salt, sugar, and yeast. With the mixer on low speed, pour in the liquid mixture. Continue mixing on medium-low speed until the dough comes together, and then knead on medium-low speed for 8 minutes, until the dough is smooth and elastic. Add more flour or water as necessary to form a dough that is sticky but does not cling to the sides of the bowl. When the mixer is running on medium-low speed, the dough should not stick to the bottom of the bowl.

3. Spray a large bowl with nonstick spray. Rub your hands on the sprayed bowl to coat them with oil, then quickly form the dough into a ball. Place the ball of dough in the bowl and cover with plastic wrap.

4. Either set the dough aside to rise at room temperature, which will take 1½ to 2 hours, or refrigerate it until the next day. If it’s chilled overnight, it will take about 5 hours at room temperature to warm and finish rising. You can also reduce the yeast to ½ teaspoon and let the dough rise on the counter for about 8 hours after it has been chilled overnight.
5. For the sauce: Pulse the tomatoes in a food processor 10-12 times, until they’re pureed. Transfer them to a fine-mesh strainer set over a large bowl and let them drain, stirring occasionally for at least 10 minutes. (You can get away with less time if you actively stir and press the tomatoes through the strainer; if you wait longer, you can stir less.) Then discard the liquid in the bowl, transfer the tomatoes from the strainer to the now-empty bowl, and stir in a pinch of pepper and 1/8 teaspoon of salt.

6. Place a pizza stone on the bottom rack of the oven and preheat the oven to 500ºF. Place the garlic on the hot pizza stone for 3-4 minutes or until fragrant.

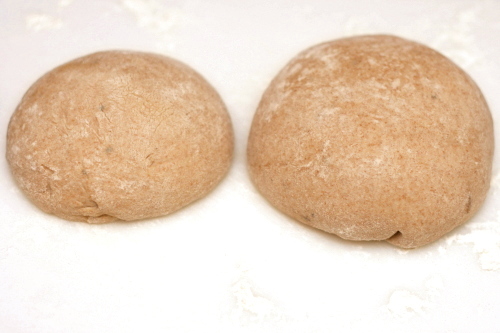
7. Divide the dough and shape each portion into a ball. You have a few options of how to divide it. It makes enough dough for three 12-inch pizzas. However, I always cut it in half and freeze half. Then I divide the remaining dough into two more parts, one twice the size of the other. I make the larger one into pizza and the smaller into cheese bread (no sauce or toppings). Let the balls of dough relax for 10-30 minutes.

8. Using tongs, remove the garlic from the oven and let it cool for a few minutes. Mince.

9. Work with one ball of dough at a time on a lightly floured surface. Flatten the dough, then pick it up and gently stretch it out, trying to keep it as circular as possible. Curl your fingers and let the dough hang on your knuckles, moving and rotating the dough so it stretches evenly. If it tears, just piece it together. If the dough stretches too much, put it down and gently tug on the thick spots.

10. Dust a pizza peel lightly with cornmeal and transfer the round of dough to the peel. Rearrange the dough to something reasonably circular; stab it several times with a fork. Add 1/3 of each of the garlic, sauce, and cheese, followed by toppings of your preference, then transfer the pizza to a hot pizza stone. Bake for 8-10 minutes, until the cheese is bubbling and the crust is spotty brown. Let the pizza cool on the peel for about 5 minutes before slicing and serving. Repeat with the remaining ingredients.

Copy of Copy of IMG_0960

vegetarian lasagna

Copy of IMG_0495

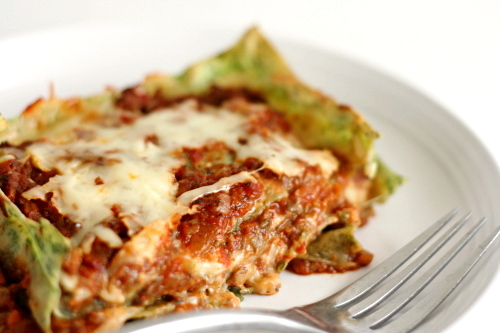
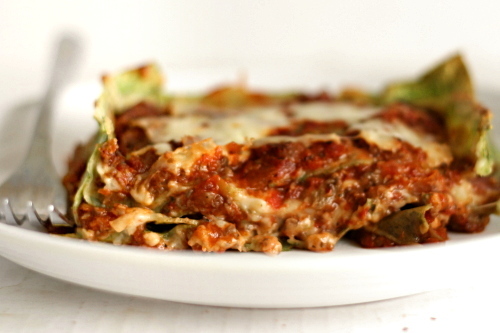
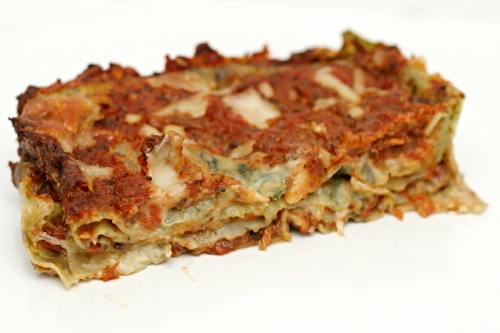
This is, for me, perfect lasagna. You can’t go wrong with most combinations of pasta + sauce + cheese, but this one has just the right balance of light and rich, cheese and tomatoes, pasta and sauce, vegetables and…well, not meat, because there is none.

Copy of IMG_0470

But don’t worry, it isn’t vegetable lasagna. It’s vegetarian lasagna. It’s a fine line.

It isn’t that I don’t like meat in my lasagna; I just don’t know that it’s really necessary for me. On the other hand, I definitely do not like large chunks of vegetables in my lasagna – no layers of eggplant or zucchini or peppers.

Copy of IMG_0478

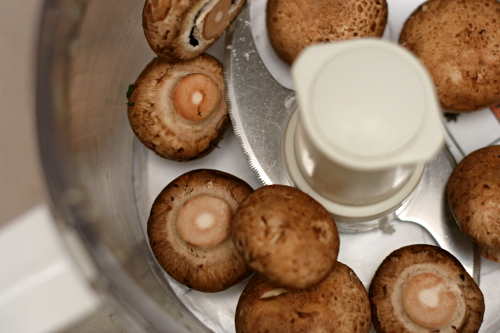
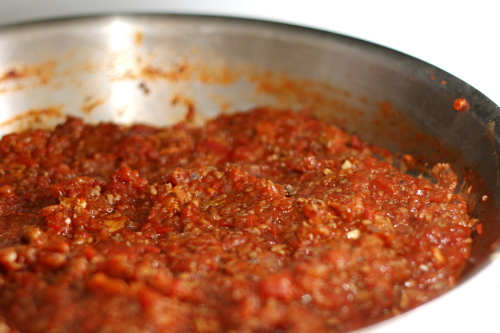
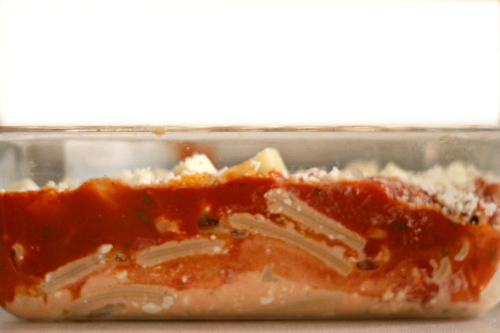
What I’ve done here is use minced mushrooms to mimic the texture and somewhat even the flavor of ground meat in the tomato sauce. The sauce has so much flavor that you’ll never miss the meat. Other than that, it’s a pretty traditional lasagna. I’ve replaced the ricotta with béchamel sauce, just because I like it that way.
Copy of IMG_0484

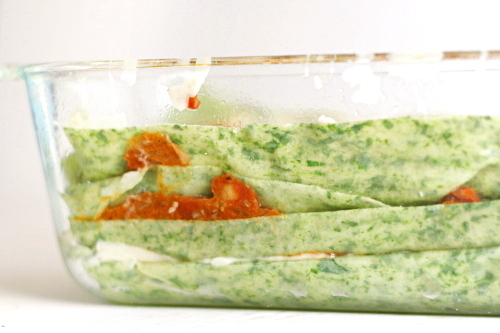
It’s also, as far as lasagna goes, not terribly indulgent. I use 2% milk in the béchamel and skim mozzarella, although you can certainly use something richer if you prefer. I like to make my own spinach pasta, because if you can add a bag of spinach to the lasagna without it affecting the final flavor or texture, why not? And with mushrooms replacing meat, plus plenty of homemade tomato sauce, there is certainly no shortage of vegetables.

Copy of IMG_0492

It’s just…perfect. Perfectly flavored, a perfect balance of richness. It’s full of vegetables, but they’re not overbearing. It’s a lot of work, yes, but I usually have fun making lasagna. And for a big pan of what is, for me, perfect lasagna? It’s absolutely worth it.

One year ago: Stuffed Sandwich Rolls

Copy of IMG_0496

Printer Friendly Recipe
Vegetarian Lasagna

Serves 8

The recipe looks more complicated than it needs to because of the homemade pasta. You can save yourself a lot of time (skip steps 1 through 4) by buying fresh pasta sheets instead of making and rolling out the spinach pasta. Or you can use a box of no-boil lasagna noodles, soaking them in hot water for 5 minutes before layering the lasagna.

Utilize your food processor! For the parmesan, mozzarella, fresh mushrooms, onion, and tomatoes (in that order).

You can make the whole lasagna ahead of time and refrigerate it overnight. Or you can freeze the whole lasagna. Let it defrost in the refrigerator overnight. To bake the lasagna straight from the refrigerator, just place it in the cold oven, then turn the oven onto 375ºF to bake the lasagna. The lasagna will warm up as the oven heats.

You can also make the pasta dough and both sauces a day in advance and then assemble the layers right before baking.

If you keep fresh basil around, definitely mince up a few leaves and add them to the cooked tomato sauce. You may also want to sprinkle some on top of the lasagna when it comes out of the oven.

Spinach pasta:
5 ounces baby spinach, washed
1 egg
¾ cup all-purpose flour, plus (a lot) more for dusting

Tomato sauce:
½ ounce dried porcini mushrooms, rinsed
2 tablespoons olive oil
1 large onion, chopped fine (reserve ½ cup of the onions for the béchamel)
4 cloves garlic, minced
16 ounces mushrooms, minced
¼ cup wine (optional; red or white is fine)
1 (28-ounce) can diced tomatoes, drained and pureed
1 (14-ounce) can diced tomatoes, drained and pureed
¾ teaspoon salt
¼ teaspoon pepper

Béchamel:
3 tablespoons unsalted butter
½ cup finely diced onions
3 garlic cloves, minced
3 tablespoons all-purpose flour
2½ cups milk
1 bay leaf
pinch nutmeg
¼ teaspoon salt
⅛ teaspoon pepper
½ cup grated parmesan cheese (1 ounce)

Assembly:
nonstick spray
8 ounces (2 cups) shredded mozzarella cheese

1. For the pasta: Place the spinach in a 12-inch skillet and add a few tablespoons of water (or if the spinach is wet from being washed, just add the wet spinach to the skillet). Turn the heat to high until the water boils, then reduce the heat and stir the spinach until it just wilts, about 1 minute. Remove the spinach from the pan (don’t wash the skillet) and place it on a clean dishtowel. Pat and squeeze the spinach until it’s very dry, then finely mince it.

2. Add the flour to a wide bowl or pie plate, then make a well in the center of the flour. Lightly beat the egg, then add it to the well with the chopped spinach. Stir the flour, egg, and spinach together until thoroughly mixed, then started kneading. Knead, adding flour as necessary to keep the dough from being sticky, until the dough is smooth and elastic, about 5 minutes. Don’t be concerned if you need to add quite a bit of extra flour; the dough should be malleable but not at all sticky.
3. Divide the dough into 3 balls. Work with one ball of dough at a time and leave the others covered with a damp dishtowel (you can use the same one you used for drying the spinach). Flatten the dough slightly, then roll it through the widest setting on a pasta roller. Fold it in thirds like a piece of paper going into an envelope, then roll it through the pasta roller again, feeding it with one of the open sides first. If at any point the dough is sticky, brush it with flour. Repeat the folding into thirds and rolling a few times. Without folding, run the pasta through the widest setting once more. Adjust the pasta roller to the next-thinner setting and roll the dough through the machine. Continue to gradually thin the dough until the third-to-last setting. Brush it with flour if the dough starts to stick at all. If the strip of dough becomes too long to handle, cut it into two shorter strips and work with each strip separately. Repeat the rolling, folding, and thinning with the remaining balls of dough, laying the sheets of pasta on dishtowels.
4. Bring a large pot of water to a boil, then add 1 tablespoon salt and reduce the heat until the water is at a lively simmer instead of a vigorous boil. Cut the strips of dough into 8-inch lengths. One by one, dip each rectangle of dough in the water, leave it for about 10 seconds, then remove it and rinse it under running water. Lay the strips of dough on dishtowels.

5. For the tomato sauce: Place the dried porcini in a small saucepan and add just enough water to cover. Bring the water to a boil over high heat, then turn the burner off.

6. Heat the olive oil over medium heat in the same large skillet the spinach was cooked in. Add the onions and a pinch of salt and sauté, stirring occasionally, until the onions just brown around the edges, about 8 minutes. Add the garlic and mushrooms and continue cooking and occasionally stirring until the mushrooms start to brown. First they’ll release a bunch of liquid, but then that will evaporate and they’ll brown. Once they do, pour in the wine and cook, scraping the bottom of the pan, until the wine almost completely evaporates, then add the tomatoes, salt and pepper. Bring to a simmer. Carefully lift the porcini from their soaking liquid with a fork; mince them and add them to the sauce. Simmer the sauce over medium heat until thick, about 15 minutes.

7. For the béchamel: Heat the butter in a medium saucepan over medium heat. When the foaming subsides, add the onions and garlic and sauté, stirring occasionally, until the onion is softened. Add the flour and stir continuously for 1 minute. Stirring constantly, gradually pour in the milk and reserved porcini liquid (pouring carefully so as to leave any grit behind in the small saucepan). Increase the heat to medium-high and bring the mixture to a light boil, stirring very frequently. Once the sauce starts to bubble, lower the heat to medium-low and let it simmer for 10 minutes, stirring in occasionally. Stir in the nutmeg, salt, pepper, and parmesan.

8. Assembly: Adjust an oven rack to the middle position and heat the oven to 375ºF. Spray a 9-by-13-inch pan with nonstick spray. Spread a thin layer of tomato sauce on the bottom of the pan, then add a layer of noodles. Spread ¼ of the béchamel on the noodles, followed by ¼ of the cheese, and ¼ of the tomato sauce. Repeat the layering (noodles, béchamel, cheese, tomato sauce) twice more, then finish by adding a layer of noodles, then the last of the béchamel, the last of the tomato sauce, and the last of the mozzarella.

9. Spray a large sheet of aluminum foil with nonstick spray, then use it to cover the lasagna. Bake, covered, for 30 minutes, then remove the foil and continue to bake for another 15 minutes, until the lasagna is bubbling around the edges. Remove the pan from the oven and let the lasagna set for 10 minutes before cutting and serving.

Copy of IMG_0901

wheat berries with caramelized onions, feta, and lentils

Copy of IMG_0628

I’m really looking forward to moving to New Mexico. There’s absolutely nothing wrong with Philadelphia; any unhappiness I had here was my own deal and not a result of the location. But I am excited about having a fresh start somewhere.

Copy of IMG_0597

I am a little concerned about the grocery store situation. I have been majorly spoiled the last few years by always living near a Wegman’s. If you’re not familiar, suffice to say that it’s a great store, with a huge selection and high quality. When a recipe says that an ingredient can be found in “any well-stocked grocery store”, I’ve never had to worry about how I’d get a hold of it.

Copy of IMG_0613

The town we’re moving to, though, is small and isolated. It has just one grocery store. My initial explorations during our visit there over the summer indicated that it isn’t terrible but it isn’t great. I should be able to find, say, goat cheese, but only one type.

Copy of IMG_0606

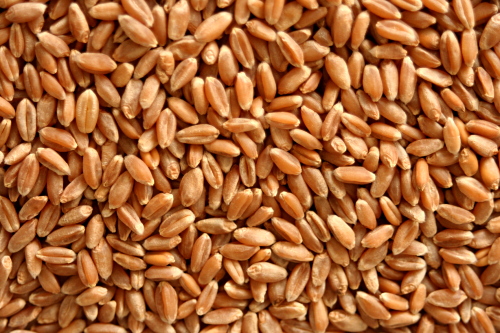
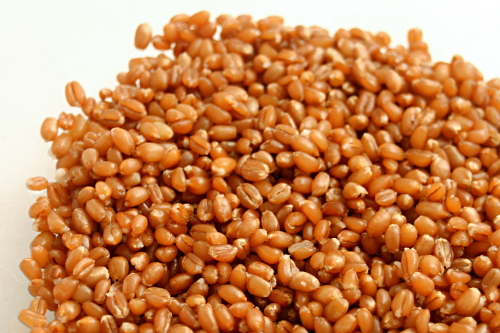
So I’ve been trying to take advantage of the wide selection of my current store while I can, by buying random unusual ingredients that I’m pretty sure I won’t be able to find after the move. My plan was actually to buy farro, but I guess even Wegman’s has its limits because they didn’t have it. I almost went with quinoa, since it’s familiar and safe, but I managed to talk myself into trying wheat berries instead.

Copy of IMG_0618

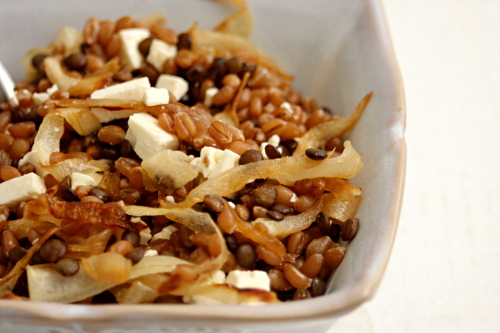
Well, I don’t know about farro, but wheat berries are certainly delicious. They’re nutty, and the texture was chewy, not unpleasantly crunchy or mushy. The sweet caramelized onions were a great compliment, and then the salty feta was perfect on top of all of that. The whole thing was just so good, and I couldn’t believe how healthy it was to boot. I sure hope I can find wheat berries and feta after we move because I want to be making this meal a lot!

Copy of IMG_0621

One year ago: Bacon-Wrapped Pork Tenderloin Medallions

Printer Friendly Recipe
Wheat Berries with Caramelized Onions, Lentils, and Feta (adapted a bit from Orangette; wheat berry cooking method from Deborah Madison’s Vegetarian Cooking for Everyone)

2-3 servings

You might not need a recipe here, because you’re just combining grains and lentils with caramelized onions and feta. If you already have favorite ways to cook grains, lentils, and onions, you should absolutely feel free to use those. In case you don’t, I’ll provide my preferred methods here.

You can probably skip the lentils if you don’t want to deal with an extra ingredient. Also, I haven’t tried it myself, but I don’t see why you couldn’t just add them to the wheat berries at the point when the wheat has 25 minutes of cooking left. Just make sure there’s enough water in the pot.  (Update 6/14/11: You can definitely cook the lentils in the same pot as the wheat berries. I’ve also used farro in this recipe now, which is convenient because it cooks in the same amount of time as lentils.)

I think you could use almost any grain here, as long as you adjust the cooking time. Quinoa would definitely be good (and would make this meal gluten-free).

¾ cup wheat berries
salt
2 onions, sliced
1 tablespoon olive oil
½ cup lentils, preferably lentils de puy, picked over and rinsed
4 ounces feta cheese, crumbled
hot sauce (optional)
lemon wedges (optional)

1. Soak the wheat berries in water for at least an hour and up to overnight. Put them in a pot with enough water to cover by a few inches. Bring to a boil, then lower the heat, cover the pot, and simmer until they’re tender, 1 to 2 hours. Add ½ teaspoon salt once they’ve started to soften.

2. Heat the oil in a large nonstick skillet over medium-high heat. Add the onions and ¼ teaspoon salt, reduce the heat to medium, and cook, stirring somewhat frequently, until they just start to brown, about 8 minutes. Reduce to heat to medium-low and continue to cook and stir until the onions are evenly golden brown, about 20 minutes longer.

3. Put the lentils into a small saucepan. Add 3 cups of cold water and ¼ teaspoon salt. Bring to a boil over medium-high heat, then reduce the heat and simmer until tender but not falling apart, about 20 to 25 minutes. Drain.

4. Combine the wheat berries, caramelized onions, lentils, and feta. Adjust the seasonings if necessary and serve with either hot sauce or lemon wedges, if desired.

Copy of IMG_0625