chicken artichoke pesto calzones

copy-of-img_2248

I hardly ever cook large roasts of meat, but when I do, I find like I like the leftovers even more than the original meal. I had lots of fun after Thanksgiving, and found that pot roast makes an amazing soup and sandwich. And roast chicken, to be honest, hardly ever impresses me served plain with dinner, but once it’s cooled and mixed with mayonnaise for some chicken salad, I am one happy camper.
copy-of-copy-of-img_2225

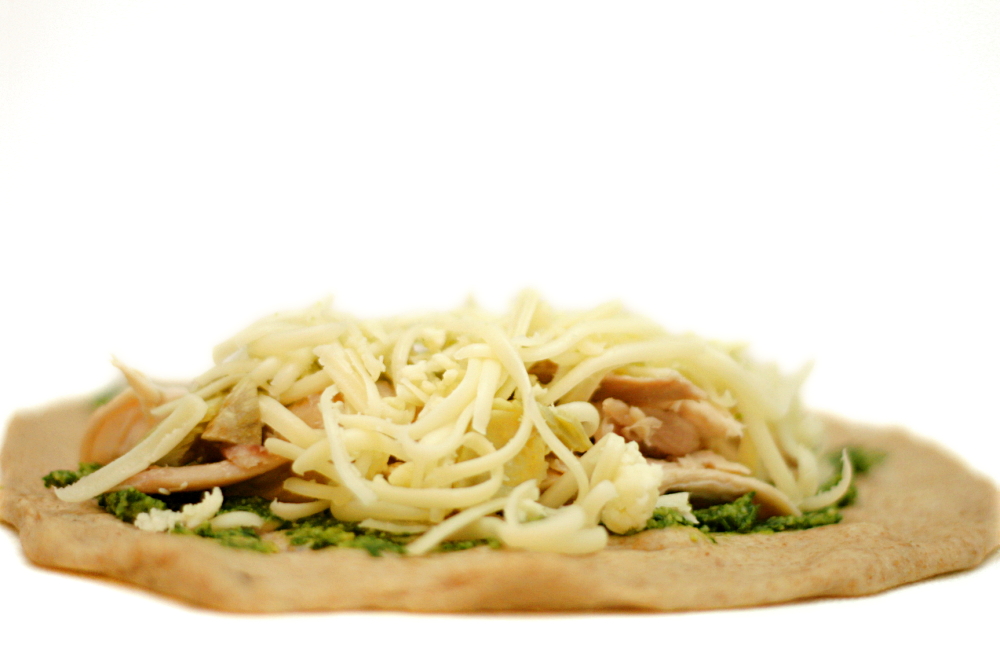
This time, though, I forwent the mayonnaise for something more interesting. I happened to come across a recipe for chicken artichoke pizza when I had shredded roast chicken, artichokes, and pizza dough in the freezer. I was practically forced to make it. Plus it sounded delicious.
copy-of-img_2230

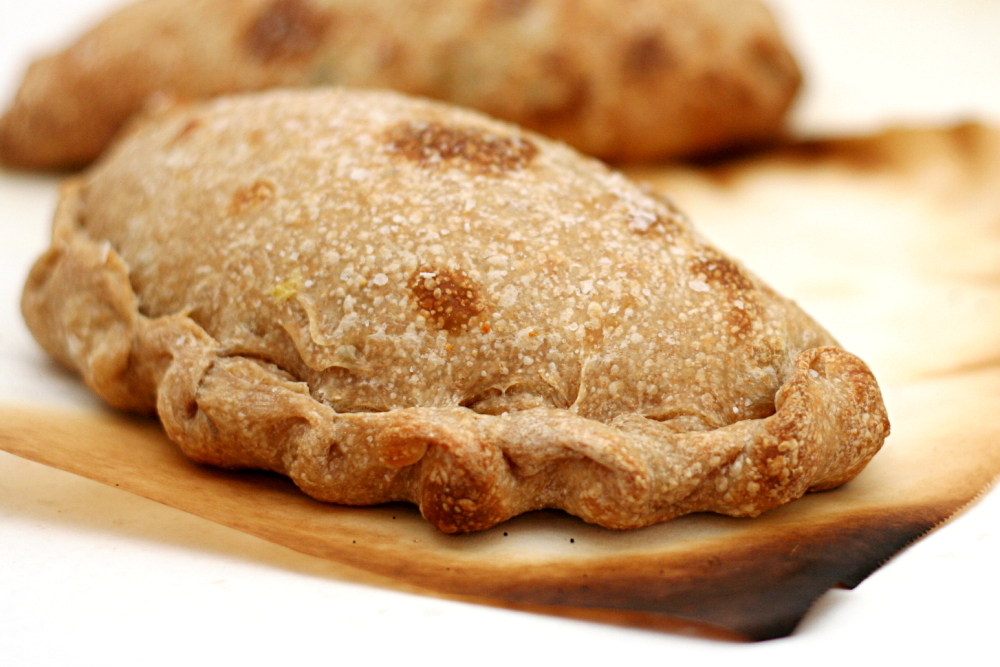
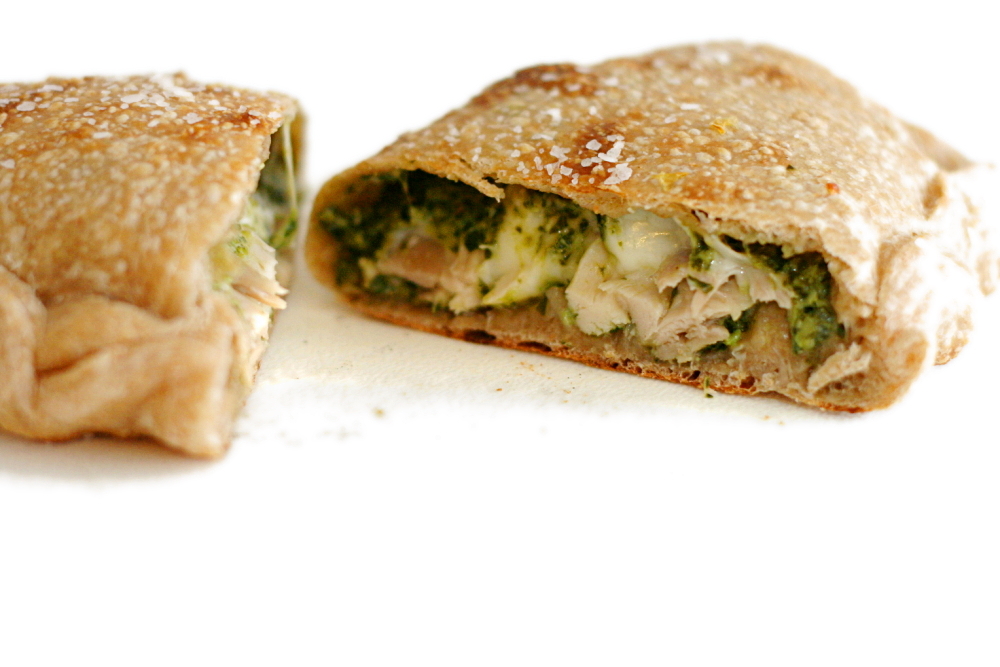
I made calzones instead of pizza mostly just because I hadn’t made them in a while, but I do think that the sizable chunks of shredded chicken that I wanted to use would be more appropriate in a calzone. Calzones, though, are undoubtedly more work than pizza. Instead of rolling out one round of dough for every 2-3 people, you’re rolling out one per person, and once the ingredients are added, the edges need to be crimped.

The extra work was worth it for me, because I really enjoyed these calzones. Pesto, chicken, and artichokes are a great combination, and it can only get better with cheese.
copy-of-img_2253

One year ago: (Almost) No-Knead Bread

Chicken Artichoke Pesto Calzones (ingredients adapted from Stefany’s pizza, which is adapted from allrecipes; calzone method adapted from Cooks Illustrated)

Serves 8

I used mozzarella because I had it, but I think fontina would be even better.

2½ pounds pizza dough (a full recipe of this one would be perfect)
1 cup pesto
1 cup frozen artichokes, defrosted and roughly chopped
2 cups shredded cooked chicken
2 cups (8 ounces) shredded mozzarella or fontina cheese
olive oil for brushing

1. Adjust the oven rack to the lowest position, set a pizza stone on the oven rack, and heat the oven to 500 °F (260°C) for at least 30 minutes. Turn the risen dough out onto an unfloured work surface. Divide the dough into eight equal pieces. Gently reshape each piece of dough into a ball. Cover with plastic wrap or a damp kitchen towel, and let the dough rest at least 15 minutes but no more than 30 minutes.

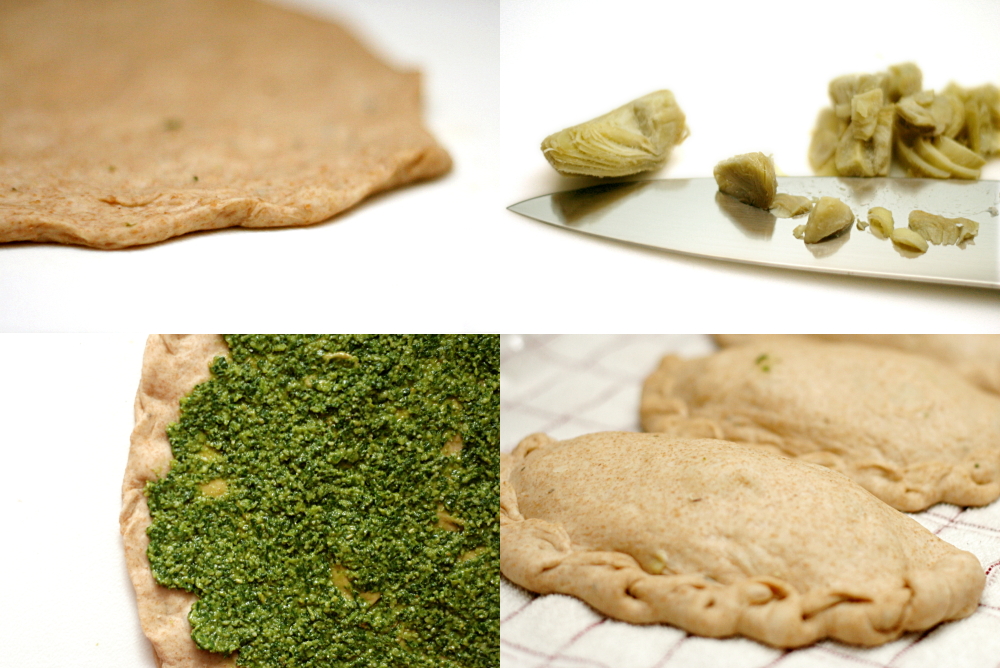
2. Working with one piece of dough at a time and keeping the other pieces covered, stretch and pull the dough into a 7- to 8-inch round. (I don’t like to roll pizza dough, but I suppose you could if you prefer.) Set it aside while you stretch out the remaining rounds of dough. You’ll want to form and fill just four at a time, and then work on the other four while the first set bakes. (Cooks Illustrated stacks the rounds with squares of parchment paper in between; I like to use a kitchen towel.)

3. Spread 2 tablespoons pesto onto each round of dough, leaving about a 1-inch border around the edge. Divide the toppings evenly between the eight dough rounds, forming a pile in the center of the bottom half of each dough round and leaving a 1-inch border uncovered.
copy-of-img_2236

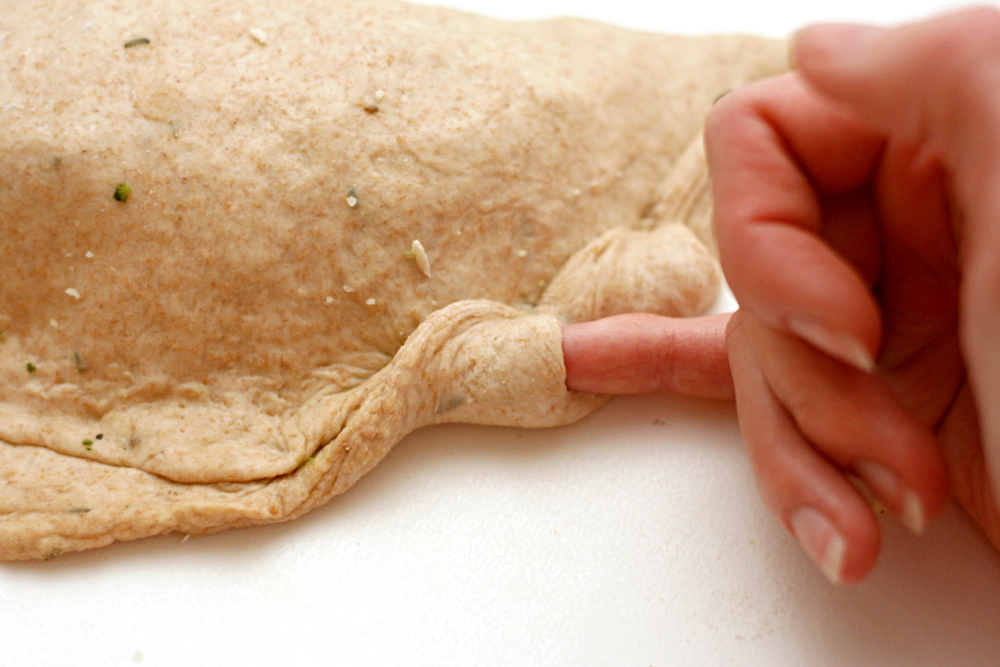
4. Fold the top half of the dough over the filling-covered bottom half, leaving ½-inch border uncovered. (The photo above shows how the dough doesn’t overlap all the way. Look at the left half of the photo, where the dough isn’t crimped yet.) With your fingertips, lightly press around the silhouette of the filling and out to the edge to lightly seal the dough shut.

5. Beginning at one end of the seam, place your index finger diagonally across the edge and gently pull the bottom layer of the dough over the tip of your index finger; press into the dough to seal. (Hopefully the same picture  helps illustrate this.) Repeat the process until the calzone is fully sealed.

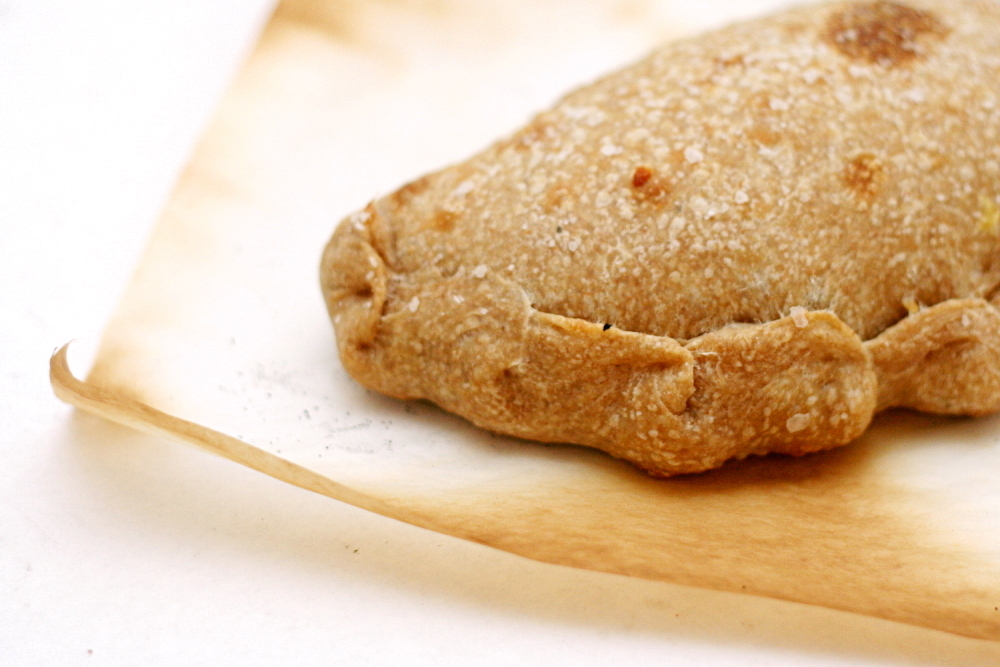
6. With a pastry brush, brush the tops and sides of the calzones with olive oil. Carefully transfer the calzones to parchment paper; slide the calzones on the parchment onto a pizza peel or rimless baking sheet, then slide the calzones with parchment onto the hot pizza stone, spacing them evenly apart. Bake until the calzones are golden brown, about 11 minutes; use a pizza peel or rimless baking sheet to remove the calzones with the parchment to a wire rack. Remove the calzones from the parchment, cool 5 minutes, and serve. While the first batch of calzones bakes, form the second batch and bake them after removing the first batch from the oven.
copy-of-img_2245

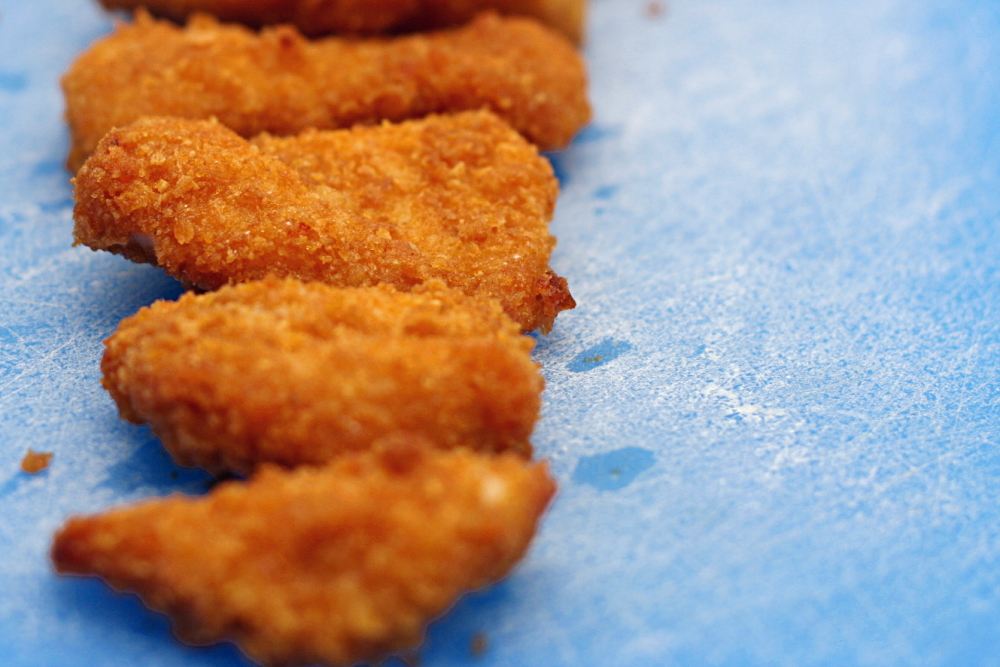
crispy baked chicken strips

copy-of-img_9435

My sister does once-a-month-cooking, so once each month (or a little longer), she and her husband spend a good portion of the weekend stocking their freezer with easily-reheatable food. I don’t think I’m cut out for this. For one thing, when she was planning her last cooking fest, I advised her to split up the cooking over several nights, and then it wouldn’t take up so much of her weekend. Which pretty much defeats the purpose, because if you’re going to cook every night, you might as well just be making dinner.

copy-of-img_7480-a

Also, I have a tendency to hoard food in my freezer. I get it in my head that I can’t possibly use the lasagna or potstickers or chili in my freezer, because then what if I have some sort of dinner emergency one night and need something super easy? Not that this has ever been an issue.  Still, whenever I make a meal that takes well to freezing, I make extra and put some in the freezer. These chicken strips are perfect for storing in the freezer.

copy-of-img_7482

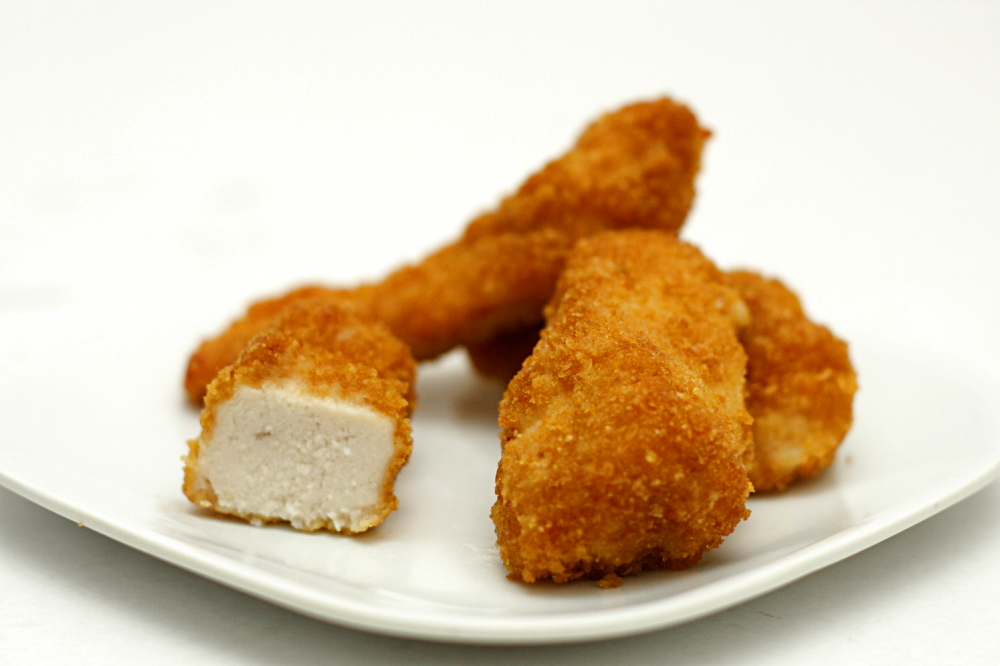
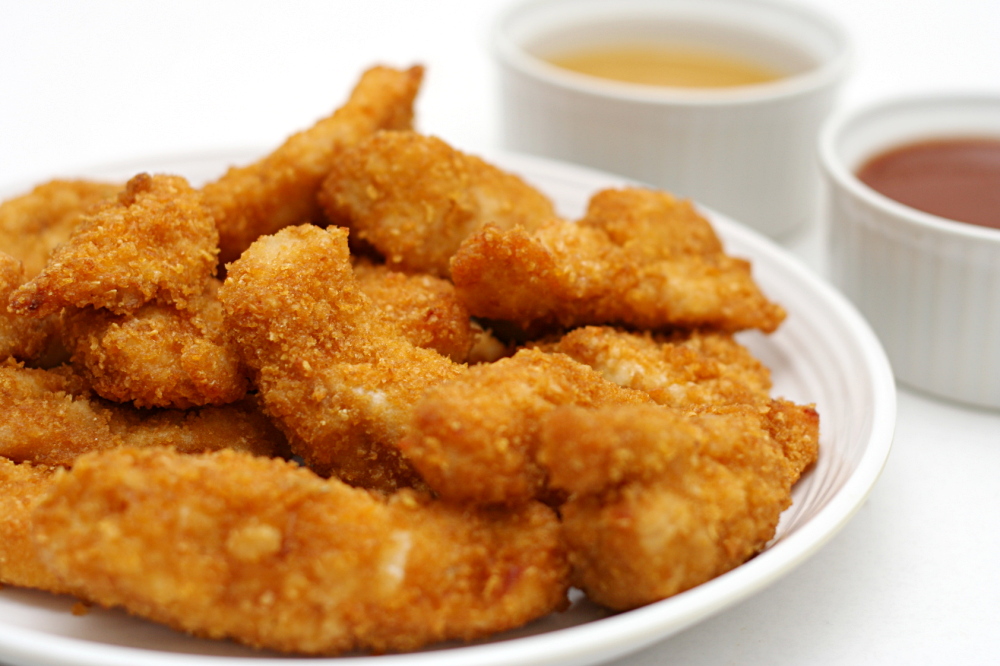
Also, they’re delicious. The coating, made from cornflakes, is crunchy and a little sweet, and the chicken is moist and seasoned from its brine. The strips, after being dipped in flour, butter, and cornflake crumbs, are baked, so there’s no frying mess to deal with and hopefully they’re a little less fattening (except for the whole dipped in butter thing, of course).

copy-of-img_9423

They’re so good, in fact, that even the extras that were stored in the freezer didn’t last too long. They were right in front, so every time I opened the freezer, I was reminded of how good these are. I couldn’t resist them long.

copy-of-img_9434

One year ago: Fish Tacos – we’ve had this for dinner twice in the last two weeks

Crispy Baked Chicken Strips

Serves 4

To freeze these, spread them on a baking sheet (without the rack) after coating and before baking. Place the pan in the freezer and chill for about half an hour, until mostly firm. Transfer the strips to freezer bags. When ready to cook, defrost them and continue with step 4 of the recipe.

¼ cup table salt
4 boneless skinless chicken breasts, cut into 1-inch strips
¼ cup flour
6 tablespoons butter, melted
2 cups finely crushed corn flakes cereal

1. Dissolve the salt in 1 quart cold water. Add the chicken, cover, and refrigerate for 30 minutes. Remove the cutlets from the brine and pat dry.

2. Adjust an oven rack to the middle position and heat the oven to 400F. Place an oven-safe baking rack in a baking sheet.

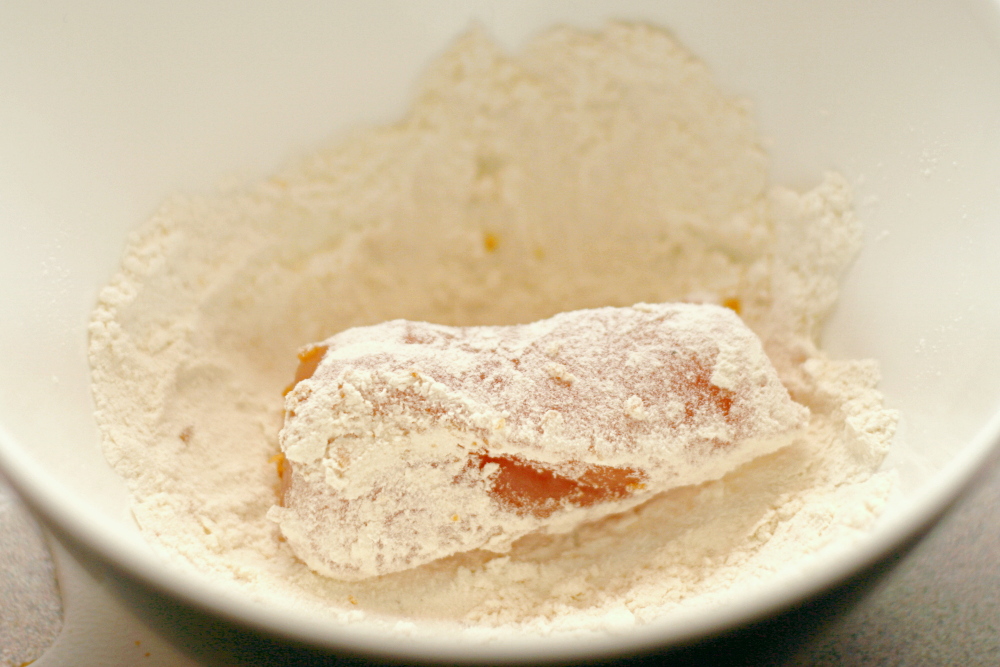
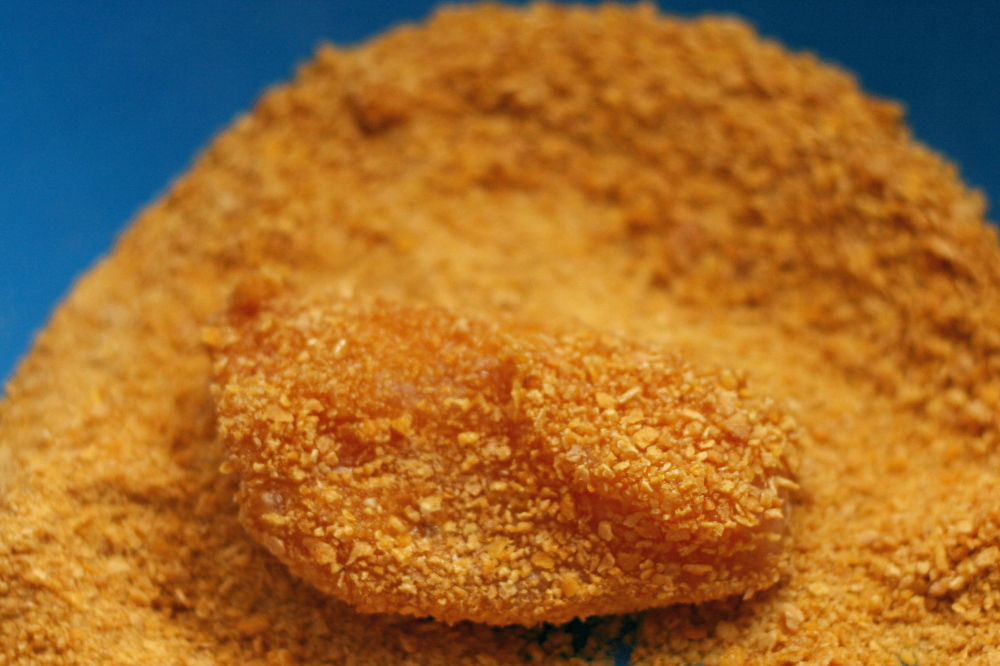
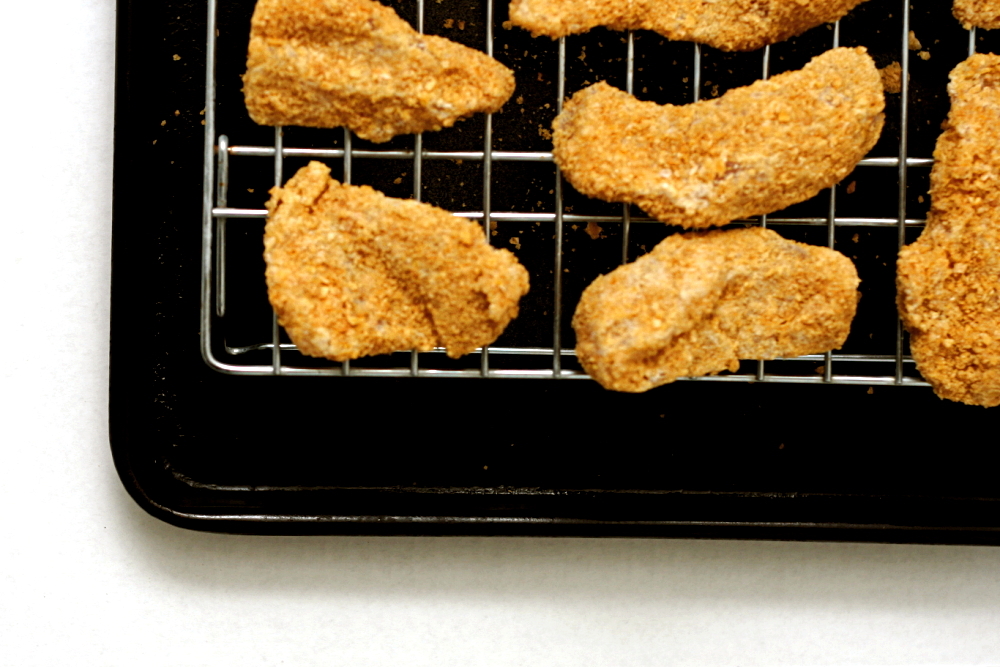
3. Place the flour and butter in separate small bowls. Add the crushed cereal to a medium-sized bowl. Dip the chicken pieces in the flour, then the butter, then the cereal. Place the coated chicken strips on the baking rack in the baking sheet.

4. Bake 15-20 minutes, until chicken is no longer pink. Serve.

copy-of-img_9428

chicken with forty cloves of garlic

This chicken is the main dish of my favorite dinner party menu. But I’m not going to lie – there are good and bad aspects to making this dish for company. The advantage is that I’m pretty sure this is the best chicken I’ve ever eaten (although this comes close). It’s infused with the flavors of garlic and wine, it’s juicy, the skin is crispy, and it’s served up with a handful of roasted garlic cloves that are perfect for smearing on slices of baguette.

On the other hand, it’s fairly work-intensive. A lot of that work can be finished a few hours before dinner, but you can’t avoid some last minute cooking here. Years ago, I thought that if I had to do any cooking once my guests arrived, it meant I was being a bad host. These days, I don’t worry so much. My friends like to help, and they’re also perfectly happy to chat and drink their wine while I finish up the sauce for the chicken. I like to have a bit of a break between courses, so I’ll generally serve the salad, then finish the chicken.

But again, much of this dish can be prepared in advance. The chicken can be brined early in the day, then rinsed, dried, and refrigerated until needed. The recipe calls for a whole chicken to be cut in pieces, but I’ve used pre-cut pieces with no problem. The garlic and shallots can be roasted in advance and set aside. Of course all of the ingredients can be measured and set right where you need them. The most important thing is to relax – you fed your guests salad so they aren’t starving, they hopefully have good wine to drink, and this chicken is absolutely worth the wait.

I’m looking over the recipe right now, and I’m wondering if you could actually make everything ahead of time and just keep it in a slightly warm oven? (You’ll have to take it out to bake the goat cheese rounds if you’re making those, but that’s easy enough.) I think it would work. I’m going to try it tonight, and then I’ll update with the results.  (Update: I tried it and it was a huge failure.  Not saying it can’t be done correctly somehow, but what I did certainly didn’t work.)

Chicken with 40 Cloves of Garlic (from Cooks Illustrated)

Serves 3 to 4

CI note: Try not to purchase heads of garlic that contain enormous cloves; if unavoidable, increase the foil-covered baking time to 40 to 45 minutes so that the largest cloves soften fully. A large Dutch oven can be used in place of a skillet, if you prefer. Broiling the chicken for a few minutes at the end of cooking crisps the skin, but this step is optional. Serve the dish with slices of crusty baguette for dipping into the sauce and onto which the roasted garlic cloves can be spread.

Table salt
1 whole chicken (3½ to 4 pounds), cut into 8 pieces (4 breast pieces, 2 thighs, 2 drumsticks) and trimmed of excess fat.
Ground black pepper
3 large heads garlic (about 8 ounces), outer papery skins removed, cloves separated and unpeeled
2 medium shallots, peeled and quartered pole to pole
1 tablespoon olive oil
2 sprigs fresh thyme
1 sprig fresh rosemary
1 bay leaf
¾ cup dry vermouth or dry white wine
¾ cup low-sodium chicken broth
2 tablespoons unsalted butter

1. Adjust oven rack to middle position and heat oven to 400 degrees. Dissolve ¼-cup salt in 2 quarts cold tap water in large container or bowl; submerge chicken pieces in brine and refrigerate until fully seasoned, about 30 minutes. Rinse chicken pieces under running water and thoroughly pat dry with paper towels. Season both sides of chicken pieces with pepper.

2. Meanwhile, toss garlic and shallots with 2 teaspoons olive oil and salt and pepper to taste in 9-inch pie plate; cover tightly with foil and roast until softened and beginning to brown, about 30 minutes, shaking pan once to toss contents after 15 minutes (foil can be left on during tossing). Uncover, stir, and continue to roast, uncovered, until browned and fully tender, 10 minutes longer, stirring once or twice. Remove from oven and increase oven temperature to 450 degrees.

3. Using kitchen twine, tie together thyme, rosemary, and bay; set aside. Heat remaining 1-teaspoon oil in 12-inch heavy-bottomed ovenproof skillet over medium-high heat until beginning to smoke; swirl to coat pan with oil. Brown chicken pieces skin-side down until deep golden, about 5 minutes; using tongs, turn chicken pieces and brown until golden on second side, about 4 minutes longer. Transfer chicken to large plate and discard fat; off heat, add vermouth, chicken broth, and herbs, scraping bottom of skillet with wooden spoon to loosen browned bits. Set skillet over medium heat, add garlic/shallot mixture to pan, then return chicken, skin-side up, to pan, nestling pieces on top of and between garlic cloves.

4. Place skillet in oven and roast until instant-read thermometer inserted into thickest part of breast registers about 160 degrees, 10 to 12 minutes. If desired, increase heat to broil and broil to crisp skin, 3 to 5 minutes. Using potholders or oven mitts, remove skillet from oven and transfer chicken to serving dish. Remove 10 to 12 garlic cloves to mesh sieve and reserve; using slotted spoon, scatter remaining garlic cloves and shallots around chicken and discard herbs. With rubber spatula push reserved garlic cloves through sieve and into bowl; discard skins. Add garlic paste to skillet. Bring liquid to simmer over medium-high heat, whisking occasionally to incorporate garlic; adjust seasoning with salt and pepper to taste. Whisk in butter; pour sauce into sauceboat and serve.

Other recipes part of this recommended dinner party menu:
Salad with Herbed Baked Goat Cheese
Sauteed Shredded Zucchini
Pain a l’Ancienne (baguettes)

Just about any dessert works well with this meal.
Many wines work well with this meal, but I especially like full-flavored whites such as Chardonnay, and medium-bodied reds such as Pinot Noir.

green chile chicken enchiladas

16.jpg

I’m from New Mexico, but I’m not one of those New Mexicans who like green chile in everything. I don’t want it in my eggs, and not really on my pizza, and I’m just coming around to the idea of it in burgers. I do love green chile in traditional New Mexican food though, and chicken enchiladas are my favorite dish.

Not that my recipe is similar to what you’d get in a New Mexican restaurant in Albuquerque. There, chicken enchiladas have nothing but shredded chicken in them, with green chile sauce on top and melted cheddar garnishing. I prefer all of those flavors mixed together right inside the tortilla.

This recipe began with a recipe for Sour Cream Chicken Enchiladas in Pillsbury’s Complete Cookbook. I took that base and combined it with some techniques from my favorite chicken pot pie recipe (coming soon), which is all about maximizing the flavor of the each ingredient, especially the chicken.

After seasoning the bone-in, skin-on chicken breast, I sear it on the stove and then roast it in the oven. When it’s done roasting, I deglaze the pan with some chicken broth to get any remnant tasty chicken-ness. Then I shred the chicken.

26.jpg

The filling is an embellished béchamel. I sauté onions and garlic in the butter before adding the flour, then add milk (and the broth used to deglaze the pan with the chicken), green chile and sour cream. Some of this mixture is set aside to become the sauce, and the chicken and some cheese is added to the remaining filling. The sauce is loosened with some additional milk and sour cream.

35.jpg

The first time I cooked with corn tortillas was a disaster, because I didn’t know that they need to be heated before they’ll roll without cracking. Now I wet the tortillas a bit, then heat them in the oven for a few minutes before attempting to fill and roll them. Once they’re all in the pan, I pour the sauce over them, sprinkle some more cheese on top, and bake until everything is heated through.

44.jpg

These are the best enchiladas I’ve ever had, putting traditional New Mexican recipes to shame.

Green Chile Chicken Enchiladas

Note: To wet the tortillas before heating and rolling them, I usually hold them under running water for a second. Alternatively, you could brush water on them using a pastry brush.

1 bone-in, skin-on chicken breast (12-16 ounces)
salt and pepper
1 tsp vegetable oil
2 tablespoons water
3 tablespoons butter
½ large onion, chopped fine
3 cloves garlic, minced
3 tablespoons flour
1 cup milk plus ¼ cup
4 ounces chopped green chiles, undrained
½ cup sour cream plus 2 tablespoons
1 cup (4 ounces) cheddar, shredded, plus ¾ cup (3 ounces)

1. For chicken: Adjust oven racks to the lower-middle and upper-middle positions; heat oven to 450 degrees. Heat oil in heavy-bottomed 9-inch ovenproof skillet over medium-high heat until oil just begins to smoke; swirl skillet to coat evenly with oil. Brown chicken breast skin side down until deep golden, 3 to 4 minutes; turn chicken breast and brown until golden on second side, 3 to 4 minutes longer. Place in oven on lower-middle rack. Roast until thickest part of breast registers about 160 degrees on instant-read thermometer, 18 to 25 minutes. Using potholder or oven mitt, remove skillet from oven. Transfer chicken to platter and set aside until cool enough to handle. Pour water into hot skillet and scrape with a heat-proof spatula or wooden spoon to loosen browned bits. Pour liquid into small bowl. Reduce oven temperature to 375 degrees.

2. For filling: Melt butter until foaming in medium saucepan over medium heat; add onions and garlic and cook, stirring frequently, until translucent, about 4 minutes. Add flour and cook, stirring constantly, for about 1½ minutes. Do not brown. Gradually whisk in milk and reserved water from deglazing. Bring mixture to boil over medium-high heat. Stir in green chiles, 1/8 teaspoon salt, and a pinch of pepper. Remove from heat, and stir in ½ cup sour cream.

3. For sauce: Set aside ¼ cup of filling mixture. Add an additional ¼ cup milk and 2 tablespoons sour cream and stir until blended.

4. Remove and discard chicken skin. Using fingers or fork, pull chicken off bones into 2-inch shreds and 1-inch chunks. Stir shredded chicken and 1 cup shredded cheddar into filling mixture. Spread ¼ of sauce in bottom of 9×13-inch pan.

5. Lightly wet both sides of four tortillas; place on baking sheet in oven for 3-4 minutes, until soft. Spread approximately ¼ cup of filling down center of each tortilla. Fold in sides and place enchilada, seam side down, in prepared pan. Repeat with remaining tortillas until all the filling has been used, wetting and warming tortillas as necessary.

6. Pour remaining sauce over enchiladas and top with remaining ¾ cup cheese. Bake on upper-middle rack until the sauce is bubbling and the cheese is melted, 20-25 minutes. Let rest 5-10 minutes and serve.

four soups

1-copy.jpg

I have backlog of soups to be blogged, so I’m going to throw them all into one soupfest entry.

First up is lentil soup, which I was excited about because I found the fancy French lentils, but it seems like I’m cursed to never quite have all the right ingredients for this soup. The first time I made it, I was entrenched in step 3, after the vegetables are softened and the lentils are darkened, adding the wine, and running out of wine. Eh. I played around with some other acidic ingredients, and ended up with a delicious but teensy bit vinegary soup. This time it was chicken broth that I ran out of. Chicken broth! I never run out of chicken broth! I carefully monitor my Better Than Bouillon supply because I loooove Better Than Bouillon. Bummer. I substituted some vegetable (not better than) bouillon. Still a damn good soup. And healthy! The only non-healthy item in the whole thing is a few slices of bacon. That’s nothing.

4-copy.jpg

Next up is white chicken chili. This is the second time I’ve made this recipe, and I seem to remember liking it more the first time. It was far from bad this time – look at all that flavory goodness, how could it be bad?

2-copy.jpg

I just didn’t feel excited about it. Maybe it would have been as simple as adding salt. Another possibility is that adding 50% more beans than the recipe called for made the soup a little bland. I will make it again, but it’s on trial.

5-copy.jpg

Poor cream of mushroom soup. It’s been relegated to nothing more than an ingredient in bad casseroles, so when I saw a recipe for the real deal, I did a double take. People actually eat mushroom soup? Unheard of! Dave and I are both big mushroom fans, so I was excited about this soup. Unfortunately, it just didn’t deliver. It wasn’t bad, it was just so dominated by pureed mushrooms. It was a little intense, even for mushroom lovers like us. Maybe because I used all cremini mushrooms instead of the button mushrooms that the recipe calls for? Whatever, next time I’ll be trying this highly recommended recipe.

6-copy.jpg

And finally, we have my favorite of these four soups. I served this hot and sour soup with the potstickers, which we’re a little crazy about, so this soup had a tough job standing up to that. But it holds it’s own, oh yes. I loved the moo shu I made a few weeks ago, and this has most of the same ingredients, but in soup form. I also really like when tofu is used in recipes where it’s actually the original ingredient, instead of covering for some maligned but more flavorful meat. Mmm, and black vinegar. This is good stuff. And I’m all about the texture that the cornstarch gives the soup. It doesn’t thicken it to a paste, it just provides a little body. The soup has so many strong and contrasting flavors, I just love it. And, it’s healthy! In fact, it’s so light, that I don’t know if I can recommend serving it as a meal on its own. I made the full recipe, we ate it with potstickers for two meals, and then we snacked on it throughout the week. I wasn’t complaining about having hot and sour soup around all week!

So there you have it – a January’s worth of soups. Yum!

Hearty Lentil Soup (from Cooks Illustrated)

Lentils du Puy, sometimes called French green lentils, are our first choice for this recipe, but brown, black, or regular green lentils are fine, too. Note that cooking times will vary depending on the type of lentils used. Lentils lose flavor with age, and because most packaged lentils do not have expiration dates, try to buy them from a store that specializes in natural foods and grains. Before use, rinse and then carefully sort through the lentils to remove small stones and pebbles. The soup can be made in advance. After adding the vinegar in step 2, cool the soup to room temperature and refrigerate it in an airtight container for up to 2 days. To serve, heat it over medium-low until hot, then stir in the parsley.

Makes about 2 quarts, serving 4 to 6

3 slices bacon (about 3 ounces), cut into ¼-inch pieces
1 large onion, chopped fine (about 1½ cups)
2 medium carrots, peeled and chopped medium (about 1 cup)
3 medium cloves garlic, minced or pressed through garlic press (about 1 tablespoon)
1 can (14½ ounces) diced tomatoes, drained
1 bay leaf
1 teaspoon minced fresh thyme leaves
1 cup lentils (7 ounces), rinsed and picked over
1 teaspoon table salt
ground black pepper
½ cup dry white wine
4½ cups low-sodium chicken broth
1½ cups water
1½ teaspoons balsamic vinegar
3 tablespoons minced fresh parsley leaves

1. Fry bacon in large stockpot or Dutch oven over medium-high heat, stirring occasionally, until fat is rendered and bacon is crisp, 3 to 4 minutes. Add onion and carrots; cook, stirring occasionally, until vegetables begin to soften, about 2 minutes. Add garlic and cook until fragrant, about 30 seconds. Stir in tomatoes, bay leaf, and thyme; cook until fragrant, about 30 seconds. Stir in lentils, salt, and pepper to taste; cover, reduce heat to medium-low, and cook until vegetables are softened and lentils have darkened, 8 to 10 minutes. Uncover, increase heat to high, add wine, and bring to simmer. Add chicken broth and water; bring to boil, cover partially, and reduce heat to low. Simmer until lentils are tender but still hold their shape, 30 to 35 minutes; discard bay leaf.

2. Puree 3 cups soup in blender until smooth, then return to pot; stir in vinegar and heat soup over medium-low until hot, about 5 minutes. Stir in 2 tablespoons parsley and serve, garnishing each bowl with some of remaining parsley.

White Chicken Chili (from Cooks Illustrated)

Adjust the heat in this dish by adding the minced ribs and seeds from the jalapeño as directed in step 6. If Anaheim chiles cannot be found, add an additional poblano and jalapeño to the chili. This dish can also be successfully made by substituting chicken thighs for the chicken breasts. If using thighs, increase the cooking time in step 4 to about 40 minutes. Serve chili with sour cream, tortilla chips, and lime wedges.

Serves 6 to 8

3 pounds bone-in, skin-on chicken breast halves, trimmed of excess fat and skin
Table salt and ground black pepper
1 tablespoon vegetable oil
3 medium jalapeño chiles
3 poblano chiles (medium), stemmed, seeded, and cut into large pieces
3 Anaheim chile peppers (medium), stemmed, seeded, and cut into large pieces
2 medium onions, cut into large pieces (2 cups)
6 medium cloves garlic, minced or pressed through garlic press (about 2 tablespoons)
1 tablespoon ground cumin
1½ teaspoons ground coriander
2 (14.5-ounce) cans cannellini beans, drained and rinsed
3 cups low-sodium chicken broth
3 tablespoons fresh lime juice (from 2 to 3 limes)
¼ cup minced fresh cilantro leaves
4 scallions, white and light green parts sliced thin
1. Season chicken liberally with salt and pepper. Heat oil in large Dutch oven over medium-high heat until just smoking. Add chicken, skin side down, and cook without moving until skin is golden brown, about 4 minutes. Using tongs, turn chicken and lightly brown on other side, about 2 minutes. Transfer chicken to plate; remove and discard skin.

2. While chicken is browning, remove and discard ribs and seeds from 2 jalapeños; mince flesh. In food processor, process half of poblano chiles, Anaheim chiles, and onions until consistency of chunky salsa, ten to twelve 1-second pulses, scraping down sides of workbowl halfway through. Transfer mixture to medium bowl. Repeat with remaining poblano chiles, Anaheim chiles, and onions; combine with first batch (do not wash food processor blade or workbowl).

3. Pour off all but 1 tablespoon fat from Dutch oven (adding additional vegetable oil if necessary) and reduce heat to medium. Add minced jalapeños, chile-onion mixture, garlic, cumin, coriander, and ¼ teaspoon salt. Cover and cook, stirring occasionally, until vegetables soften, about 10 minutes. Remove pot from heat.

4. Transfer 1 cup cooked vegetable mixture to now-empty food processor workbowl. Add 1 cup beans and 1 cup broth and process until smooth, about 20 seconds. Add vegetable-bean mixture, remaining 2 cups broth, and chicken breasts to Dutch oven and bring to boil over medium-high heat. Reduce heat to medium-low and simmer, covered, stirring occasionally, until chicken registers 160 degrees (175 degrees if using thighs) on instant-read thermometer, 15 to 20 minutes (40 minutes if using thighs).

5. Using tongs, transfer chicken to large plate. Stir in remaining beans and continue to simmer, uncovered, until beans are heated through and chili has thickened slightly, about 10 minutes.

6. Mince remaining jalapeño, reserving and mincing ribs and seeds (see note above), and set aside. When cool enough to handle, shred chicken into bite-sized pieces, discarding bones. Stir shredded chicken, lime juice, cilantro, scallions, and remaining minced jalapeño (with seeds if desired) into chili and return to simmer. Adjust seasonings with salt and pepper and serve.

Per Serving:
Cal 370; Fat 6 g; Sat fat 1 g; Chol 115 mg; Carb 25 g; Protein 52 g; Fiber 7 g; Sodium 710 mg

Creamy Mushroom Soup (from Cooks Illustrated)

To make sure that the soup has a fine, velvety texture, puree it hot off the stove, but do not fill the blender jar more than halfway, as the hot liquid may cause the lid to pop off the jar.

Makes 8 cups, serving 6 to 8

6 tablespoons unsalted butter
6 large shallots, minced (about 3/4 cup)
2 small cloves garlic, minced (about 1 1/2 teaspoons)
½ teaspoon ground nutmeg, freshly grated
2 pounds white button mushrooms, wiped clean and sliced 1/4 inch thick
3½ cups chicken stock or canned low-sodium chicken broth
4 cups hot water
½ ounce dried porcini mushrooms, rinsed well
1/3 cup dry sherry or Madeira
1 cup heavy cream
2 teaspoons lemon juice from 1 lemon
Table salt and ground black pepper

Sauteed Wild Mushroom Garnish (optional)
2 tablespoons unsalted butter
8 ounces shiitake mushrooms or chanterelle, oyster, or cremini mushrooms, stems
trimmed and discarded, mushrooms wiped clean and sliced thin
Table salt and ground black pepper

1. Melt butter in large, heavy-bottomed Dutch oven over medium-low heat; when foaming subsides, add shallots and saute, stirring frequently, until softened, about 4 minutes. Stir in garlic and nutmeg; cook until fragrant, about 1 minute longer. Increase heat to medium; add sliced mushrooms and stir to coat with butter. Cook, stirring occasionally, until mushrooms release liquid, about 7 minutes. Reduce heat to medium-low, cover pot, and cook, stirring occasionally, until softened and mushrooms have released all liquid, about 20 minutes. Add chicken stock, water, and porcini mushrooms; cover and bring to simmer, then reduce heat to low and simmer until mushrooms are fully tender, about 20 minutes longer.

2. Pour soup into a large bowl. Rinse and dry Dutch oven. Puree soup in batches in blender until smooth, filling blender jar only halfway for each batch. Return soup to Dutch oven; stir in Madeira and cream and bring to simmer over low heat. Add lemon juice, season to taste with salt and pepper, and serve with sauteed mushroom garnish, if desired. (Can be cooled to room temperature and refrigerated up to 4 days.) If making ahead, add cream at serving time.

3. For the Sauteed Wild Mushroom Garnish (optional): Heat butter in medium skillet over low heat; when foam subsides, add mushrooms and sprinkle with salt and pepper. Cover and cook, stirring occasionally, until mushrooms release their liquid, about 10 minutes for shiitakes and chanterelles, about 5 minutes for oysters, and about 9 minutes for cremini. Uncover and continue to cook, stirring occasionally, until liquid released by mushrooms has evaporated and mushrooms are browned, about 2 minutes for shiitakes, about 3 minutes for chanterelles, and about 2 minutes for oysters and cremini. Sprinkle a portion of mushrooms over individual bowls of soup and serve.

Hot and Sour Soup (from Cooks Illustrated)

To make slicing the pork chop easier, freeze it for 15 minutes. We prefer the distinctive flavor of Chinese black vinegar; look for it in Asian supermarkets. If you can’t find it, a combination of red wine vinegar and balsamic vinegar approximates its flavor. This soup is very spicy. For a less spicy soup, omit the chili oil altogether or add only 1 teaspoon.

Serves 6 to 8 as an appetizer

7 ounces extra-firm tofu, drained
4 tablespoons soy sauce
1 teaspoon toasted sesame oil
3 tablespoons cornstarch, plus an additional 1 1/2 teaspoons
1 boneless, center-cut, pork loin chop (1/2 inch thick, about 6 ounces), trimmed of fat and cut into 1 inch by 1/8-inch matchsticks
3 tablespoons cold water, plus 1 additional teaspoon
1 large egg
6 cups low-sodium chicken broth
1 cup bamboo shoots (from one 5-ounce can), sliced lengthwise into 1/8-inch-thick strips
4 ounces fresh shiitake mushrooms, stems removed, caps sliced 1/4 inch thick (about 1 cup)
5 tablespoons black Chinese vinegar or 1 tablespoon red wine vinegar plus 1 tablespoon balsamic vinegar (see note above)
2 teaspoons chili oil (see note above)
1 teaspoon ground white pepper
3 medium scallions, sliced thin

1. Place tofu in pie plate and set heavy plate on top. Weight with 2 heavy cans; let stand at least 15 minutes (tofu should release about ½ cup liquid). Whisk 1 tablespoon soy sauce, sesame oil, and 1 teaspoon cornstarch in medium bowl; toss pork with marinade and set aside for at least 10 minutes (but no more than 30 minutes).

2. Combine 3 tablespoons cornstarch with 3 tablespoons water in small bowl and mix thoroughly; set aside, leaving spoon in bowl. Mix remaining ½ teaspoon cornstarch with remaining 1 teaspoon water in small bowl; add egg and beat with fork until combined. Set aside.

3. Bring broth to boil in large saucepan set over medium-high heat. Reduce heat to medium-low; add bamboo shoots and mushrooms and simmer until mushrooms are just tender, about 5 minutes. While broth simmers, dice tofu into ½-inch cubes. Add tofu and pork, including marinade, to soup, stirring to separate any pieces of pork that stick together. Continue to simmer until pork is no longer pink, about 2 minutes.

4. Stir cornstarch mixture to recombine. Add to soup and increase heat to medium-high; cook, stirring occasionally, until soup thickens and turns translucent, about 1 minute. Stir in vinegar, chili oil, pepper, and remaining 3 tablespoons soy sauce; turn off heat.

5. Without stirring soup, use soupspoon to slowly drizzle very thin streams of egg mixture into pot in circular motion. Let soup sit 1 minute, then return saucepan to medium-high heat. Bring soup to gentle boil, then immediately remove from heat. Gently stir soup once to evenly distribute egg; ladle into bowls and top with scallions.

Per Serving:
Cal 120; Fat 5 g; Sat fat 1 g; Chol 12 mg; Carb 12 g; Protein 8 g; Fiber 1 g; Sodium 1110 mg

second chances (chicken spiedies and philly cheesesteaks)

dscn1869.jpg

There are so many mistakes in life that can’t be undone. Sharp words to a friend, a poor job interview, even a stubbed toe.

But when mistakes are made in the kitchen, there’s always the opportunity to try it until we get it right.

And thus it was that I found myself making more sandwiches this week. And this time-I nailed it.

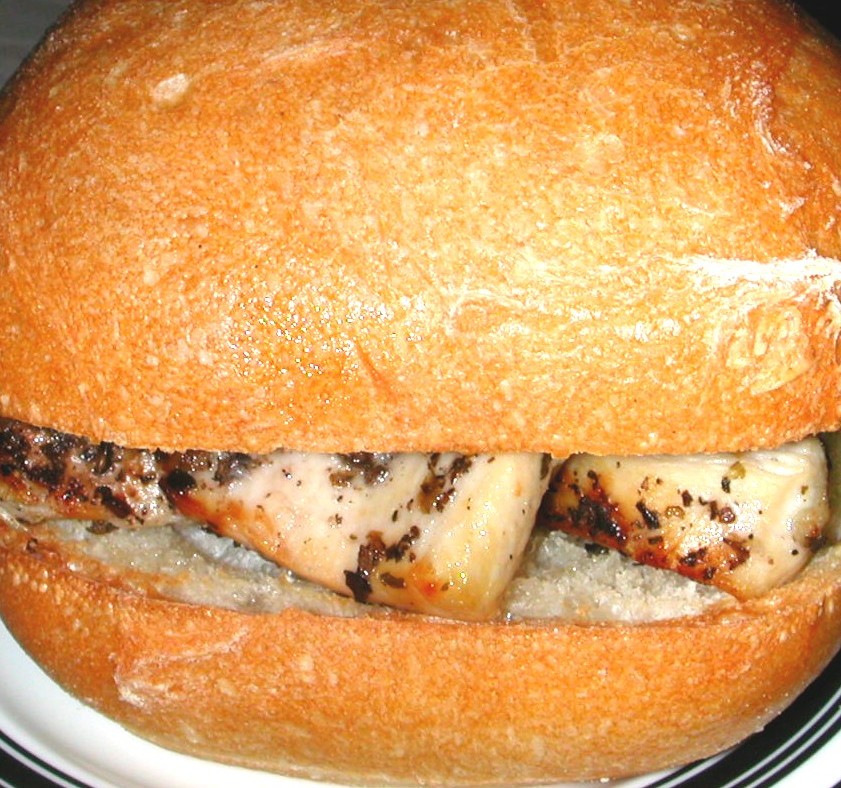
The spiedies were made just the same as the original recipe, except I didn’t broil them until they were dry as a bone! I also saved a bit of unused marinade to toss over the cooked chicken pieces. These sandwiches were all that I had hoped for-juicy and flavorful.

And, as Sara’s advice came a bit too late, in that I’d already purchased the steak for the next set of cheesesteaks, I had to do some more pounding. However, this time I cleverly cut the steak in half crosswise, so I wasn’t trying to flatten an inch and a half thick steak down to a quarter inch thickness. This was indeed far easier. I didn’t spend 10 years in college for nothing, folks! I spent less than five minutes flattening my steak this time, and maybe it’s just me, but it didn’t sound nearly so loud and abrasive.

dscn1897.jpg

I also layered on some more onions and cheese, and this was a sandwich worth eating twice within a week!

And-the cheesesteak bonus? The next day we found at that we’re moving to Philadelphia!

dscn1909.jpg

to clear our sinuses (crockpot rice and beans)

dscn1760.jpg

Well, we can’t eat sandwiches every night! We also had rice two nights in a row. Not a great week for variety.

I realized recently that I only have one crockpot meal that I make regularly. That needs to change! My sister is a crockpot fiend, so I need to ask her for some good ones.

This recipe came from my brother. The first time I had it was when I visited him in Oklahoma. We drove there from Indiana, and our car broke down in Missouri, so…we ate at like 10pm or something. Incidently, while we were waiting around for the car to be fixed in Missouri, we wandered into a bar, where we met up with an older couple who had just gotten married. Cute!

copy-of-img_9807Photo updated 12/02/08

Back to food. I’ve made a few changes to the recipe. It originally called for boneless, skinless chicken thighs, but I decided they weren’t really necessary. There’s plenty of protein from the beans and rice, right? Sometimes I do add bone-in, skinless chicken thighs and then shred the meat right before serving. There’s something about shredded chicken that I just like. Also, it’s supposed to be served over spanish rice, but white rice is easier and there’s plenty of flavor in the beans. Oh, and I changed the beans from pinto to kidney. My friend from Puerto Rico makes rice and beans with kidney beans, so maybe they’re more authentic? I don’t know, I bought them on accident once and liked them better.

And! I had to use actual canned green chiles! My New Mexican green chile supply ran out, and no one resupplied me this year!

Spicy Crockpot Beans
Serves 3

2 (15-ounce) cans kidney beans, drained and rinsed
2 (4-ounce) cans green chile, diced
2 chipotle chiles from adobo sauce, minced
1 (0.85 ounce) package chicken gravy mix (I use Simply Organic)
½ teaspoon sugar
2 tomatoes, chopped, or ½ (14.5 ounce) can diced tomatoes
2 cups cooked white rice

Add first five ingredients to crockpot and cook on low for 3-5 hours. Stir in tomatoes 30 minutes before serving. Serve over white rice. (If you use chicken pieces as well, add them skin side down on the bottom of the pot and cook for 6-8 hours.)

take your time (chicken spiedies)

dscn1756.jpg

Next up on sandwich week was spiedies.  Spiedies are one of the few things that Binghamton, NY, may be known for (the only other is probably carousels).  Sad to say, I lived in Binghamton for four years and probably only ate spiedies three or four times.  Now that it looks like we might be moving away from upstate New York, I decided it was a good time to make spiedies at home.

Spiedies are ridiculously simple.  They’re really just marinated and grilled meat on a roll.  I could have made the marinade from scratch, for it oddly felt more authentic to just buy Salamida’s State Fair Spiedie marinade.  I cut up 2 boneless, skinless chicken breasts into chunks, tossed them in the marinade, and left them alone until the next day.  Then I skewered the meat and broiled it.  Grilling wasn’t an option because I don’t have a grill.  Unfortunately, I sort of suck at broiling, and I ended up way overcooking the chicken.  The flavor was there, and it was good, but any sort of juiciness was sadly missing.  It took me about 20 minutes to make it through one sandwich.

On the plus side, I’ve got half a bottle of marinade left and two more chicken breasts in the freezer.  Looks like I’ll be doing a do-over soon.

dscn1736.jpg dscn1742.jpg