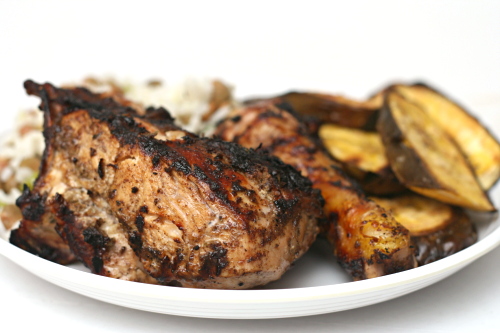
jamaican jerk chicken

Sometimes (most times) I get cranky after going to the grocery store here. It isn’t a bad little store, but it just doesn’t have the selection I had in Philadelphia. I’m spoiled. I miss good seafood and more cheese options than I know what to do with and organic produce and looseleaf tea.

One thing I do have available now, in my southern New Mexican town, is good tortillas, half an aisle dedicated to salsa, dependably perfect avocados, and a selection of fresh chiles. (Okay, so here’s another reason why I get cranky at the grocery store. They were out of Scotch Bonnets, and I had to go to Walmart, and I hate going to multiple stores, and I hate Walmart. Stop being out of stuff, grocery store.)

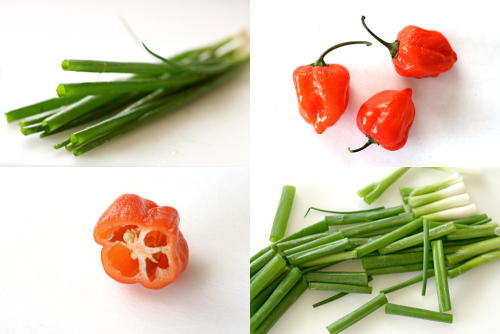
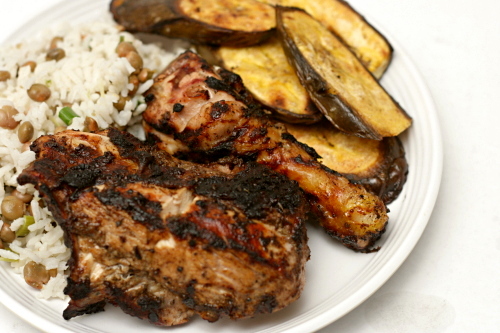
Not that jerk sauce has many chiles in it – when you’re talking about Scotch bonnets, you’ll only be needing a couple, even if they are tiny. They pack a powerful heat punch, and when combined with all sorts of other flavorful ingredients – rum, malt vinegar, onions, garlic thyme fall spices sugar pepper – they make one heck of a flavorful sauce.

The combination of ingredients was new for me, so I was excited. And I think that’s something I need to keep in mind when I get frustrated about how I don’t have the variety of food choices I used to – that even if I can’t find some ingredients and I can’t make some dishes as a result, there are still an infinite amount of great meals I can make by mixing up the food I can find in different ways. Jerk chicken is a perfect example of a dish that uses readily available ingredients to make something that is not only restaurant-quality good, but is interesting and fun as well.

One year ago: Mushroom Salad
Two years ago: Pigs in a Blanket

Printer Friendly Recipe
Jamaican Jerk Chicken (from Bon Apetit, but really epicurious)

8 servings

3 tablespoons dark rum
2 tablespoons water
½ cup malt vinegar
10 green onions, chopped
4 garlic cloves, peeled, chopped
2 tablespoons dried thyme
2 Scotch bonnet chiles or habanero chiles with seeds, chopped
2 tablespoons vegetable oil
4 teaspoons ground allspice
4 teaspoons ground ginger
4 teaspoons ground cinnamon
2 teaspoons ground nutmeg
2 teaspoons salt
2 teaspoons ground black pepper
2 teaspoons dark brown sugar
1 cup ketchup
3 tablespoons soy sauce
about 6 pounds bone-in, skin-on chicken parts
½ cup fresh lime juice

1. Boil rum and 2 tablespoons water in a small saucepan for 3 minutes.

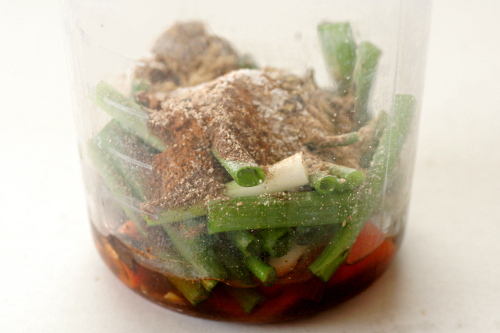
2. Transfer the rum mixture to a blender; add the vinegar, green onions, garlic, thyme, chiles, oil, spices, salt, pepper, and sugar; blend until almost smooth. Transfer 2 tablespoons of the jerk seasoning to a small bowl; mix in the ketchup and soy sauce to make the sauce. (Jerk seasoning and sauce can be made 1 day ahead; cover separately and refrigerate.)

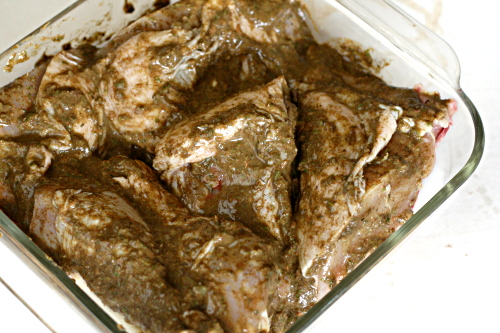
3. Arrange the chicken in a large roasting pan or baking dish. Pour the lime juice over the chicken; turn to coat. Spoon the jerk seasoning over the chicken and rub it into the chicken. Cover and refrigerate for at least 4 hours, turning occasionally. (Can be prepared 1 day ahead. Keep refrigerated.)

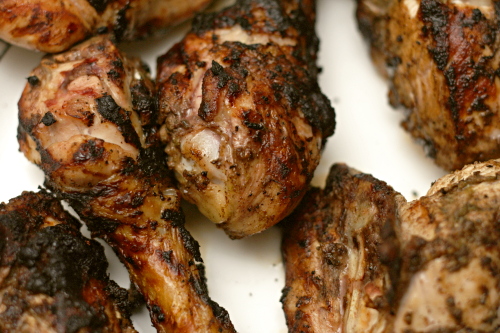
4. Prepare a two-level grill (more coals on one side than the other). Remove the chicken from the jerk seasoning marinade; sprinkle with salt and pepper. Place the chicken, skin side down, on the hot side of the grill; grill for about 2 minutes, until seared. Move the chicken to the cooler side of the grill and continue to cook, turning occasionally, for about 15 minutes, until the breasts measure 160 degrees on an instant read thermometer and the legs and thighs read 165 degrees. Serve with the jerk sauce.

I was excited to find plantains when I made this, so maybe I should stop complaining about my grocery store. I sliced and grilled them, unpeeled. They were fantastic dipped in the jerk sauce – kind of like dipping French fries in ketchup, only more…more everything.  More good.
quinoa tabbouleh

I have annoying eating habits at work. Carrots – crunchy. Bananas – smelly. Hard-boiled eggs – crunchy (during the peeling) and smelly. My officemate is very tolerant. And on our first day in the office together, she asked me, “So is that how you stay thin? By eating healthy all the time?” Hmm…

  1. Call me thin some more, if you will. I will use it as an excuse to skip my workout this evening.
  2. Define “all the time.” Because…no. Not so much.

She asked me what I normally make for dinner, and I was at a loss for an answer. I’m a food blogger; I repeat dinners maybe once every couple of months. The quickest way I could think to answer that question was to give her the link to my blog. My third day at work, and I already outed myself as Food Obsessed.

She asked me what I was making for dinner that night, and when I answered, she asked what quinoa was. I was reminded: I’m the weird one when it comes to food. And so are you, probably, if you’re reading a food blog. I wonder what percentage of people in my small isolated desert town know what quinoa is?

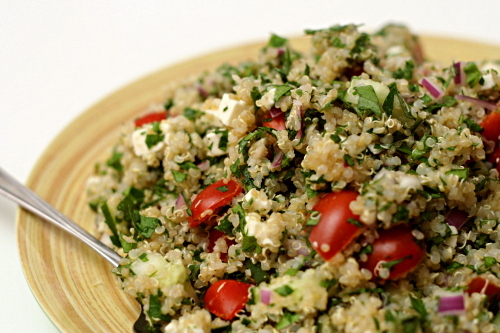
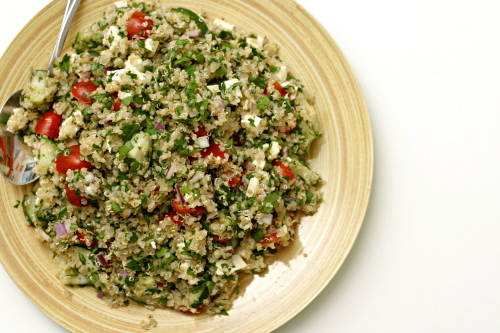
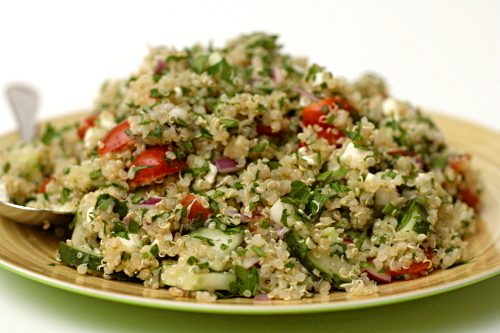
Which is sad, because, as you know if you are also one of the Food Obsessed, quinoa is what all of the other whole grains (I know, I know, not technically a grain) want to be – hearty and healthy, but fluffy and slightly sweet, the way most grains don’t taste until they’re refined. Mixing it with vegetables, herbs, and feta makes it even healthier, which is perfect because that way I get dessert.  No one can eat healthy all the time, right?

One year ago: Strawberry Lemon Sorbet
Two years ago: Ricotta Spinach Tofu Ravioli

Printer Friendly Recipe
Quinoa Tabbouleh (adapted from Bookcook via the kitchn)

Makes 3-4 main course servings

Some things: I didn’t quite follow this method to mellow the bite of the onions, and my method did not work. The leftovers were particularly intense. Soak the onion in water! You may want to add the garlic too, although I have no evidence that this method would work for garlic. It just seems like it could.

The original recipe includes mint, but I don’t usually like mint with savory food. It also called for olive oil, and I intended to add it but after tasting the salad, the oil didn’t seem necessary. And less oil in dinner means more cookies for dessert.

The standard directions for cooking quinoa seem to be 1 cup quinoa to 2 cups water, so I’ve left that as it was in the original recipe. But I’m suspicious: my pot had a lot of water left in it at the end of cooking that had to be drained off. Next time I’m trying 1½ cups water for 1 cup quinoa.

I know traditional tabbouleh is more parsley than grain, but it’s also more side dish than main, which wasn’t what I was going for.

1 cup dry quinoa
2 cups water
½ teaspoon salt
½ red onion, diced fine
2 cloves garlic, minced
1 cup cherry tomatoes, halved
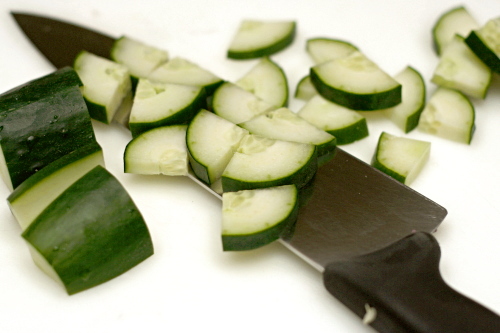
1 cucumber, quartered lengthwise and sliced ⅛-inch thick
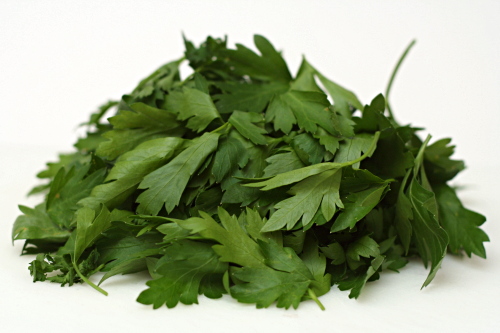
1 bunch parsley (about 2 cups), minced
8 ounces feta, crumbled
2 tablespoons fresh lemon juice

1. Rinse the quinoa well under cold water. Put it in a medium saucepan with 2 cups of water and ½ teaspoon salt. Bring the water to a boil over high heat, then reduce the heat to low and cook, covered, for 20 minutes. Transfer the cooked quinoa to a large bowl to cool slightly.

2. Meanwhile, in a small bowl, cover the diced onion and a pinch of salt with water. Let the onion soak while you prepare the other ingredients.

3. Drain the onions; add them to the bowl along with the garlic, tomatoes, cucumber, parsley, and feta; stir to combine. Add the lemon juice and toss to coat. Taste for seasoning (more salt? more lemon juice?) and serve.

grilled artichokes

When it comes to groceries, I’m not particularly thrifty. I don’t know if my old grocery store (the much-missed Wegman’s) even had sales, and if they did, it wasn’t on anything I was buying. I see more sales at my new grocery store; I don’t plan my shopping around them, but I can’t always resist them either.

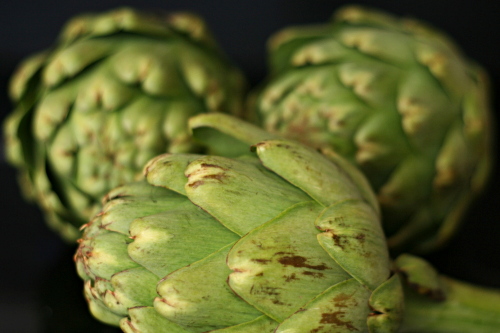
Fresh artichokes for 69 cents each! That is a deal that is not to be passed up, especially when I was keeping an eye out for some fancy sides to compliment my celebration lamb.

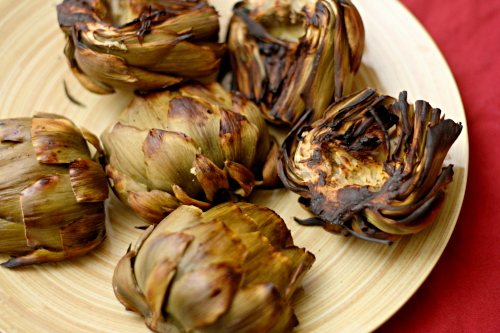
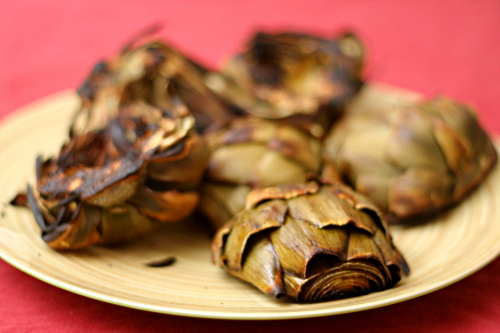
When Dave and I grill, we like to cook the whole meal on the grill, so I definitely wanted to grill the artichokes. Katie’s recipe uses the perfect approach, because the artichokes are steamed in foil packets first, and then unwrapped and seared over a hot flame. The artichokes end up both perfectly tender and decorated with beautiful grill marks.

Artichokes aren’t as time-consuming to prepare as I used to think, but they’re still pretty messy to eat. You remove individual leaves and scrape the meaty edible part off with your teeth, until you get to that delicious heart. Artichokes are good on their own, but they’re even better with a decadent dipping sauce; we used the sauce that was served with the lamb. It made a perfect compliment to perfect artichokes that accompanied a perfect meal.

Two years ago: Asparagus and Arugula Salad with Cannellini Beans

Grilled Artichokes (adapted from Good Things Catered)

Katie added extra lemon to the packets and served the grilled artichokes with cherry tomatoes. It makes for a beautiful presentation, but didn’t compliment the flavors I was serving these with. However, it serves as a great example of how easily this recipe can be adapted to the meal you’re serving.

Serves 4

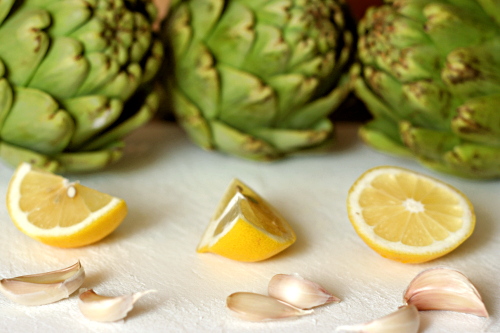
8 cloves garlic, smashed and peeled
4 globe artichokes
salt and pepper
1 lemon, quartered
about 2 tablespoons olive oil

1. Prepare a two-level fire, where one side of the grill is hotter than the other.

2. Tear off four 12-inch pieces of aluminum foil. Place two cloves of garlic in the center of each square of foil.

3. Working with one artichoke at a time, cut the stem off and the top 1½ inches of leaves. Cut the sharp tips off of the outside leaves. Halve the artichoke and carve out the fuzzy purple choke. Place the artichoke halves in one square of foil, season with salt and pepper, squeeze one lemon quarter over it, and drizzle with about 1½ teaspoons of oil. Enclose the artichoke in the foil. Repeat with the remaining three artichokes.

4. Place the foil packets on the cooler side of the grill and cook, rotating occasionally, for 25-30 minutes, until the center of the artichokes are tender. Remove the artichokes from the foil and place, cut side down, on the hot side of the grill. Cook for about 2 minutes, until seared.

5. Serve immediately, with a dipping sauce if desired.

stuffed butterflied leg of lamb

I got some big news last week. I finally got something I’ve wanted for a long time, and life is going to change drastically. I’m a little worried about when I’ll find the time to do the things I like to do – the baking, blogging, and exercising due to the baking – but I’m sure it will be worth it.

I’m not pregnant.

I do, however, have a job; a real one, with 40 hours of work per week and benefits and a retirement plan and everything. See, I’ve kept this on the down-low because I was embarrassed by it, but since I finished graduate school several years ago, I’ve been unemployed or partially employed. But those days are over now.

This was cause for celebration around here, which means that Dave and I have been drinking generous amounts of our favorite champagne. It also means we had an excuse for a fancy dinner. I got to decide whether that meal would be eaten in or out, and it wasn’t a hard decision for me – we don’t exactly live in area known for its restaurants, and spending Saturday night at home, drinking wine, watching the NBA playoffs, and grilling with Dave is pretty much my perfect evening.

What to make? Lamb, of course. I was deciding between two recipes, and Dave told me to pick the easier one. Yes, the easier option included trimming, butterflying, pounding, rolling, and tying the roast. And then I got to hand it off to Dave to cook…while I worked on the sauce. And the sides.

But in the end, what a great meal. Served with great wine, shared with a great husband, celebrating great news.

Two years ago: Hash Browns with Sauteed Vegetables and Poached Eggs

Printer Friendly Recipe
Stuffed Butterflied Leg of Lamb with Caramelized Lemon Jus
(adapted slightly from Bon Apetit via epicurious; suggested by Cara)

Serves 4-6

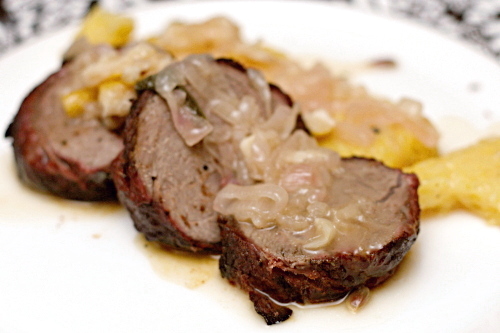
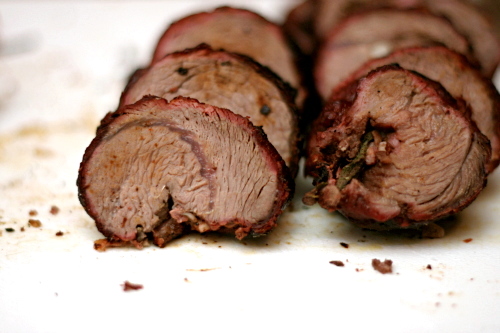
You can probably tell from the photos that my lamb isn’t cooked to rare. Oops. Next time.

4-to 4½-pound boneless leg of lamb, shank end removed
salt and pepper
4 large garlic cloves; 3 chopped, 1 sliced
1 teaspoon finely grated lemon zest
20 fresh sage leaves (about), divided
4 ounces thinly sliced pancetta (Italian bacon)
3 tablespoons fresh lemon juice
3 tablespoons extra-virgin olive oil

1. Trim the silver skin and as much fat as possible from the lamb. Butterfly the lamb by making one ¾-to 1-inch-deep full-length cut in each thick portion of the lamb (do not cut through to work surface). Cover the lamb with a sheet of plastic wrap. Using a rolling pin or meat pounder, pound to an even 1- to 1½-inch thickness (lamb will be about 8×19 inches).

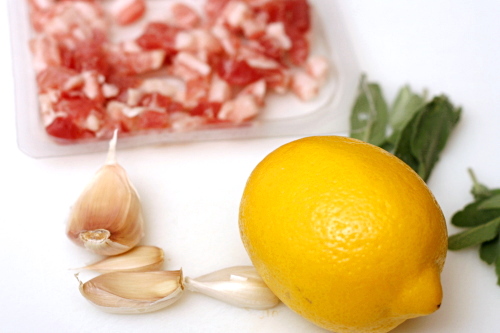
2. Remove the plastic wrap and season lamb evenly with salt and pepper, chopped garlic, and lemon zest. Top with 15 sage leaves, spaced evenly apart, then cover with the pancetta. Starting at a long side, fold the lamb in half. Tie the lamb tightly at 2-inch intervals into a long roll. Then, using a small knife, make slits in the lamb and insert a slice of garlic and a piece of sage leaf into each slit. Season the lamb with salt and pepper. (Lamb can be prepared 1 day ahead. Wrap tightly in plastic wrap and refrigerate.)

3. Whisk the lemon juice and oil in a small bowl; season with salt and pepper. Brush the lemon juice mixture all over the lamb and let stand at room temperature 1 hour.

4. Prepare a medium-hot grill. Place the prepared lamb on the grill and sear on all sides, 1 to 2 minutes per side. Continue to grill, brushing with the lemon juice mixture and rotating the lamb about every 5 minutes, until a thermometer inserted into the thickest part registers 130°F for rare.

5. Transfer the lamb to a cutting board, cover it loosely with foil, and let it rest for 10 minutes. Slice the lamb into ½-inch thick slices. Serve immediately with Caramelized Lemon Jus.

Caramelized Lemon Jus

1 large lemon, cut into ½-inch-thick slices
¼ cup extra-virgin olive oil
3 large shallots, thinly sliced (about 1 cup)
10 large fresh sage leaves
1 garlic clove, thinly sliced
3 tablespoons sugar
¾ cup dry white wine
¼ cup vodka
2 cups beef broth

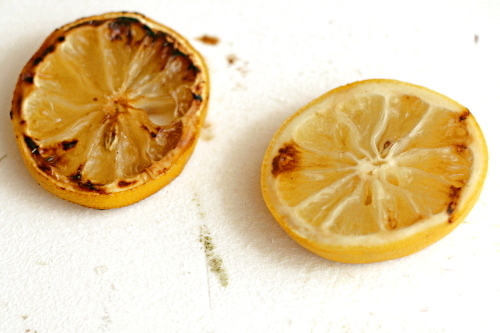
1. Prepare a medium-hot grill. Grill the lemon slices until charred, about 4 minutes per side. Transfer to plate; chop coarsely.

2. Heat the olive oil in a heavy medium saucepan over medium-high heat. Add the shallots and sauté until translucent, about 5 minutes. Add the sage leaves, garlic, and grilled lemon pieces with any juices, then the sugar. Cook until the shallots start to color, about 5 minutes. Add the wine and vodka. Using a long wooden skewer, ignite the liquors and let them burn off, about 4 minutes. Add the beef broth and bring to a boil. Reduce the heat to medium; simmer until jus is reduced to 3 cups, about 15 minutes. Season with salt and pepper. (Can be made 1 day ahead. Cover and chill. Rewarm before serving.)

swedish visiting cake

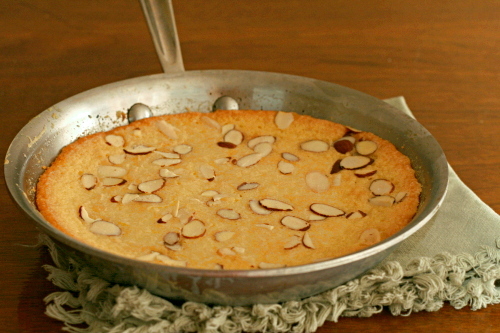
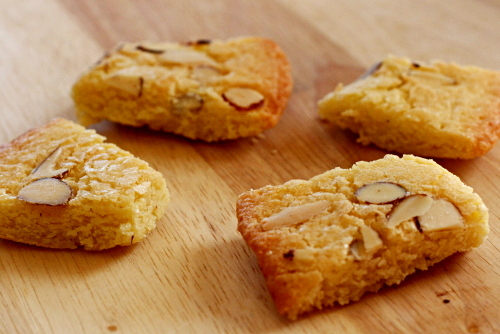
This cake fit so seamlessly into my weekend that I hardly know what to say about it. I mixed it up and baked it early Friday evening, and I grabbed a bite here and another there throughout the weekend until there was nothing left.

With the ingredients stirred by hand, and the light lemony almond flavor, it was easy to bake and just as easy to eat.

Nancy chose this for Tuesdays with Dorie, and she has the recipe posted. I doubled the salt (of course).

One year ago: Chocolate Ameretti Torte
Two years ago: Marshmallows

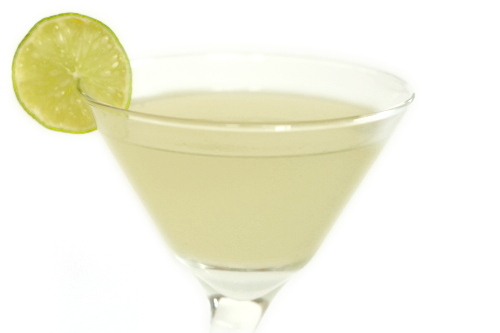
vodka gimlet

Why should food be the only thing I think I can make better than most restaurants? Let’s move on to cocktails!

Vodka gimlets are a good, basic drink, and they’ve come in handy for me a number of times – at a wedding with a terrible wine selection, at another wedding with inexperienced bartenders (“…a gimlet…what’s in that again?”), at cheap bars where the beer isn’t worth drinking.  Oh hi! I’m a snob about alcohol!

At its most basic, a vodka gimlet is simply vodka and Rose’s lime juice. (A gimlet – no ‘vodka’ qualifier – is made with gin instead of vodka.) Rose’s lime juice is bottled sweetened lime juice. This is what makes it such a great drink for when there are limited alcohol choices – there are only two ingredients and the strong lime flavor drowns out the taste of cheap alcohol.

But why use cheap alcohol when I can just as easily – if not as, ahem, cheaply – use the good stuff? And why would I use bottled lime juice when I’m committed to using the freshest ingredients possible in everything I make, whether it be food or drink?

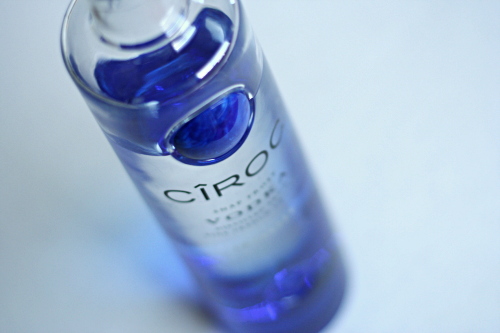
Rose’s lime juice just needs to be replaced by fresh-squeezed limes and simple syrup. That means there are three ingredients instead of two to get in balance in order to make the perfect drink, but I was happy to do some trial and error. Then when I bought a new type of vodka, I found that I needed to tweak my ratios a bit. Both vodkas had the same alcohol content, but the new brand (Ciroc) was apparently a bit smoother than the previous one (Effen).

Both vodkas make one heck of a drink. Be warned: with high quality vodka, you need a fair amount of it to balance the sour lime. Don’t drink this like you would beer or even wine. But definitely do drink it, because it is oh so good. I’m so glad it’s Friday afternoon and I’ve only got a few hours to go before I can mix myself up one of these!

One year ago: Black Bean Squash Burritos
Two years ago: Blueberry Poppy Seed Brunch Cake

Printer Friendly Recipe
Vodka Gimlet

This is the ratio I use with Ciroc vodka. With Effen vodka, I found it was best to use slightly less vodka. I like my drinks to be strong, both in alcohol flavor and in acidity. You might end up tweaking the ratios slightly to get a drink that’s perfect for you. (Trust me that good alcohol does actually taste good. Don’t equate it with the crap you got drunk on in college. Okay, the crap your friends got drunk on. You were far too mature for those shenanigans.)

4 parts good vodka
2 parts freshly squeezed lime juice
1 part simple syrup (recipe below)
ice

Combine all ingredients in a cocktail shaker, attach the lid and shake shake shake. Strain into a glass. Sip slowly or pay the price.

Simple Syrup

½ cup water
½ cup granulated sugar

Combine water and sugar in a small saucepan and heat over medium-high heat until boiling, stirring until the sugar melts. Remove from the heat and cool completely before using. Store in the refrigerator indefinitely.

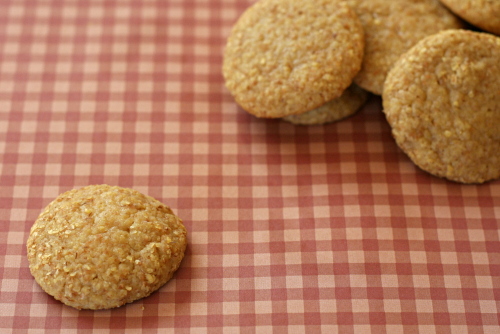
honey-wheat cookies

The problem with wheat germ cookies is that my mind focuses on the wheat germ part instead of the cookie part. So then these are healthy and therefore perfectly acceptable to eat with my tea – before breakfast. Wheat germ, people! Whole grains! Cookie schmookie.

Plus – they’re so good! No joke. I had my doubts too, especially after several weeks of baking delicious chocolate treats for Tuesdays with Dorie. Wheat germ in cookies? But the texture is so perfectly soft and chewy. The lemon was evident but somewhat subtle. The wheat germ added just a taste of bitterness. I was surprised to find that the honey was the strongest flavor, which I love because often the flavor of natural sugars gets lost in the oven.

Michelle chose these great cookies for TWD. She has the recipe posted.

One year ago: Devil’s Food White Out Cake

glazed lemon cookies

Copy of IMG_8114

Earlier in the summer, I got it in my head that I could bake all I wanted as long as I just sent the treats away. Brilliant! All the swirling butter and sugar in the mixer without any of the calories! I don’t have a PhD for nothing, people.

Copy of IMG_8082

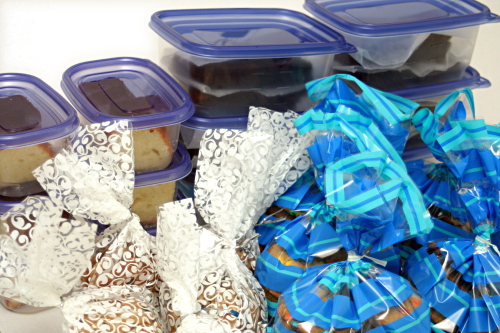
So I put out a note on Facebook – essentially “Hey! Who wants treats!” – got a whole bunch of responses, and spent the next day baking.

Copy of IMG_8089

The weakness in my strategy was that it’s almost never the actual baked dessert that I overeat. It’s the dough, always the dough.

Copy of IMG_8108

Plus, I know everyone jokes about “Oh, I have to eat one, right? Just to make sure they’re good? <wink wink>.” The thing is, you do have to eat one to make sure they’re good! What if you forgot the salt and doubled the baking powder or, I don’t know, some other easily overlooked lame-brained maneuver? And you send out eight packages, all over the country, to friends and family you haven’t seen in ages, all filled with lackluster messed up “treats”?

Copy of IMG_8112

Anyway, so after spending all day shopping, baking, packaging, eating lots of dough and (at least) one of each treat, I decided I should make myself go for a run.

Copy of IMG_8113

Uh, it wasn’t the best run ever. It was one of those runs where puking doesn’t seem too far off. Weird that sugar and butter aren’t very good fuel for exercise. Bummer.

Copy of IMG_7879

So I’ve mostly given up on the “I’ll just send everything away!” idea. Which is a shame, because now it’s going to be that much harder to find a reason to make these perfect lemon cookies. Sweet but tangy, super soft and tender, topped with a flavorful powdered sugar glaze that dries on top and snaps just a bit when you bite through it, these are cookies that I can’t resist in dough or baked form.

Copy of IMG_8115

One year ago: Wheatmeal Shortbread Cookies

Printer Friendly Recipe
Glazed Lemon Cookies (from Cooks Illustrated)

Cookies:
¾ cup (5.25 ounces) granulated sugar
2 tablespoons grated zest plus 2 tablespoons juice from 2 lemons
1¾ cup (8.75 ounces) unbleached all-purpose flour
¼ teaspoon baking powder
¼ teaspoon salt
12 tablespoons (1½ sticks) cold unsalted butter, cut into ½-inch cubes
1 large egg yolk
½ teaspoon vanilla extract

Glaze:
1 tablespoon cream cheese, softened
2 tablespoons juice from 1 lemon
1½ cups (6 ounces) confectioners’ sugar

1. For the cookies: In a food processor, process the granulated sugar and lemon zest until the sugar looks damp and the zest is thoroughly incorporated, about 30 seconds. Add the flour, baking powder, and salt; pulse to combine, about ten 1-second pulses. Scatter the butter pieces over the dry ingredients; pulse until the mixture resembles fine cornmeal, about fifteen 1-second pulses. In a measuring cup or small bowl, beat together the lemon juice, egg yolk, and vanilla with a fork to combine. With the machine running, add the juice mixture in a slow, steady stream (the process should take about 10 seconds); continue processing until the dough begins to form a ball, 10 to 15 seconds longer.

2. Turn the dough and any dry bits onto a clean work surface; working quickly, gently knead to ensure that no dry bits remain and the dough is homogeneous. Roll the dough into a cylinder approximately 10 inches long and 2 inches in diameter. Center the dough on a piece of parchment. Fold the paper over the dough. Grasp one end of the parchment. With the other hand, use a bench scraper to firmly press the parchment against the dough to form a uniform cylinder. Roll the parchment and twist the ends together to form a tight seal. Chill the dough until firm and cold, about 45 minutes in the freezer or 2 hours in the refrigerator. (The dough will keep in the refrigerator for up to 3 days or in the freezer for up to 2 weeks.)

3. Meanwhile, adjust the oven racks to the upper- and lower-middle positions; heat the oven to 375 degrees.

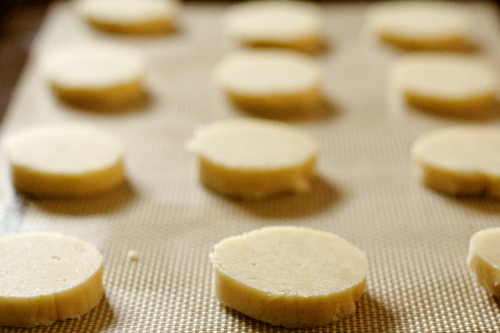
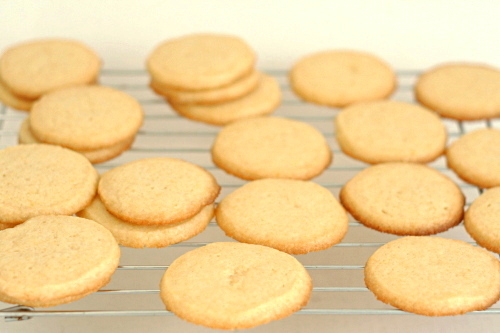
4. Line 2 large baking sheets with parchment paper or spray them with nonstick cooking spray. Remove the dough log from its wrapper and, using a sharp chef’s knife, slice the dough into rounds 3/8 inch thick; place the rounds on the prepared baking sheets, spacing them about 1 inch apart. Bake until the centers of the cookies just begin to color and the edges are golden brown, 14 to 16 minutes, rotating the baking sheets front to back and top to bottom halfway through the baking time. Cool the cookies on the baking sheets about 5 minutes; using a wide metal spatula, transfer the cookies to a wire rack and cool to room temperature before glazing.

5. For the glaze: Whisk the cream cheese and lemon juice in a medium nonreactive bowl until no lumps remain. Add the confectioners’ sugar and whisk until smooth.

6. To glaze the cookies: When the cookies have cooled, spoon a scant teaspoon of glaze onto each cookie and spread evenly with the back of the spoon. Let the cookies stand on a wire rack until the glaze is set and dry, about 1 hour. The cookies are best eaten the day they are glazed.

Copy of IMG_7881

cranberry orange scones

Copy of IMG_1625

This recipe changed the whole shape of my last year. Before making these great scones, I’d spend a large part of both weekend mornings cooking, usually something sweet one day and something savory the other. It made for a nice breakfast category here, but it wasn’t the best way to relax on the weekend.

Copy of IMG_1123

Not anymore. I still often cook something one morning, but on the other, it’s all about scones. I make the dough early in the week and freeze it, then on a lazy weekend morning, I just have to bake them, make coffee (or, more often, wait for Dave to), and sit down to flip through a cookbook. It’s become one of my favorite times of the week.

Copy of IMG_1126

These pictures? They’re from when I made the scones last winter, but it was way past cranberry season, so I’ve been holding onto this blog entry for months and months.

Copy of IMG_1137

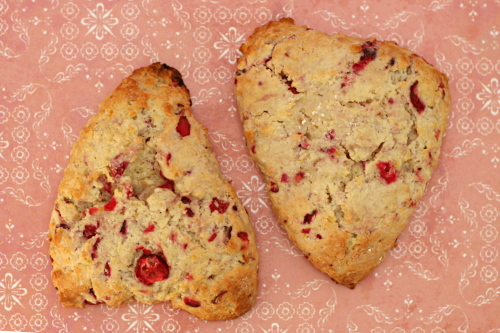
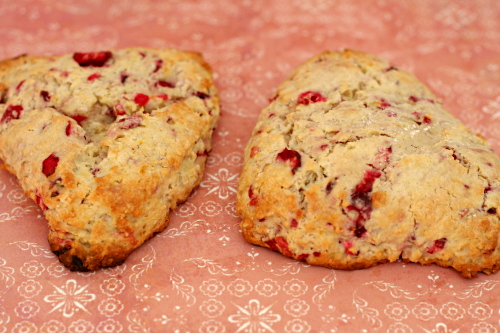
It’s time. Cranberries are showing up in stores, and there is no better way to enjoy them. These are so tender, have just the right sweetness, and make for a stress-free weekend breakfast, even with guests. Even after a year of making scones, these are still one of my favorites.

Copy of IMG_1631

One year ago: Warm Chickpea and Butternut Squash Salad

Printer Friendly Recipe
Cranberry Orange Scones (adapted from Gourmet via Smitten Kitchen)

The recipe originally calls for (Meyer) lemon zest, but orange – or tangerine, which I’ve also used – is such a great partner for cranberry that I couldn’t resist using it instead. I also like increasing the cranberries a bit (already reflected in the recipe).

I’ve baked this recipe at high altitude (at least 5000 feet) with good results. They weren’t quite as pretty, but the taste and texture weren’t affected.

I always flash-freeze scones, then bake them straight from the freezer, adding a couple extra minutes to the baking time.

Makes 8 scones

1½ tablespoons freshly grated orange zest
2½ cups (12 ounces) all-purpose flour
½ cup (3.5 ounces) sugar plus 3 tablespoons
1 tablespoon baking powder
½ teaspoon salt
¾ stick (6 tablespoons) cold unsalted butter, cut into bits
1½ cups fresh cranberries, chopped coarse (I usually do this in the food processor)
1 large egg
1 large egg yolk
1 cup heavy cream

1. Adjust an oven rack to the middle position and heat the oven to 400°F. Line a large baking sheet with parchment paper or a silicone baking mat.

2. In a small bowl, toss together fresh cranberries and 3 tablespoons sugar. In another small bowl, lightly beat the egg and yolk, then stir in cream.

3. In a food processor, pulse the flour, ½ cup sugar, baking powder, salt, and zest until combined. Add the butter and process until the mixture resembles coarse meal. Transfer to a large bowl. (You can also just smoosh the butter into the dry ingredients with your fingers instead of using a food processor.) Stir the cranberries into the flour mixture. Then gently fold the egg mixture into the flour until just combined.

4. On a well-floured surface with floured hands, pat the dough into a 1-inch-thick round (about 8 inches in diameter). With a 2-inch round cutter or the rim of a glass dipped in flour, cut out as many rounds as possible, rerolling the scraps as necessary. (Or cut the circle into wedges, which is my standard method.) Arrange the scones about 1 inch apart on the prepared baking sheet and bake 15 to 20 minutes, or until pale golden. Cool about 10 minutes, then serve.

Copy of IMG_1626

lime cream meringue pie

Copy of IMG_8317

Oh, how times change. I had kind of thought that last year’s lemon cream tart would be my first and last citrus cream experience. Seriously, that is a lot of butter. But apparently, my attitude toward rich foods has slowly evolved from ‘this is way too fattening for me to indulge in more than a few bites at a time’ to ‘well…it’s not like I eat like this all the time…’ except that, these days, I kinda do.

Copy of IMG_8202

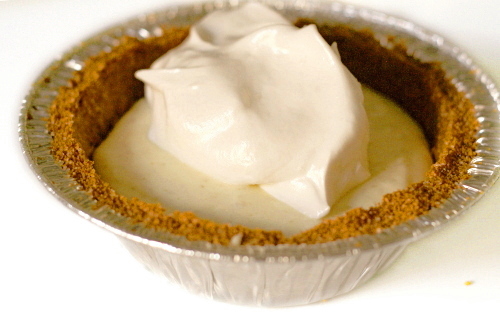
The lime cream is made almost exactly the same as last year’s lemon cream – heat sugar, eggs, zest, and juice, then blend in softened butter – with the only difference a couple teaspoons of cornstarch that is added to the lime version, along with grated fresh ginger. Don’t take me lightly when I say there’s a lot of butter involved – the full pie calls for 2½ sticks (20 tablespoons), and that doesn’t even include the portion in the crust.

Copy of IMG_8204

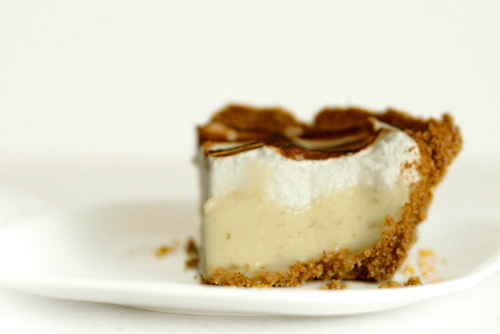
Fortunately, I was hearing that some Tuesdays with Dorie members were decreasing the butter, sometimes by as much as half. I didn’t make quite such a dramatic change, using 4 tablespoons for the quarter of the recipe I made – so the equivalent of 16 tablespoons (2 sticks) for a whole recipe. It worked really well.

Copy of IMG_8207

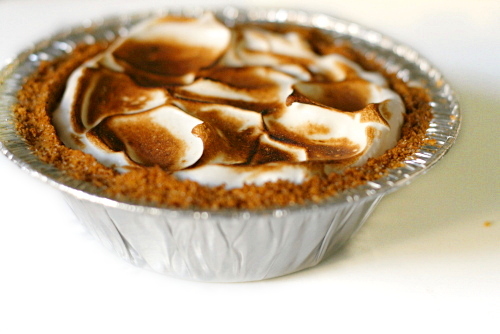
I do like these citrus creams. I’m a big fan of citrus desserts, and of smooth, rich custards, so the combination is wonderful. I also really like meringue and, you know, torching food. So there really wasn’t much not to like for me this week! Except for the tiny portions I forced upon myself. Ah, compromise…
Copy of IMG_8312

Linda has the recipe posted. I decreased the meringue by half, because I happened to have that amount of egg whites leftover from something else.  Also, I didn’t strain out the zest.
One year ago: Black (and Pink) and White Chocolate Cake

Copy of IMG_8326