candied orange peel

copy-of-img_0648

I don’t usually do much baking around the holidays. I bake so much anyway, what would I possibly do with more treats? So I’m not sure what possessed me to make five types of candy (in one day!) this year. I’m blaming Jen and all of her flawless confections.

copy-of-img_0544

This candied orange peel is her recipe. I’ve made candied orange peel once before. It didn’t knock my socks off, and I kicked myself for not using Jen’s recipe.

copy-of-img_0552
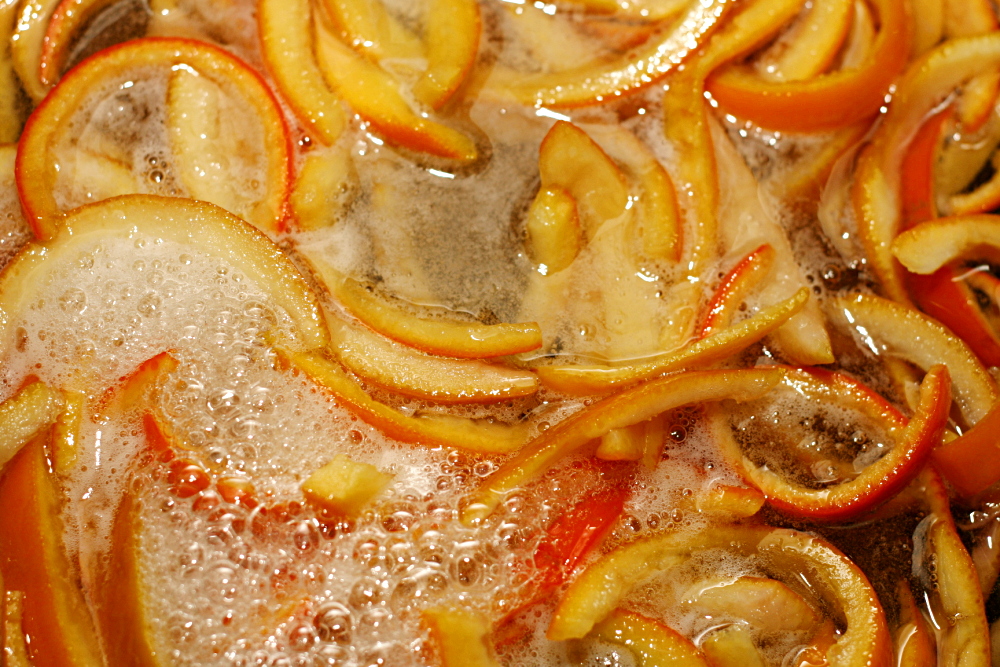
Candied orange peel, like most of the candy recipes I made yesterday, seems easy in theory but ends up involving a significant investment of time. (Or maybe it just seems that way when you wait until the last minute and have to make all of your candy recipes in one day.) Boiling the orange peel three times is no big deal, and simmering them in sugar syrup doesn’t take any effort. But juicing, cleaning, and slicing the oranges took more time and made a bigger mess than I had counted on.
copy-of-img_0553

I dipped about half of my orange peels in chocolate. The others I packaged into gift bags with some granulated sugar to (hopefully) keep them from sticking together.

copy-of-img_0595

I liked the peels far more than I was expecting. In fact, I thought at first that I was making them just for fun. I tried not to let it bother me than no one might actually eat them. But they might be my favorite of the candy recipes I made. I’m especially happy with the chocolate dipped ones. The bittersweet chocolate counters the sweetened peel so nicely. I think I’m going to go grab just one more…

copy-of-img_0600

Candied Orange (Citrus) Peel (slightly reworded from Use Real Butter)

4 oranges, peel of (or any thick skinned orange)
3 cups (21 ounces) sugar
1 cup water

1 cup (7 ounces) sugar for rolling
or
8 ounces chocolate for dipping

1. Cut the oranges in half across their equators and juice them. Cut each half in half again and take a spoon to scrape the pulp out, living a clean pith. You can remove some of the pith if you want, but it isn’t necessary because the candying process with remove (or at least overpower) the bitterness. Cut the peels into ⅛ to ¼ inch strips.

2. Place peels in a large saucepan and cover with cold water. Heat on high until water comes to a boil. Drain. Repeat heating and draining twice more.

3. Combine sugar and water in the saucepan and boil over high heat until temperature reaches 230F. Add the peels and reduce the heat to a simmer, about medium-low. Simmer until peels are translucent (30 minutes or longer).

4. Remove peels from syrup and roll in sugar if desired, and set on rack to dry for several hours. Once the peel is dry, you can dip in dark chocolate – shake off excess, and place on foil, wax paper, or baking sheet to dry. Store in a tupperware, or if not chocolate dipped, store in sugar.

copy-of-img_0623

cranberry orange muffins

copy-of-img_9788

Didn’t I just make muffins? And wasn’t I talking about how I was still on pumpkin? While it’s true that I haven’t moved past pumpkin, I’m definitely excited about cranberries too. Especially cranberry and orange together.

copy-of-img_9771

Seven or eight years ago, I went through a health nut phase where I pretty much eschewed white flour. (You can imagine that that lasted for, like, a week.) I at least substituted half whole wheat flour in most recipes, especially quick breads. I’ve apparently reached a complete turnaround. This recipe calls for 100% whole wheat flour, and I came very close to substituting half of that with white flour.

copy-of-img_9772

But I stuck to the recipe, and I am so glad I did. These muffins rocked, even though I didn’t have quite the right amount of egg (long story), I used traditional instead of quick-cooking oats, and I skipped the glaze. I’m not a huge fan of glaze on muffins – they don’t take to freezing as well, plus it seems too cupcake-like. I also changed the order that the ingredients were added, just like I did with the pumpkin muffins. I added the sugar with the wet ingredients and the zest with the dry ingredients.

copy-of-img_9778

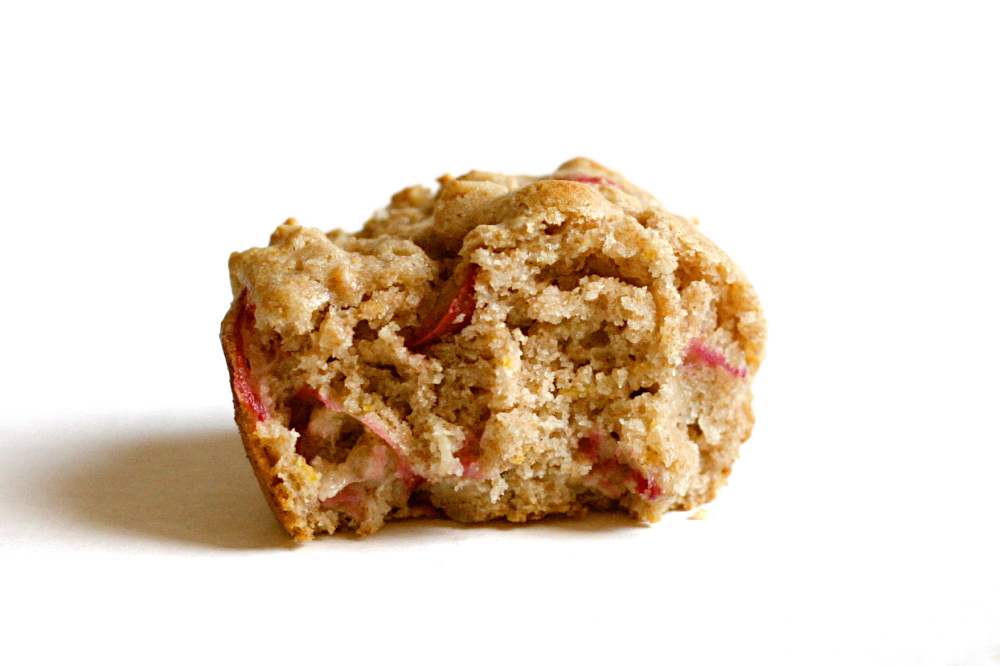
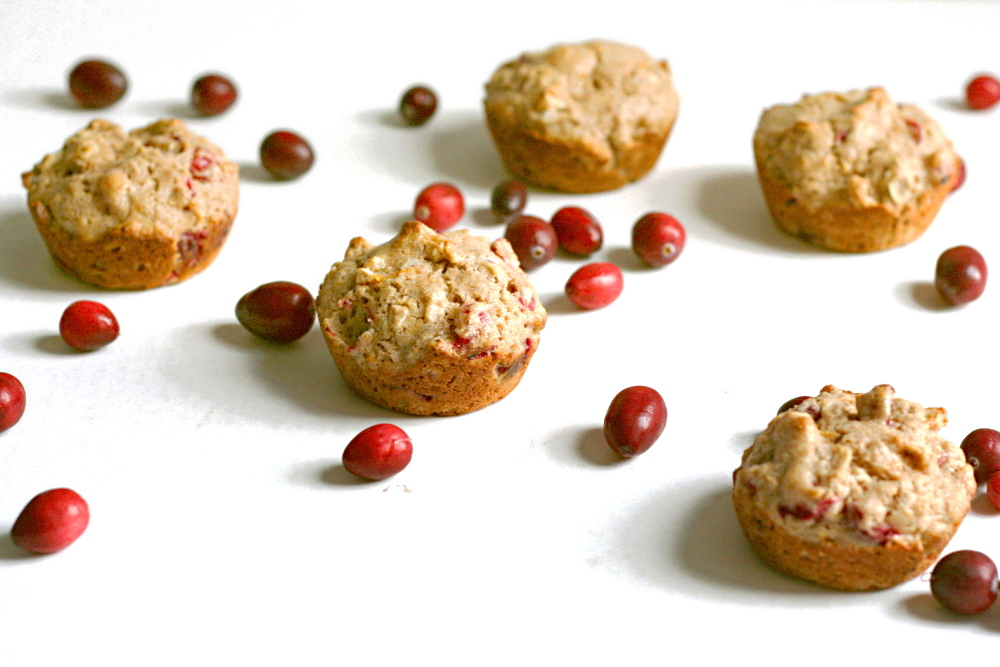
The muffins were nice and light, not at all heavy from the whole wheat flour. The orange flavor was pronounced, which I liked, and the bits of cranberry were perfectly tart and even juicy. All that using 100% whole wheat flour. 2001-me would have been so proud.

copy-of-img_9780

Cranberry Orange Muffins (adapted from King Arthur Flour)

I used traditional oats and didn’t notice any problems, but I could see how quick-cooking oats would incorporate into the dough better. I skipped the nuts because I didn’t have any. I used butter instead of oil. I also skipped the glaze.

Makes 12 muffins

1½ cups whole wheat flour
¾ cup quick-cooking rolled oats
¼ cup buttermilk powder or nonfat dry milk
2 teaspoons baking powder
1 tablespoon orange zest (finely grated orange peel)
½ teaspoon salt
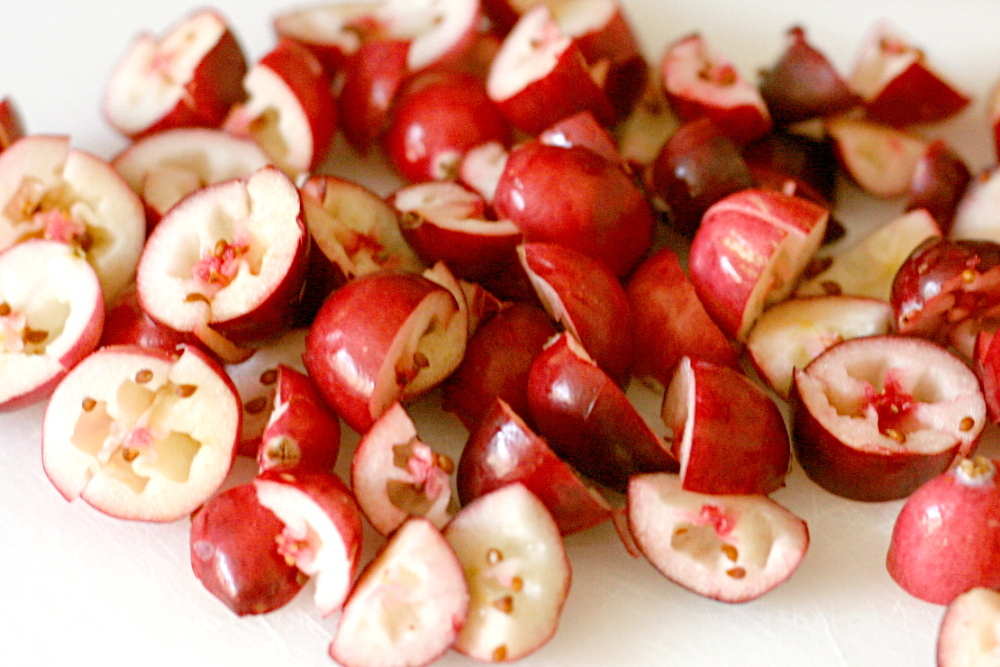
1 cup fresh or frozen cranberries, chopped
½ cup chopped pecans or walnuts (optional)
2 large eggs
⅔ cup (4.67 ounces) sugar
¾ cup milk
⅓ cup melted butter or vegetable oil

Glaze
2 tablespoons orange juice
3 tablespoons sugar

1. Adjust oven rack to middle position and heat oven to 350 degrees. Spray standard muffin tin with nonstick vegetable cooking spray.

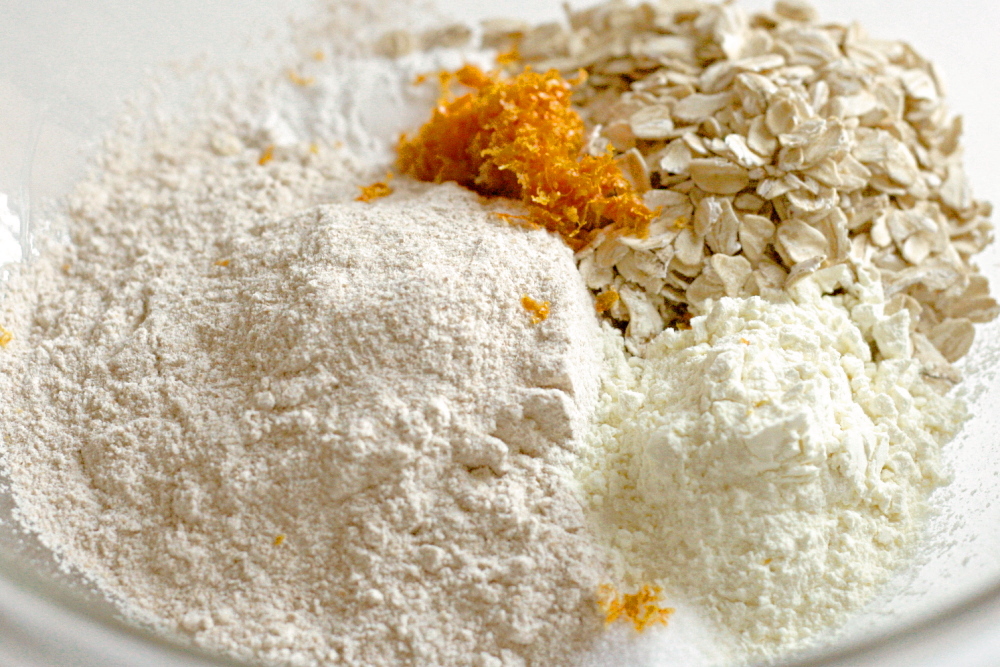
2. Whisk flour, oats, milk powder, baking powder, and orange zest in a large mixing bowl. In a separate mixing bowl, whisk egg until broken up. Add sugar and whisk until combined. Whisk in butter (or oil) and milk.

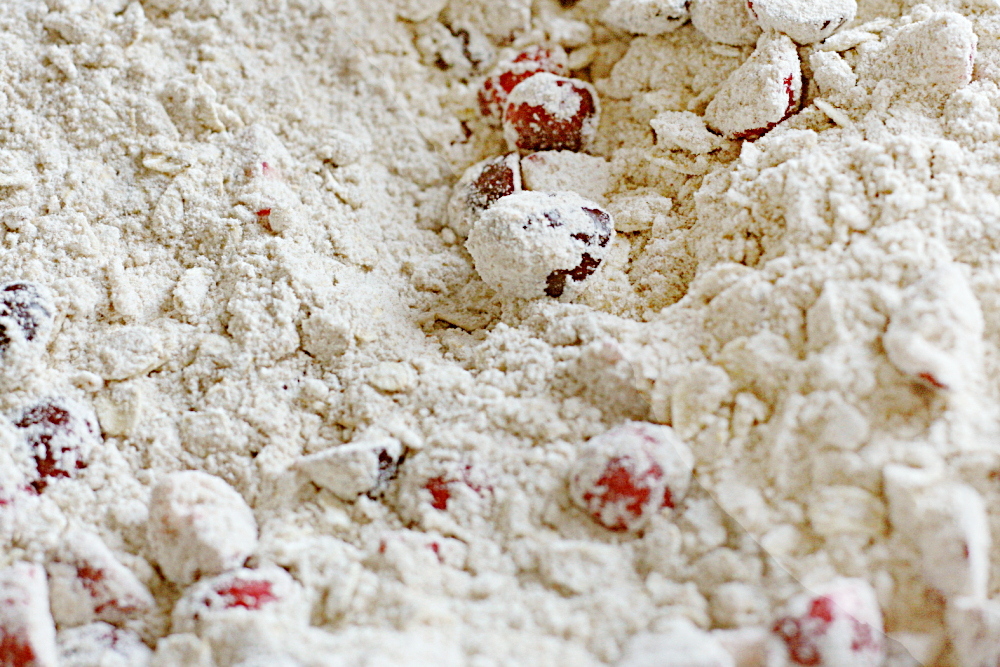
3. Add cranberries and nuts, if using, to dry ingredients and stir to combine. Add milk mixture and fold with rubber spatula until batter comes together. Do not overmix.

4. Divide batter among 12 muffin cups. Bake until toothpick inserted into center of muffin comes out clean, 18-20 minutes. Cool in pan 5 minutes, then transfer them to a rack.

5. If using glaze: In a small saucepan or the microwave, stir together the glaze ingredients. Bring just to a boil, to dissolve the sugar. Dip the tops of the warm muffins into the glaze.

copy-of-img_9783

lime meltaways

copy-of-img_8545

I’ve gotten into the annoying habit of buying a bag of limes when I only need one lime because they’re so darn expensive if you buy them singularly. And then I have to get creative trying to use up the rest of the limes. See, I was practically forced to make lime cookies.

copy-of-img_8446

There’s nothing complicated about the recipe, although for a few seconds, I wasn’t sure whether the lime juice was going to mix with the butter. You know, fat and water repelling and all. It mixed in.

copy-of-img_8447

Once the cookies come out of the oven, the recipe recommends putting them in a bag with powdered sugar and doing some shaking, until they’re evenly coated with sugar. I don’t know about this. They’re pretty fragile. Seems like you’re asking for broken cookies with this method. I just gave each one a quick dip in a bowl of powdered sugar.

copy-of-img_8480

I love lime-flavored stuff, and these were no exception. I wouldn’t have minded if they had been a little more limey – I might add just a little extra lime zest next time. Another great thing about these – this is one of those convenient recipes where you can leave the dough in the freezer until you need it. Fresh cookies with no effort!

copy-of-img_8542

Key Lime Meltaways (adapted from Martha Stewart via Smitten Kitchen)

Makes 5 dozen

You can use either regular or Key limes.

The dough, shaped into logs, can be kept in the freezer for up to 2 months.

12 tablespoons (1½ sticks) unsalted butter, room temperature
1 cup (4 ounces) powdered sugar
grated zest of 4 tiny or 2 large key limes
2 tablespoons freshly squeezed lime juice
1 tablespoon pure vanilla extract
1¾ cup plus 2 tablespoons (9.375 ounces) all-purpose flour (a.k.a. 2 cups minus 2 tablespoons)
2 tablespoons cornstarch
¼ teaspoon salt

1. In the bowl of an electric mixer fitted with the whisk attachment, cream butter and ⅓ cup (1.33 ounces) powdered sugar until fluffy. Add lime zest, juice, and vanilla; beat until fluffy.

2. In a medium bowl, whisk together flour, cornstarch, and salt. Add to butter mixture, and beat on low speed until combined.

3. Between two 8-by-12-inch pieces of parchment paper, roll dough into two 1¼-inch-diameter logs. Chill at least 1 hour.

4. Heat oven to 350F. Line two baking sheets with parchment. Place remaining ⅔ cup sugar in a resealable plastic bag. Remove parchment from logs; slice dough into ¼-inch-thick rounds. Place rounds on baking sheets, spaced 1 inch apart.

5. Bake cookies until barely golden, about 15 minutes. Transfer cookies to a wire rack to cool slightly, just three or four minutes. While still warm, place cookies in the sugar-filled bag; toss to coat. Bake or freeze remaining dough. Store baked cookies in an airtight container for up to 2 weeks.

copy-of-img_8549

lemon pancakes with blueberry syrup

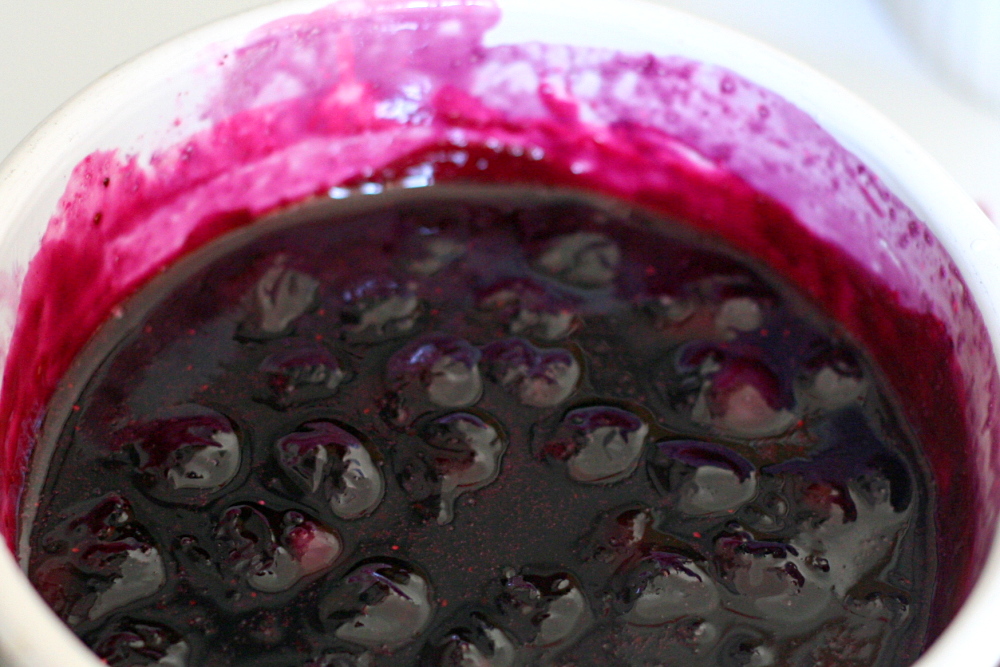
I haven’t made plain pancakes in a very long time. I guess, to me, it’s like eating bread – sure it’s good plain, but it’s so much better with Stuff. For pancakes, that Stuff mostly involves fruit. You could make lemon pancakes and put the blueberries right in them, but why not do something different with those blueberries and make a syrup out of them?

This is another Emeril breakfast recipe, and this one, I made more complicated instead of simplifying it. Emeril’s blueberry syrup is just a combination of blueberries and corn syrup, which I think sounds too one-dimensionally sweet. I have a recipe for blueberry syrup that I’ve been making for a long time that I’m really happy with, so I made that one instead, even though it involves a few more ingredients.

You can see that my pancakes came out a little thin. I’ve been experimenting with Saco powdered buttermilk, since I don’t generally keep liquid buttermilk around. The recipe uses the same ratio of flour to milk that most pancake recipes do, so I don’t think the pancakes are thin because there’s too much liquid. I think the powdered buttermilk reconstituted with water as per the instructions on the container create a thinner liquid than regular buttermilk.

But I don’t mind thin pancakes, and you really can’t go wrong with a lemon-blueberry combination. The syrup is great – the sweetness is balanced by a spritz of lemon juice and pinch of salt, so the flavor of the blueberries can shine.

Lemon Pancakes with Blueberry Syrup (adapted from Emeril Live)

Serves 3-4

Pancakes:
1 cup all-purpose flour
2 tablespoons sugar
1 teaspoon baking powder
½ teaspoon baking soda
¼ salt
1 cup buttermilk
1 large egg
2 tablespoons butter, melted
2 tablespoons fresh lemon zest, finely chopped
½ stick (4 tablespoons) butter, cut into 10 equal slices

Blueberry Syrup:
1 cup sugar
½ cup water
pinch salt
1 tablespoon cornstarch
2 tablespoons water
1 cup blueberries
½ teaspoon lemon juice
1 tablespoon butter

For the pancakes:
In a small mixing bowl, sift the flour, sugar, baking powder, baking soda and salt. In a medium mixing bowl, whisk the buttermilk, egg, and butter until fully incorporated. Add the sifted ingredients to the milk mixture and whisk until it is slightly smooth, but still has some lumps. Fold in the lemon zest and allow the batter to sit for a couple of minutes. Lightly grease a griddle over medium heat. Cooking in batches, pour ¼ cup of the batter onto the hot griddle for each pancake. Cook for about 2 to 3 minutes or until the batter bubbles and is golden brown, flip over and continue to cook until golden brown. Repeat the above process with the remaining batter. Stack the pancakes on each serving plate. Place a pat of butter between each layer. Drizzle the pancakes with the syrup and garnish with the confectioners’ sugar.

For the syrup:
Bring ½ cup water, sugar, and salt to a boil in a small saucepan. In a small bowl, mix 2 tablespoons water and cornstarch until cornstarch dissolves. Add cornstarch mixture to sugar mixture and stir to blend. Stir in blueberries and boil over medium heat until berries start to pop and syrup turns blue, 5-6 minutes. Remove from heat and add lemon juice and butter.

orange vanilla opera cake (db may 2008)

Lately I’ve become fixated with Bo Friberg’s The Professional Pastry Chef. I don’t want and have never wanted to be a professional pastry chef. But I flipped through this book and I was hooked. (Actually, in my arrogance, I grabbed The Advanced Pastry Chef first.) Page after page of beautifully plated desserts; this was more than food, this was art. Suddenly the fuss necessary to produce eye-catching desserts seemed worthwhile.

So I was elated when Ivonne, Lis, Fran, and Shea announced their choice of an opera cake for this month’s Daring Baker challenge. Layers of almond-based cake brushed with syrup, interspersed with buttercream, topped with mousse and glaze – this is exactly what I had in mind to try. I haven’t bought The Professional Pastry Chef yet, but at least I have a reason to get some practice.

The rules for the recipe were somewhat flexible in that we could flavor our cake any way we wanted – as long as it was light-colored. I would have enjoyed trying a traditional dark chocolate opera cake, but this was fun too. I’ve been loving creamsicle-like flavors lately, so I made my pastry orange and vanilla-flavored.

I hit a snag or two along the road, but nothing that couldn’t be overcome. A shortage of parchment paper meant I couldn’t adequately line my pan and the cake didn’t come out cleanly, but I was able to piece it together better than I expected. My first batch of white chocolate seized when I tried melting it, even though I used high-quality (Callebaut) chocolate and a double boiler. My orange glaze, which I adapted from a recipe Tyler Florence developed to top scones, wasn’t stable at room temperature, even though I added more powdered sugar than I’d expected to need.

No matter, everything came together in the end. The cake was good, although not as flavorful as I would have liked. I was warned before I made mine that it might be too sweet, so I added a pinch of salt to the jaconde to add some balance. I was also hoping that the orange would help balance the sweetness, but there wasn’t nearly enough orange or vanilla flavor. I didn’t end up using the zest of the orange anywhere, which certainly would have helped. And I’ve never been able to get a strong vanilla flavor in something baked. Maybe I should try rubbing the vanilla seeds into the sugar, like Dorie recommends with citrus zest?

Even if the flavor didn’t knock my socks off, I’m really glad I made this. I learned so much and used so many techniques that were new to me. I also think it’s great that we were given the freedom to develop our own flavors, which encouraged me to be creative. I’m eager to try the traditional dark chocolate version now, and this time I’ll make sure it’s rich and flavorful!

Orange-Vanilla Opera Cake

This is exactly the recipe I used, including my adaptations for orange and vanilla flavors. This recipe is half of what was given to us by the Daring Baker hosts this month. Double this amount of buttercream would probably provide the right amount to create layers of equal thickness to the cake; mine are a little thin.

Joconde: (adapted from Dorie Greenspan’s Paris Sweets)

The joconde can be made up to 1 day in advance and kept wrapped at room temperate

You can buy almond meal in bulk food stores or health food stores, or you can make it at home by grinding almonds in the food processor with two tablespoons of the flour that you would use in the cake.

2 tablespoons unsalted butter, melted and cooled
3 large egg whites, at room temperature
1 tablespoon granulated sugar
1 cup (112 grams) ground blanched almonds
1 cup (3.5 ounces) icing sugar, sifted
3 large eggs
1 vanilla bean, split and scraped
½ teaspoon vanilla
Pinch salt
¼ cup (1.25 ounces) all-purpose flour

1. Adjust an oven rack to the middle position. Preheat the oven to 425 degrees. Line a 12½ x 15½-inch jelly-roll pan with parchment paper and brush with ½ tablespoon of the melted butter.

2. In the bowl of a stand mixer fitted with the whisk attachment (or using a handheld mixer), whip the whites on low speed until they become foamy, then whip on medium-high speed until the whites reach soft peaks. Add the granulated sugar, and whip on high speed until the whites are stiff and glossy.

3. In a separate mixer bowl (or the same bowl, cleaned and dried) fitted with the paddle attachment, beat almond flour, icing sugar, eggs, salt and vanillas on medium speed until light and voluminous, about 3 minutes. Add flour and beat at low speed until it disappears.

4. Use a rubber spatula to gently fold the meringue into the almond mixture, then fold in the remaining melted butter until just combined. Spread the batter evenly in the prepared pan.

5. Bake the cake until it is lightly browned and just springy to the touch, 5-9 minutes.

6. Put the pan on a cooling rack and run a sharp knife along the edges of the cake to loosen it from the pan. Cover the pan with a sheet of parchment or wax paper, turn the pan over, and unmold. Carefully peel away the parchment, then turn the parchment over and use it to cover the cake. Let the cake cool to room temperature.

Syrup: (adapted from Dorie Greenspan’s Paris Sweets)

The syrup can be made up to 1 week in advance and kept covered in the refrigerator.

¼ cup water
1.2 ounces granulated sugar
1 tablespoon Grand Marnier

In a small saucepan, combine water and sugar. Bring to a boil, while stirring to dissolve ingredients. Stir in liqueur. Remove from heat and allow syrup to cool.

Buttercream: (adapted from Dorie Greenspan’s Baking: From My Home to Yours)

The buttercream, packed in an airtight container, can be frozen for 1 month or refrigerated for 4 days. Bring it to room temperature and beat it briefly to restore its consistency.

¼ cup (1.75 ounces) granulated sugar
1 large egg white
pinch salt
6 tablespoons unsalted butter, at room temperature
1 tablespoon fresh orange juice
¼ teaspoon pure vanilla extract

Put the sugar and egg whites in a mixer bowl or another large heatproof bowl, fit the bowl over a plan of simmering water and whisk constantly, keeping the mixture over the heat, until it feels hot to the touch (160 degrees on an instant-read thermometer), about 3 minutes. The sugar should be dissolved, and the mixture will look like shiny marshmallow cream. Remove the bowl from the heat. Working with the whisk attachment or with a hand mixer, beat the meringue on medium speed until it is cooledto room temperature, about 5 minutes.

Switch to the paddle attachment if you have one, and add the butter 2 tablespoons at a time. Once all the butter is in, beat the buttercream on medium-high speed until it is thick and very smooth, 6-10 minutes. During this time the buttercream may curdle or separate – just keep beating and it will come together again.

On medium speed, gradually beat in the orange juice, waiting until each addition is absorbed before adding more, and then the vanilla. You should have a shiny smooth, velvety, pristine white buttercream. Press a piece of plastic against the surface of the buttercream and set aside briefly.

White chocolate mousse: (from Tish Boyle and Timothy Moriarity’s Chocolate Passion)

The mousse can be made ahead and refrigerated until you’re ready to use it.

3.5 ounces white chocolate
½ cup plus 1½ tablespoons heavy cream
½ tablespoon Grand Marnier

1. Melt the chopped white chocolate and the 3 tablespoons of heavy cream. Whisk gently and let cool to room temperature.

2. Place the remaining heavy cream into a 4 1/2-quart bowl of a heavy-duty electric mixer fitted with the wire whisk attachment. Add the liqueur. Beat on high speed until soft peaks form.

3. Using a wire whisk, gently stir in about 1 cup of the whipped cream to the cooled white chocolate mixture. Using a rubber spatula, fold in the remaining cream. Do not over-mix or the mousse will become grainy. Cover and refrigerate until ready to use.

Orange glaze: (adapted from Tyler Florence)

2 tablespoons unsalted butter
2 cups (8 ounces) powdered sugar, sifted
2 oranges, juiced and zested

Combine butter, 2 cups (7 ounces) sugar, orange zest, and juice over a double boiler. Cook until butter and sugar are melted and mixture has thickened. Pour through fine mesh strainer, then beat until smooth and slightly cool, adding more sugar if necessary to reach desired consistency.

Assembly:

Line a baking sheet with parchment or wax paper. Cut and trim cake into three 10 x 5-inch rectangles. Place one section of cake on the baking sheet and moisten it gently with the 1/3 of the syrup. Spread half of the buttercream over this layer. Top with another piece of cake and moisten with 1/3 of the syrup. Spread the remaining buttercream on the cake and then top with the third section of cake. Use the remaining syrup to wet the cake and then refrigerate until very firm, at least half an hour.

Spread the mousse on the top of the last layer of cake. Refrigerate for 2-3 hours to give the mousse the opportunity to firm up.

Pour the cooled glaze over the top of the chilled cake, spreading to evenly coat the cake if necessary. Refrigerate the cake to set the glaze.

Serve the cake slightly chilled. This recipe will yield approximately 10 servings.

florida pie (twd)

I’m guessing there are recipes in Dorie’s book that aren’t obscenely rich. In fact, there’s a whole section on muffins! But the TWD recipe choosers have thus far gravitated toward the decadent side of the book, at least since I joined. This week is no exception, as Dianne’s choice of Florida Pie has well over a cup of cream in addition to the can of sweetened condensed milk, the butter in the crust, and a fair amount of coconut.

Fortunately, it’s all worth it because I love citrus desserts, especially Key lime pie. I only recently realized that I liked coconut, so this was a fun way to incorporate it into a favorite dessert.

I didn’t follow the recipe quite as closely as I normally do. I did make the coconut cream the recommended way, by simply boiling heavy cream and sweetened shredded coconut together until they reduce and thicken. For the lime filling, however, I was surprised that Dorie didn’t call for zest, and since I like my citrus desserts on the puckery side, I added about 2 limes worth. Where I strayed from the recipe the most was in the freezing steps, of which Dorie has two – one after the filling is added, and one after the meringue is toasted. I’m not sure what the purpose of either of these freezing stages is – perhaps to keep the filling cold while the pie is broiled? I used a blow torch to brown the meringue, and I didn’t want my pie frozen, so I skipped both visits to the freezer.

Overall, the pie (or in my case, tartelettes) were good. I do love lime. I have to admit that I consider the coconut more of a distraction than an improvement, but I enjoyed the dessert regardless.

Florida Pie (from Dorie Greenspan’s Baking: From My Home to Yours)

1 9-inch graham cracker crust, fully baked and cooled, or a store-bought crust
1⅓ cups heavy cream
1½ cups shredded sweetened coconut
4 large eggs, separated
1 14-ounce can sweetened condensed milk
½ cup fresh Key (or regular) lime juice (from about 5 regular limes)
¼ cup of sugar

Getting Ready: Center a rack in the oven and preheat the oven to 350 degrees F. Put the pie plate on a baking sheet lined with parchment or a silicone mat.

Put the cream and 1 cup of the coconut in a small saucepan and bring it to a boil over medium-low heat, stirring almost constantly. Continue to cook and stir until the cream is reduced by half and the mixture is slightly thickened. Scrape the coconut cream into a bowl and set it aside while you prepare the lime filling.

Working with a stand mixer, preferably fitted with a paddle attachment, or with a hand mixer in a large bowl, beat the egg yolks at high speed until thick and pale. Reduce the mixer speed to low and beat in the condensed milk. Still on low, add half of the lime juice. When it is incorporated, add the remaining juice, again mixing until it is blended. Spread the coconut cream in the bottom of the graham cracker crust, and pour over the lime filling.

Bake the pie for 12 minutes. Transfer the pie to a cooling rack and cool for 15 minutes, then freeze the pie for at least 1 hour.

To Finish the Pie with Meringue: Put the 4 egg whites and the sugar in a medium heavy-bottomed saucepan and heat over medium-low heat, whisking all the while, until the whites are hot to the touch. Transfer the whites to a stand mixer, fitted with the whisk attachment, or use a hand mixer in a large bowl, and beat the whites at high speed until they reach room temperature and hold firm peaks. Using a rubber spatula, fold the remaining ½ cup coconut into the meringue.

Spread the meringue over the top of the pie, and run the pie under the broiler until the top of the meringue is golden brown. (Or, if you’ve got a blowtorch, you can use it to brown the meringue.) Return the pie to the freezer for another 30 minutes or for up to 3 hours before serving.

lemon cream tart (twd)

I don’t deal well with lemon desserts. I lose self-control. Lemon tastes so light and fresh that I have trouble wrapping my mind around all the butter that’s usually paired with it. The Extraordinary Lemon Cream Tart that Mary chose for this week’s Tuesdays With Dorie recipe is extreme in the amount of butter called for – just shy of a full pound for a 9-inch tart.

With only Dave to share it with, I had to consider my options concerning this dessert. Unless I planned to serve nothing but salads or do nothing but exercise for several days, I was going to have to find a way to control my lemon tart intake. I decided that I needed tartelette pans so I could cut the recipe in half. Plus tartelette pans are super cute.

One of the fun aspects of being in a group like TWD is the opportunity to troubleshoot recipes. When my gooey chocolate cakes were a bit overcooked the first time I made them, my first thought was that my oven temperature was off, but with 100 other people making the recipe and most having the same problem, it seemed like it was the recipe that was off.

This week the problem that popped up involved the temperature that our lemon mixture was supposed to reach while being stirred over a double boiler. Dorie wanted our mixture to get to 180 degrees, which she said would take about 10 minutes. That seemed accurate for about half of us, but for the other half (myself included), the temperature topped out around 155 degrees and stayed there. In our ongoing discussion of the recipe, it seemed like there might be a correlation between the material of the mixing bowl used and the temperature reached – metal bowls were more likely to reach 180 degrees than glass bowls (although there were a couple outliers). I’m interested in trying the recipe again with a metal bowl instead of the pyrex bowl I used.

But I doubt I’ll be making this again. Not that it wasn’t good, because it was – very good in fact. But there’s just so much butter in it. I don’t generally shy away from rich foods, but they have to be worth it. And with over 600 calories per slice at the serving size that Dorie suggests, this tart has a lot to live up to.

The lemon cream was delicious – smooth with just the right balance of sweet and tart. But lemon curd is delicious too, and it only takes 4 tablespoons to make enough curd for a 9-inch tart, as opposed to 21 tablespoons that this cream needed. I’ll have to settle for rich-but-not-ridiculous lemon curd in the future.

The Most Extraordinary Lemon Cream Tart (from Dorie Greenspan’s From My Home To Yours)

The filling in this tart is everything. It is the lemon cream I learned to make from Pierre Hermé, and it is the ne plus ultra of the lemon world. The tart is basic-a great crust, velvety lemon cream-and profoundly satisfying. It is also profoundly play-aroundable. You can add a fruit topping (circlets of fresh rasp-berries are spectacular with this tart) or a layer of fruit at the bottom; you can finish the tart with meringue; or you can serve it with anything from whipped cream to raspberry coulis.

1 9-inch tart shell made with Sweet Tart Dough, fully baked and cooled
1 cup sugar
Finely grated zest of 3 lemons
4 large eggs
½ cup fresh lemon juice (from 4-5 lemons)
2 sticks plus 5 tablespoons (10½ ounces) unsalted butter, cut into tablespoon-size
pieces, at room temperature

Getting Ready: Have an instant-read thermometer, a strainer and a blender (first choice) or food processor at hand. Bring a few inches of water to a simmer in a saucepan.

Put the sugar and zest in a large heatproof bowl that can be set over the pan of simmering water. Off the heat, rub the sugar and zest together between your fingers until the sugar is moist, grainy and very aromatic. Whisk in the eggs, followed by the lemon juice.

Set the bowl over the pan, and start stirring with the whisk as soon as the mixture feels tepid to the touch. Cook the lemon cream until it reaches 180 degrees F. As you whisk-you must whisk constantly to keep the eggs from scrambling-you’ll see that the cream will start out light and foamy, then the bubbles will get bigger, and then, as it gets closer to 180 degrees F, it will start to thicken and the whisk will leave tracks. Heads up at this point-the tracks mean the cream is almost ready. Don’t stop whisking or checking the temperature, and have patience-depending on how much heat you’re giving the cream, getting to temp can take as long as 10 minutes.

As soon as it reaches 180 degrees F, remove the cream from the heat and strain it into the container of the blender (or food processor); discard the zest. Let the cream stand, stirring occasionally, until it cools to 140 degrees F, about 10 minutes.

Turn the blender to high (or turn on the processor) and, with the machine going, add the butter about 5 pieces at a time. Scrape down the sides of the container as needed as you incorporate the butter. Once the butter is in, keep the machine going-to get the perfect light, airy texture of lemon-cream dreams, you must continue to blend the cream for another 3 minutes. If your machine protests and gets a bit too hot, work in 1-minute intervals, giving the machine a little rest between beats.

Pour the cream into a container, press a piece of plastic wrap against the surface to create an airtight seal and refrigerate for at least 4 hours or overnight. (The cream will keep in the fridge for 4 days and, or tightly sealed, in the freezer for up to 2 months; thaw it overnight in the refrigerator.)

When you are ready to assemble the tart, just whisk the cream to loosen it and spoon it into the tart shell. Serve the tart, or refrigerate ‘until needed.

Serving: It’s a particular pleasure to have this tart when the cream is cold and the crust is at room temperature. A raspberry or other fruit coulis is nice, but not necessary; so is a little crème fraîche. I know it sounds odd to offer something as rich as crème fraîche with a tart like this, but it works because the lemon cream is so light and so intensely citric, it doesn’t taste or feel rich.

Storing: While you can make the lemon cream ahead, once the tart is constructed, it’s best to eat it the day it is made.

Sweet Tart Dough:
Makes enough for one 9-inch crust

Storing: Well wrapped, the dough can be kept in the refrigerator for up to 5 days or frozen for up to 2 months. While the fully baked crust can be packed airtight and frozen for up to 2 months, I prefer to freeze the unbaked crust in the pan and bake it directly from the freezer-it has a fresher flavor. Just add about 5 minutes to the baking time.

In French, this dough is called pâte sablée because it is buttery, tender and sandy (that’s what sablée means). It’s much like shortbread, and it’s ideal for filling with fruit, custard or chocolate.

The simplest way to make a tart shell with this dough is to press it into the pan. You can roll out the dough, but the high proportion of butter to flour and the inclusion of confectioners’ sugar makes it finicky to roll. I always press it into the pan, but if you want to roll it, I suggest you do so between sheets of plastic wrap or wax paper or inside a rolling slipcover.

1½ cups all-purpose flour
½ cup (2 ounces) confectioners’ sugar
¼ teaspoon salt
1 stick plus 1 tablespoon (9 tablespoons) very cold (or frozen) unsalted butter, cut into small pieces
1 large egg yolk

Put the flour, confectioners’ sugar and salt in a food processor and pulse a couple of times to combine. Scatter the pieces of butter over the dry ingredients and pulse until the butter is coarsely cut in-you should have some pieces the size of oatmeal flakes and some the size of peas. Stir the yolk, just to break it up, and add it a little at a time, pulsing after each addition. When the egg is in, process in long pulses-about 10 seconds each-until the dough, which will look granular soon after the egg is added, forms clumps and curds. Just before you reach this stage, the sound of the machine working the dough will change-heads up. Turn the dough out onto a work surface and, very lightly and sparingly, knead the dough just to incorporate any dry ingredients that might have escaped mixing.

To press the dough into the pan: Butter a 9-inch fluted tart pan with a removable bottom. Press the dough evenly over the bottom and up the sides of the pan, using all but one little piece of dough, which you should save in the refrigerator to patch any cracks after the crust is baked. Don’t be too heavy-handed-press the crust in so that the edges of the pieces cling to one another, but not so hard that the crust loses its crumbly texture. Freeze the crust for at least 30 minutes, preferably longer, before baking.

Center a rack in the oven and preheat the oven to 375 degrees F.

Butter the shiny side of a piece of aluminum foil and fit the foil, buttered side down, tightly against the crust. (Since you froze the crust, you can bake it without weights.) Put the tart pan on a baking sheet and bake the crust for 25 minutes. Carefully remove the foil. If the crust has puffed, press it down gently with the back of a spoon.

Bake for another 8 minutes or so, or until it is firm and golden brown. (I dislike lightly baked crusts, so I often keep the crust in the oven just a little longer. If you do that, just make sure to keep a close eye on the crust’s progress-it can go from golden to way too dark in a flash.) Transfer the tart pan to a rack and cool the crust to room temperature before filling.

To patch a partially or fully baked crust, if necessary: If there are any cracks in the baked crust, patch them with some of the reserved raw dough as soon as you remove the foil. Slice off a thin piece of the dough, place it over the crack, moisten the edges and very gently smooth the edges into the baked crust. If the tart will not be baked again with its filling, bake for another 2 minutes or so, just to take the rawness off the patch.

lemon poppy seed muffins

copy-of-dscn4303.jpg

Soon after I started dating Dave, we spent the weekend in his hometown, staying with his best friends (who are now also my best friends). Our hostess made lemon poppy seed muffins one morning for breakfast, and they were fantastic. A few months later, I asked my friend for the recipe, and she couldn’t find it. How does someone lose a recipe? I don’t get it. I have a number of recipe sources (cookbooks and websites), and if I can’t remember which one a recipe came from, I can generally figure it out with a few minutes of searching. Maybe my friend made the muffins from a mix and didn’t want to tell me. I don’t know.

Since then, I’ve tried a number of lemon poppy seed muffin recipes, looking for one that lived up to that memory. I won’t complain about any of them, because it’s an unbeatable combination of flavors, but none were as good as I was hoping for, until this recipe. These are light and tender and lemony without being sour, with a satisfying crunch from the poppy seeds. I’ll be sure not to lose this recipe.

copy-of-dscn4305.jpg

Lemon Poppy Seed Muffins (from Cooks Illustrated January 1997)

Makes 1 dozen large muffins

CI note: Remember, if you’re short on time, you can melt the butter, mix it with the eggs, and stir it into the dry ingredients. When thoroughly mixed, beat in the yogurt and proceed with the recipe.

3 cups unbleached all-purpose flour
1 tablespoon baking powder
½ teaspoon baking soda
3 tablespoons poppy seeds
½ teaspoon table salt
10 tablespoons unsalted butter, softened
1 cup granulated sugar, less 1 tablespoon
1 tablespoon grated lemon zest
2 large eggs
1½ cups plain low-fat yogurt
Vegetable cooking spray or additional unsalted butter for muffin tins
¼ cup granulated sugar
¼ cup lemon juice

1. Adjust oven rack to lower middle position and heat oven to 375 degrees. Mix flour, baking powder, baking soda, poppy seeds, and salt in medium bowl; set aside.

2. Beat butter and sugar with electric mixer on medium-high speed until light and fluffy, about 2 minutes. Add lemon zest to butter-sugar mixture. Add eggs, one at a time, beating well after each addition. Beat in one-half of dry ingredients. Beat in one-third of yogurt. Beat in remaining dry ingredients in two batches, alternating with yogurt, until incorporated.

3. Spray twelve-cup muffin tin with vegetable cooking spray or coat lightly with butter. Use large ice cream scoop to divide batter evenly among cups. Bake until muffins are golden brown, 25 to 30 minutes. Set on wire rack to cool slightly, about 5 minutes. Remove muffins from tin and glaze.

4. For Glaze: While muffins are baking, heat 1/4 cup granulated sugar and lemon juice in small saucepan until sugar dissolves and mixture forms light syrup, 3 to 4 minutes. Brush warm syrup over warm muffins and serve.

daring bakers jan 2008: lemon meringue pie

copy-of-dscn2807.jpg

I saw so excited to see that this month’s Daring Baker challenge was lemon meringue pie! Not only do I love lemon, but the one lemon meringue pie I’ve made was several years ago and was only partially successful. It seemed to me like this had to potential to be a fairly difficult challenge – pie crust, lemon curd, meringue. But when Jen of The Canadian Baker revealed this recipe to us, she expressed some concern that it might not be challenging enough for everyone.

She needn’t have worried. As one person after another wrote in to the DB private blog that they had followed the recipe exactly and had lemon meringue soup to show for their efforts, I started to get worried. And it seemed that for every disaster, there was another DBer chiming in that they had followed the recipe exactly and had perfect results. It goes without saying that I was hoping to be in the latter group.

I was not. I, however, cannot claim that I followed the recipe exactly. Because I screwed up.

copy-of-dscn2861.jpg

It was all going swimmingly until I baked the pie at the end. The crust was a bit thicker than I’m used to, and the filling overflowed the crust a bit after I added the meringue, but these are minor qualms. (Ah – I see now that the recipe is developed for a 10-inch pan, and I only have 9-inch pans. That explains it.) The problem arose when I opened the oven to bake the pie and realized that I needed to adjust the racks and add a sheet pan below to catch drips. As I fumbled around with these corrections, I cranked the oven thermometer up to make sure the heater stayed on.

About five minutes after I put the pie in, a smell reminiscent of marshmallows roasting on a campfire reminded me that I hadn’t turned the oven back down. At this point the meringue was a beautiful mix of almost black, tan, and white. Afraid of it turning entirely black, I took the pie out far earlier than the recipe instructed.

And like many DBers, my filling did not set. Is it because I baked the pie at 450 degrees for 5 minutes instead of 375 degrees for 20 minutes? I don’t know. The next day, however, the filling was nice and solid, although the meringue was insufficiently cooked.

copy-of-dscn2868.jpg

I do know that this unsatisfactory pie did not satisfy the desire for lemon meringue pie that I had by now developed. I also knew that I wasn’t taking any chances with the same recipe. Instead, I tried a Cooks Illustrated recipe. Unsurprisingly, it went off without a hitch. Gotta love Cooks Illustrated.

Check to see how the rest of the Daring Bakers pie experiences went!

copy-of-dscn3246.jpg

Lemon Meringue Pie (from Wanda Beaver’s Wanda’s Pie in the Sky)

Makes one 10-inch (25 cm) pie

For the Crust:
¾ cup (180 mL) cold butter; cut into ½-inch (1.2 cm) pieces
2 cups (475 mL) all-purpose flour
¼ cup (60 mL) granulated sugar
¼ tsp (1.2 mL) salt
⅓ cup (80 mL) ice water

For the Filling:
2 cups (475 mL) water
1 cup (240 mL) granulated sugar
½ cup (120 mL) cornstarch

5 egg yolks, beaten
¼ cup (60 mL) butter
¾ cup (180 mL) fresh lemon juice
1 tbsp (15 mL) lemon zest
1 tsp (5 mL) vanilla extract

For the Meringue:
5 egg whites, room temperature
½ tsp (2.5 mL) cream of tartar
¼ tsp (1.2 mL) salt
½ tsp (2.5 mL) vanilla extract
¾ cup (180 mL) granulated sugar

For the Crust: Make sure all ingredients are as cold as possible. Using a food processor or pastry cutter and a large bowl, combine the butter, flour, sugar and salt. Process or cut in until the mixture resembles coarse meal and begins to clump together. Sprinkle with water, let rest 30 seconds and then either process very briefly or cut in with about 15 strokes of the pastry cutter, just until the dough begins to stick together and come away from the sides of the bowl. Turn onto a lightly floured work surface and press together to form a disk. Wrap in plastic and chill for at least 20 minutes.

Allow the dough to warm slightly to room temperature if it is too hard to roll. On a lightly floured board (or countertop) roll the disk to a thickness of ⅛ inch (.3 cm). Cut a circle about 2 inches (5 cm) larger than the pie plate and transfer the pastry into the plate by folding it in half or by rolling it onto the rolling pin. Turn the pastry under, leaving an edge that hangs over the plate about ½ inch (1.2 cm). Flute decoratively. Chill for 30 minutes.

Preheat oven to 350ºF (180ºC). Line the crust with foil and fill with metal pie weights or dried beans. Bake for 20 to 25 minutes. Carefully remove the foil and continue baking for 10 to 15 minutes, until golden. Cool completely before filling.
For the Filling: Bring the water to a boil in a large, heavy saucepan. Remove from the heat and let rest 5 minutes. Whisk the sugar and cornstarch together. Add the mixture gradually to the hot water, whisking until completely incorporated.

Return to the heat and cook over medium heat, whisking constantly until the mixture comes to a boil. The mixture will be very thick. Add about 1 cup (240 mL) of the hot mixture to the beaten egg yolks, whisking until smooth. Whisking vigorously, add the warmed yolks to the pot and continue cooking, stirring constantly, until mixture comes to a boil. Remove from the heat and stir in butter until incorporated. Add the lemon juice, zest and vanilla, stirring until combined. Pour into the prepared crust. Cover with plastic wrap to prevent a skin from forming on the surface, and cool to room temperature.

For the Meringue: Preheat the oven to 375ºF (190ºC). Using an electric mixer beat the egg whites with the cream of tartar, salt and vanilla extract until soft peaks form. Add the sugar gradually, beating until it forms stiff, glossy peaks. Pile onto the cooled pie, bringing the meringue all the way over to the edge of the crust to seal it completely. Bake for 15 to 20 minutes, or until golden. Cool on a rack. Serve within 6 hours to avoid a soggy crust.

The Ultimate Lemon Meringue Pie (from Cooks Illustrated)

Makes one 9-inch pie

Graham Cracker-Coated Pie Shell
1¼ cups unbleached all-purpose flour
½ teaspoon table salt
1 tablespoon granulated sugar
6 tablespoons unsalted butter , chilled and cut into 1/4-inch pieces
4 tablespoons vegetable shortening , chilled
3-4 tablespoons cold water
½ cup graham cracker crumbs

Lemon Filling
1 cup granulated sugar
¼ cup cornstarch
1/8 teaspoon table salt
1½ cups cold water
6 large egg yolks
1 tablespoon lemon zest from 1 lemon
½ cup lemon juice from 2 to 3 lemons
2 tablespoons unsalted butter

Meringue Topping
1 tablespoon cornstarch
¼ teaspoon cream of tartar
½ cup granulated sugar
4 large egg whites
½ teaspoon vanilla extract
1. For the pie shell: Mix flour, salt and sugar in food processor fitted with steel blade. Scatter butter pieces over flour mixture, tossing to coat butter with a little of the flour. Cut butter into flour with five 1 second pulses. Add shortening; continue cutting in until flour is pale yellow and resembles coarse cornmeal with butter bits no larger than a small pea, about four more 1-second pulses. Turn mixture into medium bowl.

2. Sprinkle 3 tablespoons cold water over mixture. Using rubber spatula, fold water into mixture; press down on dough mixture with broad side of spatula until dough sticks together. If dough will not come together, add up to 1 tablespoon more cold water. Shape dough into ball, then flatten into 4-inch-wide disk. Dust lightly with flour, wrap in plastic, and refrigerate for 30 minutes before rolling.

3. Generously sprinkle work area with 2 tablespoons graham cracker crumbs. Place dough on work area. Scatter a few more crumbs over dough. Roll dough from center to edges, turning it into a 9-inch disk, rotating a quarter turn after each stroke and sprinkling additional crumbs underneath and on top as necessary to coat heavily. Flip dough over and continue to roll, but not rotate, to form a 13-inch disk slightly less than 1/8-inch thick.

4. Fold dough into quaarters; place dough point in center of 9-inch Pyrex pie pan. Unfold to cover pan completely, letting excess dough drape over pan lip. To fit dough to pan, lift edge of dough with one hand and press dougn in pan bottom with other hand; repeat process around circumferences of pan to ensure dough fits properly and is not stretched. Trim all around, ½-inch past lip of pan. Tuck ½ inch of overhanging dough under so folded edge is flush with lip of pan; press to seal. Press thumb and index finger about ½-inch apart against outside edge of dough, then use index finger or knuckle of other hand to poke a dent on inside edge of dough through opening created by the other fingers. Repeat to flute around perimeter of pie shell.

5. Refrigerate until firm, about 30 minutes. Use fork to prick shell at ½-inch intervals; press a doubled 12-inch square of aluminum foil into pie shell; prick again and refrigerate at least 30 minutes.

6. Adjust oven rack to lowest position, heat oven to 400 degrees. Bake, checking occasionally for ballooning, until crust is firmly set, about 15 minutes. Reduce oven temperature to 350 degrees, remove foil, and continue to bake until crust is crisp and rich brown in color, about 10 minutes longer.

7. For the filling: Mix sugar, cornstarch, salt, and water in a large, nonreactive saucepan. Bring mixture to simmer over medium heat, whisking occasionally at beginning of the process and more frequently as mixture begins to thicken. When mixture starts to simmer and turn translucent, whisk in egg yolks, two at a time. Whisk in zest, then lemon juice, and finally butter. Bring mixture to a brisk simmer, whisking constantly. Remove from heat, place plastic wrap directly on surface of filling to keep hot and prevent skin from forming.

8. For the meringue: Mix cornstarch with 1/3 cup water in small saucepan; bring to simmer, whisking occasionally at beginning and more frequently as mixture thickens. When mixture starts to simmer and turn translucent, remove from heat. Let cool while beating egg whites.

9. Heat oven to 325 degrees. Mix cream of tartar and sugar together. Beat egg whites and vanilla until frothy. Beat in sugar mixture, 1 tablespoon at a time; until sugar is incorporated and mixture forms soft peaks. Add cornstarch mixture, 1 tablespoon at a time; continue to beat meringue to stiff peaks. Remove plastic from filling and return to very low heat during last minute or so of beating meringue (to ensure filling is hot).

10. Pour filling into pie shell. Using a rubber spatula, immediately distribute meringue evenly around edge then center of pie to keep it from sinking into filling. Make sure meringue attaches to pie crust to prevent shrinking. Use spoon to create peaks all over meringue. Bake pie until meringue is golden brown, about 20 minutes. Transfer to wire rack and cool to room temperature. Serve.

copy-of-dscn3221.jpg

can’t deepfry on a wednesday (fish tacos)

copy-of-dscn3262.jpg

For Dave’s birthday, my parents took us out to eat at a brewery. Everyone loved the beer they ordered (except for my 8-month pregnant sister, who had to settle for soda), but I think I was the only one who enjoyed their food. Oh, and I did enjoy my food. Rarely do I finish my entire meal at a restaurant, but my shrimp tacos were too good to waste.

The shrimp was battered and fried, served with the classic shredded cabbage and aioli. I’ve made fish tacos before using a similar method, a beer batter, and they were fantastic. But…today is Wednesday, and deep-frying on a weeknight just seems irresponsible. I don’t generally shy away from fat, and I’d rather eat less of great food, than larger quantities of “reduced-fat” versions, but this time, I was ready to compromise. And after smearing everything with mayonnaise, how low-fat is this anyway?

So, I skipped the batter on the fish, and instead pan-fried it in just a slick of oil. Really, so much of the charm of this meal comes from the cabbage, mayonnaise, lime, and cilantro (not usually one of my favorites, but it has its place) that I didn’t miss the deep-fried goodness at all. In fact, I’ve decided that I’ll never bother deep-frying fish for fish tacos again. This was easier, cleaner, healthier, and just as tasty!

Weeknight Fish Tacos (adapted from my brother’s recipe)
Serves 2

I used large tortillas, because that’s all I had on hand, so this is what the picture shows. However, small tortillas actually work better. Also, I didn’t have red onions, so I used green onions.

Other possible toppings include avocado, green chile, and hot sauce.

I have tried substituting plain yogurt for the sour cream to make this even healthier, and it turned out great.

2 tablespoons lime juice
2 tablespoons extra virgin olive oil, plus 1 tablespoon for oiling pan
¼ cup minced cilantro
¼ teaspoon cumin
2 garlic cloves, minced
½ – 3/4 pound tilapia, or other white fish (halibut, cod, catfish, snapper)
salt
4 ounces (¼ – ½ head) cabbage, finely shredded
½ small red onion, thinly sliced
6-8 small flour tortillas
White sauce (recipe follows)

White sauce:
1½ tablespoon minced cilantro
3 tablespoons mayonnaise
1 tablespoon sour cream
1 tablespoon lime juice

1. Mix lime juice, 2 tablespoons olive oil, cilantro, and cumin in large, flat bowl or pie plate. Add fish and turn to coat. Let marinate 15-30 minutes.

2. Heat remaining 1 tablespoon olive oil in nonstick skillet over medium-high heat until shimmering. Add marinated fish and cook, without moving, for 3 minutes. Using 2 spatulas, flip fish and cook on second side for 2 minutes, or until fish flakes with a fork. Remove fish from pan to plate, season with salt, and let set for 2-3 minutes. Cut into approximately bite-size pieces.

3. To build each taco, spread liberal amount of white sauce on tortilla, then add fish, cabbage, red onion, and whatever garnishes you desire. Serve.

copy-of-dscn3260.jpg