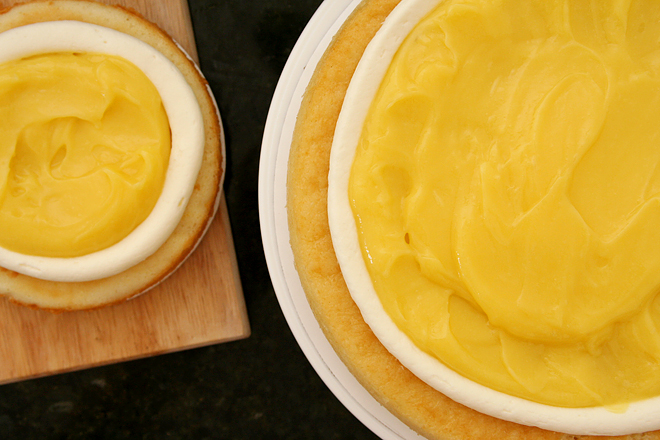
lemon cake with lemon curd filling and cream cheese frosting

fondant 22

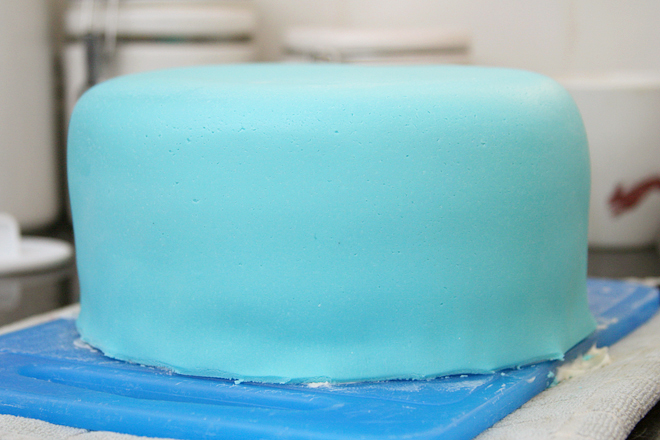
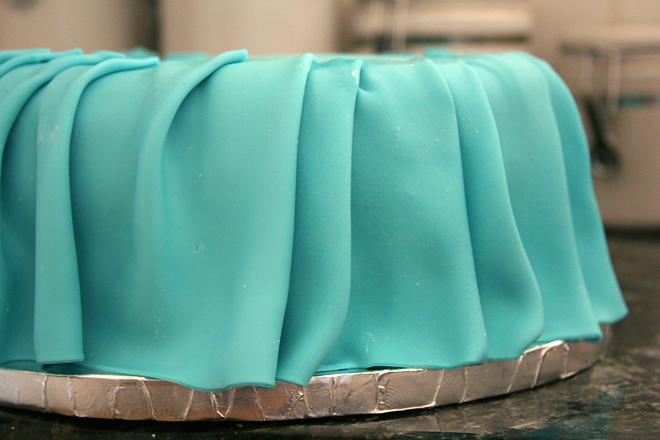
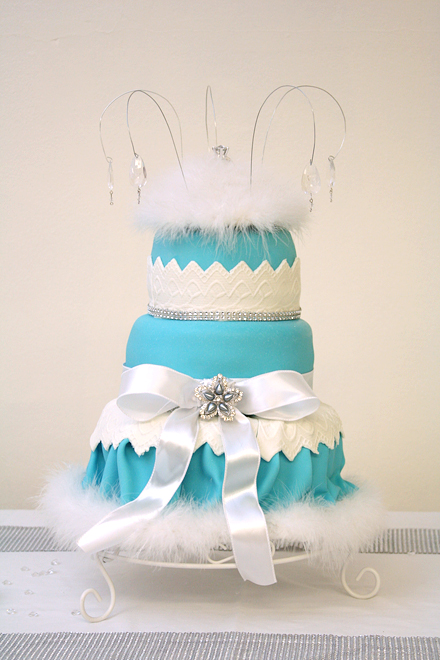
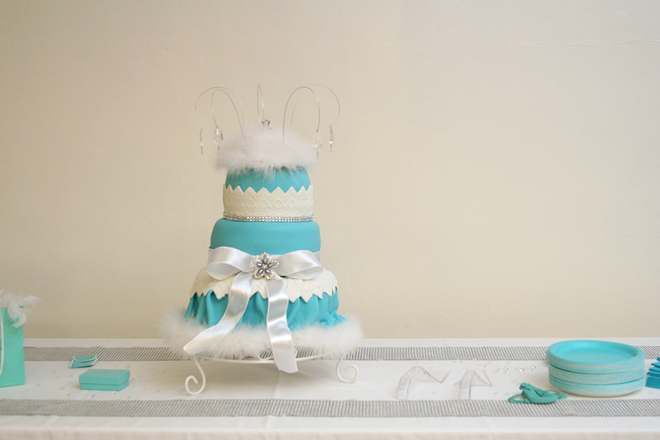
Two years ago, I made this cake for a Tiffany-themed baby shower (and I’m just now telling you about it), and it became infamous for the cake that made me cry. I wouldn’t have told anyone that myself, but Dave blurted it out when we delivered the cake. “Never again!”, he told our friends.

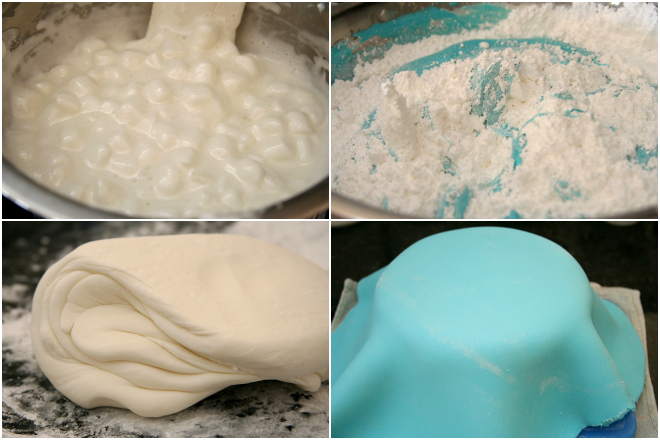
tiffany fondant collage

I’m actually proud of the cake, but it’s true that it wasn’t a smooth process. When my friend showed me a picture of the cake and asked me to reproduce it for the baby shower she was hosting for her daughter, I ambitiously agreed. I had never worked with fondant before, but how hard could it be?

fondant 16

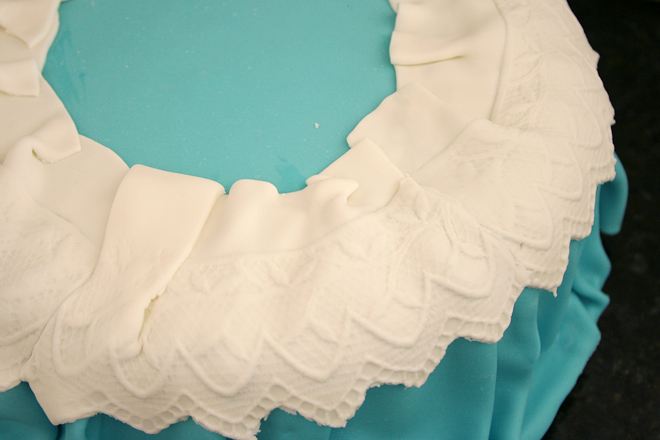
Well, pretty hard, actually, at least when you’re both inexperienced and a perfectionist. I found a few opportunities to practice before the shower and learned some valuable lessons, but on the morning of the shower, the ruffles and lace were still uncharted territory. Looking back, I can’t remember what caused the tears, but it could have been any number of things – the lace sticking to the mold, running out of fondant, running behind schedule.

fondant 18

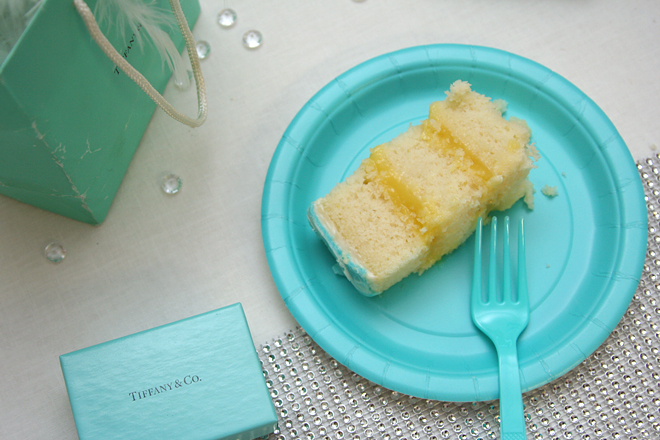
Fortunately, whether the lace had obvious seams or the fondant cracked at the corners, I knew the cake itself would taste good. I’m much more confident in my baking skills than my decorating skills. I took one of my favorite white cakes and added lemon zest, so that, at least, was one part of this project that wasn’t complicated.

fondant 19

Despite my struggles, I think the cake turned out great, and the host seemed pleased. It tasted at least as good as it looked. Still, it was two years before anyone asked me to make a tiered cake with fondant for them again. That is what I’ll be doing this weekend. Any bets on how many times I cry this time?

fondant 24

Printer Friendly Recipe
Lemon Cake with Lemon Curd Filling and Cream Cheese Frosting
(adapted from Cook’s Illustrated’s Classic White Cake)

Makes a double-layer 8-inch or 9-inch cake

1 cup whole milk, at room temperature
6 large egg whites (¾ cup), at room temperature
2 teaspoons almond extract
1 teaspoon vanilla extract
zest of 1 small lemon
1¾ cups granulated sugar (12¼ ounces)
2¼ cups cake flour (9 ounces)
4 teaspoons baking powder
1 teaspoon table salt
12 tablespoons unsalted butter (1½ sticks), softened but still cool

1. Adjust an oven rack to middle position and heat oven to 350 degrees. Grease and flour two 8- or 9-inch-wide by 2-inch-high round cake pans and line with parchment paper. In a 4-cup liquid measure or medium bowl, whisk together milk, egg whites, and vanilla.

2. In bowl of standing mixer fitted with paddle attachment, mix the flour, sugar, baking powder, and salt at low speed. With the mixer running at low speed, add the butter one piece at a time; continue beating until the mixture resembles moist crumbs with no visible butter chunks. Add all but ½ cup milk mixture to crumbs and beat at medium speed until mixture is pale and fluffy, about 1½ minutes. With mixer running at low speed, add remaining ½ cup milk mixture; increase speed to medium and beat 30 seconds more. Stop mixer and scrape sides of bowl. Return mixer to medium speed and beat 20 seconds longer. Divide batter evenly between cake pans; using rubber spatula, spread batter to pan walls and smooth tops.

3. Bake until toothpick inserted in center of cakes comes out clean, about 20 minutes for 6-inch pans, 22 minutes for 8-inch pans, and 26 minutes for 10-inch pans. Loosen cakes from the sides of the pans with a small knife, cool in pan 10 minutes, then invert onto greased wire racks; peel off parchment. Invert the cakes again; cool completely on rack, about 1½ hours.

fondant 9

Lemon Curd Filling (from Cook’s Illustrated)

⅓ cup lemon juice, from 2 lemons
2 large eggs
1 egg yolk
½ cup sugar (3½ ounces)
2 tablespoons unsalted butter, cut into ½-inch cubes and chilled
1 tablespoon heavy cream
¼ teaspoon vanilla extract
pinch table salt

1. Heat lemon juice in small nonreactive saucepan over medium heat until hot but not boiling. Whisk eggs and yolk in medium nonreactive bowl; gradually whisk in sugar. Whisking constantly, slowly pour hot lemon juice into eggs, then return mixture to saucepan and cook over medium heat, stirring constantly with wooden spoon, until mixture registers 170 degrees on instant-read thermometer and is thick enough to cling to spoon, about 3 minutes.

2. Immediately remove pan from heat and stir in cold butter until incorporated; stir in cream, vanilla, and salt, then pour curd through fine-mesh strainer into small nonreactive bowl. Cover surface of curd directly with plastic wrap; refrigerate until needed.

fondant 2

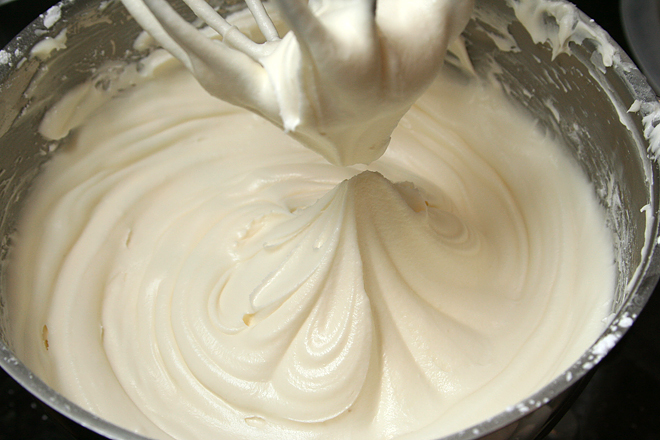
Cream Cheese Frosting (adapted from Smitten Kitchen)

Makes 6 cups

You can use 12 ounces powdered sugar instead of 16 if you’re going to make pretty swirls with the icing instead of decorating. It’ll taste less sweet and more cream cheesy.

8 ounces cream cheese, room temperature
8 tablespoons (1 stick) butter room temperature
4 cups (16 ounces) powdered sugar
1 teaspoon pure vanilla extract

Place cream cheese and butter in a medium bowl. With a handheld electric mixer, beat until light and fluffy, about 2 minutes. Add sugar and vanilla. Beat on low speed to combine.
fondant 21

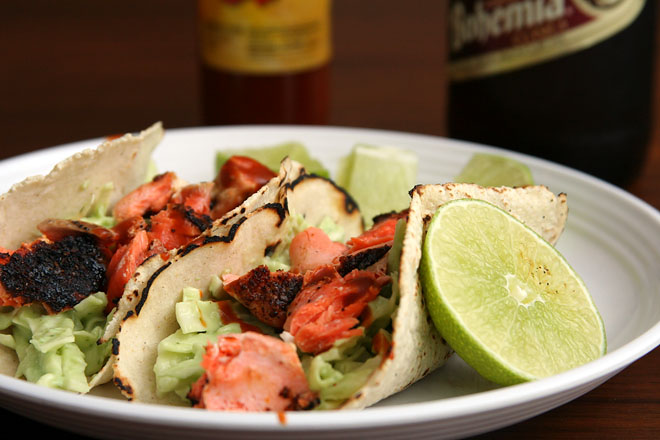
salmon tacos with tomatillo-avocado slaw

salmon tacos 6

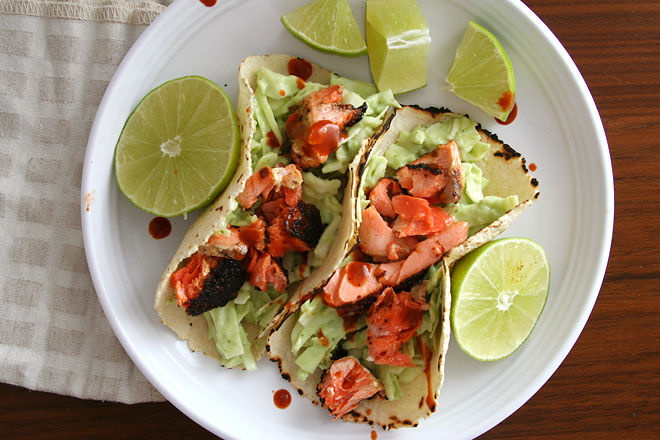
I’ve always made my fish tacos with white fish and been perfectly happy with that, but salmon actually makes a lot of sense. Just like barbacoa and chicken thighs, its richness makes a nice contrast to the crunchy slaw and tart dressing. Plus, I just really like salmon.

salmon tacos 1

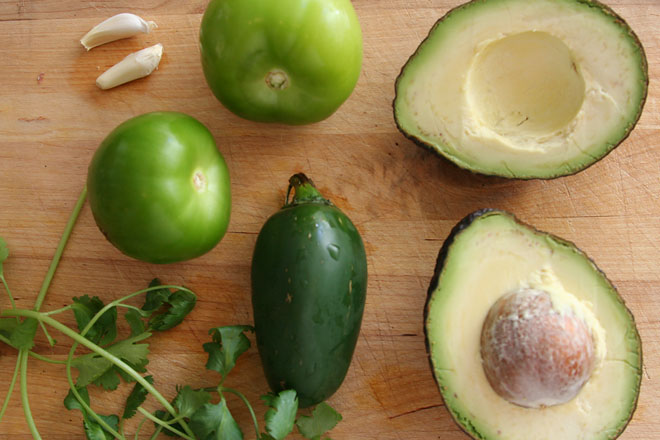
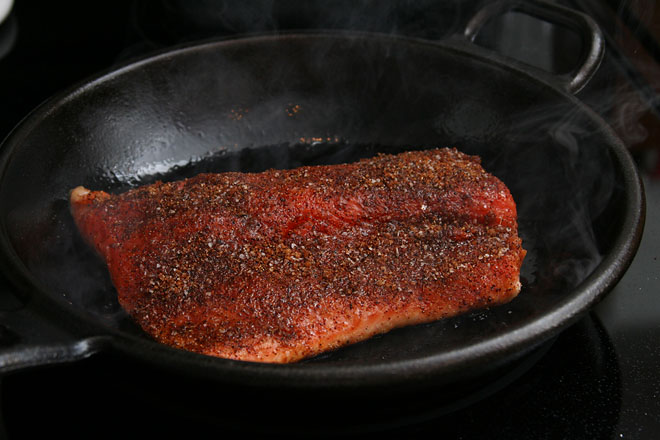
In this case, it’s rubbed with chili spices, a little sugar, and just a bit of finely ground coffee for an extra bite. Rather than serving slices of avocado in the tacos, it’s pureed along with tomatillos and cilantro into the dressing for the slaw. As much as a pile of different toppings on tacos is fun, on a weeknight, I appreciate the simplification of mixing them all into one bowl with the cabbage.

salmon tacos 4

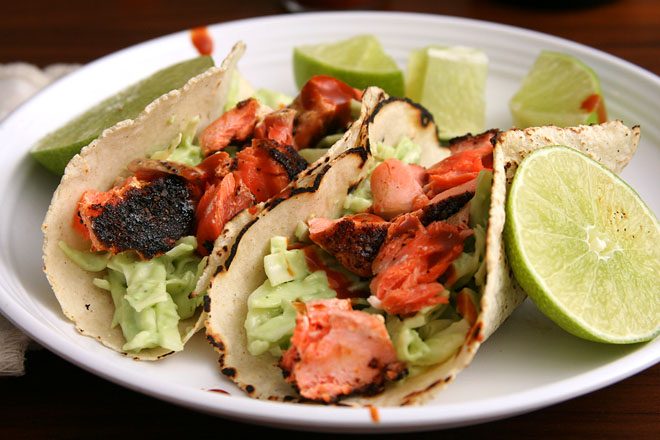
I don’t plan on pushing my white fish tacos aside – or my shredded beef tacos, or my Asian-inspired tacos, or even my lentil tacos – but we eat tacos often enough to enjoy plenty of variety. Combining one of my favorite types of fish with a creamy dressing made with avocados and stuffing it all into fresh corn tortillas? Plus it’s easy and healthy? Yes, this can be added to the list of tacos I make regularly.

salmon tacos 7

Printer Friendly Recipe
Dry-Rubbed Salmon Tacos with Tomatillo-Avocado Slaw (rewritten from Food and Wine via JBean Cuisine)

Serves 4

4 cups of pre-shredded coleslaw mix would work well here in place of the cabbage.

Tomatillo-avocado slaw:
2 tomatillos, husked and halved
2 tablespoons cilantro
1 small jalapeño, coarsely chopped
1 garlic clove, coarsely chopped
6 tablespoons sour cream or Greek yogurt
1 ripe avocado, halved, peeled, and pitted
salt to taste
lime juice to taste
½ head cabbage, cored and finely sliced

Salmon:
1 teaspoon ground cumin
1 teaspoon chili powder
½ teaspoon brown sugar
¼ teaspoon finely ground coffee
Salt and freshly ground black pepper
2 (8-ounce) salmon fillets
1 tablespoon olive oil
juice of ½ lime

For serving:
12 small flour or corn tortillas, heated and wrapped to keep warm
hot sauce, for serving

1. For the slaw: Transfer the tomatillos, cilantro, jalapeno, garlic, sour cream or Greek yogurt, and avocado to a blender or the bowl of a food processor. Process until smooth; season to taste with salt and lime juice. In a large bowl, stir the dressing into the cabbage. Set aside.

2. For the salmon: In a small bowl, combine the cumin, chili powder, brown sugar, coffee, and a generous pinch of salt and pepper. Dry the salmon fillets, then rub them with the spice mixture. If the salmon has skin, use all the rub on the skinless side; if the fillets are skinless, spread the spices on both sides.

3. Heat the oil in a large nonstick skillet over medium-high heat. Add the salmon (skin-side up if it has skin), and cook without moving until well-browned, about 4 minutes. Reduce the heat to medium, flip the salmon, and cook until the salmon just flakes, another 4-6 minutes. Transfer the salmon to a plate and break into approximately 1-inch pieces. Season with lime juice.

4. To serve: Top each tortilla with a portion of the salmon and the slaw; sprinkle with hot sauce. Serve immediately.

salmon tacos 5

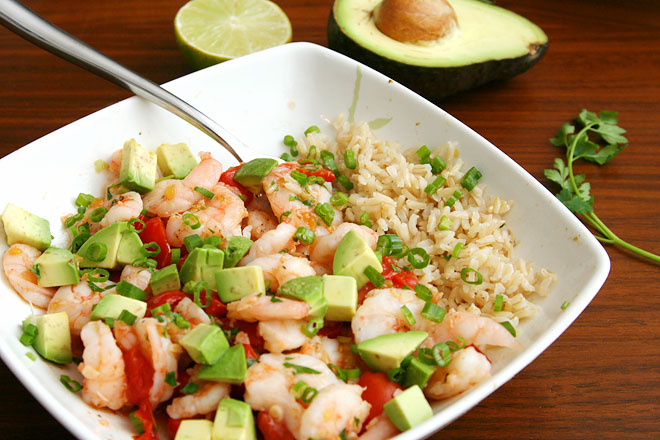
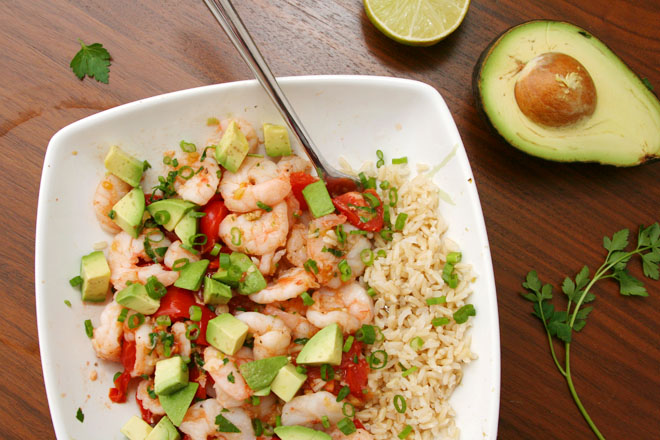
pan-seared shrimp with tomatoes and avocado

shrimp tomatoes avocado 2

I hate to be a cliche, but it’s January and I’d like to eat a little healthier for a while. That is, a little healthier than normal, and a whole lot healthier than I did over the holidays. I have no regrets; it was a delicious holiday break, full of cookies, holiday meals, restaurants, and fun new beers. But I’m happy to be back to eating the occasional green thing now.

shrimp tomatoes avocado 5

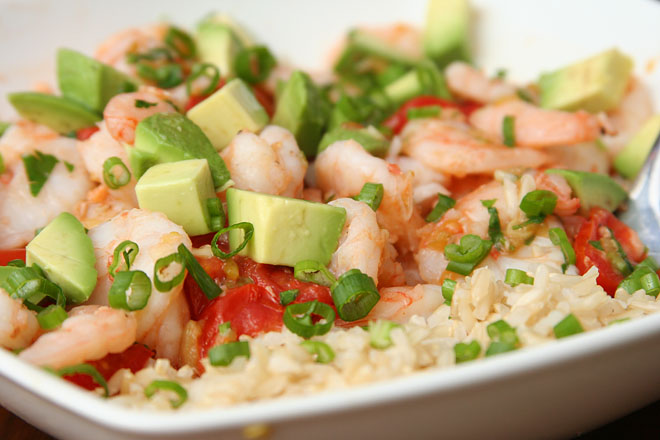
A book with Light and Healthy in the title was the obvious choice for choosing cookbook recipes in early January. It’s simply shrimp, cooked in just a bit of oil, then topped with barely softened vegetables. A bit of brown rice helps soak up any extra sauce.

shrimp tomatoes avocado 4

As much as I crave healthy foods when I’m eating feasts every night, sometimes when I’m trying to get back into eating lots of vegetables, I find myself missing sugar and fried food and cheese and all those delicious treats. Light, vegetably dishes as good as this one help ease the transition – especially since each serving has plenty of fatty, buttery, creamy avocado.

shrimp tomatoes avocado 1

Printer Friendly Recipe
Pan-Seared Shrimp with Tomatoes and Avocado
(from America’s Test Kitchen Light and Healthy 2011)

Serves 4

I used cherry tomatoes since they tend to be better in the winter than bigger varieties. I also substituted about ¼ cup minced roasted and peeled Hatch green chile for the chipotle.

1 pound tomatoes (2 to 3), cored, seeded, and cut into ½-inch pieces
6 scallions, white and green parts separated and sliced thin
¼ cup minced fresh cilantro
3 garlic cloves, minced
1 tablespoon fresh lime juice
1 teaspoon minced canned chipotle chile in adobo sauce
salt and pepper
1½ pounds extra-large shrimp (21 to 25 per pound), peeled and deveined
⅛ teaspoon sugar
4 teaspoon canola oil
1 avocado, peeled, seeded and cut into ½-inch pieces
lime wedges

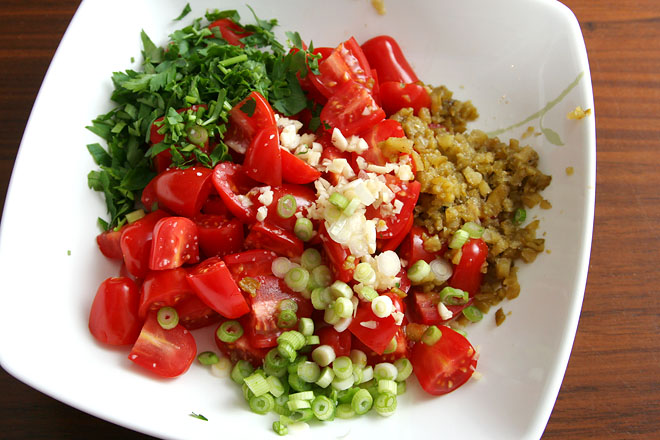
1. Combine the tomatoes, scallion whites, cilantro, garlic, lime juice, chipotle, and ¼ teaspoon salt in bowl.

2. Pat the shrimp dry with paper towels and season with the sugar, salt, and pepper. Heat 2 teaspoons oil in a 12-inch nonstick skillet over high heat until just smoking. Add half of the shrimp and cook until curled and lightly browned, about 2 minutes.

3. Transfer the shrimp to a bowl and cover with aluminum foil. Repeat with the remaining 2 teaspoons oil and shrimp; transfer to the bowl.

4. Return the skillet to high heat, add the tomato mixture, and cook until the tomatoes soften slightly, about 1 minute. Off the heat, return the shrimp to the skillet and toss to coat. Transfer the shrimp and tomatoes to a platter, season with salt and pepper to taste, and sprinkle with the scallion greens and avocado. Serve with lime wedges.

shrimp tomatoes avocado 3

cranberry swirl shortbread

cranberry shortbread 5

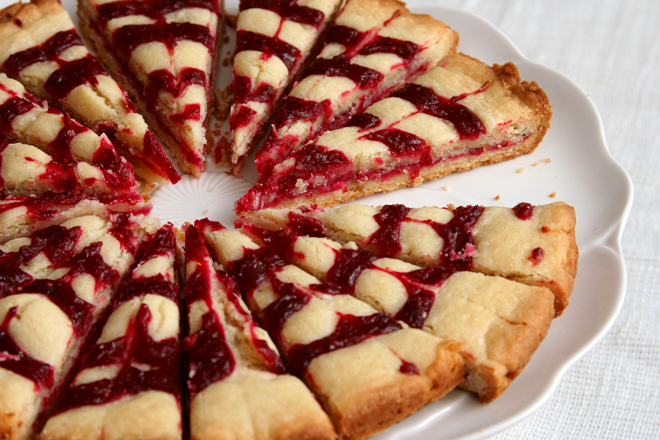
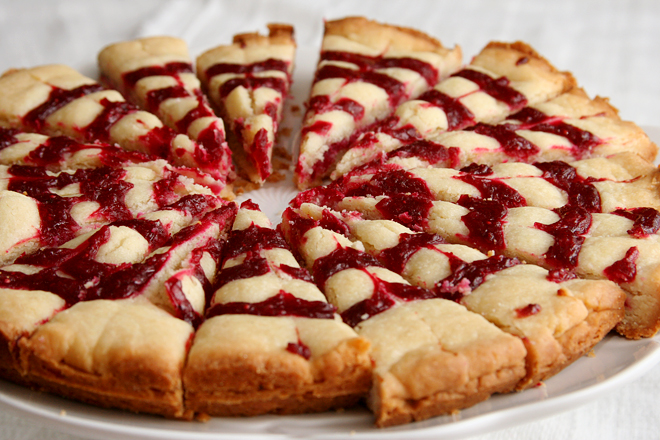
I was not feeling it the Monday night I made this shortbread. I was, however, feeling it the day before, when I had a relatively chore-free Sunday, and went ahead and made the cranberry filling, a double batch. In fact, I was so in the mood to bake that afternoon that I made a batch of my favorite Christmas cookies, just for the heck of it. But I forgot how long it takes to shape those cookies into their spirals and stripes and by the time that was over, I’d pretty much had my fill of baking.

cranberry shortbread 1

Which left me with a weeknight to make the shortbread dough, roll out four circles, chill the circles, partially bake two of the circles, layer them with cranberries, add more dough, pipe on more cranberry filling, score the dough, and add designs in the filling. All when I just wasn’t feeling it.

cranberry shortbread 2

My coworkers, however, were definitely feeling it the next day when a double batch disappeared in no time. Not only are these bright and attractive – even when you rush through making the design – but they’re tender and sweet with refreshingly tart filling. I will definitely make these again, but next time I’ll make sure I’m in the mood.

cranberry shortbread 3

Printer Friendly Recipe
Cranberry Swirl Shortbread (from Cook’s Illustrated)

Makes 16 wedges

4 ounces (1 cup) fresh or frozen cranberries
½ cup (3½ ounces) granulated sugar
½ teaspoon grated orange zest plus 2 tablespoons juice
¼ teaspoon ground cinnamon
2 cups (10 ounces) all-purpose flour
½ cup (2 ounces) confectioners’ sugar
½ teaspoon salt
14 tablespoons unsalted butter, cut into ½-inch pieces and chilled

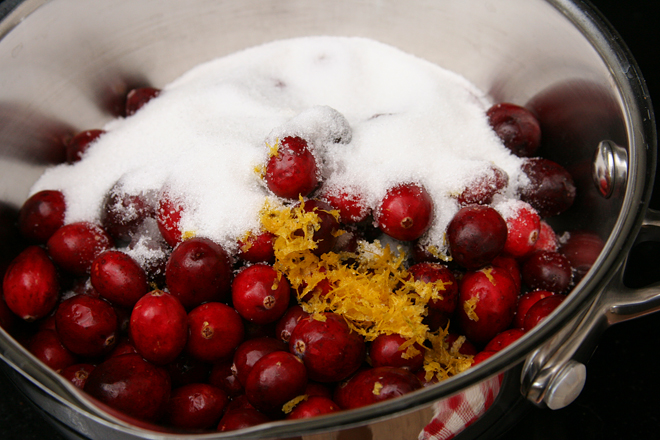
1. Bring the cranberries, ¼ cup granulated sugar, orange zest and juice, and cinnamon to a boil in a medium saucepan over medium-high heat. Cook, stirring frequently, until the cranberries have burst and the juice has just started to thicken, 2 to 4 minutes; let cool for 1 hour.

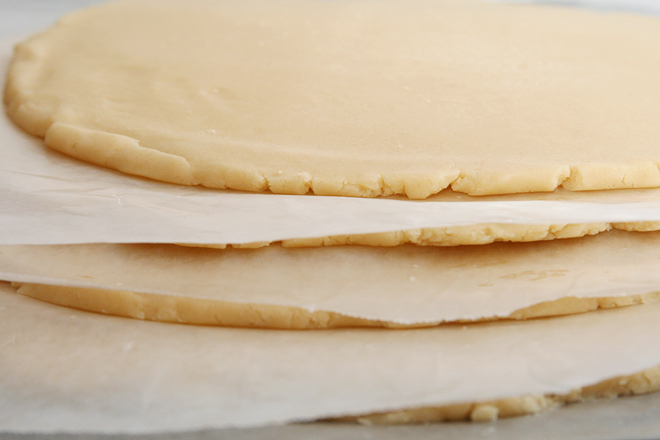
2. Adjust an oven rack to the middle position and heat the oven to 375 degrees. Process the flour, confectioners’ sugar, salt, and remaining ¼ cup granulated sugar in a food processor until combined, about 5 seconds. Scatter the butter over the top and process until the dough starts to come together, about 1 minute. Gently knead the dough by hand until no floury bits remain. (Do not wash the food processor bowl.) Divide the dough in half and roll each half into a 9-inch circle on parchment paper; refrigerate for 20 minutes. Process the cooled cranberry mixture in the food processor until smooth, about 20 seconds.

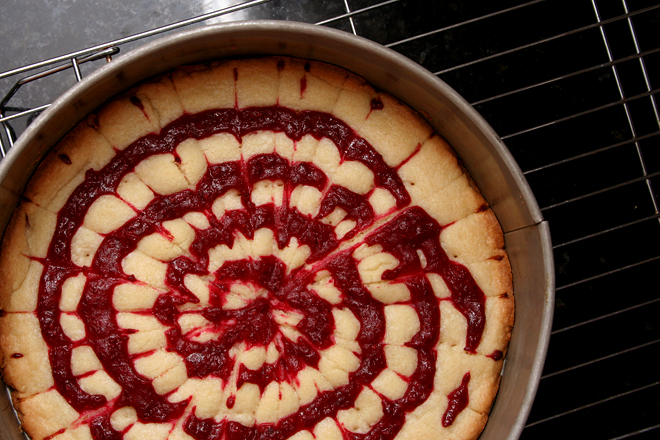
3. Press one dough circle into a 9-inch tart pan with a removable bottom and poke all over with fork. Bake on a baking sheet until the edges are light golden brown, 15 to 17 minutes, rotating the tart pan halfway through baking. Spread the dough with ¼ cup cranberry puree, the top with second dough circle, and poke all over with fork. Pipe the remaining cranberry puree over the dough in a spiral shape. Score the dough into 16 wedges. Between the score marks, lightly run a knife in the opposite direction of the cranberry spiral. Bake until the top is pale golden, 25 to 30 minutes, rotating the tart pan halfway through baking. Let the shortbread cool for 10 minutes, then remove the outer ring of the tart pan. Cut through the score marks, transfer the wedges to a wire rack, and let cool completely before serving.

cranberry shortbread 4

cranberry almond crostata

cranberry crostata 6

I’ve got nothing against pie – buttery, flaky crust, fruit filling, what’s not to like? – but I’m mostly a cake girl. Soft, spongy, tender, doughy cake. Brownies are good too. Or cookies. Pie is great, but it isn’t as good as doughy baked things, either to eat or to make.

cranberry crostata 1

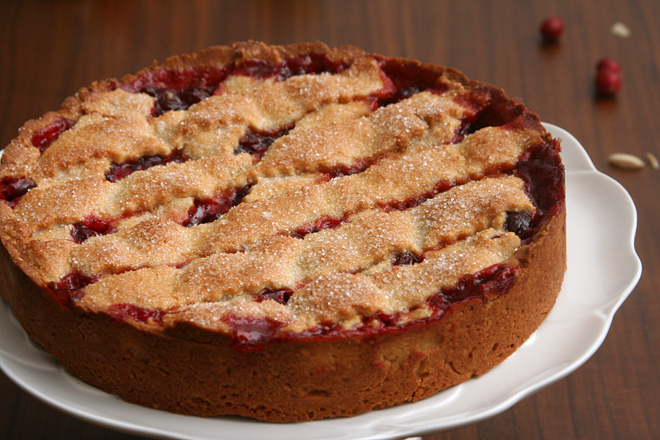
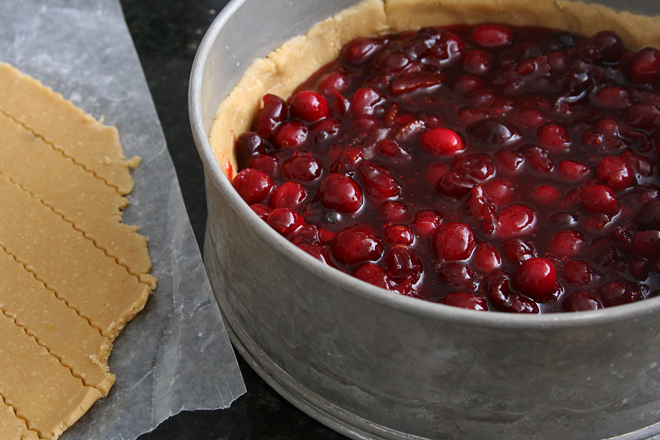
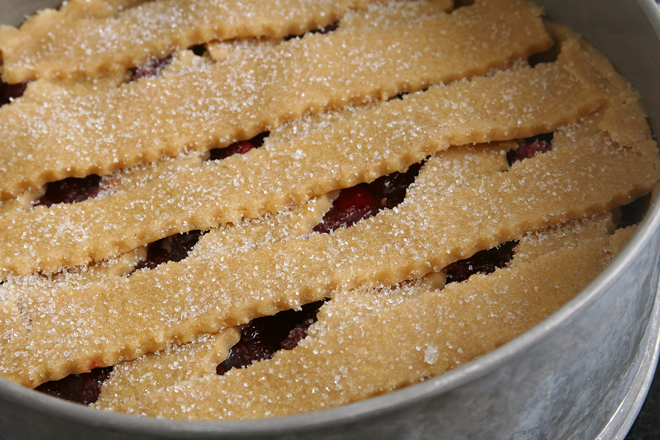
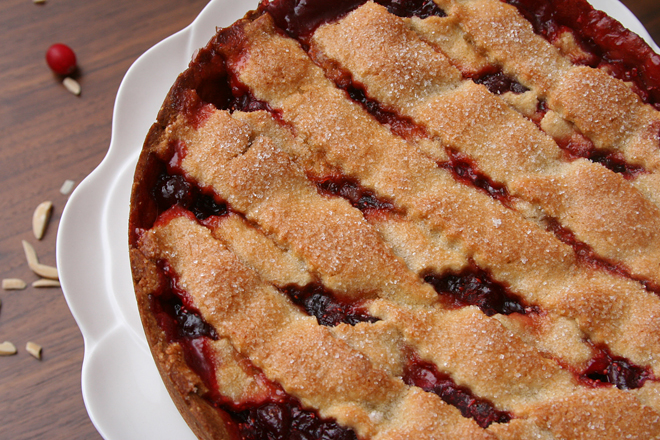
This crostata, however, is the perfect compromise, because the crust is made from cookie dough, not pie dough. The filling, on the other hand, is classic pie – thickened, fruity, juicy. It looked just like cherry pie as it baked.

cranberry crostata 3

When I made this for my big Italian-themed turkey feast last year, I mixed and cut the dough the day before the meal, storing it in the freezer. I also cooked and chilled the filling overnight. The next day, I spent 15 minutes assembling the tart in the morning before anything else needed to go in the oven. After transferring the beautifully browned and sugar sparkly tart to a cake stand, I didn’t have to think about it again until it was time for dessert. This sweet and tart and buttery dessert was the perfect end to the meal – and it was just as good the next morning for breakfast, just like pie.

cranberry crostata 4

Printer Friendly Recipe
Cranberry Almond Crostata (from Gourmet via epicurious)

For pastry dough:
⅛ cup whole raw almonds (¼ pound), toasted and cooled
2 cups all-purpose flour, divided
1¼ sticks unsalted butter, softened
½ cup packed light brown sugar
1 large egg, lightly beaten, divided
½ teaspoon pure vanilla extract
⅛ teaspoon pure almond extract
2 teaspoons grated lemon zest
½ teaspoon salt

For filling and assembly:
2½ cups fresh or frozen cranberries (10 ounces)
¼ cup fresh orange juice
½ cup sweet orange marmalade
½ cup packed light brown sugar
¼ teaspoon salt
1 tablespoon granulated sugar

1. Make the dough: Pulse the almonds with ¼ cup flour until finely ground (be careful not to grind to a paste). Beat together the butter and brown sugar with an electric mixer at medium speed until pale and fluffy, about 3 minutes. Reserve 1 tablespoon of the beaten egg, chilled, for egg wash and beat the remaining egg into the butter mixture, then add the vanilla and almond extracts, beating well. At low speed, mix in the almond mixture, zest, salt, and remaining 1¾ cups flour until mixture just forms a dough. Halve the dough and form each half into a 5- to 6-inch disk. Wrap the disks separately in plastic wrap and chill until firm, at least 30 minutes.

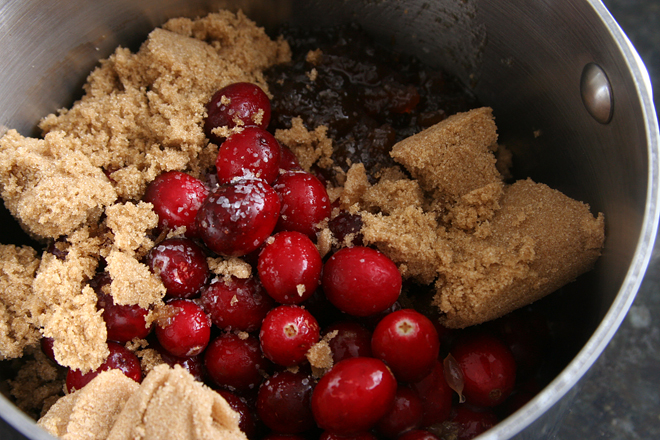
2. Make the filling: Bring the cranberries, orange juice, marmalade, brown sugar, and salt to a boil in a heavy medium pot, stirring, then simmer, uncovered, until some of the cranberries burst and the mixture is slightly thickened, about 5 minutes. Cool the filling quickly by spreading it in a shallow baking pan and chilling until lukewarm, about 15 minutes.

3. Preheat the oven to 375 degrees with a foil-lined large baking sheet on the middle rack. Generously grease a springform pan.

4. Roll out 1 piece of dough between sheets of wax or parchment paper into a 12-inch round (dough will be very tender). Remove the top sheet of paper and invert the dough into the springform pan. (Dough will tear easily but can be patched together with your fingers.) Press the dough over the bottom and up the side of the pan, trimming the dough to reach ½ inch up the side of the pan. Chill.

5. Roll out the remaining dough into a 12-inch round in same manner. Remove the top sheet of paper, then cut the dough into 10 (⅓-inch-wide) strips with a pastry wheel and slide (still on the wax paper) onto a tray. Freeze strips until firm, about 10 minutes.

6. Spread the filling in the chilled shell and arrange 5 strips 1 inch apart on filling. Arrange the remaining 5 strips 1 inch apart diagonally across first strips to form a lattice with diamond-shaped spaces. Trim the edges of all the strips flush with the edge of the shell. Brush the lattice top with the reserved beaten egg and sprinkle the crostata with the 1 tablespoon granulated sugar.

7. Bake the crostata in the pan on the hot baking sheet until the pastry is golden and the filling is bubbling, 50 to 60 minutes. (If the pastry is too brown after 30 minutes, loosely cover the crostata with foil.) Cool the crostata completely in the pan on a rack, 1½ to 2 hours.

cranberry crostata 5

vietnamese shrimp quinoa salad

vietnamese shrimp salad 8

Does anyone else think shrimp can have an off-putting texture sometimes? It’s not just when it’s overcooked and chewy; even cooked correctly, there can be an unevenly textured graininess that I don’t like. The smaller the shrimp, the less that texture is an issue. On the other hand, the smaller the shrimp, the more shrimp you have to peel.

vietnamese shrimp salad 1

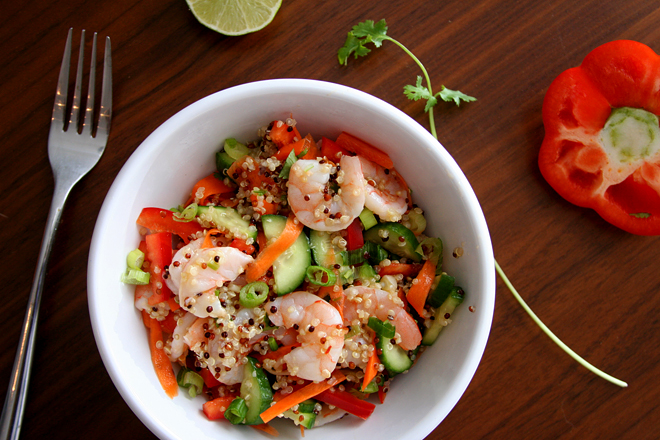
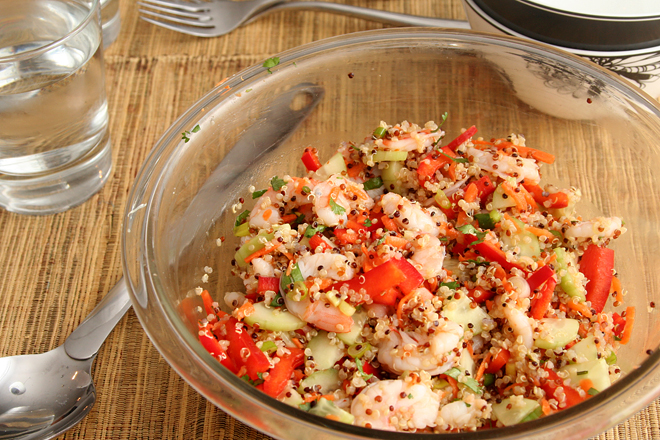
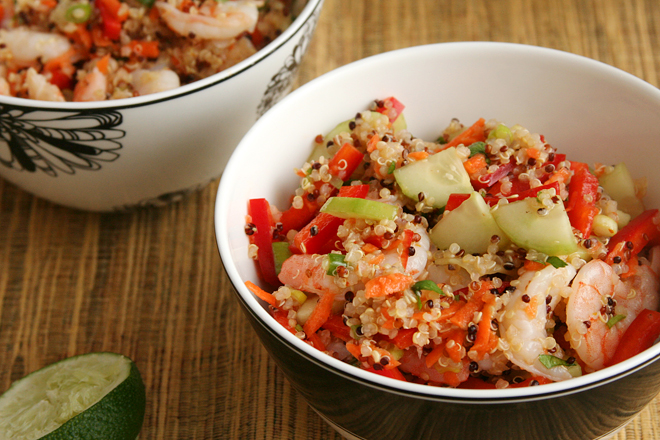
However, I love the flavor. Sweet and briny, it’s so good in a huge variety of dishes. This is one of my recent favorites. The vegetables are crunchy and fresh, but the shrimp and quinoa keep it satisfying.

vietnamese shrimp salad 2

I’ve found a trick that seems to solve my texture issues with shrimp, although it’s an extra tedious step on top of the already tedious peeling. After cooking, I cut the shrimp in half lengthwise. As an added bonus, it makes them closer to bite-sized for me, so I can get a forkful with all the goodies – shrimp and quinoa and vegetables and herbs. This one simple trick makes me love shrimp – both the flavor and the texture.

vietnamese shrimp salad 4

Printer Friendly Recipe
Vietnamese Shrimp and Quinoa Salad (adapted from Serious Eats)

You can save some time by cooking the quinoa in water instead of the cooking liquid from the shrimp, starting to cook the quinoa around the same time as the shrimp.

Shrimp:
1 pound shrimp, unpeeled
2 cups water
5 cilantro sprigs
1 tablespoon sugar
1 teaspoon salt
1 lime

Salad:
½ cup uncooked quinoa, rinsed
1 red pepper, diced
1 cucumber, peeled, seeds removed, quartered lengthwise, and sliced
1 large carrot, peeled and shredded
2 scallions, sliced thin
¼ cup cilantro, minced

Dressing:
¼ cup lime juice from 2 limes
1 tablespoon fish sauce
1 tablespoons vegetable oil
2 teaspoons sugar
¼ teaspoon red pepper flakes

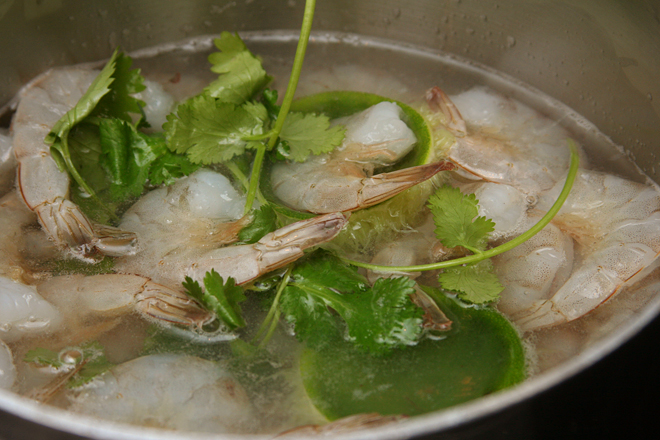
1. For the shrimp: In a 2-quart saucepan, combine the shrimp, water, cilantro sprigs, 1 tablespoon sugar, and 1 teaspoon salt. Juice the lime into the saucepan, then add the lime peels to the saucepan. Place the saucepan over medium-high heat and cook until the shrimp turn pink, 8 to 10 minutes. Drain the shrimp, reserving ¾ cup of the shrimp broth. Rinse the saucepan.

2. For the salad: Add the shrimp broth and quinoa to the rinsed saucepan and heat over medium-high heat until the broth boils. Cover, reduce the heat to low, and cook for 15 minutes. Remove from the heat and let set, covered, for 10 minutes.

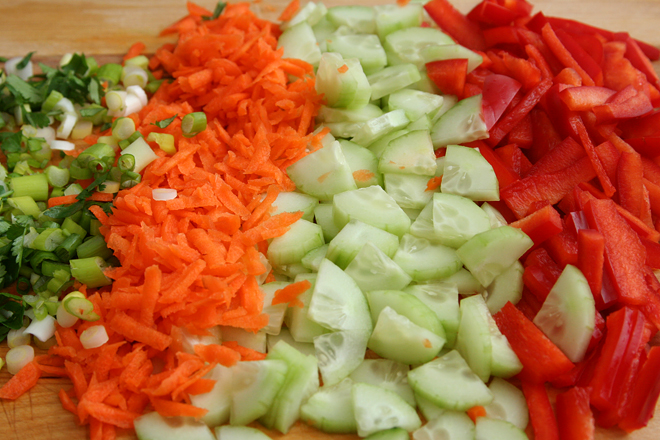
3. In a large bowl, combine the quinoa, red peppers, cucumber, carrot, scallions, and cilantro. Peel the cooled shrimp and add it to the bowl.

4. For the dressing: Mix everything. Pour over the salad and stir to combine. Serve immediately, or cover and chill for up to four hours.
vietnamese shrimp salad 6

goat cheese-stuffed mini peppers

goat cheese stuffed peppers 3

I’ve been lucky to have a lot of opportunities for tapas lately. It started, I believe, last year when Dave and I met my brother for a weekend in Los Angeles, and we shared an exceptional tapas meal. Since then, my brother is tapas-crazy.

goat cheese stuffed peppers 1

On our family’s recent trip to the beach, we collaborated to serve nine different tapas to eleven people (in a house with no dishwasher). Two weeks later, Dave and I had the opportunity to go tailgating in the parking lot of an opera house before seeing Carmen; tapas was the obvious choice again. Less than a week after that, a friend hosted a potluck dinner, and the theme she chose was tapas.

goat cheese stuffed peppers 2

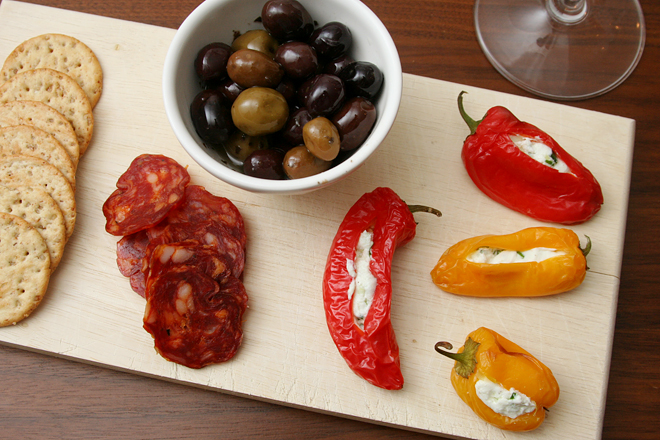
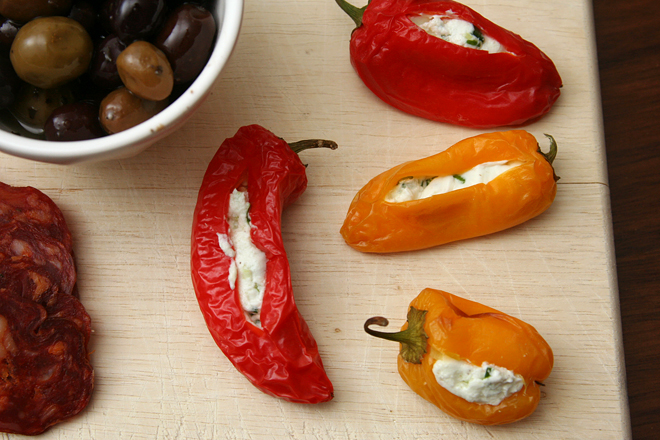
These are among some of my favorite of the options at each dinner, with nods also going to gazpacho and anything with bread (obviously). There are so many bread-based snack options that I love offering something different, especially something with vegetables. But the vegetables are filled with cheese, so they can hold their own on a table filled with garlicky shrimp and things-on-bread. With this recipe in my pocket, I’m ready for many more tapas dinners.

goat cheese stuffed peppers 4

Printer Friendly Recipe
Goat Cheese-Stuffed Mini Peppers

Makes 24 appetizers

I don’t take the seeds or veins out of these when I make them. It hasn’t been a problem.

24 miniature sweet peppers
8 ounces soft goat cheese
2 scallions, finely chopped
2 tablespoons lemon juice
Pinch salt
Pinch black pepper

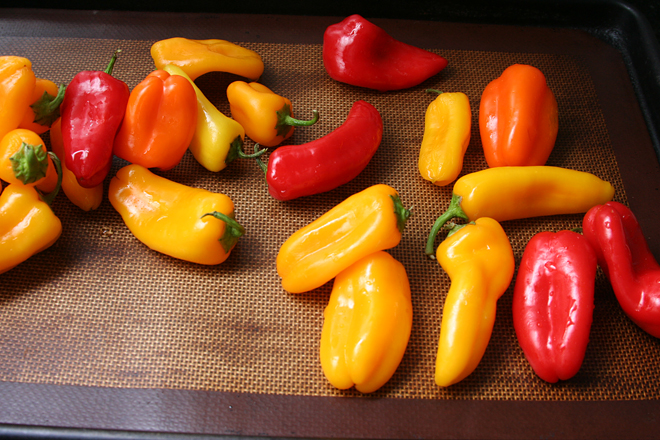
1. Adjust a rack to the middle position and heat the oven to 400 degrees. Cut a 1 to 2-inch slit down the side of each pepper. Arrange the peppers in a single layer on a rimmed baking sheet, cut-side up. Roasted until softened and slightly browned, about 20 minutes. Set aside to cool slightly.

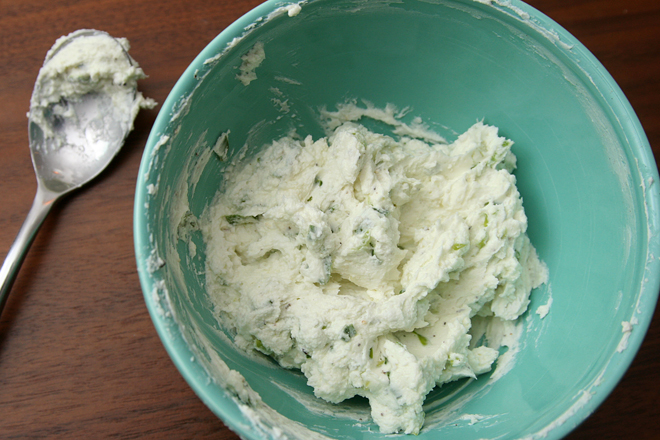
2. Meanwhile, mix the goat cheese, scallions, lemon juice, salt, and pepper. Transfer the mixture to a piping bag with a wide tip or a zip-top bag with a corner cut off. (I tried spooning the filling into the peppers once, and it didn’t work at all. Piping is definitely the way to go.)

3. Squeeze the goat cheese mixture into each pepper, widening the cut in the pepper if necessary. Serve at room temperature (can be made 2 days in advance).

margarita cupcakes

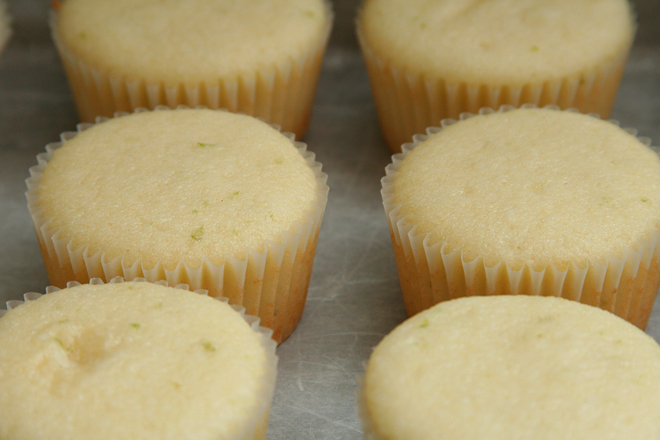
margarita cupcakes 5

I haven’t really been drinking margaritas lately, since we’ve moved from daiquiris into experiments with all sorts of tiki drinks, but eating them is another thing. I hosted a taco bar party recently, where I supplied corn tortillas and beef barbacoa and everyone else brought sides or toppings. I thought about serving margaritas, but I wasn’t excited about squeezing a hundred limes; sangria for a crowd is a whole lot easier.

margarita cupcakes 2

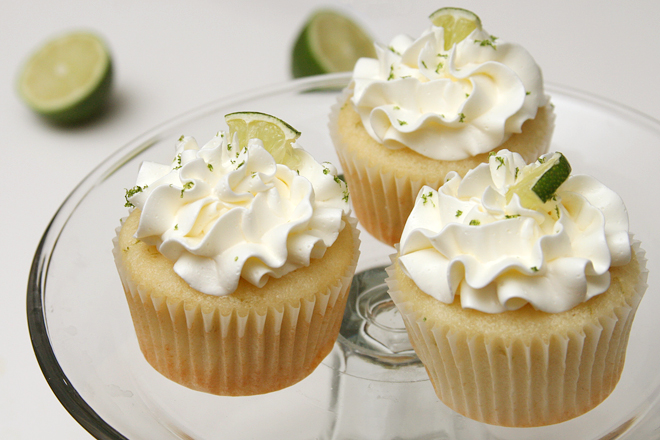
But a taco party without margaritas in any form just isn’t right, so we’d have them for dessert instead. This is a white cupcake flavored with lime zest, then brushed very liberally with a mixture of tequila and orange liqueur. The buttercream, light and airy swiss meringue, is flavored with more lime juice and more tequila.

margarita cupcakes 3

I’ve found it’s nearly impossible to get the flavor of liquor in the batter to come across after a dessert is baked (bourbon pound cake seems to be an exception), so I don’t even attempt that here, just brushing – and then brushing some more, and then more – the baked cakes with liquor. The cupcakes aren’t so strong that you’ll gag on the fumes, but they do have a hint of bite to them, just like the best margaritas. And I had way more fun making cupcakes and frosting than I would have had squeezing lime after lime after lime.

margarita cupcakes 4

Printer Friendly Recipe
Margarita Cupcakes (adapted from Dorie Greenspan’s Perfect Party Cake from Baking: From my Home to Yours)

Makes 24 cupcakes

It seems like a lot of liquor to brush into the cupcakes, but trust me that you will use it all, and the cupcakes won’t be soggy.

Cupcakes:
3¼ cups plus 2 tablespoons (13.5 ounces) cake flour
1½ teaspoons baking powder
¼ teaspoon baking soda
1 teaspoon salt
1 cup plain yogurt
6 large egg whites
2¼ cups (15.75 ounces) granulated sugar
1 tablespoon grated lime zest
12 tablespoons (1½ stick) unsalted butter, at room temperature
2 tablespoons lime juice
6 tablespoons tequila
3 tablespoons orange liqueur

Buttercream:
1 cup (7 ounces) granulated sugar
4 large egg whites
pinch salt
24 tablespoons (3 sticks) unsalted butter, at room temperature
4 tablespoons fresh lime juice (from 2 limes)
2 tablespoons tequila

1. For the cupcakes: Center a rack in the oven and preheat the oven to 350 degrees F. Line 24 cupcake cups with liners. Sift together the flour, baking powder and salt. Whisk together the buttermilk and egg whites in a medium bowl.

2. Put the sugar and lime zest in a mixer bowl mix with paddle attachment until the sugar is moist and fragrant. Add the butter and beat at medium speed for a full 3 minutes, until the butter and sugar are very light. Beat in the lime juice, then add one third of the flour mixture, still beating on medium speed. Beat in half of the milk-egg mixture, then beat in half of the remaining dry ingredients until incorporated. Add the rest of the milk and eggs, beating until the batter is homogeneous, then add the last of the dry ingredients. Finally, give the batter a good 2-minute beating to ensure that it is thoroughly mixed and well aerated.

3. Divide batter among cupcake liners, filling them ⅔ to ¾ of the way. Bake until a toothpick inserted into the center of a cupcake comes out clean, 18-24 minutes, rotating the pans once front to back if your oven bakes unevenly. Transfer the pans to wire racks; cool about 5 minutes, them remove the cupcakes. Cool cupcakes completely on a rack before frosting.

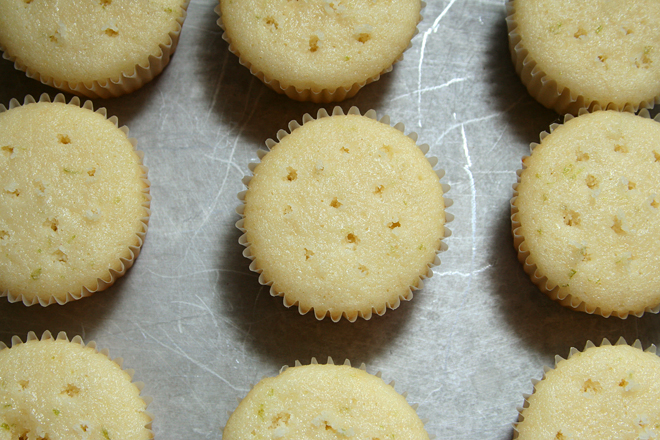
4. Combine the tequila and orange liqueur in a small dish. Using a toothpick or skewer, poke about 10 holes in the top of each cupcake, almost to the base. Brush with the alcohol mixture. Keep brushing the cupcakes until all the alcohol has been used.

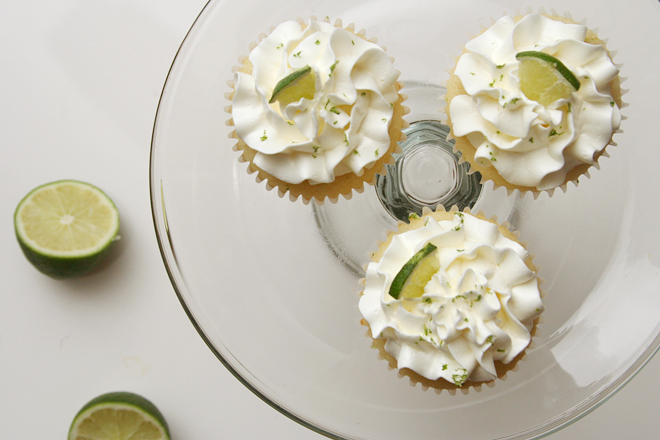
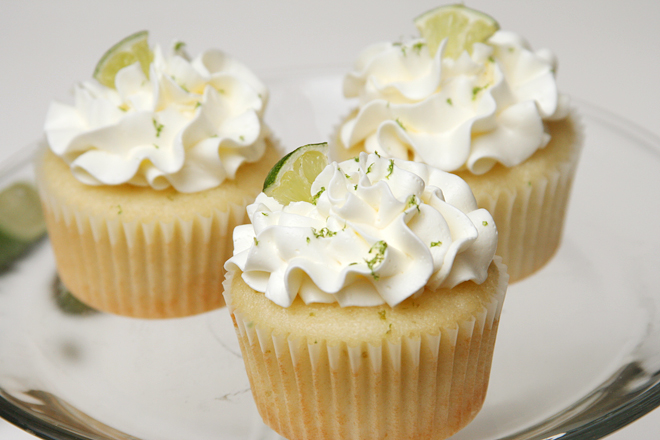
5. For the buttercream: Combine the egg whites, sugar, and salt in a metal mixing bowl set over a pot of simmering water. Heat, whisking frequently, until the mixture reaches 160 degrees and the sugar has dissolved. Using the whisk attachment, beat on medium-high speed until stiff peaks form and the mixture has cooled to room temperature, about 6 minutes. Reduce the speed to medium and add the butter, 2 tablespoons at a time, adding more once each addition has been incorporated. If the frosting looks soupy or curdled, continue to beat on medium-high speed until thick and smooth again, about 3-5 minutes more. Stir in the lime juice and tequila; mix just until incorporated. Use a wide star tip to pipe frosting onto the cupcakes, garnishing with tiny lime wedges and lime zest.

margarita cupcakes 6

green chile chicken tacos

chicken tacos 3

Okay, so all my taco recipes are almost the same – I want avocado, and salty cheese, and fresh lime juice, cilantro, maybe some pickled onions, all mixed up in a fresh corn tortilla. Even with just those fixings and no meat, I’d probably be perfectly happy. But, I’ve been spoiled by barbacoa. Tacos are held to a higher standard now.

chicken tacos 1

My first couple attempts at chicken tacos weren’t up to par. I thought grilling sounded promising, but afterward, the chicken just tasted like chicken, with nothing more interesting to contribute. Plus it’s so easy for chicken to dry out on the grill.

chicken tacos 2

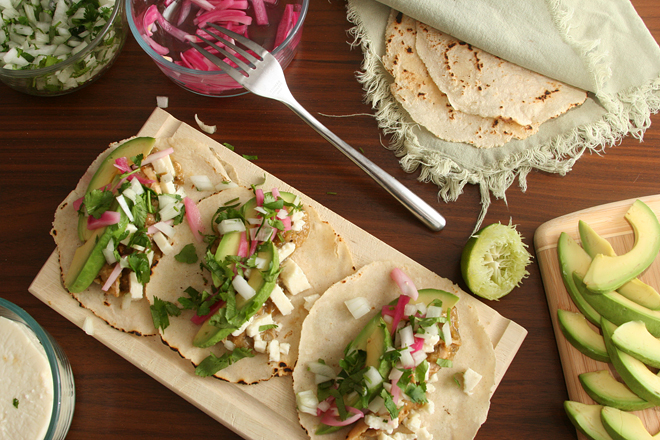
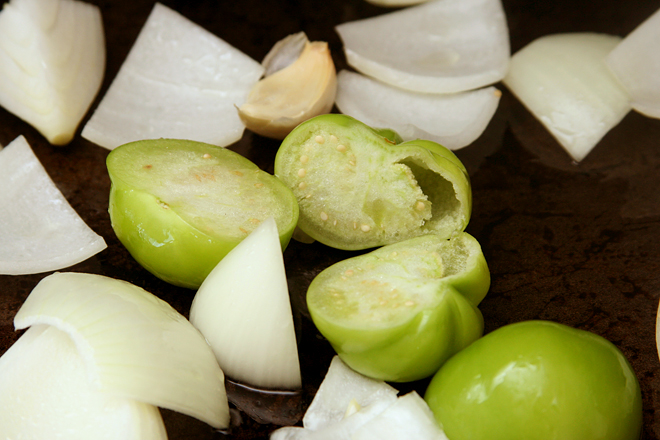
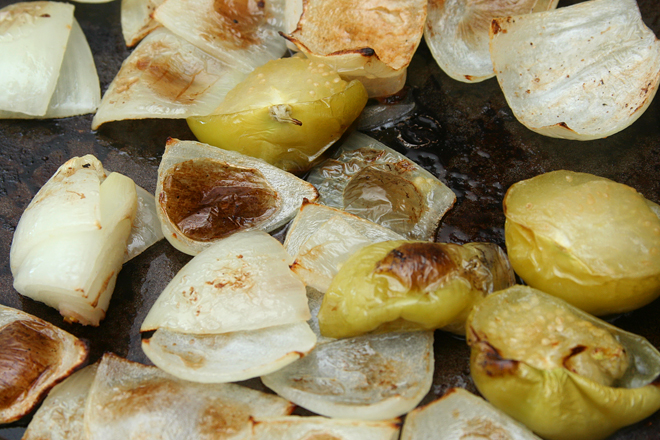
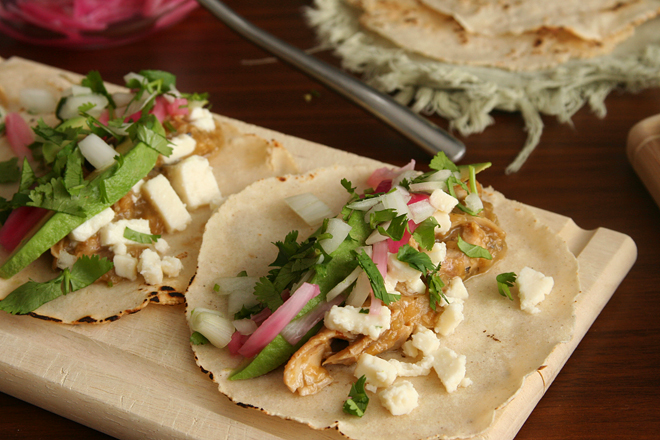
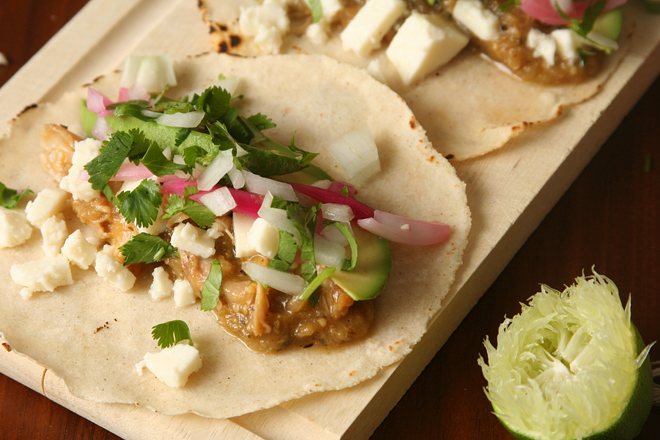
This recipe solves any problem of dry, bland chicken by braising chicken thighs directly in a sauce made from blistered tomatillos, onions, and green chiles. The chicken turns out tender and juicy, already tasting like it’s meant for tacos, and then the game is upped even more when the braising liquid is reduced to a sauce. I feel like I should say something about how this filling is so good that I don’t need all those tasty fixings, but no filling is good enough to pass up a slice of avocado in a corn tortilla.  Still, this is the next best thing to barbacoa.

chicken tacos 4

Printer Friendly Recipe
Green Chile Chicken Tacos (almost directly from Kenji Alt-Lopez at Serious Eats)

Serves 4 to 6

2 green chiles, preferably Hatch or Anaheim
2 medium tomatillos, husks removed, split in half
1 small yellow onion, peeled and split in half
3 cloves garlic, unpeeled
2 tablespoons vegetable oil, divided
1 cup fresh cilantro leaves, roughly chopped, divided
Kosher salt and freshly ground black pepper
4 limes
2 pounds chicken thighs (bone-in and skin-on)
1 small white onion, minced
16 to 24 warm corn tortillas
1 batch pickled red onions
½ cup grated queso cotija or jack cheese
1 avocado, sliced

1. Preheat the broiler to high and adjust the broiler rack to 5 to 6 inches below the heating element. Toss the peppers, tomatillos, yellow onion, and garlic in a medium bowl with 1 tablespoon of the olive oil. Place on a foil-lined rimmed baking sheet and broil until the vegetables are completely tender and charred on all sides, turning occasionally, about 20 minutes total. When cool enough to handle, peel the peppers and remove the stems and seeds. Transfer the vegetables to a food processor or blender with half of the cilantro and ½ teaspoon of salt; process on high speed until smooth. Add 2 tablespoons of lime juice from about 2 of the limes, season to taste with salt, and set aside.

2. While the vegetables broil, heat the remaining oil in a Dutch oven over high heat until shimmering. Add the chicken pieces skin side-down and cook, without moving, until well browned, about 6 minutes. Flip and brown the second side, about 3 minutes longer. Transfer to a plate. Pour off the excess fat and deglaze the Dutch oven with 1 cup of water, scraping up the browned bits from the bottom of the pot.

3. Transfer the vegetable puree to the Dutch oven and stir with the deglazing water to combine. Nestle the chicken pieces into the sauce. Bring to a boil, reduce to a bare simmer, cover, and cook until the chicken is completely tender, about 30 minutes. Remove the chicken from sauce and place on a plate to cool.
4. When the chicken is cool enough to handle, discard the skin and bones and shred meat into bite-sized pieces. Return the meat to the sauce and bring to a simmer. Cook until thick and saucy, then season to taste with salt and pepper if desired.

5. Combine the white onion and remaining cilantro in a bowl. Serve chicken with warm tortillas, onion and cilantro mixture, pickled onions, cheese, and avocado.

chicken tacos 5

strawberry daiquiris

strawberry daiquiris 4

These ain’t your mama’s strawberry daiquiris. Or at least, they’re not my mama’s strawberry daiquiris, which are slushy and sugary and delicious and rightfully earn their classification as a frou frou drink.

strawberry daiquiris 7

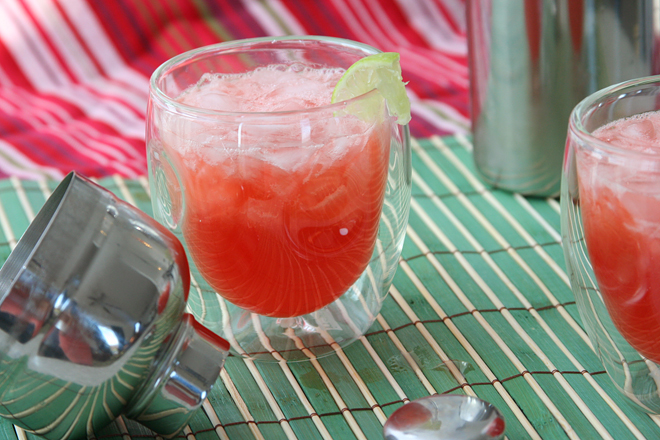
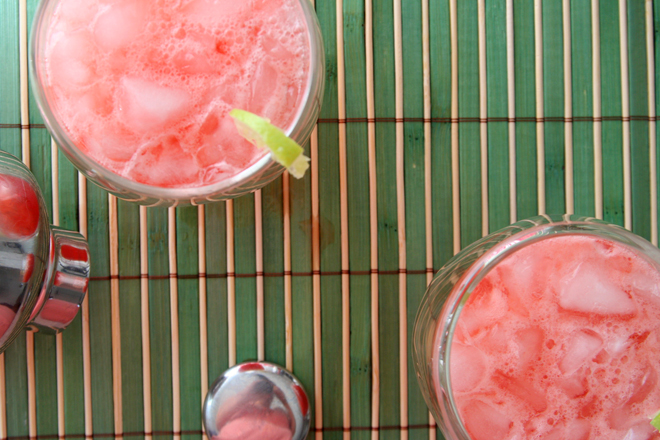
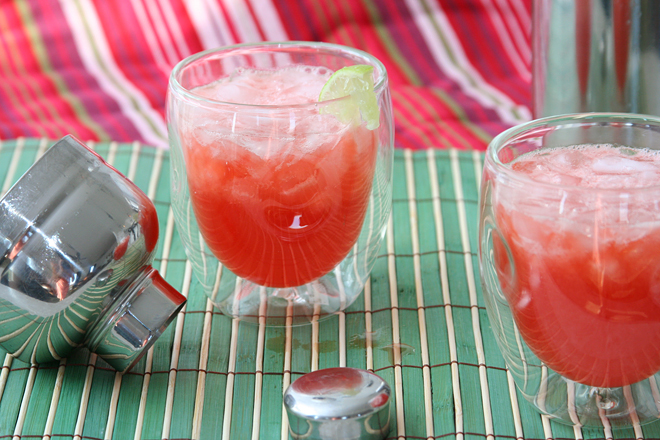
These strawberry daiquiris are no frou frou drink. They’re serious. Made from nothing but strawberry-infused rum, sugar syrup, and lime juice, they are also the most delicious cocktail I have ever had.

strawberry daiquiris 6

It’s all thanks to Dave, who found an interest in rum after we went on a Caribbean cruise with his parents last year. Our liquor cabinet is now half rum, which is fair since that’s all we drink now that Dave is willing to mix up a variety of rum drinks and I’m willing to let him bring them to me.

strawberry daiquiris 1

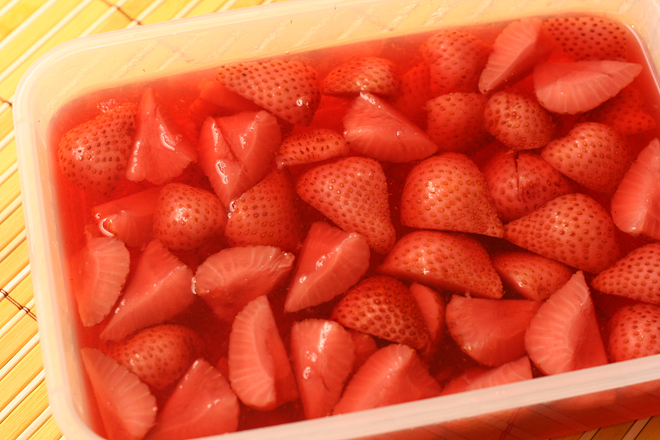
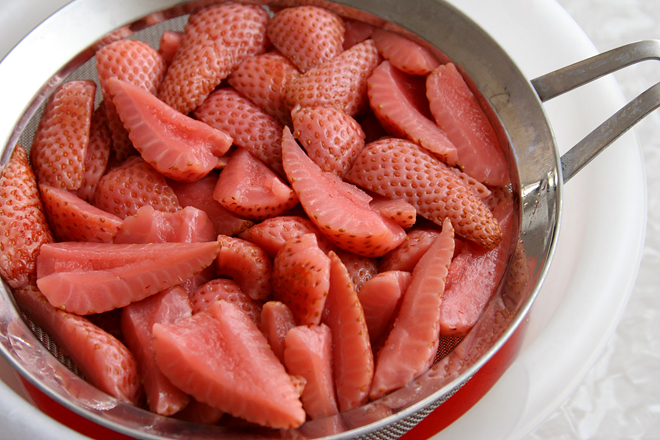
My part in this recipe is to think ahead enough to pour a bottle of rum over strawberries. Let them sit for a week (or really, just a few days if you’re in a hurry), strain, and you’re on your way to a seriously great cocktail. Just be careful, because these ain’t no frou frou drink.

strawberry daiquiris 3

Printer Friendly Recipe
Strawberry Daiquiris

4 drinks

Make the sugar syrup by heating 1 cup water and 1 cup sugar over medium heat until the sugar dissolves. Cool before using. Cover and refrigerate leftovers for several weeks.

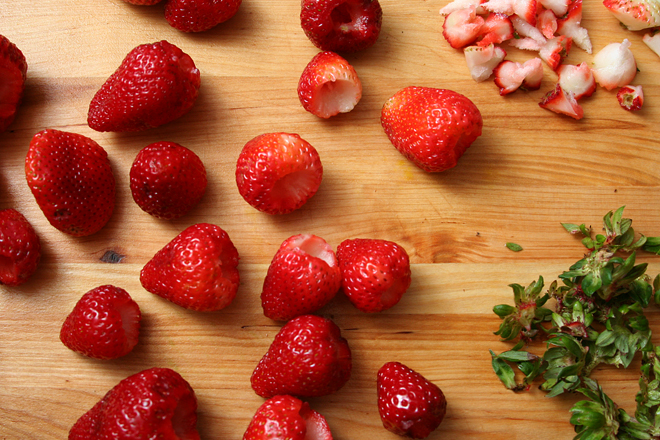
Make the strawberry rum by pouring 1 (750-ml) bottle of rum over 1 pound of stemmed and quartered strawberries. Strain after 5-7 days. Cover and refrigerate leftovers for several weeks.

Our favorite rum for mixing is Shellback Silver.

Update 6/5/2014 – Unfortunately, I had this recipe wrong initially.  The sugar syrup has now been reduced from ½ cup to ¼ cup.  We use ¼ cup, although we like our drinks on the tart side.

1½ cups strawberry rum
¾ cup lime juice
¼ cup sugar syrup

In a large measuring cup, mix the three ingredients. Fill a cocktail shaker with crushed ice; add half the rum mixture. Cover and shake until the sides of the cocktail shaker are frosty. Strain into two glasses. Add more ice and repeat with the remaining mix. Add some of the ice from the shaker into each glass. Serve immediately.

strawberry daiquiris 2