shrimp and avocado ceviche

shrimp ceviche 6

Both times I’ve had barbacoa tacos for dinner, I’ve made this the same day – but not as an appetizer. When dinner is one of your absolute favorite foods, an appetizer just takes up valuable stomach space. But I love this dip almost as much as the barbacoa, and they’re a great match, so we have it for lunch instead.

shrimp ceviche 3

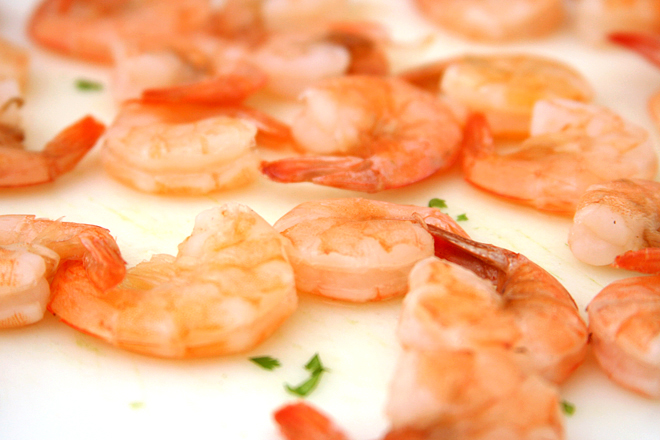
I appreciate that the shrimp are cooked first. Maybe that’s cheating, maybe that makes it something other than ceviche – I don’t care. It means I can have it without worrying about food poisoning, and that’s good enough for me.

shrimp ceviche 4

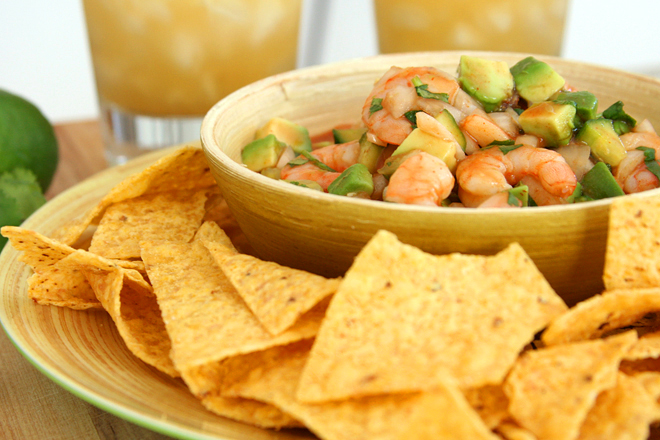
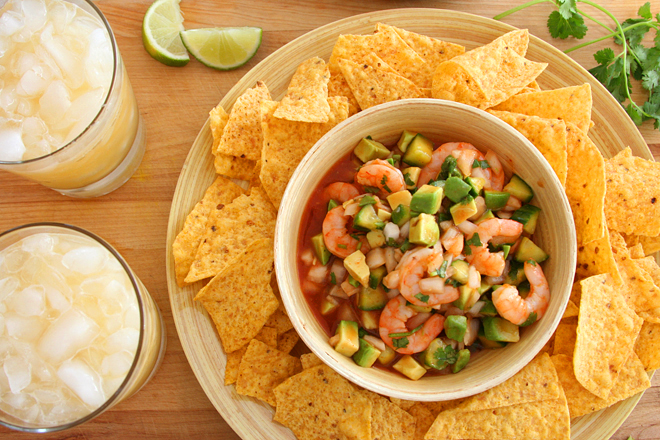
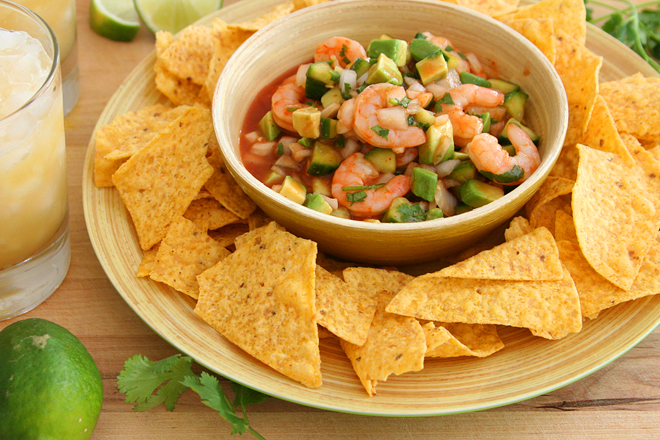
The cooked shrimp are marinated in lime juice, then mixed with avocados, cucumbers, onions, and cilantro. The dressing is made from more lime juice, olive oil, and, oddly, ketchup. I liked the tomatoey sweetness from the ketchup, but I didn’t like a lot of it – the second time I made this, I cut the ketchup down by half, and next time, I’ll use just half of that.

shrimp ceviche 2

Not that a little extra ketchupiness has stopped this from being my new favorite chip topper – yes, even more so than plain guacamole.  It has the avocado I love, but balanced by all this citrusy crunch.  This for lunch and barbacoa tacos for dinner make for a ridiculously good day of eating.

shrimp ceviche 7

One year ago: Fish Tacos
Two years ago: Tartine Country Bread
Three years ago: Spinach Artichoke Pizza
Four years ago: Tofu Mu Shu
Five years ago: Crockpot Pulled Pork

Printer Friendly Recipe
Shrimp and Avocado Ceviche (adapted from Rick Bayless’s Mexico One Plate at a Time via epicurious)

6 servings

I used 51/60 shrimp for this. The second time, I cut the shrimp in half after peeling so that they’d be about the same size as everything else in the dip – better for getting all sorts of goodies on a single chip.

½ cup plus 2 tablespoons fresh lime juice
1 pound unpeeled small shrimp
½ medium white onion, chopped into ¼ inch pieces
⅓ cup chopped fresh cilantro, plus several sprigs for garnish
2 tablespoons ketchup
2 tablespoons vinegary Mexican bottled hot sauce
1 tablespoon extra virgin olive oil
1 cup diced peeled cucumber or jicama (or a mix)
2 small ripe avocados, peeled, pitted and cubed
salt
Several lime slices for garnish
tortilla chips for serving

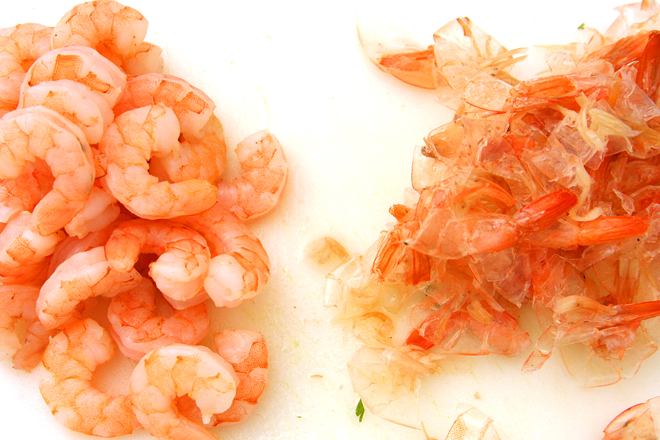
1. In a small saucepan, bring 2 cups of salted water to a boil; add 2 tablespoons of the lime juice and the shrimp. Cover the saucepan and let the water return to a boil. Once it boils, immediately remove the pot from the heat and pour off all the liquid. Replace the cover and let the shrimp steam off the heat for 8 minutes. Transfer the shrimp to a large glass or stainless steel bowl to cool completely. Once cook, peel and devein the shrimp. Toss the shrimp with the remaining ½ cup lime juice; cover and refrigerate for about an hour.

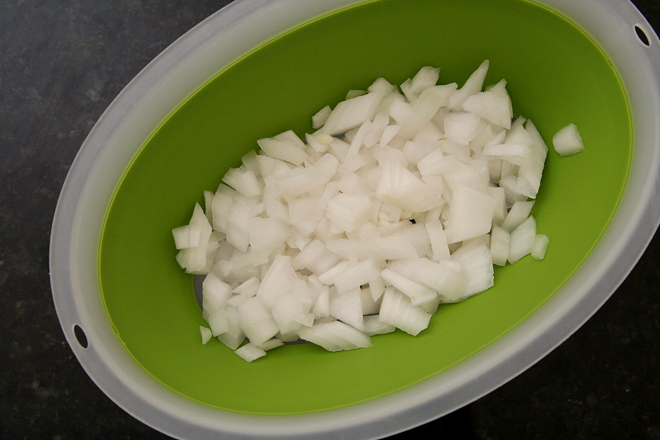
2. After the shrimp has marinated, in a small strainer, rinse the diced onion under cold water, then shake off the excess liquid. Add to the shrimp bowl along with the cilantro, ketchup, hot sauce, olive oil, cucumber and/or jicama, avocado, and ¼ teaspoon salt. Cover and refrigerate if not serving immediately.

3. Spoon the ceviche into sundae glasses, martini glasses, or small bowls; garnish with sprigs of cilantro and slices of lime. Serve with tortilla chips.
shrimp ceviche 5

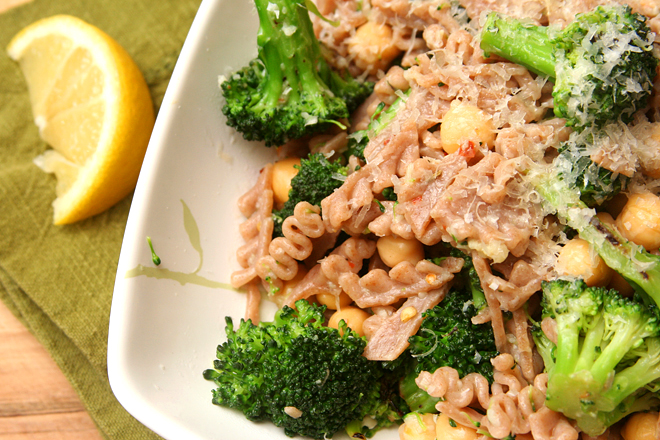
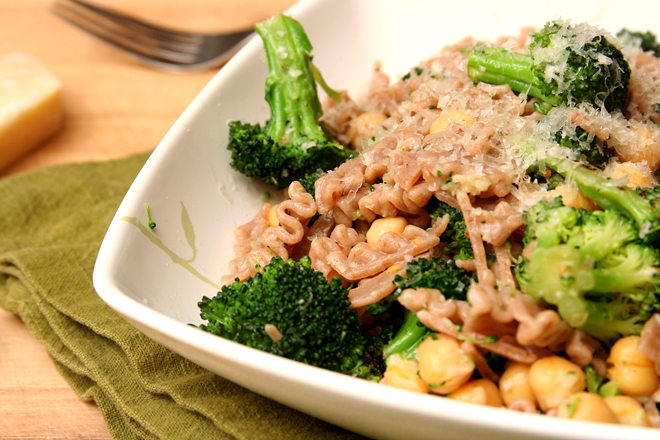
pasta with broccoli, chickpeas, and garlic

broccoli chickpea pasta 5

Have I told you that we’re moving? In just a few days, in fact. It isn’t a big move as far as distance, as our new house is just a 15-minute drive away from our old one, but it is big as far as life steps. Having spent the majority of our twenties in graduate school, we watched our friends buy houses while we were still solidly in apartment mode. We’ve rented a nice little house for the last three years since we moved to New Mexico, but now, finally, we’re acting like grown-ups and buying our own place.
broccoli chickpea pasta 1

The process hasn’t been without its hiccups. Who knew that ordering lighting fixtures would be so complicated? I keep telling myself that, when we’re settled and I have bright and colorful pendants hanging over the breakfast bar, it’ll be worth it, but for now, I just wish we could find lights that aren’t actually purple when the website says they’re cobalt, or lights with cords that are long enough, or lights that work with the slopes of our vaulted ceilings. Not to mention the hours of packing, visits to the bank, trips to Lowe’s, and oh yeah, we’re going on vacation a week after closing.
broccoli chickpea pasta 2

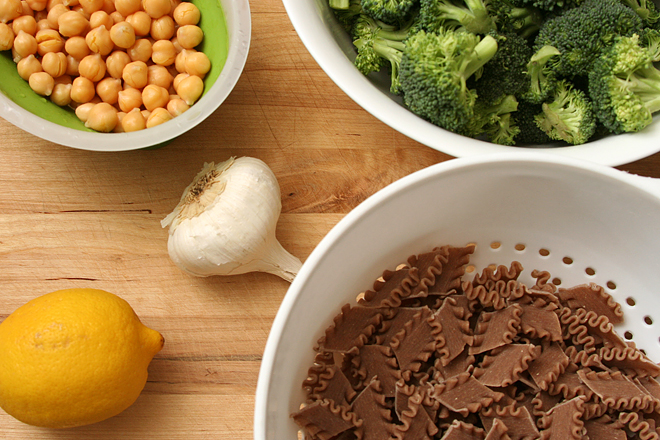
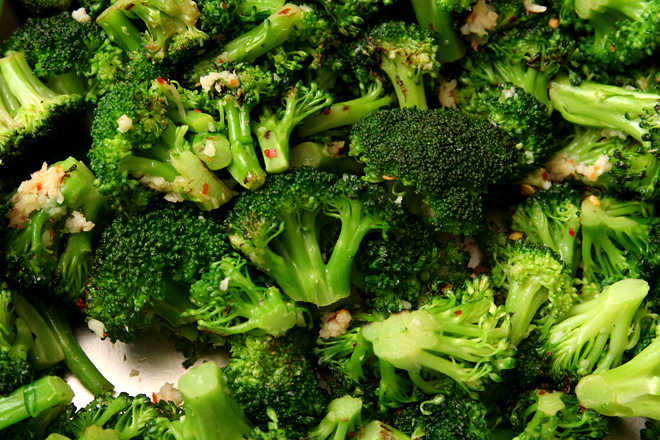
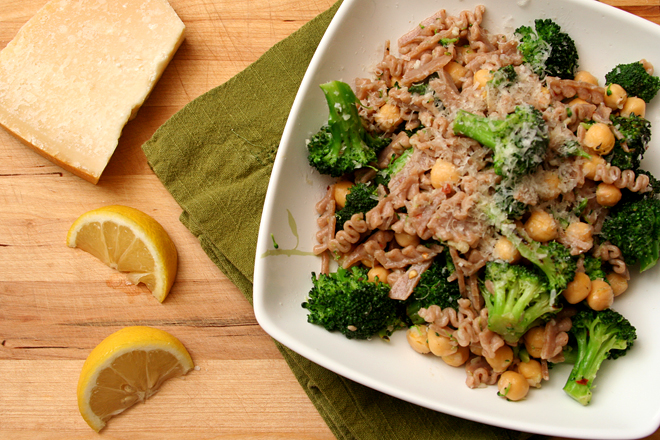
When we’re not eating leftovers from the freezer, we’ve been eating a lot of quick meals like this one. Even better, I’ve gotten in the habit of buying those bags of pre-cut broccoli, which shaves another ten minutes off of prep time. At that point, it’s just an issue of boiling pasta while pan-roasting broccoli, pressing garlic into the pan with a pinch of red pepper flakes, and mixing everything together with a whole lot of lemon juice and parmesan to up the flavor ante. Dinner is served in no time at all, which means I can get back to procrastinating on packing by shopping for light fixtures.

broccoli chickpea pasta 4

One year ago: Star Wars Cookies
Two years ago: Cream Cheese Pound Cake
Three years ago: Roll-out Sugar Cookies (comparison of 3 recipes)
Four years ago: Roasted Kale
Five years ago: Spaghetti and Meatballs

Printer Friendly Recipe
Pasta with Broccoli, Chickpeas, and Garlic (adapted from Gourmet via epicurious)

Serves 6

Pasta dishes like this tend to cool quickly after being transferred to serving dishes, so I like to warm the empty bowls in an oven heated to about 200 degrees.

16 ounces whole wheat pasta
salt
3 tablespoons olive oil, divided
2 (12-ounce) bags fresh chopped broccoli (or 3 heads of broccoli, chopped into bite-sized pieces)
12 garlic cloves, minced or pressed through a garlic press
1 teaspoon dried hot red pepper flakes
2 (15-ounce) cans chickpeas, rinsed and drained
juice from 1 lemon
1 cup (2 ounces) finely grated parmesan, plus more for garnish

1. Bring 4 quarts water to a rapid boil over high heat. Add 1 tablespoon salt and the pasta. Cook according to package instructions. Before draining the cooked pasta, put about 1 cup pasta cooking water in a separate bowl and set aside. Return the drained pasta to the cooking pot.

2. Meanwhile, heat 2 tablespoons olive oil in a 12-inch skillet over medium-high heat. When hot, add the broccoli and a pinch of salt and cook, stirring occasionally, until bright green and browned in spots, 4-5 minutes. Add ¼ cup water; cover the pan for 1 minute to cook the broccoli through. Remove the lid and push the broccoli to the edges of the pan. Add the remaining tablespoon of oil, the garlic, and the red pepper flakes to the center of the pan. Cook, stirring constantly and excluding the broccoli as much as possible, for about 1 minute, then add the chickpeas and stir the mixture into the broccoli. Add the lemon juice and 1 teaspoon salt.

3. Transfer the broccoli to the pot with the pasta, stirring to incorporate. Add about half of the reserved pasta cooking water and 1 cup of cheese, stirring until the cheese melts evenly over the pasta. Taste and adjust for seasoning with more salt, lemon juice, or parmesan. Add more pasta cooking water if the pasta seems dry. Serve immediately in warmed bowls.

broccoli chickpea pasta 3

lemon ginger scones

lemon ginger scones 6

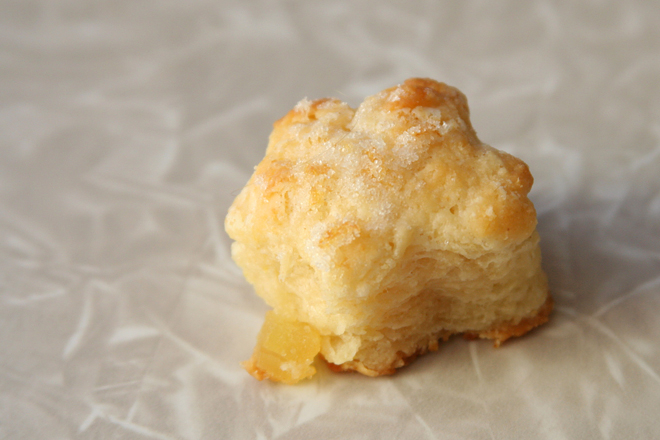
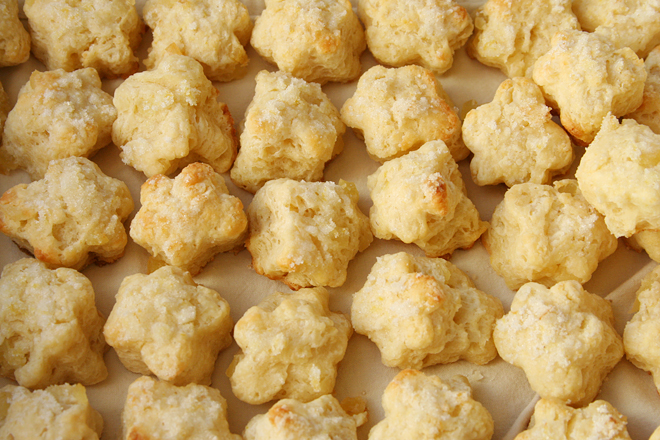
I’ve had in the back of my mind for a while now, years actually, that scones would be a perfect treat to bring in to work. I could do most of the work the night or weekend beforehand and then just bake them in the morning before work. It would be easy for me, and my coworkers would have fresh scones to go with their morning coffee.

lemon ginger scones 1

It sounds good in theory. In reality, it was a harried morning of showering, emptying the dishwasher, making smoothies, chugging my morning tea, skipping a couple makeup steps, hoping the blue of my scarf didn’t clash too much with the blue of my shirt, oh and garnishing, baking, cooling, and snapping a few very quick pictures of lemon-ginger scones.

lemon ginger scones 2

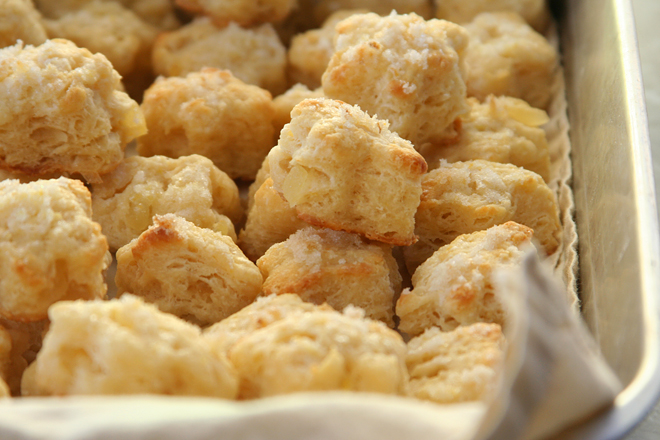
So I was wrong about the convenience of baking scones in the morning before work. But I was right about my coworkers loving them. It was a nice morning of compliments – not on my outfit with its clashing blues, obviously, but the tender and slightly spicy scones made up for the unavoidable shortcomings that resulted from my rushed morning.

lemon ginger scones 5

One year ago: Pasta with Tiny Meatball Sauce
Two years ago: Stromboli
Three years ago: Baked Ziti
Four years ago: Twice-Baked Potatoes with Broccoli, Cheddar, and Scallions
Five years ago: Deviled Eggs with Tuna

Printer Friendly Recipe
Lemon-Ginger Scones (inspired by Bon Appetit’s Lemon Cream Scones, but when I realized I didn’t have nearly enough cream, I adapted Tartine’s Buttermilk Scones instead)

Serves about 8

As always, you can freeze scones after shaping, before baking. Bake directly from the freezer, adding 2-3 minutes to the baking time.

2½ (12 ounces) all-purpose flour
¼ cup (1.75 ounces) granulated sugar, plus 2 tablespoons
3 teaspoons lemon zest, plus 1 teaspoon
1½ teaspoon baking powder
1/3 teaspoon baking soda
½ teaspoon salt
8 tablespoons (1 stick) unsalted butter, cut into ¼-inch cubes, very cold
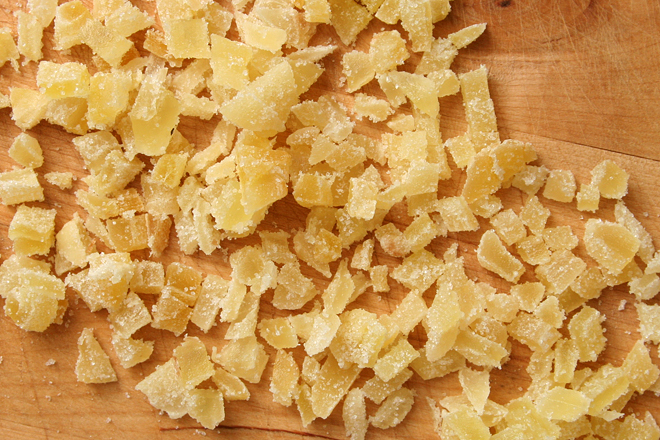
2 ounces crystallized ginger, chopped fine
1 cup buttermilk
1 tablespoon unsalted butter, melted

1. Heat the oven to 425 degrees. Line a baking sheet with parchment paper or a silicone baking mat.

2.Pulse the flour, ¼ cup sugar, 3 teaspoons lemon zest, baking powder, baking soda, and salt in a food processor until evenly mixed.  Scatter the butter cubes over the dry ingredients and pulse until the largest bits of butter are no larger than peas.  Transfer the mixture to a large bowl and stir in the ginger, then the buttermilk.  Knead a few times to bring the dough together.

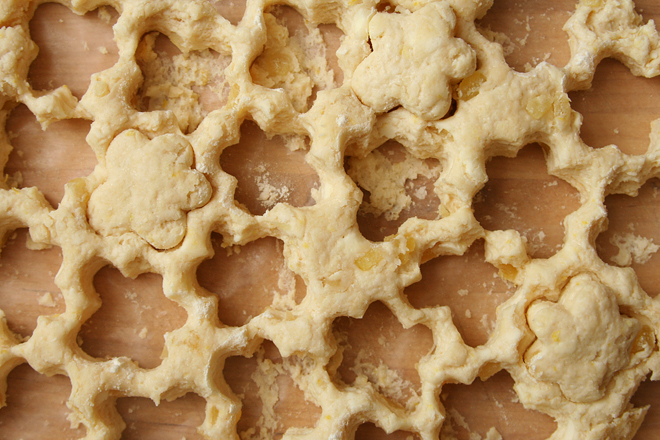
3. On a lightly floured work surface, pat the dough out to ½-inch round.  Cut the round into 8 wedges or use cutters to cut other shapes.

4. Transfer the scones to the prepared baking sheet.  Rub the remaining 1 teaspoon of zest into the remaining 2 tablespoons of sugar.  Brush the scones with the melted butter and top with the sugar mixture.  Bake until lightly browned around the edges, about 16-20 minutes.  Transfer to a wire rack to cool slightly before serving.

lemon ginger scones 4

pepper-crusted salmon with wasabi dipping sauce

wasabi salmon 4

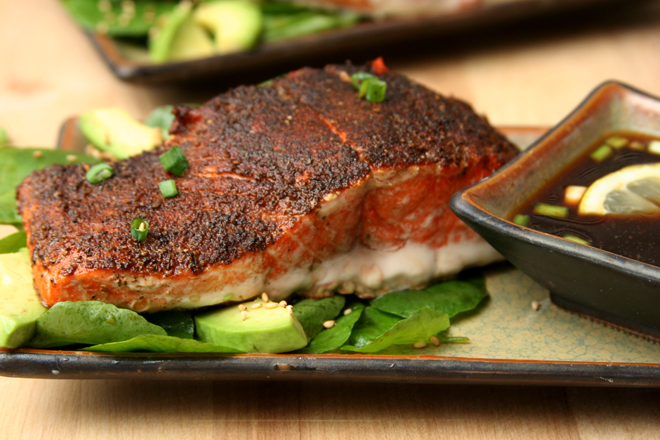
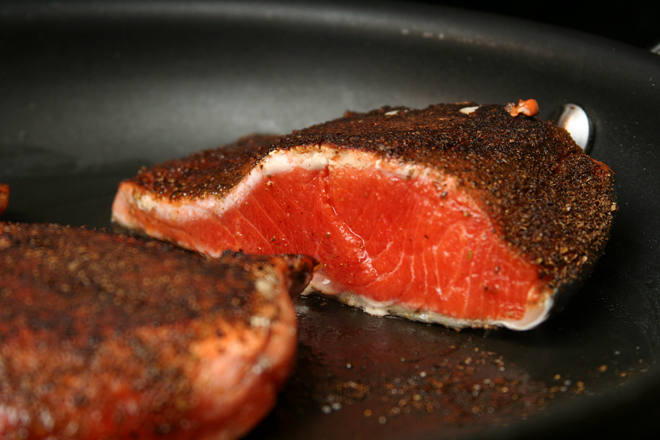
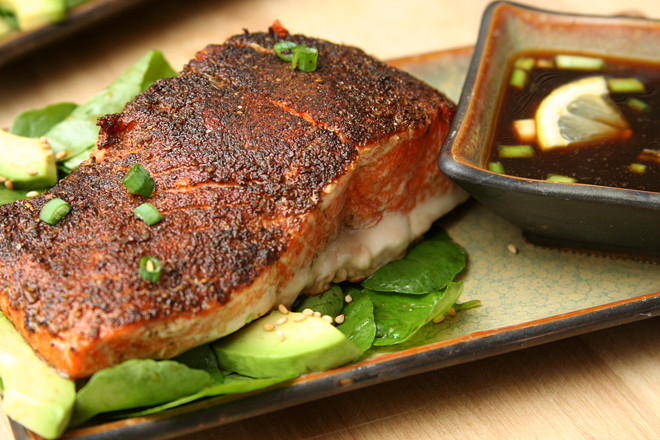
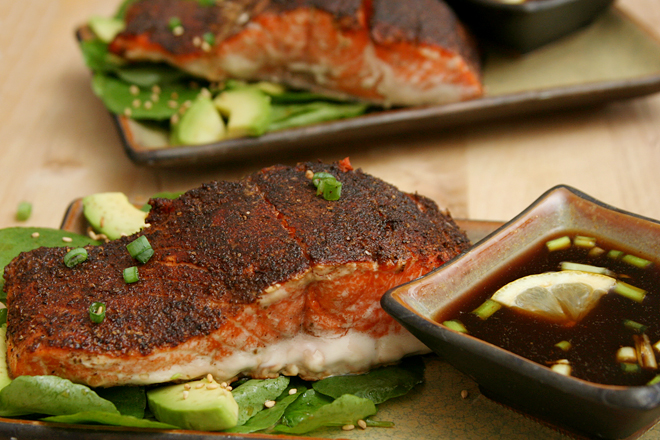
This is one of the best new meals I’ve made recently. The salmon was perfectly browned on top but still juicy in the middle. The Old Bay and lemon were interesting matches with the wasabi and ginger, but it definitely worked. The watercress and avocado salad I served the salmon with was the perfect bright balance to the umami-rich fish and soy sauce dip. The meal had a few of my favorite sushi components, with the fish, wasabi, and avocado, but it went a different direction with the salad and Old Bay.

wasabi salmon 1

It was an unusually light weekend dinner for us. Usually those tend to include a lot more carbs and red meat. It isn’t rare that they also require a serious investment of time in the kitchen, and this recipe differs from that routine as well.

wasabi salmon 2

In fact, there is absolutely no reason this wouldn’t fit right in with our weekday routine of healthy and quick meals. And that’s good news, because there are more weeknights than weekends, and that means more opportunities to make this dish.

wasabi salmon 5

One year ago: Dulce de Leche Cupcakes
Two years ago: Beer-Marinated Flank Steak
Three years ago: Zucchini Bread
Four years ago: Chocolate Whopper Malted Drops

Printer Friendly Recipe
Pepper-Crusted Salmon with Wasabi-Lemon Dipping Sauce (adapted from Steven Raichlen’s Planet Barbecue! via epicurious and from Cook’s Illustrated’s Glazed Salmon recipe)

Serves 4

I served this with Avocado and Watercress Salad (without the apple), and it was absolutely perfect.

For the sauce:
1 tablespoon wasabi powder
1 tablespoon water
1 tablespoon grated fresh ginger
juice of 1 lemon
½ cup soy sauce
1 scallion, white and green parts, minced

For the salmon:
2 tablespoons Old Bay seasoning
½ teaspoon kosher salt
1 teaspoon sugar
¼ teaspoon cornstarch
4 (8-ounce) salmon fillets
coarsely ground black pepper
1 tablespoon canola oil

1. Heat the oven to 300 degrees. In a small bowl, mix the wasabi powder and water until smooth. Set aside for 10 minutes to enhance the wasabi flavors, then add the remaining sauce ingredients.

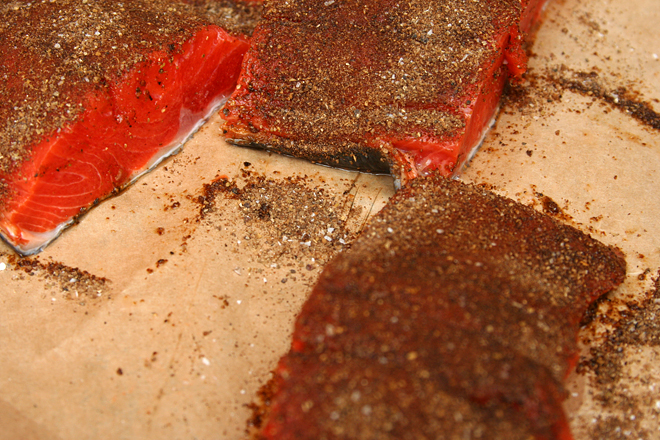
2. In a small bowl, combine the Old Bay, salt, sugar, and cornstarch. Rub into the flesh (not the skin) of the salmon. Season with a generous layer of coarsely ground black pepper, pressing the pepper into the salmon.

3. Heat the oil in a nonstick 12-inch oven-proof skillet over medium-high heat. Transfer the salmon to the pan, flesh-side down. Cook without moving for 1 minute, then flip and cook for another minute. Transfer the skillet to the oven; cook 8-10 minutes, or until the thickest part of the salmon reaches an internal temperature of 125 degrees. Serve immediately.

wasabi salmon 3

orange vanilla creamsicle whoopie pies

creamsicle whoopie pies 5

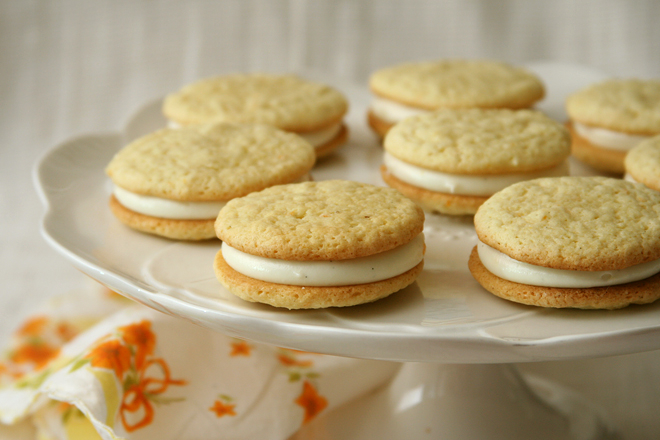
I brought pumpkin whoopie pies to a company picnic a couple years ago, and my coworkers got quite a kick over the name. So you’ll forgive me if the post-it next to these in the office kitchen said “orange vanilla creamsicle sandwich cookies”, with no mention of whoopie. I didn’t need the giggles today.

creamsicle whoopie pies 2

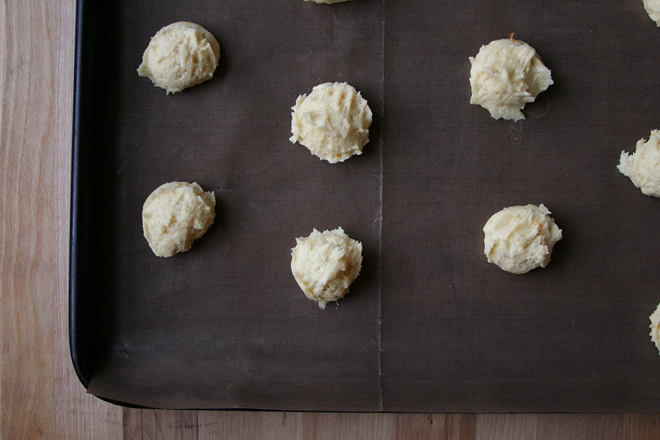
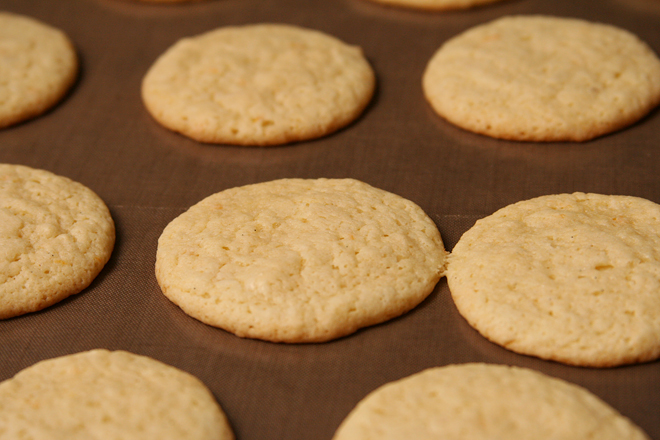
I’m not sure if these are more whoopie pie or more sandwich cookie anyway. The cookie part ended up on the chewy side, not as tender and fluffy as the traditional cakey whoopie pie. At least it seemed that way to me fresh out of the oven.

creamsicle whoopie pies 4

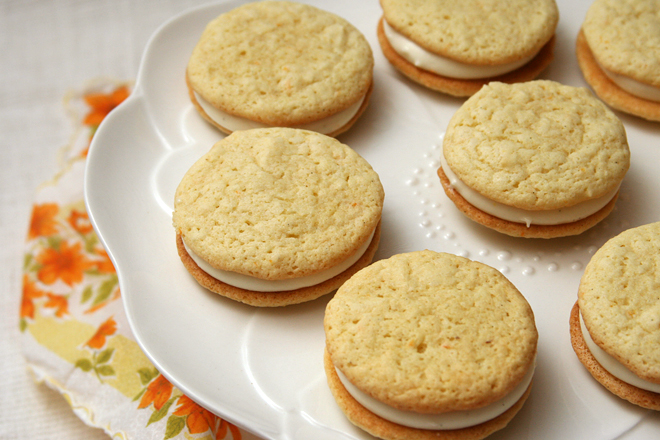
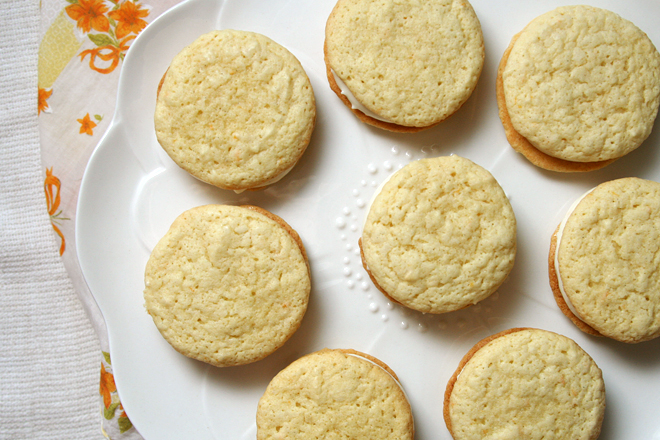
Sandwiched with cream cheese frosting and left overnight in the fridge, they seem to have become more cakey, because the several coworkers I quizzed about whether these seemed more cookie-like or more cake-like guessed cake. (They didn’t seem excited about the pop quiz, but they passed with flying colors.) More importantly, they raved, so whoopie pies or sandwich cookies, it doesn’t matter; all that matters is how good they are.

creamsicle whoopie pies 6

One year ago: Blueberry Barbecue Salmon
Two years ago: Rhubarb Crumb Coffee Cake
Three years ago: Quick Baking Powder Pizza Crust
Four years ago: Mashed Potatoes with Kale

Printer Friendly Recipe
Orange Vanilla Creamsicle Whoopie Pies (adapted from Culinary Concoctions by Peabody)

Makes about 3 dozen sandwiches

If you have vanilla sugar, use that!

I am a food blogger failure and used cream cheese frosting that I’ve had in my freezer for months, doctored up with vanilla seeds.

Cookies:
3½ cups (16.8 ounces) all-purpose flour
1¼ teaspoon baking soda
1¼ teaspoon baking powder 2 cups (14 ounces) sugar
zest from 2 oranges
12 tablespoons unsalted butter, room temperature
½ teaspoon salt
1 vanilla bean, seeds scraped
½ cup sour cream
2 eggs, room temperature

Filling:
3 ounces cream cheese
3 tablespoons unsalted butter
1 vanilla bean, seeds scraped
pinch salt
1½ cups (6 ounces) powdered sugar
1 teaspoon vanilla extract

1. For the cookies: Adjust an oven rack to the middle position; preheat the oven to 350 degrees. Line two baking sheets with parchment paper or silicone mats. In a medium bowl, whisk together the flour, baking soda, and baking powder.

2. In a stand mixer fitted with the paddle attachment (or a large mixing bowl with a hand mixer), beat the sugar and orange zest on medium speed until fragrant, about a minute. Add the butter, salt, and vanilla seeds; continue beating until fluffy, about 2 minutes. Beat in the sour cream. Add the eggs, one at a time, beating to incorporate each addition. Reduce the mixer speed to low, and gradually add the flour mixture, beating just until combined.

3. Spoon (or pipe) the batter in 1 tablespoon rounds on the prepared baking sheets, leaving 2 inches between rounds.

4. Bake until the tops of the cookies don’t look wet and the bottoms just begin to brown, 8-12 minutes. Cool for 2 minutes on the cookie sheet before transferring the cookies to a wire rack to cool completely.

5. For the filling: Add the cream cheese, butter, vanilla seeds, and salt to a clean mixer bowl and beat until smooth. Gradually add the powdered sugar, beating until smooth. Beat in the vanilla extract.

6. To fill, dollop (or pipe) the filling onto the flat sides of half of the cookies. Top with the remaining cookies, flat sides down. Serve immediately, or cover tightly and store in the refrigerator for up to 2 days, bringing to cool room temperature before serving.

creamsicle whoopie pies 8

grilled shrimp and tomatillo enchilada casserole

shrimp enchiladas 7

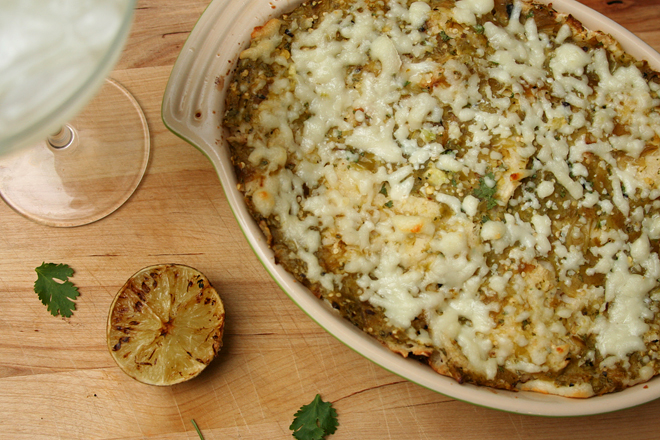
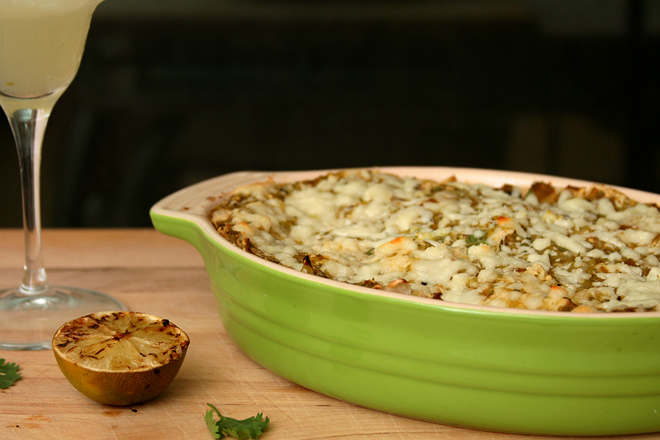
I made this at the end of one of those days that felt like I’d spent entirely too much time in the kitchen creating messes and then cleaning them up. The last thing I wanted was yet another project that would lead to yet another load of dishes. I needed to simplify.

shrimp enchiladas 1

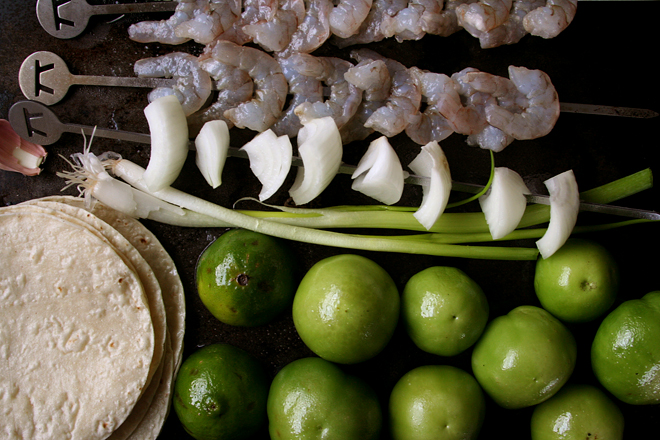
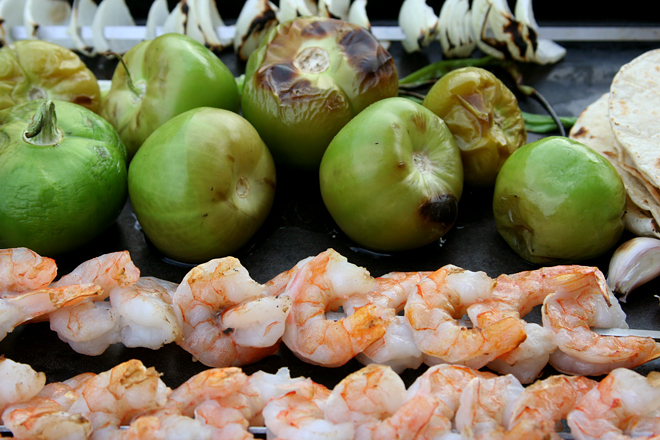
And so I did. As long as I was already grilling the tomatillos for the sauce, I went ahead and grilled…everything. The shrimp and onions that were intended to be sautéed on the stove, the tortillas that would have needed steaming (or frying) to roll. And forget rolling – I gave up on rolling tortillas for enchiladas years ago when I got lazy. Now I just create layers of filling and tortillas, like a chile-filled corny lasagna.

shrimp enchiladas 4

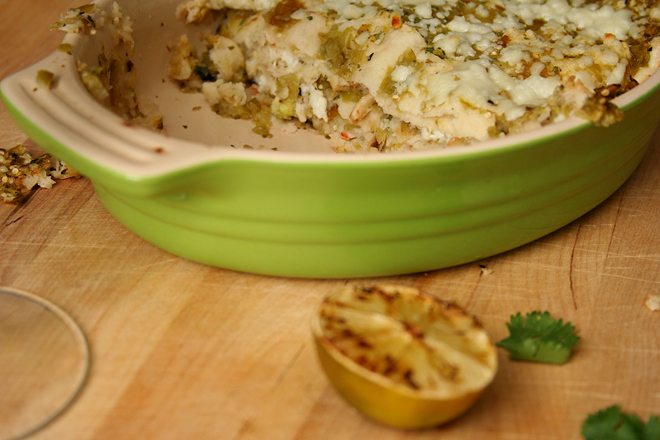
I don’t know if it was despite the shortcuts or because of them, but this is one of the favorite meals I’ve made lately. I was surprised that no single ingredient stood out – the dish didn’t taste particularly shrimpy or oniony or cheesy. I thought for a second that this meant I should have added more shrimp (or onions or cheese), but then I realized that it would be hard to improve on what I had. Especially considering that it hardly dirtied more dishes than the baking pan.

shrimp enchiladas 10

One year ago: Sweet Corn Hash
Two years ago: Penne alla Vodka
Three years ago: Pasta with No-Cook Tomato Sauce and Fresh Mozzarella
Four years ago: Country Egg Scramble

Printer Friendly Recipe
Grilled Shrimp and Tomatillo Enchilada Casserole (adapted from Bon Appétit via Confections of a Foodie Bride)

Serves 6

I used 2 ounces of roasted, peeled, and seeded Hatch green chiles in place of the jalapeno.

You could probably skip the scallions if you didn’t want to buy them.

½ teaspoon cumin
½ teaspoon chile powder
1 tablespoon olive oil
20 ounces shrimp, peeled and deveined
1 onion, cut into 1-inch cubes
18 corn tortillas
12 ounces (about 8) tomatillos, husks removed
1 jalapeno
2 cloves garlic, unpeeled
2 scallions
½ lime
¼ cup cilantro leaves
salt
12 ounces queso fresco, crumbled

1. Heat the oven to 350 degrees. Spray a 9-by-13-inch pan with nonstick spray. Prepare a grill with a medium-hot side and a cooler side.

2. In a large bowl, combine the cumin, chile powder, and olive oil. Add the shrimp; toss to coat. Thread the shrimp onto skewers. Thread the cubed onions onto skewers. Spray or lightly brush the onions and the tortillas with oil.

3. Grill the skewered onions over the cooler side of the grill until slightly softened and browned on the edges, about 10 minutes. Carefully place the garlic over the cooler side of the grill; heat until softened, about 4 minutes. (If the grill grates are too wide to hold the garlic cloves, skewer them with the onions.) Grill the tortillas over the hotter side of the grill until they begin to brown, about 30 seconds per side. Grill the shrimp on the hotter side until they begin to brown, 1-2 minutes per side. Grill the jalapeno over the hotter side of the grill until it’s blistered and mostly blackened, about 5 minutes, rotating occasionally; when cool enough to handle, remove the stem and seeds. Grill the lime, cut-side down, over the hotter side of the grill until it begins to brown, 2-3 minutes. Grill the scallions, with the white sides over the hotter side of the grill and the green sides over the cool side, until lightly browned, about 1 minute.

4. Remove the shrimp and onions from the skewers and transfer to the bowl of a food processor; process until coarsely chopped; transfer to a bowl. Add the tomatillos, jalapeno, garlic, scallions, juice from the lime, cilantro, and ½ teaspoon salt to the food processor; process until smooth.

5. Spread a thin layer of the tomatillo sauce over the bottom of the prepared pan. Distribute 6 tortillas evenly over the sauce. Top with one-third of the remaining sauce, then half of the shrimp mixture and one-third of the cheese. Repeat the layering of tortillas, sauce, shrimp, and cheese. Distribute the remaining tortillas over the cheese, then the remaining sauce and remaining cheese.

6. Bake, uncovered, until the cheese is browned and the casserole is bubbling around the edges, 30-40 minutes. Let rest 10 minutes before serving.

shrimp enchiladas 9

quinoa black bean burrito bowls

quinoa burrito bowls 5

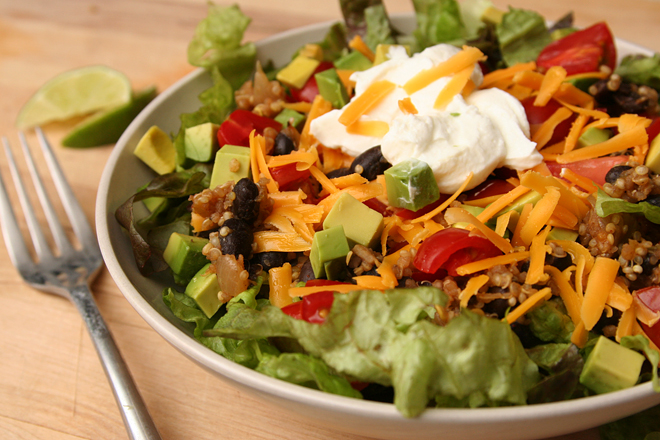
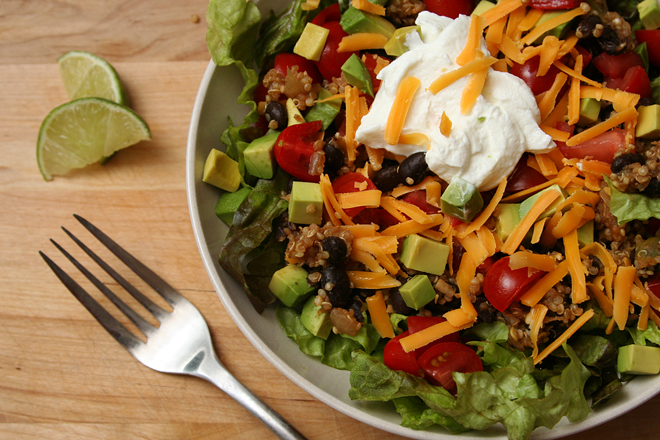
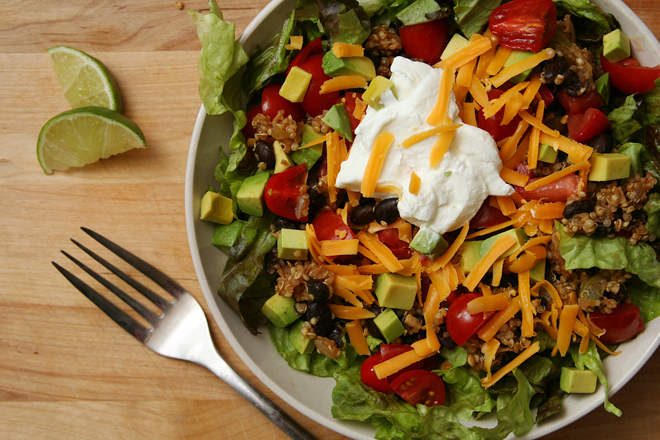
I know there’s nothing groundbreaking about this combination. Topping black beans and starch with lettuce, tomatoes, and cheese is always going to be good. Still, it’s worth talking about, just because it’s such a tasty meal, not to mention it has all of my other favorite dinner characteristics – it’s healthy, easy, and flexible.

quinoa burrito bowls 1

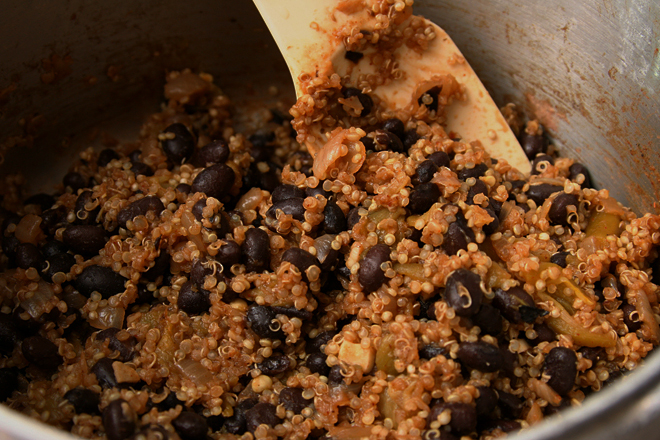
When I made this, I prepared the quinoa and black bean mixture over the weekend. The next night, when I knew I’d be getting home late, all I had to do was heat up the base and chop the toppings. Not that the first step takes long on its own, as it’s just sauteing onions with garlic and spices, adding liquid and quinoa to simmer, and stirring in black beans. But it’s nice to have meals that aren’t any worse for being made ahead and reheated.

quinoa burrito bowls 2

I’ve put these same toppings in tortillas with meat and beans, as well as over rice instead of quinoa, and it never fails to turn into a meal I love. Adding the fresh vegetables provides a bright, fresh contrast to the warm spicy beans and carbs. Classic flavors, combined in a slightly new way – it isn’t groundbreaking, but it’s one of my favorite new weeknight meals anyway.

quinoa burrito bowls 3

One year ago: Chocolate Friands
Two years ago: Baked French Toast
Three years ago: Potato Tomato Tart
Four years ago: Banana Nutella Crepes

Printer Friendly Recipe
Quinoa Black Bean Burrito Bowls (adapted from Shiksa in the Kitchen via Prevention RD)

Serves 4

I also added about 4 ounces of Hatch green chiles, roasted, peeled, seeded, and diced, when I stirred in the lime juice.

1 tablespoon olive oil
1 onion, diced
¼ teaspoon salt
2 garlic cloves, minced
2 teaspoons chili powder
1 cup water
1 cup quinoa, rinsed and drained
2 (15-ounce) cans black beans, rinsed and drained
juice of ½ lime
toppings – shredded lettuce, diced tomatoes, cilantro, cheddar cheese or queso fresco, diced avocado, salsa, sour cream or Greek yogurt, black olives

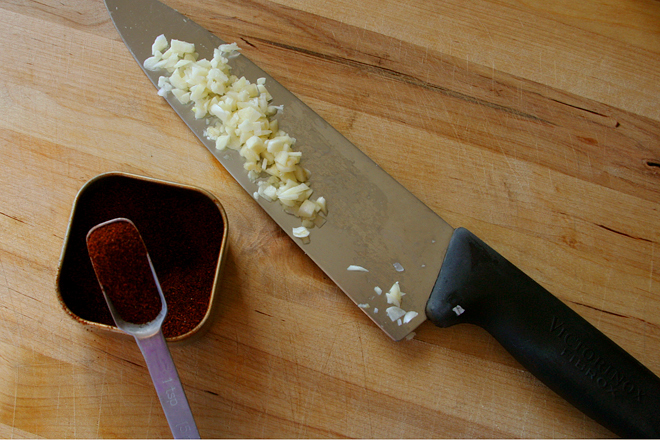
In a medium saucepan over medium heat, heat the oil until it flows like water when the pan is tilted. Add the onion and salt; cook, stirring occasionally, until the onion is just browned at the edges, 6-8 minutes. Add the garlic and chili powder and cook, stirring constantly, until fragrant, about 1 minute. Add the water, quinoa, and black beans; bring to a simmer, then cover the pot and reduce the heat to low. Simmer 15 minutes; without removing the lid, let the quinoa sit off the heat for an additional 10 minutes, until tender. Remove the lid, add the lime juice, and fluff the quinoa with a fork. Serve with your desired toppings.

quinoa burrito bowls 4

key lime cheesecake

key lime cheesecake 6

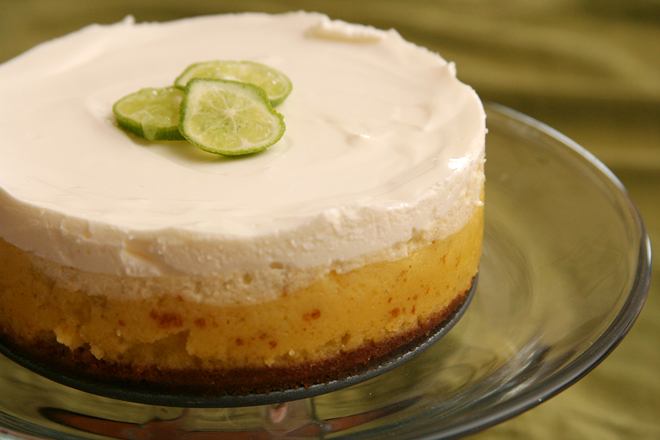
This was the last of my three birthday cakes. That’s right, I got three birthday cakes. The first was the blackberry oreo cake while on vacation with my family, and then I brought funfetti cupcakes to work, and then I made this one for myself to enjoy over my birthday weekend. Making three birthday cakes really takes the pressure off of making the perfect choice. You can have the dramatic, the fun, and the rich. (Okay, I confess that they’re all rich.)

key lime cheesecake 2

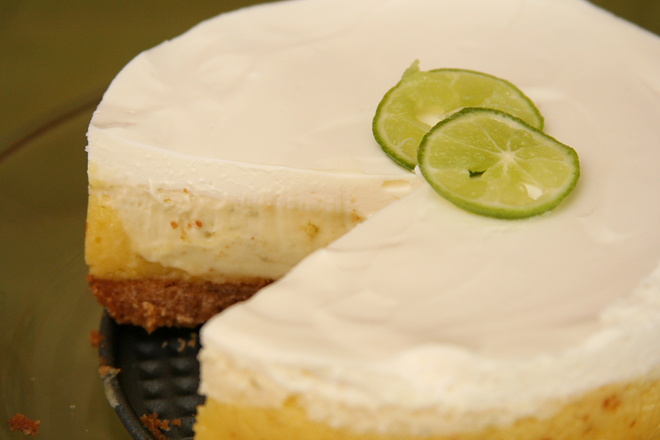
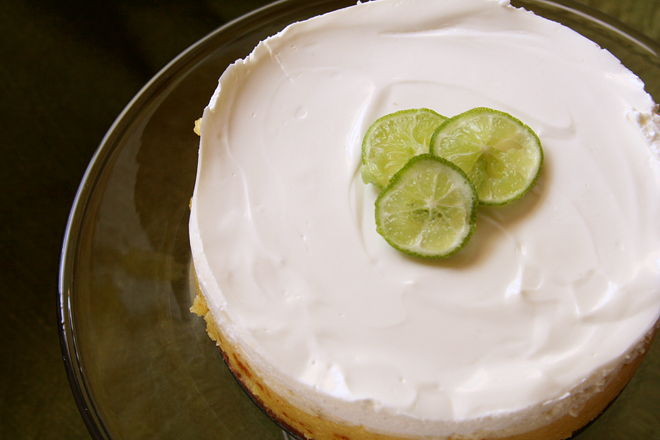
Although cheesecake might not seem like a traditional celebration cake, this one, with its four separate layers, is certainly involved enough to qualify. The graham cracker crust and zest-infused cream cheese might be expected, but it’s the layer of curd under the cream cheese that delivers most of the lime pucker. I had some reservations about the sour cream topping, but the sweet-tart coating complimented and balanced the lime and sugar in the other layers.

key lime cheesecake 3

It probably isn’t right to choose favorites, is it? Something went wrong with the funfetti cupcakes, so they don’t stand a chance anyway.  The blackberry oreo cake was tall and colorful and had dark chocolate and bright berries, so there’s no complaints there. But…cheesecake always wins.  If I’m ever confronted with a one-cake birthday again, remind me: cheesecake.

key lime cheesecake 7

One year ago: Spice-Rubbed Picnic Chicken
Two years ago: Whole Wheat Challah
Three years ago: Vegetable Curry
Four years ago: Fruit Bruschetta

Key Lime Cheesecake
Key Lime Cheesecake (from Bon Appétit via epicurious)

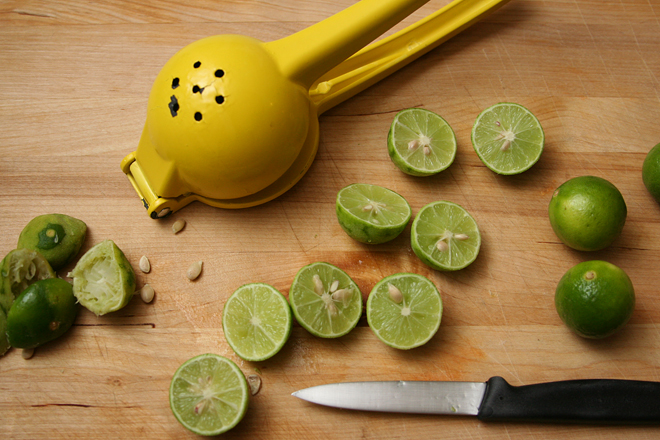
I used Key limes, but you can certainly use regular (Persian) limes instead.

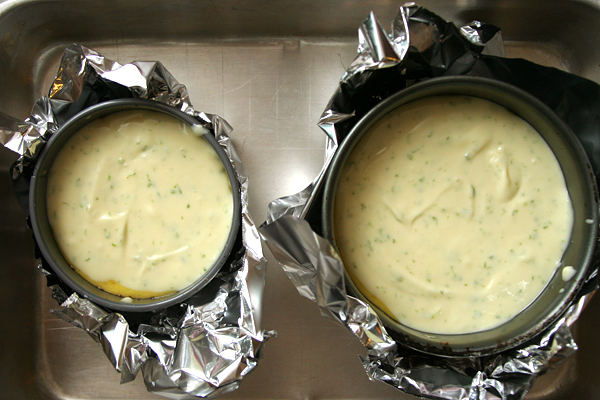
The recipe calls for an 8- or 8½-inch round springform pan, but if you only have the more common 9-inch springform pan, you can certainly use that. I made a half recipe, split between a 5-inch round pan and a 3.5-inch round pan.

Crust:
12 whole graham crackers
¼ cup (1.75 ounces) sugar
¼ teaspoon table salt
½ cup (1 stick) unsalted butter, melted

Lime custard:
6 large egg yolks
¾ cup (5.25 ounces) sugar
6 tablespoons fresh Key lime juice
1 teaspoon grated Key lime zest

Filling:
2 (8-ounce) packages cream cheese, room temperature
⅔ cup (4.67 ounces) sugar
¼ teaspoon table salt
2 large eggs, room temperature
3 tablespoons fresh Key lime juice
1 tablespoon grated Key lime zest

Topping:
1 (16-ounce container) sour cream
3 tablespoons sugar

1. For the crust: Preheat the oven to 350 degrees. Spray an 8- to 8½-inch springform pan with nonstick spray. Wrap a layer of foil around the outside of the pan. Place the springform pan in a large baking pan with at least 2-inch sides. Bring 6 cups of water to a simmer; cover to keep warm.

2. In a food processor, process the graham crackers, sugar, and salt until evenly ground. Add the butter and pulse to combine, scraping the sides of the bowl as needed. Press the crumb mixture onto the bottom of the prepared pan. Bake until fragrant and browning slightly around the edges, about 10 minutes. Set aside to cool, maintaining the oven temperature.

3. For the lime custard: In the top of a double boiler or a heatproof bowl set over a saucepan of simmering water, whisk together the egg yolks, sugar, lime juice and zest. Cook, whisking frequently, until thick enough to coat the back of a spoon, about 8 minutes.

4. For the filling: In the bowl of a stand mixer fitted with the paddle attachment (or in a medium mixing bowl with a hand mixer), beat the cream cheese until smooth, about 1 minute. Add the sugar, salt, and lime zest; beat until light, about 2 minutes. Add the eggs one at a time, beating just until each addition is incorporated. Add the lime juice, blending well.

5. Scrape the lime custard over the crust, spreading it into an even layer. Spoon the cream cheese filling over the custard. Add enough of the hot water to the larger baking pan to come 1 inch up the sides of the cheesecake pan. Bake until the middle of the cheesecake is almost set, but not puffed and center moves slightly when pan is gently shaken, about 45 minutes.

6. For the topping: Stir the sour cream and remaining 3 tablespoons sugar in a medium bowl to blend.

7. Remove the hot cheesecake from the oven, leaving it in the baking pan. Carefully spoon the sour cream mixture over the hot cheesecake; let it set a few seconds to soften, then smooth it into an even layer. Bake the cheesecake for 10 more minutes. Transfer it to a wire rack to cool completely, then cover and refrigerate overnight. (Can be made 2 days ahead.) Release the pan sides from cheesecake; serve.

key lime cheesecake 4

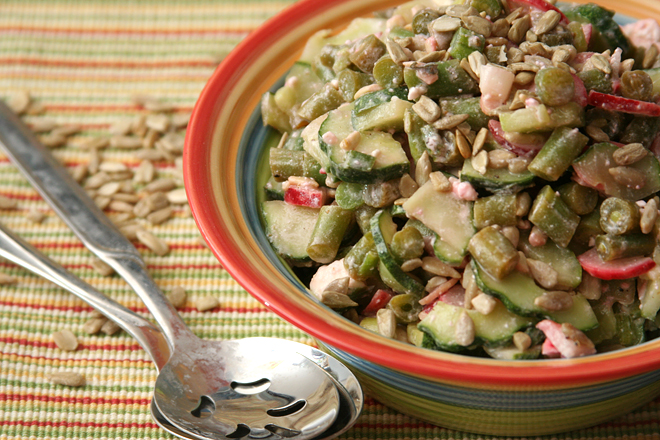
summer chopped salad with feta

summer chopped salad with feta 7

I wore out coleslaw. It was too convenient and easy and good and healthy, so I made it whenever we had pulled pork or burgers or barbecue. And that was fine for a while, for over a year, in fact, but now I’ve had enough. I needed something new to catch my fancy.

summer chopped salad with feta 1

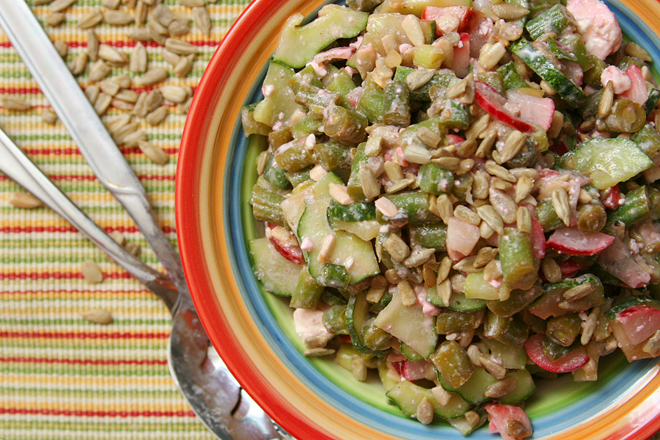
I found it. This is my new favorite side salad for a number of reasons. For one thing, it passes the no-lettuce test; delicate lettuce-based salads seem so out of place next to a hearty burger. It goes without saying that a side salad should be healthy and easy, and this one is.

summer chopped salad with feta 3

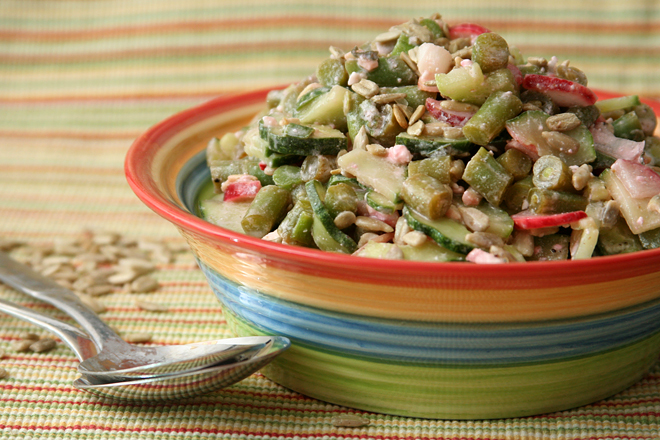
And maybe most importantly, it’s adaptable. I’ve been making coleslaw nearly the exact same way for well over a year, but this salad can be made with different vegetables, different types of citrus juice, and different seasonings to match the meal you’re serving it with. The original recipe used lime juice and cumin for a southwestern vibe, but I wanted something more Mediterranean, so I went with lemon juice this time.  It went perfectly with spareribs.  Coleslaw has been relegated from my favorite summer side to just my favorite pulled pork topping.

summer chopped salad with feta 6

One year ago: Chocolate Chocolate Chunk Muffins
Two years ago: Tarte Noire
Three years ago: Seafood Lasagna
Four years ago: Salmon Clubs with Avocado Butter

Printer Friendly Recipe
Summer Chopped Salad with Feta (adapted from Smitten Kitchen)

Serves 8 as a side dish

I steamed the green beans for about 1 minute, then did not blanch them (dip them into ice water to stop the cooking). If you do plan to blanch your beans, cook them for another minute or two. My beans looks olive green instead of bright green in the photos because I took these pictures the day after I made the salad, and the citrus juice had darkened the beans.

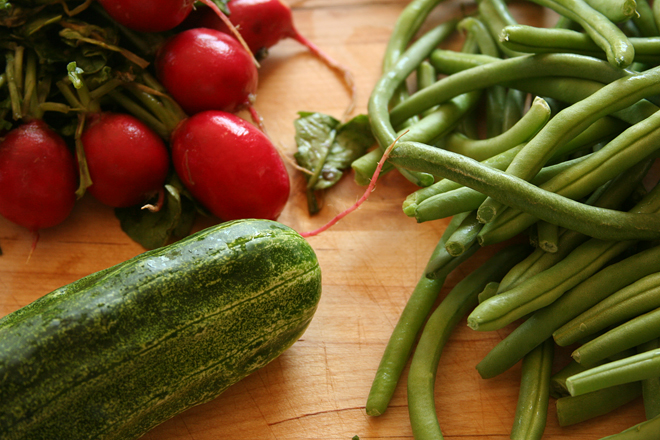
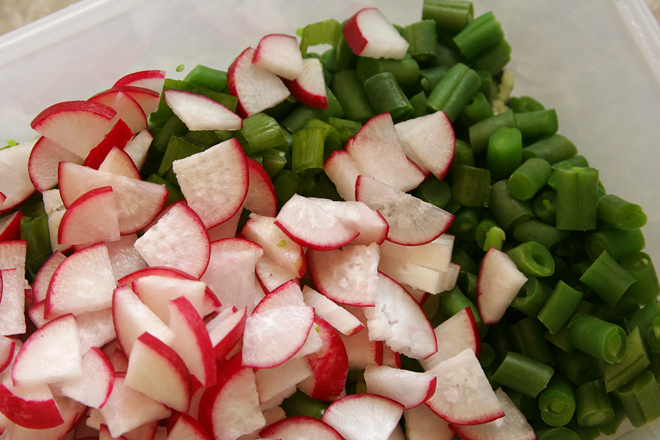
16 ounces green beans, lightly cooked, chopped into ¼-inch pieces
2 cups (7 ounces) radishes, halved and thinly sliced
1 hothouse or 3 English cucumbers (5 ounces total), halved lengthwise and sliced
4 scallions, thinly sliced
1 cup (4 ounces) crumbled feta
¾ cup toasted sunflower seeds, salted or unsalted
¼ cup fresh lemon juice
½ teaspoon salt
freshly ground black pepper, to taste
2 tablespoons thinly sliced fresh mint leaves
2-4 tablespoons extra virgin olive oil

Mix everything except the olive oil.  Add the oil and more salt to taste.

summer chopped salad with feta 8

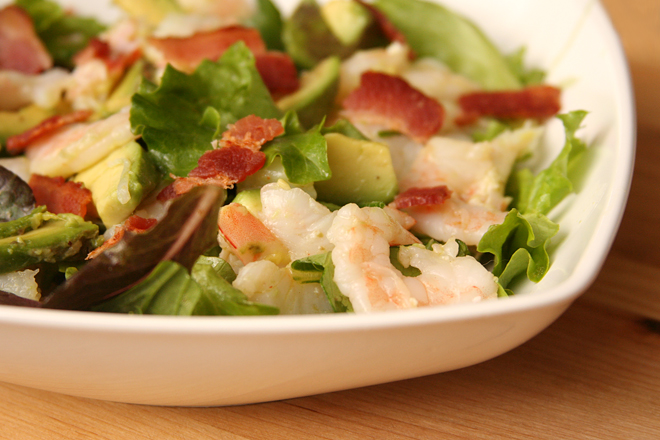
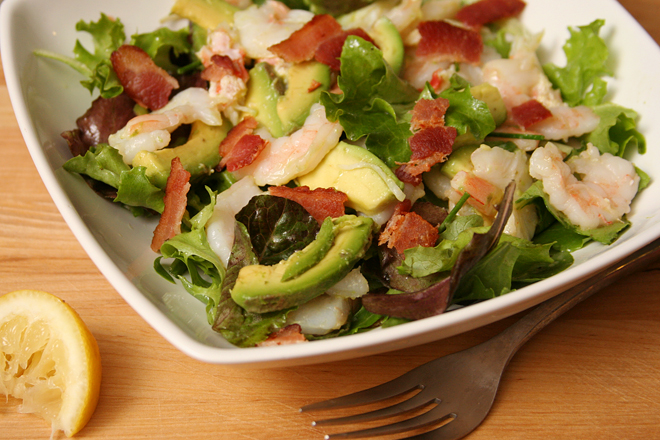
shrimp and crab avocado salad

shrimp avocado salad 4

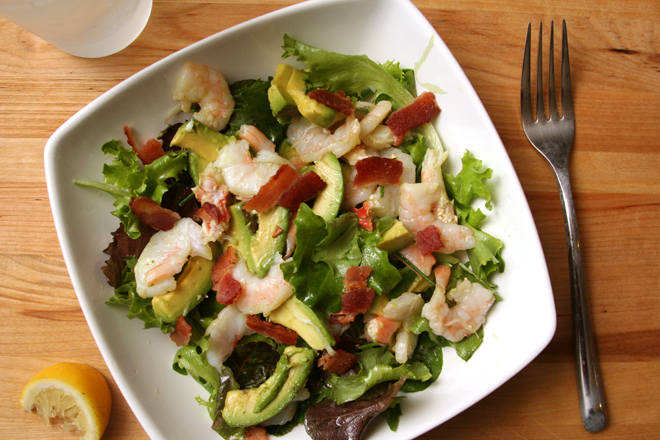
It never fails that I plan lettuce-based salads for dinner on nights when I want something light and quick, forgetting, every time, that the time-consuming part of cooking isn’t waiting for onions to sauté or sauces to simmer, it’s preparing your ingredients. And the process of making salad is almost entirely chopping. And if you’re like me and you like your main dish salads with a lot of components, the time it takes to prepare each one can really add up.

shrimp avocado salad 1

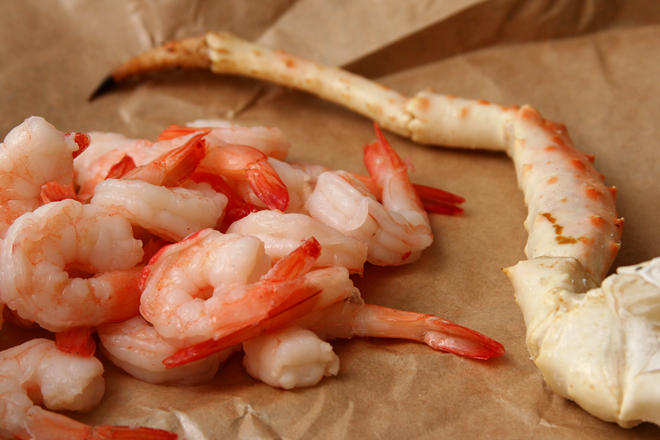
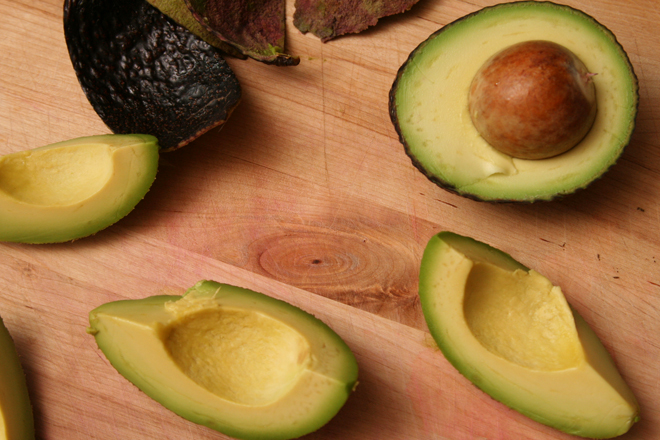
This salad required slicing shrimp in half lengthwise (I’m not sure why I bothered with this and I don’t recommend that you do), dicing avocado, picking crab out of its shell, and mixing up the dressing. And then cooking bacon at the last minute because I forgot about it earlier (I don’t recommend you do this either). It doesn’t sound like much when I say it that way, but it sure felt like a lot after an early morning run, a full workday, and a big grocery shopping trip.

shrimp avocado salad 2

You must already know that it was worth the effort or I wouldn’t tell you about it. Truly, I loved this salad and will certainly make it again – but only when I have plenty of time, or at least energy, to spare.

shrimp avocado salad 5

One year ago: Creamy Taco Mac
Two years ago: Pasta with Goat Cheese and Asparagus
Three years ago: Honey Peach Ice Cream
Four years ago: Croque Madame

Printer Friendly Recipe
Shrimp and Crab Avocado Salad (adapted from Maggiano’s)

Serves 2

Dressing:
2 tablespoons lemon juice
1 teaspoon mayonnaise
½ teaspoon mustard
¼ teaspoon salt
pinch pepper
2-3 tablespoons extra virgin olive oil

Salad:
2 slices bacon
½ pound cooked, peeled shrimp
1 cooked king crab leg, shelled
1 avocado, peeled and diced
4 cups lettuce (about 8 ounces), torn into bite-size pieces

1. In a small bowl, whisk the lemon juice, mayonnaise, mustard, salt, and pepper. Slowly pour in 2 tablespoons of olive oil, whisking continuously. Taste the dressing by dipping a bite-size piece of lettuce into it, then add more oil to taste, if desired.

2. In a small skillet, cook the bacon over medium heat until crisp. Remove from the pan and break into small pieces.

3. Combine the shrimp, crab, and avocado in a medium bowl. Add 1 tablespoon of the dressing; toss to coat. Transfer the lettuce to a separate large bowl (or in individual serving bowls); mix with the remaining dressing. Top the lettuce with the shrimp mixture and distribute the bacon over the salad. Serve immediately.

shrimp avocado salad 6