chicken gyros

chicken gyros 14

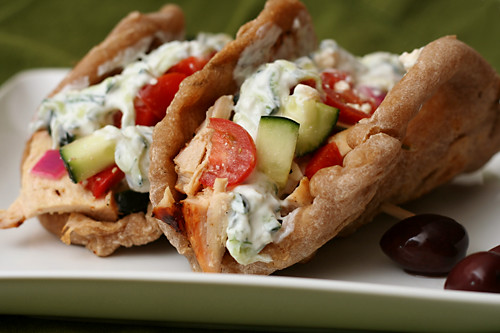
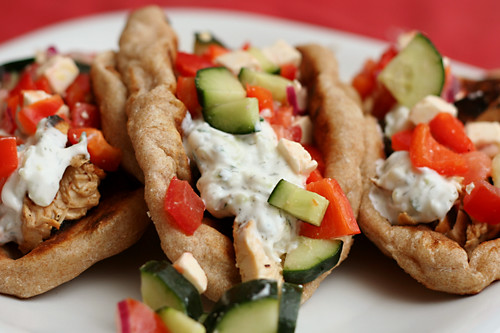
Elly’s chicken gyros are so very popular for good reason – it’s a simple recipe with exceptional results. I, of course, can’t keep anything simple. After I made Elly’s recipe a few times, I noticed how similar it is to chicken fajitas – marinated chicken wrapped in flat bread with vegetables. My favorite chicken fajita recipe has a few tricks up its sleeve that I love, so I started incorporating those into Elly’s chicken gyro recipe.

chicken gyros 1

My favorite trick is saving a portion of the marinade (before mixing it with raw meat, of course) to stir into the cooked and shredded chicken, reviving any flavors that might be lost during cooking. Another portion of the marinade is stirred into the vegetables, brightening their flavor while the vinegar tames the onion’s bite. I also insist on taking advantage of everyone’s favorite cooking method – fire. I love grilling the chicken and then toasting the pita over the remaining coals.

chicken gyros 2

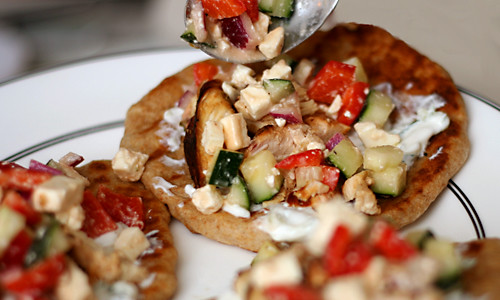
I’m fairly certain that traditionally, gyros aren’t topped with red peppers and feta, and the first few times I made this recipe, I served those on the side as part of Mediterranean Pepper Salad. But each time, more and more of the salad made its way onto the gyro, and eventually I stopped keeping them separate at all. With the vegetables right on top of the marinated grilled chicken and toasted flatbread, topped with tart white sauce, these were even more similar to chicken fajitas, except – dare I say – even better.

chicken gyros 5

One year ago: Croissants (Martha Stewart’s recipe)
Two years ago: Rhubarb Scones
Three years ago: Pita (cook these right on the grill instead of baking!)

Printer Friendly Recipe
Chicken Gyros (adapted from Elly Says Opa and from Cooks Illustrated’s Chicken Fajita recipe)

Greek yogurt is often sold in 7-ounce containers. If you don’t have extra plain yogurt around to use in the marinade, using 2 tablespoons of the Greek yogurt meant for the tzatziki recipe in your marinade won’t hurt your tzatziki at all.

Chicken:
¼ cup juice from 1 to 2 lemons
2 tablespoons olive oil
3 medium garlic cloves, crushed
1 tablespoon red wine vinegar
1 teaspoon sugar
table salt and ground black pepper
2 tablespoons plain yogurt
3 boneless, skinless chicken breasts (about 1½ pounds), trimmed of fat, tenderloins removed, pounded to ½-inch thickness

Tzatziki:
½ cucumber, unpeeled, shredded
½ teaspoon kosher salt
7 ounces Greek yogurt
1 tablespoon freshly squeezed lemon juice
½ tablespoon white wine vinegar
½ tablespoon minced fresh dill (optional)
1 clove garlic, minced
¼ teaspoon freshly ground black pepper

For serving:
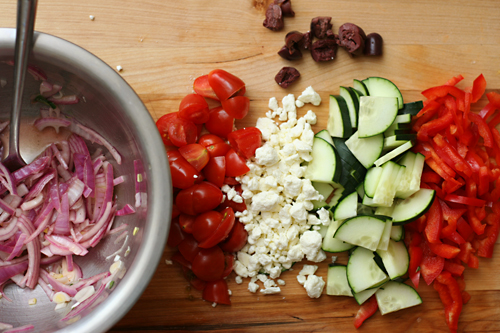
½ red onion, quartered lengthwise and sliced thinly
1 large red bell pepper, quartered lengthwise and sliced thinly
½ cucumber, quartered lengthwise and sliced thinly
1 tomato, chopped medium, or 1 cup grape tomatoes, halved
½ cup feta, crumbled
4-6 (6-inch) pocketless pitas

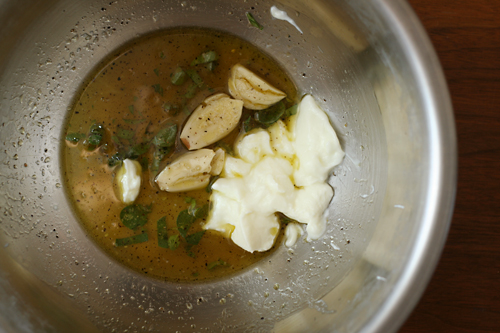
1. In a medium bowl, whisk together the lemon juice, oil, garlic, vinegar, sugar, 1 teaspoon salt, and ¾ teaspoon pepper. Reserve 3 tablespoons of the marinade in a small bowl; set aside. Add the yogurt and another teaspoon salt to the remaining marinade. Place the chicken in the marinade; cover with plastic wrap and refrigerate 15 minutes.

2. Meanwhile, using a large chimney starter, ignite 6 quarts of charcoal briquettes and burn until the coals are fully ignited, about 20 minutes. Empty the coals into the grill, spreading them in a single layer; place an additional 20 unlit coals over the lit coals on one side of grill to create a two-level fire. Position the grill grate over the coals and heat the grate for 5 minutes; scrape clean with a grill brush. (For a gas grill, light all burners and turn to high, cover, and heat the grill until hot, about 15 minutes; scrape the grill grate clean with a grill brush. Leave one burner on high heat while turning the remaining burner(s) down to medium.)

3. For the tzatziki: Place the cucumber in a strainer set over a medium bowl and add the salt. Set aside for at least 15 minutes to drain. Transfer the cucumber to a clean kitchen towel and squeeze dry. Combine the drained cucumber with the yogurt, lemon juice, vinegar, dill, garlic, and pepper.

4. Add 2 tablespoons of the reserved marinade to a bowl; add the sliced onion to the marinade. Set aside to lightly pickle while you prepare the remaining toppings. Mix all of the vegetables and feta into the bowl with the onion.

5. Remove the chicken from the marinade and place it smooth side down on the hotter side of the grill; discard the remaining marinade. Cook the chicken until it’s well browned, 4 to 5 minutes; using tongs, flip the chicken and continue grilling until it’s no longer pink when cut into with a paring knife or an instant-read thermometer inserted into the thickest part registers about 160 degrees, 4 to 5 minutes longer. Transfer to a plate; cover to keep warm.

6. Working in 2 or 3 batches, place the pitas in a single layer on the cooler side of the now-empty grill and cook until warm and lightly browned, about 20 seconds per side (do not grill too long or the pitas will become brittle). As the pitas are done, wrap them in a kitchen towel or a large sheet of foil.

7. Slice the chicken into ¼-inch strips and toss with the remaining tablespoon of reserved marinade in another bowl; arrange the chicken and vegetables on a large platter and serve with the warmed pitas.
chicken gyros 8

grapefruit honey yogurt scones

grapefruit scones 5

Here’s what scones mean for me: Either I wake up on Saturday and immediately get out the butter, flour, and sugar so I can start mixing and making a big mess of the kitchen. Or, I wake up on Saturday and pilfer my time away on the internet, or, if I’m really smart, relaxing reading a book while scones go straight from the freezer to the oven. Either way, scones = Saturday = things that make me happy.

grapefruit scones 2

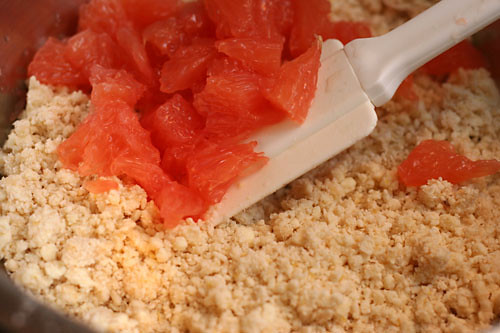
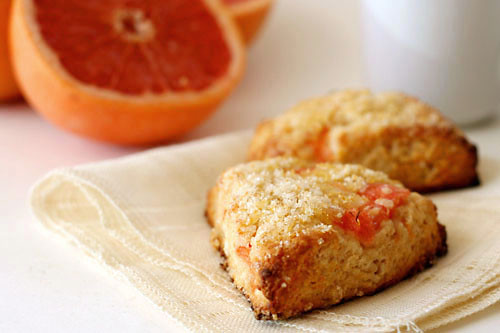
I wasn’t completely sure that cooked grapefruit would make me happy, but it turns out that grapefruit pieces in the middle of a scone create a nice pocket of juiciness. The honey flavor, which is often overpowered, was distinct. The yogurt keeps the scones tender, along with the butter and careful mixing of course.  I’m generally already happy on Saturday mornings, but good scones certainly don’t hurt.
grapefruit scones 6

One year ago: Eggs in Tomato Sauce
Two years ago: Anadama Bread
Three years ago: Baba Ghanoush, Falafel, and Hummus

Printer Friendly Recipe
Grapefruit, Honey, and Yogurt Scones (adapted from Joy the Baker)

Makes 6 scones

I used nonfat Greek yogurt, and it worked fine.

This was my first time segmenting citrus. It wasn’t as bad as I was expecting. Branny has detailed instructions in her blog.

As always, you can freeze scones after shaping, before baking. Bake directly from the freezer, adding 2-3 minutes to the baking time.

½ cup plain Greek yogurt
2 tablespoons honey
1 teaspoon vanilla
¼ cup (1.75 ounces) granulated sugar
1 grapefruit, zested, then segmented and coarsely chopped
1½ cups (7.2 ounces) all-purpose flour
1 teaspoon baking powder
½ teaspoon baking soda
¼ teaspoon salt
6 tablespoons unsalted butter, cold, cut into ¼-inch cubes

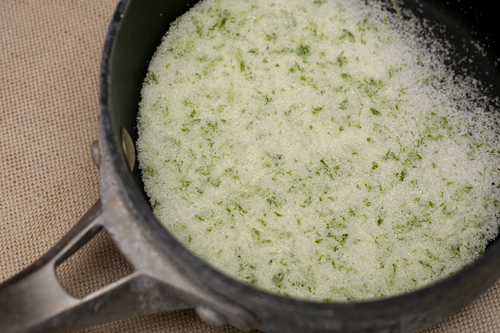
1. Place a rack in the center of the oven; heat to 425 degrees. Line a baking sheet with parchment paper or a silicone mat. In a measuring cup, combine the yogurt, honey, and vanilla. In a small bowl, rub the sugar and the grapefruit zest together until the sugar is moist and fragrant.

2. Place the flour, 2 tablespoons of the sugar mixture, baking powder, baking soda and salt in the bowl of a food processor. Pulse to combine. Add the butter; process in 1-second pulses until the mixture resembles coarse meal. Pour the yogurt mixture over the flour mixture; pulse until the dough is crumbly. Transfer the mixture to a large bowl and fold in the grapefruit pieces.

3. Turn the scone dough out onto a lightly floured surface. Form it into an 8 inch circle, about 1 inch thick. Use a knife or a bench scraper to cut the dough into six triangles. Place on the prepared baking sheet; top with the remaining grapefruit sugar.

4. Bake the scones for 15 to 17 minutes, until they’re golden brown. Allow to cool on the pan for 10 minutes before serving. These scones are best served the day they’re made.

grapefruit scones 4

carrot avocado salad

carrot avocado salad 3

The problem with just about every recipe that contains avocado is that there isn’t enough avocado. The only exception I can think of is guacamole, because it’s almost entirely avocado. My favorite way to eat avocado is on toast with a sprinkling of kosher salt.

carrot avocado salad 2

My usual way of eating it, however, is as an accent in which there’s just enough avocado so that most bites have a tiny portion. And all the bites without avocado are just sad.  And all the bites that do have avocado need more of it.

carrot avocado salad 1

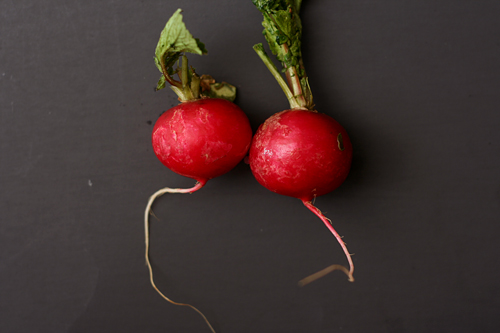
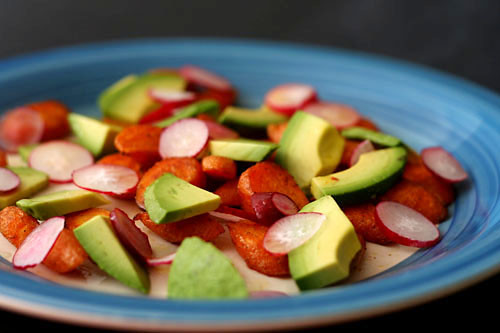
And that is what I love about this salad – avocado is the main event, or at least it shares equal billing with the sweet caramelized carrots. It might sound like an unusual combination, but it works. The radishes add a nice touch as well, crisp and spicy. I’m pretty sure the only way I could like this salad more would be if I left out the carrots, pepper, cumin, olive oil, and radishes. And maybe added in some toast.

carrot avocado salad 4

One year ago: Spinach Artichoke Pizza
Two years ago: Tofu Mu Shu
Three years ago: Crockpot Pulled Pork

Printer Friendly Recipe
Roasted Carrot and Avocado Salad (adapted from Smitten Kitchen)

4 servings

I prefer to use a regular olive oil to roast the carrots and extra virgin olive oil in the dressing.

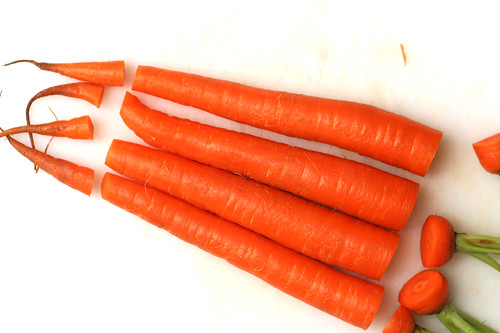
1 pound carrots, scrubbed or peeled and cut into two-inch segments
Coarse salt and freshly ground black pepper
½ teaspoon ground cumin
3 tablespoons olive oil, divided
3 tablespoons lemon juice
4 radishes, chopped small
1 avocado, pitted and sliced

1. Adjust a rack to the middle position and heat the oven to 400 degrees. On a large baking sheet, toss the carrots with ¼ teaspoon salt, ⅛ teaspoon pepper, cumin, and 2 tablespoons olive oil. Roast for about 20 to 30 minutes, until the carrots are tender and browned.

2. In a small bowl, whisk together the lemon juice and the remaining tablespoon olive oil. In a medium serving bowl, combine the carrots, avocado and radishes. Drizzle the vegetables with the dressing, adding more salt and pepper to taste. Serve immediately.

carrot avocado salad 5

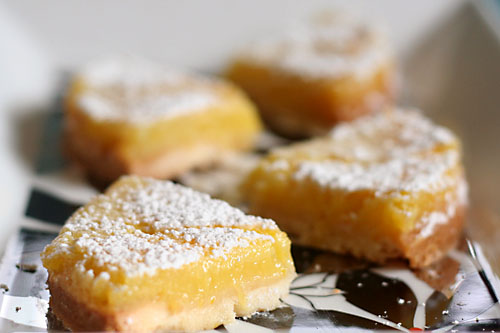
lemon bar comparison

front to back: Cooks Illustrated, Lebovitz

I don’t make lemon bars often, despite how much I love them. They feel so light and refreshing that I can’t convince my brain that these are, in fact, full of butter. So I end up eating a lot of them.  But if I don’t get to make them often, when I do get a chance to, they need to be perfect. I need the best recipe. And how do I know which is best without a side-by-side comparison?

I started with Cooks Illustrated as a trustworthy source of straightforward results. I chose Tartine’s lemon bars on brown butter shortbread because it was one of the first recipes in the book that caught my eye and is typical of their talent for taking a classic recipe up a notch. I also made David Lebovitz’s lemon bar recipe, which uses the whole lemon, pith and all.

Cooks Illustrated: As promised, this is a typical lemon bar recipe with no tricks up its sleeve. The crust is a combination of flour, powdered sugar, cornstarch, salt, and butter, which is combined in the food processor, pressed into a pan, and chilled before baking. The topping is eggs, sugar, flour, milk, salt, and lemon zest and juice. The topping is poured onto the hot crust and baked until firm.

Tartine: The browned butter shortbread in this recipe’s title is a misnomer, as it turns out that the crust is mixed like any other lemon bar crust, with no browning of the butter beforehand. Instead, the crust just browned in the oven, making it more of a butter crust that is browned instead of a crust that includes browned butter.  The filling is similar to Cooks Illustrated’s, except it contains no milk.

Lebovitz: David Lebovitz’s crust uses granulated instead of powdered sugar and melted butter instead of solid. Like the other recipes, this topping is based on sugar, eggs, and lemon, but instead of a small amount of flour, it incorporates cornstarch, as well as melted butter, which is not present in the other recipes. And most importantly, this recipe includes the entire lemon, pith in addition to juice and zest.

Comparing the lemon bars made me realize how important the crust is. I’d always focused on the filling before, wanting it as lemony and sour as I could stand, and I thought the crust was nothing more than a vehicle to hold up the filling. Now the crust seems like an important contrast to the tart filling. In fact, in many ways, the crust was the deciding factor in choosing preferences. The fillings were similar, but the crusts varied widely.

Cooks Illustrated: The all-important crust factor was the downfall of this recipe. The crust was dry and didn’t brown. I’m blaming this on the cornstarch. It’s probably important for structure, but it didn’t do the flavor any favors. The filling, on the other hand, was creamy and tart and wonderful. The top photo spotlights the CI bars in front, and you can clearly see their pale crust and luscious filling.

Tartine: This crust was substantial enough to hold up the filling and had just a bit of snap to it. It did, indeed, brown well, which gave it a nice flavor. The filling was lemony and smooth, although it  cratered when it was removed from the oven, resulting in a sunken middle.  I surprised myself by wanting a higher ratio of crust to filling.

Lebovitz: The granulated sugar lent this crust a great flavor, but it was crumbly and sometimes broke under the weight of the filling. The filling itself contained far too many chunks of lemon, although this might be a result of using a food processor instead of a blender to puree the lemon.  The topping was pockmarked like the moon (scroll down to see a picture of the tops of the three recipes).

I enjoyed the lemon squares from all three recipes, but I believe the one perfect bar would be made from Tartine’s crust and Cooks Illustrated’s filling.


left to right: Lebovitz, Tartine, Cooks Illustrated

One year ago: Stuffed Butterflied Leg of Lamb
Two years ago: Fresh Strawberry Scones
Three years ago: Asparagus and Arugula Salad with Cannellini Beans and Balsamic Vinegar

Printer Friendly Recipe
Lemon Bars on Brown Butter Shortbread (from Tartine)

For the crust:
½ cup (2 ounces) confectioners’ sugar
1½ cups (7.5 ounces) all-purpose flour
12 tablespoons (1½ sticks) unsalted butter, at room temperature
½ cup (2 ounces) pine nuts (optional)

For the filling:
½ cup (2½ ounces) all-purpose flour
2¼ cups (16 ounces) sugar
1 cup plus 2 tablespoons lemon juice
lemon zest, grated from 1 small lemon
6 large whole eggs
1 large egg yolk
pinch salt
confectioners’ sugar for topping (optional)

1. Preheat the oven to 350 degrees and butter a 9-by-13-inch baking pan.

2. To make the crust: Sift the confectioners’ sugar into the bowl of a stand mixer fitted with the paddle attachment. Stir in the flour. Add the butter and pine nuts (if using) and beat on low speed just until a smooth dough forms.

3. Press the dough evenly into the pan and allow it to come up about a ½ inch up the sides of the pan. Line the crust with parchment paper and fill with pie weights. Bake the crust until it is a deep golden brown, about 25-35 minutes.

4. To make the filling: While the crust is baking, sift the flour into a mixing bowl and whisk in the sugar until blended. Add the lemon juice and zest and stir to dissolve the sugar. In a separate mixing bowl, whisk the whole eggs and egg yolk with the salt. Add the eggs to the lemon juice mixture and whisk until well mixed.

5. Once the crust is ready, pour the filling directly into the pan. Reduce the oven temperature to 300 degrees and bake just until the center of the custard is set, about 30 to 40 minutes.

6. Let cool completely on a wire rock, then cover and chill well before cutting. Cut into squares and dust the top with confectioners’ sugar, if desired. They will keep in an airtight container or well covered in the baking dish in the refrigerator for up to 4 days.

Printer Friendly Recipe
Perfect Lemon Bars (from Cooks Illustrated)

For the crust
1¾ cups (8.75 ounces) unbleached all-purpose flour
⅔ cup confectioners’ sugar, plus extra to decorate finished bars
¼ cup cornstarch
¾ teaspoon table salt
12 tablespoons unsalted butter (1 ½ sticks), at very cool room temperature, cut into 1-inch pieces

Lemon filling
4 large eggs, beaten lightly
1⅓ cups (9.33 ounces) granulated sugar
3 tablespoons unbleached all-purpose flour
2 teaspoons grated lemon zest from 2 large lemons
⅔ cup lemon juice from 3 to 4 large lemons, strained
⅓ cup whole milk
⅛ teaspoon table salt

1. For the crust: Adjust an oven rack to middle position and heat the oven to 350 degrees. Lightly oil a 13-by-9-inch baking dish and line with one sheet parchment or wax paper. Dot the paper with butter, then lay a second sheet crosswise over it.

2. Pulse the flour, confectioners’ sugar, cornstarch, and salt in the food processor workbowl fitted with the steel blade. Add the butter and process to blend, 8 to 10 seconds, then pulse until the mixture is pale yellow and resembles coarse meal, about three 1-second bursts. (To do this by hand, mix flour, confectioners’ sugar, cornstarch, and salt in medium bowl. Freeze the butter and grate it on the large holes of a box grater into the flour mixture. Toss the butter pieces to coat. Rub pieces between your fingers for a minute, until the flour turns pale yellow and coarse.) Sprinkle the mixture into the lined pan and press firmly with fingers into an even, ¼-inch layer over the entire pan bottom and about ½-inch up the sides. Refrigerate for 30 minutes, then bake until the crust is golden brown, about 20 minutes.

3. For the filling: Meanwhile, whisk the eggs, sugar, and flour in a medium bowl, then stir in the lemon zest, juice, milk, and salt to blend well.

4. To finish the bars: Reduce the oven temperature to 325 degrees. Stir the filling mixture to reblend; pour into the warm crust. Bake until the filling feels firm when touched lightly, about 20 minutes. Transfer the pan to a wire rack; cool to near room temperature, at least 30 minutes. Transfer to a cutting board, fold the paper down, and cut into serving-size bars, wiping knife or pizza cutter clean between cuts, as necessary. Sieve confectioners’ sugar over bars, if desired.

Printer Friendly Recipe
Whole Lemon Bars (reformatted slightly but not actually changed from David Lebovitz)

I needed 2 lemons to make 6 ounces of lemon. I trim off the knobby ends when making whole lemon desserts.

Crust:
1 cup (4.8 ounces) all-purpose flour
¼ cup (1.75 ounces) sugar
¼ teaspoon salt
8 tablespoons (1 stick) melted unsalted butter
½ teaspoon vanilla extract

Lemon topping:
1 lemon (about 6 ounces), organic or unsprayed
1 cup (7 ounces) sugar
3 tablespoons freshly squeezed lemon juice
3 large eggs, room temperature
4 teaspoons cornstarch
¼ teaspoon salt
3 tablespoons melted unsalted butter
Optional: powdered sugar, for serving

1. Preheat the oven to 350ºF (180ºC). Line an 8-inch square with foil.

2. For the crust: In a medium bowl, mix the flour, sugar, salt, melted butter, and vanilla, stirring just until smooth. Press the batter into the bottom of the pan, using your hands or a small offset spatula to get it as level as possible. Bake the crust for 25 minutes, or until it’s deep-golden brown.

3. For the topping: While the crust is cooking, cut the lemon in half, remove the seeds, and cut it into chunks. Put the chunks of lemon in a food processor or blender along with the sugar and lemon juice, and let it run until the lemon is completely broken up. Add the eggs, cornstarch, melted butter, and blend until almost smooth. (A few tiny bits of lemon pieces are normal and encouraged.)

4. When the crust comes out of the oven, reduce the oven temperature to 300ºF (150ºC). Pour the lemon filling over the hot crust and bake for 25 minutes or just until the filling stops jiggling and is barely set.

5. Remove from the oven and let cool completely. Once cool, carefully lift out the bars grasping the foil. Cut the bars into squares or rectangles. Sift powdered sugar over the top just before serving, if desired.

Storage: The bars will keep in an airtight container at room temperature up to three days. You can freeze the lemon bars as well for up to one month, letting them come to room temperature before serving.

left to right: Cooks Illustrated, Tartine, Lebovitz

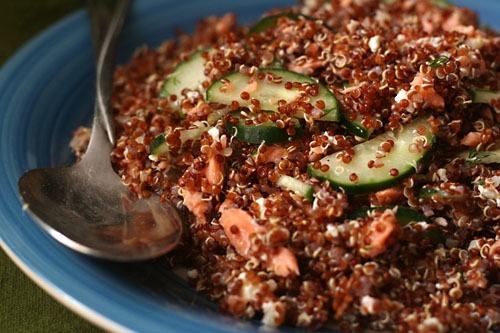
quinoa with salmon, feta, and dill

I imagine that most people have a set of ten, twenty, or maybe even thirty dinners that they regularly make. Some people might try a new recipe every couple of weeks. But for the most part, I suspect that dinner on any given night is something familiar.

Then there are a class of people who have so many recipes they want to try that they know there simply aren’t enough nights in the week, month, year, life. Every time an old favorite is made is an opportunity lost to try something new. Not that I don’t have a rotation; it’s just that meals are considered on the rotation if they’re made only once or twice a year. Something in heavy rotation might be made six or seven times per year.

This was a surprise addition to my rotation. If I didn’t think we’d like it, I wouldn’t have made it, but I didn’t know we’d like it as much as we did. Dave compared it sushi bowls, with the grain base, fish, and cucumbers, but the lemon, dill, and feta take it in a different direction.

Of course, it takes more than good flavor to be added to my rotation – dishes have to be healthy, which means no refined carbs, limited oil and butter, and plenty of protein and vegetables. Recipes also have to be easy if there’s any hope of me making them often, and the limited amount of ingredient prep required here can be accomplished while the quinoa cooks. Not only have I made this three times in the last year, I’ve made it twice in the last month – heavy rotation indeed.

One year ago: Shrimp Burgers
Two years ago: Roasted Baby Artichokes
Three years ago: Double (or Triple) Chocolate Cookies

Printer Friendly Recipe
Quinoa with Salmon, Feta, and Dill (adapted from Apple a Day)

Serves 6

You can use also fresh salmon and cook it either on the stove or in the oven. Kelsey has directions for stovetop cooking. If you use fresh salmon instead of smoked, increase the salt in the quinoa cooking water to ½ teaspoon.

While you can serve this immediately after mixing, it will be better if you give the flavors some time to meld, even just 15 minutes. This is particularly true if you’re using salty smoked salmon.

1 cup quinoa
2 cups water
¼ teaspoon salt
1 lemon, juice and zest
8 ounces smoked salmon, chopped small
1 tablespoon extra virgin olive oil
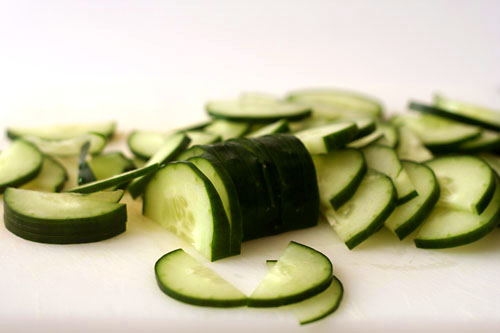
½ cucumber, quartered lengthwise and sliced ¼-inch thick
½ cup feta cheese, chopped
1 tablespoon fresh dill, minced

1. Place the quinoa in a fine-mesh strainer; rinse until the water no longer foams. In a medium saucepan, bring the water to a boil. Add the quinoa, salt, and the zest of the lemon. Reduce the heat to low, cover, and simmer for 15 minutes. After 15 minutes, turn the heat off; let the quinoa set, still covered, for another 5 minutes. Drain off any unabsorbed water.

2. Squeeze the juice of the lemon over the quinoa, then mix in the salmon and remaining ingredients. Serve immediately or refrigerate overnight.

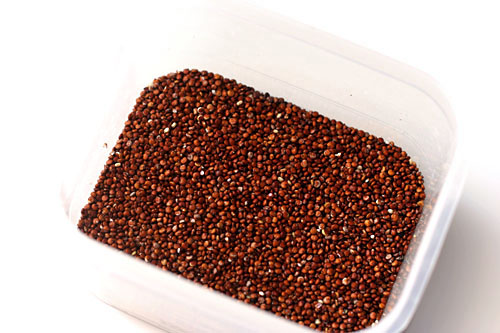
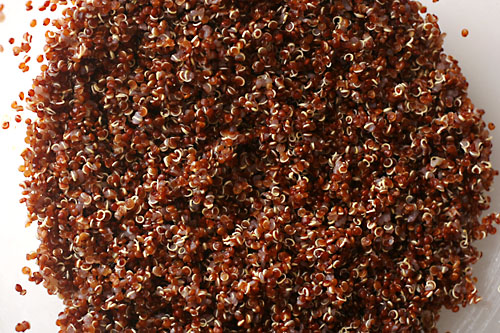
Oh yeah, I used red quinoa!  Regular quinoa will work every bit as well though.

lemon ricotta strawberry muffins

Sometimes it bothers me that I can’t buy any locally produced food. I get to thinking that if food can’t be grown here, maybe we shouldn’t live here. Clearly it’s an unenvironmental place to live if everything from greens to beef to beans has to be shipped here.

Then I remember that I’m here for an environmental reason. I work for a radioactive waste disposal site. And it’s here because there aren’t a lot of people here. Do you want radioactive waste stored anywhere near your city? Probably not. (Although the truth is that most of the locals here appreciate the repository’s presence, as it brings good jobs to the area and has had no environmental effect.) And there aren’t a lot of people here because stuff doesn’t grow here.

The upshot of this is that I have no qualms about buying California strawberries or Florida peaches. If I tried to follow a 100-mile diet in southern NM, we’d have to survive on pecans. Even the state’s prized green chiles are grown almost 200 miles away. I draw the line at Chilean berries, but anything from the US or Mexico is fair game.

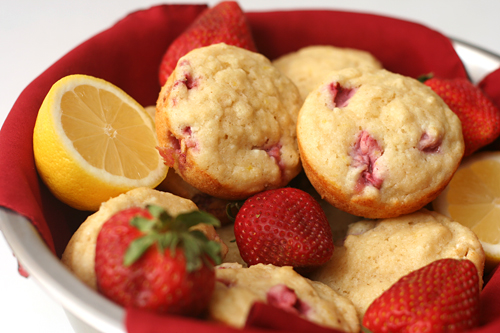
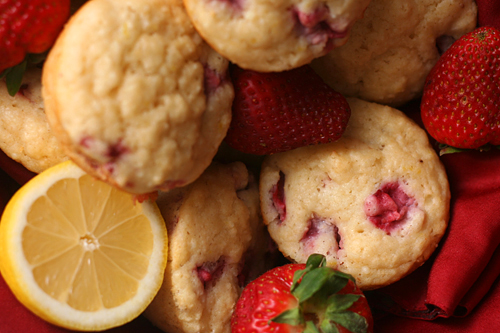
If you try to eat local and you live farther north, you probably don’t have strawberries yet. When you do, here’s a great way to use them. These light, tender muffins are fragrant with lemon and studded with sweet berries. We enjoyed them while sitting outside in our sunbaked parched desert.

One year ago: Cauliflower Cheese Pie with Grated Potato Crust
Two years ago: Pan-Roasted Asparagus
Three years ago: Hazelnut Dried Cherry Biscotti

Printer Friendly Recipe
Lemon Ricotta Strawberry Muffins (adapted from Mollie Katzen via Apple a Day)

Makes 12 muffins

I substituted ½ cup whole wheat pastry flour for an equal amount of the all-purpose flour.

2 cups (9.6 ounces) all-purpose flour
1½ teaspoon baking powder
½ teaspoon salt
⅛ teaspoon baking soda
½ cup (3.5 ounces) granulated sugar
1 tablespoon lemon zest
1 cup ricotta cheese
2 large eggs
1 cup buttermilk
1 tablespoon vanilla extract
1 tablespoon lemon juice
4 tablespoons unsalted butter, melted and cooled
1½ cups strawberries, chopped

1. Heat the oven to 350ºF. Spray the bottoms only of a 12-cup muffin pan with nonstick spray or line with paper liners. In a large bowl, combine the flour, baking powder, salt, and baking soda.

2. In a medium bowl, rub the lemon zest into the sugar. Whisk in the eggs, ricotta, buttermilk, vanilla, lemon juice, and butter. Pour the ricotta mixture into the flour mixture and fold until the flour is evenly dispersed but not completely mixed in. Add the strawberries and fold until the flour is moistened (some lumps are okay) and the strawberries are evenly distributed.

3. Divide the batter evenly between the muffin cups. Bake until a toothpick inserted into a muffin comes out clean, 18-22 minutes. Set the pan on a rack to cool slightly, about 5 minutes, then use a thin-bladed knife to remove the muffins from the pan.

green pea ravioli in lemon broth

My notes call this Saturday night cooking adventure “Light Italian Meal”. I was experimenting with wet scallops – scallops that have been treated with sodium triphosphate to help them retain moisture. Cooks Illustrated has a recipe designed to make wet scallops palatable, so I gave it a go. I tried to keep the rest of the meal relatively light to compliment the scallops, starting with these ravioli, then moving onto insalata di crudita before serving the seared scallops with almond cream sauce. Pinot grigio and whole wheat ciabatta accompanied every part of the meal.

This was the only recipe I made that night that I was really excited by. The only reason the ciabatta doesn’t qualify is because I didn’t follow much of a recipe, and the salad, although crisp and fresh, was a fairly typical side salad. The scallops were a disaster. Not only was the almond cream sauce too rich, but the scallops themselves didn’t brown until they had overcooked into balls of rubber. What’s worse, while I set them aside to finish the sauce, the cooked scallops released a freaky blue liquid. I choked a down few and filled up on bread.

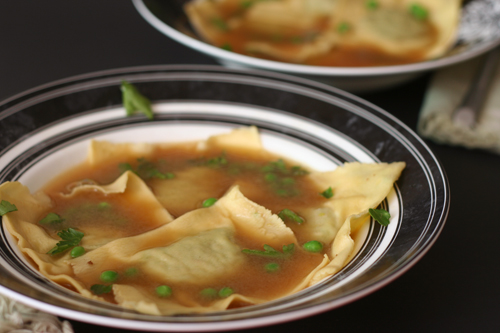
I wish I had made enough ravioli to fill up on those, rather than teasing myself with a small starter course serving. These pasta pouches with their vibrant filling were the highlight of my meal that night. There aren’t many ingredients in the filling, but each one has something to offer: the peas are both sweet and earthy, the shallots are bright, the parmesan salty. This humble mixture might have not had much to live up to compared to the rest of the meal, but it would have been just as special on its own.

One year ago: Vodka Gimlets
Two years ago: Pasta with Roasted Red Pepper Sauce
Three years ago: Cinnamon Rolls

Printer Friendly Recipe
Green Pea Ravioli with Lemon Broth (adapted from Gourmet via epicurious)

6 servings

I’ve doubled the amount of filling, because I only had enough filling for 9 ravioli, not the 18 the original recipe indicates.

Pasta:
1⅓ cups (6.4 ounces) all-purpose flour
2 eggs, lightly beaten

Filling:
2 cups baby peas, defrosted
1 tablespoon olive oil
2 shallots, minced
Salt
6 tablespoons freshly grated parmesan
6 tablespoons fresh bread crumbs

Broth:
4 cups chicken broth
2 garlic cloves, smashed
1 teaspoon freshly grated lemon zest
Squeeze fresh lemon juice

Garnish: fresh chervil or parsley and cooked peas

1. Combine the flour and eggs until smooth (either by hand, with a food processor, or with a stand mixer). Add more flour if the dough is sticky or more water if it’s crumbly. If you stick a dry finger into the center of the dough, it should come out nearly clean. Wrap the dough in a damp towel and set aside to rest while you prepare the filling.

2. Force the peas through the fine disk of a food mill into a bowl to remove their skins. Heat the oil in a small skillet over medium heat; add the shallot and a pinch of salt; cook until shallot is softened, 3-4 minutes, stirring occasionally. Combine the pea puree, cooked shallot, parmesan, and bread crumbs.

3. Divide the dough into 6 portions. Working with one portion at a time, flatten it and fold in thirds, like a letter. Roll it through the widest setting on a pasta roller. Repeat the folding and rolling 3-4 more times, flouring the dough as needed to prevent sticking. Adjust the pasta roller to the next thinnest setting; roll the pasta sheet through. Continue thinning the pasta until the next-to-thinnest setting. Lay the thinned pasta sheet on a dry dish towel. Repeat with the remaining portions of pasta.

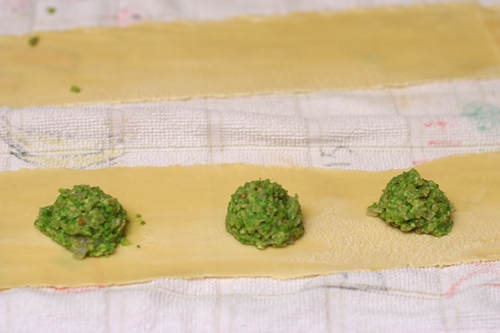
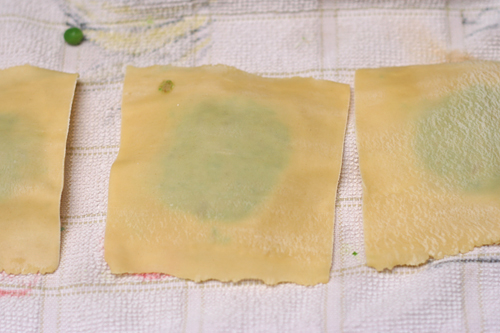
4. Place one rounded teaspoon of filling every 3 inches along the length of a pasta sheet. Using a pasta brush or your fingers, wet the pasta in between the rounds of filling. If the pasta sheet is at least 4 inches wide, fold it lengthwise over the filling. If the pasta sheet is too thin to fold lengthwise, lay a second pasta sheet over the filling. Press around each ball of filling to seal the two layers of pasta together. Use a pizza roller to cut between the filling to form squares of ravioli. Store the ravioli on a dry dish towel (there’s no need to cover it). Repeat with the remaining dough and filling.

5. Combine the broth, garlic, lemon zest, and salt and pepper to taste in a saucepan; bring to a simmer. Lower the heat and cover to keep warm.

6. Bring a large pot of water to a boil; add a tablespoon of salt and lower the heat until the water is at a lively simmer. Cook the ravioli in small batches until al dente, 2 to 3 minutes, using a skimmer or large slotted spoon to remove the ravioli from the boiling water. Divide the cooked ravioli between six soup bowls.

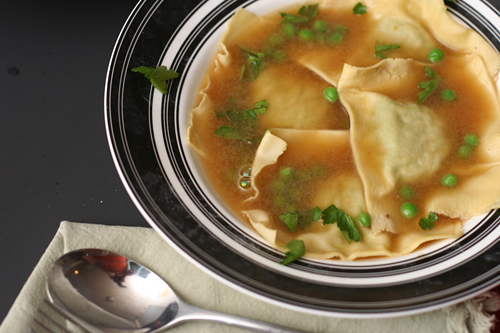
7. Discard the garlic in the broth. Ladle the hot broth over the ravioli. Garnish with herbs and cooked peas, if desired; serve immediately.

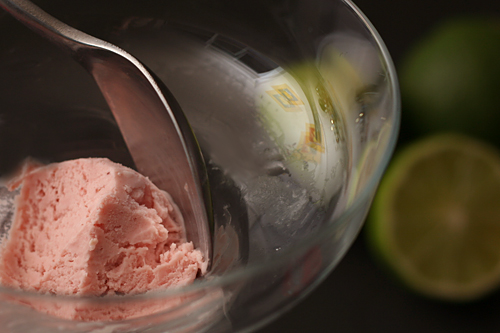
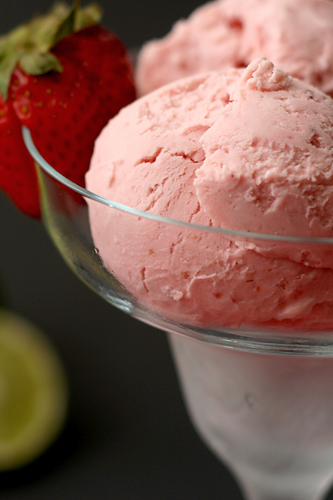
strawberry daiquiri ice cream

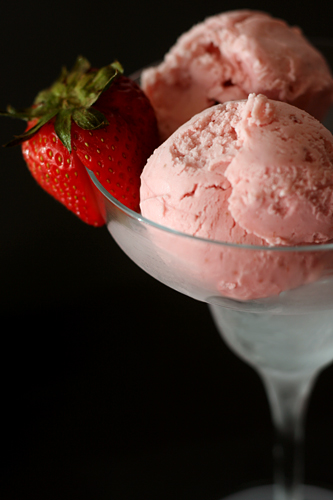
When it comes to alcohol, I pretty much like it all. Red wine, white wine, dark beers, light beers, vodka cocktails, straight whiskey. It’s all good. I don’t drink foo-foo drinks often, only because they’re too much work to mix up at home and too low on alcohol to pay for in a bar. But that doesn’t mean I have anything against the combination of fruit and liquor.

Still, doesn’t it seem like fruit puree, citrus, alcohol, and the cream that’s inevitably served, whipped, on top, would be an even better combination churned into ice cream?  The same combination of strawberries and lime, but smoother, richer, and, okay, less alcoholic.

I wish it had occurred to me earlier – like before we ate all the ice cream – to pour rum over the ice cream. Rum float!  Or to mix so much rum into the base that the ice cream doesn’t freeze completely.  Rum slushy!  Or I suppose we could keep this recipe as a dessert and not a cocktail.  If I must.

One year ago: Artichoke Ravioli
Three years ago: Blueberry Poppy Seed Brunch Cake

Printer Friendly Recipe
Strawberry Daiquiri Ice Cream (adapted from David Lebovitz’s Raspberry Ice Cream recipe in The Perfect Scoop)

Makes about 1 quart

Mine wasn’t as limey as I would have liked, so I’ve doubled both the zest and the juice from what I used. I don’t believe the extra juice will be detrimental to the smoothness of the ice cream. You could also let the half-and-half mixture steep with the zest for up to an hour before reheating it and mixing it with the yolks.

When strawberries are pureed, I often prefer to use frozen berries that have been defrosted. Because they are picked at their peak and immediately frozen, they are often of higher quality than fresh strawberries. Furthermore, they make a smoother puree.

To make this more kid-friendly, feel free to use only half the rum.  Don’t leave it all out, as it helps keep the ice cream softer.

1 cup (7 ounces) sugar, separated
Zest from 2 limes
Pinch salt
1½ cups half-and-half
1½ cups heavy cream
4 yolks
1½ cups (6 ounces) strawberry puree
¼ cup lime juice (2 limes)
2 tablespoons rum

1. In a medium saucepan, rub the lime zest into ½ cup (3.5 ounces) of the sugar until fragrant. Add the half-and-half and heat the mixture over medium-high heat until it simmers. Meanwhile, pour the cream into a large bowl; set a fine-mesh strainer over the bowl.

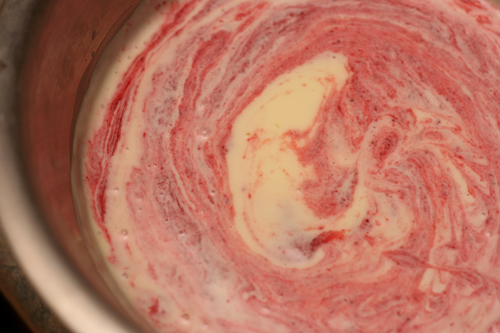
2. In a separate medium bowl, beat the egg yolks with the remaining ½ cup (3.5 ounces) sugar. When the half-and-half simmers, very slowly pour it into the beaten egg yolks, whisking constantly. Pour the mixture back into the pot and bring just to a simmer over medium heat, still whisking constantly. Pour through the strainer into the bowl with the cream; stir to combine. Mix in the strawberry puree, lime juice, and rum. Chill until cold, at least 4 hours or up to overnight.

3. Freeze the ice cream custard in your ice cream maker according to the manufacturer’s instructions. Once frozen to the consistency of soft serve ice cream, transfer the ice cream to a chilled bowl and freeze until firm.


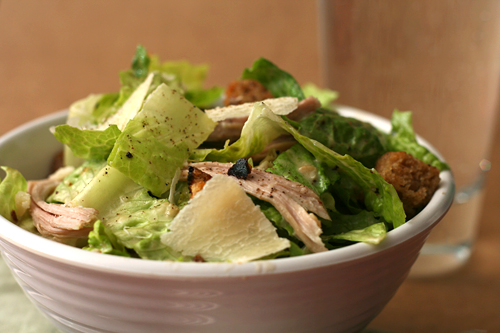
caesar salad

I didn’t always get Caesar salad. It seemed like it was just salad that was all lettuce and no goodies. Where’s the tomatoes, hard-boiled eggs, carrots, or cured meats?

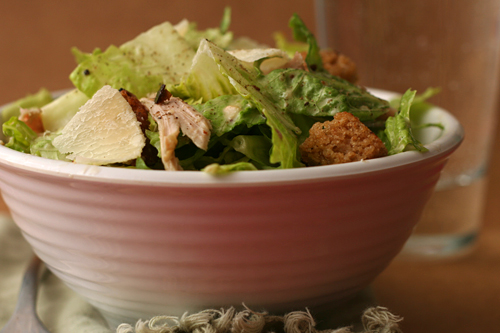
I understand now that that’s the point of it – that even without a range of colors, a salad can have a range of textures and flavors. Crisp lettuce, crunchy croutons, creamy dressing; salty parmesan, lightly bitter romaine, and most importantly, stinky garlic and wonderful savory anchovies.

Not everyone thinks anchovies are wonderful, I know. Some people – people who are otherwise not picky at all despite their reticence toward brownies – think they’re actually quite disgusting. Those people were not implicitly told about the anchovies in this recipe, and even when the amount was accidentally doubled one time, those people (or the one of those people I regularly cook for) still raved about the salad. Do not fear the anchovy.

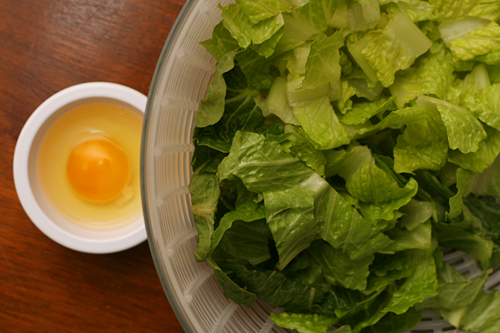
But if you want to fear the raw egg (which I do not, as we all know from my cookie dough habit), you may, because I tested this out with mayonnaise instead of the yolks, and it was nearly as good as the original. With the addition of some leftover shredded chicken, this salad becomes a simple (if surprisingly unhealthy) meal.

One year ago: Cherry Tomato Salad
Two years ago: Lemon Poppy Seed Waffles
Three years ago: Sushi Rolls

Printer Friendly Recipe
Caesar Salad (from Cooks Illustrated)

Serves 4

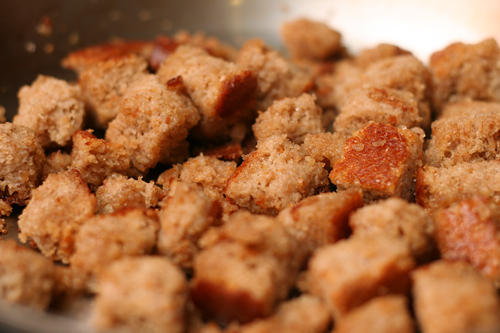
I confess that I did not care for this method of toasting the croutons. I was not able to achieve evenly browned croutons on the stovetop, probably because I wasn’t willing to use the full amount of oil. I’ll reproduce the original recipe below, but in the future, I’ll toast the lightly oiled croutons the oven and then toss them with the oil/garlic mixture.

If you don’t want to work with raw egg, substitute 1-2 tablespoons of mayonnaise for the yolks.  This will result in a slightly thicker dressing, but not a bad one.

Croutons:
5 tablespoons extra virgin olive oil
1 medium garlic clove, pressed through a garlic press (or pureed on the tines of a fork)
5 cups (¾-inch) ciabatta bread cubes
¼ cup water
¼ teaspoon table salt
2 tablespoons finely grated Parmesan

Salad:
1 large garlic clove, pressed through a garlic press (or pureed on the tines of a fork)
2-3 tablespoons juice from 1 to 2 lemons
½ teaspoon Worcestershire sauce
6 anchovy fillets, mashed to a paste with a fork (1 tablespoon)
2 large egg yolks
5 tablespoons canola oil
5 teaspoons extra virgin olive oil
1½ ounces (¾ cup) finely grated Parmesan
Ground black pepper
2-3 romaine hearts, cut crosswise into ¾-inch-thick slices, rinsed, and dried very well (8-9 lightly pressed cups)

1. For the croutons: Combine 1 tablespoon oil and garlic paste in small bowl; set aside. Place bread cubes in large bowl. Sprinkle with water and salt. Toss, squeezing gently so bread absorbs water. Place remaining 4 tablespoons oil and soaked bread cubes in 12-inch nonstick skillet. Cook over medium-high heat, stirring frequently, until browned and crisp, 7 to 10 minutes.

2. Remove skillet from heat, push croutons to sides of skillet to clear center; add garlic/oil mixture to clearing and cook with residual heat of pan, 10 seconds. Sprinkle with Parmesan; toss until garlic and Parmesan are evenly distributed. Transfer croutons to bowl; set aside.

3. For the salad: Whisk garlic paste and 2 tablespoons lemon juice together in large bowl. Let stand 10 minutes.

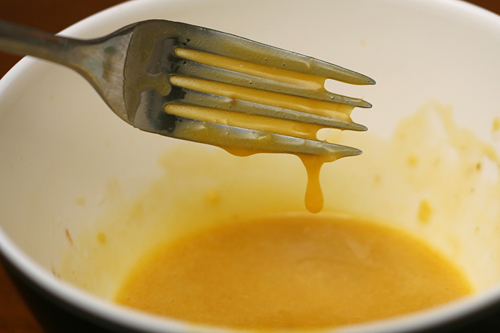
4. Whisk Worcestershire sauce, anchovies, and egg yolks into garlic/lemon juice mixture. While whisking constantly, drizzle canola oil and extra virgin olive oil into bowl in slow, steady stream until fully emulsified. Add ½ cup Parmesan and pepper to taste; whisk until incorporated.

5. Add romaine to dressing and toss to coat. Add croutons and mix gently until evenly distributed. Taste and season with up to additional 1 tablespoon lemon juice. Serve immediately, passing remaining ¼ cup Parmesan separately.

scampi fra diavolo

I remember last semester, when I was teaching in the evenings, I had all these plans for what I wanted to do once the semester ended. I was going to organize my recipes and study photoshop and learn Italian and basically rule the world. Instead, I’ve been cooking.

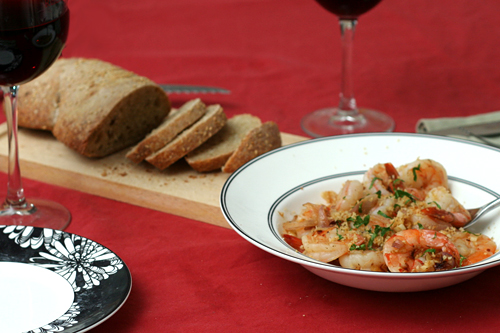
So if you’re in my little town on a Saturday night, the best meal in town is at my house. There’ll be appetizers, there’ll be wine, there’ll be some sort of meaty main course, there’ll be a dessert you have no room for but can’t resist anyway. There’ll probably be bread. In between courses, there’ll be live music courtesy of Dave. You’re all invited! Just keep in mind that I live hundreds of miles from a major airport. Plus Dave thinks you’re all secretly rapists. Okay, I take it back, you’re not invited.

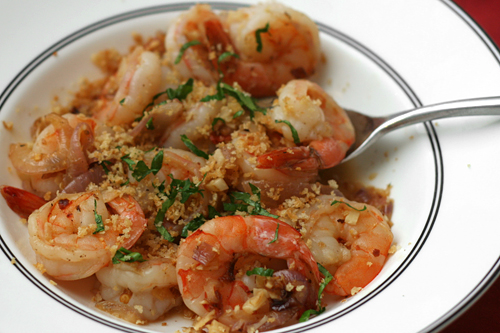
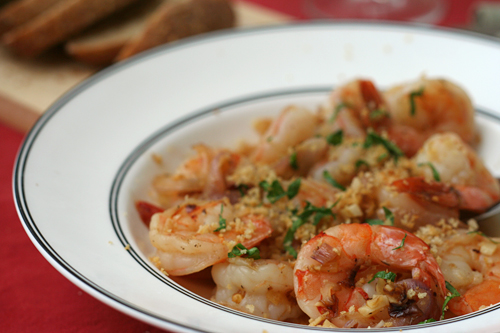
Which is too bad, because you’ll be missing out on some good food, the best of which I believe was this shrimp. A cross between the bright flavors of shrimp scampi and the heat of shrimp fra diavolo (“shrimp of the devil”), this fresh spicy dish was the perfect opening to a evening of cooking and eating. Around these parts, that’s just an average Saturday night.

One year ago: Whole Wheat Brioche
Three years ago: Almost No-Knead Bread

Scampi fra Diavolo (tweaked from Bon Appétit via epicurious)

3 tablespoons butter, divided
⅓ cup panko (Japanese breadcrumbs)
½ cup chopped fresh Italian parsley, divided
1¼ pounds uncooked large shrimp, peeled, deveined, tails left intact
2 tablespoons olive oil
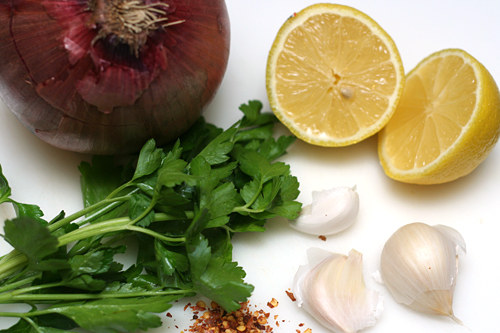
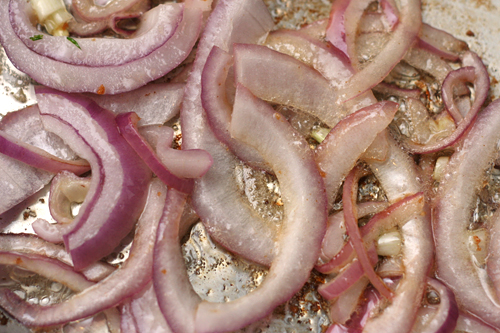
1½ cups thinly sliced red onion
5 garlic cloves, minced
½ teaspoon dried crushed red pepper
⅔ cup dry white wine (preferably Sauvignon Blanc)
Lemon wedges

1. Melt 1 tablespoon butter in a medium nonstick skillet over medium-high heat. Add the panko and stir until it’s golden and crisp, about 2 minutes. Transfer to a small bowl; mix in 2 tablespoons of parsley. Wipe out skillet.

2. Sprinkle the shrimp with salt and pepper. Melt the remaining 2 tablespoons of butter with the olive oil in the same skillet over medium-high heat. Add the red onion and sauté until it’s beginning to soften, about 3 minutes. Stir in the garlic and crushed red pepper and sauté 1 minute. Add the shrimp and sauté until barely opaque in center, about 1 minute per side. Add the white wine and simmer until the liquid is slightly thickened and reduced, 2 to 3 minutes. Season to taste with salt and pepper. Stir in the remaining parsley. Transfer to a shallow bowl. Top with the sautéed panko and serve with lemon wedges.