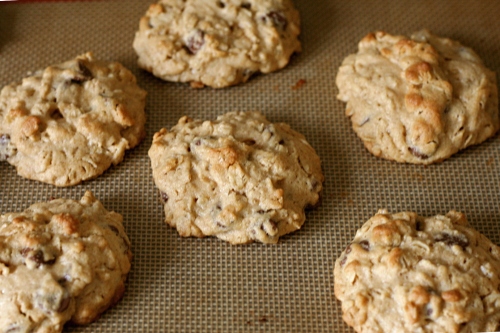
chunky peanut butter and oatmeal chocolate chipsters

I didn’t realize how picky I was about cookies until they started getting chosen for TWD recipes. First the all-too-nutritious granola grabbers, and now Stefany chooses oatmeal cookies. I’m not sure why I have a prejudice against oatmeal cookies, but I suspect it’s the raisins. I don’t hate raisins, but I don’t want them where chocolate chips should be.

But, these cookies do have chocolate chips instead of raisins. And they have peanut butter, which is never a bad thing.

What do you know, these were great! I’m think I’m over my oatmeal prejudice – there was absolutely nothing unpleasant about the oatmeal in these cookies. I also loved how the peanut butter flavor was noticeable but not overpowering.

Ever since the NY Times article about chocolate chip cookies, I’ve been experimenting with chilling cookie dough overnight before I bake it. This recipe especially lent itself to a comparison in resting-before-baking times because Dorie encourages the baker to chill the dough for 2 hours before baking. I expected ugly flat cookies from those that were baked immediately, but I was surprised to see that they baked up perfectly. Dave and I actually didn’t notice a significant difference between the cookies baked immediately and those chilled for 2 hours. In contrast, the cookies from the dough that was chilled overnight were more evenly chewy. I preferred the chewier cookies, but Dave didn’t agree with me. We don’t remember any noticeable difference in flavor.

Whether baked immediately or from chilled dough, these offer fun variety from my routine of more traditional cookies. The recipe is provided on Stefany’s site.

granola grabbers (twd)

No classic cookie recipes have been chosen for TWD since I joined. I like making cookies, so I was looking forward to Michelle’s choice for this week.

With all of the ingredients in this recipe, I thought at first that they’d be similar to Magic Cookie Bars. And then I looked closer at the recipe – 3 cups of granola and almost 3 more cups of other healthy-ish stuff compared to only 1 cup of flour. These were some sort of melding of granola bars and cookies. Hmm…that sounds…healthy.

And it tasted healthy. Too much granola! Too many raisins (any raisins in cookies is too many), too many nuts. I added 1 cup of chocolate chips to the recipe, and it was the saving grace. It also might have caused some problems – the cookies were a little crumbly, I think because there was just too many add-ins, and not enough dough to hold them together.

Dave and some other friends are going backpacking this weekend, so I baked (most of) the cookies as bar cookies, which hold up better with being squashed at the bottom of a pack. Unfortunately, in a rare move for me, I made the whole recipe. I was only able to pawn about half of that off on the backpackers, so I threw the rest in the freezer until further notice. I have a feeling they’re going to get sent to Iraq, which I feel kind of bad about, but I just don’t know what else to do with them. They’re not bad, they’re not good enough to bother eating. Plus, they’re not healthy – they just taste like it.

If you’d like to check out the recipe, Michelle has posted it.

deep dark chocolate cookies

I’m helpless in the face of recipes with names like Deep Dark Chocolate Cookies, even when I already have a deep, dark chocolate cookie recipe that I’m very happy with. I was intrigued by the lack of flour, butter, and egg yolks in this one. It seemed like that would produce a texture similar to a meringue cookie, but the recipe specifically refers to the cookies as dense and chewy.

Although the recipe was published in Bon Appetit’s fast and easy section, I’d say that the amount of work involved in on par with other cookie recipes. Chocolate is melted in one bowl, egg whites and sugar are beaten in another, and the dry ingredients – sugar and cocoa with just a bit of cornstarch and salt – are mixed in a third. The contents of the three bowls are blended together with an additional handful of chocolate chips. I considered it a good sign that the recipe contained chocolate in three forms.

The recipe states that once all of the ingredients are mixed together, the dough will become very stiff, and should then be rolled into balls and coated in powdered sugar. My dough was not “roll into balls” consistency. It was more like a really fudgy chocolate frosting than cookie dough. I simply scooped out a spoonful of dough, dropped it in powdered sugar, and pushed it around until it was evenly(ish) coated.

While the cookies were nice and chocolately, and I suppose dense and chewy, I considered the texture a bit off from what I prefer. There was indeed a similarity to meringue cookies, especially around the edges. I also thought the cookies were too sweet, which would be easily remedied by reducing the powdered sugar.

I definitely prefer my other recipe for chocolate cookies. However, these are the best gluten-free cookie I’ve ever eaten, with none of the “off” flavors that can sometimes occur in cookies based on gluten-free flour mixes. The cookies are also a bit healthier than your average cookie. The only fat in the recipe is chocolate, and once the sugar is reduced a bit (I’d say to ¾ cup in both the egg white mixture and the cocoa mixture instead of 1 cup), there’s about 100 calories per cookie, about 25% less than my favorite chocolate chip cookies.

Deep Dark Chocolate Cookies (from Bon Appetit June 2008 )

BA note: Made without butter or flour, these dense, chewy cookies will satisfy even the most intense chocolate craving.

Bridge note: I’d reduce the powdered sugar to ¾ cup (3 ounces) each in the egg white mixture and in the cocoa mixture. I also baked the cookies for 8 minutes.

Servings: Makes about 24

Nonstick vegetable oil spray
1½ cups bittersweet chocolate chips (about 9 ounces), divided
3 large egg whites, room temperature
2½ cups (10 ounces) powdered sugar, divided
½ cup (1½ ounces) unsweetened cocoa powder
1 tablespoon cornstarch
¼ teaspoon salt

Preheat oven to 400°F. Spray 2 large baking sheets with nonstick spray. Melt 1 cup chocolate chips in glass bowl in microwave, stirring twice, about 2 minutes. Cool slightly.

Using electric mixer, beat whites in large bowl to soft peaks. Gradually beat in 1 cup (4 ounces) sugar. Continue beating until mixture resembles soft marshmallow creme. Whisk 1 cup sugar (4 ounces), cocoa, cornstarch, and salt in medium bowl to blend. On low speed, beat dry ingredients into meringue. Stir in lukewarm chocolate and ½ cup chocolate chips (dough will become very stiff).

Place ½ cup (2 ounces) sugar in bowl. Roll 1 rounded tablespoon dough into ball; roll in sugar, coating thickly. Place on prepared sheet. Repeat with remaining dough, spacing 2 inches apart. Bake until puffed and tops crack, about 10 minutes. Cool on sheets on rack 10 minutes. Transfer to rack; cool.

french chocolate brownies (twd)

One of my favorite aspects of Dorie Greenspan’s Baking is that she gives twelve brownie recipes. There’s so much discussion about the best brownie recipe that it seems like sometimes the variety between brownies gets overlooked. Not only are there different add-ins – turtle brownies, espresso brownies, creme de menthe brownies – but there are different textures, and one isn’t necessarily better than another. Di’s TWD choice of French Chocolate Brownies was the first of Dorie’s brownies recipes that I tried.

Dorie tells a story of how these brownies were intended to be a rich chocolate cake, but her guests mistook them for brownies, and she didn’t correct them. I can see the confusion. The ingredient list is classic brownie, but the mixing method and resulting texture bridge the line between brownie and cake. Beating the eggs and sugar together until they’re thick creates a light, airy confection that is at the same time tender and moist and far less dense than most brownies.

Dorie calls for the unusual addition of flambéed raisins to the brownies, which most members of TWD weren’t excited about. I considered leaving that step out altogether, but didn’t want to miss out on the fun of flambéing. One of my favorite dessert combinations is raspberries and chocolate, so I used fresh raspberries. It was perfect. I think I’ll always add the raspberries to this recipe.

My only disappointment with these brownies was that they weren’t as chocolately as I would prefer, but I don’t blame Dorie for that. She says she prefers bittersweet chocolate over semisweet, but of course those words don’t have any official meaning in the US. I usually bake with Ghirardelli, whose bittersweet chocolate is 60% cacao, but this time I used Sharffenberger, whose semisweet is 60%, so I bought the semisweet. I probably should have used their bittersweet. On top of that, I read a Cooks Illustrated’s review of dark chocolates, and their comments for Sharffenberger included “lacked choco-oomph.” So perhaps it wasn’t the best choice of chocolate for this recipe.

But regardless, I’m nitpicking (again). I savored every single bite I took of these brownies, and I was sad when I finished each serving. I love that they’re chocolately and rich, but also unique for a brownie in their cakelike tenderness. And, an added bonus for a middle-brownie lover? There’s really no difference between the edges and middle. Every single serving is moist and light.

French Chocolate Brownies (from Dorie Greenspan’s Baking: From My Home to Yours)

16 brownies

Bridget note: I substituted about ½ cup fresh raspberries, halved, for the raisins. Instead of boiling them in water as in step 2, I gently heated them in a small skillet before adding the rum and continuing with step 2.

Update: I made these again, this time using a Pyrex dish instead of the metal pan I used for the original entry.  I don’t know if things bake faster in glass or what, but I must have overbaked them, because the brownies were too dry.   So check for doneness early!

½ cup all-purpose flour
⅛ teaspoon salt
⅛ teaspoon cinnamon (optional)
⅓ cup raisins, dark or golden
1½ tablespoons water
1½ tablespoons dark rum
6 ounces bittersweet chocolate, finely chopped
1½ sticks (12 tablespoons; 6 ounces) unsalted butter, at room temperature and cut into 12 pieces
3 large eggs, at room temperature
1 cup sugar

Getting ready: Center a rack in the oven and preheat the oven to 300°F. Line an 8-inch square baking pan with foil, butter the foil, place the pan on a baking sheet, and set aside.

1. Whisk together the flour, salt and cinnamon, if you’re using it.

2. Put the raisins in a small saucepan with the water, bring to a boil over medium heat and cook until the water almost evaporates. Add the rum, let it warm for about 30 seconds, turn off the heat, stand back and ignite the rum. Allow the flames to die down, and set the raisins aside until needed.

3. Put the chocolate in a heatproof bowl and set the bowl over a saucepan of simmering water. Slowly and gently melt the chocolate, stirring occasionally. Remove the bowl from the saucepan and add the butter, stirring so that it melts. It’s important that the chocolate and butter not get very hot. However, if the butter is not melting, you can put the bowl back over the still-hot water for a minute. If you’ve got a couple of little bits of unmelted butter, leave them-it’s better to have a few bits than to overheat the whole. Set the chocolate aside for the moment.

4. Working with a stand mixer with the whisk attachment, or with a hand mixer in a large bowl, beat the eggs and sugar until they are thick and pale, about 2 minutes. Lower the mixer speed and pour in the chocolate-butter, mixing only until it is incorporated-you’ll have a thick, creamy batter. Add the dry ingredients and mix at low speed for about 30 seconds-the dry ingredients won’t be completely incorporated and that’s fine. Finish folding in the dry ingredients by hand with a rubber spatula, then fold in the raisins along with any liquid remaining in the pan.

5. Scrape the batter into the pan and bake 50 to 60 minutes, or until the top is dry and crackled and a knife inserted into the center of the cake comes out clean. Transfer the pan to a rack and allow the brownies to cool to warm or room temperature.

6. Carefully lift the brownies out of the pan, using the foil edges as handles, and transfer to a cutting board. With a long-bladed knife, cut the brownies into 16 squares, each roughly 2 inches on a side, taking care not to cut through the foil.

Serving: The brownies are good just warm or at room temperature; they’re even fine cold. I like these with a little something on top or alongside-good go-alongs are whipped crème fraiche or whipped cream, ice cream or chocolate sauce or even all three!

Storing: Wrapped well, these can be kept at room temperature for up to 3 days or frozen for up to 2 months.

I’m out of town this week, building sand castles and burying nephews in the sand. I’ll be back next week to catch up on comments and other blogs!

traditional madeleines (twd)

I hemmed and hawed about whether to try Tara’s choice of madeleines for this week’s TWD recipe. I don’t have a madeleine pan, and I’m feeling stubborn about buying a pan that has such a specific use. I found out that a mini-muffin pan can be substituted, but I don’t have one of those either. Some people tried baking their madeleines in spoons, but my spoons aren’t very rounded and I wasn’t keen on putting them in the oven. It was suggested that those of us without the proper equipment blog about a previous TWD recipe that we missed instead, and I was all ready with a Snickery Squares entry.

But once the Snickery Squares were eaten, I decided to try out the madeleines anyway, in a regular muffin pan. The recipe says that it makes 12 madeleines, so I planned to divide the batter evenly between the 12 muffin cups. (Actually, I halved the recipe and made six.) I lined the bottom of the muffin cups with cookie press stamps to add some decoration to my tea cakes. I figured that I had nothing to lose if things didn’t work out – the recipe is neither work nor calorie intensive.

I have to admit that this is my first madeleine experience; not just making them, but eating them as well. That means that I have no basis for comparison for how this recipe compares to others and how the muffin madeleines compare to the traditional shell shapes. However, I can make some judgments about what I want from a tea cake.

The muffin pans seemed to work well enough, although I didn’t get the characteristic and elusive hump that’s so desired. But I didn’t feel that my madeleines were tender enough. Honestly, I think there’s too much butter in them, and the batter just couldn’t support and incorporate all of it. I’m also a little surprised by how coarse my crumb was; I must not have beat the eggs and sugar long enough.

Overall though, I’m pleased by the idea of a cookie-sized cake. While I doubt that there’s a madeleine pan in my near future, I might try out some other shapes to see if I can come up with the light and tender tea cake that I want.

Traditional Madeleines (from Dorie Greenspan’s Baking: From My Home to Yours)

⅔ cup all-purpose flour
¾ teaspoon baking powder
Pinch of salt
½ cup sugar
Grated zest of 1 lemon
2 large eggs, at room temperature
2 teaspoons pure vanilla extract
¾ stick (6 tablespoons) unsalted butter, melted and cooled
Confectioners’ sugar, for dusting

Whisk together the flour, baking powder and salt.

Working in a mixer bowl, or in a large bowl, rub the sugar and lemon zest together with your fingertips until the sugar is moist and fragrant. Add the eggs to the bowl. Working with the whisk attachment, or with a hand mixer, beat the eggs and sugar together on medium-high speed until pale, thick and light, 2 to 3 minutes. Beat in the vanilla. With a rubber spatula, very gently fold in the dry ingredients, followed by the melted butter. Press a piece of plastic wrap against the surface of the batter and refrigerate it for at least 3 hours, or for up to 2 days. This long chill period will help the batter form the hump that is characteristic of madeleines. (For convenience, you can spoon the batter into the madeleine molds, cover and refrigerate, then bake the cookies directly from the fridge; see below for instructions on prepping the pans.)

GETTING READY TO BAKE: Center a rack in the oven and preheat the oven to 400 degrees F. Butter 12 full-size madeleine molds, or up to 36 mini madeleine molds, dust the insides with flour and tap out the excess. Or, if you have a nonstick pan (or pans), give it a light coating of vegetable cooking spray. If you have a silicone pan, no prep is needed. Place the pan(s) on a baking sheet.

Spoon the batter into the molds, filling each one almost to the top. Don’t worry about spreading the batter evenly, the oven’s heat will take care of that. Bake large madeleines for 11 to 13 minutes, and minis for 8 to 10 minutes, or until they are golden and the tops spring back when touched. Remove the pan(s) from the oven and release the madeleines from the molds by rapping the edge of the pan against the counter. Gently pry any recalcitrant madeleines from the pan using your fingers or a butter knife. Transfer the cookies to a rack to cool to just warm or to room temperature.

If you are making minis and have more batter, bake the next batch(es), making certain that you cool, then properly prepare the pan(s) before baking.

Just before serving, dust the madeleines with confectioners’ sugar.

snickery squares

Sometimes when I cook, I want to make absolutely the best version of that dish possible. I want to coax the maximum potential from every single ingredient, and I’m willing to do whatever it takes to make it happen.

Other times, I just want to use up the container of dulce de leche in the fridge.

I only made a quarter of the Florida Pie recipe, which left me with leftover sweetened condensed milk. I made it into dulce de leche, thinking it would preserve better that way and that I’d have more options on how to use it. Half a Snickery Squares recipe called for almost exactly the amount of dulce de leche I needed to use up. (Um, I think. There was no measuring.)

I didn’t want to get out and then wash all of my food processor parts for half a recipe of shortbread crust, so I mixed that by hand. I didn’t want to bother with half an egg yolk, so I used heavy cream. I made the caramel peanuts as instructed, and that was fun. Caramel always fascinates me, and the peanuts sounded like plastic pieces once they cooled. Due to laziness and ingredient availability, I tweaked the chocolate topping ingredients just a bit. Everything seemed to come together nicely, even with the shortcuts.

I didn’t expect to love this dessert. I don’t dislike Snickers bars, but neither am I a fan. And I’ve heard a few reviews saying that these bars are really rich, so I was expecting another over-the-top Dorie creation.

Holy smokes, this is the best treat I’ve made in months. It’s certainly my favorite of the recipes I’ve made from Dorie’s Baking book. The shortbread crust is sturdy but tender, the dulce de leche adds complexity, the peanuts provide crunch, and the bittersweet chocolate ties everything together and keeps it from being too sweet.

There are a few tiny changes I would make to the recipe next time. I’d reduce the sugar in the crust. I was surprised by how sweet it was when I tasted it plain, and I think it would make a better contrast to the filling if it weren’t so sweet. I’ll probably use heavy cream in the crust in the future, like I did this time, because it seemed to work fine and it’s easier than dealing with an egg yolk. And I’d reduce the peanuts from 1½ cups to 1 cup, because I really couldn’t fit them all in the pan. I’d correspondingly reduce the sugar in the filling to ¼ cup (for a full recipe).

But really, this is nitpicking. The squares are amazing how they are, and after two days of them beckoning me from the kitchen, begging for nibbles to be taken and already-clean edges to be shaved off, I’m relieved but sad to have just sent the last square off to work with Dave.

Snickery Squares (from Dorie Greenspan’s Baking: From My Home to Yours)

Bridget notes: Next time I’ll reduce the granulated sugar in the crust to 3 tablespoons and the powdered sugar to 1 tablespoon. I’ll reduce the peanuts to 1 cup, the sugar in the filling to ¼ cup, and the water in the filling to 2½ tablespoons. However, these changes aren’t to say that the bars aren’t amazing how they are.

For the Crust:
1 cup (5 ounces) all-purpose flour
¼ (1.75 ounces) cup sugar
2 tablespoons (0.5 ounce) powdered sugar
¼ teaspoon salt
8 tablespoons (1 stick) unsalted butter, cut into small pieces and chilled
1 large egg yolk, lightly beaten

For the Filling:
⅓ cup (2.33 ounces) sugar
3 tablespoons water
1½ cups salted peanuts
About 1½ cups store-bought dulce de leche

For the Topping:
7 ounces bittersweet chocolate, coarsely chopped
4 tablespoons (½ stick) unsalted butter, cut into 8 pieces, at room temperature

Getting Ready: Preheat oven to 350F. Butter an 8-inch square pan and put it on a baking sheet.

To Make the Crust: Toss the flour, sugar, powdered sugar and salt into a food processor and pulse a few times to combine. Toss in the pieces of cold butter and pulse about 12 times, until the mixture looks like coarse meal. Pour the yolk over the ingredients and pulse until the dough forms clumps and curds – stop before the dough comes together in a ball.

Turn the dough into the buttered pan and gently press it evenly across the bottom of the pan. Prick the dough with a fork and slide the sheet into the oven. Bake the crust for 15-20 minutes, or until it takes on just a little color around the edges. Transfer the pan to a rack and cool to room temperature before filling.

To Make the Filling: Have a parchment or silicone mat-lined baking sheet at the ready, as well as a long-handled wooden spoon and a medium heavy bottomed saucepan.

Put the sugar and water in the saucepan and cook over medium-high heat, stirring, until the sugar dissolves. Keeping the heat fairly high, continue to cook the sugar, without stirring, until it just starts to color. Toss the peanuts and immediately start stirring. Keep stirring, to coat the peanuts with sugar. Within a few minutes, they will be covered with sugar and turn white-keep stirring until the sugar turns back into caramel. When the peanuts are coated with a nice deep amber caramel, remove the pan from the heat and turn the nuts out onto the baking sheet, using the wooden spoon to spread them out as best you can. Cool the nuts to room temperature.

When they are cool enough to handle, separate the nuts or break them into small pieces. Divide the nuts in half. Keep half of the nuts whole or in biggish pieces for the filling, and finely chop the other half for the topping.

Spread the dulce de leche over the shortbread base and sprinkle over the whole candied nuts.
To Make the Topping: Melt the chocolate in a heatproof bowl set over a saucepan of barely simmering water. Remove chocolate from the heat and gently stir in the butter, stirring until it is fully blended into the chocolate.

Pour the chocolate over the dulce de leche, smoothing it with a long metal icing spatula, then sprinkle over the rest of the peanuts. Slide the pan into the fridge to set the topping, about 20 minutes; if you’d like to serve the squares cold, keep them refrigerated for at least 3 hours before cutting.

Cut into 16 bars.

Also – I just got a new camera. This is the first post I’ve used it on, and I guess I was little excited, huh?

snickerdoodles

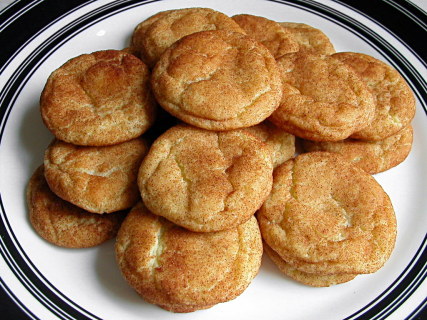
Snickerdoodles are so underrated. They’re Dave’s favorite cookie, and I think my dad’s as well. You probably won’t be surprised that Dave’s and my dad’s favorite ice cream flavors are strawberry and vanilla, respectively. Plain flavors, not too rich, but certainly still a delicious treat. As for me, I have to admit I usually make snickerdoodles when I’m out of chocolate chips.

But these are so good! We’re all missing out with our disdain of the humble snickerdoodle. Buttery, soft, coated in cinnamon sugar – these may not feel as rich as chocolate chip cookies, but they certainly have their place.

There are a lot of recipes for snickerdoodles, but they’re almost identical. I just take Betty Crocker’s basic recipe and tweak it to my liking. The most important change is replacing the shortening with more butter. Shortening in a cookie? Seriously? Blech. I also double the salt. The original recipe calls for a quarter of the salt most chocolate chip cookie recipes use. I find cookies with that little salt too bland. The next change I make is replacing one tablespoon of the granulated sugar with brown sugar. This is a trick I picked up from Cooks Illustrated’s sugar cookie recipe, which is designed to add a bit of complexity to the cookie with a hit of butterscotch flavor. The final tweak I make is to increase the cinnamon to sugar ratio in the coating. The original recipe has only 2 teaspoons cinnamon to a quarter cup sugar – a ratio of 1 part cinnamon to 6 parts sugar.  I like a ratio of 1 part cinnamon to 2 parts sugar. Sometimes, when I want to make Dave really happy, I also grate some nutmeg into the cinnamon sugar mixture.

Next time you’re in the mood to bake, don’t forget about snickerdoodles! And not just because they don’t require any ingredients besides staples, but because they’re delicious!

Snickerdoodles (adapted from Betty Crocker’s Big Red Cookbook)

Makes about 4 dozen 2-inch cookies

2¾ cups (13.75 ounces) unbleached flour
2 teaspoons cream of tartar
1 teaspoon baking soda
½ teaspoons salt
1½ cups granulated sugar minus 1 tablespoon (10.35 ounces total)
1 tablespoon light brown sugar
16 tablespoons (2 sticks) unsalted butter, softened
2 large eggs
¼ cup (1.75 ounces) granulated sugar (for rolling)
2 tablespoons cinnamon

1. Adjust oven rack to middle position and heat oven to 375 degrees. Whisk the flour, salt and baking soda in a medium bowl; set aside.

2. Beat butter and sugars (except the ¼ cup granulated sugar for rolling) until creamy; add eggs and beat until combined. Add flour mixture and mix until just combined.

3. Mix ¼ cup sugar and the cinnamon in a shallow bowl. Roll approximately a tablespoon of dough into a 1-inch ball; roll ball in cinnamon sugar mixture. Repeat with remaining dough, placing balls 2 inches apart on ungreased baking sheet.

4. Bake until cookies are just set and turning golden brown at edges, 8-9 minutes. Cool cookies on baking sheet for 2 minutes; then, using a wide metal spatula, transfer cookies to a wire rack and cool to room temperature.

double (or triple) chocolate cookies

I made these cookies quite a while ago, but I’ve been putting off posting the entry. Because I think they look like poop in the pictures. Poop!

Now that your appetite is whetted, let me assure you that they’re good. Really good, I swear! My absolute favorite cookie when I’m in the mood for something super chocolately.

They’re about as chocolately as you can get in a cookie. The addition of both cocoa and a whole pound of semisweet chocolate gives them a depth of flavor that using only one type of chocolate can’t provide. I’ve never added the optional chocolate chips, but I think next time I will, just to give them a little textural contrast.

They’re soft and fudgy throughout, and really not appropriate unless you love chocolate. And if you do love chocolate, they’re absolutely perfect.

Thick and Chewy Double Chocolate Cookies (from Cooks Illustrated September 1999)

Makes about 3½ dozen cookies

To melt the chocolate in a microwave, heat at 50 percent power for 2 minutes, stir, then continue heating at 50 percent power for 1 more minute. If not completely melted, heat an additional 30 to 45 seconds at 50 percent power. Semisweet chocolate chips (12 ounces) may be added for a bigger chocolate punch; if used, they will slightly increase the yield on the cookies. We recommend using a spring-loaded ice cream scoop to scoop the dough. Resist the urge to bake the cookies longer than indicated; they may appear underbaked at first but will firm up as they cool.

2 cups unbleached all-purpose flour
½ cup Dutch-processed cocoa powder
2 teaspoons baking powder
1 teaspoon table salt
16 ounces semisweet chocolate, chopped
4 large eggs
2 teaspoons vanilla extract
2 teaspoons instant coffee or espresso powder
10 tablespoons unsalted butter (1¼ sticks), softened but still firm
1½ cups light brown sugar
½ cup granulated sugar

1. Sift together flour, cocoa, baking powder, and salt in medium bowl; set aside. Melt chocolate in medium heatproof bowl set over pan of almost-simmering water, stirring once or twice, until smooth; remove from heat. Beat eggs and vanilla lightly with fork, sprinkle coffee powder over to dissolve, and set aside.

2. In bowl of standing mixer fitted with paddle attachment (or with hand mixer), beat butter at medium speed until smooth and creamy, about 5 seconds (15 seconds with hand mixer). Beat in sugars until combined, about 45 seconds (1½ minutes with hand mixer); mixture will look granular. Reduce speed to low and gradually beat in egg mixture until incorporated, about 45 seconds (1½ minutes with hand mixer). Add chocolate in steady stream and beat until combined, about 40 seconds (1 minute with hand mixer). Scrape bottom and sides of bowl with rubber spatula. With mixer at low speed, add flour mixture and mix until combined, about 40 seconds (1 minute with hand mixer). Do not overbeat. Cover with plastic wrap and let stand at room temperature until consistency is scoopable and fudgelike, about 30 minutes.

3. Meanwhile, adjust oven racks to upper- and lower-middle positions and heat oven to 350 degrees. Line 2 cookie sheets with parchment paper. Leaving about 1½-inches between each ball, scoop dough onto parchment-lined cookie sheets with 1 ¾-inch diameter ice cream scoop.

4. Bake cookies until edges have just begun to set but centers are still very soft, about 10 minutes, turning cookie sheets from front to back and switching from top to bottom racks halfway through baking.

5. Cool cookies on sheets about 10 minutes, slide parchment with cookies onto wire rack and cool to room temperature; remove with wide metal spatula.

almond biscotti and hazelnut dried cherry biscotti

On one of our first dates, Dave and I drove two hours into Chicago to see one of his favorite musicians perform. It was a great night, one that moved our relationship from “so far, so good…” to “holy smokes this is going well.” At the beginning of every song, Dave would whisper in my ear that this one was his favorite. On the way home, we missed our exit not once, but twice, for which I still tease Dave. Fortunately, he had thought ahead and brought along some almond biscotti from his favorite bakery. It was one of my first times eating biscotti, and certainly the first time I gave it an honest chance.
It was good. I was surprised, always having likened biscotti to sweetened stale bread. But even though I enjoyed it that night, and Dave has asked me to make it several times in the past six years, I’d only bothered to once, and I sent that batch off to a friend. Dave still requested it, and I still said “yeah, of course, when I get around to it.” Deb finally convinced me that it was time with her recently published almond biscotti recipe.

And this recipe was worth getting out of my too-lazy-to-make-biscotti- for-my-boyfriend-then-fiance-then-husband habit. The biscotti are crunchy, but not rock hard. Sweet but not cloying. The almonds are a noticeable and satisfying addition.

The recipe is also adaptable. After the success I had with the almond variety, I wanted to try other flavors. I looked for good biscotti recipes on epicurious, but couldn’t find one that sounded good and had good reviews. So I decided to make the same base recipe I had before, but with different flavorings. I used dried cherries and hazelnuts, and it worked great.

Deb calls this recipe a hole in one, and I have to agree. Tasty, crunchy, straightforward, and adaptable – this recipe has it all.

Almond Biscotti (adapted from Bon Appetit, December 1999, as copied from Smitten Kitchen)

Deb note: They’re supposed to make 3 dozen, but my batch yielded at least 45.

Bridget note: The second time I skipped the egg white wash, and I recommend using it. I also substituted 1 cup of hazelnuts (toasted and chopped) and 1 cup of dried cherries for the almonds, and reduced the orange liqueur by half.  Also, my biscotti tended to be a little browner than I wanted, so I recommend reducing the baking times in the last step to 11 minutes on one side and 7 on the other.

3¼ cups all purpose flour
1 tablespoon baking powder
1/3 teaspoon salt
1½ cups sugar
10 tablespoons (1 ¼ sticks) unsalted butter, melted
3 large eggs
1 tablespoon vanilla extract
1 tablespoon Grand Marnier or orange liqueur
1 tablespoon orange zest
1 cup whole almonds, toasted, coarsely chopped or sliced almonds
1 large egg white

Position rack in center of oven and preheat to 350°F. Line baking sheet with parchment paper. Sift flour, baking powder and salt into medium bowl. Mix sugar, melted butter, 3 eggs, vanilla extract, orange liqueur and zest in large bowl. Add flour mixture to egg mixture and stir with wooden spoon until well blended. Mix in almonds.

Divide dough in half. Using floured hands, shape each dough half into 13½-inch-long, 2 ½-inch-wide log. Transfer both logs to prepared baking sheet, spacing apart. Whisk egg white in small bowl until foamy; brush over top and sides of each dough log.
Bake logs until golden brown (logs will spread), about 30 minutes. Cool logs completely on sheet on rack, about 25 minutes. Maintain oven temperature.

Transfer logs to work surface; discard parchment paper. Using serrated knife, cut logs on diagonal into ½-inch-wide slices. Arrange slices, cut side down, on same baking sheet. Bake 12 minutes. Turn biscotti over; bake until just beginning to color, about 8 minutes. Transfer to rack and cool.

Can be prepared 1 week ahead. Store in airtight container at room temperature.

chocolate sandwich cookies

copy-of-dscn4429.jpg

I made these cookies without knowing what I was getting into. Based on the picture, I thought they’d be a rich, soft chocolate cookie topped with sweet vanilla icing. I didn’t bother reading the part of the description specifically referring to them as “crisp” until it was too late and I was committed.

So, they’re crisp cocoa-flavored cookies with vanilla icing. They’re Oreos. I don’t dislike Oreos, but I don’t think they’re worth making at home.

Especially with Martha Stewart’s recipe. She’s nitpicky. The recipe instructs that the dough should be flattened, chilled, rolled out, chilled, cut, chilled, and finally baked. Wow. I skipped all that. I rolled the dough into a cylinder and put it in the freezer until I was ready to bake it (which was two months later). Then I cut off slices.

Martha’s method would definitely produce more perfectly-shaped cookies. Mine weren’t nearly as uniformly round. But I’m happy with the easier method.

copy-of-dscn4432.jpg

I underbaked the cookies slightly in the hopes that they’d end up more chewy than crisp. They were softer, which was nice, but they were overwhelmingly cocoa-flavored. My kitchen smelled like a nice cup of hot cocoa when the cookies came out of the oven. Not a bad smell, but I was hoping for a deeper chocolate flavor.

So what do I do with a batch of cookies that I’m not impressed with? I make an oreo-cookie crust.

copy-of-dscn4439.jpg

Mmm…chocolate pie…I definitely enjoyed these cookies, in their proper place!

Chocolate Wafer Sandwich Cookies (from Martha Stewart’s Baking Handbook)

Makes about 2 dozen sandwich cookies

MS note: These crisp cookies can be sandwiched with Vanilla Cream Filling, freshly whipped cream, or your favorite ice cream.

Bridget note: If you’re not picky about your cookies being perfectly round, you can skip the rolling, chilling, and cutting, and simply roll the dough into a cylinder of 1½ inch diameter, wrap it in parchment paper, and freeze until firm, about 30 minutes. When you’re ready to bake, remove dough log from wrapping and, using sharp chef’s knife, slice dough into rounds 1/8 inch thick.

1¼ cups (6¼ ounces) all-purpose flour, plus more for dusting
¼ cup plus 2 (1 1/8 ounces) tablespoons Dutch-process cocoa powder
½ teaspoon baking powder
½ teaspoon baking soda
¼ teaspoon salt
1 stick (½ cup) unsalted butter, room temperature
2/3 cup (4 2/3 ounces) packed light-brown sugar
1/3 cup (2 1/3 ounces) granulated sugar
1 large egg
1 teaspoon pure vanilla extract
Vanilla Cream Filling (recipe follows)

Line two large baking sheets with parchment paper; set aside. In a large bowl, whisk together flour, cocoa, baking powder, baking soda, and salt; set aside. In the bowl of an electric mixer fitted with the paddle attachment, beat the butter and both sugars on medium sped until light and fluffy, 2 to 3 minutes. Add the egg and vanilla; beat to combine. With mixer on low speed, add flour mixture, and beat to combine, scraping down the sides of the bowl as needed.

Turn out the dough onto a piece of plastic wrap, and divide in half. With floured hands, shape each piece into a flattened rectangle, wrap with plastic wrap, and refrigerate until firm, about 30 minutes.

Place one rectangle of dough on a lightly floured work surface. Roll out dough to a scant 1/8-inch thickness, stopping every so often to release the dough by running an offset spatula underneath. You should end up with a rectangle that’s about 14 by 11 inches. Transfer dough to a prepared baking sheet, and freeze until very firm, about 30 minutes. Repeat with remaining dough.

Preheat the oven to 350 degrees. Place one rectangle of dough on a clean work surface. Working quickly, cut out rounds using a 2-inch cookie cutter. (If the dough begins to soften too much, return to the freezer for a few minutes.) Using a wide metal spatula, transfer rounds to a parchment-lined baking sheets, about 1½ inches apart. Gather together remaining scraps, reroll, and cut out more rounds. Freeze until firm, about 15 minutes. Repeat with the remaining rectangle of dough.

Bake, rotating sheets halfway through, until the centers of the cookies feel firm when lightly pressed, 12 to 14 minutes. Transfer to a wire rack to cool completely.

Using an offset spatula, spread 1 tablespoon desired filling onto the flat sides of half the cookies. Sandwich with remaining cookies, keeping the flat sides down. Unfilled cookies can be kept in an airtight container at room temperature for up to 1 week. Once filled, cookies are best eaten the day they are made, but they can be kept in an airtight container in the refrigerator for up to 3 days.

Vanilla Cream Filling

Makes enough to fill 2 dozen sandwich cookies

Bridget note: I used all butter in my filling, because butter is good.

1 1/3 (5 1/3 ounces) confectioners’ sugar
1/3 cup vegetable shortening
1/3 cup (5 1/3 tablespoons) unsalted butter, room temperature
½ teaspoon pure vanilla extract
pinch of salt

In the bowl of an electric mixer fitted with the paddle attachment, combine all ingredients. Beat on medium-high speed until fluffy and light, 3 to 4 minutes. Use immediately or refrigerate in an airtight container for up to 3 days. Let soften at room temperature before using.

copy-of-dscn4417.jpg