tiramisu

tiramisu 12

I got confused when my coworker told me, while studiously avoiding eye contact, that the only thing they needed to figure out for another coworker’s rehearsal dinner was the dessert. I started trying to evaluate our previous history of eye contact. Was the lack of eye contact normal between us, or was that a hint? I was willing to help her out, but I was going to feel awfully silly if I jumped in to bake for thirty people I’d never met if it wasn’t necessary.

tiramisu 5

Well, I did volunteer, of course, because it was an opportunity to make desserts without eating them all myself! The dinner had an Italian theme, with big pans of lasagna, loaves of garlic bread, and pots of Italian wedding soup, so tiramisu was a natural choice. It didn’t hurt that I’d made this recipe once, years ago, and had wanted a reason to make it again ever since.

tiramisu 6

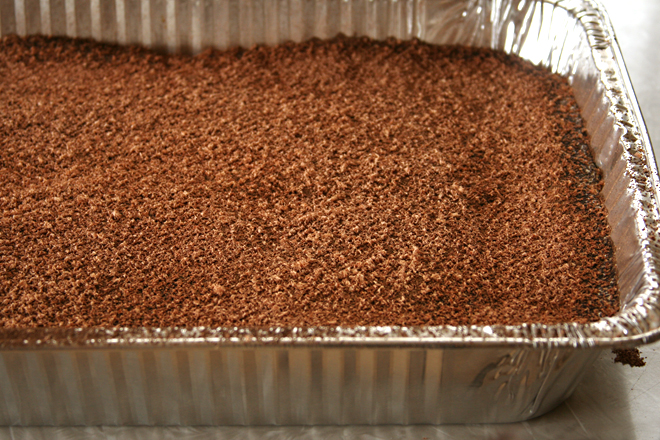
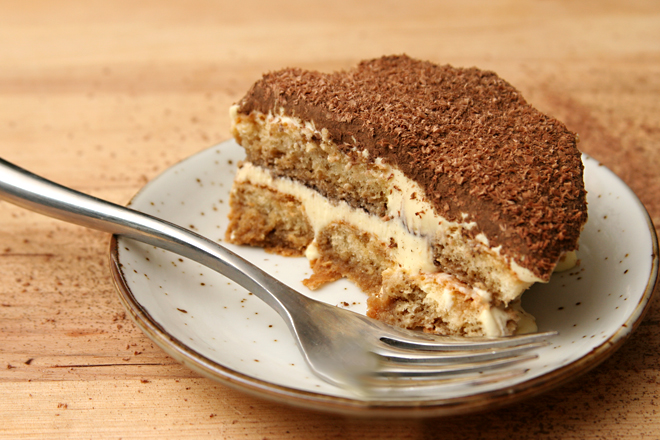
It’s the perfect balance of sweet and bitter and tinged with alcohol. The ladyfingers soak up just enough of the coffee and rum to turn soft and cakey, but not enough to get mushy. The creamy mascarpone layer is like a rich custard filling between layers of cake. The cocoa and grated chocolate (optional, but I added it) provide a welcome hint of chocolate, but it doesn’t dominate.

tiramisu 8

I made a double batch for the party (and was lucky enough to have a friend come over to dip and arrange nearly a hundred ladyfingers in the pan) and kept a tiny taster serving for myself. It was a smart move, because there wasn’t one bit leftover from the rehearsal dinner. Savoring my tiramisu at home that night, I didn’t regret volunteering to bake this dessert one bit.

tiramisu 13

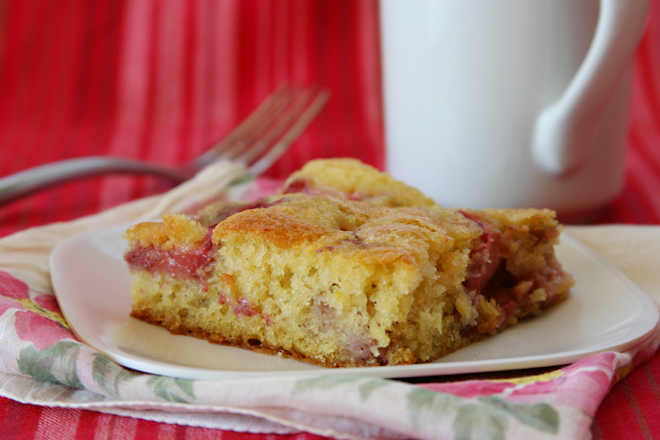
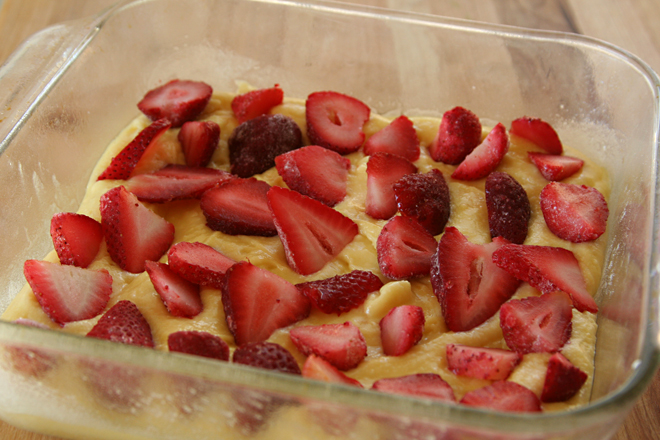
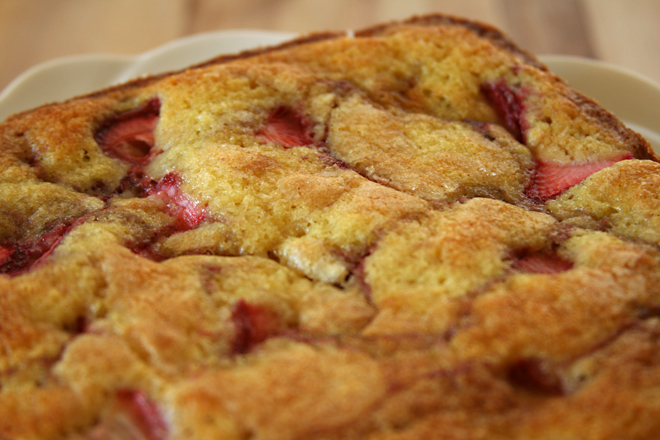
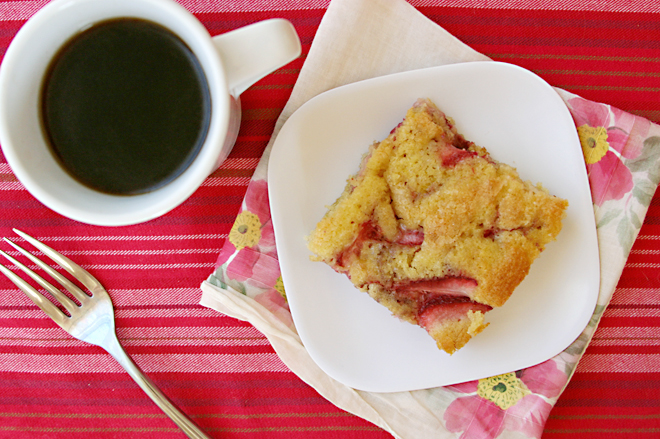
One year ago: Lemon Ricotta Strawberry Muffins
Two years ago: Slaw Tartare
Three years ago: Chocolate Amaretti Torte
Four years ago: Breakfast Strata with Sausage, Mushrooms, and Monterey Jack

Printer Friendly Recipe
Tiramisù (from Cook’s Illustrated)

Cook’s Illustrated’s notes: Brandy and even whiskey can stand in for the dark rum. Cook’s Illustrated prefers a tiramisù with a pronounced rum flavor; for a less potent rum flavor, halve the amount of rum added to the coffee mixture in step 1. Do not allow the mascarpone to warm to room temperature before using it; it has a tendency to break if allowed to do so. Be certain to use hard, not soft ladyfingers.

2½ cups strong black coffee, room temperature
1½ tablespoons instant espresso powder
9 tablespoons dark rum
6 large egg yolks
⅔ cup (4.67 ounces) sugar
¼ teaspoon table salt
1½ pounds mascarpone cheese
¾ cup heavy cream (cold)
14 ounces ladyfingers (42 to 60, depending on size)
3½ tablespoons cocoa, preferably Dutch-processed
¼ cup semisweet or bittersweet chocolate, grated (optional)

1. Stir coffee, espresso, and 5 tablespoons of the rum in a wide bowl or baking dish until the espresso dissolves; set aside.

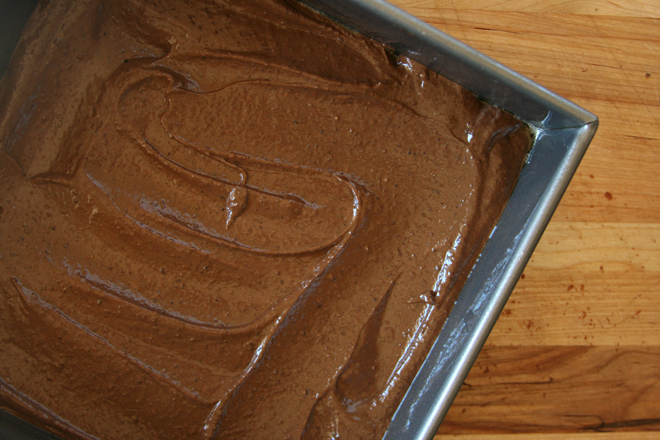
2. In the bowl of a standing mixer fitted with the whisk attachment, beat the yolks at low speed until just combined. Add the sugar and salt and beat at medium-high speed until pale yellow, 1½ to 2 minutes, scraping down the bowl with a rubber spatula once or twice. Add the remaining 4 tablespoons rum and beat at medium speed until just combined, 20 to 30 seconds; scrape the bowl. Add the mascarpone and beat at medium speed until no lumps remain, 30 to 45 seconds, scraping down the bowl once or twice. Transfer the mixture to a large bowl and set aside.

3. In the now-empty mixer bowl (there’s no need to clean the bowl), beat the cream at medium speed until frothy, 1 to 1½ minutes. Increase the speed to high and continue to beat until the cream holds stiff peaks, 1 to 1½ minutes longer. Using a rubber spatula, fold one-third of the whipped cream into the mascarpone mixture to lighten, then gently fold in the remaining whipped cream until no white streaks remain. Set the mascarpone mixture aside.

4. Working with one at a time, drop half of the ladyfingers into the coffee mixture, roll, remove, and transfer to 13 by 9-inch glass or ceramic baking dish. (Do not submerge the ladyfingers in the coffee mixture; the entire process should take no longer than 2 to 3 seconds for each cookie.) Arrange the soaked cookies in a single layer in the baking dish, breaking or trimming the ladyfingers as needed to fit neatly into the dish.

5. Spread half of the mascarpone mixture over the ladyfingers; use a rubber spatula to spread the mixture to the sides and into the corners of the dish and smooth the surface. Place 2 tablespoons of the cocoa in a fine-mesh strainer and dust the cocoa over the mascarpone.

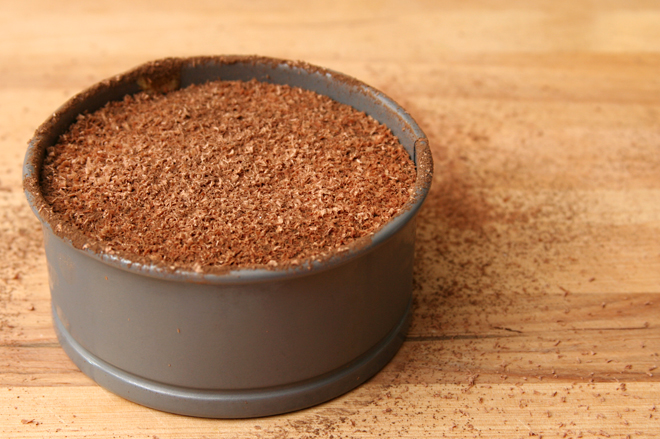
6. Repeat the dipping and arrangement of ladyfingers; spread the remaining mascarpone mixture over the ladyfingers and dust with the remaining 1½ tablespoons cocoa. Wipe the edges of the dish with a dry paper towel. Cover with plastic wrap and refrigerate for 6 to 24 hours. Sprinkle with the grated chocolate, if using; cut into pieces and serve chilled.

tiramisu 11

lemon pound cake

lemon pound cake 4

Lemons have been added to the list of ingredients I like to buy in the Big City (which isn’t that big compared to a lot of other cities but is definitely big compared to the town I live in), along with coffee, chocolate, parmesan cheese, and cheap wine from Trader Joe’s. This is because organic lemons aren’t available in my town, and while I have nothing against lemon juice, my favorite part of the lemon by far is the zest. The problem is that lemons have a more limited shelf life than my other Big City buys and the fruit tends to get hard (or worse, soft) after a few weeks in the crisper drawer.

lemon pound cake 2

Around this time is when I start going into lemon mania mode, and a lemon cake soaked with lemon syrup and drizzled with lemon glaze is a fine way to use up some of the lemon excess. In fact, I was so focused on my primary goals of using up lemons and having fun in the kitchen that I pushed another priority aside, that of making the best possible recipe. When combining loads of butter with loads of sugar, I knew it couldn’t end up too bad.

lemon pound cake 3

And so, for no other reason than I think the stand mixer is more fun to use and easier to clean up, I used that instead of the food processor the original recipe calls for, but when the top of my cake came out a little flat, I started thinking that maybe I should have just followed directions. I took the cake to work without tasting it, saving myself a piece for the end of the workday. It was good I set some aside for myself, because this cake disappeared in less than half the time as some of the other treats I’ve brought in. Savoring my much-anticipated slice at the end of the day, I decided that mixer or food processor, it didn’t matter; this cake would be a success either way.

lemon pound cake 7

One year ago: Chocolate Chunk Oatmeal Cookies with Dried Cherries and Pecans
Two years ago: Vodka Gimlet
Three years ago: Cook’s Illustrated’s Perfect Chocolate Chip Cookies
Four years ago: Cinnamon Rolls

Printer Friendly Recipe
Lemon Pound Cake (adapted from Baked: New Frontiers in Baking via the now defunct Dinner and Dessert)

Makes one loaf

I made this with a stand mixer instead of a food process like the original recipe instructs for no reason other than I think the mixer is more fun to use and easier to clean up.

For the cake:
¾ cup (3 ounces) cake flour
¾ cup (3.6 ounces) all-purpose flour
1 teaspoon baking powder
⅛ teaspoon baking soda
¼ cup sour cream, at room temperature
2 tablespoons fresh lemon juice
1 teaspoon pure vanilla extract
16 tablespoons (2 sticks) unsalted butter, room temperature
½ teaspoon salt
1 cup + 2 tablespoons (7.9 ounces) sugar
2 tablespoons grated lemon zest (from about 2 lemons)
4 large eggs, at room temperature

For the syrup:
2½ tablespoons fresh lemon juice
2½ tablespoons sugar

For the glaze:
1 cup (4 ounces) confectioners’ sugar, sifted
2 tablespoons fresh lemon juice

1. Heat the oven to 350 degrees. Spray the sides and bottom of a 9-by-5-by-3-inch loaf pan with nonstick cooking spray. Line the bottom with parchment paper and spray the paper. Sift both flours, baking powder, and baking soda together in a medium bowl. In a small measuring cup, whisk together the sour cream, lemon juice, and vanilla.

2. In the bowl of a stand mixer fitted with the paddle attachment (or a large mixing bowl with a hand-held mixer), beat the sugar and zest together until fragrant. Add the butter and salt; beat on medium speed until the mixture is light and fluffy, 2-3 minutes. With the mixer running, add the eggs one a time. Once the eggs are in, stop and scrape the sides of the bowl, then continue beating for another 2-3 minutes. Reduce the mixture speed to low, add one-third of the flour mixture, then half of the sour cream mixture. Continue alternating additions of dry and wet ingredients, ending with the dry ingredients. Scrape the bowl and mix for another 20-30 seconds, until the flour is thoroughly incorporated.

3. Transfer the batter to the prepared pan, smoothing the top. Bake in the center of the oven for 20 minutes, rotate the pans, reduce the oven temperature to 325 degrees, and bake for another 30 to 35 minutes, or until a toothpick inserted in the center of the loaf comes out clean. Let cool in the pans for 15 minutes.

4. In a small saucepan over medium heat, heat the lemon juice and sugar until the sugar is completely dissolved. Once dissolved, continue to cook for 3 more minutes. Remove from the heat and set aside.

5. Inver the cake onto a cooling rack set over a rimmed pan. Use a toothpick to poke holes in the top and sides of the loaf. Brush the top and sides of the loaves with the lemon syrup. Let the syrup soak into the cake and brush again. Let the cake cool completely, at least 30 minutes. (The soaked but unglazed loaf will keep, wrapped in two layers of plastic wrap and frozen, for up to 6 weeks.)

6. In a small bowl, whisk together the confectioners’ sugar and the lemon juice. Pour the lemon glaze over the top of the loaf and let it drip down the sides. Let the lemon glaze harden, about 15 minutes, before serving. (The glazed loaves will keep for up to 3 days, wrapped tightly in plastic wrap, at room temperature.)

lemon pound cake 5

strawberry lemonade bars

strawberry lemonade bars 8

I’m always trying to find desserts that Dave will eat because they’re so good he can’t resist, and not just to be polite. It isn’t that those desserts don’t exist – crème brulee, eclairs, and tapioca pudding come to mind – it’s just that the desserts he loves don’t require me to use the mixer, and where’s the fun in that? So the real challenge is finding a dessert that Dave loves to eat as much as I love to bake it.

strawberry lemonade bars 1

Strawberry lemonade bars weren’t a sure thing, but it was a good bet, I thought. He does like lemon bars – not as much as, say, snickerdoodles, but more than brownies at least. And his favorite ice cream flavor is strawberry, so strawberry lemonade bars seemed like they’d have potential.

strawberry lemonade bars 2

The browned flaky crust, taken from my lemon bar comparison last year, didn’t hurt, and neither did the creamy filling. The filling was not just a lemon bar filling with some strawberry juice added; it incorporated a generous portion of flour, necessary to hold all the extra liquid together. The result was a bar that was soft and gooey (maybe I should have cooked it longer) and tasted perfectly of lemons and strawberries. I loved the bars, and as for Dave – he liked them enough to eat a couple to be polite.

strawberry lemonade bars 5

One year ago: Caesar Salad
Two years ago: Whole Wheat Brioche
Three years ago: Blueberry Crumb Cake
Four years ago: Spinach Feta Pine Nut Tart

Printer Friendly Recipe
Strawberry Lemonade Bars (adapted from Annie’s Eats via Sophistimom)

For the crust:
8 tablespoons unsalted butter, at room temperature
⅓ cup (1.33 ounces) powdered sugar
1 cup (5 ounces) all-purpose flour
¼ teaspoon salt

For the filling:
1½ cups (10.5 ounces) sugar
⅔ cup (3.3 ounces) all-purpose flour
1½ tablespoons lemon zest (from 3 lemons)
⅛ teaspoon salt
1½ cups (8 ounces) frozen strawberries, thawed
3 large egg whites
1 large egg
⅔ cup freshly squeezed lemon juice (from 3 lemons)
Confectioners’ sugar, for dusting

1. Preheat the oven to 350 degrees. Spray an 8-by-8 inch baking pan with nonstick spray.

2. In the bowl of an electric mixer, beat the butter and sugar on medium-high speed until smooth, 1-2 minutes. Reduce the mixer speed to low and add the flour and salt, mixing just until incorporated.

3. Transfer the dough to the prepared baking pan, pressing into an even layer over the bottom of the pan. Bake the crust for about 25 minutes, or until light golden brown. Remove from the oven, maintaining the temperature.

4. While the crust is baking, prepare the filling. Combine the sugar, flour, lemon zest and salt in a blender. Add the strawberries; blend until smooth. Add the egg whites and eggs; blend until incorporated. Add the lemon juice, processing just until evenly mixed.

5. Pour the filling over the crust and bake until the center is just set and no longer jiggles when gently shaken, about 30-40 minutes. Transfer to a wire rack to cool to room temperature, then cover and refrigerate for at least 2 hours. Dust the top with confectioners’ sugar before cutting and serving.

strawberry lemonade bars 7

whole wheat chocolate chip cookies

whole wheat chocolate chip cookies 4

I was never a big fan of roast turkey, so when I was a kid, my favorite part of Thanksgiving was that it was the only time of year my mom bought white sandwich bread, because she liked it better for the stuffing. White bread! What a treat!  It’s been a slow adjustment, spanning close to ten years, but these days, largely due to Peter Reinhart’s trick and Tartine’s country bread, I actually prefer bread with a hearty portion of whole wheat flour. The flavor is deeper, more complex. I’m disappointed when a restaurant serves only pasty white bread.

whole wheat chocolate chip cookies 1

Cookies, in my experience, are a different matter. But my experience is only for substituting whole wheat flour in a recipe designed for white flour. Starting with a recipe designed for whole wheat flour is bound to give me better results. The only ingredient called for in this recipe that isn’t in the Tollhouse chocolate chip cookie recipe, besides whole wheat flour of course, is baking powder, substituted for the baking soda in most chocolate chip cookie recipes. Other differences are more flour and sugar for the same amount of butter and eggs in the Tollhouse recipe and less chocolate.

whole wheat chocolate chip cookies 2

I was a little worried that the dough, my favorite part about baking chocolate chip cookies, wouldn’t be as tasty as dough made with white flour, but it definitely passed inspection. The cookies themselves were also irresistible. Obviously the whole wheat flour doesn’t make the cookies healthy – that isn’t the point. These cookies are just as loaded with butter and sugar as any other cookie, and the whole grains are just for flavor. For me, though, the flavor was perhaps a little stronger than I might prefer. Plus, the texture was more bread-like than tender. I still loved the cookies, but now I want to find a way to tone down the whole wheatiness and get the texture I want. Should I replace half of the flour in this recipe with white bread flour? Should I start with my favorite regular chocolate chip cookie recipe and substitute whole wheat flour for some of the white? I can’t wait to start experimenting.

whole wheat chocolate chip cookies 3

One year ago: Comparison of 3 Chocolate Mousse recipes
Two years ago: Brown Soda Bread
Three years ago: Deli-Style Rye Bread
Four years ago: Chocolate Cream Pie

Printer Friendly Recipe
Whole Wheat Chocolate Chip Cookies (adapted from Kim Boyle’s Good to the Grain)

The original recipe is designed to start with cold butter, perhaps so the dough doesn’t get too warm and spread too much in the oven. However, because I have found that an overnight rest is good for both cookie dough and whole wheat doughs, I knew I would be chilling the dough before baking it and started with the softened butter that I’m used to. I also increased the chocolate and used chips instead of chopping my own.

3 cups whole wheat flour
1½ teaspoons baking powder
1 teaspoon baking soda
16 tablespoons (2 sticks) unsalted butter, softened
1½ teaspoons salt
1 cup (7 ounces) dark brown sugar
1 cup (7 ounces) sugar
2 eggs
2 teaspoons pure vanilla extract
8 ounces bittersweet chocolate, roughly chopped into ¼- and ½-inch pieces

1. In a small bowl, combine the flour and baking powder. In the bowl of a stand mixer fitted with the paddle attachment (or a hand mixer, or a spoon or whatever), beat the butter and salt until creamy. Add the sugars and beat on medium speed until fluffy. Add the eggs, one a time, mixing for one minute after each addition. Add the vanilla. Reduce the mixer speed to low and add the flour miture, mixing just until almost combined. Add the chocolate and pulse the mixer on low speed until the chips are dispersed and the flour is incorporated. Press a sheet of plastic wrap right against the dough; refrigerate overnight or up to 3 days.

2. Adjust an oven rack to the middle position. Heat the oven to 350 degrees. Line a baking sheet with parchment paper or a silicone baking mat.

3. Drop rounded tablespoons of dough onto the lined baking pan, spaced an inch or two apart. Bake the cookies for 7-10 minutes, until slightly browned around the edges and just set in the middle. Cool the cookies for at least 2 minutes on the sheet before transferring to a rack to finish cooling. (If they still seem fragile after 2 minutes of cooling, you can just leave them on the sheet to cool completely.)

whole wheat chocolate chip cookies 5

guinness chocolate cupcakes with irish cream buttercream

guinness chocolate baileys 8

Despite my penchant for baking, I’ve only very rarely baked by request. So when a coworker asked me to help plan for another coworker’s bridal shower, mentioning while studiously avoiding eye contact that one thing they needed someone to do was prepare dessert, I jumped at the excuse to bake, but then I got nervous.

guinness chocolate baileys 1

It’s one thing to bring extra crumbly rice krispy treats to set out in the office kitchen, where nearly anything sweet is appreciated during a long work day, but the standards are significantly higher for someone’s bridal shower. Complicating matters was the timing, because the party was scheduled for after work on a Thursday, so I would need to do everything during weekday evenings. (I know you can freeze cupcakes, but I haven’t tried it myself and wasn’t ready to experiment.)

guinness chocolate baileys 4

Neither the bride nor the host had any suggestions, so I decided that cocktail-inspired cupcakes would be fun for a bridal shower. I wanted a chocolate option and a fruit option and settled on Guinness cupcakes with whiskey ganache and Bailey’s buttercream (based on the controversially titled Irish Car Bomb drink, in which a shot of whiskey and Bailey’s is added to Guinness, and the whole mess has to be chugged before it curdles) and margarita cupcakes – lime cupcakes brushed with tequila and triple sec and topped with tequila lime swiss meringue buttercream.

guinness chocolate baileys 6

A couple days in advance, I mixed up the Bailey’s buttercream and attempted the whiskey ganache. Unfortunately, I learned that if the cream is too hot when you mix it with the finely chopped chocolate to make ganache, the mixture will curdle. I went home at lunch the next day to try to save my curdled ganache, but it remained curdled. (It’s in my freezer now. Does anyone have any suggestions on what I can do with broken ganache? Some sort of cake with chocolate and cream maybe?) Wednesday evening, I still needed to bake both batches of cupcakes, make the swiss meringue buttercream, remake the ganache, brush the margarita cupcakes with alcohol, fill the chocolate cupcakes, and frost both. Thursday I would go home at lunch and apply garnishes.

guinness chocolate baileys 7

One problem I consistently have with cupcakes is the wrappers pulling away from the cake, and I’ve finally figured out that this is a result of moisture building up, probably in large part from the frosting, while the cupcakes are stored tightly overnight. I only loosely covered these overnight, because loose wrappers would not do for the party, and only a few wrappers separated just slightly.

guinness chocolate baileys 5

Surprisingly, everything went off without a hitch, and I wasn’t even up all night on Wednesday. Even the hardest part of preparing cupcakes, getting them to your destination without mussing them, went smoothly. My first attempt at baking for an event was a definite success that gave me more confidence to do it again – which is good, because I had agreed to make dessert for the rehearsal dinner just a week later.

guinness chocolate baileys 9

One year ago: Baked Reuben Dip
Two years ago: Masa Pancakes with Chipotle Salsa and Poached Eggs
Three years ago: Spinach Bread
Four years ago: Almost No-Knead Bread

Printer Friendly Recipe
Guinness Chocolate Cupcakes with Bailey’s Buttercream (slightly adapted from Smitten Kitchen)

Makes 24

For the cupcakes:
1 cup stout (such as Guinness)
16 tablespoons (2 sticks) unsalted butter
¾ cup unsweetened cocoa powder (preferably Dutch-process)
2 cups all-purpose flour
2 cups sugar
1½ teaspoons baking soda
¾ teaspoon salt
2 large eggs
⅓ cup sour cream

For the filling:
8 ounces bittersweet chocolate, finely chopped
⅓ cup heavy cream
2 tablespoons butter, room temperature
1 to 2 teaspoons Irish whiskey (optional)

For the frosting:
4 cups (16 ounces) confections sugar
8 ounces (1 stick) unsalted butter, at room temperature
6 to 8 tablespoons Irish cream (or milk or heavy cream)

1. Make the cupcakes: Adjust a rack to the middle position and heat the oven to 350°F. Line 24 muffin wells with liners. In a medium saucepan over medium heat, bring 1 cup stout and 16 tablespoons of butter to a simmer. Add the cocoa powder; whisk until the mixture is smooth. Cool slightly.

2. Whisk the flour, sugar, baking soda, and ¾ teaspoon salt in a large bowl. With a stand mixer fitted with the paddle attachment (or in a large bowl with a handheld mixer), beat the eggs and sour cream to blend. Add the stout mixture to the egg mixture and beat just to combine. Add the flour mixture and beat briefly on slow speed. Using a rubber spatula, fold the batter until completely combined.

3. Divide the batter among the cupcake liners, filling them about ⅔ full. Bake until a toothpick inserted into the center of a cupcake comes out clean, rotating the pan once front to back if your oven bakes unevenly, 18-22 minutes. Cool cupcakes on a rack completely.

4. Make the filling: Place the chocolate in a heatproof bowl. Heat the cream until just simmering and pour it over the chocolate. Let it sit for one minute and then stir until smooth. (If this has not sufficiently melted the chocolate, you can return it to a double-boiler to gently melt what remains. 20 seconds in the microwave, watching carefully, will also work.) Add the butter and whiskey (if using) and stir until combined.

5. Fill the cupcakes: Let the ganache cool until thick but still soft enough to be piped, about an hour. Meanwhile, using a 1-inch round cookie cutter, an apple corer, or a paring knife, cut the centers out of the cooled cupcakes about ⅔ to the bottom. Fill the holes with the ganache, using either a piping bag or a spoon.

6. Make the frosting: With a stand mixer fitted with the whisk attachment (or in a large bowl using a handheld mixer), whip the butter very light and fluffy, 2-3 minutes. Reduce the heat to low and gradually add the powdered sugar, then the Irish cream. Frost the cupcakes with the Bailey’s buttercream; serve.

guinness chocolate baileys 10

sugar cookies – star wars characters

star wars cookies 1

I recently overheard people talking about a dessert I’d baked, and they said something to effect that probably anyone could do something like that with the right equipment. I mostly agree with them; there are no sneaky tricks up my sleeve. I followed a recipe, with a few tweaks to get the flavors I wanted and with the experience to know what pitfalls I might encounter. (Not that that ever stops me from finding new mistakes to make.)

star wars cookies 6

But they are wrong in one important aspect, and that is that what sets some bakers apart is a high capacity for tedium. Sugar cookies decorated with royal icing are the best example. The whole process takes forever.

star wars cookies 2 vader

I prefer to divide the work up between four different days, mixing up the dough on one, rolling the dough and cutting shapes on another, then the big day of baking, outlining, and flooding, and finally adding the details after the flooded icing has dried. This time, I only had a few days between receiving these Star Wars cutters as a gift and having dinner with a couple of young Star Wars fans.

star wars cookies 5 stormtrooper

I’ve used royal icing a handful of times previously, but so intermittently that I wasn’t learning from my mistakes. I have found that it’s imperative that I draw a map of my plan for each shape – first the outline color, then the flooding, then each layer of detail. Maybe more experienced decorators don’t need this, but for a newbie like me, it makes the process less intimidating. (Each photo set shows essentially what my hand-drawings do, as far as the steps to decorate each cookie.)

star wars cookies 4 yoda

This was probably my most successful attempt at royal icing – and the most time-consuming, because there was a lot of detail in these designs. I did learn a few things along the way, and I can only hope that it will make me better at this in the future. Still, I suspect that this is one of those baking endeavors that will always require a generous tolerance for tedium – and that, for better or worse, is something I have.

star wars cookies 3 yoda

One year ago: Cream Cheese Pound Cake
Two years ago: Roll-out Sugar Cookies (comparison of 4 recipes) (coincidence, I swear!)
Three years ago: Roasted Kale
Four years ago: Rice Pudding

I used the first recipe listed in my sugar cookie comparison.  I’m not confident enough in my royal icing skills to offer any sort of tutorial. At this stage, I’m still referencing Annie’s tutorial for instructions.

star wars cookies 8

butterscotch peanut butter chocolate rice krispy treats

rice krispie treats 8

I did something very, very stupid with this recipe. It calls for 1½ bags of butterscotch chips. The thing is, I don’t like butterscotch chips very much, so I didn’t want half a bag leftover that I would feel obligated to keep around indefinitely, where it would take up valuable cabinet space. I only bought one bag, deciding to wing it (always trouble) for the remainder.

rice krispie treats 3

I started regretting this shortly after leaving the store. Because obviously I could have just dumped that half bag of chips into a batch of chocolate chip cookies and they would be hardly noticeable. Or, heaven forbid, I could just throw a handful of butterscotch chips away if I didn’t plan to use them.

rice krispie treats 12

Instead of making an extra trip back to the store, I forged ahead. Things looked bad from the beginning when I measured out my single bag of butterscotch chips and it was even less than I was expecting. I still forged ahead, adding in a couple tablespoons of butter and another couple tablespoons of corn syrup to make up for the fat and sugar I was missing from the extra chips. I knew I was in bad shape when I poured in the entire box of cereal, and it filled my pot to the brim. I thought about shoveling some of the cereal out before mixing it into the melted butterscotch and peanut butter mixture but stubbornly forged ahead instead.

rice krispie treats 7

No one is surprised that my rice krispy bars were a crumbly mess, are they? There simply wasn’t enough glue to hold together all that cereal. They tasted good, like that classic combination of peanut butter and chocolate, but, while I did manage to cut a few clean squares, they’re so delicate that they crumble as soon as they’re touched. Of course I ate them anyway, because they’re butterscotch peanut butter chocolate rice krispy bars. Crumbles aside, what’s not to love? But next time, I’ll follow the directions, half bag of extra chips be damned.

rice krispie treats 10

One year ago: Strawberry Buttercream
Two years ago: Bacon-Wrapped Stuffed Dates
Three years ago: Beer-Battered Fish
Four years ago: Julia Child’s French Bread

Printer Friendly Recipe
Butterscotch Peanut Butter Chocolate Rice Krispy Treats (slightly adapted from Cara’s Cravings)

About 32 tall bar cookies

3 cups (1½ to 2 11-ounce bags) butterscotch chips
1½ cups (13½ ounces) creamy peanut butter
salt
1 (12-ounce) box crisp rice cereal
4 cups (2 12-ounce bags) semi-sweet chocolate chips
8 tablespoons (1 stick) butter, cut into ½-inch cubes
1½ cups (6 ounces) confectioners’ sugar
¼ cup water

1. Spray a 9-by-13 inch pan with cooking spray.

2. In a large (at least 5-quart) pot over medium-low heat, melt the butterscotch chips with the peanut butter and ¼ teaspoon salt. When the mixture is smooth, which will take 8-10 minutes, add the cereal and stir to thoroughly coat the cereal with the peanut butter mixture.

3. Meanwhile, bring 1-inch of water to a simmer in a saucepan. Place the chocolate, water, 1/8 teaspoon salt, and butter in a heatproof bowl and set it over the simmering water. Stir occasionally until the chocolate is melted and smooth, 6-8 minutes. Stir in the powdered sugar.

4. Transfer half of the cereal mixture to the prepared pan; use a rubber spatula or greased hands to pat the mixture into an even layer, pressing lightly to compact. Spread the chocolate mixture evenly over the cereal in the pan. Top with the remaining cereal mixture. Cover lightly with plastic wrap and refrigerate until set, about 2 hours.

rice krispie treats 9

Normally I wouldn’t waste your time describing such a mistake, but this recipe was on my list of 2012 goals for February.

strawberry buttermilk cake

strawberry buttermilk cake 6

I woke up yesterday wanting cake. Not wanting to eat cake, so much, although that part is nice, but wanting to watch butter and sugar swirl in the mixer bowl and gradually turn into a smooth batter. This despite plans to make Danish dough, two Danish fillings, fajitas, grapefruit cookies (which didn’t happen because I’d gotten my mixer fix with the cake), and a batch of Tartine country bread dough to freeze (which didn’t happen because I ran out of flour). No one said anything about being practical.

strawberry buttermilk cake 3

I started poking around the internet for recipes, and chose this one because it uses buttermilk, which I have right now, and it wasn’t loaded with butter, which is always nice when you’re planning to eat cake for breakfast. I did not have any fresh berries, but I always keep strawberries in the freezer for our weekday smoothies. And it didn’t require an hour in the oven; key on a government holiday that included sleeping in.

strawberry buttermilk cake 4

The cake was everything I’d been craving. The most important part of the craving was my favorite mixing method of beating butter and sugar until fluffy, whipping in an egg and vanilla, and alternating the additions of buttermilk and dry ingredients. But cake for breakfast doesn’t hurt either.

strawberry buttermilk cake 5

One year ago: Eggplant Rollatini
Two years ago: Pasta with Baked Ricotta and Sweet Tomato Sauce
Three years ago: Vegetarian Chili
Four years ago: Salmon Cakes, Flaky Biscuits, Hashed Brussels Sprouts

Printer Friendly Recipe
Berry Buttermilk Cake (rewritten but not changed from Gourmet via Smitten Kitchen)

Serves 6

Two things: The original recipe calls for fresh raspberries, which are probably a better choice than the (frozen) strawberries I used. Strawberries are juicier than other berries, so my cake was a little wetter than is probably ideal. I also thought it was too sweet, which could be because strawberries aren’t as tart as raspberries, but still, next time I’ll only use ½ cup of sugar.

1 cup (4.8 ounces) all-purpose flour
½ teaspoon baking powder
½ teaspoon baking soda
¼ teaspoon salt
½ stick unsalted butter, room temperature
⅔ cup (4.67 ounces) plus 1½ tablespoons sugar, divided
1 teaspoon grated lemon zest
½ teaspoon pure vanilla extract
1 large egg
½ cup well-shaken buttermilk
1 cup (5 ounces) fresh raspberries (or other berries)

1. Adjust a rack to the middle position and heat the oven to 400 degrees. Butter and flour a 9-inch round cake pan. In a small bowl, whisk together the flour, baking powder, baking soda, and salt.

2. In a stand mixer fitted with the paddle attachment (or in a medium bowl using a hand mixer), beat the butter, sugar, and lemon zest (if using) on medium-high speed until pale and fluffy, about 2 minutes. Add the egg and vanilla, beating until combined. Reduce the mixer speed to low; add one-third of the flour mixture, then half of the buttermilk. Continue alternating the dry ingredients and buttermilk, ending with the dry ingredients.

3. Scrape the batter into the prepared pan, smoothing the top. Scatter the berries evenly over the top, then sprinkle with the remaining 1½ tablespoons sugar. Bake until the cake is golden and a toothpick inserted into the center comes out clean, 25 to 30 minutes. Transfer the cake to a cooling rack; cool for 10 minutes. Remove the cake from the pan and cool another 10-15 minutes before serving.

strawberry buttermilk cake 7

chocolate sugar cookies

chocolate sugar cookies 4

Once the holidays ended and we got into the slower part of the year, I started thinking about what I wanted to do with my newfound free time. Get my garden up, which we can do early in the year where I live; fix up my house a bit; set up a recipe database; get better at Photoshop; relearn how to ride a bike; and, maybe, if there’s time after everything else, decorate sugar cookies more often.

chocolate sugar cookies 1

I haven’t decorated sugar cookies since I made these, for Valentine’s Day last year. I distinctly remember staying up long after my normal bed time, on a weeknight, using toothpicks to manipulate royal icing into hearts, then cleaning mixing bowls and squeeze bottles at midnight. I think I’m up until midnight every time I decorate sugar cookies.

chocolate sugar cookies 2

Rationally, I know that when I decorate sugar cookies with royal icing, I should think of it as a day-long project – and that’s assuming that I’ve already made the cookie dough, rolled it out, cut shapes, and baked the cookies. But every time I actually work with royal icing, I wait until the end of the day, because I can’t convince myself that a simple outline and filling of sugar cookies could really take several hours. And then it takes that long, every time.

chocolate sugar cookies 3

These hearts, although not any less time-consuming than regular royal icinged sugar cookies, are at least more foolproof. Instead of painstakingly (at least it’s painstaking for me) detailing on top of hardened icing, you use toothpicks to manipulate two liquid royal icing colors. All you have to do is drag a toothpick through a dot to turn it into a heart.

chocolate sugar cookies 5

The over-the-topness of tiny hearts set into pink, red, and white icing on top of heart-shaped cookies should not detract from the chocolate cookie itself, which is soft, meltingly tender, and most importantly, intensely chocolately. It was almost worth the loss of several hours of sleep. Still, I’m not sure how often I see myself doing this, no matter how much free time I have.

chocolate sugar cookies 8

One year ago: Fettuccine Alfredo
Two years ago: Oatmeal Pancakes
Three years ago: Crispy Bagel Roll
Four years ago: Olive Oil Bread

I’m not qualified to give a royal icing tutorial. I used Karen’s tutorial for these hearts, and Annie later did one as well.

Printer Friendly Recipe
Chocolate Sugar Cookies (adapted from Smitten Kitchen)

I reduced the flour slightly from Deb’s original recipe; this increases the chocolate flavor, although it has the potential to lead to more spreading in the oven. But as you can see, the scalloped hearts retained their decorative edge after baking. Still, if you’re working with a delicate shape, freeze the dough until firm after cutting shapes, then bake the cookies directly from the freezer.

2¾ cups (13.2 ounces) all-purpose flour
⅔ cup unsweetened cocoa, sifted to remove lumps
½ teaspoon baking powder
16 tablespoons (2 sticks) unsalted butter, softened
¾ teaspoon salt
1½ cups (10.5 ounces) sugar
2 large eggs
1 teaspoon vanilla extract

1. In a medium bowl, combine the flour, cocoa, and baking powder; set aside. In a stand mixer fitted with the paddle attachment (or in a large mixing bowl if using a hand mixer), beat the butter and salt until creamy, about 1 minute. With the mixer running, gradually add the sugar; beat on medium speed until fluffy, about 2 minutes. Add the eggs, one at a time, mixing to incorporate each one before adding the next. Beat in the vanilla. Reduce the mixer speed to low; add the dry ingredients and mix just until combined, with no dry pockets of flour. Shape the dough into a 1-inch thick disk; wrap in plastic wrap and refrigerate for at least one hour.

2. Adjust a rack to the middle position and heat the oven to 350 degrees. Line a baking sheet with parchment paper or a silicone mat.

3. Lightly flour a large sheet of wax (or parchment) paper. Transfer the chilled dough to the paper and top with a second sheet of wax paper. Roll the dough into ⅛-inch thickness, flouring as needed to prevent the dough from sticking to the paper. Use floured cookie cutters to cut shapes; transfer the shapes to the prepared pan. Re-roll and cut shapes from the scraps, using as little flour as possible.

4. Bake the cookies until the tops look dry but are still slightly soft, about 8 minutes. Let the cookies cool on the pan for about 2 minutes, then transfer to a wire rack.

chocolate sugar cookies 6

black bean avocado brownies

black bean brownies 13

I have developed an extensive spreadsheet of calculations in an effort to address to issue of brownies that aren’t bad for you, and what I have discovered is that brownies are bad for you. The problem is the chocolate. Chocolate on its own doesn’t taste good, as you’re probably aware. It needs sugar to taste good. Fat is nice too. Sugar and fat aren’t good for you.

black bean brownies 4

Sure, the internet is rife with recipes for black bean brownies, in which beans replace the flour, cocoa powder is the only source of chocolate, and, in Cara’s recipe, avocado adds some fat, but the healthy kind. I made Cara’s recipe, exchanging 2 tablespoons of cocoa for 1 ounce of bittersweet chocolate to add oomph to the chocolateliness in a compromise between health and flavor that I thought was worthwhile. The brownies were very, very edible. They didn’t taste like beans or like avocado. They also didn’t taste much like chocolate.

black bean brownies 7

This is when I started calculating calories, trying to see how much chocolate I could add to black bean brownies before it defeats the purpose of making a healthier brownie. I started by looking at Cook’s Illustrated’s Lighter Brownies recipe, replacing the flour with beans and the butter with avocado. I also added some ground almonds, because the original brownies needed something dry to absorb some of the moisture and bulk up the batter.

black bean brownies 8

Once you add more chocolate and fatty nuts to the recipe, it has just as much fat as Cook’s Illustrated butter-containing light brownie recipe. It has twice the fat of Cara’s recipe – but half the fat of my favorite regular brownie recipe (for the same size square). It has about the same amount of fiber and protein as Cara’s recipe, and two or three times the protein of a regular brownie recipe. (Regular brownies don’t contain any fiber to speak of.)

black bean brownies 10

What these brownies have going for them is that they’re chock full of fiber, high in protein, gluten-free, and full of good fats. What they have working against them is that they still have a significant amount of refined sugar, and they have more fat and therefore more calories than other black bean brownie recipes. They also have more flavor, more chocolate flavor, that is; in fact, so much chocolate flavor that this won’t just satisfy a chocolate craving, but it’ll cause a craving – for black bean brownies.

black bean brownies 3
first batch (all other photos are of second batch)

One year ago: Great Grains Muffins
Two years ago: Butternut Squash Macaroni and Cheese
Three years ago: Tofu Croutons
Four years ago: Potstickers

Printer Friendly Recipe
Black Bean Avocado Brownies (adapted from Cara’s Cravings and Cook’s Illustrated’s Lighter Brownies)

12 medium squares

¼ cup almonds
½ cup (3.5 ounces) sugar
⅛ teaspoon table salt
1 (15-ounce black) beans, rinsed and drained
2 ounces avocado flesh (about ½ an avocado)
3 ounces semisweet chocolate, coarsely chopped
2 tablespoons Dutch-processed cocoa powder
1 tablespoon boiling water
1 tablespoon vanilla extract
½ teaspoon instant espresso powder
½ teaspoon baking powder
2 large eggs

1. Adjust an oven rack to the middle position and heat the oven to 350 degrees. Coat an 8-inch square baking pan with vegetable oil spray.

2. Process the almonds, sugar, and salt in a food processor until the almonds are finely ground, about 2 minutes. Add the beans and avocado; process until the beans are smoothly pureed, 4-5 minutes (some flecks of bean skins may remain).

3. Set a heatproof bowl over a saucepan containing one inch of simmering water. Add the chocolate; stir frequently until the chocolate is smooth, then remove from the heat. In a separate small bowl, whisk the cocoa, water, vanilla, and espresso powder together. Add the chocolate, cocoa mixture, and baking powder to the bean mixture in the food processor; pulse to combine. Add the eggs; process for 30 seconds, stopping twice to scrape the sides of the bowl.

4. Pour the batter into the prepared pan and smooth the top. Bake until a toothpick inserted into the center comes out clean, about 25 minutes. Cool completely on a wire rack, at least 1 hour. Store leftovers, tightly wrapped, in the refrigerator for up to 5 days.

black bean brownies 11