cranberry orange muffins

copy-of-img_9788

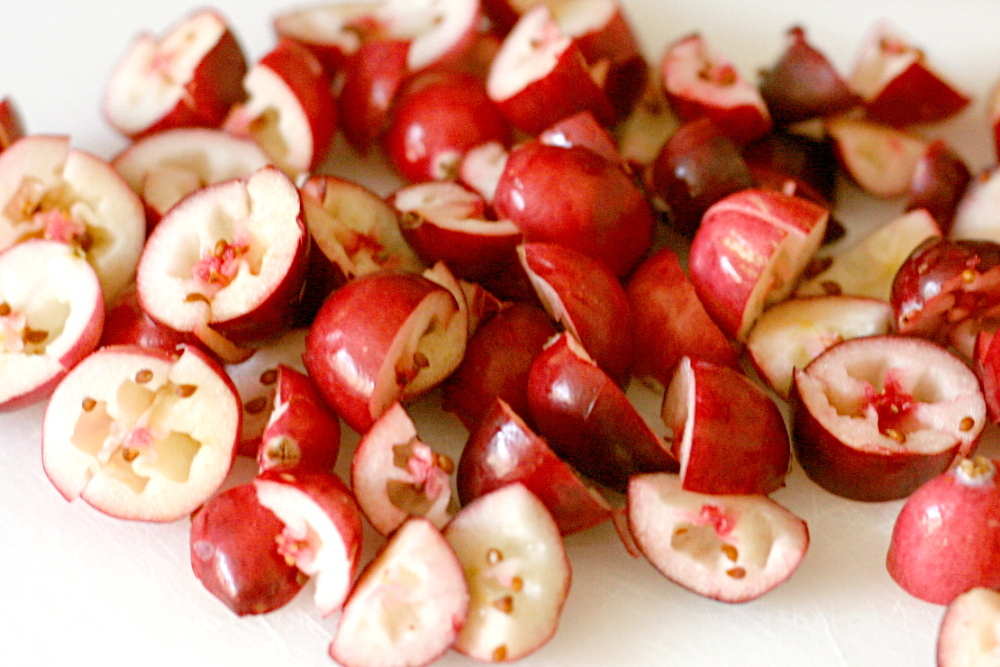
Didn’t I just make muffins? And wasn’t I talking about how I was still on pumpkin? While it’s true that I haven’t moved past pumpkin, I’m definitely excited about cranberries too. Especially cranberry and orange together.
copy-of-img_9771

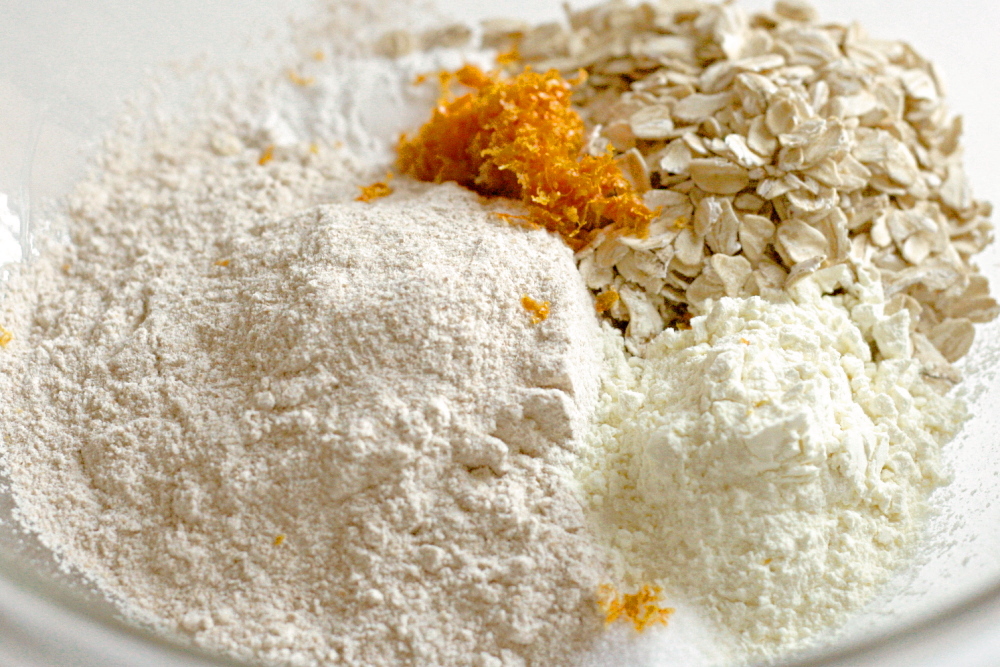
Seven or eight years ago, I went through a health nut phase where I pretty much eschewed white flour. (You can imagine that that lasted for, like, a week.) I at least substituted half whole wheat flour in most recipes, especially quick breads. I’ve apparently reached a complete turnaround. This recipe calls for 100% whole wheat flour, and I came very close to substituting half of that with white flour.
copy-of-img_9772

But I stuck to the recipe, and I am so glad I did. These muffins rocked, even though I didn’t have quite the right amount of egg (long story), I used traditional instead of quick-cooking oats, and I skipped the glaze. I’m not a huge fan of glaze on muffins – they don’t take to freezing as well, plus it seems too cupcake-like. I also changed the order that the ingredients were added, just like I did with the pumpkin muffins. I added the sugar with the wet ingredients and the zest with the dry ingredients.
copy-of-img_9778

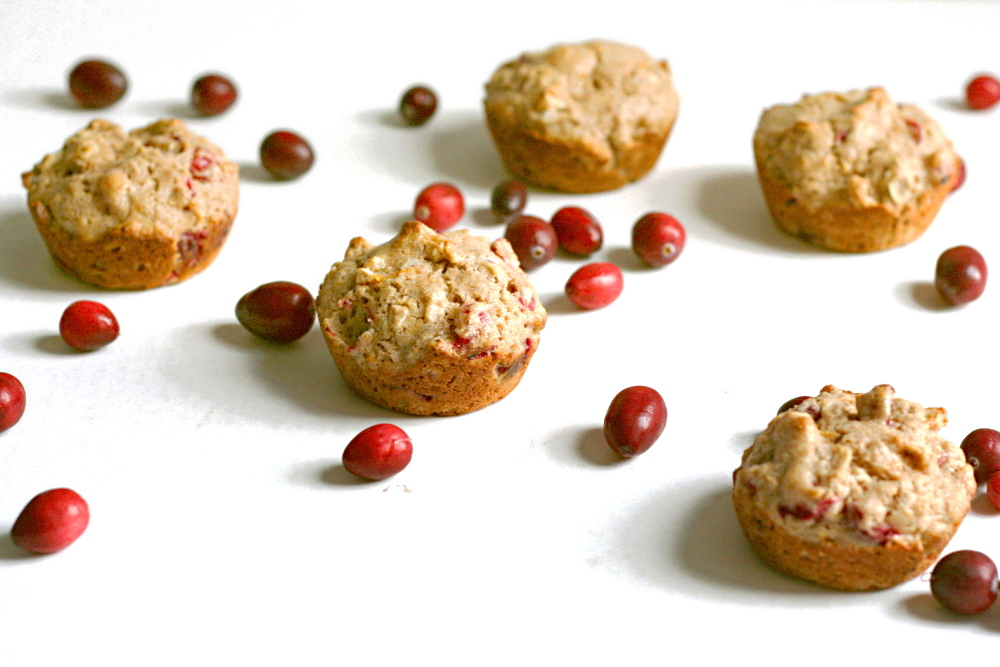
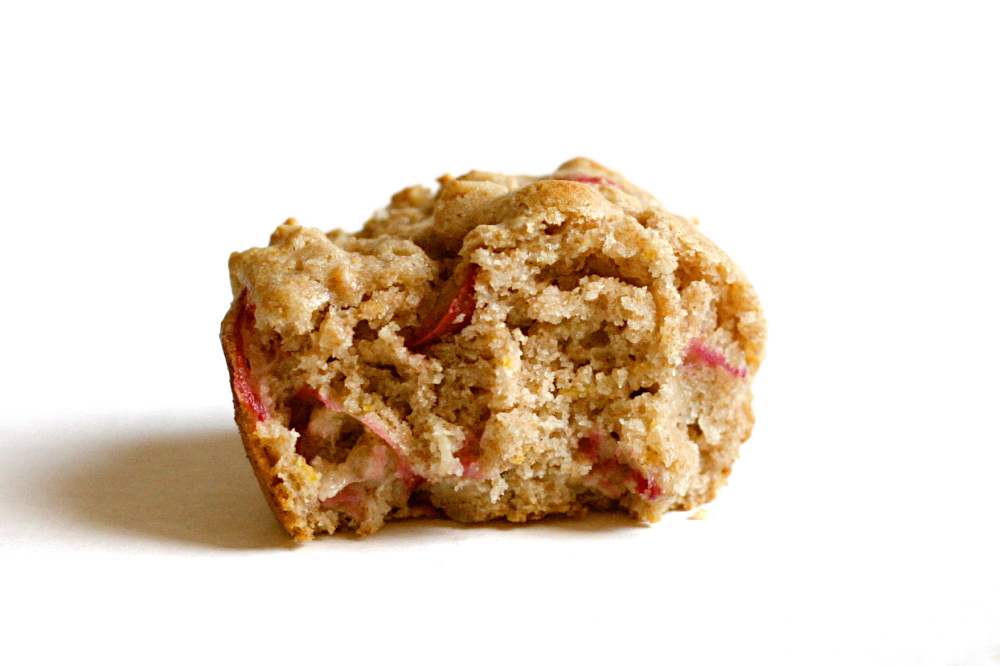
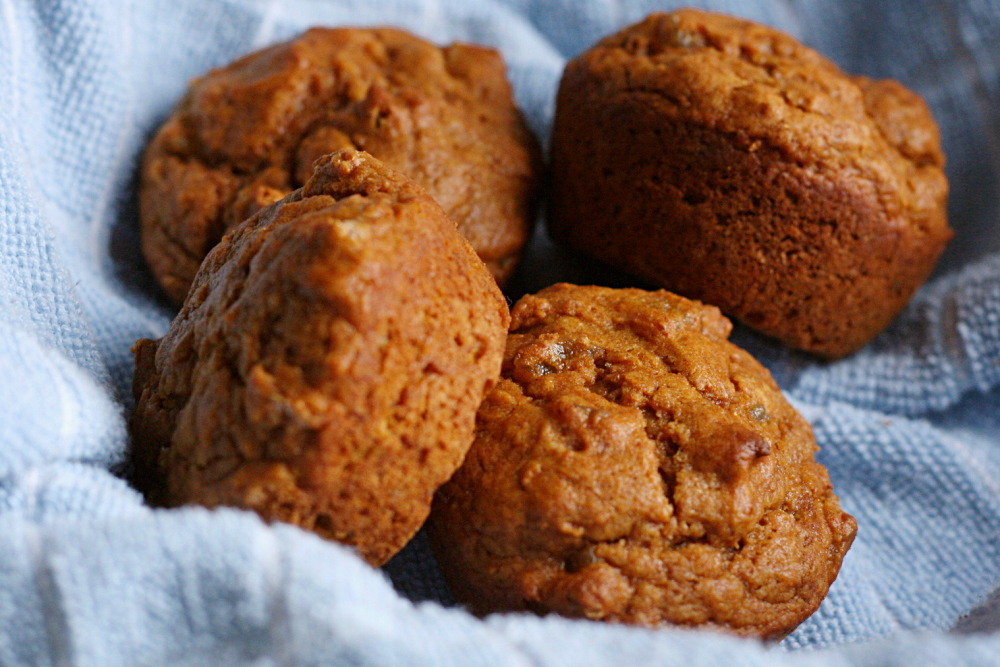
The muffins were nice and light, not at all heavy from the whole wheat flour. The orange flavor was pronounced, which I liked, and the bits of cranberry were perfectly tart and even juicy. All that using 100% whole wheat flour. 2001-me would have been so proud.

copy-of-img_9780

Cranberry Orange Muffins (adapted from King Arthur Flour)

I used traditional oats and didn’t notice any problems, but I could see how quick-cooking oats would incorporate into the dough better. I skipped the nuts because I didn’t have any. I used butter instead of oil. I also skipped the glaze.

Makes 12 muffins

1½ cups whole wheat flour
¾ cup quick-cooking rolled oats
¼ cup buttermilk powder or nonfat dry milk
2 teaspoons baking powder
1 tablespoon orange zest (finely grated orange peel)
½ teaspoon salt
1 cup fresh or frozen cranberries, chopped
½ cup chopped pecans or walnuts (optional)
2 large eggs
⅔ cup (4.67 ounces) sugar
¾ cup milk
⅓ cup melted butter or vegetable oil

Glaze
2 tablespoons orange juice
3 tablespoons sugar

1. Adjust oven rack to middle position and heat oven to 350 degrees. Spray standard muffin tin with nonstick vegetable cooking spray.

2. Whisk flour, oats, milk powder, baking powder, and orange zest in a large mixing bowl. In a separate mixing bowl, whisk egg until broken up. Add sugar and whisk until combined. Whisk in butter (or oil) and milk.

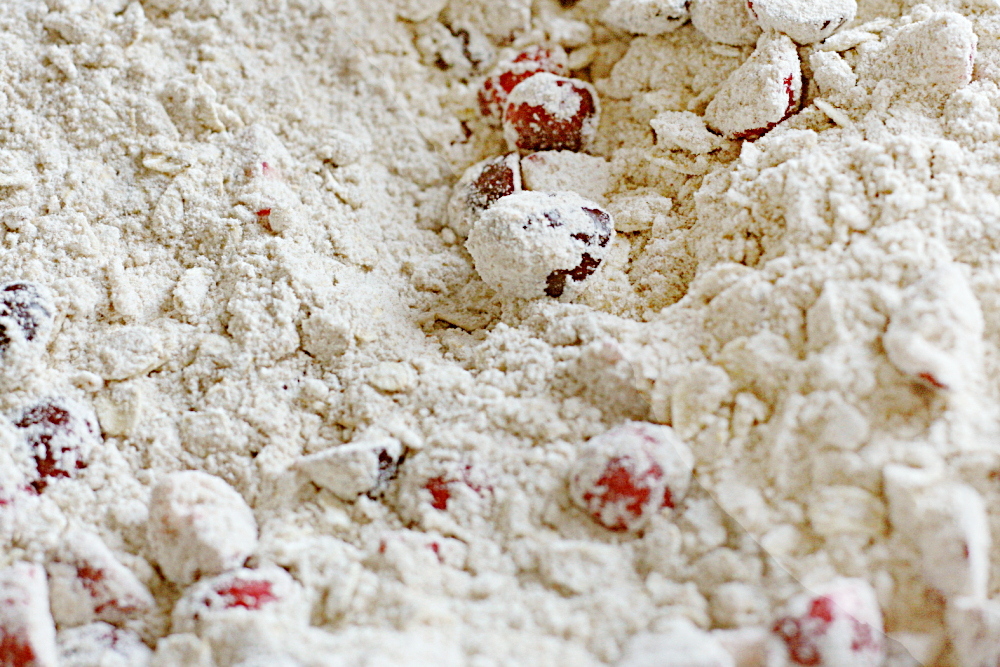
3. Add cranberries and nuts, if using, to dry ingredients and stir to combine. Add milk mixture and fold with rubber spatula until batter comes together. Do not overmix.

4. Divide batter among 12 muffin cups. Bake until toothpick inserted into center of muffin comes out clean, 18-20 minutes. Cool in pan 5 minutes, then transfer them to a rack.

5. If using glaze: In a small saucepan or the microwave, stir together the glaze ingredients. Bring just to a boil, to dissolve the sugar. Dip the tops of the warm muffins into the glaze.
copy-of-img_9783

pumpkin ginger muffins

copy-of-img_9794

I am not done with pumpkin. Everyone has moved onto cranberries and is all blasé about pumpkin now. “Pumpkin is so November.” Well, I for one am not done.

copy-of-img_9708

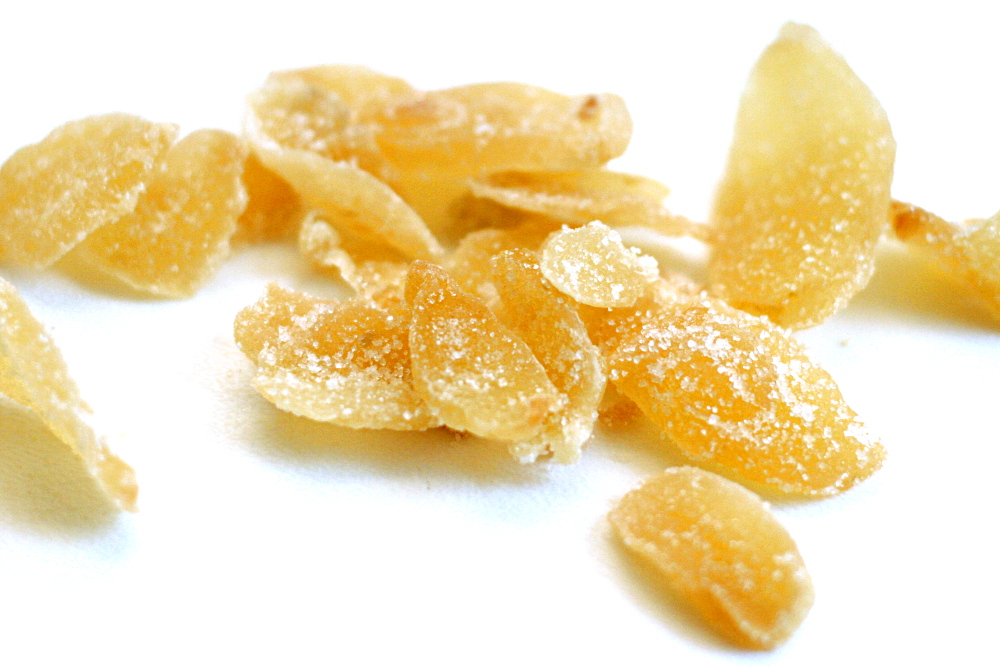
I’ve been looking for a good pumpkin muffin recipe for a while. What has been holding me back is the add-ins – dried cranberries, raisins, and nuts are all fine, but they aren’t the perfect match for pumpkin that I was looking for. I finally figured it out when my friend mentioned that she had a great recipe for pumpkin muffins that included a lot of ginger. Of course – crystallized ginger has just the texture and flavor that I wanted.

copy-of-img_9720

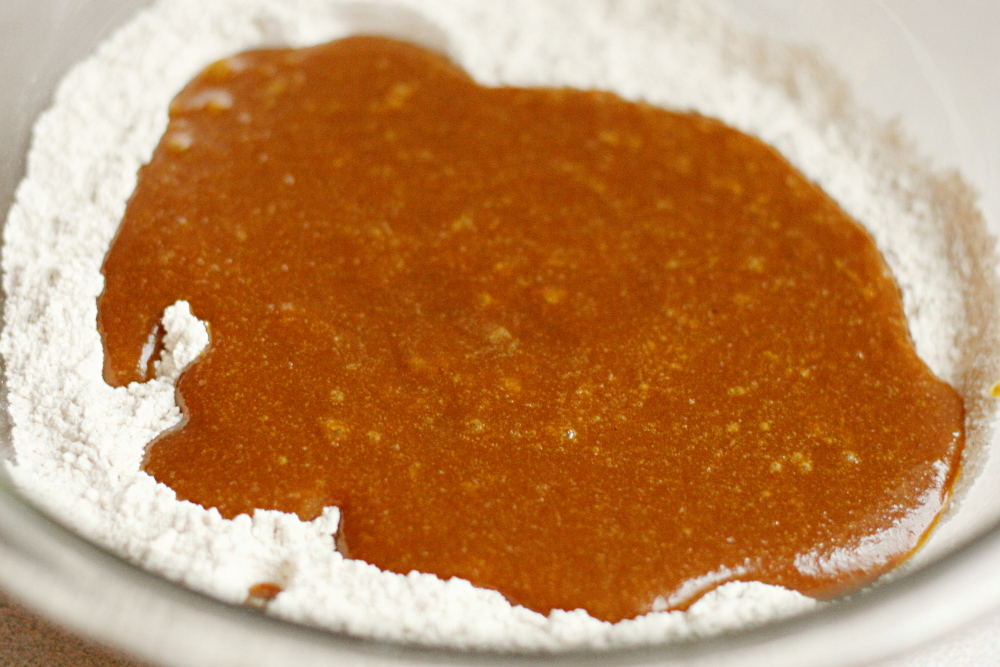
My friend’s recipe uses powdered ginger, which I eliminated in favor of adding the crystallized ginger. It also didn’t include salt, which I thought was weird, so I added some. I also changed the order that the ingredients were mixed, adding the sugar with the liquid ingredients instead of the dry. Also, the original recipe called for half of the flour to be added at the end, after everything else had been mixed. I didn’t understand the point of that, so I just added all of the flour to the dry ingredients.

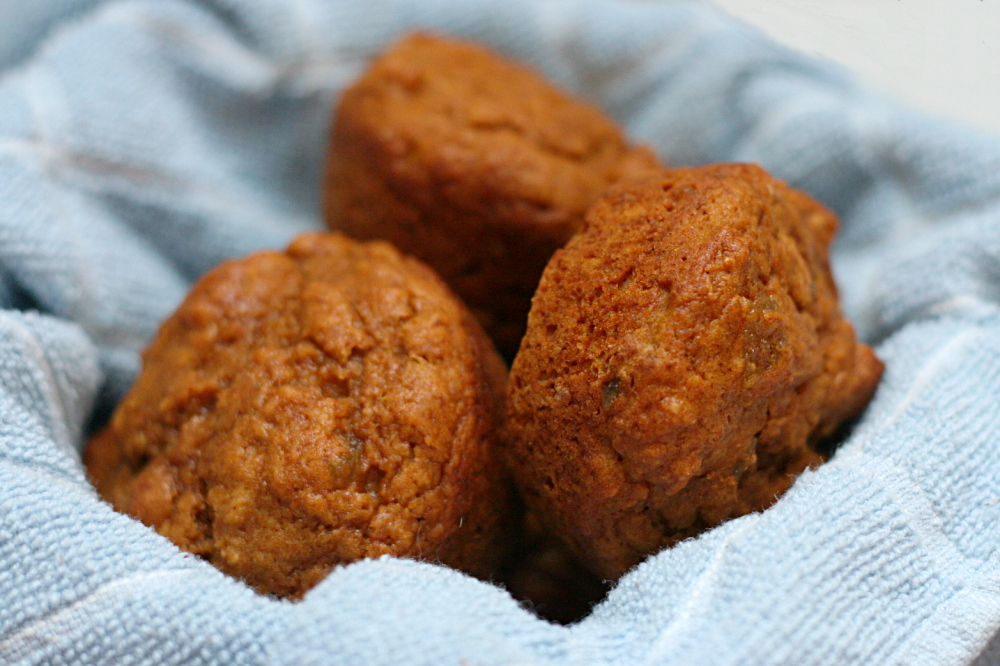
These are the pumpkin muffins I’ve been looking for – pumpkiny and moist and tender with spicy ginger bits. The only thing I would change is adding the powdered ginger back in – without it, the muffins are too sweet, and the crystallized ginger doesn’t provide as much spiciness as I thought it would. And with the addition of molasses, these resemble gingerbread, so they could actually be perfect for everyone who’s ready to move onto December-specific treats.

Ginger Pumpkin Muffins

Makes 8 muffins

1 cup (5 ounces) unbleached flour
1 teaspoon baking powder
¼ teaspoon baking soda
¼ teaspoon salt
1 teaspoon ground cinnamon
1 teaspoon ground ginger
½ cup (2.5 ounces) minced crystallized ginger (optional; or add your preferred mix-in)
1 egg
¼ cup (1.75 ounces) packed light brown sugar
½ cup canned pumpkin
¼ cup molasses
3 tablespoons butter, melted
2 tablespoons milk

1. Adjust oven rack to middle position and heat oven to 350F. Spray standard muffin tin with nonstick vegetable cooking spray.

2. Whisk flour, baking powder, baking soda, salt, ginger, and cinnamon in a large mixing bowl.In a separate mixing bowl, whisk egg until broken up.Add sugar and whisk until combined. Whisk in pumpkin, molasses, butter, and milk.

3. Add crystallized ginger to dry ingredients and stir to combine. Add pumpkin mixture and fold with rubber spatula until batter comes together and ginger is evenly distributed. Do not overmix.

4. Divide batter among 8 muffin cups.Bake until toothpick inserted into center of muffin comes out clean, 20-25 minutes.Cool in pan 5 minutes, then remove from pan and serve.

copy-of-img_9870

bourbon pumpkin cheesecake

copy-of-img_9023

For years, I didn’t make cheesecake, because I only had a 9-inch springform pan, and I rarely had anyone around to eat 12-16 servings of cheesecake. I know cheesecake freezes well, but it sounded like a hassle, with the slicing and packaging correctly to avoid freezer burn. Then I got this little 4-inch springform pan, which has come in handy a few times, and which led to the fantastic Brown Sugar Apple Cheesecake. But a 4-inch springform cheesecake is really only big enough to whet my appetite. Dave and I had two tiny servings each of the apple cheesecake, and it wasn’t near enough.

copy-of-img_8998

The solution, of course, is more cheesecake. Pumpkin cheesecake is not only seasonal, but one of my favorite cheesecake flavors. I’ve tried a couple different recipes, all of which were good, but none struck me as the best pumpkin cheesecake ever, so I saw no reason not to try a new recipe. I chose the one on epicurious that had the most positive reviews.

copy-of-img_9004

I used a different recipe for the crust, because I didn’t have pecans, and I’m not sure I’d want them in the crust anyway. The recipe also includes a sour cream topping that I skipped because I didn’t have sour cream. And, again, it seems unnecessary.

copy-of-img_9013

I made one third of the recipe, which was a little too much for my mini springform pan, so I did some googling and figured out how to make cup-cheesecakes. I love it! They’re so cute and perfectly sized. I think next time I’ll just press the crust in the bottom of the muffin cup and not up the sides, but other than that, I was really pleased with this method. I followed Clare’s instructions and let the cheesecakes chill in the freezer for a few minutes before popping them out with a butter knife, and they came out fine, even though I had underbaked the centers.

copy-of-img_8999

One problem with pumpkin cheesecake is that it tends to look plain. This recipe recommends a sour cream topping, and I’ve seen some accompanied by recipes for bourbon whipped cream, but cheesecake is so rich that I can’t see topping it with something else that’s so rich. I think what I want to do is make a marbled cheesecake. I’m going to try separating out some of the batter before adding the pumpkin, then swirling the plain batter in the pumpkin base. I might have to tweak the filling ingredients just slightly, but I want to keep the recipe similar.

copy-of-img_9018

As is though, the flavor and texture of this cheesecake more than makes up for its lackluster appearance. It was perfect – dense and creamy with just the right balance of pumpkin and cream cheese. We finished the third of the recipe that I made in an embarrassingly short time, and it was all I could do to resist making more just two days later.

copy-of-img_9178

Update 10.14.09: The cheesecake can be successfully and easily dressed up with some swirling!  You just need to add the pumpkin to the batter last, removing some plain batter before adding the pumpkin.  Here’s what I recommend: If you want only the top to be marbled, remove 1/4 cup of plain batter before adding the pumpkin to the remaining batter.  Pour the pumpkin batter into the prepared pan, then dot the plain batter over the top and use a knife to make a marble pattern.  If you’d like the swirling to continue throughout the entire cheesecake, separate out 3/4 cup batter before adding the pumpkin to the rest, then add 1/3 of the pumpkin batter to the pan, then 1/3 of the plain batter, and swirl.  Repeat twice more.  When I tried it, I separated out the larger amount of batter before adding the pumpkin, and I didn’t notice that the texture was compromised by the higher concentration of pumpkin.

Copy of IMG_0239

Printer Friendly Recipe
Bourbon Pumpkin Cheesecake
(crust from Cooks Illustrated, filling adapted from Gourmet via epicurious.com)

To bake cheesecakes in a muffin pan, line each muffin cup with the crust mixture. Pour in the filling and bake 20-25 minutes at 350F. Cool on a rack until room temperature, then freeze for 15 minutes before using a butter knife to prop the cheesecakes out of the pan.  I’m thinking this amount of filling will made about 24 cup-cheesecakes.  You’ll probably need to increase the crust to 12 crackers, 4 tbsp sugar, 8 tbsp butter (and a teensy bit more of each spice).

Crust:
5 ounces graham crackers (9 whole crackers), broken into large pieces
3 tablespoons granulated sugar
½ teaspoon ground ginger
½ teaspoon ground cinnamon
¼ teaspoon ground cloves
6 tablespoons unsalted butter, melted

Filling:
3 (8-ounce) packages cream cheese, at room temperature
½ cup (3.5 ounces) packed light brown sugar
½ cup (3.5 ounces) granulated sugar
1 tablespoon cornstarch
1½ teaspoons cinnamon
½ teaspoon freshly grated nutmeg
½ teaspoon ground ginger
½ teaspoon salt
1½ cups canned solid-pack pumpkin
3 large eggs
2 tablespoons heavy cream
1 teaspoon vanilla
1 tablespoon bourbon liqueur or bourbon (optional)

1. Adjust oven rack to lower-middle position and heat oven to 350F. Spray bottom and sides of 9-inch springform pan evenly with nonstick cooking spray. Pulse crackers, sugar, and spices in food processor until evenly and finely ground, about fifteen 2-second pulses. Transfer crumbs to medium bowl, drizzle melted butter over, and mix with rubber spatula until evenly moistened. Turn crumbs into prepared springform pan and, using hand, spread crumbs into even layer. Using flat-bottomed ramekin or drinking glass, press crumbs evenly into pan bottom, then use a soup spoon to press and smooth crumbs into edges of pan. Bake until fragrant and browned about the edges, about 12 minutes. Cool on wire rack while making filling.

2. Working with a stand mixer fitted with a paddle attachment, or with a hand mixer in a large bowl, beat the cream cheese on medium speed, scraping down the bowl as needed, until smooth, about 2 minutes. Add the brown and granulated sugars, cornstarch, cinnamon, nutmeg, ginger, and salt to the cream cheese and beat for another 2 minutes. Mix in the pumpkin, then add the eggs one at a time, mixing until incorporated. Add the cream, vanilla, and bourbon (if using) and mix until just combined.

3. Pour the filling into the crust, smoothing the top. Bake until the center is just set and measures 155 degrees on an instant-read thermometer, 55 to 65 minutes.

4. Cool the cheesecake completely in the pan on a rack, about 3 hours. Chill, covered, until cold, at least 4 hours. Remove the sides of the pan and bring the cheesecake to room temperature before serving.

copy-of-img_9172

brown sugar apple cheesecake

copy-of-copy-of-morning-awb

I’ve been avoiding buying apples so far this fall. I like them, quite a bit in fact, but I have to pace myself. I eat a lot of fruit, and apples are pretty much the only fruit in season for a good portion of the year. I try to maximize my opportunities to eat the fruit with shorter seasons. But it’s getting to be time to move on to apples, and what better way to kick off apple season than with cheesecake? I should start using every fruit in cheesecake to kick off its season.

copy-of-img_8570

Tuesdays with Dorie made this cheesecake long before I joined, and it definitely contributed to my eventual purchase of the book. I don’t know why apple cheesecake never occurred to me before, but what a fantastic idea. Dorie has tweaked traditional cheesecake to include brown sugar, cinnamon and apple cider, and I’m sure you can imagine how well that compliments the apples.

copy-of-img_8581

The recipe went off without a hitch, despite making just 1/6 of it in a tiny but cute springform pan. With three components, it isn’t the quickest recipe to put together, but it’s worth it even before the cheesecake – because you also get to eat the batter. My favorite is when it’s just cream cheese and sugar, but I make sure I test every stage.

copy-of-img_8583

The cheesecake is delicious, although I think I’ll slice the apples a lot thinner next time because I’m picky about texture. Dorie describes the texture as middle-of-the-road as far as cheesecakes go, and I think she’s right on; it’s not exceptionally dense. The mini-cheesecake was a mistake, because I definitely did not get enough.

PS – The apples decoration on top was shamelessly copied from foodie bride.

copy-of-img_8647

Brown Sugar-Apple Cheesecake (from Dorie Greenspans’s Baking: From My Home to Yours)

For the Crust
30 gingersnaps (or a scant 2 cups graham cracker crumbs)
2 tablespoons light brown sugar
½ teaspoons ground cinnamon (optional)
½ stick (4 tablespoons) unsalted butter, melted

For the Apples
½ stick (4 tablespoons) unsalted butter
3 large Golden Delicious or Fuji apples, peeled, cored and cut into eighths
2 tablespoons (packed) light brown sugar

For the Filling
1½ pounds (three 8-ounce packages) cream cheese, at room temperature
¾ cup (packed) light brown sugar
6 tablespoons sugar
3 tablespoons apple cider
2 teaspoons pure vanilla extract
2 teaspoons ground cinnamon
3 large eggs
¾ cup sour cream
⅓ cup heavy cream

Apple jelly, for glazing, or confectioner’s sugar, for dusting (optional)

To Make the Crust:
Butter the bottom and sides of a 10-inch springform pan.

Put the gingersnaps in a food processor and whir until you have crumbs; you should have a scant 2 cups. (If you are using graham cracker crumbs, just put them in the food processor.) Pulse in the sugar and cinnamon, if you’re using it, then pour over the melted butter and pulse until the crumbs are moistened. Turn the crumbs into the springform pan and, using your fingertips, firmly press them evenly over the bottom and up the sides of the pan as far as they’ll go. Put the pan in the freezer while you preheat the oven. (The crust can be covered and frozen for up to 2 months.)

Center a rack in the oven and preheat the oven to 350 degrees F.

Remove the pan from the freezer and wrap the bottom tightly in aluminum foil, going up the sides. Place the pan on a baking sheet and bake for 10 minutes, or until the crust is set and lightly browned. Transfer to a rack to cool while you make the apples and the filling. Leave the oven at 350 degrees F.

To Make the Apples:
Melt 2 tablespoons of the butter in a large nonstick skillet over medium-high heat. When the foam subsides, toss in half of the apple slices and cook, turning once, until they are golden brown, about 3 minutes. Sprinkle the apples with 1 tablespoon of the sugar and cook them, turning, just until coated, another minute or so. Scrape the apples onto a plate, wipe out the skillet and repeat with the remaining apples. Let the apples cool while you make the filling.

Getting Ready to Bake:
Have a roasting pan large enough to hold the springform pan at hand. Put a kettle of water on to boil.

To Make the Filling:
Working with a stand mixer, preferably fitted with a paddle attachment, or with a hand mixer in a large bowl, beat the cream cheese on medium speed, scraping down the bowl often, for about 4 minutes, or until it is velvety smooth. Add the sugars and beat for another 2 minutes. Beat in the cider, vanilla, and cinnamon. Reduce the speed to low and beat in the eggs one by one, beating for 1 minute after each egg goes in. Finally, beat in the sour cream and heavy cream, beating just until the batter is smooth.
Pour about one third of the batter into the baked crust. Drain the apples by lifting them off the plate with a slotted spoon or spatula, and spoon them into the pan. Cover with the remaining batter and, if needed, jiggle the pan to even the top. Place the springform pan in the roasting pan and pour in enough boiling water to come halfway up the sides of the springform pan.

Bake the cheesecake for 1 hour and 30 to 45 minutes, covering the cake loosely with a foil tent at the 45-minute mark. The cake will rise evenly and crack around the edges, and it should be fully set except, possibly, in the very center-if the center shimmies, that’s just fine. Gently transfer the cake, still in the pan, to a cooling rack and let it cool to room temperature, then refrigerate it for at least 6 hours; overnight would be better.

Run a blunt knife around the edges of the pan to loosen the crust, open the pan’s latch and release and remove the sides.

copy-of-copy-of-day1

chickpea and butternut squash salad

copy-of-img_8391

Do you like squash? It seems like as soon as we were past Labor Day, everyone went squash crazy. I have reservations about squash that I think can be traced back to childhood.

copy-of-img_8381

I remember one Halloween, my mom roasted acorn squash for me and my brother, with brown sugar in the middle. We were less than pleased. I can’t remember any other squash experiences until I was cooking on my own, and I’m not the only one in my family who is inexperienced in squash. A year or two ago, my older sister called me to ask what she was supposed to do with the butternut squash she had bought.

copy-of-img_8386

I do like squash these days, but every time I eat it, I’m surprised I like it. “Wow! This is actually good!” That’s exactly how I felt about this recipe, which I heard about from Deb, but is actually from Molly. Both tend to recommend recipes that are right up my alley, so that made this recipe worth trying even with the less than familiar squash.  (This is only the third recipe I’ve ever used winter squash in.)

copy-of-img_8390

My doubts did go beyond just the squash issue. I wasn’t so sure about combining sweet squash with hummus ingredients – chickpeas and tahini, lemon juice and cilantro. And then I was worried that the sauce wouldn’t come together and be smooth (somehow it did) and that there would be too much sauce (I ended up adding it all).

copy-of-img_8383

The recipe was easy, aside from my snail-like squash peeling and cutting pace. And I was, yes, surprised by how much I liked it. The sweet squash was balanced so well by the bitter tahini and sour citrus. What a great combination.

copy-of-img_8395

Butternut and Chickpea Salad with Tahini (reworded slightly from Orangette, who adapted it from Casa Moro)

Thoughts: I’m anti raw garlic lately, so I threw the garlic in the oven with the squash for a few minutes, just to tame its sharpness a little before adding it to the sauce.

For salad:
1 medium butternut squash (about 2 to 2½ pounds, seeded, and cut into 1½-inch pieces)
1 medium garlic clove, minced or pressed
½ teaspoon ground allspice
2 tablespoons olive oil
Salt
1 (15-ounce) can chickpeas, drained and rinsed
¼ medium red onion, finely chopped
¼ cup coarsely chopped cilantro leaves

For tahini sauce:
1 medium garlic clove, finely minced with a pinch of salt (or shredded on a Microplane)
3½ tablespoons lemon juice
3 tablespoons well-stirred tahini
2 tablespoons water
2 tablespoons olive oil, plus more to taste

Preheat the oven to 425F.

In a large bowl, combine the butternut squash, garlic, allspice, olive oil, and a good pinch or two of salt. Using a large spoon or your hands, toss until the squash pieces are evenly coated. Turn them out onto a baking sheet, and bake for 15 to 25 minutes, or until soft. Remove from the oven and cool.

Meanwhile, make the tahini sauce. In a small bowl, whisk together the garlic and lemon juice. Add the tahini, and whisk to blend. Add the water and olive oil, whisk well, and taste for seasoning. The sauce should have plenty of nutty tahini flavor, but also a little kick of lemon.

To assemble the salad, combine the squash, chickpeas, onion, and cilantro in a mixing bowl. Add tahini sauce to taste, and toss carefully. (Alternatively, you can also serve the salad undressed, with the tahini sauce on the side. That way, each person can use as much or as little as they want, and the individual ingredients taste a little brighter, too.) Serve, with additional salt for sprinkling.

Note: This salad, lightly dressed, keeps beautifully in the fridge. (Hold a little of the tahini sauce on the side, for dressing at the table.) Before serving, warm slightly with quick jolt in the microwave.

copy-of-img_8391

pumpkin pancakes

Dave loves fall. Besides feeling cozy and the pretty leaves, he gets excited about two things – candy corn, which he can and will eat until he’s sick, and pumpkin pancakes. Not that there’s anything keeping us from eating pumpkin pancakes year-round, except for my stubbornness. If we eat pumpkin pancakes in June, what will we have to look forward to in October? I guess I enforce seasonal eating even when it involves canned ingredients.

I’ve played around with my pumpkin pancake recipe for years. The first recipe I tried made pancakes that were a little too thin, too sweet, and not pumpkiny enough. I spent a few years trying to perfect that recipe, and then eventually gave up and started adding pumpkin and spices to a regular pancake recipe. But that wasn’t as easy as it should have been either, because I only recently found a pancake recipe that I’m completely happy with.

Because pumpkin puree has a viscosity pretty similar to pancake batter, I haven’t had any problems adding it to pancake recipes without changing the flour to liquid ratio. I also like to replace the white sugar with brown sugar, and of course I add some spices, but overall, it’s a pretty straightforward transition from plain to pumpkin pancakes.

I do have one caveat about this recipe. I’ve been using powdered buttermilk for the last few months, which is much more convenient than buying liquid buttermilk and then struggling to use it all up before it goes bad. But I think it’s thinner than liquid buttermilk. If you’re using liquid buttermilk instead of reconstituted powdered buttermilk, you may need to add a little more liquid.

This is, finally, a tried and true pumpkin pancake recipe, and one more great reason to look forward to fall.

Pumpkin Pancakes (adapted from Cathy Lowe’s Simple Homemade Pancakes, found through My Apples and Oranges)

Serves 2-3

1 cup (5 ounces) flour
1 tablespoon brown sugar
1 teaspoon baking powder
½ teaspoon baking soda
½ teaspoon salt
½ teaspoon cinnamon
¼ teaspoon allspice
¼ nutmeg
1 egg
2 tablespoons butter, melted and cooled
½ cup pumpkin
1 cup buttermilk
vegetable oil for the pan

1. In a large mixing bowl, stir together the flour, sugar, baking powder, baking soda, salt and spices. In a separate mixing bowl, whisk the egg until thoroughly combined, then add the butter, pumpkin, and buttermilk. Pour the liquid ingredients into the dry ingredients and whisk gently until batter is mostly mixed but still contains small lumps. Let batter rest while pan heats, at least 5 minutes.

2. Heat non-stick skillet or griddle over medium heat. Add a few drops of oil and spread it over the bottom of the pan. Using a ¼ cup measure, pour pancake batter onto hot griddle. When pancake is golden brown, flip to cook other side. Keep warm in oven heated to 275 degrees.

pumpkin muffins

I’ve been on the lookout for a pumpkin quick bread recipe for a couple of years. I like quick breads to have some textural contrast with add-ins, but I couldn’t think of anything that seemed to fit with the flavors of the pumpkin. Of course Dorie could, as Kelly’s choice for this week’s TWD recipe made evident.

Dorie adds raisins and walnuts (or pecans) to her pumpkin muffins. Like I almost always do, I replaced the raisins with something else; in this case, dried cranberries. I wasn’t sure if the flavors would get along – they’re both common fall ingredients, but I don’t often see them together. I topped the muffins with pumpkin seeds instead of sunflower seeds. I’m not sure why Dorie calls for sunflower seeds; pumpkin seeds seem so perfect for these muffins.

The muffins were good. The walnuts and dried cranberries were fine as additions. However, shortly after I made them, one of my friends told me about a pumpkin muffin recipe she makes that has a lot of ginger in it, and then it occurred to me that the perfect add-in for pumpkin muffins is crystallized ginger. Now I’m looking forward to trying this combination.

Dorie’s recipe is posted on Kelly’s blog.

mulled cider

I held off fall for as long as I could, mostly because I hadn’t (and still haven’t!) gotten my fill of fresh tomatoes. Plus I don’t like to be cold. But I can’t deny it anymore – there’s a chill in the air, and the trees are looking absolutely beautiful. It’s time for cider.

I looked up a few recipes for mulled cider, and they were all basically the same. But the first recipe I made, Ina Garten’s, was too sweet and not spicy enough. The next time, I eliminated all of the orange juice and just added the peel without the juice. Dave and I agreed that it was still two orangey, so I cut down the amount of peel even more. I also increased all of the spices, plus added one that wasn’t in the original recipe – allspice, which was perfect with the cider.

Ina’s recipe says to simmer for just 5 to 10 minutes, which doesn’t seem like nearly enough time to extract much flavor from whole spices. Most of the reviewers said that they simmered the mixture for far longer, and I agree with them. I generally brought the cider to a hard simmer, then turned off the heat, covered it, and forgot about it for an hour or so. Then Dave would say “didn’t you make cider?” and I’d remember and be excited and drink some and love October.

Hot Mulled Cider (adapted from Ina Garten)

Serves 4-6

8 cups (½ gallon) pure apple juice or fresh apple cider
2 (2-inch) cinnamon sticks
4 whole cloves
2 star anise
6 allspice berries
2 strips orange zest, removed with vegetable peeler, each strip about 2 inches long by ½-inch wide, cleaned of any white pith

Combine all the ingredients in a saucepan and bring to a simmer over medium-high heat. Turn off heat, cover, and let sit for 30 minutes. Pour into mugs, straining if desired, and serve.

apple cheddar scones (twd)

Apple and cheddar is a combination of flavors that I’ve heard about often but had never tried, so I was happy that Karina’s choice of Apple-Cheddar Scones for this week’s TWD recipe would give me that chance. Also, while I’m not sure if this is supposed to be a sweet or savory recipe, I served it with soup for dinner, which means I actually got to choose my own dessert to make last week! How exciting.

I made the full recipe, a rarity for me, and froze most of the shaped scones. The recipe came together with no hitches, although the dough was a bit stickier than I was expecting.

Although we ate these for dinner twice last week, situations beyond my control prevented me from enjoying one fresh from the oven. However, they were great even at room temperature. They were very light and tender.

That being said, I’ll tweak the recipe a bit for the next time I make it. Most importantly, I double the salt, because I kept hoping for just a bit more flavor from each bite, and this recipe calls for significantly less salt than most other biscuit recipes. I’d also cut the cheese into tiny squares instead of grating it, because I think the flavor almost gets lost when it’s evenly mixed in with the flour. I want little bursts of cheddar flavor. And I might increase the apples a bit, because I didn’t get as much apple flavor as I wanted either.

But they were still really good. I’m glad I have four more in the freezer. I’m also more interested in other apple-cheddar recipes now.

Karina has posted the recipe.

martha martha martha (maple walnut cupcakes)

dscn2685.jpg

For someone who’s been very interested in food and cooking for a large part of her life, I was late catching onto Martha Stewart fanhood. I just didn’t know much about her, for whatever reason. I didn’t watch her show, I didn’t read her magazine, and I hadn’t made any of her recipes. But then last Christmas, my mother-in-law gave me Martha Stewart’s Baking Handbook.

This is a really great book. For one thing, every recipe has a beautiful picture accompanying it. Also, many of the recipes include garnishes. What a relief for someone like me, who is new to caring about garnishes! But more important, of course, are the recipes themselves. There’s a great mix of classics, like chocolate chip cookies and buttermilk biscuits, to more advanced but still familiar recipes, like a wedding cake and croissants, plus a good peppering of more original ideas, like grapefruit cookies and rum-raisin pie. I’m especially excited to make my way through some of the cookie recipes. Whoever heard of grapefruit in cookies? Yum!

I’ve been craving cupcakes for quite some time now, and I wanted something a little bit more…interesting that your standard old chocolate or vanilla. These were perfect! I’m especially happy with the maple buttercream frosting. I had my doubts going in, because I haven’t had the most successful history of working with buttercream. Also, I was only making a third of the recipe. I know buttercream is very temperature sensitive, and this much smaller amount was going to change temperatures a lot faster than the recipe indicates. And, I was worried about the method of combining the maple syrup and the egg yolk. The syrup is heated to 240 degrees (my probe thermometer tops out at 212 degrees, so I guessed and hoped for the best), then drizzled into the egg yolk. 240 degrees is…hot, especially for egg. But, it all seemed to work out! The buttercream did show signs of breaking, but I tried beating it more, and it actually came together very nicely!

The only change I would make to the recipe is to toast the walnuts before mixing them with the batter. Oh, and I wouldn’t spill a quarter of the dry ingredient mixture on the counter and then not notice until the cupcakes were in the oven. All in all, they were really good.  And cute!

dscn2680.jpg

Maple-Walnut Cupcakes (from Martha Stewart’s Baking Handbook)
Makes 2 dozen

2¾ cups (13.75 ounces) unbleached flour
1 tablespoon baking powder
¼ teaspoon salt
1 teaspoon ground cinnamon
16 tablespoons (2 sticks) unsalted butter, room temperature
1 ½ cups (10.5 ounces) granulated sugar
3 large eggs
1 teaspoon vanilla extract
1 cup milk
1½ cups (5.5 ounces) walnuts, toasted, chopped medium-fine
Maple Buttercream

Preheat the oven to 350 degrees. Line two standard 12-up muffin pans with paper liners. Into a large bowl, sift together flour, baking powder, salt, and cinnamon; set aside.

In the bowl of an electric mixer fitted with the paddle attachment, beat the butter and sugar on medium speed until creamy, about 3 minutes. Add the eggs and vanilla, and beat until combined. With the mixer still on medium speed, add the flour mixture in two parts, alternating with the milk and beginning and ended with the flour. Fold in the walnuts.

Divide the batter evenly among he muffin cups, adding about 1/3 cup to each. Bake, rotating the pans halfway through, until cupcakes are golden and a cake tester inserted into the center of a cupcake comes out clean, 18-20 minutes. Transfer the pans to a wire rack to cool slightly. Invert the cupcakes onto the rack; then reinvert and let them cool completely, top sides up. Frost tops with Maple Buttercream. Cupcakes can be refrigerated in an airtight container for up to 3 days.

Maple Buttercream
Makes enough for 2 dozen cupcakes (about 2 cups)

This frosting can be refrigerated in an airtight container for up to three days. Bring to room temperature before using.

3 large eggs yolks
1 cup pure maple syrup
16 tablespoons (2 sticks) unsalted butter, cold, cut into small pieces

In the bowl of an electric mixer fitting with the whisk attachment, beat the egg yolks on high speed until light and fluffy, about 5 minutes; set aside. In a small saucepan set over medium-high heat, bring the maple syrup to a boil, and cook until it registers 240 degrees on a candy thermometer, about 15 minutes. Remove from heat.

With the mixer running, slowly pour syrup down the side of the bowl in a slow, steady stream, until completely incorporated, about 1 minute. Continue beating until bowl is just slightly warm to the touch, 4 to 5 minutes. Add butter, one piece at a time, until thoroughly incorporated and the frosting is fluffy, about 4 minutes more.

dscn2688.jpg