classic burritos

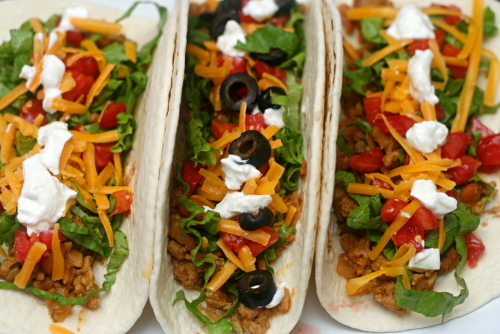
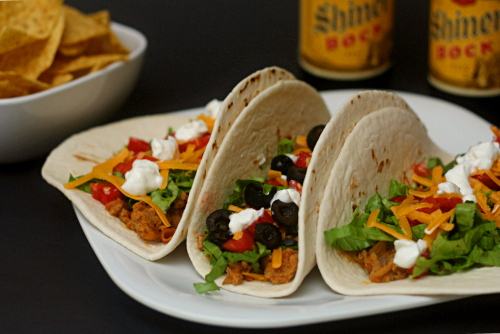
This is not my most gourmet meal. It’s mostly fancy Taco Bell. It kind of looks like dog food. It’s delicious and easy and kinda healthy. I like it.

It’s at least fancier than we made it when I was a kid. Back then, we (usually my brother) browned some ground beef, dumped in a packet of burrito seasoning and some water, and stirred in a can of refried beans. Then we glopped it on tortillas with fixin’s and were happy.

Then my brother started getting creative. He would add green chile to the mix or use shredded chicken instead of ground beef. I don’t like change. I just want my fancy Taco Bell.

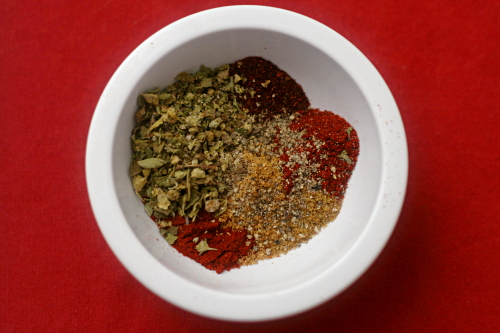
What I have changed is to get rid of the sodium and preservative-filled spice packet and the pasty canned refried beans for some good stuff – browned onions, fresh garlic, spices that I already have anyway, and pinto beans I mush up myself. Plus I use ground turkey instead of ground beef, because it tastes the same once it’s mixed in with everything else, and it’s a little healthier. Same goes for Greek yogurt instead of sour cream.

Sure, it’s just a regular old burrito, and it costs 79 cents at a fast food chain. But if you make it yourself, you can use high quality ingredients – lettuce that is actually crisp, cheese that has flavor, spices that are fresh – and it isn’t much harder than going through the drive-thru.

One year ago: Bran Muffins
Two years ago: Spinach Artichoke and Red Pepper Strata

Printer Friendly Recipe
Classic Burritos

4-6 servings

The filling also reheats really well, so I usually make enough for more than one meal and have an easy leftover night a few days later.

These are my favorite fillings for these very basic burritos. Obviously you can go wild here with whatever you like – salsa, hot sauce, green chile, guacamole…

Filling:
1 tablespoon vegetable oil
1 onion, diced
2 cloves garlic, minced
2 teaspoons ground cumin
2 teaspoons chile powder
1 teaspoon coriander
1 teaspoon dried oregano
¼ teaspoon black pepper
¼ teaspoon cayenne
1 pound ground turkey (or other ground meat of your choice)
1 teaspoon salt
1 (15-ounce) can pinto beans, rinsed and drained
1 cup water

Toppings:
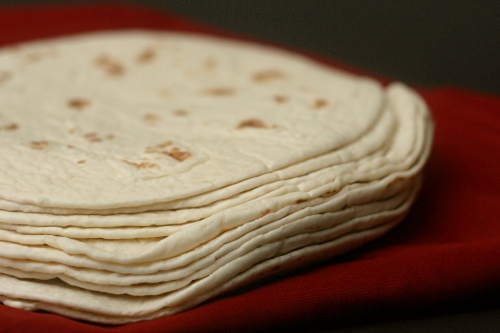
flour tortillas
green leaf lettuce, sliced
tomatoes, diced
cheddar cheese, shredded
black olives, chopped
sour cream (or Greek yogurt)

Heat the oil in a large nonstick skillet over medium heat. Add the onion and sauté, stirring occasionally, until just browned around the edges, about 8 minutes. Add the spices and garlic and cook, stirring constantly, for about a minute, until fragrant. Add the meat and salt and cook, stirring occasionally to break up large chunks, until no longer pink. Clear a space in the middle of the pan and add the beans to it; use a potato masher to break up the beans slightly. Stir in the water and simmer over medium heat until the liquid mostly evaporates. Serve the filling with toppings of your choice.
whole wheat bagels

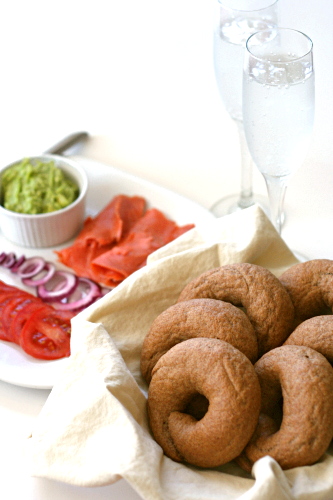
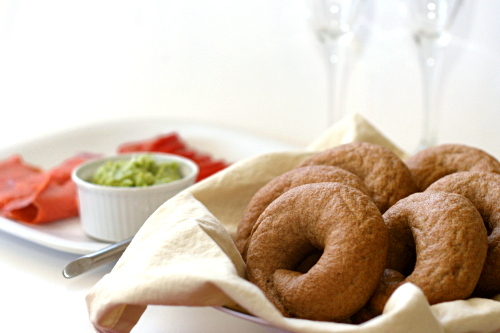
It’s possible that bagels are my favorite food. Yes, more so than tomato soup, than macaroni and cheese, even more so than chocolate chip cookie dough! And so I eat one almost everyday. It’s basically my lunch break and it’s a happy little time for me with my bagel, my black tea, and my Google Reader.

But here’s the thing – if I’m going to be eating a bagel every single day, I better make sure it’s healthy. For years, I made bagels with half white and half whole wheat flour, and I felt like that was a nice compromise between delicious and nutritious. Bagels with no white flour would be like hockey pucks, right? And they would taste like whole wheat. The horror!

I know I’m becoming a broken record, but the answer, of course, is in Peter Reinhart’s Whole Grain Breads. All it takes is a little overnight soak, and those whole grains act like refined white flour – they taste sweeter, form supple doughs, and bake into tender, light breads.

Not that it was smooth-sailing from the beginning with this bagel recipe. The problem I was having with this is that it’s too simple. Most bagel recipes need an overnight retardation in the refrigerator before they can be boiled and baked. This recipe doesn’t require that, and in fact, doesn’t need much time for a second rise at all. I’ve had the hardest time getting this through my stubborn head, and so over and over, I was making over-risen, sunken, ugly bagels.

A year after I started using this recipe, I think I’ve finally nailed it. You know what I did? I followed the recipe closer. My happy little bagel break just got a little happier.

One year ago: Pasta with No-Cook Tomato Sauce and Fresh Mozzarella
Two years ago: Country Egg Scramble

Printer Friendly Recipe
Whole Wheat Bagels (adapted from Peter Reinhart’s Whole Grain Breads)

Makes 8 large bagels or 12 small bagels

There are a few shortcuts in this compared to Reinhart’s original recipe. I make it every couple of weeks, so the faster I can get it done, the better!

I’ve played with the timing of this recipe quite a bit. The original results in fresh bagels 5-6 hours after you start (the second day). But I usually want them in the morning. You can refrigerate the dough in two places – either after the bagels are formed (in which case you should decrease the yeast slightly to prevent the bagels from over-rising) or right after kneading. The last time I refrigerated it after kneading, it rose overnight in the fridge, and in the morning, I immediately shaped the bagels and boiled them shortly afterward.

Pre-dough 1:
8 ounces whole wheat flour
¼ teaspoon instant yeast
6 ounces (¾ cup) water

Pre-dough 2:
2 tablespoons barley malt syrup
5 ounces water
8 ounces whole wheat flour
½ teaspoon salt

Final dough:
both pre-doughs
1 tablespoon water
2 teaspoons yeast
¾ teaspoon salt
7 tablespoons flour, plus more if necessary
1 tablespoon baking soda (for boiling)

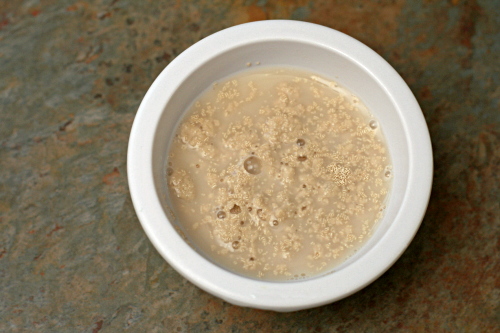
1. In the bowl of a stand mixer fitted with the dough hook, mix all of the ingredients in Pre-dough 1 on medium-low speed until combined. Set aside for 5 minutes. Meanwhile, in a 1-cup measuring cup, stir together the barley malt syrup and the 5 ounces of water in Pre-dough 2. Set aside, stirring occasionally, until the barley malt syrup dissolves into the water. Return to Pre-dough 1 and knead on low speed for 1 minute. Transfer to a small bowl and cover with plastic wrap or a damp kitchen towel. Refrigerate overnight. Add the flour and salt for Pre-dough 2 to the empty mixer bowl; with the mixer on low speed, pour in the water-syrup mixture. Mix on medium-low just until combined. Cover the mixer bowl with plastic wrap or a damp kitchen towel and set aside at room temperature for at least 8 hours or overnight.

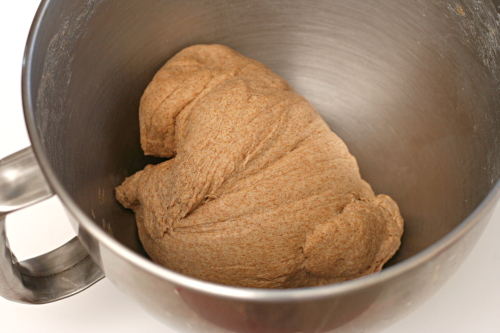
2. The following day, transfer the refrigerated Pre-dough 1 to room temperature for a couple hours to warm slightly. When you’re ready to make the final dough, stir together the 1 tablespoon water and the yeast. In the bowl of a stand mixer fitted with the dough hook, mix both pre-doughs, the water and yeast, and the salt on low speed until combined. While the mixer is running, add in the flour, 1 tablespoon at a time, until it’s fully absorbed by the dough. Knead on low speed for 5-6 minutes, adding more flour or water if necessary to form a smooth, firm dough. It shouldn’t be sticky.

3. Let the dough rise at room temperature until it increases to about 1½ times its original size, 1-2 hours.

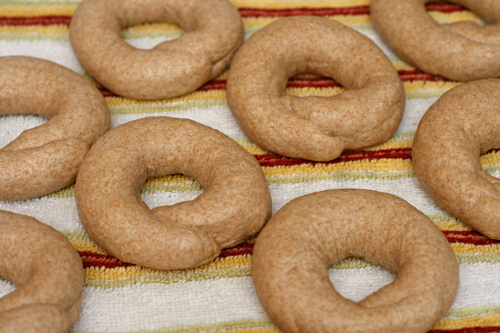
4. Divide the dough into 8-12 pieces. Shape each piece into a smooth ball, then roll each piece into a rope about ¾-inch thick (slightly thicker for larger bagels). Bring the ends of the rope together and gently roll them on a flat surface to seal. Set aside for about 20 minutes.

5. Meanwhile, preheat the oven to 500 degrees, line a baking sheet with parchment paper or a silicone mat, and bring at least three inches of water to a boil in a large pot over high heat. Add 1 tablespoon baking soda, reduce the heat to medium-high and gently drop 2-4 bagels (as many as will fit without crowding) into the water. Boil for 1 minute, flipping the bagels halfway through.

6. Place the boiled bagels on the prepared baking sheet. Transfer the sheet to the oven, reduce the oven temperature to 450 degrees, and bake until the bagels are browned and feel hard, 13 minutes for small bagels and slightly longer for larger bagels. (The bagels will soften as they cool.) Cool completely before serving. (I can only fit one baking sheet, holding half a batch of bagels, in my oven at once, so I refrigerate the remaining unboiled bagels until the first pan is almost done baking, then boil and bake them.)

penne alla vodka

People keep asking me how my recent vacation was, and I can’t think of any response other “so, so good.” How else do you sum up a week of playing in the waves, drinking margaritas, snorkeling, baking cookies, swimming with sea lions, watching shooting stars, eating shrimp tacos, and just basically everything that is good. I didn’t even get sunburned. I want to go back.

At least I had an easy meal planned for my first night at home. This is my ‘just got back from vacation’ dish. After traveling all day, I don’t want to spend much time cooking. There’s no time to defrost anything. We haven’t been home, so there isn’t a lot of fresh food around. I’ve been eating out all week on vacation, so I don’t want to get takeout.

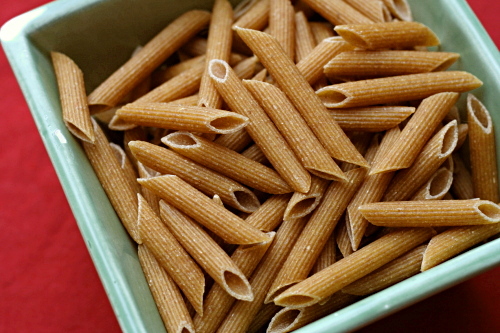
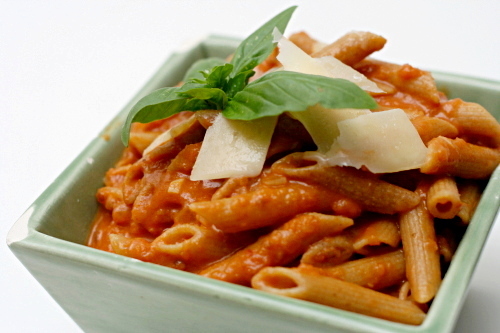
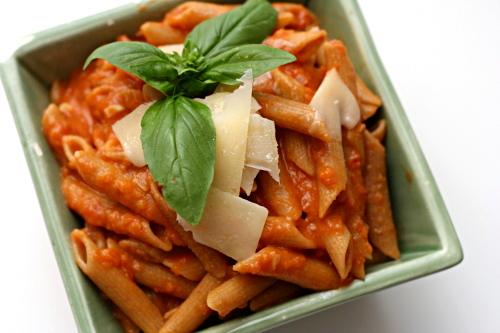
This dish solves all those problems. It takes as long to make as it takes pasta to cook. There are only a couple ingredients to chop. It’s fairly healthy. And it uses ingredients that I can buy before I leave and trust that they’ll keep until I get back – pasta, canned tomatoes, onion. And of course, it tastes great.

I bet it would taste even better on vacation. Everything is better on vacation.

One year ago: Potato Tomato Tart
Two years ago: Banana Coconut Muffins

Printer Friendly Recipe
Penne alla Vodka (from Cooks Illustrated)

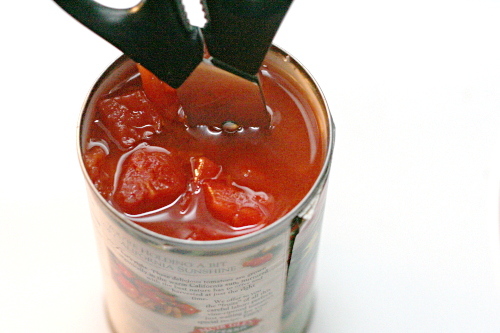
You can never go wrong following a Cooks Illustrated recipe precisely. I, however, don’t, in this case. Because I almost always make this after a day of traveling, I simplify it wherever possible. Instead of pureeing half of the tomatoes and dicing the rest, I simply stick a pair of kitchen shears in the tomato can and snip away. I don’t separate the liquid and the tomatoes in order to measure a certain amount; I just pour all of the liquid in to the sauce. I like to use 2 shallots instead of half an onion. If I don’t have cream, I use milk. If I don’t have milk, I skip the dairy. If I don’t have basil, I use parsley. If I don’t have parsley, I skip the herbs or use dried. It’s tomatoes, pasta, and alcohol; it isn’t going to be bad.

1 (28-ounce) can whole tomatoes, drained, liquid reserved
2 tablespoons olive oil
½ small onion, minced (about ¼ cup)
1 tablespoon tomato paste
2 medium garlic cloves, minced or pressed through a garlic press (about 2 teaspoons)
¼-½ teaspoon hot red pepper flakes
table salt
⅓ cup vodka
½ cup heavy cream
2 tablespoons finely chopped fresh basil leaves
fresh parmesan cheese, for serving

1. Puree half of the tomatoes in a food processor until smooth. Dice the remaining tomatoes into ½-inch pieces, discarding cores. Combine the pureed and diced tomatoes in a liquid measuring cup (you should have about 1⅔ cups). Add reserved tomato liquid to equal 2 cups.

2. Heat the oil in a large saucepan over medium heat until shimmering. Add the onion and tomato paste and cook, stirring occasionally, until the onions are light golden around the edges, about 3 minutes. Add the garlic and pepper flakes; cook, stirring constantly, until fragrant, about 30 seconds.

3. Stir in the tomatoes and ½ teaspoon salt. Remove the pan from the heat and add the vodka. Return the pan to medium-high heat and simmer briskly until the alcohol flavor is cooked off, 8 to 10 minutes; stir frequently and lower the heat to medium if the simmering becomes too vigorous. Stir in the cream and cook until hot, about 1 minutes.

4. Meanwhile, bring 4 quarts water to a boil in a large Dutch oven over high heat. Add 1 tablespoon salt and the pasta. Cook until just shy of al dente, then drain the pasta, reserving ¼ cup cooking water, and transfer the pasta back to the Dutch oven. Add the sauce to the pasta and toss over medium heat until the pasta absorbs some of the sauce, 1 to 2 minutes, adding reserved cooking water if sauce is too thick. Stir in the basil and adjust the seasoning with salt. Divide among pasta bowls and serve immediately, passing Parmesan separately.

cream cheese spritz

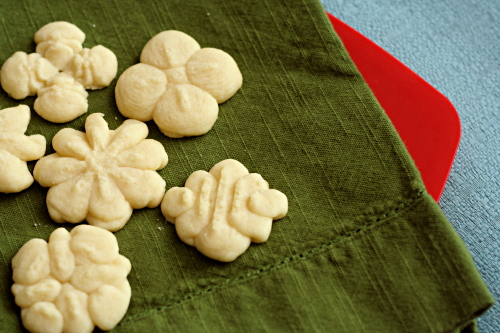
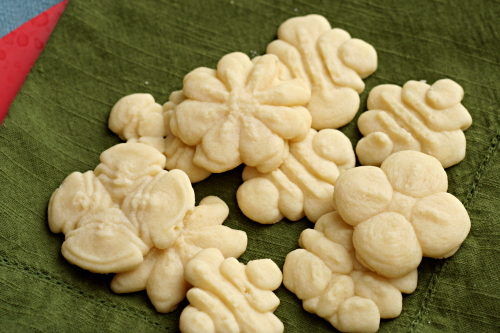
I was so disappointed a few years ago, when I was sure I had a great family recipe to share, something everyone I knew who’d tried it had loved, something I hadn’t seen before on other cookie plates, something that had been a classic in my family for as long as I could remember.

But, a quick internet search indicated that everyone knew about cream cheese spritz cookies already! It’s on every well-established recipe website, in every magazine at some point in its history, in so many blogs, and hey! It’s in this blog now too. And not even at Christmastime! Yes, I make cream cheese spritz year round, because they are so darn good.

That being said…there are other spritz cookie recipes out there that are worth making, right? Please let me know if you have any! It would be nice to get some more use out of my cookie press. Although, even if I only use it for this one recipe, it’s worth having just for that.


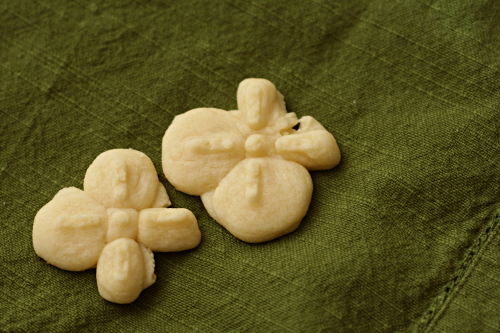
Poor deformed cookies. Clearly I need more spritz practice.

One year ago: Basic Lentil Soup
Two years ago: Snickery Squares

Printer Friendly Recipe
Cream Cheese Spritz

I’ve tweaked the amount of butter and cream cheese from the standard recipe, just so that it uses a more convenient amount of cream cheese. Also so that it’s even cream cheesier, which is never a bad thing.

14 tablespoons (1¾ sticks) unsalted butter, softened
4 ounces cream cheese, room temperature
½ teaspoon salt
1 cup (7 ounces) sugar
1 egg yolk
1 teaspoon vanilla
2½ cups flour (12 ounces) all-purpose flour

1. Adjust an oven rack to the middle position and heat the oven to 350ºF. Line a baking sheet with a silicone mat or parchment paper.

2. Fit the mixer with the paddle attachment and add the butter and cream cheese to the mixer bowl (or a large mixing bowl with a hand-held mixer). Beat on medium-low speed until the butter and cream cheese are soft and creamy, about 1 minute. Add the salt, then, with the mixer running, slowly pour in the sugar. Continue mixing on medium speed until the mixture is light and fluffy, about 2 minutes. With the mixer running, add the egg yolk and vanilla and beat until thoroughly incorporated, about 1 minute, stopping the scrape the mixer bowl as necessary. Reduce to mixer speed to its lowest setting and gradually add the flour, mixing just until incorporated.

3. Fill the cookie press with the dough. Spritz the cookies onto the prepared baking sheet.

4. Bake the cookies for 8-10 minutes, until they no longer look wet on top and the edges are slightly browned. Let the cookies cool for several minutes on the baking sheet, then transfer to wire racks to cook completely. Sealed in an airtight bag, the cookies will keep for several days.

corned beef hash

One time at the zoo, I walked by the reindeer exhibit, but they weren’t out. Huh, I thought. Bummer. I would have liked to see the reindeer. But on the other side of the path, there was another animal to ooh and ahh over, and I moved on. When the reindeer came back out just a few minutes later, I overheard someone tell her friend that they could go see them now, and the lady said “Reindeer? I was excited about that 10 minutes ago!”

Reindeer lose their interestingness after 10 minutes apparently.

The moral of the story is this: No one cares about corned beef in May. You were excited about that 2 months ago. But, I am not the type of person to sit on an entry (or two, in this case) for 11 months until its season of popularity comes back, so if you’re not one to cook corned beef outside of March, you are missing out you can bookmark this post for next year.

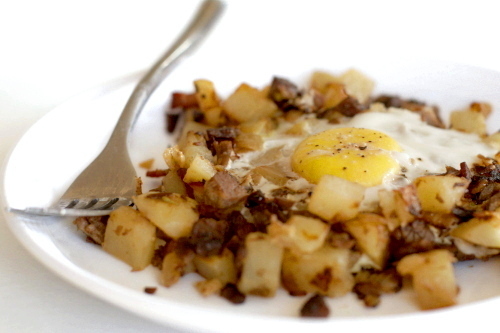
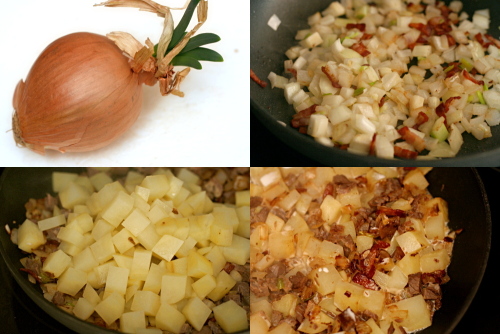
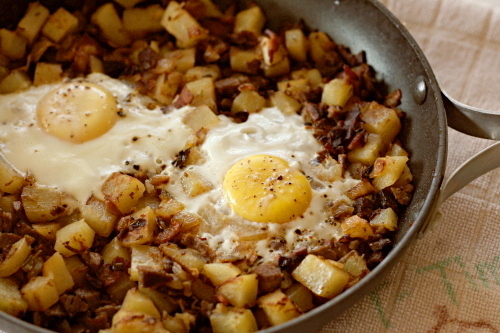
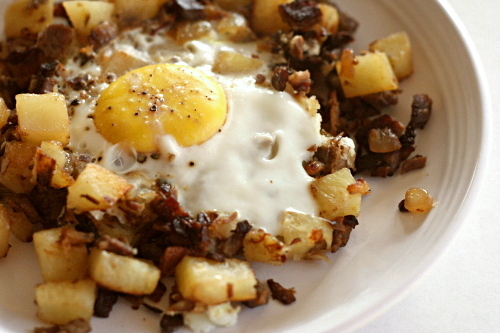
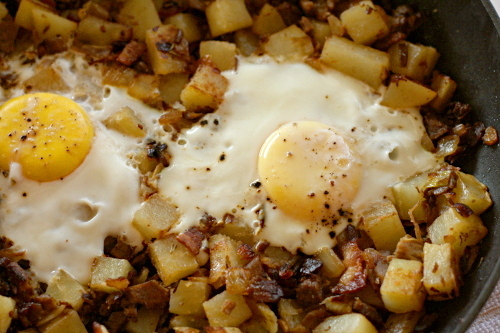
And don’t forget about it! That would be sad, because this is not just the best way to use corned beef leftovers, it is one of the best breakfasts, ever. It’s bacon, browned onions, crispy potatoes, salty seasoned beef, drippy yolks. What more could you ask for for breakfast? I’m excited about corned beef hash all year.

One year ago: Orange-Oatmeal-Currant Cookies (This is the recipe that’s had me complaining about not being able to find currants. But I recently discovered that the flavors are perfect with dried cranberries too.)
Two years ago: Double (or Triple) Chocolate Cookies

Printer Friendly Recipe
Corned Beef Hash (from Cooks Illustrated)

You absolutely do not need corned beef leftovers to make this. I often make it with thick-sliced deli corned beef, and it’s still delicious. That being said, last time I made it, I par-boiled the potatoes in the liquid leftover from cooking the corned beef, and was that ever good!

I like to give Cooks Illustrated recipes exact, because they’re so nicely detailed. However, this is one of those recipes that I’ve made so often that I often cut corners now – skipping the hot sauce, which I never have around; leaving the corned beef in large chunks; using Yukon Gold potatoes so I don’t have to peel them; pouring in a bit of whatever milk I have around instead of using cream. As long as you have the same basic ingredients and everything is crisped and browned, you can’t go wrong here.

2 pounds russet potatoes, peeled and cut into ½-inch dice
salt
2 bay leaves
4 ounces (4 slices) bacon, diced
1 medium onion, diced
2 medium garlic cloves, minced or pressed through a garlic press
½ teaspoon minced fresh thyme leaves
1 pound corned beef, minced (pieces should be ¼-inch or smaller)
½ cup heavy cream
¼ teaspoon hot pepper sauce
4 large eggs
ground black pepper

1. Bring the potatoes, 5 cups water, ½ teaspoon salt, and the bay leaves to a boil in a medium saucepan over medium-high heat. Once the water boils, cook the potatoes for 4 minutes, drain, and set aside.

2. Place the bacon in a 12-inch nonstick skillet over medium-high heat and cook until the fat is partially rendered, about 2 minutes. Add the onions and cook, stirring occasionally, until the onion has softened and browned around the edges, about 8 minutes. Add the garlic and thyme and cook until fragrant, about 30 seconds. Add the corned beef and stir until thoroughly combined with the onion mixture. Mix in the potatoes and lightly pack the mixture into the pan with a spatula. Reduce the heat to medium and pour the heavy cream and hot pepper sauce evenly over the hash. Cook, undisturbed, for 4 minutes, then, with the spatula, invert the hash, a portion at a time, and fold the browned bits back into the hash. Lightly pack the hash into the pan. Repeat the process every minute or two until the potatoes are thoroughly cooked, about 8 minutes longer.

3. Make 4 indentations (each measuring about 2 inches across) equally spaced on the surface of the hash. Crack 1 egg into each indentation and season the egg with salt and pepper to taste. Reduce the heat to medium-low, cover the pan, and cook until the eggs are just set, about 6 minutes. Cut the hash into 4 wedges, making sure each has an egg, and serve immediately.

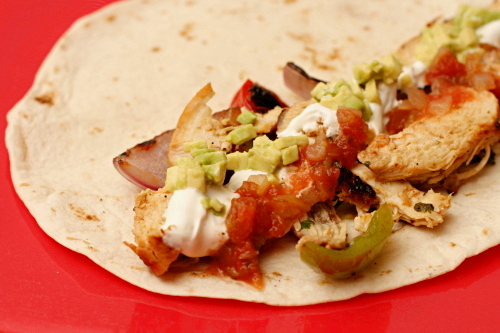
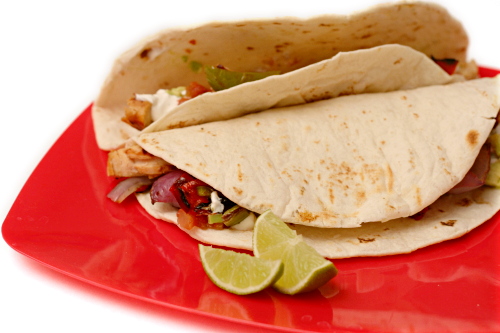
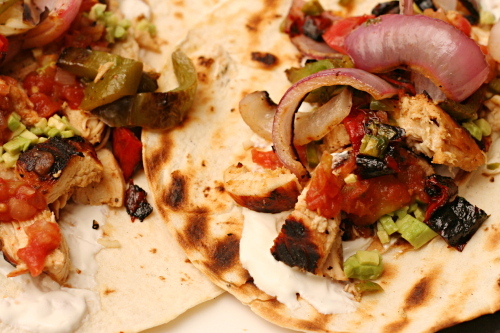
chicken fajitas

I guess they don’t call it “manning” the grill for nothing. Why is it that so many men who have no interest in cooking inside are willing to stand outside and grill? I really thought I’d be the one doing the grilling around here, just like I do the ovening and the stoving, but so far, it’s all Dave. I kind of feel like I should get some practice cooking over fire too, but I can never resist the opportunity to clean up the kitchen or work on the sides or, let’s be honest, mix up my favorite cocktail, while Dave takes care of the cooking.

But while he does enjoy the actual grilling, he really isn’t into the reading the recipe part of the procedure. That means there are constant calls asking me what the next step is. Is there any funny business with the coals? How long does everything cook? What should be on the hotter and on the cooler sides of the grill? And on and on.

And since this is a Cooks Illustrated recipe, there are a fair amount of details to straighten out. But with only 15 minutes of marinating and 10 minutes of grilling, this really is an easy recipe. And what’s so great about it, besides the obvious – charred flavor on everything from the chicken to the vegetables to the tortillas, is the hit of marinade everything gets after it’s cooked. You marinate the meat beforehand, like you’d expect, and then when it comes off the grill, you dump some more flavor on it, as well as on the vegetables. It makes the whole thing taste fresh and citrusy.

One of the things that makes Dave and I such a great team is that we tend to love the same recipes, like this one. Plus, while he mans the grill, I can rush in to wash his tongs for him, bring a clean plate, or, maybe, if the sides are done and the kitchen is reasonably clean and my cocktail is mixed up, stand over the fire and admire the sunset with my husband. Grilling has more advantages than just great food.

One year ago: Pasta with Roasted Red Pepper Sauce
Two years ago: Cinnamon Rolls

Printer Friendly Recipe
Chicken Fajitas (from Cooks Illustrated)

Serves 4 to 6

CI’s note: The chicken and vegetables in these fajitas are only mildly spicy. For more heat, include the jalapeno seeds and ribs when mincing. When you head outside to grill, bring along a clean kitchen towel or a large piece of foil in which to wrap the tortillas and keep them warm as they come off the grill. Although the chicken and vegetables have enough flavor to stand on their own, accompaniments (guacamole, salsa, sour cream, shredded cheddar or Monterey Jack cheese, and lime wedges) can be offered at the table.

My note: I think the oil can be significantly reduced, especially in the part of the marinade used to flavor the vegetables and chicken after they’re cooked.

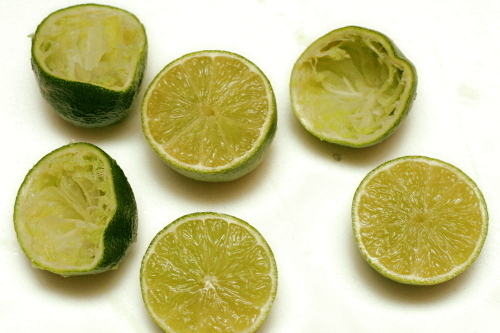
⅓ cup juice from 2 to 3 limes
6 tablespoons vegetable oil
3 medium garlic cloves, minced
1 tablespoon Worcestershire sauce
1½ teaspoons brown sugar
1 jalapeno, seeds and ribs removed, minced
1½ tablespoons minced fresh cilantro leaves
table salt and ground black pepper
3 boneless, skinless chicken breasts (about 1½ pounds), trimmed of fat, tenderloins removed, pounded to ½-inch thickness
1 large red onion (about 14 ounces), peeled and cut into ½-inch-thick rounds (do not separate rings)
1 large red bell pepper (about 10 ounces), quartered, stemmed, and seeded
1 large green bell pepper (about 10 ounces), quartered, stemmed, and seeded
8-12 (6-inch) flour tortillas

1. In a medium bowl, whisk together the lime juice, 4 tablespoons oil, garlic, Worcestershire, brown sugar, jalapeno, cilantro, 1 teaspoon salt, and ¾ teaspoon pepper. Reserve ¼ cup marinade in a small bowl; set aside. Add another teaspoon salt to the remaining marinade. Place the chicken in the marinade; cover with plastic wrap and refrigerate 15 minutes. Brush both sides of the onion rounds and the peppers with the remaining 2 tablespoons oil and season with salt and pepper.

2. Meanwhile, using a large chimney starter, ignite 6 quarts of charcoal briquettes and burn until the coals are fully ignited, about 20 minutes. Empty the coals into the grill, spreading them in a single layer; place an additional 20 unlit coals over the lit coals on one side of grill to create a two-level fire. Position the grill grate over the coals and heat the grate for 5 minutes; scrape clean with a grill brush. (For a gas grill, light all burners and turn to high, cover, and heat the grill until hot, about 15 minutes; scrape the grill grate clean with a grill brush. Leave one burner on high heat while turning the remaining burner(s) down to medium.)

3. Remove the chicken from the marinade and place it smooth side down on the hotter side of the grill; discard the remaining marinade. Place the onion rounds and peppers (skin side down) on the cooler side of the grill. Cook the chicken until it’s well browned, 4 to 5 minutes; using tongs, flip the chicken and continue grilling until it’s no longer pink when cut into with a paring knife or an instant-read thermometer inserted into the thickest part registers about 160 degrees, 4 to 5 minutes longer. Meanwhile, cook the peppers until spottily charred and crisp-tender, 8 to 10 minutes, turning once or twice as needed; cook the onions until tender and charred on both sides, 10 to 12 minutes, turning every 3 to 4 minutes. When the chicken and vegetables are done, transfer them to a large plate; tent with foil to keep warm.

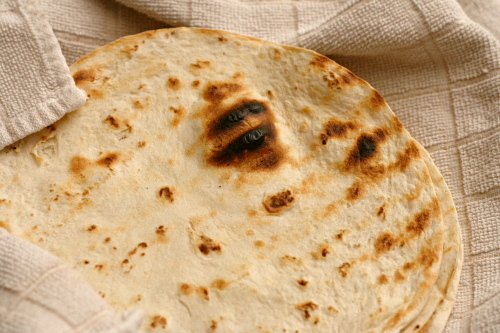
4. Working in 2 or 3 batches, place the tortillas in a single layer on the cooler side of the now-empty grill and cook until warm and lightly browned, about 20 seconds per side (do not grill too long or the tortillas will become brittle). As the tortillas are done, wrap them in a kitchen towel or a large sheet of foil.

5. Separate the onions into rings and place them in a medium bowl; slice the bell peppers lengthwise into ¼-inch strips and place them in the bowl with the onions. Add 2 tablespoons reserved unused marinade to the vegetables and toss well to combine. Slice the chicken into ¼-inch strips and toss with the remaining 2 tablespoons reserved marinade in another bowl; arrange the chicken and vegetables on a large platter and serve with the warmed tortillas.

vodka gimlet

Why should food be the only thing I think I can make better than most restaurants? Let’s move on to cocktails!

Vodka gimlets are a good, basic drink, and they’ve come in handy for me a number of times – at a wedding with a terrible wine selection, at another wedding with inexperienced bartenders (“…a gimlet…what’s in that again?”), at cheap bars where the beer isn’t worth drinking.  Oh hi! I’m a snob about alcohol!

At its most basic, a vodka gimlet is simply vodka and Rose’s lime juice. (A gimlet – no ‘vodka’ qualifier – is made with gin instead of vodka.) Rose’s lime juice is bottled sweetened lime juice. This is what makes it such a great drink for when there are limited alcohol choices – there are only two ingredients and the strong lime flavor drowns out the taste of cheap alcohol.
But why use cheap alcohol when I can just as easily – if not as, ahem, cheaply – use the good stuff? And why would I use bottled lime juice when I’m committed to using the freshest ingredients possible in everything I make, whether it be food or drink?

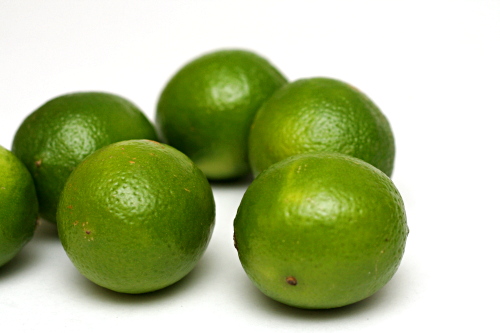
Rose’s lime juice just needs to be replaced by fresh-squeezed limes and simple syrup. That means there are three ingredients instead of two to get in balance in order to make the perfect drink, but I was happy to do some trial and error. Then when I bought a new type of vodka, I found that I needed to tweak my ratios a bit. Both vodkas had the same alcohol content, but the new brand (Ciroc) was apparently a bit smoother than the previous one (Effen).

Both vodkas make one heck of a drink. Be warned: with high quality vodka, you need a fair amount of it to balance the sour lime. Don’t drink this like you would beer or even wine. But definitely do drink it, because it is oh so good. I’m so glad it’s Friday afternoon and I’ve only got a few hours to go before I can mix myself up one of these!

One year ago: Black Bean Squash Burritos
Two years ago: Blueberry Poppy Seed Brunch Cake

Printer Friendly Recipe
Vodka Gimlet

This is the ratio I use with Ciroc vodka. With Effen vodka, I found it was best to use slightly less vodka. I like my drinks to be strong, both in alcohol flavor and in acidity. You might end up tweaking the ratios slightly to get a drink that’s perfect for you. (Trust me that good alcohol does actually taste good. Don’t equate it with the crap you got drunk on in college. Okay, the crap your friends got drunk on. You were far too mature for those shenanigans.)

4 parts good vodka
2 parts freshly squeezed lime juice
1 part simple syrup (recipe below)
ice

Combine all ingredients in a cocktail shaker, attach the lid and shake shake shake. Strain into a glass. Sip slowly or pay the price.

Simple Syrup

½ cup water
½ cup granulated sugar

Combine water and sugar in a small saucepan and heat over medium-high heat until boiling, stirring until the sugar melts. Remove from the heat and cool completely before using. Store in the refrigerator indefinitely.

how to adapt any bread recipe to be whole wheat

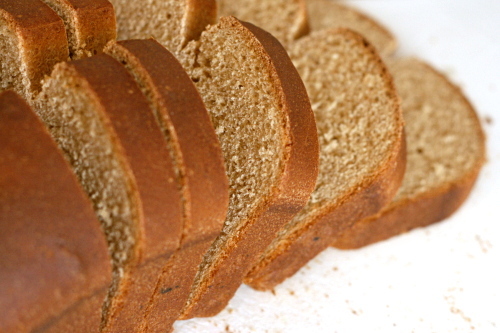
As much as I love Peter Reinhart’s Whole Grain Breads, I’ve only made a few recipes from the book. Instead, I’ve been busy using his techniques to adapt my old favorite bread recipes to whole wheat versions. While you can, in general, simply substitute up to half of the flour in a bread recipe with whole wheat, I guarantee that you’ll have better results if you use Reinhart’s trick.

Reinhart uses the same method for most of the breads in his book – about half of the whole wheat flour is combined with salt and liquid and the other half is combined with yeast and liquid. Both mixtures sit overnight before they’re mixed and kneaded into the dough. The resting time breaks down the long bran molecules, making the bread smoother, lighter, and sweeter – in short, more like a white bread.

The 100% whole wheat breads that I’ve tried from Reinhart’s book are truly exceptional. However, I guess I’m sort of a wimp about whole grains. I do like the flavor and texture of white bread, but of course I prefer the health factor of whole grain bread. Plus, I’m still interested in bread recipes outside of Reinhart’s book.

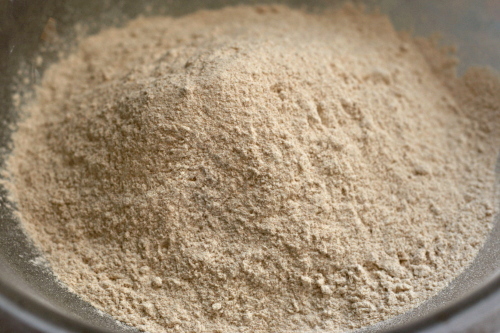
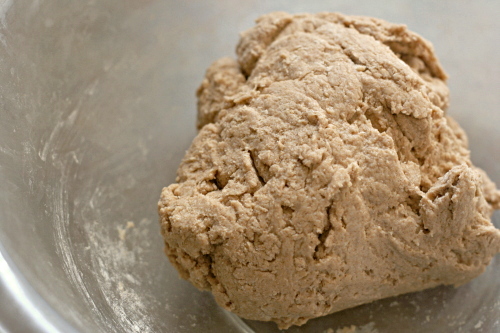
(the pre-dough before resting)

The solution is to mix up just one of Reinhart’s mixtures with whole wheat flour and let that rest overnight (or for around 8 hours), then continue with the recipe as written, mixing in the pre-dough. I’ve done this with all sorts of bread recipes – English muffins, pain ordinaire, light brioche buns, country crust bread, pizza crust.

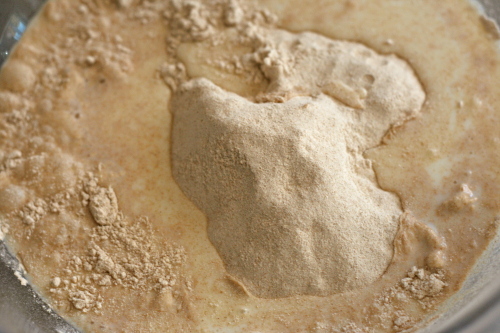
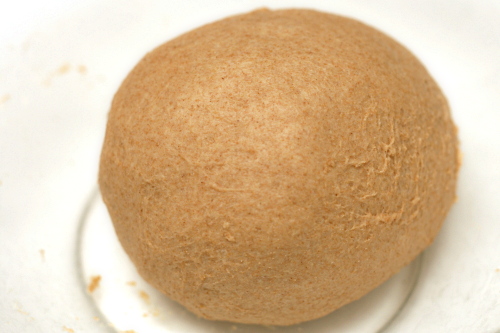
(the pre-dough after resting and a bit of kneading)

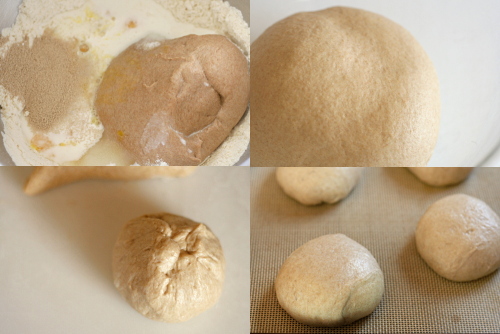
In all cases, I take half of the flour in the recipe and mix it with ¼ teaspoon salt for every 4 ounces of flour. Then I mix in enough liquid – whatever liquid the recipe calls for – to moisten the flour until it forms a dough. Most bread recipes call for about 16 ounces flour total, so the pre-dough is simply 8 ounces of whole wheat flour, ½ teaspoon of salt, and ¾ cup of water (or whatever liquid the recipe calls for).  When the final dough is mixed, those ingredients are subtracted from the original recipe.

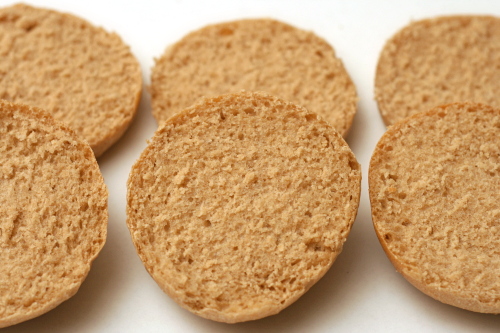
And every time, the result is essentially identical to an all-white version – the dough is smooth, elastic, and easy to work with. The bread is light and flavorful. And, I still get to play with an entire world of bread recipes. Win win win!

One year ago: Roasted Kale
Two years ago: Banana Walnut Pancakes

Printer Friendly Recipe
Whole Wheat Light Brioche Burger Buns (adapted from Smitten Kitchen and Peter Reinhart’s Whole Grain Breads)

Makes 8 buns

Pre-dough:
1¾ cups (8 ounces) whole wheat flour
½ teaspoon salt
¾ cup water

1. Mix all of the soaker ingredients together in a bowl for about 1 minute, until all of the flour is hydrated and the ingredients form a ball of dough.

2. Cover loosely with plastic wrap and leave at room temperature for 12 to 24 hours. (If it will be more than 24 hours, place the soaker in the refrigerator; it will be good for up to 3 days. Remove it 2 hours before mixing the final dough to take off the chill.)

Dough:
8 ounces (about 1⅔ cups) bread flour
1 teaspoon salt
2½ tablespoons unsalted butter, softened
pre-dough
¼ cup warm water
3 tablespoons warm milk
2 teaspoons instant yeast
2½ tablespoons sugar
1 large egg
extra flour or water for adjustments
egg wash: 1 tablespoon milk or 1 egg white or whole egg beaten with 1 tablespoon water
sesame seeds

1. If mixing with a stand mixer: Add the flour and salt to mixer bowl fitted with paddle attachment. Mix on low just to combine. Add the butter and mix on medium-low speed until the mixture resembles crumbs. Cut the pre-dough into about 12 pieces and add them to the flour mixture, tossing the pieces to coat (to keep them from immediately sticking back together). Replace the paddle attachment with the hook. Add the water, milk, yeast, sugar, and egg to the mixer bowl and mix on medium-low until combined, then continue kneading until smooth and elastic, 6-8 minutes. The dough should be just a bit loose and sticky; add flour if necessary.

If mixing by hand: In a large bowl, whisk flours with salt. Add butter and rub into flour between your fingers, making crumbs. Cut the pre-dough into about 12 pieces and add them to the flour mixture, tossing the pieces to coat (to keep them from immediately sticking back together). Add the water, milk, yeast, sugar, and egg and stir with a rubber spatula until a dough forms. Scrape dough onto clean, well-floured counter and knead, scooping dough up, slapping it on counter and turning it, until smooth and elastic, 8 to 10 minutes. The dough will be on the sticky side so it can be a bit messy, but keep in mind that the more flour you knead in, the tougher the buns will get. Try to leave them tackier than you would a round loaf.

2. Spray a bowl with nonstick spray; shape dough into a ball and place it in bowl. Cover bowl with plastic wrap or a damp towel and let rise in a warm place until doubled in bulk, one to two hours.

3. Line a baking sheet with parchment paper or a silicone mat. Divide dough into 8 equal parts. To shape each portion into an even round, gently pull the edges toward a pucker and pinch them together. Gently roll each into a ball and arrange them two to three inches apart on the prepared baking sheet. Cover loosely with a piece of plastic wrap lightly coated in nonstick spray (or a damp towel) and let buns rise in a warm place for about one hour.

4. Preheat oven to 400 degrees with rack in center. Brush egg wash on buns and sprinkle with sesame seeds. Bake, turning sheet halfway through baking, until tops are golden brown and an instant-read thermometer reads at least 185 degrees, about 15 minutes. Transfer to a rack to cool completely.

Printer Friendly Recipe
Whole Wheat Pain Ordinaire (adapted from Eric Treuille and Ursula Ferrigno’s Ultimate Bread and Peter Reinhart’s Whole Grain Breads)

Makes 1 loaf

Pre-dough:
1¾ cups (8 ounces) whole wheat flour
½ teaspoon salt
¾ cup water

1. Mix all of the soaker ingredients together in a bowl for about 1 minute, until all of the flour is hydrated and the ingredients form a ball of dough.

2. Cover loosely with plastic wrap and leave at room temperature for 12 to 24 hours. (If it will be more than 24 hours, place the soaker in the refrigerator; it will be good for up to 3 days. Remove it 2 hours before mixing the final dough to take off the chill.)

Dough:
1¾ cups (9½ ounces) all-purpose or bread flour
pre-dough
2 teaspoons instant yeast
⅔ cup water, room temperature
¾ teaspoon salt

1. Add the flour to a mixer bowl fitted with hook attachment (or a large bowl if mixing by hand). Cut the pre-dough into about 12 pieces and add them to the flour, tossing the pieces to coat (to keep them from immediately sticking back together). Add the water, yeast, and salt to the mixer bowl and mix on medium-low until combined (or stir with a rubber spatula), then continue kneading until smooth and elastic, 6-8 minutes (8-10 minutes if by hand). The dough should be soft but not sticky; add flour if necessary.

2. Lightly oil a large bowl and transfer the dough to the bowl, rolling it to coat with the oil. Cover the bowl with plastic wrap or a damp towel. Let rise until doubled in size, about 1½ to 2 hours.

3. Gently pat the dough into a rough rectangle. Fold the bottom third of dough, letter style, up to the center and press to seal, creasing surface tension on the outer edge. Fold the remaining dough over the top and use the edge of your hand to seal the seam closed and to increase the surface tension all over. Press evenly with the palms of both hands and roll the dough backward and forward until it is 10 inches in length. Line a pizza peel baking parchment. Place the loaf on the peel and lightly dust with flour. Cover loosely with plastic wrap or a damp towel.

4. Proof at room temperature for about 1 hour, or until the loaf has grown to about twice its original size. About half an hour into the second rise, place a baking stone on the bottom rack of the oven and preheat the oven to 500 degrees.

5. Using a very sharp knife or a serrated bread knife, cut 5 diagonal slashes, each about ¼ to ½-inch deep, across the top of the loaf. (Alternatively, cut one long slash that extends for the length of the loaf.)

6. Transfer the dough on the parchment to the baking stone. Close the oven and reduce the temperature to 450 degrees. Bake until golden brown and the temperature is at least 200 degrees at the center. Transfer the loaves to a cooling rack and cool for at least 1 hour before slicing and serving.

Printer Friendly Recipe
Whole Wheat Country Crust Bread (adapted from Betty Crocker and Peter Reinhart’s Whole Grain Breads)

Makes 1 sandwich loaf

Pre-dough:
1¾ cups (8 ounces) whole wheat flour
½ teaspoon salt
¾ cup water

1. Mix all of the soaker ingredients together in a bowl for about 1 minute, until all of the flour is hydrated and the ingredients form a ball of dough.

2. Cover loosely with plastic wrap and leave at room temperature for 12 to 24 hours. (If it will be more than 24 hours, place the soaker in the refrigerator; it will be good for up to 3 days. Remove it 2 hours before mixing the final dough to take off the chill.)

Dough:
1¾ cups (9½ ounces) unbleached flour
1 teaspoon table salt
¼ cup water, warm (110 degrees)
1 egg
2 tablespoons vegetable oil or unsalted butter, melted
¼ cup (1.75 ounces) granulated sugar
2 teaspoons instant yeast

1. Add the flour to mixer bowl fitted with hook attachment (or a large bowl if mixing by hand). Cut the pre-dough into about 12 pieces and add them to the flour, tossing the pieces to coat (to keep them from immediately sticking back together). Add the salt, water, egg, oil, sugar, and yeast to the mixer bowl and mix on medium-low until combined (or stir with a rubber spatula), then continue kneading until smooth and elastic, 6-8 minutes (8-10 minutes if by hand). The dough should be soft but not sticky; add flour if necessary.

2. Lightly oil a large bowl and transfer the dough to the bowl, rolling it to coat with the oil. Cover the bowl with plastic wrap or a damp towel. Let rise until doubled in size, about 1½ to 2 hours.

3. Form dough into loaf by gently pressing the dough into a rectangle, one inch thick and no wider than the length of the loaf pan. Next, roll the dough firmly into a cylinder, pressing with your fingers to make sure the dough sticks to itself. Turn the dough seam side up and pinch it closed. Finally, place dough in greased 9-by-5-by-3-inch loaf pan and press it gently so it touches all four sides of the pan.

4. Cover with plastic wrap or a damp towel; set aside in warm spot until dough almost doubles in size, about 45 minutes. Heat oven to 350 degrees.

5. Remove plastic wrap from loaf pan; place pan in oven. Bake until instant-read thermometer inserted at angle from short end just above pan rim into center of loaf reads 195 degrees, about 40 to 50 minutes. Remove bread from pan, transfer to a wire rack, and cool to room temperature. Slice and serve.

thumbprints for us big guys

I don’t how I managed to go this long without complaining about the grocery store situation in my new little town. There are three grocery stores here – a Walmart, a food thrift store, and a regular store. I know some Walmarts have a good selection, but this one certainly does not. I had high hopes for the regular grocery store at first, but it seems that the longer I shop there, the more frustrated I get.

Today was the last straw. Brisket – I have to buy the whole brisket. What am I going to do with 15 pounds of brisket?! (I know, I’m going to freeze most of it. Still.)

My days of rack of lamb are over. Wheat berries? Fresh fish? Currants? Loose-leaf tea? Please. I couldn’t even find hazelnuts.

Fortunately, these cookies are just as delicious with walnuts instead of hazelnuts. And I guess that’s what it all comes down to – adapting to my new situation and making the best of it. And being grateful for all of the great salsa and green chile that’s available to me now.

Mike from Ugly Food Dude chose these cookies for Tuesdays with Dorie. I added 1 teaspoon of salt to the dough, and with that small change, I’d say that these are one of my favorite recipes from Dorie’s book. They were so soft and tender with wonderful contrasting nut and tart jam flavors.  I loved them.

One year ago: Chocolate Whiskey Cake (another TWD favorite!)

bacon-wrapped goat-cheese-and-almond-stuffed dates

Stuffed dates are part of one my favorite days recently – one of those that, for whatever reason, just ended up being particularly awesome. Some great friends visited us in Philadelphia shortly before we moved. After walking around the famous historical sites and before seeing one of my favorite musicians play; before walking up the famous steps to the art museum and much before eating cheesesteaks at 2am, we ate dinner at Alma de Cuba.

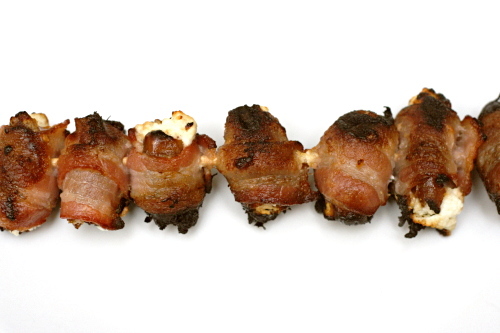
While we all loved our entrees, our drinks, and the ceviche, the star of the show was the bacon-wrapped almond-stuffed dates. Is transcendent too over-the-top a description? It seems appropriate for something that caused each of us to close our eyes and exclaim with every bite.

I had kind of assumed that my bacon-wrapped almond-stuffed date days were behind me when we moved from Philadelphia. I don’t know why it never occurred to me that I could make them myself. I certainly never thought it would be so easy.

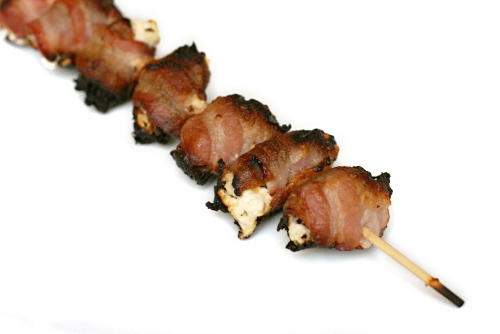
And just as good! I mean, it’s missing the friends-visiting, concert-going, downtown-exploring mystique, but it retains other important things – salty bacon, sweet dates, tangy goat cheese, crunchy almonds. And now it isn’t a once in a lifetime treat, like those standout days are.

One year ago: Honey Yogurt Dip
Two years ago: Salmon Cakes with Hashed Brussels Sprouts and Flaky Biscuits

Printer Friendly Recipe
Bacon-Wrapped Goat-Cheese-and-Almond-Stuffed Dates (rewritten from Beantown Baker)

Makes 32 appetizers

32 dates, pitted
4 ounces goat cheese
32 almonds (about ⅓ cup)
16 slices (about 1 pound) bacon, halved lengthwise

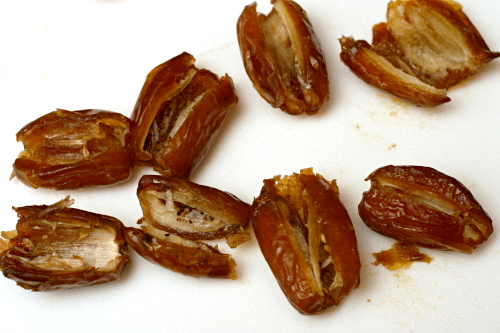
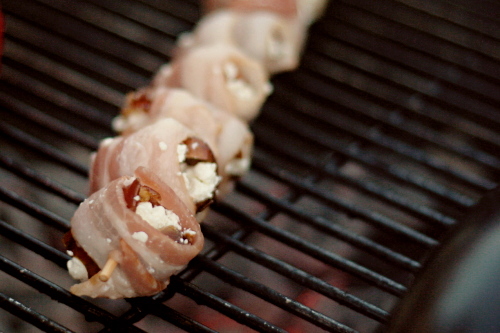
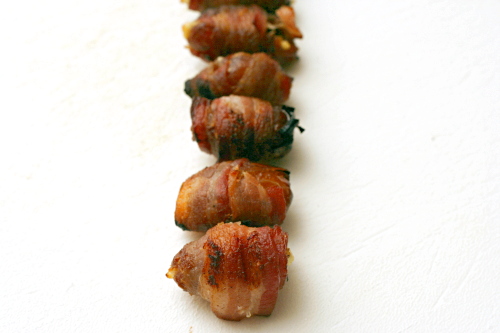
1. With a paring knife, cut through one long edge of each date; unfold the dates to open them up. Use your fingers to stuff both sides of the date with goat cheese. Push an almond into the goat cheese; close up the dates. Wrap each stuffed date with a piece of bacon and secure with a toothpick or skewer.

2. If you’re broiling the dates, put them on a rimmed baking sheet. Grill the dates over medium-hot coals or broil them 5 inches from the heating unit until the bacon is cooked through, about 5 minutes per side. Serve immediately or at room temperature.