summer fresh tomato sauce

tomato sauce 5

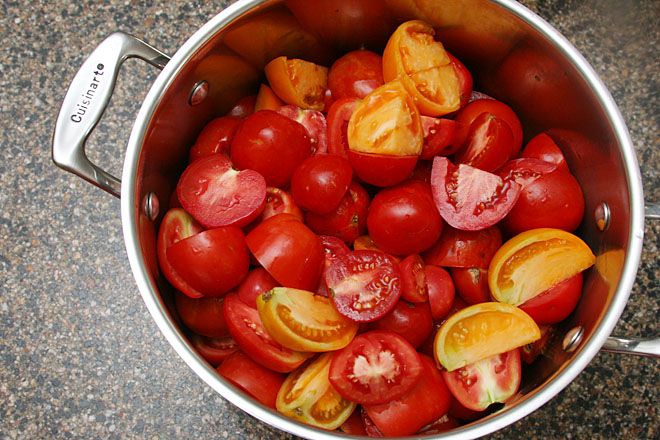
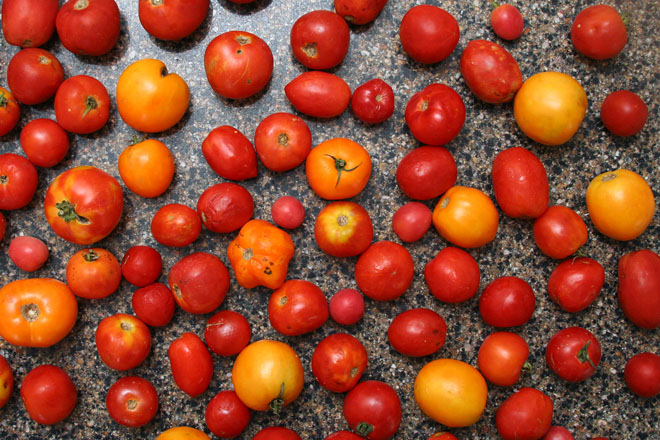
My requirements for the perfect tomato sauce made from fresh tomatoes were very specific – the same issues that everyone has with removing enough liquid from the tomatoes without cooking away all the fresh flavor that makes them so special, plus one more – I did not want to peel the tomatoes. I hate peeling tomatoes. I hate using a vegetable peeler to peel them, and I hate cutting an X into the bottom of each one, then boiling them, then dipping them in cold water, and then pulling the peels off. I cooked sixteen pounds of tomatoes into this batch of sauce, which was well over fifty tomatoes. I do not want to individually peel fifty tomatoes.

tomato sauce 1

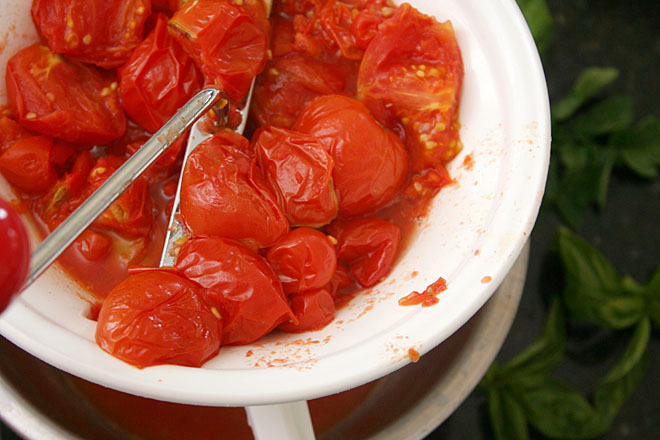
This recipe satisfies all of those requirements, with an added bonus – you don’t even have to core the tomatoes. The tomatoes, very roughly chopped, are cooked down slightly to soften them, then pressed through a food mill – the mill strains out the seeds, cores, and peels. For a batch this large, it’s still a somewhat tedious process, but nothing compared to the prospect of coring and peeling each tomato individually.

tomato sauce 2

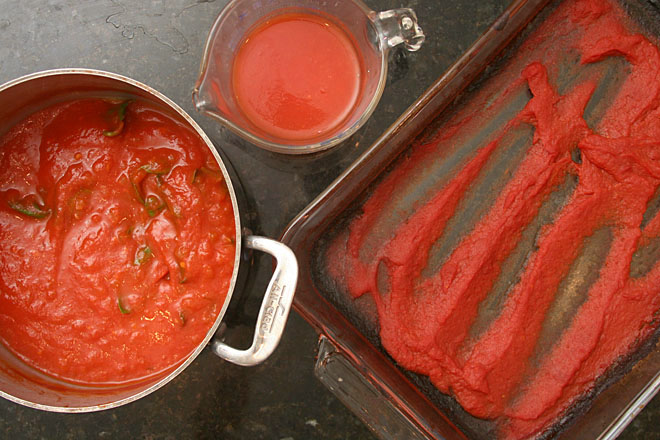
From there, the fresh tomato puree is divided into three portions – one portion is simmered on the stovetop with aromatics until it reaches a sauce consistency. Another is kept fresh, with no cooking at all. If just these two portions were combined, the resulting sauce would be too liquidy, so the final portion is transferred to a baking pan and roasted until it’s thick and slightly caramelized.

tomato sauce 8

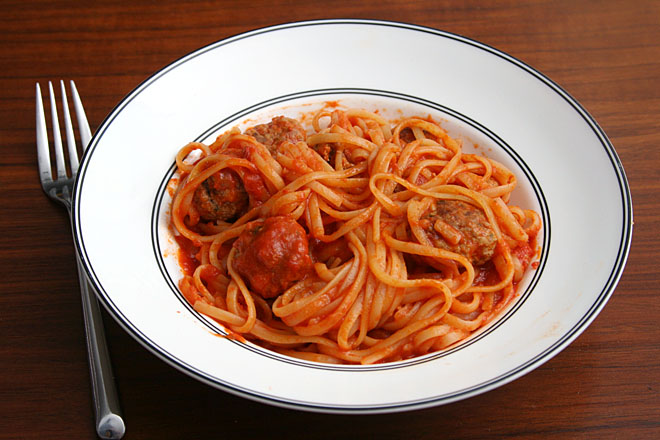
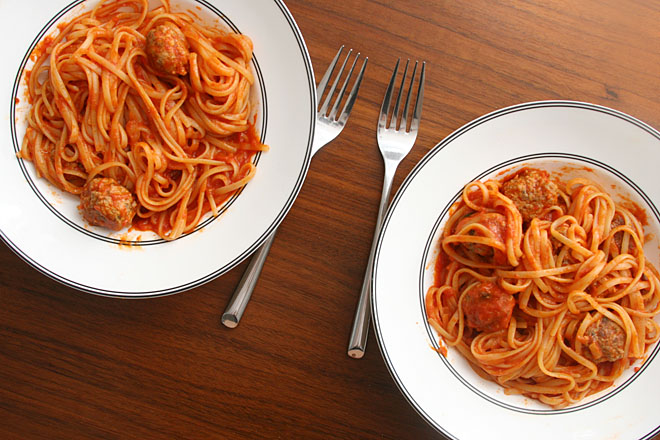
These three mixtures each have something different to offer to the final sauce, and the combination of them makes a sauce with the best that tomatoes have to offer in any form – the bright summeriness of uncooked tomatoes, the deep savoriness of roasted tomatoes. It’s thick enough for anything you’d normally use tomato sauce for – meatballs and spaghetti like we did here, pizza, lasagna. All that, and the only real work you have to do is quarter the tomatoes and push them through a food mill. This has become my summer staple, with extra in the freezer to hoard as long as I can stand.

tomato sauce 9

Printer Friendly Recipe
Summer Fresh Tomato Sauce
(slightly adapted from Serious Eats)

The original recipe starts with 25 pounds of tomatoes. The largest batch I’ve made was 16 pounds, but I’ve also made much smaller batches with just a handful of tomatoes. I’ve based my recipe on ten pounds because it’s a nice round number.

While the recipe recommends any variety of tomato, I’d be hesitant to use all cherry tomatoes, which could make the sauce too sweet. Also, wetter variety of tomatoes will take longer to reduce to a sauce or paste consistency.

If you’re scaling this recipe up or down, put about 40% of the puree in the oven, leave 10% uncooked, and cook the remaining 50% on the stove.

Makes about 1 quart of sauce, although it will depend on the type(s) of tomatoes used

10 pounds tomatoes, any variety, quartered, or halved if small
1 tablespoon olive oil
1 small yellow onion, chopped fine
salt
1 clove garlic, minced
2 sprigs fresh basil
1 small tomato plant cutting with about 5 leaves attached (optional)

1. Heat the oven to 300 degrees. In a large (7- or 8-quart) stockpot over medium heat, cook the tomatoes, covered, until they begin to soften and release their liquid. (You may need to do this in multiple batches, depending on the size of your largest pot and the size of the batch you’re making.) Transfer the tomatoes to a food mill on the finest setting set over a large bowl and press the tomatoes through. Discard the skins and seeds that accumulate in the food mill.

2. Spray two 9-by-13-inch (or similarly sized) baking pans with cooking spray (or grease lightly with olive oil). Pour 3½ cups of tomato puree into each of the pans. Transfer the pans to the oven and roast, stirring occasionally, until the puree has reduced to a paste and leaves a clean trail when a spatula is dragged through it, 2 to 4 hours.

3. Pour another 1½ cups of tomato puree into a small container. Set aside.

4. In a large saucepan over medium heat, cook the onion and a pinch of salt, stirring occasionally, until translucent, 4 to 5 minutes. Add the garlic and cook, stirring constantly, until fragrant, about 1 minute. Add the remaining tomato puree and cook, stirring very occasionally, until thick enough to coat the back of a spoon, 1 to 2 hours. Remove from the heat, add the basil and tomato leaves (if using) and set aside for about 5 minutes. Remove the basil and tomato leaves and discard them.

5. Combine the three mixtures, and add salt to taste. Serve, refrigerate for up to 5 days, or freeze.
tomato sauce 4

easy foolproof pie dough

pie crust 7

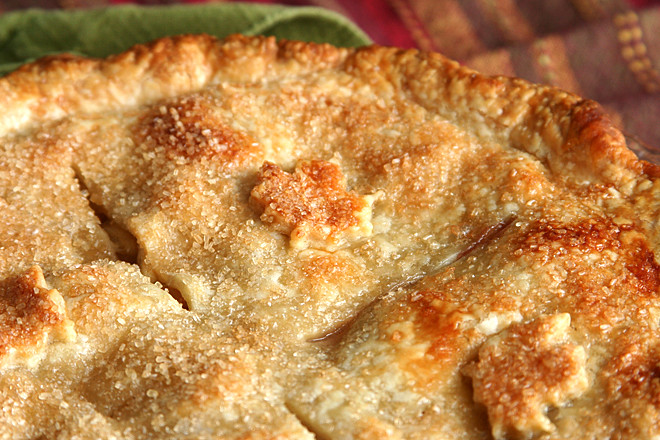
If you eat the filling and leave the thick edge of your pie crust on the plate, you’re making your pie crust wrong. Your pie crust should be crisp, browned, and flaky. Just a little bit sweet so it goes with the fruity filling, rich and buttery. Pie crust isn’t better than the filling, but it isn’t worse either, and every bit of it, including the thick crimped edges, is necessary to balance all the filling.

pie crust 1

I’ve tried some of those creative additions (sour cream, vodka), but mostly, I’ve stuck with a traditional crust recipe – butter is cut into flour, salt, and a smidge of sugar, then water is added until it just comes together. But I had a bad habit of adding too much water, so it wasn’t foolproof for me. No one complained; it was still tastier and flakier than a store-bought crust, but it tended to slump when baked.
pie crust 2

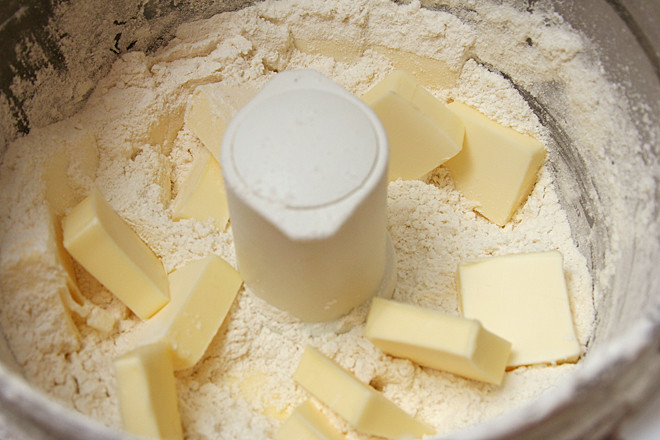
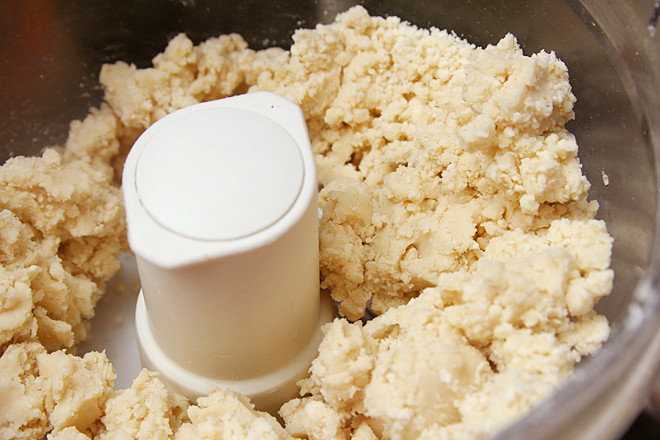
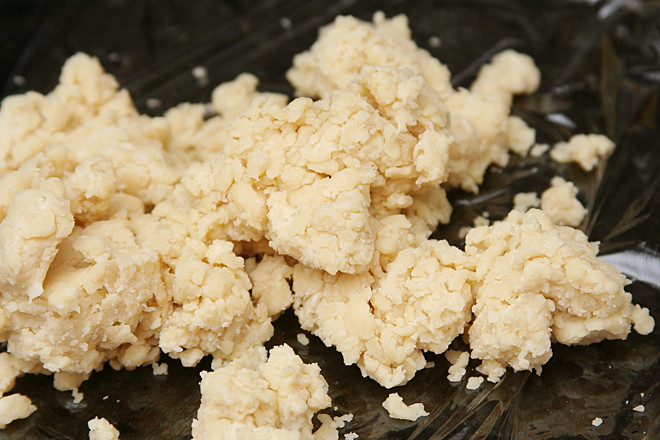
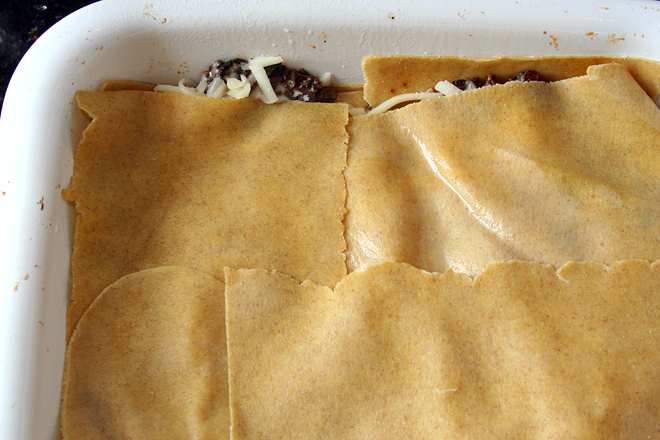
I don’t consider myself an amateur pie crust maker at this point, but apparently I still needed something foolproof. This recipe solves my problem. The butter is processed into a portion of the flour, not until it’s broken up into pea-sized bits, but until it’s a crumbly, homogeneous mixture. Then the rest of the flour and some water is mixed in.

pie crust 4

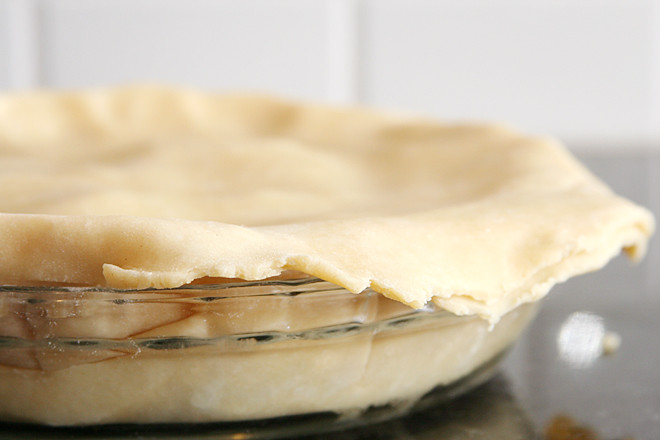
After resting, the dough rolls out smoothly and trouble-free, without ripping or cracking. You can freeze it either before or after rolling. Then it bakes up golden, puffy, light, crisp. It’s everything you want from a pie crust, just easier to make. It definitely holds its own against any filling.

pie crust 6

Easy Pie Dough (not really adapted from The Food Lab)

My butter cubes came straight from the freezer, which might be why it took a lot more than 25 pulses for the dough to form clumps.

2½ cups (12.5 ounces) all-purpose flour
2 tablespoons sugar
1 teaspoon kosher salt
20 tablespoons butter (2½ sticks) cold unsalted butter, cut into ½-inch cubes
6 tablespoons cold water

1. Combine two thirds of flour with sugar and salt in the bowl of a food processor. Pulse to blend. Spread the butter evenly over flour mix; pulse until no dry flour remains and the dough just begins to collect in clumps, about 25 short pulses. Use a rubber spatula to spread the dough evenly around the bowl of the food processor. Sprinkle with the remaining flour and pulse until dough is just barely broken up, about 5 short pulses. Transfer the dough to a large bowl.

2. Sprinkle with the water, then, using a rubber spatula, fold and press the dough until it comes together into a ball. Divide in half and form each half into a 4-inch disk. Wrap tightly in plastic wrap and refrigerate for at least 2 hours before rolling and baking.

Save

Save

butternut squash and goat cheese ravioli with sage browned butter

goat cheese squash ravioli 7

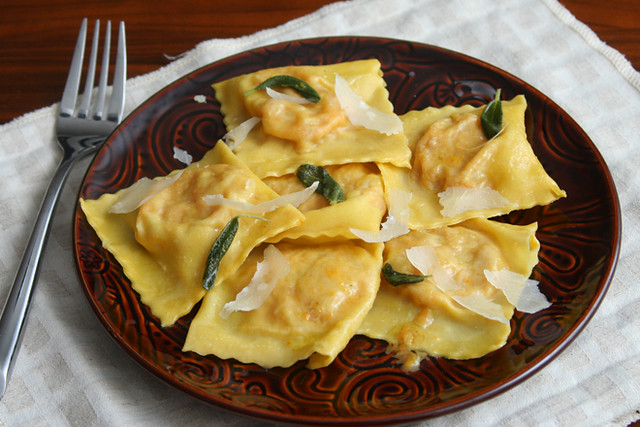
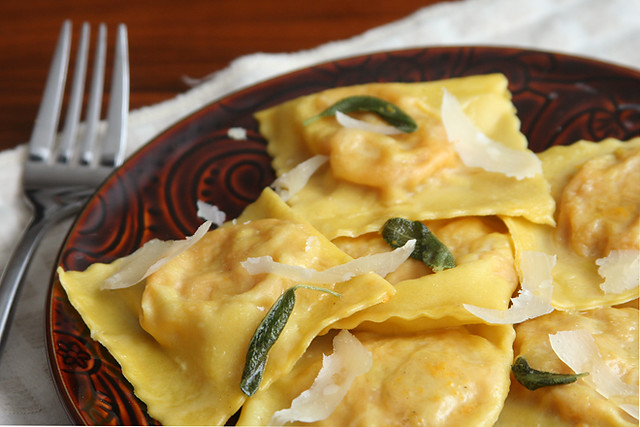
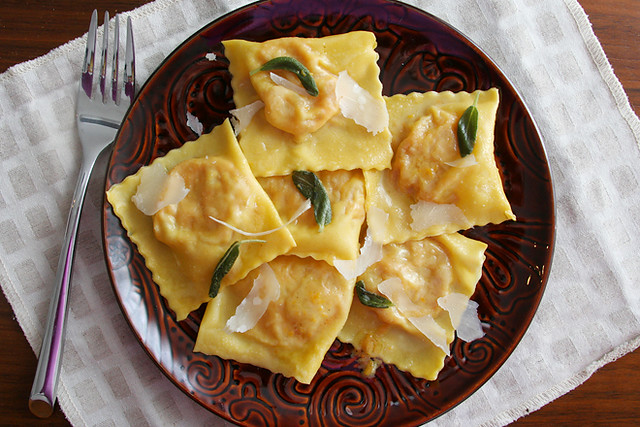
On that fateful homecoming from visiting my in-laws for Thanksgiving, this is what I’d planned to have for dinner. The ravioli were already filled and formed in the freezer, just requiring a quick drop in simmering water and a trip through a skillet of butter. But coming home to disaster made even that seem overwhelming; instead, we ate toppingless chili from the freezer in between shop-vaccing up buckets of water.

goat cheese squash ravioli 2

These are still in the freezer, and at least that’s one advantage of this mess. Actually, my freezer is stuffed to the brim now. In the absence of any other outlet for that stereotypical late pregnancy nesting urge, I cooked. I cooked until the freezer in the rental house was overflowing, then I transferred some meals to our home freezer, and cooked some more.

goat cheese squash ravioli 3

We’ve moved back home now, but there’s plenty of work to do before the house is back to normal. I have a feeling I’ll be very, very grateful to have a freezer full of food once I have a newborn on top of a million house chores. This meal, combining some of my favorite ingredients, will be saved for something special – maybe the day we get doors installed.

goat cheese squash ravioli 5

Butternut Squash, Goat Cheese, and Pancetta Ravioli with Sage Browned Butter

Serves 8 as a first course or 4 as a main course

I made my pasta using this method and the following ingredients: 5 ounces flour, pinch salt, 1 egg, 2 egg yolks, and ½ teaspoon olive oil.

6 ounces pancetta, diced into ¼-inch cubes
1 onion, diced fine
salt
1 small butternut squash, peeled, diced into ½-inch cubes
1 teaspoon fresh thyme leaves, minced
5 ounces goat cheese
pinch nutmeg
2 ounces (1 cup) grated parmesan
8 ounces fresh pasta, rolled to the second-to-last setting on a pasta roller
6 tablespoons unsalted butter, melted
12 sage leaves, sliced

1. In a 12-inch nonstick skillet over medium heat, cook the pancetta until crisp, about 8 minutes. Using a slotted spoon, transfer the pancetta to a large bowl. Drain the fat in the pan into a small bowl. Transfer 1 tablespoon of fat back to the pan and add the onions. Cook, stirring occasionally, until the onions are lightly browned around the edges, about 8 minutes. Transfer the onions to the bowl with the pancetta. Add another 1 tablespoon reserved pancetta fat to the pan; add the squash. Cover the pan and cook, stirring occasionally, until the squash is browned and tender, about 15 minutes. Use a potato masher to lightly mash the squash, then transfer it to the bowl with the onions and pancetta. Add the thyme, goat cheese, nutmeg, parmesan, and additional salt to taste to the bowl; stir to combine.

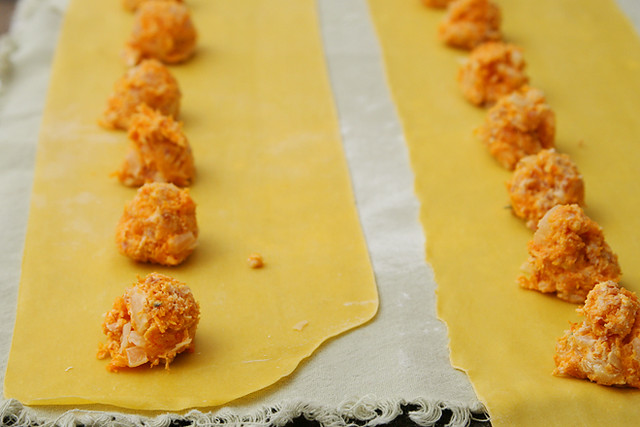
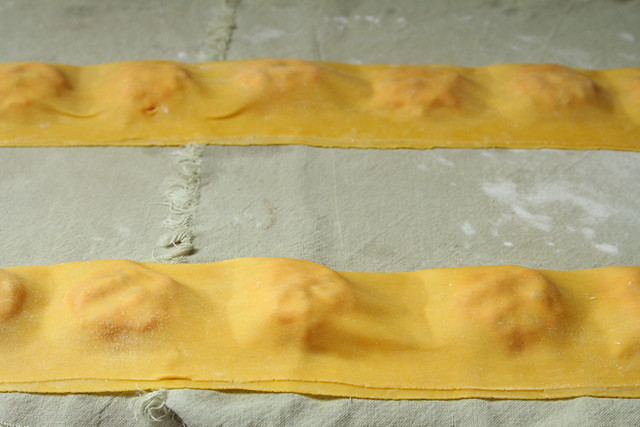
2. Place one rounded tablespoon of filling every 2 inches along the length of a pasta sheet. Use a pastry brush dipped in water to wet the pasta along the long edges and between the filling. Fold the pasta sheet lengthwise over the filling, pressing around each ball of filling to seal the two layers of pasta together. Use a pizza cutter to cut between the filling to form squares of ravioli. Store the ravioli on a dry dish towel. Repeat with the remaining dough and filling. (Ravioli can be formed several hours in advance and covered and refrigerated or can be flash-frozen, then transferred to freezer bags and frozen for several weeks. Do not defrost before cooking.)

3. In a large skillet, brown the butter with sage and a generous pinch of salt. Bring a large pot of water to a boil; add a tablespoon of salt and lower the heat until the water is at a lively simmer. Boil the ravioli in small batches for about 2 minutes. Use a slotted spoon to transfer the ravioli from the cooking water to the butter; simmer and shake over medium-high heat until the ravioli are evenly coated. Serve immediately, with additional parmesan if desired.

goat cheese squash ravioli 6

julia child’s boeuf bourguignon

boeuf bourguignon 6

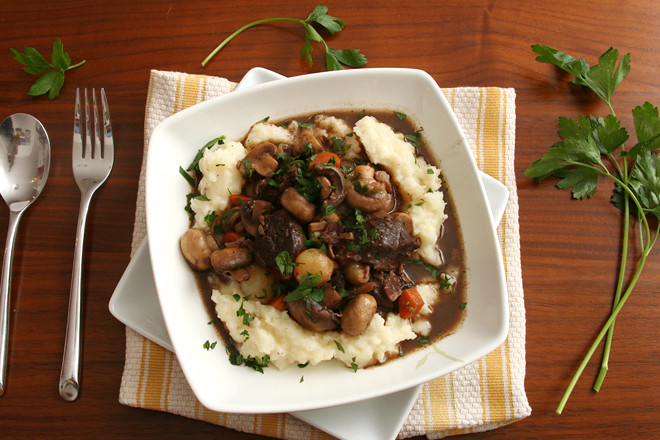
I wanted winey beef stew. I knew there were easier recipes out there, and maybe even better recipes, but Julia Child’s boeuf bourguignon is a bucket list recipe for me. I guess sometimes I can’t resist using every pot and skillet I own just to make one dish.

boeuf bourguignon 3

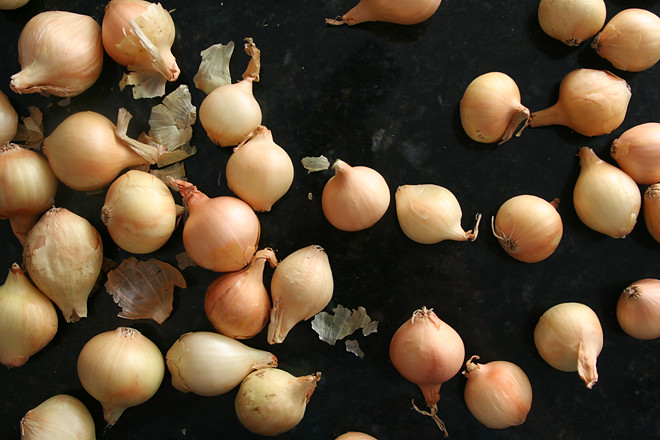
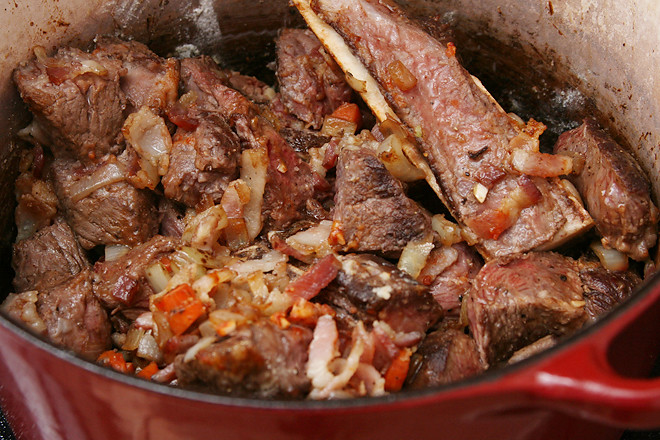
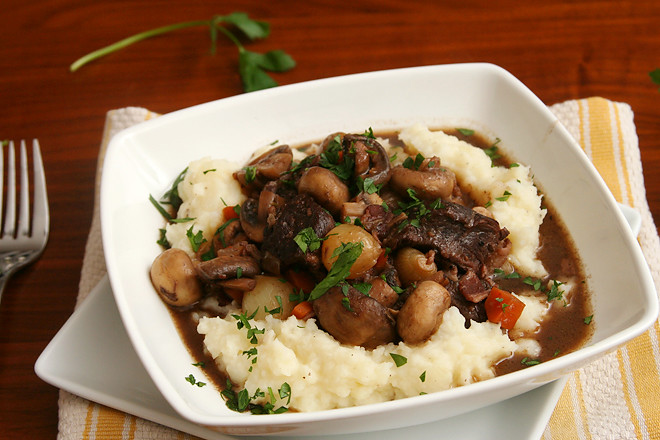
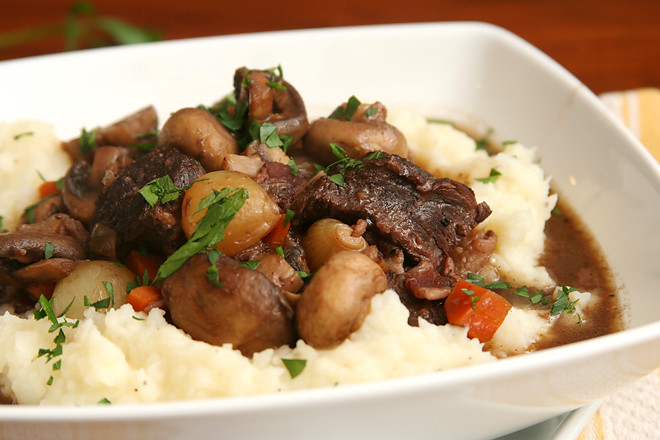
But it was worth it for one single thing I learned from this recipe: how to enjoy pearl onions. The French seem to love using them in their fancy braises, but I’ve never liked their texture in the coq au vin or other beef burgundy recipes I’ve tried. Instead of the quick saute most recipes call for, Julia braises them in broth for almost an hour. At the end, they’re meltingly tender – okay, maybe they’re mushy. But that’s a lot better than the feeling that there are crunchy eyeballs in my stew. They also soak up meaty flavor from the broth, which doesn’t hurt matters.

boeuf bourguignon 1

Other than that, the stew was very good, but probably not any better than my favorite pot roast recipe. Am I allowed to say that about one of Julia Child’s most famous recipes? It’s not that it wasn’t good, because I always really enjoy braising beef in wine. It’s just that I also enjoy using one pot for that braise. But now I can check this one off the bucket list, and that, plus those soft pearl onions, makes this a win.

boeuf bourguignon 7

Julia Child’s Boeuf Bourguignon (adapted from Mastering the Art of French Cooking)

Serves 4

I liked the onions a lot, but I would have preferred the mushrooms cooked until they were drier and browner.

6 ounces (about 6 slices) bacon, sliced ¼-inch thick
2 tablespoons vegetable oil, divided
3 pounds chuck roast, trimmed, cut into 2-inch cubes
salt
1 large or 2 small carrots, cut into ½-inch dice
1 medium onion, diced
ground black pepper
2 tablespoons flour
1 (750-liter) bottle medium red wine, such as pinot noir, cotes du rhone, or chianti
2 cups beef broth, plus ½ cup to cook the onions
1 tablespoon tomato paste
2 cloves garlic, smashed
1 bay leaf
4 tablespoons butter, divided
24 pearl onions, peeled (or frozen)
1 sprig fresh thyme
1 small bay leaf
4 sprigs parsley, plus more for garnish
1 pound mushrooms, halved or quartered in large

1. Heat the oven to 450 degrees. In a medium saucepan over high heat, bring the bacon and 6 cups of water to a simmer. Reduce the heat to medium and simmer for 10 minutes. Drain and dry the bacon. In a 5-quart Dutch oven over medium heat, cook the bacon until it’s slightly browned, 2 to 3 minutes. Use a slotted spoon to remove it from the pot, leaving the rendered fat in the pot; set the bacon aside.

2. Add 1 tablespoon of oil to the pot with the bacon fat and heat over medium-high heat until just smoking. Season the beef generously with salt. Add half of the beef in a single layer, leaving space between each piece. Cook without moving until the bottom side is browned, about 2 minutes. Rotate each piece, searing and rotating until all sides are browned. Transfer to a plate and repeat with the remaining beef.

3. Add the carrots and diced onion to the pot and cook until lightly browned, about 2 minutes. Return the beef and bacon to the pot with the vegetables; add 1 teaspoon salt and ¼ teaspoon ground black pepper; stir to combine. Sprinkle the flour evenly over the mixture; stir to evenly distribute the flour. Transfer the pot to the oven and cook for 4 minutes. Stir, then cook in the oven for an additional 4 minutes. Transfer the Dutch oven back to the stove. Reduce the oven temperature to 325 degrees.

4. Add the wine and 2 cups of broth to the pot with the beef and vegetables. Add the tomato paste, garlic, and herbs. Bring to a simmer over medium-high heat. Cover the pot, transfer it to the oven, and cook until the meat is tender, 2½ to 3 hours, stirring about once an hour.

5. Meanwhile, in a medium skillet over medium heat, melt 2 tablespoons butter. Add the pearl onions and cook, stirring frequently, until they’re browned. Add ½ cup of broth, the thyme, bay leaf, parsley, and a generous sprinkling of salt, then cover the skillet, reduce the heat to low, and cook until the onions are very tender, about 40 minutes. If there is any liquid left in the pan at this point, let it evaporate. Set aside.

6. In a medium skillet over high heat, heat 2 tablespoons butter and the oil. Add the mushrooms and cook, stirring constantly, until they are lightly browned, 4 to 5 minutes. Set aside.

7. Remove the Dutch oven from the oven. Strain the liquid into a separate saucepan, returning the beef and bacon to the Dutch oven or a serving dish. Add the mushrooms and onions to the beef. Skim the liquid in the saucepan of fat and simmer until it’s reduced to about 2½ cups and is thick enough to lightly coat a spoon. Pour the reduced sauce over the meat and vegetables. Serve, topped with minced parsley.

boeuf bourguignon 8

goat cheese and braised lamb shank ravioli

lamb goat cheese ravioli 6

I do use my pasta roller for dishes other than ravioli – but not often. I make the occasional lasagna when I can carve out half a day, but cut pastas like fettuccine are rare. Homemade ravioli lets me get some of the creative flavor variations of lasagna with less – although not insignificant – effort.

lamb goat cheese ravioli 1

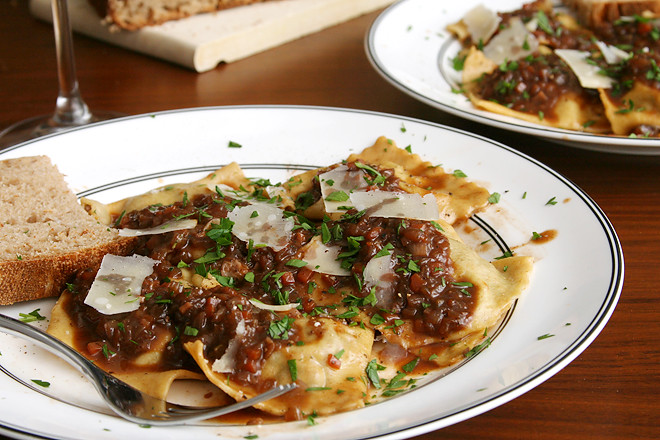
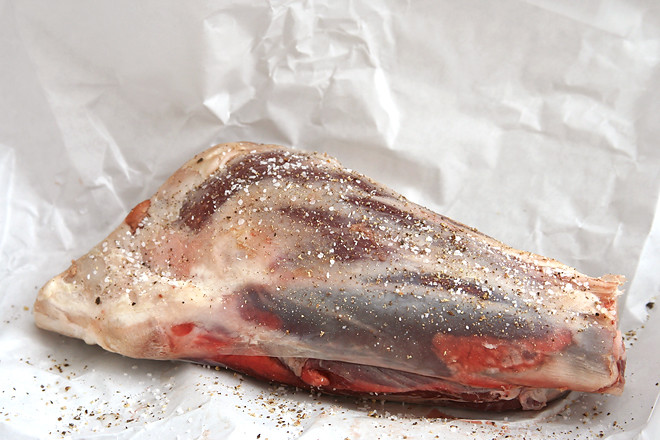
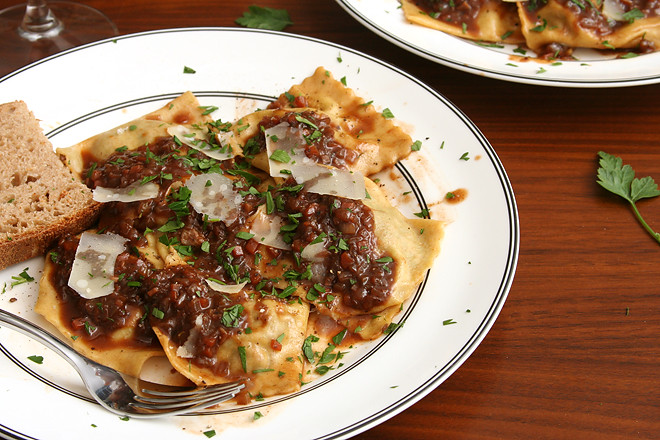
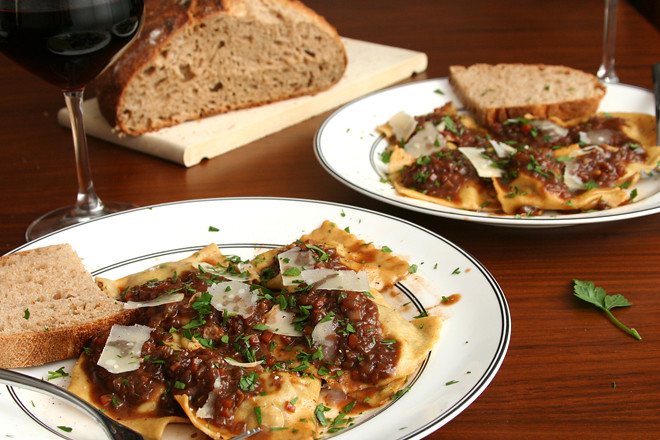
Some of my favorite ravioli recipes lend themselves to a nice plated first course, particularly the ones with fillings based on vegetables. But with braised meat as the star of this one, it’s rich enough to be the main course. I think the slight funkiness of goat cheese is the perfect complement to the gamey lamb.

lamb goat cheese ravioli 3

I didn’t want to lose or overpower any of that wonderful lamb flavor, so I reduced the winey braising liquid down to a sauce. Instead of using a starch for thickener, which could turn the sauce pasty and dull the flavor, I used gelatin. This makes a sauce that forms a glossy coating on the pasta. A little soy sauce (you could also use fish sauce) amplifies the meatiness of the whole dish. This is definitely a dish worthy of getting out the pasta roller.

lamb goat cheese ravioli 5

Printer Friendly Recipe
Braised Lamb and Goat Cheese Ravioli

Makes about 32 ravioli, serving 4 as a main course or 8 as a first course

I made my pasta using this method and the following ingredients: 5 ounces flour, pinch salt, 1 egg, 2 egg yolks, and ½ teaspoon olive oil.

1½ teaspoon gelatin powder
2 cups chicken broth
2 (1-pound) lamb shanks
olive oil
salt and pepper
1 large carrot, diced fine
1 celery stalk, diced fine
1 onion, diced fine
2 cloves garlic, minced
1 tablespoon tomato paste
1 cup unoaked red wine
1 sprig rosemary
2 sprigs thyme
1½ teaspoons soy sauce
10 ounces goat cheese
1 egg
¼ cup (½ ounce) grated parmesan cheese, plus more for serving
8 ounces fresh pasta, rolled to the second-to-last setting on a pasta roller

1. Heat the oven to 300 degrees. In a measuring cup, sprinkle the gelatin over the chicken broth.

2. Heat a large Dutch oven over medium-high heat. Season the lamb generously with salt and pepper. Add a drizzle of oil to the pot and add the lamb shanks; cook, without moving, until darkly browned on bottom, about 2 minutes, then turn and brown on all sides. Transfer the lamb to a plate. Reduce the heat to medium and add the carrots, celery, and onions to the pot; cook, stirring constantly, until softened and lightly browned, 3-4 minutes. Add the garlic and tomato paste, and cooking, stirring constantly, until fragrant, about 1 minute. Add the red wine and scrape up any browned bits stuck to the bottom of the pot. Add the broth with gelatin, rosemary, thyme, and browned lamb to the pot. Cover the pot and transfer to the oven. Cook until the lamb is tender and can be easily shredded, about 3 hours, turning the lamb shanks every hour.

3. Transfer the lamb to a clean plate. When cool enough to handle, remove the meat from the bones and finely chop it.

4. Remove the rosemary and thyme from the liquid remaining in the pot and discard. Over medium-high heat, simmer until the liquid in the pot is reduced to ½ cup, about 8 minutes. Add the soy sauce. Cover and set aside.

5. Combine the shredded lamb, goat cheese, egg, and ¼ cup parmesan cheese.

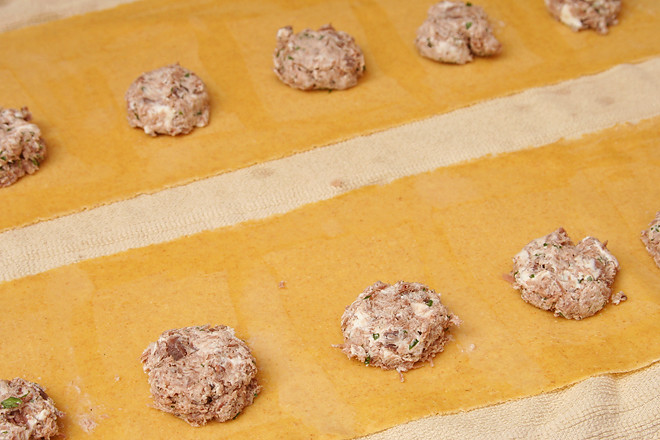
6. Place one rounded tablespoon of filling every 2 inches along the length of a pasta sheet. Use a pastry brush dipped in water to wet the pasta along the long edges and between the filling. Fold the pasta sheet lengthwise over the filling, pressing around each ball of filling to seal the two layers of pasta together. Use a pizza cutter to cut between the filling to form squares of ravioli. Store the ravioli on a dry dish towel. Repeat with the remaining dough and filling. (Ravioli can be formed several hours in advance and covered and refrigerated or can be flash-frozen, then transferred to freezer bags and frozen for several weeks. Do not defrost before cooking.)

7. Bring a large pot of water to a boil; add a tablespoon of salt and lower the heat until the water is at a lively simmer. Boil the ravioli in small batches until al dente, 2 to 3 minutes, using a skimmer or large slotted spoon to remove the ravioli from the boiling water and transfer them directly to a serving platter or individual plates or pasta bowls. Top with the sauce and addition parmesan and serve immediately.

lamb goat cheese ravioli 4

black bean burgers

black bean patties 4

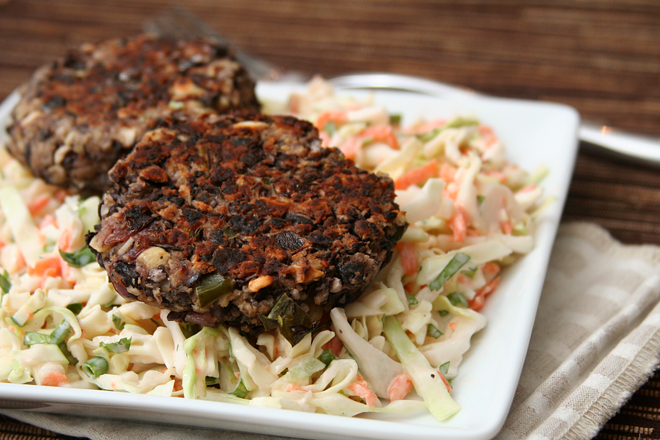
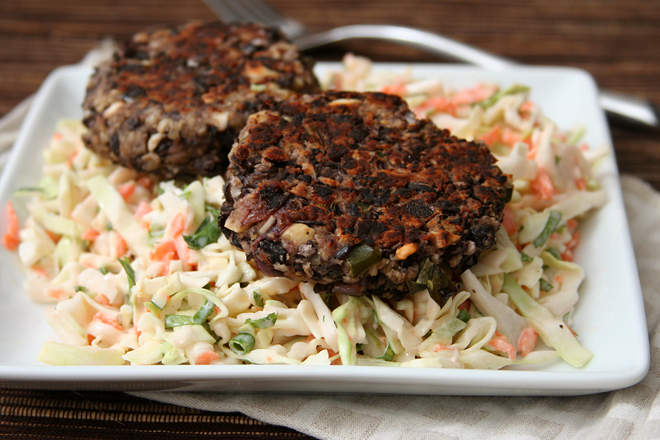
I actually don’t have any need for a black bean burger. Because Dave and I eat either vegetarian or fish during the week, I’m always ready for some meat by the weekend. And I don’t eat much bread on weekdays either (other than my daily bagel at work – best part of the workday!), so I wouldn’t pair vegetarian burgers with buns. But on top of slaw, now that works.

black bean patties 1

This recipe doesn’t have (much of) my other issue with most vegetarian burgers, which is that they’re usually bound with large amounts of breadcrumbs or other grains, so you’re, in essence, putting carbs on a bun. This mix does have some bread crumbs, but it’s also bulked up with extra protein from cheese and nuts. They’re not there for your health though – they provide a nice variation in texture, so the burgers aren’t uniform, and they’re certainly not mushy, thanks to some time the beans spend in the oven getting dehydrated.

black bean patties 3

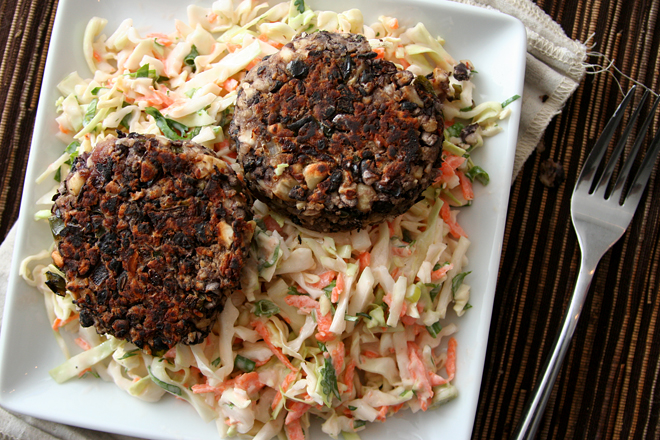
The mix itself was so good that I couldn’t stop eating it. Formed into patties and browned, it was that much better. What isn’t better with crisp, caramelized sides? I’m sure they’re great on a bun with your favorite burger toppings, but I loved them on a simple lime-cilantro slaw. I have finally found a place for black bean burgers in my life, and I have found the black bean burger to take that place.

black bean patties 6

Printer Friendly Recipe
Black Bean Burgers
(rewritten but hardly adapted from The Food Lab)

Makes 8 to 12 burgers (the patties in the pictures are each one-tenth of the recipe)

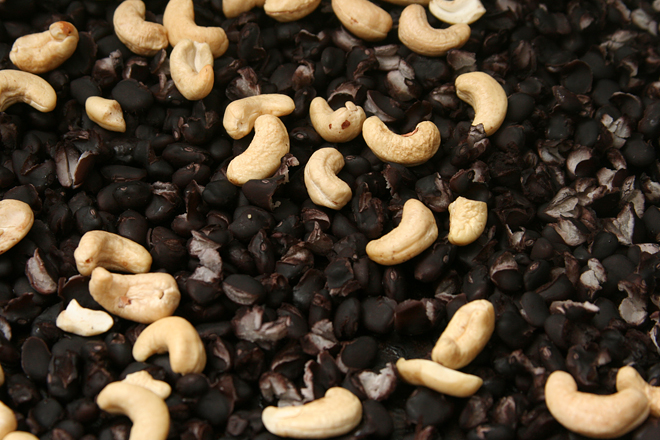
If your cashews aren’t toasted already, put them in the oven before the beans. Don’t do what I did and combine the two on one baking sheet; they’re treated separately in the food processor.

The recipe makes a lot. I formed the mixture into patties and froze most of them. They defrost and cook up perfectly.

According to the original recipe, you can grill these as well as pan-fry them, but I didn’t try it. You’d want to brush the sides with oil before grilling.

2 (15-ounce) cans black beans, rinsed and drained
3 tablespoons vegetable oil, divided
1 medium onion, finely chopped
1 large poblano pepper, finely chopped
3 medium cloves garlic, minced
1 chipotle chile in adobo sauce, finely chopped, plus 1 teaspoon sauce
¾ cup toasted cashews
½ cup finely crumbled feta or cotija cheese
¾ cup panko bread crumbs
2 tablespoons mayonnaise
1 large egg
Kosher salt and freshly ground black pepper

1. Heat the oven to 350 degrees. Spread the black beans evenly on a rimmed baking sheet; bake until the edges are splitting, about 20 minutes.

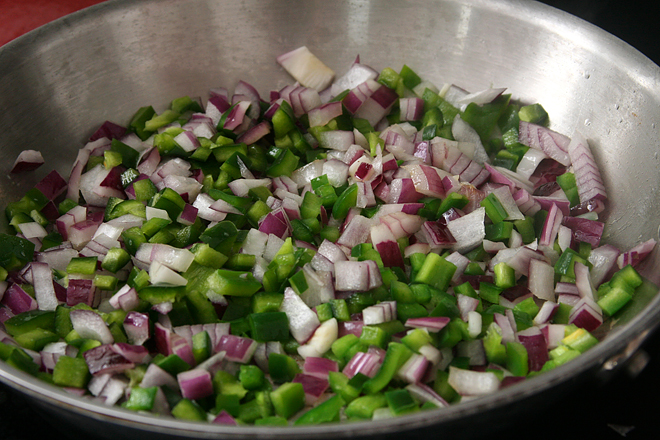
2. Meanwhile, heat 1 tablespoon oil in a large saucepan over medium heat. Add the onion, poblano, and a pinch of salt, and cook, stirring occasionally, until the onion is just beginning to brown at the edges, about 8 minutes. Add the garlic; cook, stirring constantly, until fragrant, about 1 minute. Remove from the heat and stir in the chipotle chile and sauce. Transfer the mixture to a large mixing bowl.

3. In a food process, pulse the cashews until the largest pieces are about ¼-inch. Transfer to the bowl with the vegetables. Transfer the dried black beans and cheese to the food processor and pulse until the largest pieces are about ¼-inch. Transfer to the bowl with the cashews. Add the bread crumbs, mayonnaise, egg, 1 teaspoon salt, and ½ teaspoon pepper to the mixing bowl. Stir until evenly combined.

4. Form the mixture into patties ¾-inch thick. You can make them any size you want; I made about ten patties from this recipe, and they were each about 4 inches in diameter.

5. In a large nonstick skillet, heat 1 tablespoon oil over medium heat. Add half of the patties and cook, without moving, until crisp and browned on the bottom, about 5 minutes. Flip the patties and continue cooking until the second side is browned, another 5 minutes. Repeat with the remaining patties.

Lime-Cilantro Slaw

½ cabbage, sliced thinly
¼ cup lime juice
½ cup Greek yogurt
4 green onions (or half of a small red onion), minced
¼ teaspoon salt
1 large or 2 small carrots, shredded
2 tablespoons finely chopped cilantro

Combine all ingredients.

black bean patties 5

spicy mexican beans and rice

mexican rice and beans 6

It’s been a long road since I shared something vaguely similar to this recipe, well over six years ago. At the time, I said that I had a goal to make more crockpot recipes. Since then, I have made exactly three crockpot recipes worth sharing, and one of those I’ve never made again. In general, I’m more into low-and-slow oven cooking than crockpotting. Heck, I recently even made “crockpot” pulled “pork” (it was venison; still delicious) in the oven.

mexican rice and beans 1

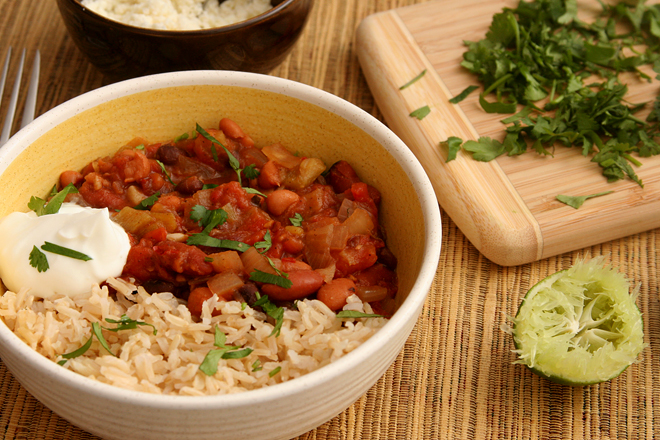
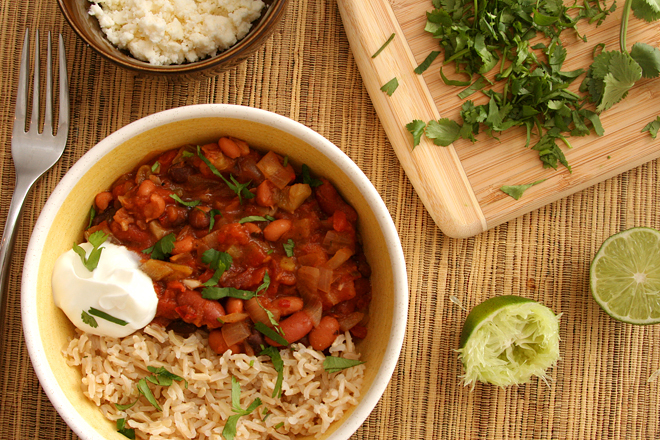
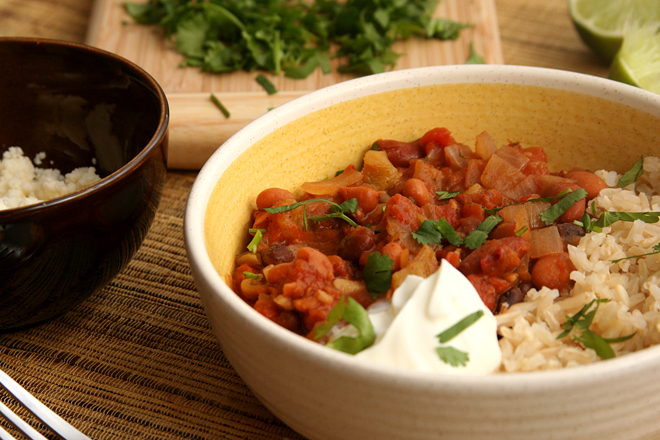
The long road of not-crockpotting has led me to adapt my old favorite crockpot recipe for the stove. The way the original recipe is written, with bone-in chicken thighs, the crockpot is a good choice. However, I always make this as an easy, healthy, vegetarian weeknight meal, leaving the chicken out. Why spend 10 hours, the whole day when I’m away for work, slow-cooking canned beans with some seasonings?

mexican rice and beans 3

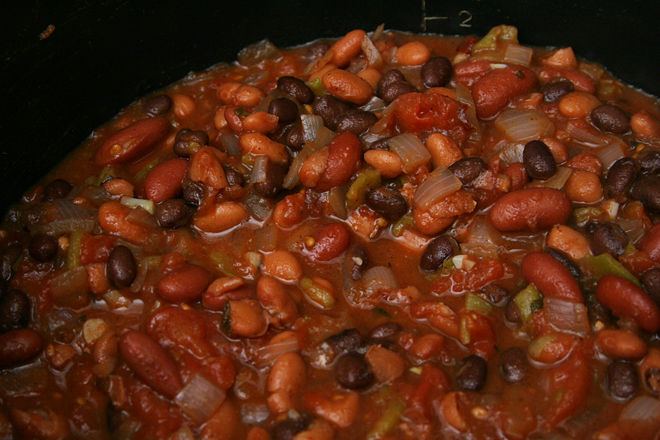
So instead of adapting stovetop or oven recipes for the crockpot like most people do, I’ve adapted a crockpot recipe for the stove. I replaced the chicken soup mix with aromatics and spices, the chicken with a greater variety of beans, and the fresh tomatoes with canned tomatoes (in season year round!). It really isn’t any harder than the crockpot recipe was, and it tastes just as good.  With this new crockpot-less recipe, it might be time to retire my crockpot entirely.  Surely I can think of another fun new kitchen tool that I don’t really need to take up that cabinet space, right?

mexican rice and beans 5

Printer Friendly Recipe
Spicy Mexican Beans and Rice

8 servings

2 tablespoons vegetable or olive oil
1 large or 2 small to medium onions, diced
salt
4 cloves garlic, minced
2 teaspoons chili powder
1 teaspoon cumin
½ teaspoon oregano
½ cup green chile, roasted, peeled, and diced
2 chipotle chiles, minced
2 (15-ounce) cans black beans, drained and rinsed
1 (15-ounce) can kidney beans, drained and rinsed
1 (15-ounce) can pinto beans, drained and rinsed
1 (14-ounce) diced tomatoes
1 cup chicken broth
juice from 1 lime
6 cups cooked rice from 2 cups uncooked rice
cilantro, minced
optional toppings: queso fresco or cheddar cheese, diced avocado, Greek yogurt or sour cream

Heat the oil in a large saucepan over medium heat. Add the onion and a pinch of salt and cook, stirring occasionally, until just beginning to brown at the edges, about 8 minutes. Add the garlic, chili powder, cumin, and oregano; cook, stirring constantly, until fragrant, about 30 seconds. Add the green chile, chipotle chiles, beans, tomatoes, and broth; cover, bring to a simmer, then reduce the heat to low and lightly simmer until the flavors are blended, at least 20 minutes or up to an hour if you aren’t in a hurry. If the mixture is too liquidy, remove the cover, increase the heat to medium, and simmer until the desired thickness is reached. Taste and add salt if necessary. Stir in the lime juice. Serve over rice, topped with cilantro and other toppings as desired.

mexican rice and beans 8

swiss chard mushroom sausage lasagna

swiss chard lasagna 4

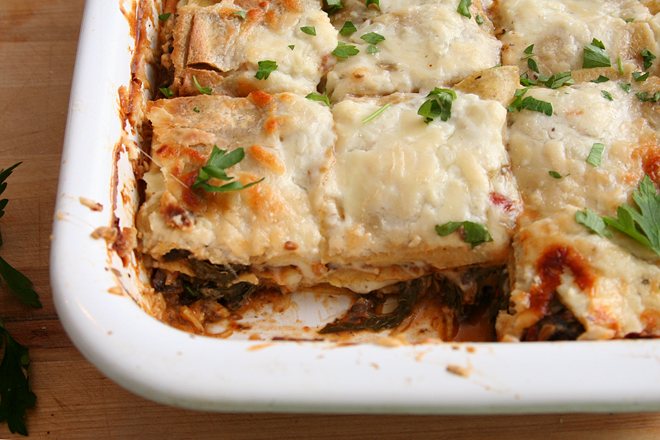
I have this weird thing with lasagna, in that I love it, and I love making it, but I have a hard time bringing myself to repeat recipes. I’m always searching for the next new lasagna recipe, but the truth is, my favorite lasagnas involve tomatoes and cheese and probably bechamel and something that tastes meaty (which could be mushrooms and not meat). And there’s only so many ways to combine those ingredients and still call it in a new recipe.

swiss chard lasagna 2

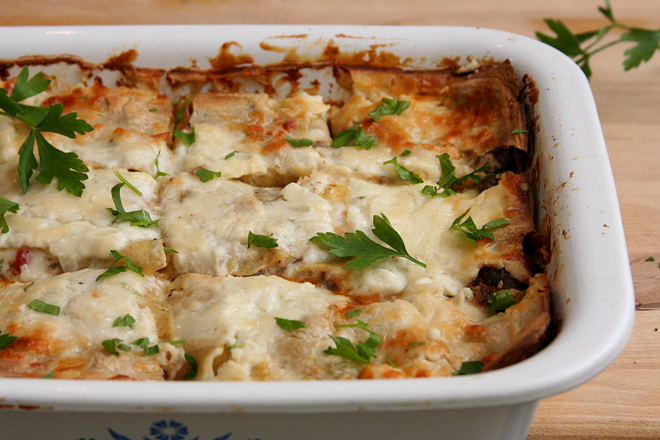
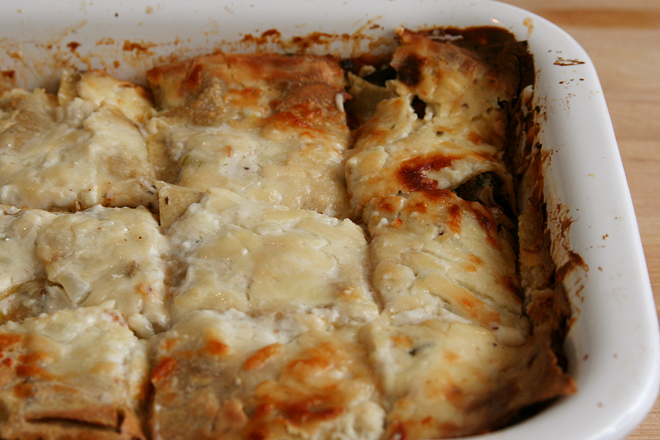
This one, however, I did make twice, because the first time wasn’t quite right. I was thinking that because I enjoy both bechamel and ricotta in lasagna, that I would enjoy having them both there. It turns out, though, that it was overkill, so I nixed the ricotta. Also, the original recipe didn’t include tomatoes or sausage, but they both mix in so well with béchamel and cheese and greens that I couldn’t resist adding them.

swiss chard lasagna 1

I can’t call this my favorite lasagna. With my compulsion to keep trying new recipes, I can’t claim any favorite. But this is certainly worth adding to the list of great recipes. It’s almost like a classic lasagna with some extra vegetables, and those vegetables fit in perfectly with the cheese and tomatoes and meat. It’s so good I might even make it again someday. But in the meantime, tell me: what’s your favorite lasagna recipe?

swiss chard lasagna 3

Printer Friendly Recipe
Swiss Chard Mushroom Sausage Lasagna (adapted from Bon Appetit via epicurious)

For instructions on boiling and rinsing the noodles, see step 4 of this recipe.  You’ll only need half of a recipe of fresh pasta.

Béchamel sauce:
3 tablespoons (½ stick) unsalted butter
¼ large onion, chopped fine
3 cloves garlic, minced
3 tablespoons all-purpose flour
3 cups milk
1 bay leaf
pinch nutmeg
½ teaspoon salt
¼ cup (½ ounce) grated parmesan cheese

Swiss chard and mushroom layer:
8 ounces Italian sausage, removed from casing
1 tablespoon olive oil
¾ large onion, diced
1 pound crimini mushrooms, sliced
salt
4 large garlic cloves, minced
¼ teaspoon dried crushed red pepper
1 (15-ounce) can diced tomatoes with juice
1 pound Swiss chard, center rib and stem cut from each leaf
pepper

Lasagna:
1 pound fresh lasagna noodles or 12 7-by-3-inch lasagna noodles, boiled and rinsed
4 ounces (1 cup) provolone, shredded
4 ounces (1 cup) mozzarella, shredded
2 ounces (1 cup) finely grated Parmesan cheese
2 tablespoons minced parsley

1. For the béchamel sauce: In a medium saucepan over medium heat, melt the butter. When the foaming subsides, add the onion and the garlic. Cook, stirring often, until the onions are softened and translucent, about 5 minutes. Add the flour and cook, stirring constantly, for 1 minute. Whisking constantly, slowly add the milk. Add the bay leaf, increase the heat to medium-high, and bring to a simmer, whisking constantly. When the mixture simmers, reduce the heat to medium-low, add the nutmeg and salt, and simmer 5 minutes. Remove the bay leaf and stir in the parmesan. Cover and set aside.

2. For the swiss chard and mushroom layer: Heat the oil in medium skillet over medium-high heat. Add the onion; sauté until the onion is tender, 3 to 4 minutes. Add the mushrooms and ½ teaspoon salt; cook, stirring occasionally, until the mushrooms release their liquid and then brown, about 8 minutes. Add the garlic and crushed red pepper; cook, stirring constantly, until fragrant, about 30 seconds. Add the tomatoes; simmer until slightly reduced, about 10 minutes. Mix in the chard; cook, stirring frequently, until wilted, about 5 minutes. Stir the sausage back into the sauce; season to taste with salt and ground black pepper.

3. Heat the oven to 350 degrees. Spread a thin layer of the béchamel sauce on the bottom of a 9×13-inch baking dish. Cover the sauce with a slightly overlapping layer of boiled noodles, cutting them as needed to fill any gaps. Evenly spread ¾ cup of the sauce over the noodles. Top with one-third of the sausage-mushroom mixture and one-fourth of the cheeses.  Repeat the layers twice more. Layer a final layer of noodles, then cover with the remaining béchamel and cheeses.  Cover the pan with aluminum foil.

4. Bake, covered, for 30 minutes. Remove the foil and continue to bake until the lasagna is bubbling around the edges and golden on top, 20 to 30 minutes longer. Let stand at room temperature for 10 to 15 minutes. Sprinkle evenly with parsley and serve.

swiss chard lasagna 6

beef barbacoa

barbacoa 8

I am going through a taco phase, and it might have started out with these. Well, mostly I just really like tacos, because who doesn’t, but things have ramped up in recent weeks. We’ve had all sorts of tasty fillings recently, but it’s hard to beat barbacoa.

barbacoa 2

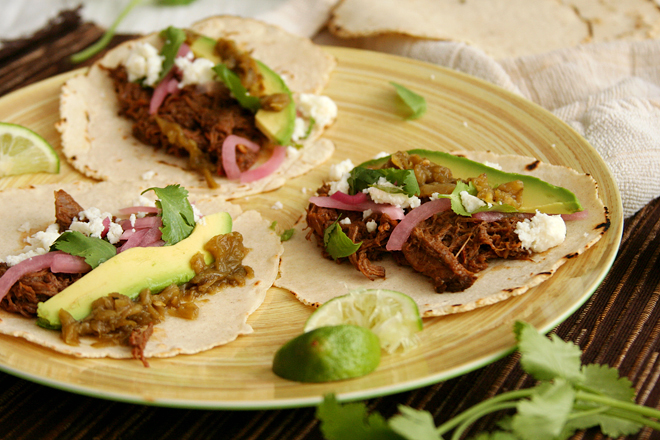
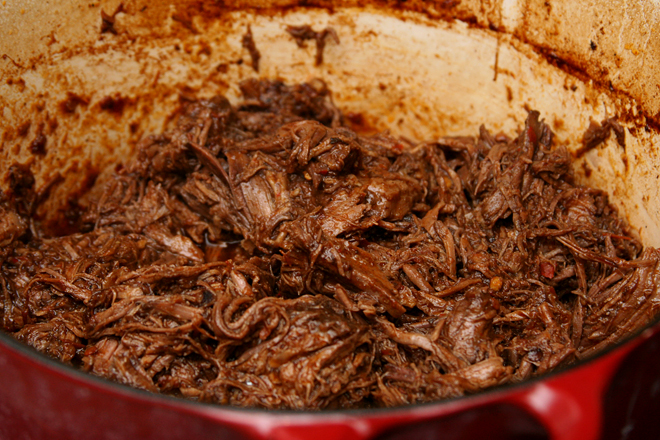
Barbacoa has so many satisfying flavors – it’s a little sweet, a little sour with a squeeze of lime juice, plenty meaty of course. It definitely has a spicy kick. It’s coated in a rich layer of sauce that delivers loads of flavor, with nothing left behind in the pot.

barbacoa 3

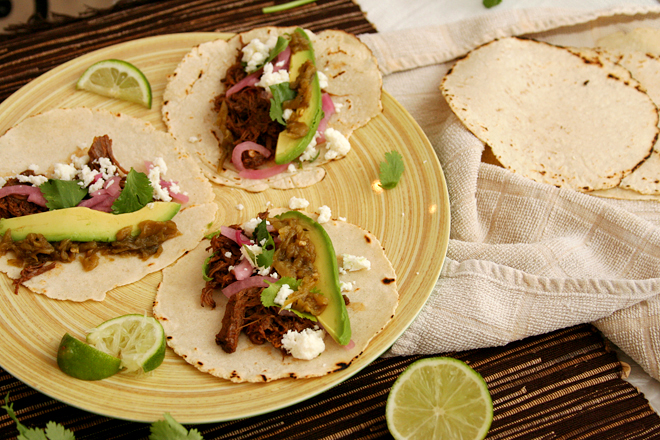
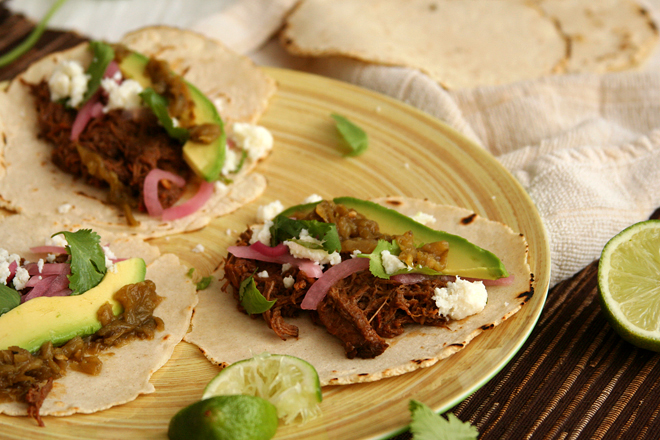
It only gets better with toppings. Avocado is arguably my favorite part of most tacos (not these; the barbacoa wins by a mile), and queso fresco is the perfect salty fresh compliment to the rich meat. Those two and a wedge of lime are my only requirements, but pickled onions and a smattering of cilantro are nice too.

barbacoa 4

This isn’t a hard recipe, although it’s far from fast. The long ingredient list looks worse than it is. There’s a lot of spices, chiles, and condiments, but nothing other than an onion and some garlic require a cutting board. Not even the beef needs to be sliced or cut into cubes. What I thought was going to be a significant project took me about half an hour.

barbacoa 6

Of course, you don’t actually get to eat until almost 5 hours layer, after the beef has become tender and rich and the broth has been reduced down to a sauce. It’s getting warm out and you might not want to leave your oven on for four hours while the beef cooks, but the result is worth some air-conditioning. Plus, it reheats great, maybe even better than it was the first day. I have to admit that I haven’t really been in a taco phase, just a barbacoa phase. I’ve got one more batch stored in the freezer, and I can’t wait.

barbacoa 9

One year ago: California Roll Burgers
Two years ago: Basic Coleslaw
Three years ago: Quinoa Tabbouleh
Four years ago: Fresh Strawberry Scones
Five years ago: Ricotta Spinach and Tofu Ravioli

Printer Friendly Recipe
Beef Barbacoa
(very slightly adapted from The Food Lab on Serious Eats)

About 6 servings

I think the crockpot is a definite possibility here, but it’ll take you a lot longer to reduce the liquid to a sauce after the cooking time.  You’ll still need to brown the oxtails and onions beforehand, because that adds tons of flavor.  That’s an easy tradeoff to save 4 hours of oven use when the weather’s warm!

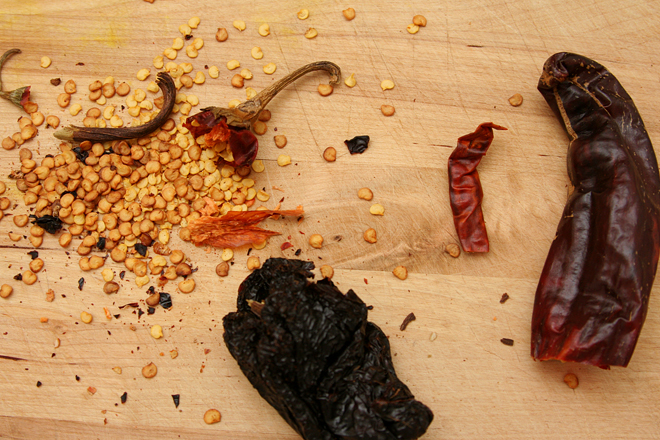
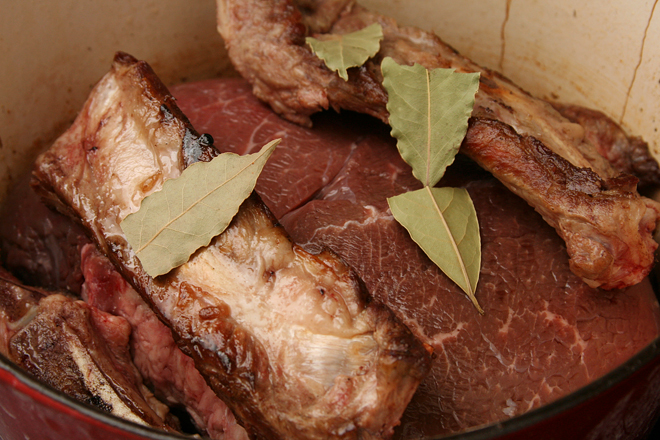
If you can’t find these exact types of chiles, any combination of mild, fruity and bright-tasting chiles will do, such as guajillo or Colorado.  I used a New Mexico, an ancho, and an arbol chile.  I couldn’t find oxtails either, so I used beef ribs.

1 whole dried New Mexico, costeño, or choricero chili, seeds and stem removed
1 whole chile ancho or pasilla, seeds and stem removed
1 whole chile negro, seeds and stem removed
4 cups low-sodium chicken stock, divided
3 tablespoons vegetable or canola oil, divided
1 pound oxtails
1 small onion, diced
6 medium cloves garlic, peeled and smashed
2 teaspoons ground cumin
½ teaspoon ground cloves
2 teaspoons dried oregano
4 chipotle chiles packed in adobo, chopped, with 2 tablespoons adobo sauce
¼ cup apple cider vinegar
2 teaspoons fish sauce
1 whole chuck roast (about 4 pounds)
Kosher salt and freshly ground black pepper
2 whole bay leaves
Kosher salt
Warm corn tortillas, avocados, queso fresco, pickled onions, cilantro, salsa, limes, and other condiments for serving

1. Adjust an oven rack to the lower-middle position and preheat the oven to 275 degrees. Place the dried chiles in the bottom of a large Dutch oven and heat over high heat. Cook, turning the chiles with tongs occasionally, until fragrant and toasted, about 3 minutes. Transfer the chiles to a small saucepan and cover with 2 cups of chicken broth. Bring to a boil over high heat, reduce to a simmer, and cook until chiles are completely tender, about 15 minutes. Set aside.

2. Meanwhile, heat 1 tablespoon of oil in the now-empty Dutch oven over high heat until shimmering. Cook the oxtails until they’re well-browned on all sides, about 8 minutes total. Remove the oxtails and set aside. Reduce the heat to medium.

3. Add the remaining two tablespoons oil and heat along with the onions and garlic, and cook, stirring frequently, until deep brown and just starting to burn, about 10 minutes. Add the cumin, cloves, and oregano, and cook, stirring constantly until fragrant, about 30 seconds. Add the chipotle chiles, vinegar, and remaining chicken broth. Scrape up the browned bits from the bottom of the pan, simmer until reduced by about half, then transfer the entire contents to the jar of a blender.

4. Add the soaked chiles and their liquid to the blender along with the fish sauce. Start the blender on low (be careful of blowups!) and slowly increase the speed to high. Puree until smooth, about 1 minute. Set aside.

5. Place the beef roast in the Dutch oven. Add the browned oxtails, 2 teaspoons salt, 1 teaspoon black pepper, the bay leaves, and the sauce. Bring to a boil over high heat. Place the lid on the pot, slightly cracked, then transfer to the oven. Cook, turning the beef occasionally, until completely tender and a cake tester or metal skewer inserted into the meat shows little to no resistance, about 4 hours. Discard the bay leaves and oxtails (meat from oxtails can be eaten if desired). Transfer the chuck to a large plate. Return the Dutch oven to the stovetop, and cook, stirring frequently, over medium-high heat until the liquid is reduced to about 1½ cups, about 5 minutes.

6. Beef can be shredded and served immediately or transferred to a sealed container along with the liquid and refrigerate up to five days. When ready to serve, shred into large chunks with your fingers or two forks. Return the beef to a pot along with the sauce. Bring to a simmer and cook, gently stirring and folding until the beef is hot, tender, and coated in sauce. Season to taste with salt. Serve immediately, piling the beef into warm corn tortillas with onions, queso fresco, avocados, cilantro, salsa, limes, or other condiments as desired.

barbacoa 10

rosemary gruyere and sea salt crisps

gruyere crisps 7

Pretty much every year, I get it into my head that I want to make a big Thanksgiving-style turkey dinner. Geography doesn’t allow me to host the holiday for either my family or my in-laws, so I usually end up doing it on a random weekend in December. This time I had to wait until January. (My “insane amount of time spent in the kitchen” project for December was the Star Wars cookies, and there wasn’t time for another big project.)

gruyere crisps 2

I had some friends over, and they brought the stuffing, but the rest was up to me. I spent almost one full day of a 3-day weekend preparing as much as I could ahead of time and the greater part of the next day cooking, then entertaining. It was glorious.

gruyere crisps 3

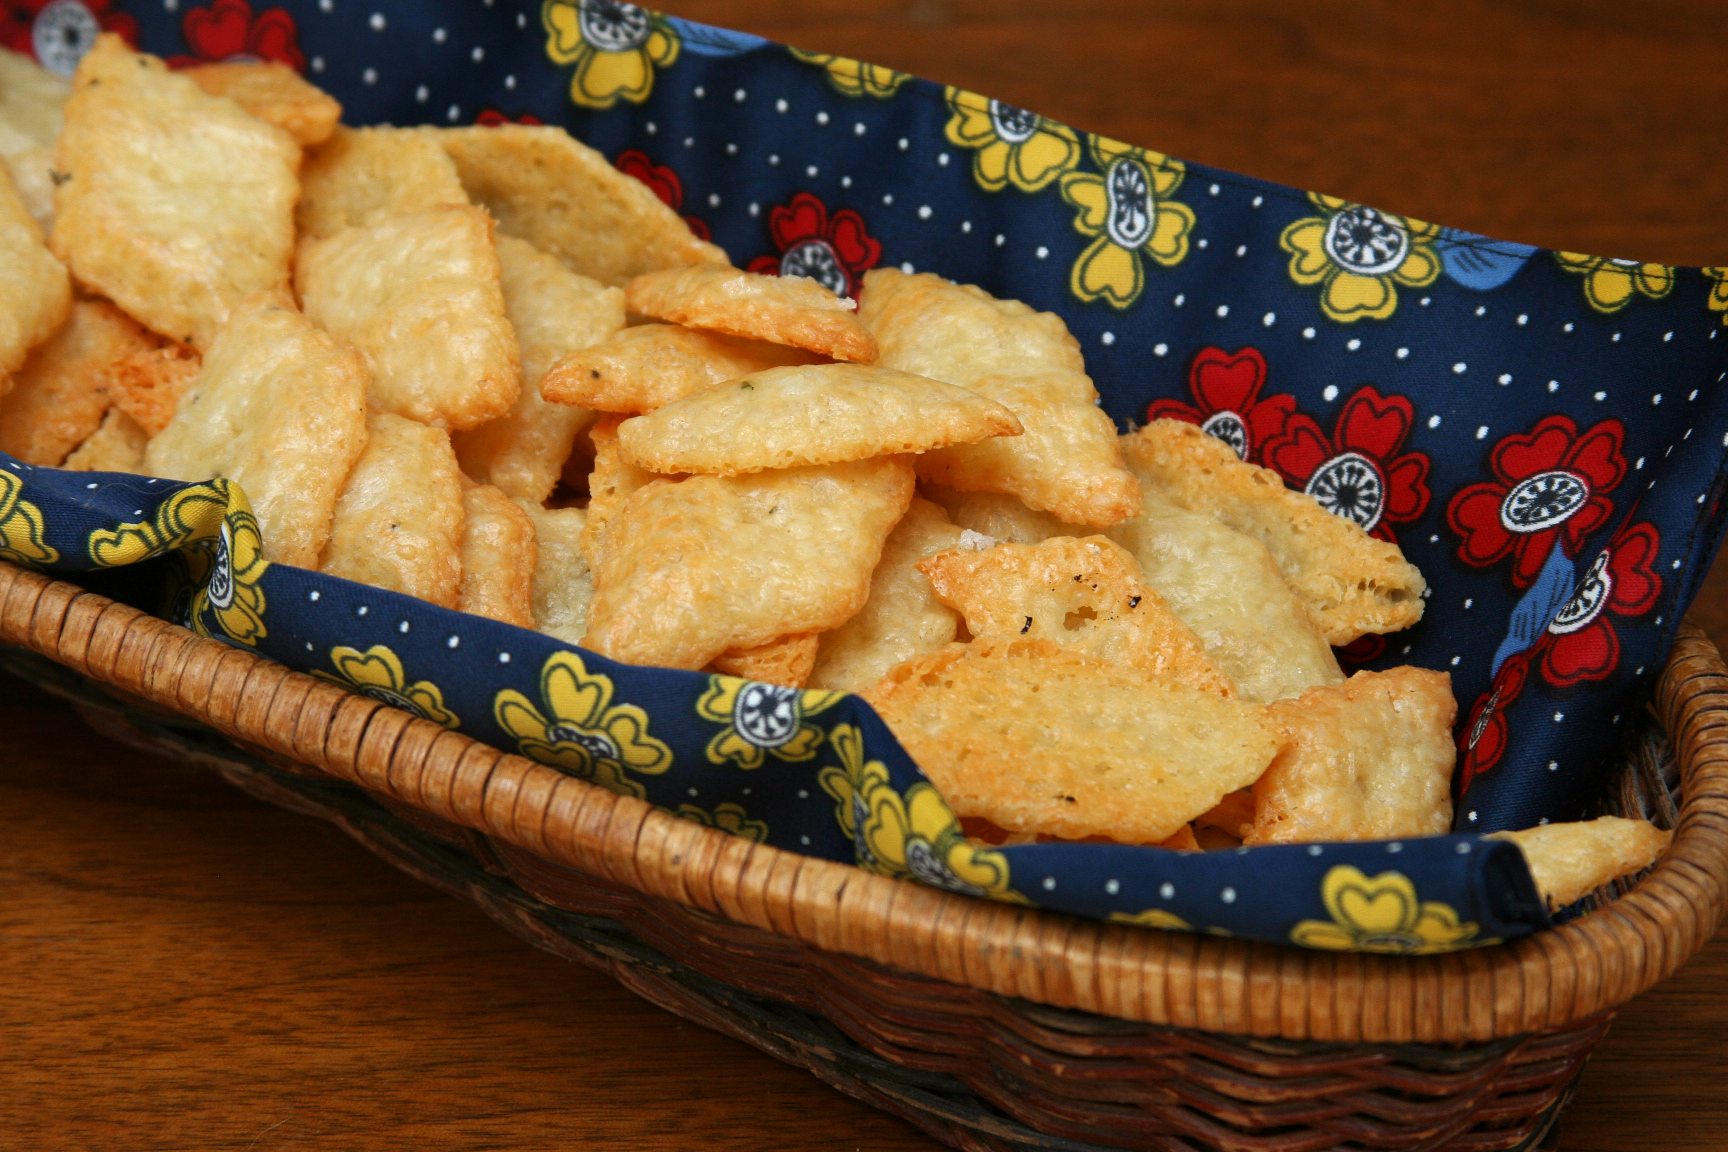
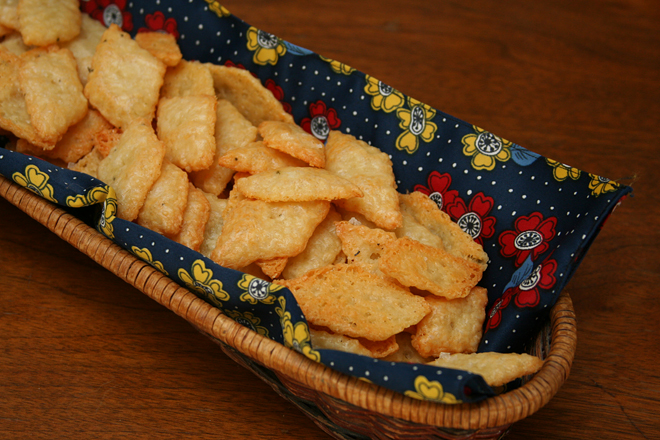
I served these, along with glazed pecans and butternut squash phyllo cigars, as a snack before dinner (insurance against dinner being late – which, miracle of miracles, it wasn’t!). They’re a great recipe for a big meal like this, because almost all of the work can be done in advance – far in advance – and you still get to serve perfectly fresh crackers. I mixed, rolled, cut, docked, and froze the dough the weekend beforehand. The day of my dinner, all that was left to do was transfer the crackers to a baking sheet, spritz with water, and top with salt.  And beyond their convenience, their eminent snackability make these little grown-up Cheez-Its perfect for before a feast.

gruyere crisps 4

One year ago: Chickpea and Rosemary Soup
Two years ago: Curry Coconut Chickpea Soup
Three years ago: Butternut Squash Macaroni and Cheese
Four years ago: Crispy Baked Chicken Strips
Five years ago: Caramel Flan

Printer Friendly Recipe
Rosemary Gruyere and Sea Salt Crisps (from Deb Perelman’s The Smitten Kitchen Cookbook)

6 ounces (1½ cups) shredded Gruyere cheese
4 tablespoons butter
¾ cup (3.6 ounces) all-purpose flour
1 teaspoon finely minced fresh rosemary (from about 1 sprig)
¼ teaspoon fine sea salt, plus more for sprinkling

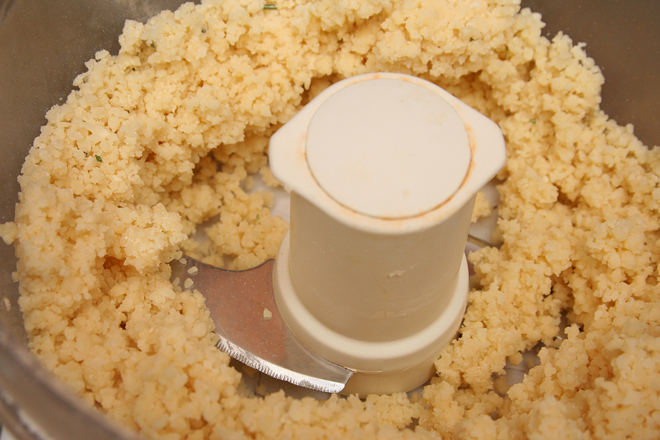
1. Combine all ingredients in a food processor, processing continuously until the mixture resembles coarse, craggy crumbs, about 2 minutes. Transfer the mixture to a large sheet of plastic wrap, gather it together into a ball, and flatten it into a thick square. Wrap in plastic wrap and chill for 15-20 minutes.

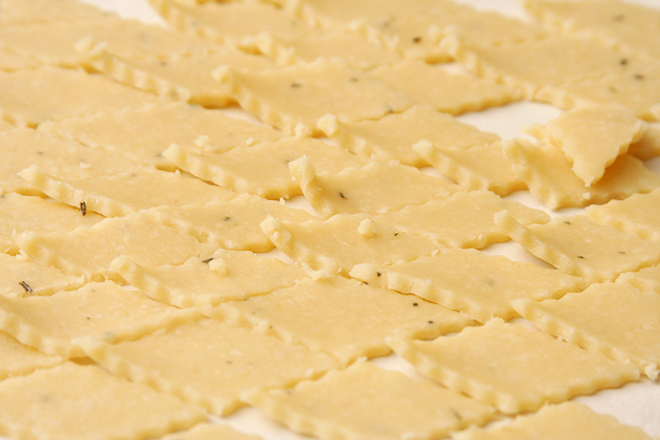
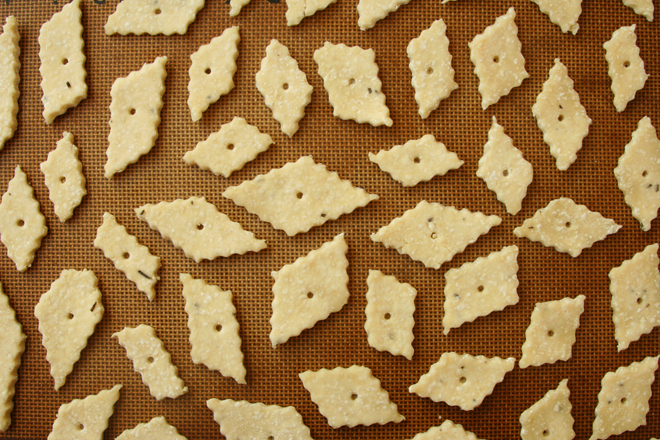
2. On a floured work surface, roll the dough to about ⅛-inch thickness. Cut the dough into 1-inch pieces. Dock each cracker with a skewer, then brush with water and sprinkle with sea salt. Transfer the crackers to a parchment- or silicone-lined baking sheet. Bake at 350 degrees for 10-12 minutes, or until the bottoms are lightly browned.

gruyere crisps 6