maple oatmeal scones

I got scooped! I was just about to write an entry on these scones a few days ago and decided to go with the apple muffins instead. The next day Michelle posted about them. What are the chances?

Actually, considering that these first appeared on Barefoot Contessa Saturday morning, and by the time I baked them the next day there were already a handful of reviews on the Food Network’s site, the chances might not be so bad. Apparently I wasn’t the only one tempted by maple oatmeal scones.

Maple seems like an underused ingredient, considering how delicious it is. Perhaps the problem is that it’s an easily overpowered flavor once it’s mixed into dough and baked. These scones overcome this problem by adding additional maple in the form of a glaze.

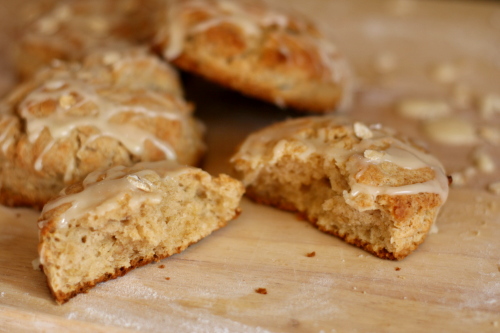
I often think that glazes on scones make them too sweet, but since the scones themselves are only lightly sweetened, these have just the right level of sweetness. They’re also light and tender inside and crisp on top, and really just the perfect way to start out a weekend morning. I can see why Michelle was so eager to post about them!

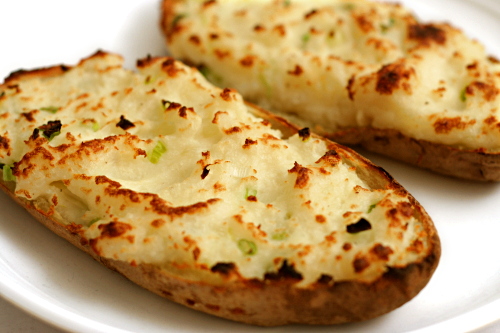
One year ago: Twice-Baked Potatoes with Broccoli, Cheddar, and Scallions
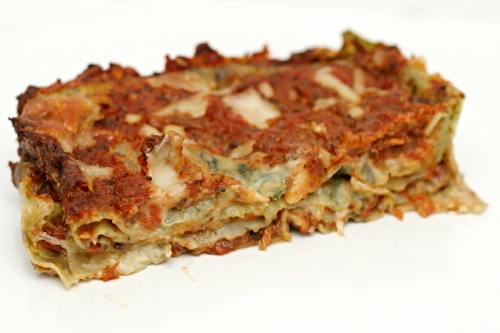
Two years ago: Lasagne Bolognese

Printer Friendly Recipe
Maple Oatmeal Scones (adapted just slightly from Barefoot Contessa)

I used traditional rolled oats, which worked just fine.

As always with scones, you can freeze the dough after shaping it, then bake the scones straight from the freezer.

Scones:
1¾ cups (8.4 ounces) all-purpose flour
½ cup whole wheat flour
½ cup quick-cooking oats, plus additional for sprinkling
1 tablespoon baking powder
1 tablespoon granulated sugar
1 teaspoon salt
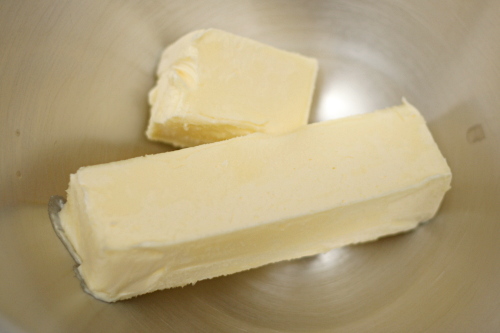
16 tablespoons (2 sticks) cold unsalted butter, cut into ½-inch cubes
¼ cup cold buttermilk
¼ cup pure maple syrup
2 large eggs, lightly beaten

Glaze:
½ cup confectioners’ sugar
¼ cup pure maple syrup
½ teaspoon pure vanilla extract

1. Preheat the oven to 400 degrees. In the bowl of an electric mixer fitted with a paddle attachment, combine the flours, oats, baking powder, sugar and salt. Blend the cold butter in at the lowest speed and mix until the butter is in pea-size pieces. Combine the buttermilk, maple syrup and eggs and add quickly to the flour-and-butter mixture. Mix until just blended. The dough may be sticky.

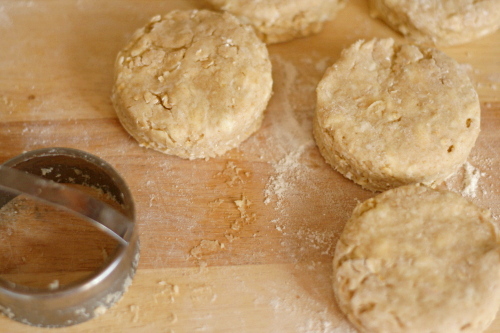
2. Dump the dough out onto a well-floured surface and be sure it is combined. Flour your hands and a rolling pin and roll the dough ¾ to 1 inch thick. You should see lumps of butter in the dough. Cut into 3-inch rounds with a plain or fluted cutter and place on a baking sheet lined with parchment paper. Lightly knead the scraps together and cut more scones.

3. Bake for 20 to 25 minutes, until the tops are crisp.

4. To make the glaze, combine the confectioners’ sugar, maple syrup and vanilla. When the scones are done, cool for 5 minutes, then drizzle each scone with 1 tablespoon of the glaze. For garnish, sprinkle a few uncooked oats on the tops of the scones.

lamb stew

Whenever I eat lamb, my first whiff of it always seems a little…off. Is lamb like feety cheese – stinky, but in a good way? Or am I just attuned to beef, and I’m surprised when the lamb smells different? Whatever, I’ve decided that I officially like lamb. Stinky or not.

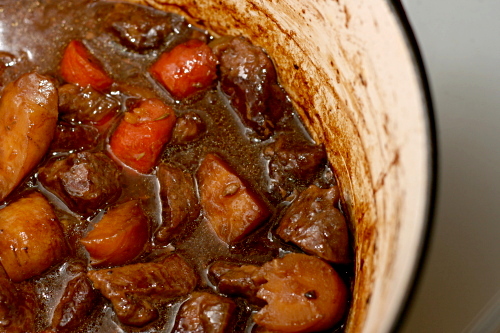
This stew is not any sort of authentic ethnic lamb stew – not Morrocon or Irish or whatever. It’s just lamb stew. It’s what I was in the mood for at the time – chunks of lamb, onions, root vegetables, thyme, and dark rich beer.

My only uncertainty was which type of lamb meat to use. I usually use beef chuck roast for stew, but what is that equivalent to for lamb? Certainly not sirloin, which was one of my few options. I also didn’t want to use expensive rib chops. Leg? Too big. Shanks? Dur…I don’t know. I went with a combination of sirloin meat and loin chops. I think blade chops would be a great option, but my store didn’t have them.

Whatever I did must have worked though, because the stew was just great. So rich and hearty and comforting. And distinctively…lamby. Which is a good thing.

One year ago: German Apple Pancake

Printer Friendly Recipe
Lamb Stew

The type of lamb to use is ill-defined, because a variety of lamb cuts might not be available and a number of different cuts will work. If you can find them, go for blade chops. I used a combination of loin chops and a sirloin steak, and it worked out very well. If the cut you use contains bones, use the higher amount of meat (around 3 pounds); otherwise, use around 2 pounds of meat.

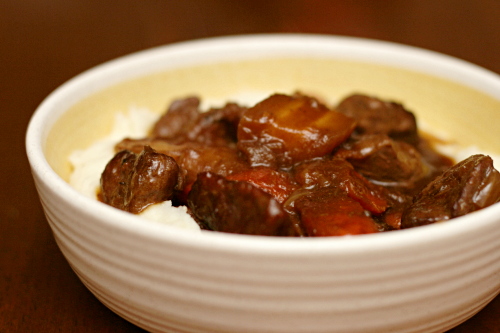
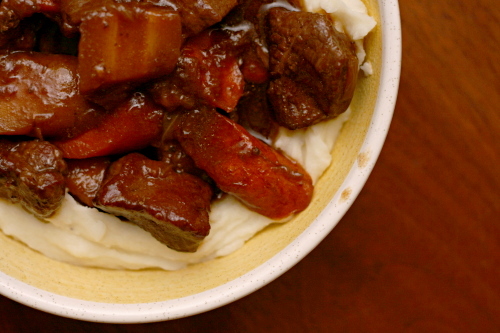
I served this over mashed potatoes, which I really enjoyed. You can also replace the parsnips with potatoes if you want something a little more like traditional stew.

Serves 6

3 tablespoon vegetable oil
2-3 pounds lamb meat, fat trimmed and cut into 1-inch chunks, bones reserved (see note)
salt
3 onions, chopped course
1 (12-ounce) bottle of stout
2 cups water
½ teaspoon black pepper
1 teaspoon dried thyme (or 2 sprigs fresh)
12 ounces carrots, halved lengthwise and sliced on a slight bias about ½ inch thick
12 ounces parsnips, halved lengthwise and sliced on a slight bias about ½ inch thick
¼ cup minced parsley

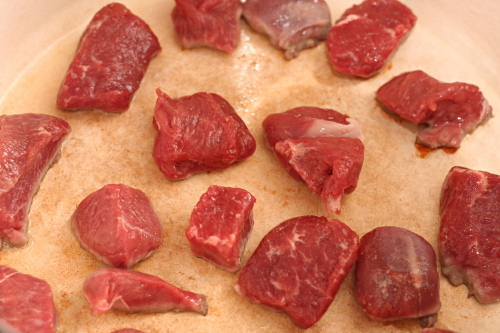
1. Adjust a rack to the lower-middle position and heat the oven to 325 degrees. Heat 1 tablespoon of the oil in a 5-quart Dutch oven over medium to medium-high heat. Add half of the meat, with pieces spaced about one inch apart. Cook without stirring for 2-3 minutes, until the first side is dark brown. Turn each piece to another flat side and cook for another 2-3 minutes, until the second side is dark brown. Continue cooking and turning the pieces until all sides are dark brown, about 10 minutes. Remove the lamb from the pot and place it on a plate. Repeat with another tablespoon oil and the remaining lamb. (If you use a 7-quart Dutch oven instead of a 5-quart, you might be able to fit them all in one batch.)

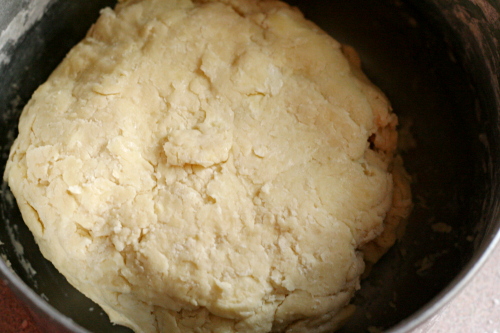
2. Reduce the heat to medium. Add the last tablespoon of oil to the empty, unrinsed pot, then add the onions and a pinch of salt. Sauté the onions, scraping the browned bits from the bottom of the pot and stirring occasionally, for 8-10 minutes, until the onions are softened and browned around the edges.

3. Add the browned meat, lamb bones, beer, water, 1½ teaspoons salt, pepper, and thyme to the pot with the onions. Bring to a simmer over medium-high heat, then cover the pot and place it in the oven. Cook for one hour, uncovered.

4. Add the carrots and parsnips to the stew and cook for another hour, or until the meat is tender and the vegetables are softened. Remove the lamb bones, stir in the parsley, adjust the salt and pepper if necessary, and serve.

twice-baked potatoes

Copy of IMG_1022

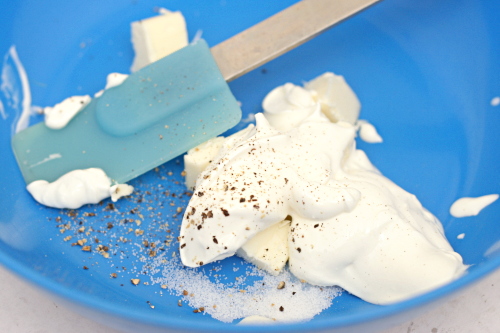
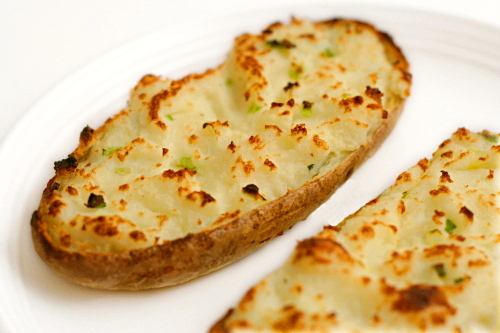
Trust me, you don’t need a recipe for twice-baked potatoes. You know what makes twice-baked potatoes so good? Fat. The more butter and sour cream you add, the better your potatoes will be. The less you add, the better you’ll feel about eating those potatoes.

Copy of IMG_0990

Decide what your goals are – if you want indulgence, you can add all sorts of sour cream, butter, cheese if you want it! If you want to keep it very light, replace the sour cream with buttermilk and reduce the butter to just enough to moisten the potato filling.

Copy of IMG_0999

Because I often serve twice-baked potatoes as part of nice meals, my goal tends to be flavor and not nutrition. In this case, I was making them just for myself and Dave, so I tried not to get carried away with the butter and sour cream. If I was serving them for a bigger occasion, I might add a bit more of each.

Copy of IMG_1005

Hey, don’t look at me like I’m some sort of fat-adding heathen. My mom pushes a small cube of butter into each potato before its second bake, which melts into an inviting pool of decadence; at least I resisted that!

Copy of IMG_1037

One year ago: Candied Orange Peels
Two years ago: Yule Log (Daring Bakers)

Printer Friendly Recipe
Twice-Baked Potatoes

Serves 4

You can certainly add cheese to these if you like that sort of thing; a couple of ounces (½ cup) of something like cheddar would compliment the other flavors nicely. If you want to make the potatoes lighter, replace all or a portion of the sour cream with buttermilk. If you want to make them even more delicious, increase the sour cream by a couple of tablespoons. The flavor of the filling won’t change significantly after its second bake, so feel free to taste and adjust as you go.

24 ounces (approximately) russet potatoes (4 small or 2 large)
4 tablespoons (½ stick) butter, room temperature
¼ cup sour cream
½ teaspoon salt
⅛ teaspoon black pepper
2 scallions, finely chopped

1. Adjust an oven rack to the middle position and heat the oven to 400ºF. Scrub the potatoes and stab each one several times with a fork. Place the potatoes right on the oven rack and bake them until a fork inserted into one meets no resistance, 60-75 minutes. Remove the potatoes from the oven and let them cool slightly. Heat the broiler.

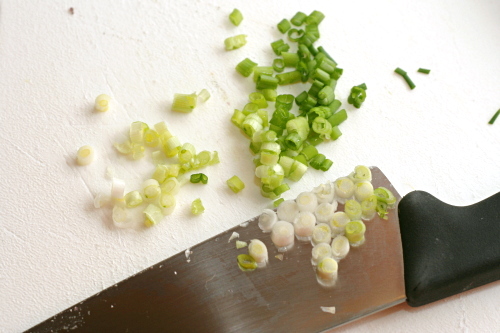
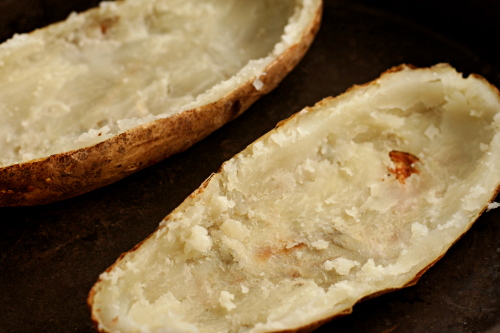
2. In a large bowl, mix the butter, sour cream, salt and pepper. Cut the potatoes in half and use a spoon to scoop out the flesh, leaving behind a thin layer of potato on the skin. Add the potato flesh to the bowl with the sour cream mixture. Using a potato masher, mash the potatoes into the sour cream mixture until it’s combined and there are no large chunks of potato. Fold in the scallions (reserving a few for a garnish, if you’d like).

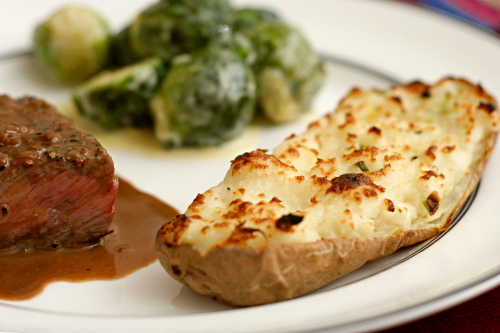
3. Spoon the filling into the potato shells. Place the potatoes on a baking sheet and broil until the tops are crisp and lightly browned. Serve immediately.

Copy of IMG_1023

Suggested menu: Steak au Poivre, Brussels Sprouts Braised in Cream, Twice-Baked Potatoes

sablés

Copy of IMG_1733
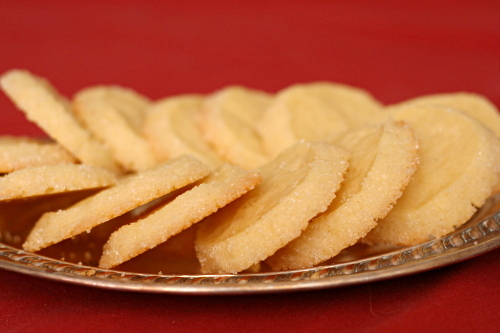
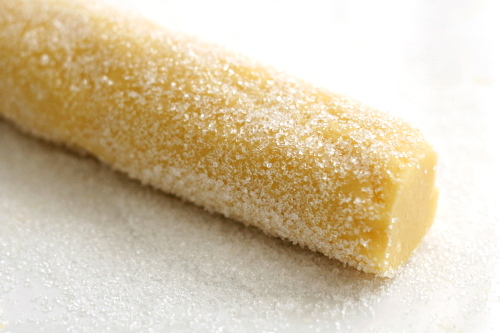
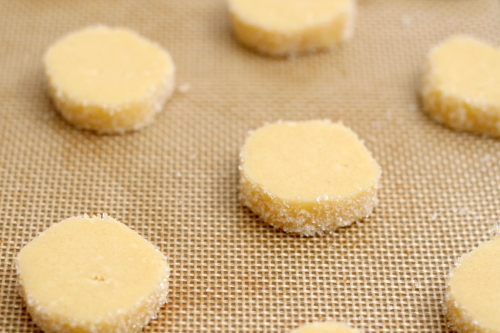
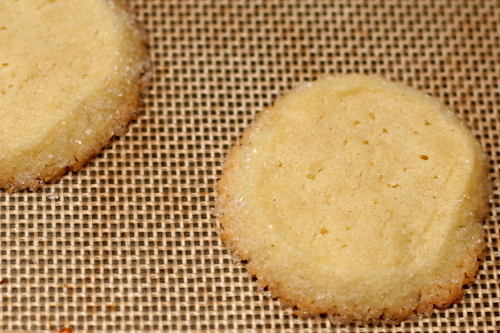
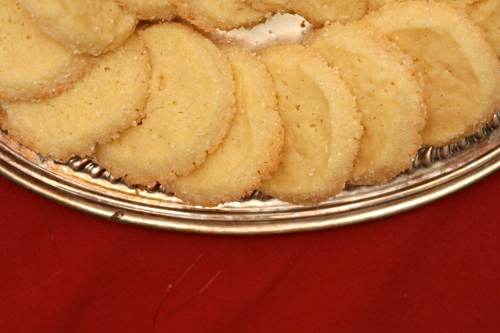
I was all excited about these cookies after I mixed up the dough, which tasted amazing. I was looking forward to how pretty they’d look once they were baked, tall and flat with glittery sugar around their edges.

Copy of IMG_1679

Then I saw that there was some flavor variations that I could have played with. Because what’s better than regular sablés? Lemon sablés! Ooh, or orange. Or I could have used vanilla sugar instead of regular sugar! Now I was disappointed in my cookies. Stupid boring plain sablés.

Copy of IMG_1684

Except, not really. Because without any other flavors getting in the way, these cookies mostly taste like butter. And sugar. And salt. In other words, like everything good.

Copy of IMG_1687

Barbara chose these for Tuesdays with Dorie and has the recipe posted. I didn’t follow the directions quite as precisely as I should have, which is why my cookies don’t have straight edges and and a perfectly even texture.

One year ago: Grandma’s All-Occasion Sugar Cookies

Copy of IMG_1735

brioche raisin snails

Copy of IMG_6438

I’m very comfortable cutting recipes in half. Some people say that they don’t like to deal with the math, but I come from a family of three engineers and a math teacher, so I can handle math. Plus, I’m cooking for just two people now, and I lived alone for six years before that, so my options are either to make half-recipes, throw a lot of food away, or eat the same thing for weeks. Given those choices, I take fractions all the way.

Copy of IMG_6424

Even if a recipe specifically recommends making the full recipe because smaller amounts are harder to work with – eh. Whatever. I usually cut it in half anyway. Cakes, caramel, bread dough, whatever. You’d be surprised what you can get away with, although you might, as in this case, have to split the occasional egg in half.

Copy of IMG_6425

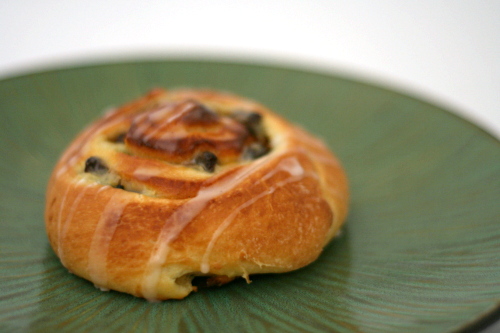
Dorie’s brioche raisin snails are a rich yeast dough with pastry cream and flambéed raisins rolled into it. It probably sounds like quite a bit of work, and frankly, it is, but it’s a nice change from cinnamon rolls if you find yourself making those often.

Copy of IMG_6426

If you follow the recipe exactly, you’ll end up with twice as much brioche as you need for the snails, so you can always make some of Dorie’s fantastic sticky buns too. Or, just cut the brioche recipe in half like I did. Does anyone really need two different kinds of buttery tender breakfast breads tempting them at once?

Copy of IMG_6429

One year ago: Pumpkin Ginger Muffins

Printer Friendly Recipe
Brioche Raisin Snails
(from Dorie Greenspan’s Baking: From My Home to Yours)

Makes about 12 snails

You’ll only need half of the brioche dough, and while Dorie recommends making the full recipe and saving half for later (the dough takes well to freezing), I found that I could successfully make half the recipe if I used a faster mixing speed than the recipe recommends. If you find that there isn’t enough dough for the dough hook to work effectively, knead with the paddle attachment, switching to the dough hook for just the last few minutes of kneading. The full recipe is presented below.

You can shape the rolls into a log and then wrap the log well and freeze it. When you’re ready to bake, let the log defrost in the refrigerator overnight, then cut the rolls and let them rise at room temperature.

Brioche:
2 packets (4½ teaspoons) instant yeast
⅓ cup warm water
⅓ cup warm milk
3¾ cups (27.6 ounces) all-purpose flour
2 teaspoons salt
3 large eggs, at room temperature
¼ cup sugar
24 tablespoons (3 sticks) unsalted butter, at room temperature but still slightly firm

Pastry cream:
1 cup whole milk
3 large egg yolks
¼ cup (1.75 ounces) sugar
2½ tablespoons cornstarch, sifted
¾ teaspoon pure vanilla extract
1½ tablespoons unsalted butter, at room temperature, cut into bits

Assembly:
1 cup moist, plump raisins
3 tablespoons dark rum
1½ teaspoons sugar
Scant ¼ teaspoon ground cinnamon

Glaze:
¾ cup confectioners’ sugar
about 1 teaspoon water
drop of pure vanilla extract

For the brioche: Put the yeast, water, and milk in the bowl of a stand mixer and, using a wooden spoon, stir until the yeast is dissolved. Add the flour and salt, and fit the mixer with the dough hook, if you have one. Toss a kitchen towel over the mixer, covering the bowl as completely as you can – this will help keep you, the counter and your kitchen floor from being showered in flour. Turn the mixer on and off in a few short pulses, just to dampen the flour (yes, you can peek to see how you’re doing), then remove the towel, increase the mixer speed to medium-low and mix for a minute or two, just until the flour is moistened. At this point you’ll have a fairly dry, shaggy mass.

Scrape the sides and bottom of the bowl with a rubber spatula, set the mixer to low and add the eggs, followed by the sugar. Increase the mixer speed to medium and beat for about 3 minutes, until the dough forms a ball. Reduce the speed to low and add the butter in 2-tablespoon-size chunks, beating until each piece is almost incorporated before adding the next. You’ll have a dough that is very soft, almost like a batter. Increase the speed to medium-high and continue to beat until the dough pulls away from the sides of the bowl, about 10 minutes.

Transfer the dough to a clean bowl (or wash out the mixer bowl and use it), cover with plastic wrap and leave at room temperature until nearly doubled in size, 40 to 60 minutes, depending upon the warmth of your room.

Deflate the dough b lifting it up around the edges and letting it fall with a slap into the bowl. Cover the bowl with plastic wrap and put it in the refrigerator. Slap the dough down in the bowl every 30 minutes until it stops rising, about 2 hours, then leave the covered dough in the refrigerator to chill overnight.

Divide the dough in half, reserving half for another use.

For the pastry cream: Bring the milk to a boil in a small saucepan.

Meanwhile, in a medium heavy-bottomed saucepan, whisk the yolks together with the sugar and cornstarch until thick and well blended. Still whisking, drizzle in about 2 tablespoons of the hot milk – this will temper, or warm, the yolks so they won’t curdle. Whisking all the while, slowly pour in the remainder of the milk. Put the pan over medium heat and, whisking vigorously, constantly and thoroughly (making sure to get into the edges of the pot), bring the mixture to a boil. Keep at a boil, still whisking, for 1 to 2 minutes, then remove the pan from the heat.

Whisk in the vanilla extract. Let sit for 5 minutes, then whisk in the bits of butter, stirring until they are fully incorporated and the pastry cream is smooth and silky. Scrape the cream into a bowl. You can press a piece of plastic wrap against the surface of the cream to create an airtight seal and refrigerate the pastry cream until cold or, if you want to cool is quickly, put the bowl into a larger bowl filled with ice cubes and cold water, and stir the pastry cream occasionally until it is thoroughly chilled, about 20 minutes.

To assemble: Line one large or two smaller baking sheets with parchment or silicone mats.

Put the raisins in a small saucepan, cover them with hot water and let them steep for about 4 minutes, until they are plumped. Drain the raisins, return them to the saucepan and, stirring constantly, warm them over low heat. When the raisins are very hot, pull the pan from the heat and pour over the rum. Standing back, ignite the liquor. Stir until the flames go out, then cover and set aside. (The raisins and liquor can be kept in a covered jar for up to 1 day.)

Mix the sugar and cinnamon together.

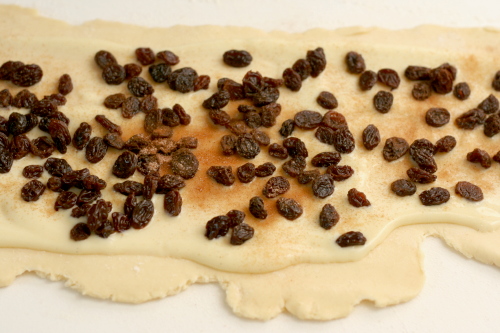
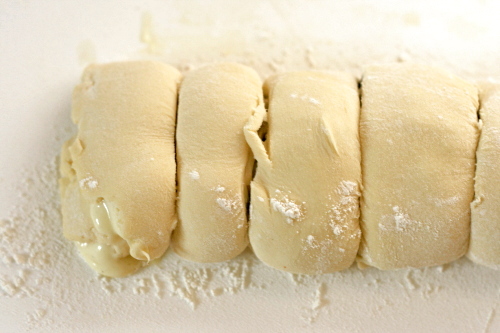
On a flour dusted surface, roll the dough into a rectangle about 12 inches wide and 16 inches long, with a short end toward you. Spread the pastry cream across the dough, leaving 1-inch strip bare on the side farthest from you. Scatter the raisins over the pastry cream and sprinkle the raisins and cream with the cinnamon sugar. Starting wit the side nearest you, roll the dough into a cylinder, keeping the roll as tight as you can. (At this point, you can wrap the dough airtight and freeze it up to 2 months; see Storing for further instructions. Or, if you do not want to make the full recipe, use as much of the dough as you’d like and freeze the remainder.)

With a bread knife or unflavored floss, trim just a tiny bit from the ends if they’re ragged or not well filled, then cut the log into rounds a scant 1 inch thick. Put the snails on the lined baking sheet(s), leaving some puff space between them.

Lightly cover the snails with wax paper and set the baking sheet(s) in a warm place until the snails have doubles in volume – they’ll be puffy and soft – about 1 hour and 30 minutes.

When the snails have almost fully risen, preheat the oven: depending on the number of baking sheets you have, either center a rack in the oven or position the racks to divide the oven into thirds and preheat the oven to 375ºF.

Remove the wax paper, and bake the snails for about 25 minutes (rotate the sheets, if you’re using two, from top to bottom and front to back after 15 minutes), or until they are puffed and richly browned. Using a metal spatula, transfer the snails to a cooling rack.

Copy of IMG_6434

slice and bake brown sugar cookies

Copy of IMG_1207

It’s Thanksgiving! And that means it’s officially Christmastime!

Right?

Oh, it means something about giving thanks? Hmm. That’s cool too.

Copy of Copy of IMG_1129

Still, once the feast is over, it’s all about Christmas. I used to try to hold off thinking about, hearing, and seeing anything Christmas-related until Thanksgiving, but you can imagine how successful that strategy was. These days, I’m more in the ‘if you can’t beat ‘em, join ‘em’ mindset. I didn’t play carols or put up my tree, but I did smile over cute decorations.

Copy of IMG_1153

What better way to kick off the Christmas season than cookies? One of my favorite Christmas cookies, in fact, and I think I finally figured out exactly why I like them so much.

Copy of Copy of IMG_1198

The dough is pretty typical for cookies, with butter, sugar, salt, eggs, vanilla, flour, and leavening. But, it uses twice as much brown sugar as white sugar, which…you guys! It’s chocolate chip cookie dough, without the chocolate! Nothing against chocolate, but that’s pretty much my perfect cookie.

Copy of IMG_1192

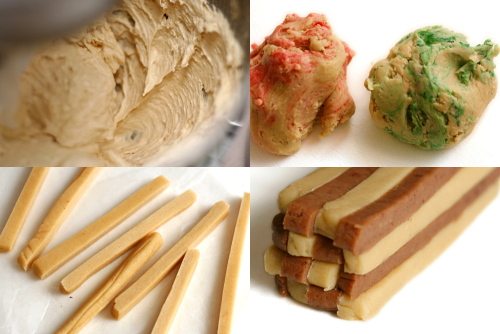
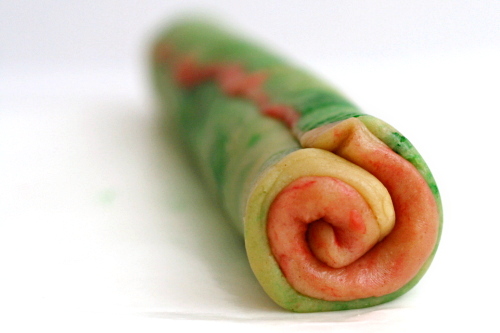
Plus, they’re so pretty. It takes a bit of effort to get them into the different shapes, but once they’re formed, you just throw the logs of dough in the freezer, then bake however many you want whenever you want.

Copy of IMG_1190

These cookies are delicious, they’re not hard to make, they look impressive, and their timing is completely flexible. In other words, they’re perfect. There can be no better way to shift into the Christmas season.

Copy of IMG_1208

One year ago: Multigrain Pancakes

Printer Friendly Recipe
Slice and Bake Brown Sugar Cookies

Makes about 8 dozen

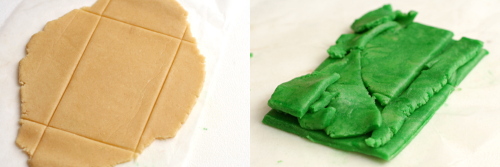
The only slightly difficult part of this recipe is rolling out the dough to an exact size. The best method I found was to initially roll it out to about twice the desired size, then trim the edges to a shape 1 inch smaller in each direction than you eventually want. Place the trimmings on the cut rectangle, cover with wax paper, and roll out to your final desired size (see photos above).

Update 12/22/2011: I like these cookies even better with a ½ cup less flour (3½ cups total).  The dough is stickier, and there’s no way you’d be able to roll it out to the right size, but I’ve decided that simply pressing it to the right size is easier anyway.

4 cups (19.2 ounces) unbleached flour
1 teaspoon baking powder
¼ teaspoon baking soda
2 eggs, preferably room temperature
2 teaspoons vanilla extract
20 tablespoons (2½ sticks) butter, room temperature
1 teaspoon salt
1 cup (7 ounces) firmly packed light brown sugar
½ cup (3½ ounces) granulated sugar
½ ounce unsweetened chocolate, finely chopped

1. In a medium-sized bowl, combine the flour, baking powder, and baking soda. Break the eggs into a small measuring cup, whisk them lightly, and mix in the vanilla.

2. Place the butter in the bowl of a stand mixer fitted with the paddle attachment (or a large mixing bowl if you’re using a hand-held mixer). Beat the butter on medium-low speed until it’s smooth, then add the salt and both sugars. Continue beating on medium-low until the mixture is light and fluffy, about 2 minutes, scraping the sides of the bowl as needed. With the mixer running, gradually add the egg mixture. Once the eggs have been added, scrape the sides of the bowl once, then continue mixing on medium speed for about 1 minute. Reduce the mixer speed to low and gradually add the flour mixture, mixing just until evenly combined. Divide the dough into three equal portions.

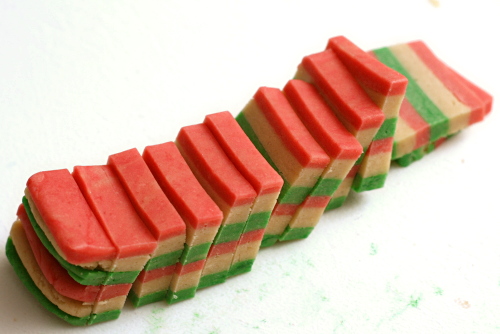
3. For the striped cookies: Divide the first portion of dough into three more equally sized parts. Color one third red, another green, and leave the last one white. Between sheets of wax paper, roll each portion out to a 3-by-9-inch rectangle. Freeze the rectangles for about 10 minutes, until they’re firm enough to cut and stack. Cut each rectangle in half lengthwise to form two 1½-by-9-inch rectangles. Stack the rectangles of dough, alternating colors, to form a block of dough with stripes. Trim the edges if desired. Wrap in wax paper and freeze for at least four hours, or up to 4 weeks.

4. For the checkerboard cookies: Place the chocolate in a microwave-safe bowl and microwave on half power for about 30 seconds. Stir, then repeat the heating and stirring until fully melted, being careful not to burn the chocolate. Divide one portion of dough into two equally sized parts. Mix the chocolate into one half and leave the other plain. Roll each portion into a 9-by-3-inch rectangle. Freeze the rectangles for about 10 minutes, until they’re firm enough to cut and stack. Cut each rectangle into eight 9-by-3/8-inch strips. On a sheet of wax paper, lay four strips next to each other, alternating colors. Press the strips together gently to remove any gaps. Lay another four strips on top of the first layer, alternating colors between layers. Repeat twice more, until there are four layers of four strips each. Trim the edges if desired. Wrap in wax paper and freeze for at least four hours, or up to 4 weeks.

5. For the spiral cookies: Divide the last portion of dough into two equally sized parts. Color one half red and the other green. Between sheets of waxed paper, roll each portion of dough into an 8-by-8-inch square. Without chilling the dough, stack the squares, then tightly roll them together to form a spiral. Wrap the dough in wax paper and freeze for at least fours hours, or up to 4 weeks.

6. When ready to bake, adjust an oven rack to the middle position and heat the oven to 350ºF. Line a baking pan with parchment paper or a silicone mat. Slice the frozen logs into cookies about 1/8-inch thick. Lay the cookies on the prepared pan, about ½-inch apart. Bake for 7-10 minutes, just until the tops no longer look wet. Let the cookies cool on the pan for about 2 minutes, then transfer them to wire racks. Serve at room temperature. Stored in an airtight container, the cookies will be good for at least a week.

Copy of IMG_1220

chicken empanadas

Copy of IMG_1318

Dave got yelled at over these empanadas. I’m not much of a yeller normally; I’m more of a silent treatment and glower type of person. But there was no time for that; action needed to be taken immediately.

Copy of IMG_9781

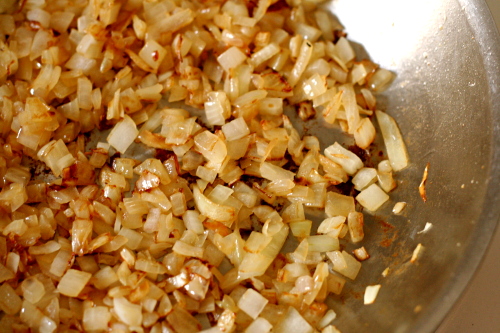
It’s all because I made the filling a couple of days before I planned to form and bake the empanadas. The filling isn’t the most simple thing to make. There’s all kinds of chopping, browning, simmering, and meat shredding. And I was a little short on chicken, so I didn’t end up with as much filling as I’d hoped.

Copy of IMG_9780

That night, Dave needed to heat something up for himself for dinner, so I told him there was some extra brown rice with black beans in the fridge. I walked away for a few minutes, and when I came back, he had dumped my precious empanada filling onto a plate, microwaved it, and was scooping it up with a fork.

Copy of IMG_9973

Hey, guess what there is none of in this filling? 1) Brown rice. 2) Black beans.

“Damn!” he exclaimed. “This is good!”  That’s when I yelled, because I just needed him to stop eating it right away.

And then he was so apologetic and I felt like a jerk. He kept saying, “It really was tasty!” as if that was supposed to make me feel better about it.  Yes. I know it’s tasty.  I spent some good time making sure it was.

Copy of IMG_9987

And what can you do to make something so delicious even better? Wrap it in pastry and bake it until it’s browned and flaky and crisp. Oh wow, these are good. And apparently that’s true whether they’re wrapped in pastry and baked or just dumped onto a plate and microwaved.

Copy of IMG_1331

One year ago: Comparison of 2 chocolate cake recipes
Two years ago: Cream cheese chocolate chip cookies (and my very first blog entry)

Printer Friendly Recipe
Chicken Empanadas (adapted from Smitten Kitchen and epicurious)

Makes about 18 empanadas

I didn’t actually measure anything in the filling. I had to leave the olives out because Dave hates them.

As I formed each empanada, I put it in the freezer while I worked with the rest. That way the dough didn’t get too soft and it baked up flaky.

After forming the empanadas, I baked about half of them immediately. I froze the rest for a couple of months, then baked them straight from the freezer. They were perfect.

Dough:
4½ cups (21.6 ounces) unbleached all-purpose flour
3 teaspoons salt
16 tablespoons (2 sticks) cold unsalted butter, cut into ½-inch cubes
2 large eggs
⅔ cup ice water
2 tablespoons distilled white vinegar

Filling:
3 whole chicken legs, including thighs (2 to 2¼ pounds total)
1 teaspoon salt
¼ teaspoon black pepper
1 tablespoon extra-virgin olive oil
2 large onions, halved lengthwise, diced
2 large garlic cloves, minced
2 Turkish bay leaves or 1 California
⅓ cup (1½ ounces) finely diced Spanish chorizo
½ teaspoon Spanish smoked paprika (not hot)
¼ cup chopped pitted green olives
¼ cup golden raisins
½ cup dry white wine
½ cup reduced-sodium chicken broth

Egg wash:
1 egg
water
salt

1. For the dough: Mix the flour and salt in a large bowl; blend in the butter with your fingertips or a pastry blender until the mixture resembles coarse meal with some roughly pea-sized butter lumps. Beat together the egg, water, and vinegar in a small bowl. Add it to the flour mixture, stirring until just incorporated. The mixture will look shaggy. Turn out the mixture onto a lightly floured surface and gather it together, kneading gently with heel of your hand once or twice, just enough to bring the dough together. Form the dough into two flat rectangles and chill them, each wrapped in plastic wrap, at least 1 hour or overnight.

2. For the filling: Pat the chicken dry and season it with salt and pepper. Heat 1 tablespoon oil in a 12-inch heavy skillet over medium-high heat until hot but not smoking, then add the chicken, skin-side down. Cook it without moving for about 3 minutes, until dark golden brown, then turn it and continue cooking for another 3 minutes. Remove the chicken from the pan and set it aside.

3. Add the onions, garlic, and bay leaves to the skillet and sauté, stirring frequently, until the onions are softened, 4 to 5 minutes. Add the chorizo and paprika and cook, stirring, for 1 minute. Add the olives, raisins, wine, and broth and bring the mixture to a boil, stirring and scraping up any brown bits. Return the chicken to the skillet along with any juices accumulated on the plate, then reduce the heat to medium-low and simmer, covered, turning the chicken once, until the chicken is tender, 25 to 30 minutes total.

4. Transfer the chicken to a clean plate. The sauce remaining in the skillet should be the consistency of heavy cream; if it isn’t, briskly simmer until it’s slightly thickened, about 5 minutes. When the chicken is cool enough to handle, discard the skin and bones and coarsely chop the meat. Stir the chicken back into the sauce. Discard the bay leaves and season the filling with salt and pepper. Let the filling cool for 30 minutes, uncovered.

5. To form and bake the empanadas: Adjust an oven rack to the middle position and preheat the oven to 400°F. Line a baking pan with a parchment paper or a silicone mat. Divide the dough into 24 equal pieces and from each into a disc. Keeping remaining pieces covered, roll out 1 piece on a lightly floured surface with a lightly floured rolling pin into a 5-inch round (about 1/8 inch thick).

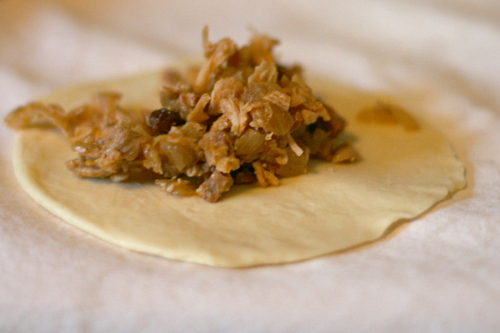
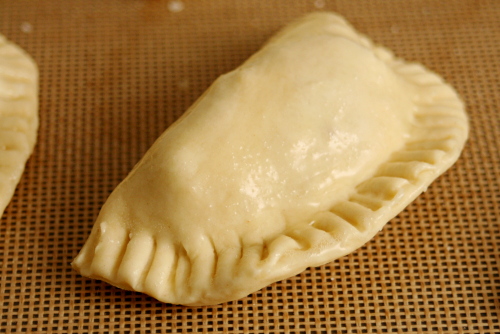
6. Spoon about 2 tablespoons filling onto the center of each round of dough and fold the dough in half, enclosing the filling. Press the edges together to seal, then crimp decoratively with your fingers or the tines of a fork. Transfer the empanada to the prepared pan. Repeat with the remaining dough. You might have extra dough.

7. Beat the egg with 1 tablespoon of water and a pinch of salt. Brush the empanadas with the egg wash, then bake one sheet at a time until the empanadas are golden brown, about 25 minutes. Transfer them to a cooling rack and let them cool for at least 10 minutes. Serve warm.

Copy of IMG_1320

carne adovada

Copy of IMG_5067

A carne adovada comparison post is a very bad idea because:

1. I don’t love cooking with meat, with the constant hand-washing and being careful not to contaminate cooked meat tools with raw meat tools.

Copy of IMG_7465

2. My limited counter space makes working with large roasts difficult.

3. The oven was on for four hours – in July.

Copy of IMG_7470

4. One of the recipes includes the warning “Don’t breathe the fumes!”

5. Another warning, this time from my sister: “My coworker said to be careful because red chile can give some people the runs if they aren’t used to eating it.”

Copy of IMG_4864

6. Carne adovada is red. Deep, dark red, and yes, of course it stains.

7. Who, outside of New Mexico, has even heard of carne adovada?

Copy of IMG_7487

Oh, and then, the outcome?

8. Dave thought all three recipes tasted the same anyway.

Copy of IMG_4879

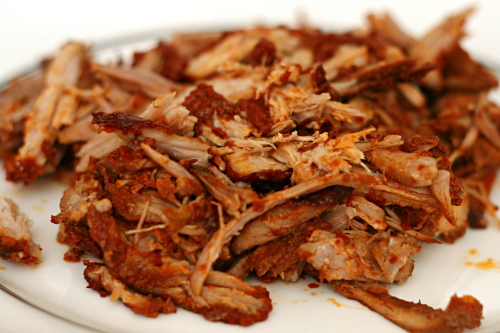
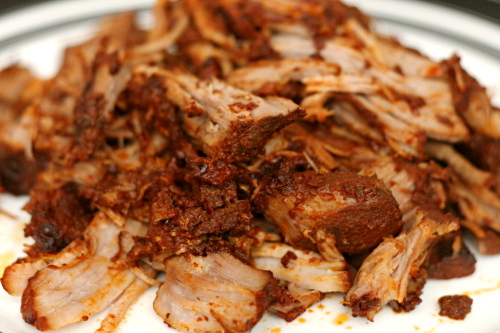
Carne adovada is pork marinated in red chile sauce, then slow roasted. It isn’t something that I’ve eaten a lot of; my dad made it once when I was young and it was crazy ridiculously painfully spicy, and I’ve pretty much been scared of it since. Of course now I realize that the level of spiciness will vary with the heat of the chiles.

Copy of IMG_4881

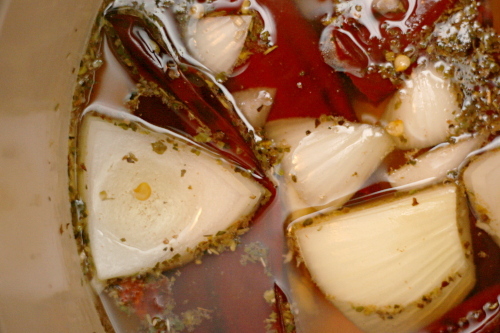
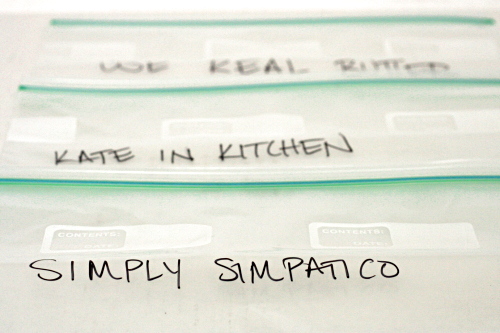
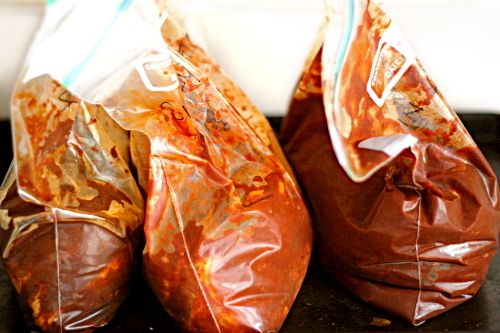
Unable, as usual, to decide on a recipe, I decided to compare a few. The meat in all recipes is marinated and cooked using the same method and cooking time; the difference is in the red chile sauce. At its most simple, the red chiles are soaked in hot water to rehydrate them, then blended with onions, garlic, and salt. Jen’s method is only slightly more complicated, with the added step of toasting the dried chiles before soaking them.

Copy of IMG_4871

Kate’s recipe is a little more complicated – and uses far, far more red chiles. It’s similar but significantly more fussy, with a soak followed by a simmer instead of just a soak, and then the blended ingredients need to be pushed through a sieve, a step I find tedious in most recipes that call for it.

Copy of IMG_7463

I let the meat marinate for about 24 hours, but if you can swing longer, up to 2 full days, I really think that’s the way to go. The more red chile flavor, the better.

Copy of IMG_7505

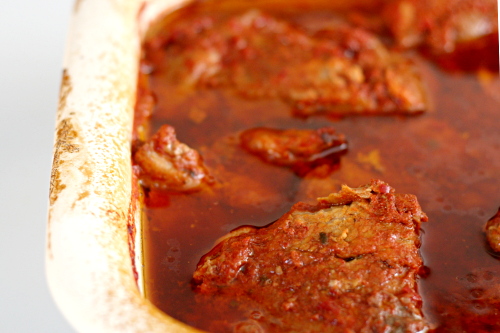
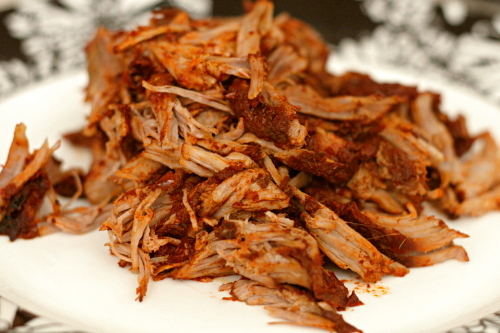
After finding enough properly-sized baking pans, jigsawing the pans into the oven, roasting the meat for hours, letting it cool slightly, and shredding all three pans of meat while trying to keep straight which was which so I could identify the photos, Dave and I decided that they were very, very similar.

Copy of IMG_7514

Dave would say identical. I would say that they’re oh-so-slightly different, but equally good. Kate’s recipe, which used so much more chiles, was spiciest. The recipe that did not require toasting the chiles tasted lighter and fresher, while the recipe with toasted chiles had a deeper flavor.

Copy of IMG_7523

My favorite was probably the simplest recipe; I liked that fresh flavor. Plus, if they all taste essentially the same, I might as well make the easiest, right? I guess a comparison was necessary, just so I know that, in this case, simple works just fine.

Copy of IMG_4929

Update: I thought I should add that neither of us had any, ah, digestive issues after eating the red chile, despite the concerns of my sister and her coworker.

One year ago: Baked Eggs with Spinach and Mushrooms

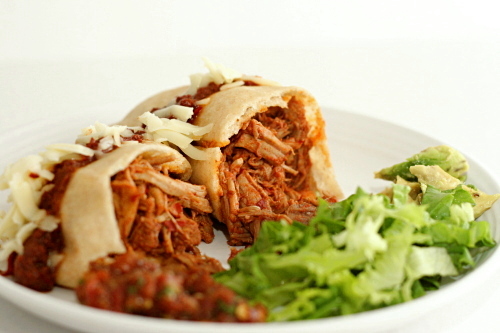
Serving suggestions: Burritos, stuffed sopaipillas (shown in the top photo), quesadillas, tacos, breakfast burritos.  You can also add potatoes to the mixture before cooking, and then serve the potatoes and meat as a main dish with beans and rice as sides.

Printer Friendly Recipe
Carne Adovada
(adapted from Simply Simpatico, by the Junior League of Albuquerque)

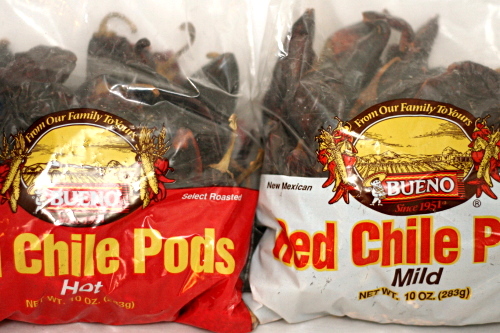
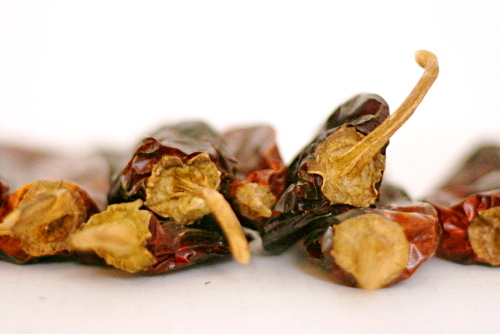
16-18 dried red chile pods
hot water
3 cloves garlic
2 teaspoons salt
1 tablespoon dried oregano
4 pounds pork shoulder, trimmed of thick layer of fat and sliced ½-inch thick

1. Remove stems and seeds from the chile pods. Place the pods in a large bowl or pot and pour in enough hot water to cover them. Soak for 1 hour. Strain, reserving the soaking liquid.

2. Place the chiles, garlic, and salt in a blender and add enough soaking liquid to just cover. Making sure there’s about two inches of headspace, blend until the skins disappear and the mixture is smooth, 2-3 minutes. Pour the sauce over meat, cover tightly, and marinate in the refrigerator for 24-28 hours.

3. Adjust a rack to the middle position and heat the oven to 350ºF. Place the meat and chile sauce marinade in a baking pan and cover tightly with foil. Bake the carne adovada until the meat is falling apart tender, about 4 hours. (You can also cook the carne adovada in a crockpot on low heat for 7-9 hours.) When the meat is done, shred it or cut it into 1-inch pieces. Serve.

Copy of IMG_7527

Printer Friendly Recipe
Carne Adovado
(adapted from Jen at Use Real Butter, who adapted it from Sante Fe Recipe)

16 dried red chile pods
1 tablespoon salt
4 cloves garlic
2 teaspoons oregano
5 pounds pork shoulder, trimmed of thick layer of fat and sliced ½-inch thick

1. Adjust an oven rack to the middle position and heat the oven to 325ºF. Remove the stems from the chile pods; place the pods in a pan and bake for 5-10 minutes, stirring occasionally, until the chiles are lightly roasted. Leave the oven door open, and don’t breathe the fumes! Shake the seeds out of the pods and discard them.

2. Place the chiles in a medium bowl and cover them with boiling water. Let them sit for 30 minutes. Drain the water, reserving about 2 cups. Place the chiles in a food processor or blender; add the salt, garlic, and oregano. Cover the mixture with the reserved chile water, and blend or process for 2 minutes or until the skins disappear.

3. Pour the sauce over meat, cover tightly, and marinate in the refrigerator for 24-28 hours.

4. Adjust a rack to the middle position and heat the oven to 350ºF. Place the meat and chile sauce marinade in a baking pan and cover tightly with foil. Bake the carne adovada until the meat is falling apart tender, about 4 hours. (You can also cook the carne adovada in a crockpot on low heat for 7-9 hours.) When the meat is done, shred it or cut it into 1-inch pieces. Serve.

Copy of IMG_7526

Printer Friendly Recipe
Carne Adovada
(adapted from Kate in the Kitchen , who adapted it from Sante Fe Hot and Spicy Recipes)

12 ounces dried red chile peppers
1 large onion, chopped
8 cloves fresh garlic, smashed with skins removed
2 teaspoons dried oregano
2 teaspoons ground cumin
2 teaspoon kosher salt
3-4 pounds pork shoulder, trimmed of thick layer of fat and sliced ½-inch thick
4 teaspoons red pepper flakes
2 sticks cinnamon

1. De-stem and de-seed chile peppers; place in a large stock pot and cover with hot water. Soak for 30 minutes. Add the remaining ingredients to the pot; bring to a boil. Reduce the heat to low and simmer for 30 minutes.

2. Strain, reserving liquid. Allow to cool slightly, then process solids in batches in a food processor using reserve liquid for proper consistency. Strain through a wire sieve, pressing on the solids to extract the liquids.

3. Pour the sauce over meat, add the cinnamon and red pepper flakes, cover tightly, and marinate in the refrigerator for 24-28 hours.

4. Adjust a rack to the middle position and heat the oven to 350ºF. Remove the cinnamon stick. Place the meat and chile sauce marinade in a baking pan and cover tightly with foil. Bake the carne adovada until the meat is falling apart tender, about 4 hours. (You can also cook the carne adovada in a crockpot on low heat for 7-9 hours.) When the meat is done, shred it or cut it into 1-inch pieces. Serve.

Copy of IMG_7524

sugar-topped molasses spice cookies

Copy of IMG_0865

A story:

I was trying to decide where to go to graduate school, visiting schools and meeting with potential advisors. One of those advisors had me over for dinner at his house with his family. His wife said she’d recently made molasses taffy, and I blurted out, “It doesn’t taste like molasses, right? That would be disgusting!” Yes, she said, clearly taken aback, it tastes like molasses.

Copy of IMG_0850

Oh, god, it still makes me cringe. Shut up, Bridget.

It’s not my fault! I didn’t know much about molasses back then, and in fact had only recently bought my first jar – of blackstrap molasses, because I didn’t know there were different types. No wonder I thought all molasses tasted bad.

Now I know better. Molasses = gingerbread = good.

Copy of IMG_0853

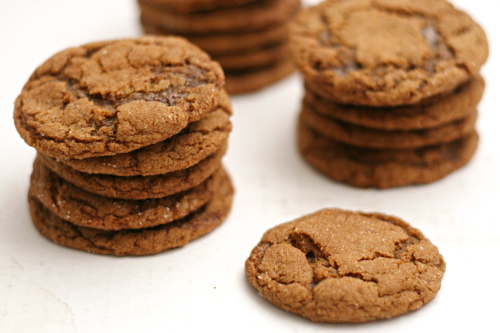
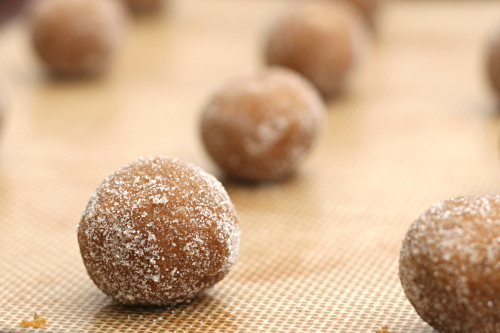
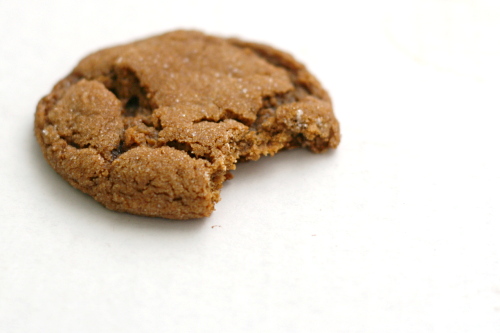
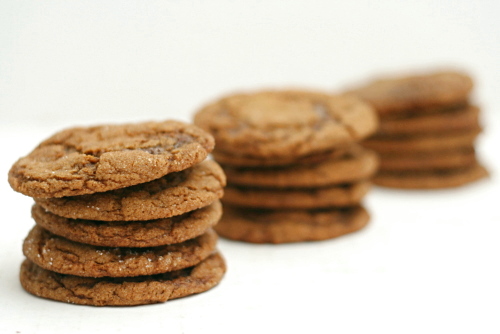
These cookies are even more molassey than gingerbread, which I don’t mind at all these days. And you know what? I ate a piece of that molasses taffy, way back when, and it wasn’t all bad either. I must have come up with something appropriately polite to say, because four years later, that advisor gave me a degree.

Copy of IMG_0870

Pamela has the recipe posted for Tuesdays with Dorie. I liked the texture and shape of the cookies better when they were baked at 375ºF for 8-10 minutes instead of 350ºF for 12-14 minutes.

One year ago: Rice Pudding

Copy of IMG_0868

vegetarian lasagna

Copy of IMG_0495

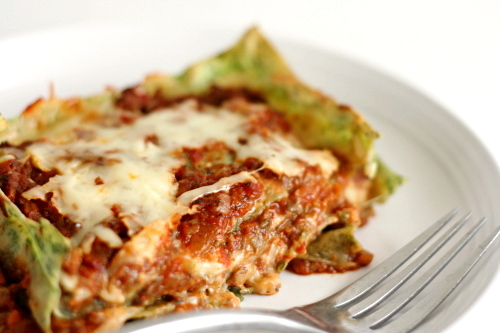
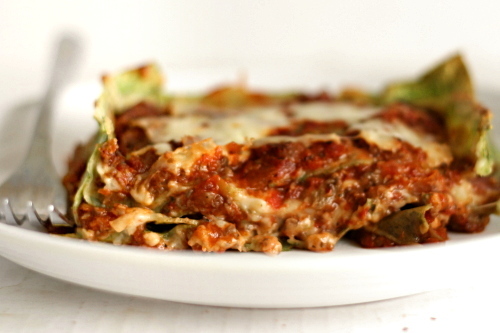
This is, for me, perfect lasagna. You can’t go wrong with most combinations of pasta + sauce + cheese, but this one has just the right balance of light and rich, cheese and tomatoes, pasta and sauce, vegetables and…well, not meat, because there is none.

Copy of IMG_0470

But don’t worry, it isn’t vegetable lasagna. It’s vegetarian lasagna. It’s a fine line.

It isn’t that I don’t like meat in my lasagna; I just don’t know that it’s really necessary for me. On the other hand, I definitely do not like large chunks of vegetables in my lasagna – no layers of eggplant or zucchini or peppers.

Copy of IMG_0478

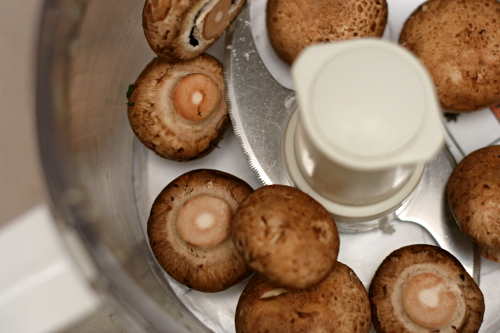
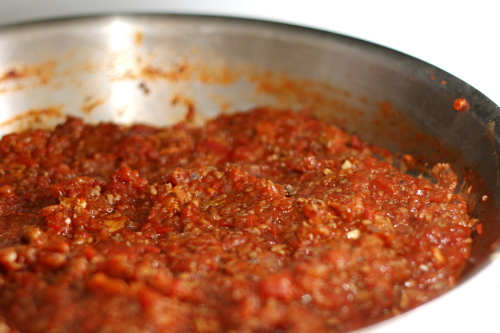
What I’ve done here is use minced mushrooms to mimic the texture and somewhat even the flavor of ground meat in the tomato sauce. The sauce has so much flavor that you’ll never miss the meat. Other than that, it’s a pretty traditional lasagna. I’ve replaced the ricotta with béchamel sauce, just because I like it that way.

Copy of IMG_0484

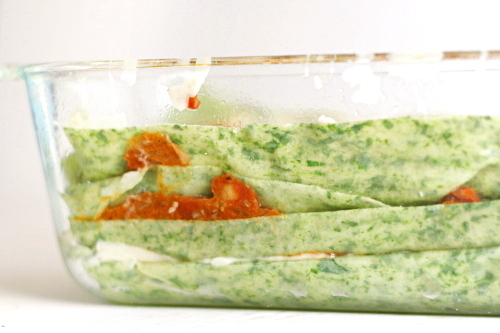
It’s also, as far as lasagna goes, not terribly indulgent. I use 2% milk in the béchamel and skim mozzarella, although you can certainly use something richer if you prefer. I like to make my own spinach pasta, because if you can add a bag of spinach to the lasagna without it affecting the final flavor or texture, why not? And with mushrooms replacing meat, plus plenty of homemade tomato sauce, there is certainly no shortage of vegetables.

Copy of IMG_0492

It’s just…perfect. Perfectly flavored, a perfect balance of richness. It’s full of vegetables, but they’re not overbearing. It’s a lot of work, yes, but I usually have fun making lasagna. And for a big pan of what is, for me, perfect lasagna? It’s absolutely worth it.

One year ago: Stuffed Sandwich Rolls

Copy of IMG_0496

Printer Friendly Recipe
Vegetarian Lasagna

Serves 8

The recipe looks more complicated than it needs to because of the homemade pasta. You can save yourself a lot of time (skip steps 1 through 4) by buying fresh pasta sheets instead of making and rolling out the spinach pasta. Or you can use a box of no-boil lasagna noodles, soaking them in hot water for 5 minutes before layering the lasagna.

Utilize your food processor! For the parmesan, mozzarella, fresh mushrooms, onion, and tomatoes (in that order).

You can make the whole lasagna ahead of time and refrigerate it overnight. Or you can freeze the whole lasagna. Let it defrost in the refrigerator overnight. To bake the lasagna straight from the refrigerator, just place it in the cold oven, then turn the oven onto 375ºF to bake the lasagna. The lasagna will warm up as the oven heats.

You can also make the pasta dough and both sauces a day in advance and then assemble the layers right before baking.

If you keep fresh basil around, definitely mince up a few leaves and add them to the cooked tomato sauce. You may also want to sprinkle some on top of the lasagna when it comes out of the oven.

Spinach pasta:
5 ounces baby spinach, washed
1 egg
¾ cup all-purpose flour, plus (a lot) more for dusting

Tomato sauce:
½ ounce dried porcini mushrooms, rinsed
2 tablespoons olive oil
1 large onion, chopped fine (reserve ½ cup of the onions for the béchamel)
4 cloves garlic, minced
16 ounces mushrooms, minced
¼ cup wine (optional; red or white is fine)
1 (28-ounce) can diced tomatoes, drained and pureed
1 (14-ounce) can diced tomatoes, drained and pureed
¾ teaspoon salt
¼ teaspoon pepper

Béchamel:
3 tablespoons unsalted butter
½ cup finely diced onions
3 garlic cloves, minced
3 tablespoons all-purpose flour
2½ cups milk
1 bay leaf
pinch nutmeg
¼ teaspoon salt
⅛ teaspoon pepper
½ cup grated parmesan cheese (1 ounce)

Assembly:
nonstick spray
8 ounces (2 cups) shredded mozzarella cheese

1. For the pasta: Place the spinach in a 12-inch skillet and add a few tablespoons of water (or if the spinach is wet from being washed, just add the wet spinach to the skillet). Turn the heat to high until the water boils, then reduce the heat and stir the spinach until it just wilts, about 1 minute. Remove the spinach from the pan (don’t wash the skillet) and place it on a clean dishtowel. Pat and squeeze the spinach until it’s very dry, then finely mince it.

2. Add the flour to a wide bowl or pie plate, then make a well in the center of the flour. Lightly beat the egg, then add it to the well with the chopped spinach. Stir the flour, egg, and spinach together until thoroughly mixed, then started kneading. Knead, adding flour as necessary to keep the dough from being sticky, until the dough is smooth and elastic, about 5 minutes. Don’t be concerned if you need to add quite a bit of extra flour; the dough should be malleable but not at all sticky.

3. Divide the dough into 3 balls. Work with one ball of dough at a time and leave the others covered with a damp dishtowel (you can use the same one you used for drying the spinach). Flatten the dough slightly, then roll it through the widest setting on a pasta roller. Fold it in thirds like a piece of paper going into an envelope, then roll it through the pasta roller again, feeding it with one of the open sides first. If at any point the dough is sticky, brush it with flour. Repeat the folding into thirds and rolling a few times. Without folding, run the pasta through the widest setting once more. Adjust the pasta roller to the next-thinner setting and roll the dough through the machine. Continue to gradually thin the dough until the third-to-last setting. Brush it with flour if the dough starts to stick at all. If the strip of dough becomes too long to handle, cut it into two shorter strips and work with each strip separately. Repeat the rolling, folding, and thinning with the remaining balls of dough, laying the sheets of pasta on dishtowels.

4. Bring a large pot of water to a boil, then add 1 tablespoon salt and reduce the heat until the water is at a lively simmer instead of a vigorous boil. Cut the strips of dough into 8-inch lengths. One by one, dip each rectangle of dough in the water, leave it for about 10 seconds, then remove it and rinse it under running water. Lay the strips of dough on dishtowels.

5. For the tomato sauce: Place the dried porcini in a small saucepan and add just enough water to cover. Bring the water to a boil over high heat, then turn the burner off.

6. Heat the olive oil over medium heat in the same large skillet the spinach was cooked in. Add the onions and a pinch of salt and sauté, stirring occasionally, until the onions just brown around the edges, about 8 minutes. Add the garlic and mushrooms and continue cooking and occasionally stirring until the mushrooms start to brown. First they’ll release a bunch of liquid, but then that will evaporate and they’ll brown. Once they do, pour in the wine and cook, scraping the bottom of the pan, until the wine almost completely evaporates, then add the tomatoes, salt and pepper. Bring to a simmer. Carefully lift the porcini from their soaking liquid with a fork; mince them and add them to the sauce. Simmer the sauce over medium heat until thick, about 15 minutes.

7. For the béchamel: Heat the butter in a medium saucepan over medium heat. When the foaming subsides, add the onions and garlic and sauté, stirring occasionally, until the onion is softened. Add the flour and stir continuously for 1 minute. Stirring constantly, gradually pour in the milk and reserved porcini liquid (pouring carefully so as to leave any grit behind in the small saucepan). Increase the heat to medium-high and bring the mixture to a light boil, stirring very frequently. Once the sauce starts to bubble, lower the heat to medium-low and let it simmer for 10 minutes, stirring in occasionally. Stir in the nutmeg, salt, pepper, and parmesan.

8. Assembly: Adjust an oven rack to the middle position and heat the oven to 375ºF. Spray a 9-by-13-inch pan with nonstick spray. Spread a thin layer of tomato sauce on the bottom of the pan, then add a layer of noodles. Spread ¼ of the béchamel on the noodles, followed by ¼ of the cheese, and ¼ of the tomato sauce. Repeat the layering (noodles, béchamel, cheese, tomato sauce) twice more, then finish by adding a layer of noodles, then the last of the béchamel, the last of the tomato sauce, and the last of the mozzarella.

9. Spray a large sheet of aluminum foil with nonstick spray, then use it to cover the lasagna. Bake, covered, for 30 minutes, then remove the foil and continue to bake for another 15 minutes, until the lasagna is bubbling around the edges. Remove the pan from the oven and let the lasagna set for 10 minutes before cutting and serving.

Copy of IMG_0901