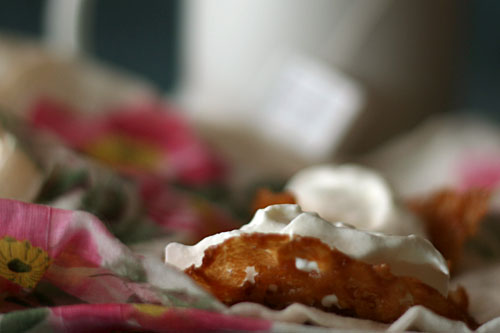
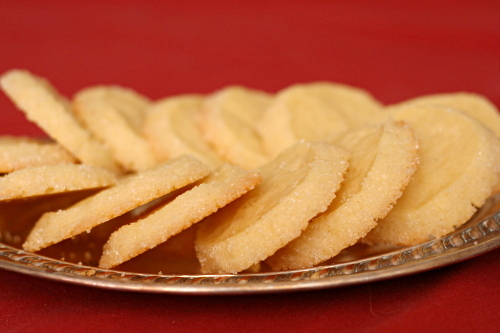
translucent maple tuiles

Sometimes I’m really on my game, and other times I am just not at all. For example, last month, I made a big turkey dinner feast for me and Dave, just for fun, and it went flawlessly except for the oven getting turned off in the middle of the day and no one noticing until an hour after I put the turkey in. Every recipe impressed me, I got the food to the table while it was still hot, the kitchen was mostly clean before we sat down to eat. That was me on my game.

These tuiles are a simple little recipe. They only have four ingredients. The dough can be made days in advance. They don’t spend long in the oven. It shouldn’t have been complicated.

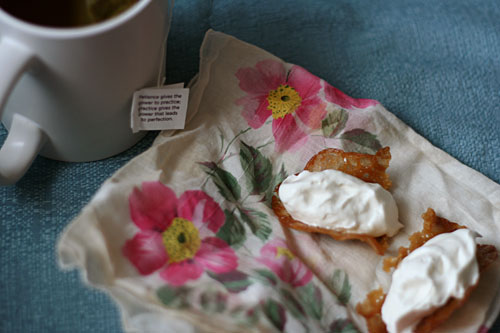
But I made mistakes at every step. First I added too little flour, which was solved easily enough by softening my chilled dough, working in more flour, and re-chilling. My tuiles baked up well and I only broke one during the transfer from baking pan to cooling rack (or beer bottle, in this case). But they were chewy, and I assumed they were supposed to be crisp, so I put them back in the oven for a few minutes, draped over the rungs of a cooling rack. You, being smarter than me, can probably tell where this went wrong – the tuiles dripped off of the cooling rack in pieces. And they didn’t get any crisper.

From there, it was just breaking the pieces every time I moved them and adding a ridiculous amount of brandy to the whipped cream filling. So. Tuiles. That was interesting.

Hindy chose this recipe for Tuesdays with Dorie, and she has it posted. I added a bit of salt to my dough. Dorie says to bake the tuiles on an unlined baking pan, but mine is really dark and burns things when it’s unlined, so I used parchment paper, which worked great.

One year ago: Rosy Pear and Pistachio Tart
Two years ago: Grandma’s All-Occasion Sugar Cookies
almost-fudge gateau

If I’m not careful, my sister is going to start to associate visiting me with having to find time for extra workouts after she gets back, and then she won’t visit. Or maybe she’ll associate her visits down here with exceptionally rich desserts, and she’ll bring my nephews here more often. These are things I need to consider.

After the cheesecake extravaganza of her last visit, I resisted my very strong desire to make pumpkin cheesecake this time. Instead, I considered my brother-in-law’s preferences, which are chocolate chocolate chocolate.

So, after the park, after dinner, after bath time, after stories, it was time for grown-up dessert. And it’s just possible that almost-fudge gateau – topped with ganache one evening and raspberry coulis the next – might draw them back here soon. And not just because the kids want to climb on the rocket ship in the playground.

One year ago: Sugar-Topped Molasses Spice Cookies
Two years ago: Thanksgiving Twofer Pie

Almost-Fudge Gateau (adapted from Dorie Greenspan’s Baking: From My Home to Yours)

5 large eggs
9 ounces bittersweet chocolate, coarsely chopped
1 cup (7 ounces) sugar
5 tablespoon unsalted butter, cut into chunks
2 tablespoons coffee or water
⅓ cup (1.6 ounces) all-purpose flour
pinch salt

Glaze:
4 ounces bittersweet chocolate, coarsely chopped
½ cup heavy cream
2 teaspoons light corn syrup

1. Preheat the oven to 350 degrees F. Butter a 9-inch springform pan, line the bottom with parchment paper, butter the paper, dust the inside of the pan with flour, and tap out the excess. Place the pan on a baking sheet lined with parchment or a silicone mat.

2. Separate the eggs, putting the whites in a large bowl and the yolks in a small bowl.

3. Set a heatproof bowl over a saucepan of simmering water, and add the chocolate, sugar, butter and coffee. Stir occasionally, until the chocolate and butter are melted. Transfer the bowl to the counter, and let the mixture sit for 3 minutes.

4. Using a rubber spatula, stir in the yolks, one by one, then fold in the flour.

5. Using a mixer with a whisk attachment, beat the egg whites with the pinch of salt until they hold firm, glossy peaks. Using the spatula, stir about one quarter of the beaten whites into the batter, then gently fold in the rest. Scrape the butter into the pan, and jiggle the pan from side to side to even the batter.

6. Bake for 35 to 45 minutes, or until the cake has risen evenly (it might rise around the edges, and you’ll think it’s done, but give it a few minutes, and the center will puff, too) and the top has firmed (it will probably be cracked) and doesn’t shimmy when tapped; a thin knife inserted into the center should come out just slightly streaked with chocolate. Transfer the pan to a cooling rack, and let the cake rest for 5 to 10 minutes.

7. Run a blunt knife gently around the edges of the cake, and remove the sides of the pan. Carefully turn the cake over onto a rack, and remove the pan bottom and the parchment paper. Invert the cake onto another rack, and cool to room temperature right side up. As the cake cools, it may sink.

8. For the Glaze: First, turn the cooled cake over onto another rack, so you’ll be glazing the flat bottom, and place the rack over a baking sheet lined with parchment or wax paper to catch any drips.

9. Put the chocolate in a small heatproof bowl. Melt the chocolate in a microwave or over a pan of simmering water.

10. Meanwhile, bring the cream to a boil in a small saucepan. Pour the hot cream over the chocolate, and stir very gently with a rubber spatula until the mixture is smooth and shiny. Stir in the corn syrup.

11. Pour the glaze over the cake, and smooth the top with a long metal icing spatula. Allow the glaze to set at room temperature, or slip the cake into the refrigerator for about 20 minutes. If the glaze dulls in the fridge, give it a little gentle heat from a hairdryer.

cranberry apple galette

I used to have a friend who always served steamed broccoli with her lasagna. “Everyone does salad with their lasagna”, she scoffed. But it seems to me that everyone does it because it works so well.

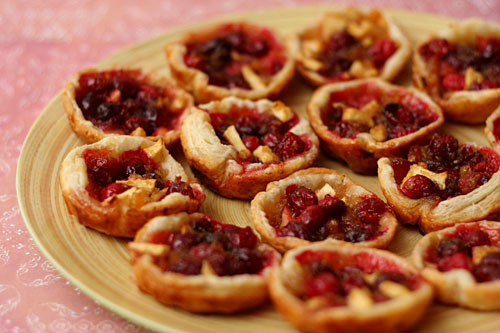
Cranberry and orange are another combination that is classic simply because it’s good. Cranberry and lime…well, I don’t know, because I wasn’t brave enough to try it. I do love tart foods, but since I knew I’d be sharing these, I took the safe and familiar route with cranberry and orange.

And it tasted just as good as I expected. I’m almost positive the cranberry-lime variation would have been wonderful too. Of course I can’t be sure, having taken the safe route.

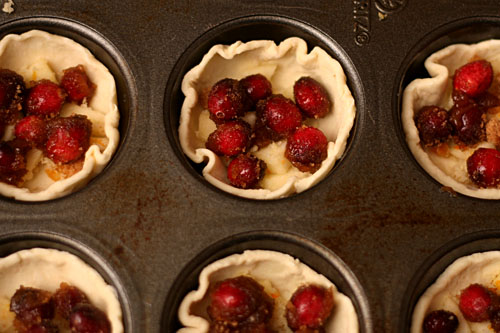
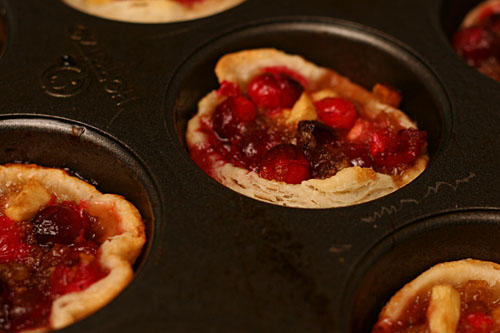
The sisters of Celestial Confections chose this galette for Tuesdays with Dorie, and they have the recipe posted. Make minis at your own time-consuming risk, by cutting 3-inch circles from the rolled dough and stuffing them in muffin cups before filling. Don’t bother trying to fold the sides in. Bake until bubbling and browned, 18-20 minutes.  Also, I used this galette dough, because I already had some in the freezer.  I suspect its malleability helps with maneuvering the dough circles into muffin cups.

One year ago: Cran-Apple Crisps
Two years ago: Rice Pudding

palmiers

If you watch the Food Network regularly, you’ve probably heard that the correct Italian pronunciation of bruschetta is “brusketta”. That’s all well and good, but most of us in the US pronounce it ‘brushetta’. And no matter how much you insist that it’s supposed to be brusketta, I’m going to consider you an insufferable know-it-all who needs to just go along with the flow. You can do as the Romans do when you’re in Rome; when you’re here, just say brushetta like the rest of us.

So how do you pronounce ‘palmiers’, anyway? The all-knowing Google says PALM-yeh, but I’m not sure if that’s the I’m-saying-it-the-French-way-even-though-we’re-not-in-France-and-no-one-here-talks-like-that way, or if Americans do actually say it like that. Maybe I don’t watch enough Food Network.

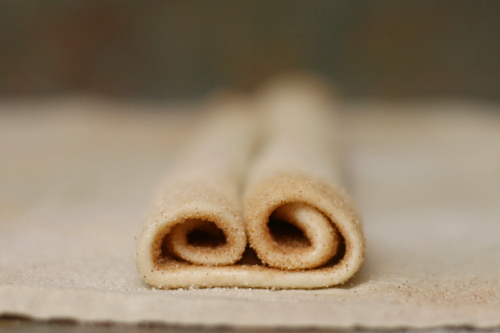
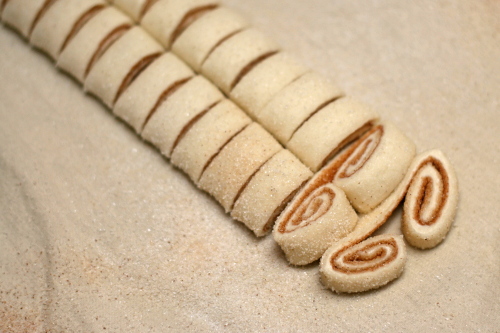
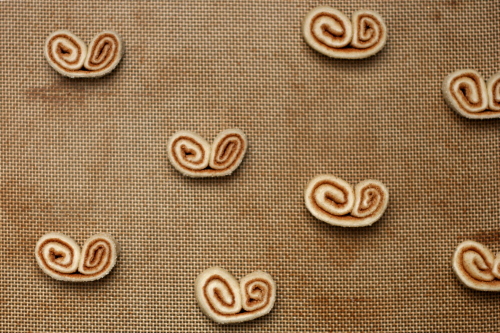
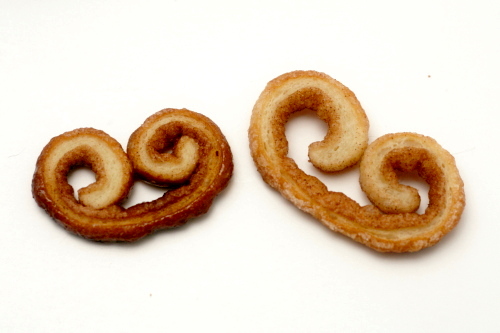
Fortunately, they’re easier to make than they are to figure out how to pronounce. All you do is roll out puff pastry, coat it in sugar and maybe spices, fold up the sides, slice, and bake. I actually did it before work, although I was late for work that day. But I’m late for work everyday, so I can’t blame the cookies.

My coworker described them as cinnamon rolls in cookie form, which is exactly what I was going for. Several people asked me what they were, to which I had no good answer. “Um…I don’t know how to pronounce it…some French word that means palm…” Someone please make me smarter. Palm-yay? Palm-yers?

One year ago: Pumpkin Cupcake Comparison
Two years ago: Pain Ordinaire

Printer Friendly Recipe
Palmiers (adapted from Ina Garten and About.com)

Makes about 30 cookies

1 cup sugar
pinch table salt
2 teaspoons cinnamon (optional; or other spices of your choice)
8 ounces puff pastry

1. Heat the oven to 425 degrees. Line two baking sheets with parchment paper or silicone mats. Mix the sugar, cinnamon, and salt.

2. Spread an even coating of the sugar mixture onto a pastry cloth or clean section of countertop. Coat more sugar over the top of the dough. Roll the dough out to a 15- by 12-inch rectangle, adding more sugar as necessary to prevent sticking. Starting at each long end, tightly roll the edges toward the center until they meet. Slice the dough into 3/8-inch cookies, transferring them to the prepared pans. Leave plenty of space between the cookies.

3. Bake one sheet at a time for 10-12 minutes, until the cookies puff and turn golden brown. Immediately (before the molten sugar hardens and glues the cookies to the pan!) transfer them to a wire rack to cool.

tarte fine

My boss and I both teach a course at the local community college, in addition to our day job. It keeps us busy. Yesterday he said that he’s considered taking semesters off from teaching, but then he wonders what he would do with the extra time.

I’m taking next semester off, and I can tell you all sorts of things I’m going to do with that time. I’m going to work out more. I’m going to brew beer. I’m going to pay attention to my husband in the evenings. I’m going to keep in closer touch with my friends. I’m going to make petits fours again. I’m going to go to bed earlier and buy birthday presents on time and keep my house cleaner. (Okay probably none of that last stuff will happen, because I’ll be too busy making petits fours and brewing beer.)

Until then, thank goodness for easy apple tarts that can be made after a Sunday evening faculty meeting; whose flaky crust and softened apples make for a just reward for going to a work meeting on the weekend, while softening the blow of another rushed week ahead.

Leslie chose this tart for Tuesdays with Dorie, and she has the recipe posted. In between grading exams and writing blog entries on Sunday, I managed to make my own puff pastry. I’d forgotten how easy it is.

One year ago:  Flaky Apple Turnovers
Two years ago: Crème Brulée

raspberry lemon petits fours

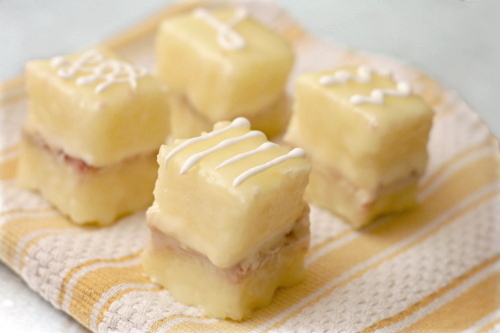
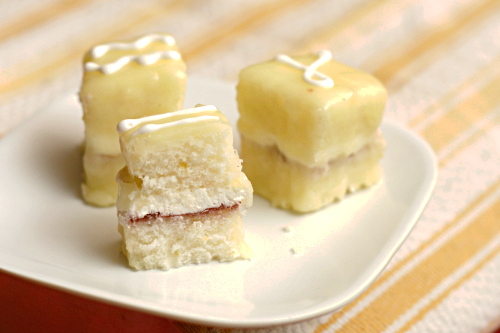
Making petits fours is like giving birth. Right afterwards, you’re convinced, NEVER AGAIN, because that freaking sucked. As time passes, you start thinking, well, maybe I could do that again. It’s worth it in the end, right?

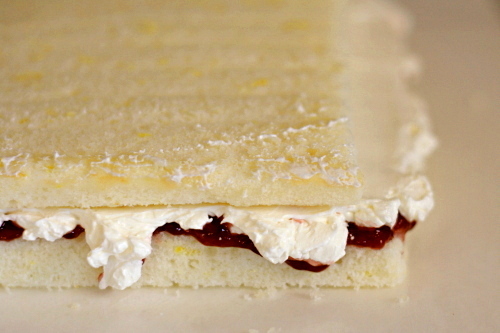
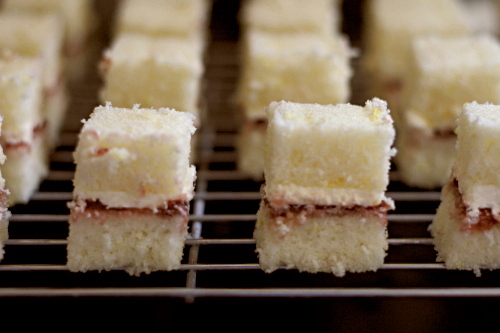
It all seemed so simple at first. I baked the cake in advance and froze it. I wasn’t going to brush the cakes with syrup, and the filling I was using was storebought jam – how hard could this be? You smear your cake with jam and frosting, cut it into cubes, drizzle pourable fondant over everything, and slap on some decorations. Clearly every blog entry I’d read on petits fours, in which the person swore that they would never be doing that again, was an exaggeration.

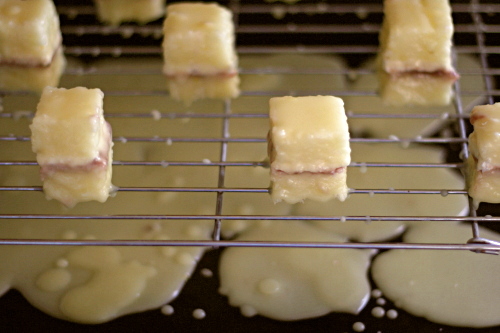
It’s the fondant that complicates things. Pourable fondant, made of warmed powdered sugar and water and corn syrup, is, quite frankly, a big pain in the ass. You’re lucky if ten percent of it stays on the squares of cake; the remainder drips onto a pan below. The lost fondant repeatably needs to be scraped off the pan back into a double boiler to reheat. It doesn’t coat very thickly, so multiple coats are necessary, and it doesn’t dry very solid, so the finished petits fours are sticky.

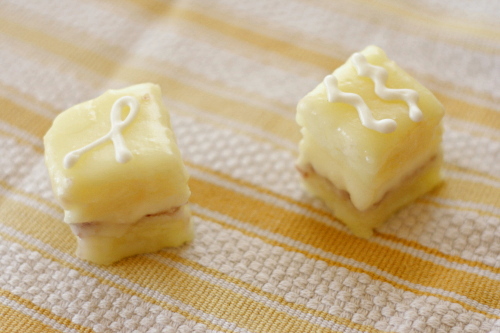
Okay, so they’re not perfect, and the process was frustrating and made me late for work. (This was back in those days when “work” was teaching one course in the evenings, which now I do in addition to my full-time day job.) On the other hand, they’re so cute! And completely delicious, since they are really nothing more than cake, filling, and frosting. Yes, I will definitely be trying again. If you’d asked me four months ago, when I made these, I don’t think I would have been so certain.

One year ago: Green Chile Huevos Rancheros
Two years ago: Pan-Seared Steak with Red Wine Pan Sauce

Printer Friendly Recipe
Raspberry Lemon Petits Fours

Makes about 30 petits fours

This is what I did, which is not the same as what I’ll do next time. Next time I’ll use Dorie’s Perfect Party Cake, because it isn’t as moist, and regular, rolled, fondant, probably a marshmallow version.

For decorations, consider fresh fruit to match your flavors; royal icing flowers (purchased or homemade); piped royal icing; or something more interesting that I’m not creative enough to come up with.

½ recipe White Cake (my adaptation), baked in a 9×13-inch pan for 16-22 minutes
¼ cup raspberry jam
½ recipe of Dorie Greenspan’s Buttercream
1 recipe Pourable Lemon Fondant (recipe follows)
decorations

Cut cake in half crosswise. Spread jam over one cake half. Spread buttercream over jam; you might not use it all. Top with remaining cake half. With a serrated knife, trim cake edges; cut cake into 1¼-inch squares. Arrange the squares on a cooling rack set over a baking sheet. Use a squeeze bottle, pastry bag, or ziploc bag with a hole cut from a corner to cover cake squares with fondant. As necessary, scrape fondant from baking sheet back into double boiler; rewarm. Allow fondant to dry before adding decorations.

Pourable Lemon Fondant: (from Use Real Butter)
2¼ cups (10 ounces) confectioner’s sugar
¼ cup water
2 tablespoons light corn syrup
¼ teaspoon vanilla
¼ teaspoon lemon extract
drop of yellow food coloring (optional)

Combine all ingredients except coloring in double boiler. Heat until lukewarm. Remove from heat and stir in food coloring.

croissants 3 (martha stewart)

I worked in a lab for years, but I never absolutely loved it. You’d think I would have, considering that I basically mixed up ingredients and baked them, but I guess without that crucial eating-the-batter – sorry, of course I mean that eating-the-result step, it just wasn’t as fun.

Plus I could never get the hang of keeping good records in the lab. My notebook seemed to be both unorganized and lacking crucial information. I took detailed notes on the amount and type of ingredients used and the baking temperature and time, but whenever I needed to look up details of the result, I was left with a few marginally descriptive words.

In the kitchen, it’s the opposite. The result, now that’s memorable, especially in this case – slightly sweet, intensely flaky, dark golden brown, impossible to resist, always leaving me wanting another.

The path to that result isn’t as memorable, particularly in the amount of instant dry yeast I used. Probably I should have written that down somewhere. I’m going to hypothesize – remember, hypothesizing is not the same thing as guessing! It’s an educated guess, which is to say, don’t skip out on this recipe just because the fresh yeast called for in the original recipe is dumb and I’m bad at note-taking, because the chances are very good that my estimate of the amount of yeast I used isn’t too terribly terrible, and anyway, it’s yeast and yeast always does its job eventually.

Anyway. I’m going to hypothesize that I used about one packet of yeast. Please accept my apologies for not taking thirty seconds to write it down. This must be why I now have an office job instead of a lab job.

One year ago: Anadama Bread
Two years ago: Baba Ghanoush and Falafel

Printer Friendly Recipe
Croissants (adapted from Martha Stewart’s Baking Handbook)

Makes 12

1 cup cold milk
1 tablespoon honey
14 ounces (about 3 cups) all-purpose flour
¼ cup (1.75 ounces) sugar
2¼ teaspoons salt
2¼ teaspoons (1 packet) instant yeast
20 tablespoons (2½ sticks) unsalted butter, cold
1 large egg, lightly beaten with a pinch of salt and a dribble of water or milk

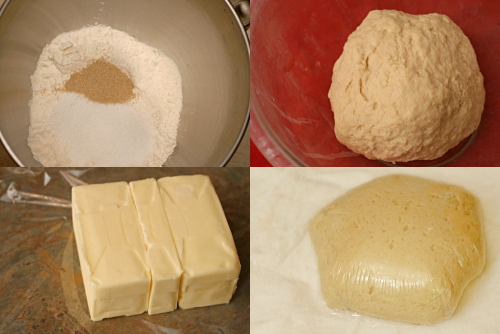
1. Make the dough package: Pour the milk and honey into a 2-cup liquid measuring cup, and stir to combine; set aside. In the bowl of an electric mixer fitted with the dough hook, stir together 12 ounces (about 2¾ cups) of the flour, the sugar, yeast, and salt; stir to combine. Add the milk mixture and mix on low speed until the dough just comes together, 2 to 3 minutes.

2. Turn out the dough onto a lightly floured work surface; gently knead to form a smooth ball, about 45 seconds. Wrap in plastic and refrigerate at least 1 hour or overnight.

3. Make the butter package: Lay the butter sticks side by side on a piece of plastic wrap, and sprinkle with the remaining 1 ounce (about 2 tablespoons) flour. Pound with a rolling pin until the flour is incorporated; roll into a 4- by 3-inch rectangle. Wrap tightly and refrigerate for at least 1 hour or overnight.

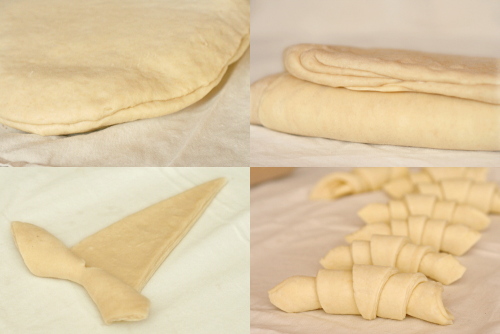
4. Remove the dough package from the refrigerator; place on a lightly floured work surface. Roll out to an 8-by-10-inch rectangle, about ½ inch thick, with a short side facing you. Remove the butter package from the refrigerator; place on the bottom half of the dough; fold the top half of the dough over the butter, and pinch the edges to seal.

5. Roll out the dough to a 10-by-10-inch square about ½ inch thick; keep the corners as square as possible. Remove any excess flour with a dry pastry brush. Starting at the far end, fold the square in thirds, as you would a business letter. This completes the first of three turns. Wrap in plastic and refrigerate for 1 hour.

6. Repeat rolling and folding as above two more times, starting with the flap opening on the right, as if it were a book, and refrigerate at least 1 hour between turns. To help you remember how many turns have been completed, mark the dough after each: Make one mark for the first turn, two for the second, and three for the third. After the third, wrap the dough in plastic, and refrigerate 6 to 8 hours, or overnight.

7. Turn out the chilled dough onto a lightly floured work surface. Roll out the dough to a 30-by-8-inch rectangle. (If the dough becomes too elastic, cover with plastic wrap, and let rest in the refrigerator for 10 minutes.) Using a pizza wheel, cut the dough into triangles, each with a 4-inch base (you will have scraps of dough at both ends). Cut a 1-inch slit in the center of the base of each triangle. Place triangles in a single layer on a clean work surface.

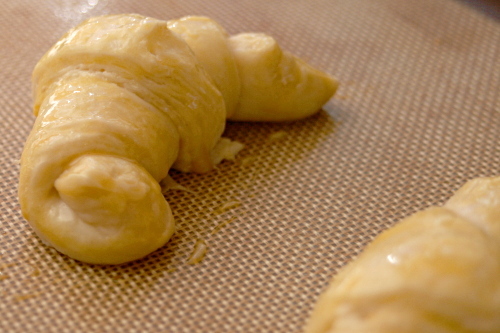
8. To shape the croissants, stretch the two lower points of each triangle to enlarge the slit slightly. Fold the inner corners formed by the slit toward the outer sides of the triangles, and press down to seal. Using your fingertips, roll the base of each triangle up and away from you, stretching the dough slightly outward as you roll; the tip should be tucked under the croissant. Pull the two ends toward you to form a crescent. Transfer the crescents to a parchment-lined baking sheets, 2 inches apart. Cover loosely with plastic wrap, and let rise in a warm place until very spongy and doubled in bulk, 45 to 60 minutes.

9. Preheat the oven to 400ºF, with a rack in the middle position. Lightly brush the crescents with the beaten egg. Bake until the croissants are puffed and golden brown, about 15 to 20 minutes. Transfer the sheet to a wire rack to cool. Serve warm or at room temperature.

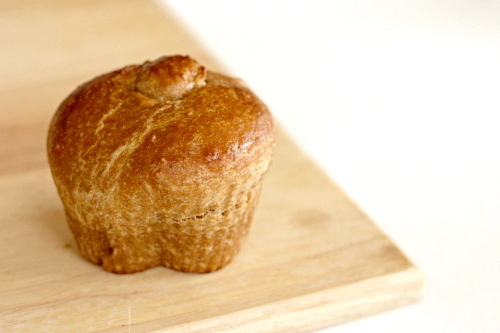
whole wheat brioche

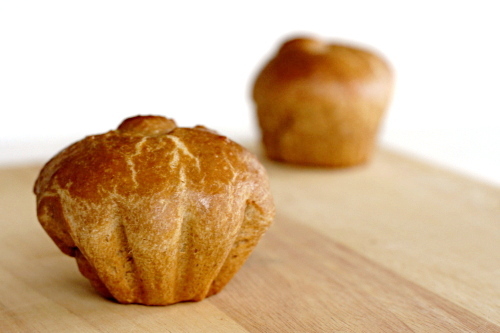
This recipe cracks me up. Each little brioche roll has 1¼ tablespoons of butter in it, so it doesn’t matter how much whole grain you use – these are not good for you.

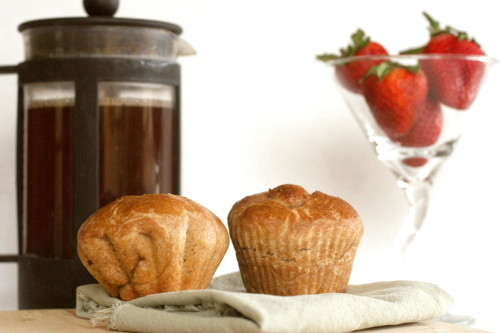
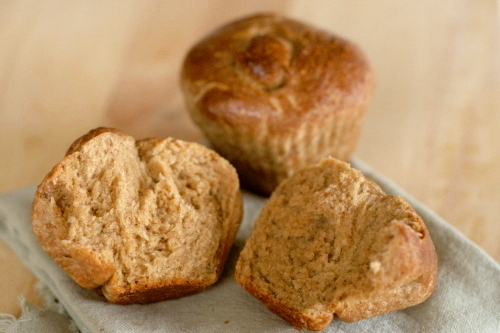
They are, however, good. Of course they don’t have much in common with their white flour cousins, which, if we were talking about people, would be one of those unceasingly friendly people who always have something nice to say. The whole wheat version is more akin to a sarcastic friend who always manages to make you laugh, but sometimes at your own expense. Both are good! Just different.

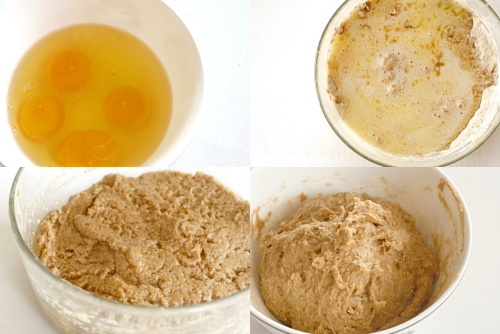
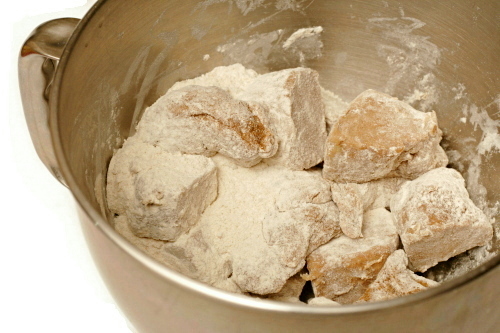
The whole wheat brioche is made along the same lines as the rest of Peter Reinhart’s Whole Grain Breads. What’s fun about this recipe is that the liquid used in one of the pre-doughs is melted butter, and in the other, it’s eggs. The one with the butter had a texture very different from the normal water-hydrated doughs – and not a particularly appetizing one, truth be told, as the best word to describe it would be ‘greasy’. Fortunately, after sitting in the fridge for several hours, the butter hardens and the mixture is more palatable – plus, of course, the liquid has had an opportunity to break down those bran fibers, which is the heart of Reinhart’s whole wheat bread method.

I tried a trick with this bread that was marginally successful. After the final dough is mixed and kneaded, it’s shaped immediately and then needs to rise again – for 3 to 4 hours. We tend to eat breakfast kind of late on weekends, but not that late!

So I reduced the yeast quite a bit, with the goal of extending the rising time to about 8 hours, or overnight. I wanted to wake up, heat the oven and throw the perfectly risen brioche rolls in to bake.

It turns out, though, that I decreased the yeast too much, and the poor little guys didn’t have enough strength to lift up that heavy dough. I still think the method is sound; I just need to use more yeast than I did. (The under-risen after 8 hours brioche were salvageable; I just had to give them an hour or so in a really warm environment before I could bake them.)

Usually my theory is that if food is supposed to be indulgent, then make it indulgent! Why worry about whole grains if you’re mainlining butter? But sometimes it’s just fun to make something weird, and whole wheat brioche is, indeed, weird.

One year ago: Pecan Sour Cream Biscuits
Two years ago: Chocolate Cream Pie

Printer Friendly Recipe
Whole Wheat Brioche (rewritten from Peter Reinhart’s Whole Grain Breads)

I reduced the yeast in the final dough to ½ teaspoon, hoping I could stretch the rising time to 8-10 hours, or overnight. This was too little, but I still think the method is worth trying, but with 1 teaspoon yeast.

I froze the brioche rolls after shaping, before rising. I let them defrost in the fridge for a few hours before moving them to room temperature to rise.

The melted butter kept leaking out of its pre-dough. Once the dough had chilled somewhat, I stirred it back in, so that the pre-dough would be homogeneous.

For the final cup of flour, after both pre-doughs are combined, I used white flour. I know that’s cheating, but I’ve had better results with Reinhart’s whole wheat bagels when white flour is used at the end, and I thought it was probably similar here. The rolls are still 80% whole wheat.

Pre-dough 1:
1¾ cups (8 ounces) whole wheat flour
½ teaspoon salt
½ cup whole milk, scalded and cooled
16 tablespoons (2 sticks) unsalted butter, melted

Mix all of the ingredients until thoroughly combined. Cover and refrigerate at least 8 hours and up to 3 days.

Pre-dough 2:
1¾ cups (8 ounces) whole wheat flour
¼ teaspoon instant yeast
4 large eggs, slightly beaten

Mix all of the ingredients until thoroughly combined. Using a rubber spatula or wet hands, knead the dough in the bowl for a couple minutes; it will be very tacky. Let the dough rest for 5 minutes, then knead again for 1 minute. Cover and refrigerate for at least 8 hours and up to 3 days.

Final dough:
Both pre-doughs
1 cup (4.5 ounces) whole wheat flour (see note)
¾ teaspoon salt
2¼ teaspoons instant yeast (see note)
3 tablespoons sugar

Egg wash:
1 egg beaten with 1 tablespoon water and a pinch of salt

1. Chop the chilled pre-doughs into to 12 pieces each. Combine the pre-doughs, flour, salt, yeast and sugar in the bowl of a standing mixer fitted with the dough hook (or a large bowl if mixing by hand). Mix on slow speed for 3 to 4 minutes, scraping the bowl as needed, (or knead with wet hands) until the pre-doughs are assimilated into each other. Add flour or water, as needed, to form a soft and slightly sticky dough. Knead (either with a mixer or by hand) for 3 to 4 minutes, until the dough is cold, firm, and slightly tacky. Let the dough rest for 5 minutes.

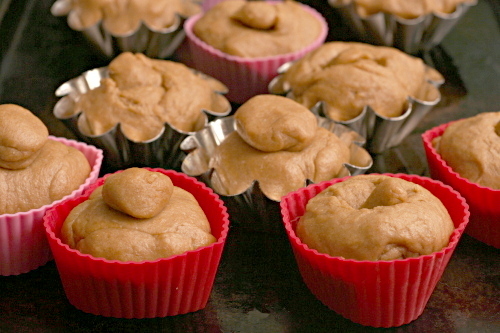
2. Divide the dough into 12 equal pieces and round each into a smooth ball. Spray 12 brioche molds or a 12-cup muffin pan with spray oil. To shape the brioche, roll each piece of dough into a cone; poke a hole through the larger end and slip the small end through the hole. (I also sometimes just formed a much smaller round from a small portion of the dough and stuck that on top of the larger round. I didn’t notice a difference in the baked versions of the two shaping methods.) Place the shaped rolls into the prepared pan and cover loosely with plastic wrap or a damp towel. Let rise at room temperature for 3 to 4 hours, until the dough has grown to about 1½ times its original size.

3. Adjust a rack to the middle position and heat the oven to 425 degrees. Brush the risen rolls with egg wash and place them in the oven, lowering the temperature to 400 degrees. Bake for 17 to 25 minutes, rotating the pan halfway through, until the brioche are dark golden brown, measure 195 degrees in the center, and sound hollow when tapped on the bottom (after one is removed from its pan).

4. Remove the rolls from their molds; cool on a cooling rack for at least 20 minutes before serving.

steak au poivre

Copy of IMG_1038

The importance of the Go-To Thing was hammered into me recently. I was sitting at home doing basically nothing, unshowered and unchanged from my recent workout, when Dave called me from a bar half an hour away. “Everyone wants you to come hang out!” Uh…will they still want to hang out in an hour or so, when I might actually show up?

Copy of IMG_0982

I didn’t have time to mull over my clothes, so I just chose the same outfit I’ve worn every time I’ve gone out recently. It’s easy, comfortable, cute, warm, and spans a wide range of situations. (Although my silky teal scarf was a little out of place at the Rob Zombie concert we ended up at.)

Copy of IMG_1011

Having a go-to meal for guests has also come in handy.  On December 23rd last year, Dave and I decided to skip the party we’d planned to go to on Christmas Eve so we could hang out with his parents instead. We offered to make them dinner, which meant I needed to come up with something I could make in my mother-in-law’s kitchen that would be quick enough to put together after a 7-hour drive, special enough for a holiday, and accessible enough that my picky stepfather-in-law would enjoy it.

Copy of IMG_1015

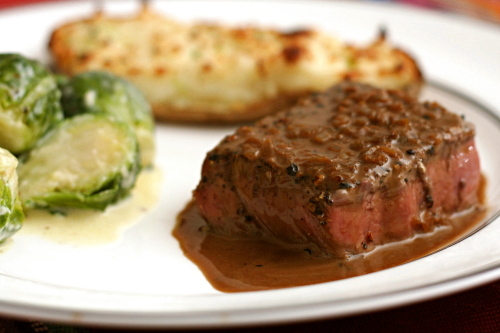
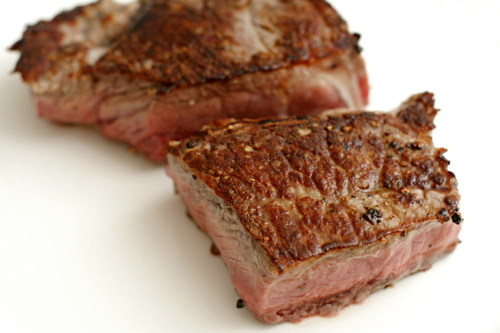
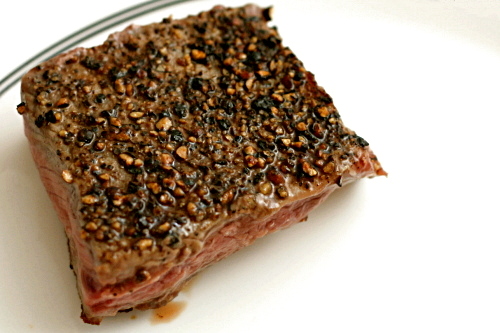
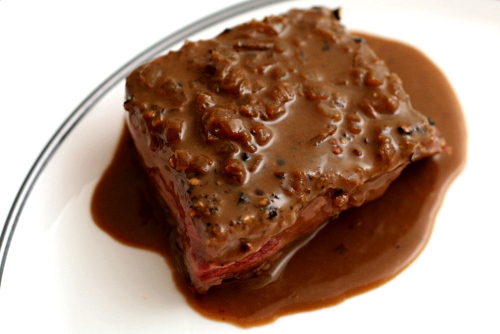
The answer is steak, of course. Steak that has one side coated in black pepper and is dowsed in brandy cream sauce. Served along with twice-baked potatoes and Brussels sprouts braised in cream. Yes, cream sauce, sour cream, braised in cream – it’s a holiday, okay?

Copy of IMG_1029

It’s also delicious. And easy, and most of it can be prepared in advance. The evidence: 1) I finished it at my mother-in-law’s, and her sharpest knife is essentially a butter knife, and 2) my stepfather-in-law not only ate his entire meal, including the Brussels sprouts, but offered something vaguely complimentary. This meal is a success even under the toughest circumstances.

Copy of IMG_1031

One year ago: Red Velvet Whoopie Pies

Printer Friendly Recipe
Steak au Poivre with Brandied Cream Sauce
(from Cooks Illustrated)

Serves 4

Sauce:
4 tablespoons unsalted butter
1 medium shallot, minced
1 cup low-sodium beef broth
¾ cup low-sodium chicken broth
¼ cup heavy cream
¼ cup brandy + 1 tablespoon
1 teaspoon lemon juice or 1 teaspoon champagne vinegar
table salt

Steaks:
4 strip steaks (8 to 10 ounces each), ¾ to 1 inch thick, trimmed of exterior gristle
table salt
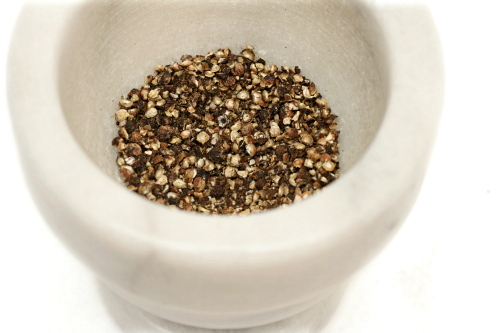
1 tablespoon black peppercorns, crushed

1. Heat 1 tablespoon butter in 12-inch heavy-bottomed skillet over medium heat; when foaming subsides, add shallot and cook, stirring occasionally, until softened, about 2 minutes. Add beef and chicken broths, increase heat to high, and boil until reduced to about ½ cup, about 8 minutes. Set reduced broth mixture aside. Rinse and wipe out skillet.

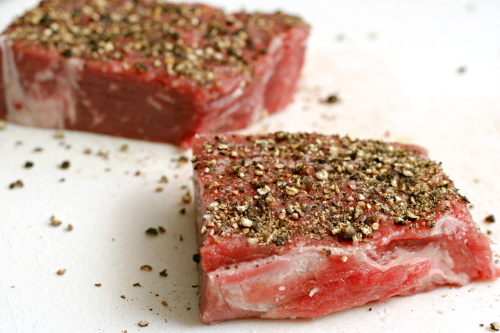
2. Meanwhile, sprinkle both sides of steaks with salt; rub one side of each steak with 1 teaspoon crushed peppercorns, and, using fingers, press peppercorns into steaks to make them adhere.

3. Place now-empty skillet over medium heat until hot, about 4 minutes. Lay steaks unpeppered-side down in hot skillet, increase heat to medium-high, firmly press down on steaks with bottom of cake pan (see illustration below), and cook steaks without moving them until well-browned, about 6 minutes. Using tongs, flip steaks, firmly press down on steaks with bottom of cake pan, and cook on peppered side, about 3 minutes longer for rare, about 4 minutes longer for medium-rare, or about 5 minutes longer for medium. Transfer steaks to large plate and tent loosely with foil to keep warm.

4. Pour reduced broth, cream, and ¼ cup brandy into now-empty skillet; increase heat to high and bring to boil, scraping pan bottom with wooden spoon to loosen browned bits. Simmer until deep golden brown and thick enough to heavily coat back of metal tablespoon or soup spoon, about 5 minutes. Off heat, whisk in remaining 3 tablespoons butter, remaining 1 tablespoon brandy, lemon juice or vinegar, and any accumulated meat juices. Adjust seasonings with salt.

5. Set steaks on individual dinner plates, spoon portion of sauce over steaks, and serve immediately.

Copy of IMG_1032

Suggested menu: Steak au Poivre, Brussels Sprouts Braised in Cream, Twice-Baked Potatoes

sablés

Copy of IMG_1733
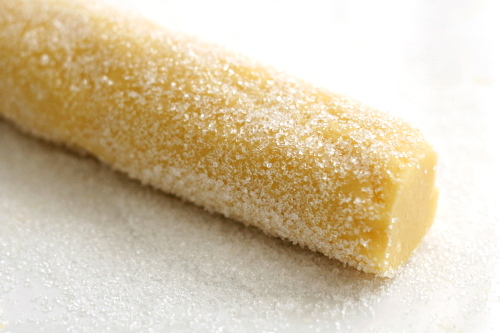
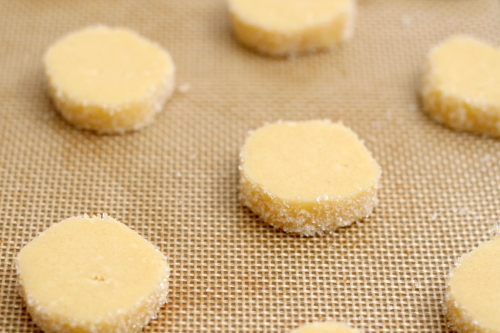
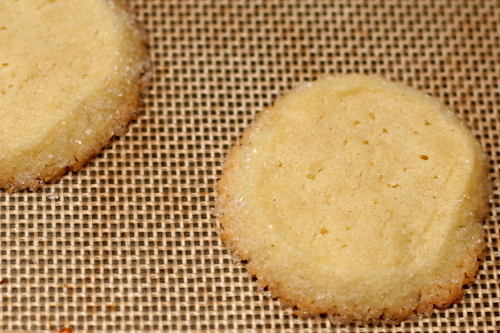
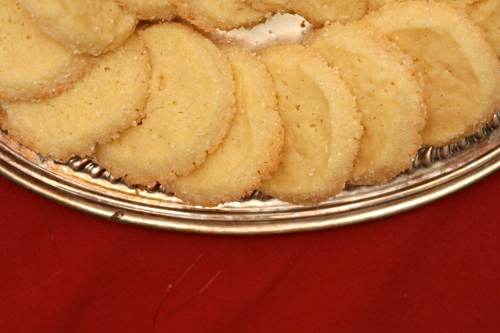
I was all excited about these cookies after I mixed up the dough, which tasted amazing. I was looking forward to how pretty they’d look once they were baked, tall and flat with glittery sugar around their edges.

Copy of IMG_1679

Then I saw that there was some flavor variations that I could have played with. Because what’s better than regular sablés? Lemon sablés! Ooh, or orange. Or I could have used vanilla sugar instead of regular sugar! Now I was disappointed in my cookies. Stupid boring plain sablés.

Copy of IMG_1684

Except, not really. Because without any other flavors getting in the way, these cookies mostly taste like butter. And sugar. And salt. In other words, like everything good.

Copy of IMG_1687

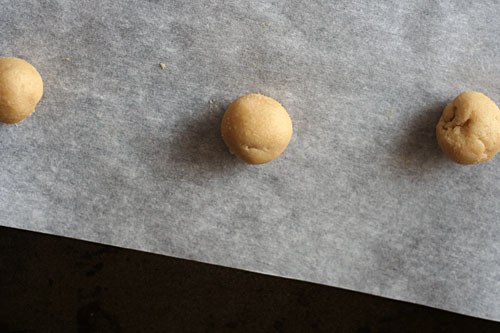
Barbara chose these for Tuesdays with Dorie and has the recipe posted. I didn’t follow the directions quite as precisely as I should have, which is why my cookies don’t have straight edges and and a perfectly even texture.

One year ago: Grandma’s All-Occasion Sugar Cookies
Copy of IMG_1735