linzer sablés

copy-of-img_9756

I think Tuesday snuck up on a lot of the Tuesdays with Dorie members this week. I know it did for me. I’ve been holding onto last week as much as possible, with the long weekend and the holiday largely dedicated to food (oh yeah, and being thankful) and the turkey and the pie and mostly the long weekend. But going back to work yesterday made it hit me that I better get crackin’ on making this week’s recipe.

copy-of-img_9742

I’m glad Dennis picked a fairly simple recipe this week, so I could get the whole thing done Monday after work. Fortunately, I happened to have three bags of walnuts in the pantry that each had just a little bit left, and together made just enough ground nuts for me to make this recipe.

copy-of-img_9746

Some people who made the recipe before me suggested rolling out the dough thinner than Dorie’s recommended ¼-inch, so I took that advice. I’m glad I did, because I can see how that would have made some pretty thick cookies. The only other issue I had was a result of my super cheap cookie cutters, which were determined to hold onto the cut cookie dough instead of releasing it onto the baking sheet. I will be adding cookie cutters to my Christmas list.

copy-of-img_9753

I really enjoyed the cookies. The spice was a really nice addition, and the texture was this great tender-crisp combination. I don’t know that crisp is the right word, but they’re definitely not soft and chewy. Sablé, meaning sand, is really the right name for these cookies. I didn’t add enough jam to mine, but that wasn’t a big deal. Dave and I agreed that they’re a very nice cookie for Christmas.

You can find the recipe on Dennis’ blog.

One year ago: Crockpot Rice and Beans – I really love this meal.  We’re actually having it for dinner tonight.

copy-of-img_9761

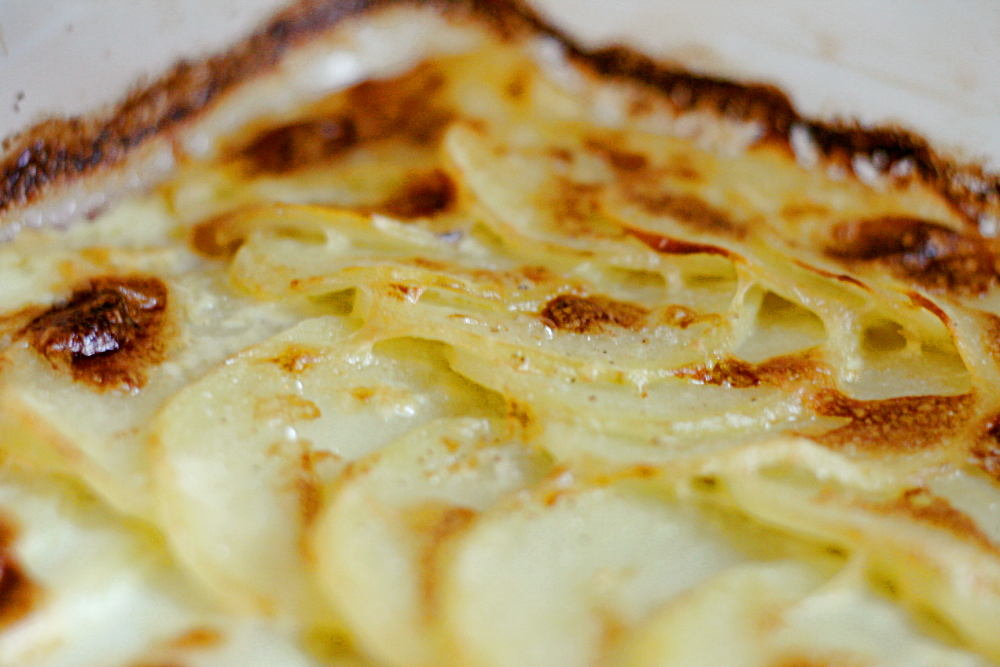
gratin dauphinois (potatoes au gratin)

copy-of-img_67821

One advantage of screwing up a recipe is that at least you know when you don’t screw it up. The first time I made this recipe, I thought I might have overcooked it. The second time, I knew I overcooked it.

I’m a big fan of Jeffrey Steingarten, the food writer for Vogue. I have two of his books and I’ve enjoyed them both. He claims to have made a gratin once a week for the past ten years and calls this one “so fantastically good that [he has] made it every day for the past few weeks.” I’m not capable of resisting that recommendation, regardless of the half stick of butter and 1½ cups of cream. (Yikes.)

copy-of-img_67171

Steingarten developed his recipe to maximize the crispy parts, so the potatoes are placed in the baking pan in a single layer. Steingarten considers cheese in this type of gratin “a gross and pitiful imposture”, because the cream should reduce to a cheese-like flavor, so adding cheese is unnecessary. I have to do one more quote, because there’s no way I’ll be able to describe this as accurately and enticingly as Steingarten (which is why he is a professional and I am a blogger). “[The liquid] will coat the vegetable with an intensely flavorful concentrate…and the surface…is beautifully browned and crusty and delicious.”

copy-of-img_67291

Steingarten also says “if your gratin is truly brilliant, the bottom will become golden and crisp as well.” My gratin was not, and has never been with this recipe, truly brilliant. I’m not sure why; my only theory is that I’m using Pyrex when cast iron would be a better choice. The only cast iron cook/bakeware I have is my Dutch oven, but maybe I’ll try baking this is an All-Clan stainless steel skillet next time to see if I can get the bottom crust to form.

copy-of-img_67361

The recipe isn’t particularly difficult; it looks long due to Steingarten’s very detailed instructions. I typed out the recipe in Steingarten’s exact words because they have so much of his writing style in them, which I thought was worth keeping. However, there are aspects of the recipe that I change. A minor one is replacing the white pepper with black pepper, not only because I keep the black pepper on the counter and the white pepper requires some digging in the pantry, but because I think the flavor is better with the potatoes. Also, Steingarten calls for a pound and a half of potatoes, and says that “you will undoubtedly have some slices leftover.” With the pan size he calls for, I tend to have at least a third of the slices leftover. I’ve found that I should either increase the pan size or decrease the potatoes I slice.

copy-of-img_67471

Steingarten is also careful to instruct that the potatoes should be removed from the oven before “the cream has broken down into clear, foamy butterfat”. Oops. Good advice. Otherwise you end up with a disgusting greasy mess that makes it all too obvious that there’s a dismaying amount of fat in the recipe.

copy-of-img_67551

But, if you do it right, you have deliciously tender, creamy, crisp potatoes that don’t need cheese to taste cheesey or bread crumbs to be crispy. On the top. If you try the recipe and get a crispy bottom too, let me know!

copy-of-img_67831

Gratin Dauphinois (from Jeffrey Steingarten’s It Must’ve Been Something I Ate)

4 tablespoons (½ stick) butter
1 (scant) cup milk
1 large garlic clove, peeled and lightly crushed
½ teaspoon freshly ground white pepper
¾ teaspoon salt
1/8 teaspoon freshly grated nutmeg, about a dozen gratings
1½ pounds baking potatoes
1½ cups heavy cream

Special equipment: A large, low baking dish made of enameled iron, glass, or earthernware. The quantities in this recipe work out perfectly when baked in a dish measuring about 120 square inches on the inside bottom, where the slices of potato will lie. This translates into a rectangle 9-by-13 inches, or 10-by-12 inches; an 11-inch square; a 12-inch circle; or an oval 10-by-15 inches. An enameled iron baking dish is preferred – mine is made by Le Creuset – because it produces a delectable crust underneath the potatoes. A hand-sliced device, such as a traditional French stainless-steel mandoline or a much less expensive but excellent plastic Japanese-made device manufactures by Benriner.

Let the butter soften at room temperature for an hour or so. Meanwhile, preheat your oven to 425F.

Place the milk, garlic clove, pepper, salt, and nutmeg in a small saucepan, bring to a boil, and remove from the heat.

Meanwhile, liberally butter the bottom of the baking dish using about half the butter. Peel the potatoes, rinse them, and pat them dry. Then, slice them 1/8-inch thick, discarding the smallest slices. (This is easier with a slicing machine, inexpensive or elaborate. The quantities and cooking times given here work out best when the slices are even and close to 1/8 inch. Just keep adjusting your slicing machine until a little pile of eight slices measures an inch high.) Under no circumstances should you wash the potatoes after they have been sliced – the surface starch is absolutely indispensable.

Evenly arrange the potatoes in the buttered dish in one layer of overlapping slices. (Begin by laying out a row of slices along one narrow end of the baking dish, overlapping each one about a third of the way over the slice that came before. Repeat with a second row. Continue until the baking dish is neatly paved.) You will undoubtedly have some slices left over. Please do not try to cram them in.

Bring the milk to the boil again and pour it over the potatoes, removing the garlic. Cover the pan with a sheet of aluminum foil. Bake in the middle of the oven for about 15 minutes, until most of the milk has been absorbed. Meanwhile, bring the cream to a boil, and remove from the heat. When the potatoes are ready, remove and discard the aluminum foil. Bring the cream back to the boil and pour it over the potatoes, dotting the surface with the remaining butter.

Bake, uncovered, for another 20 to 25 minutes, until the potatoes have turned a golden brown, spotted with darker, crisp area. (Rotate the baking dish halfway through if the gratin is browning unevenly.) The underside of the gratin will also be brown and crispy in spots. But do not wait until most of the cream has broken down into clear, foamy butterfat. The potatoes should be dotted with thickened, clotted cream, especially between the slices.

Let the gratin settle for 10 minutes. (This will allow the excess butterfat to drain to the bottom of the dish.) Then eat immediately – taste and texture suffer with each passing minute. Cut into 6 or 8 rectangles with a blunt knife and serve each one with a thin, wide metal slotted spatula.

creme brulee (twd)

I love Dorie’s creative recipes, but I tend to turn to Cooks Illustrated for classics. So when I saw that Mari had chosen crème brulee for TWD, my first thought was to compare the two. But I’ve already compared Dorie and CI’s recipes a couple times, so instead, I decided I would play with some of the different flavors Dorie recommends.

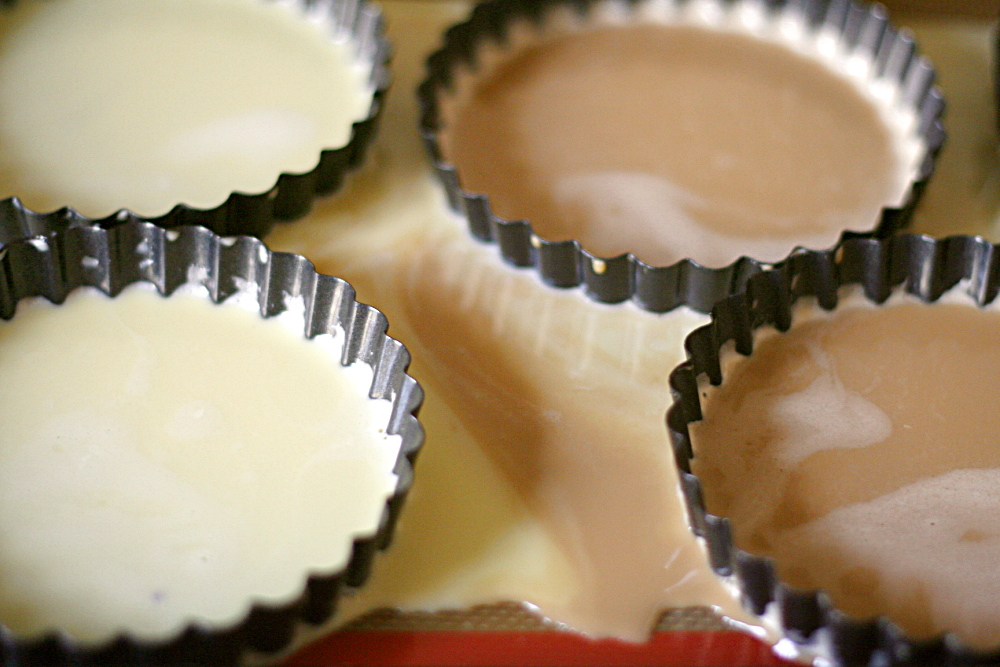
I made vanilla, Earl Grey, and ginger variations. I thought I could combine some of the steps for the variations, but that didn’t work out, so it was really like making the recipe three separate times. I didn’t have enough of the right sized ramekins, so I put the custard mixes in mini-tart pans instead. I was worried that the custard would leak because the tart pans have removable bottoms, but it worked out okay. Until I dropped the baking pan with the six full tartelette pans on it and everything spilled. Being clumsy is a pain in the ass.

Frustrated with that, I went back to my original plan to compare Dorie’s recipe to CI’s. (My freezer is full of egg whites now.) I was curious about this comparison anyway, because the recipes were significantly different. Dorie uses almost half the number of egg yolks compared to the amount of dairy, and she also uses a combination of heavy cream and milk instead of just heavy cream. That makes CI’s recipe much richer.

Whoa. Dorie’s also makes tiny servings. I wouldn’t expect that from her.

I assumed we’d like the richer crème brulee better, but Dave and I both preferred Dorie’s softer custard. However, Dave liked the flavor of CI’s better, which may be the pinch of salt added, or the lower amount of sugar used in CI’s, which could bring out the flavor of the other ingredients more. I used vanilla beans instead of vanilla extract in both recipes.

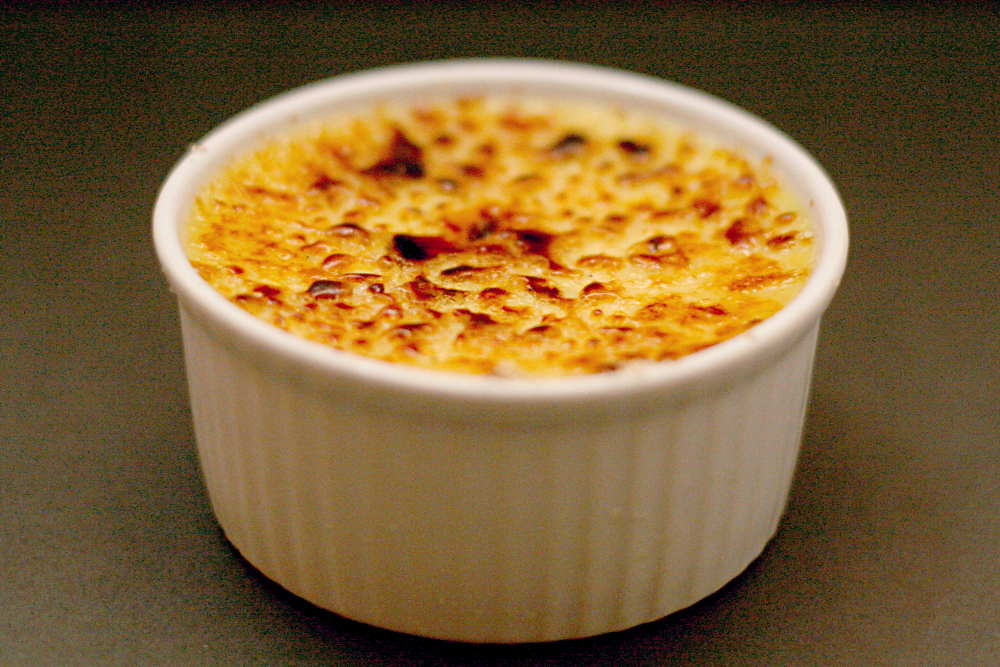
This is my most successful brulee job. (That goes for Dave too – this is the only kitchen task he’s excited about helping with.) I used a mixture of brown sugar and granulated, and in the past I used pure granulated. Apparently the mixture is more forgiving, because I used to end up with a combination of charcoaly burned areas and raw areas.

It’s crème brulee, so you really can’t go wrong. Unless you spill it all over the oven. Check Mari’s blog for Dorie’s recipe.

Classic Creme Brulee (from Cooks Illustrated)

Serves 8

CI note: Separate the eggs and whisk the yolks after the cream has finished steeping; if left to sit, the surface of the yolks will dry and form a film. A vanilla bean gives custard the deepest flavor, but 2 teaspoons of extract, whisked into the yolks in step 4, can be used instead. The best way to judge doneness is with a digital instant-read thermometer. The custards, especially if baked in shallow fluted dishes, will not be deep enough to provide an accurate reading with a dial-face thermometer. For the caramelized sugar crust, we recommend turbinado or Demerara sugar. Regular granulated sugar will work, too, but use only 1 scant teaspoon on each ramekin or 1 teaspoon on each shallow fluted dish.

4 cups heavy cream, chilled
⅔ cup granulated sugar
pinch table salt
1 vanilla bean, halved lengthwise
12 large egg yolks
8 – 12 teaspoons turbinado sugar or Demerara sugar

1. Adjust oven rack to lower-middle position and heat oven to 300 degrees.

2. Combine 2 cups cream, sugar, and salt in medium saucepan; with paring knife, scrape seeds from vanilla bean into pan, submerge pod in cream, and bring mixture to boil over medium heat, stirring occasionally to ensure that sugar dissolves. Take pan off heat and let steep 15 minutes to infuse flavors.

3. Meanwhile, place kitchen towel in bottom of large baking dish or roasting pan and arrange eight 4- to 5-ounce ramekins (or shallow fluted dishes) on towel. Bring kettle or large saucepan of water to boil over high heat.

4. After cream has steeped, stir in remaining 2 cups cream to cool down mixture. Whisk yolks in large bowl until broken up and combined. Whisk about 1 cup cream mixture into yolks until loosened and combined; repeat with another 1 cup cream. Add remaining cream and whisk until evenly colored and thoroughly combined. Strain through fine-mesh strainer into 2-quart measuring cup or pitcher (or clean medium bowl); discard solids in strainer. Pour or ladle mixture into ramekins, dividing it evenly among them.

5. Carefully place baking dish with ramekins on oven rack; pour boiling water into dish, taking care not to splash water into ramekins, until water reaches two-thirds height of ramekins. Bake until centers of custards are just barely set and are no longer sloshy and digital instant-read thermometer inserted in centers registers 170 to 175 degrees, 30 to 35 minutes (25 to 30 minutes for shallow fluted dishes). Begin checking temperature about 5 minutes before recommended time.

6. Transfer ramekins to wire rack; cool to room temperature, about 2 hours. Set ramekins on rimmed baking sheet, cover tightly with plastic wrap, and refrigerate until cold, at least 4 hours or up to 4 days.

7. Uncover ramekins; if condensation has collected on custards, place paper towel on surface to soak up moisture. Sprinkle each with about 1 teaspoon turbinado sugar (1½ teaspoons for shallow fluted dishes); tilt and tap ramekin for even coverage. Ignite torch and caramelize sugar. Refrigerate ramekins, uncovered, to re-chill, 30 to 45 minutes (but no longer); serve.

eclairs (daring bakers)

I was happy about Tony and Meeta’s choice of Chocolate Eclairs for this month’s Daring Baker recipe because I actually have some experience making éclairs, but I haven’t found a recipe that’s convinced me to use it faithfully. And because I’m somewhat confident in my éclair-making ability, I was comfortable tweaking the recipe.

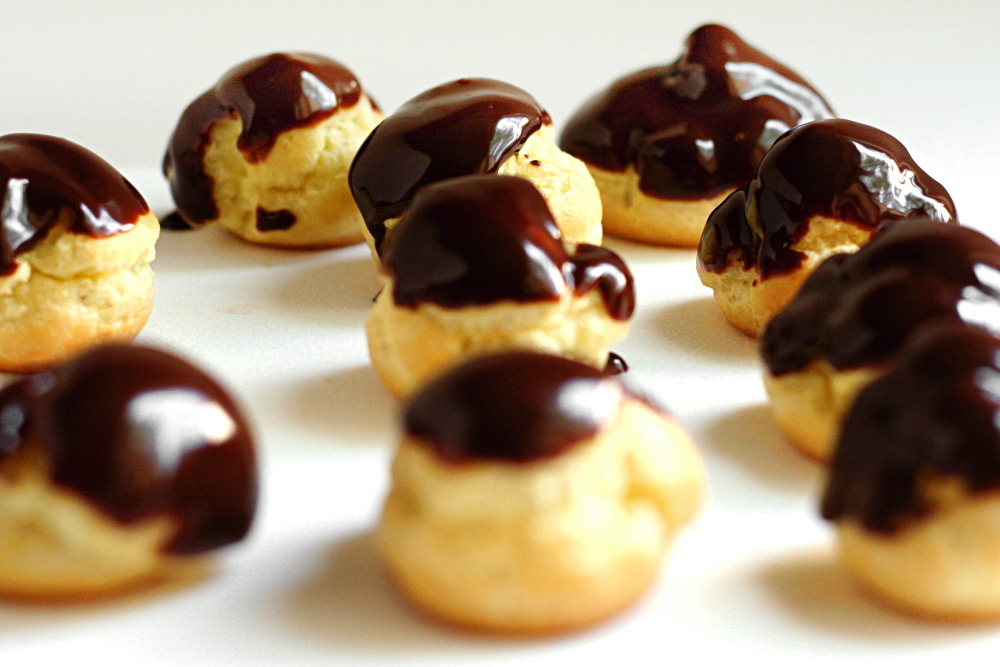
When I was in college, there was a dessert shop nearby that made the best mini-cream puffs. My friends and I went there at least once per week, and sometimes I would bypass all of the beautiful and tempting cakes and pies so that I could have just a pile of little cream puffs. But usually I would get a wonderful slice of chocolate layer cake with a cream puff on the side. I could never resist those cream puffs. Those mini-cream puffs are what I strived to recreate with this recipe.

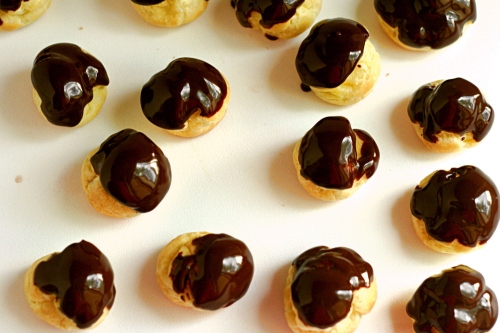
I used the chocolate glaze recipe suggested by Tony and Meeta.  The glaze was very good, although the recipe is perhaps unnecessarily complicated, requiring a chocolate sauce to be made first, which is then used as an ingredient in the chocolate glaze. I’m assuming this is only because Pierre Herme assumes that anyone who owns his book Chocolate Desserts will keep a supply of the chocolate sauce around. It was a good glaze, and I may use it in the future, but I’ll condense the steps to bypass the separate sauce-making process.

I used a raspberry pastry cream filling instead of the chocolate pastry cream that Herme suggests. While I suppose that all’s well that ends well, it’s not a recipe that I would recommend to others. I simply took my favorite vanilla pastry cream recipe and mixed in raspberry puree at the end. Unfortunately, there was too much puree and the pastry cream never set. I tried some other stuff, but ultimately I had to dissolve some gelatin in half-and-half and mix that in to stabilize the cream enough to be piped.

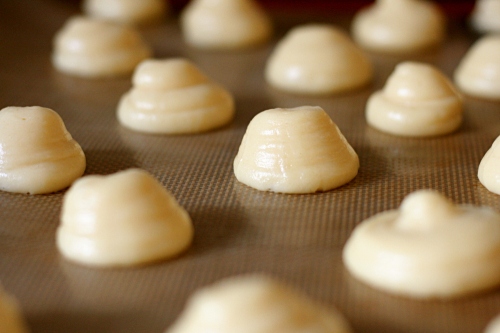
One thing I’ve never liked about regular-sized cream puffs and éclairs is how they have to be cut in half, filled, and stuck back together. I wanted to fill my miniature cream puffs without cutting them open, so I put my pastry cream into a bag with a simple round tip and squeezed pastry cream into the cream puffs through a small hole in the bottom. It wasn’t completely successful – the inside of the cream puffs were often split into two or more large portions, and only one portion got filled with this method. I think I could also squirt pastry cream into the cream puff from a hole in the top, which will then be covered with glaze.

These were the best cream puffs I’ve ever made. I do want to tweak the dough recipe, and obviously the pastry cream was kind of a bust, but they were the perfect size and so easy to eat. Every time I’ve made éclairs I’ve gotten better at it, and I hope next time it’ll be just perfect.

Pierre Hermé’s Chocolate Éclairs (adapted from Chocolate Desserts by Pierre Hermé, except for the pastry cream, which is adapted from Cooks Illustrated)

The pastry cream didn’t work out. But I already had the recipe written down and don’t want redo it.

Makes 20-24 eclairs

Cream Puff Dough:
½ cup (125g) whole milk
½ cup (125g) water
1 stick (4 ounces; 115 g) unsalted butter, cut into 8 pieces
¼ teaspoon sugar
¼ teaspoon salt
1 cup (140 g) all-purpose flour
5 large eggs, at room temperature

Raspberry Pastry Cream:
6 ounces raspberries
2 cups half-and-half
½ cup granulated sugar
pinch table salt
5 large egg yolks,
3 tablespoons cornstarch
4 tablespoons unsalted butter (cold), cut into 4 pieces
1½ teaspoons vanilla extract

Chocolate Sauce:
0.9 oz (26 g) bittersweet chocolate, finely chopped
3 tablespoons (50 g) water
5 teaspoons (25 g) crème fraîche or heavy cream
1 tablespoon (14 g) sugar

Chocolate Glaze:
⅓ cup (80 g) heavy cream
3½ ounce (100 g) bittersweet chocolate, finely chopped
4 teaspoon (20 g) unsalted butter, cut into 4 pieces, at room temperature
7 tablespoon (110 g) Chocolate Sauce, warm or at room temperature

For the éclairs:
1. Preheat your oven to 375 degrees F (190 degrees C). Divide the oven into thirds by
positioning the racks in the upper and lower half of the oven. Line two baking sheets with
waxed or parchment paper.

2. In a heavy bottomed medium saucepan, bring the milk, water, butter, sugar and salt to the boil.

3. Once the mixture is at a rolling boil, add all of the flour at once, reduce the heat to medium and start to stir the mixture vigorously with a wooden spoon. The dough comes together very quickly. Do not worry if a slight crust forms at the bottom of the pan, it’s supposed to. You need to carry on stirring for a further 2-3 minutes to dry the dough. After this time the dough will be very soft and smooth.

4. Transfer the dough into a bowl of a mixer fitted with the paddle attachment, or using your hand mixer or if you still have the energy, continue by hand. Add the eggs one at a time, beating after each egg has been added to incorporate it into the dough. You will notice that after you have added the first egg, the dough will separate, once again do not worry. As you keep working the dough, it will come back all together again by the time you have added the third egg. In the end the dough should be thick and shiny and when lifted it should fall back into the bowl in a ribbon. (Once the dough is made you need to shape it immediately. Or, you can pipe the dough and the freeze it. Simply pipe the dough onto parchment-lined baking sheets and slide the sheets into the freezer. Once the dough is completely frozen, transfer the piped shapes into freezer bags. They can be kept in the freezer for up to a month.

5. Fill a large pastry bag fitted with a 2/3-inch (2cm) plain tip nozzle with the warm cream puff dough. Pipe the dough onto the baking sheets in long, 4 to 4½ inches (about 11 cm) chubby fingers. Leave about 2 inches (5 cm) space in between each dough strip to allow them room to puff. The dough should give you enough to pipe 20-24 éclairs.

6. Slide both the baking sheets into the oven and bake for 7 minutes. After the 7 minutes, slip the handle of a wooden spoon into the door to keep it ajar. When the éclairs have been in the oven for a total of 12 minutes, rotate the sheets top to bottom and front to back. Continue baking for a further 8 minutes or until the éclairs are puffed, golden and firm. The total baking time should be approximately 20 minutes. (The éclairs can be kept in a cool, dry place for several hours before filling.)

For the pastry cream:
7. While the éclairs are baking, set a mesh strainer over a medium bowl. Add the raspberries to the strainer and use a spoon to mash them and press them through the strainer to create a seedless raspberry puree.

8. Heat half-and-half, 6 tablespoons sugar, and salt in medium heavy-bottomed saucepan over medium heat until simmering, stirring occasionally to dissolve sugar.

9. Meanwhile, whisk egg yolks in medium bowl until thoroughly combined. Whisk in remaining 2 tablespoons sugar and whisk until sugar has begun to dissolve and mixture is creamy, about 15 seconds. Whisk in cornstarch until combined and mixture is pale yellow and thick, about 30 seconds.

10. When half-and-half mixture reaches full simmer, gradually whisk simmering half-and-half into yolk mixture to temper. Return mixture to saucepan, scraping bowl with rubber spatula; return to simmer over medium heat, whisking constantly, until 3 or 4 bubbles burst on surface and mixture is thickened and glossy, about 30 seconds. Off heat, whisk in butter and vanilla. Strain the pastry cream through a fine-mesh sieve set over a medium bowl. Stir in the raspberry puree. Press plastic wrap directly on surface, and refrigerate until cold and set, at least 3 hours or up to 48 hours.

For the chocolate sauce:
11. Place all the ingredients into a heavy-bottomed saucepan and bring to a boil, making sure to stir constantly. Then reduce the heat to low and continue stirring with a wooden spoon until the sauce thickens.

12. It may take 10-15 minutes for the sauce to thicken, but you will know when it is done when it coats the back of your spoon. (You can make this sauce ahead of time and store it in the refrigerator for two weeks. Reheat the sauce in a microwave oven or a double boiler before using.)

For the chocolate glaze:
13. In a small saucepan, bring the heavy cream to a boil. Remove from the heat and slowly begin to add the chocolate, stirring with a wooden spoon or spatula.

14. Stirring gently, stir in the butter, piece by piece, followed by the chocolate sauce. (If the chocolate glaze is too cool (i.e. not liquid enough) you may heat it briefly in the microwave or over a double boiler.)

For the assembly:
15. Slice the éclairs horizontally, using a serrated knife and a gently sawing motion. Set aside the bottoms and place the tops on a rack over a piece of parchment paper.

16. The glaze should be barely warm to the touch (between 95 – 104 degrees F or 35 – 40 degrees C, as measured on an instant read thermometer). Spread the glaze over the tops of the éclairs using a metal icing spatula. Allow the tops to set and in the meantime fill the bottoms with the pastry cream.

17. Pipe or spoon the pastry cream into the bottoms of the éclairs. Make sure you fill the bottoms with enough cream to mound above the pastry. Place the glazed tops onto the pastry cream and wriggle gently to settle them.

18. The éclairs should be served as soon as they have been filled.

summer fruit galette (twd)

It’s safe to say that this Summer Fruit Galette, chosen for TWD by Michelle, wasn’t my best effort. My baking has gotten really out of control lately – my freezer is full of cupcakes, cookies, muffins, and breads. There’s cookie dough and half a cake in my refrigerator. (But I finally found someone to offload some of this excess onto, so I’m excited about that!) My capacity to bake has far outstripped our capacity to eat. I thought the galette would fit into this pattern perfectly because I could pare down the recipe, which would be tricky with a regular pie.

Last time I made Dorie’s pie crust, I was pretty happy with it, but was put off by the shortening. Mari suggested substituting lard for the shortening, and since the galette uses the same dough as the blueberry pie did, I had that opportunity. I didn’t notice any big differences between the crusts made with shortening and with lard – they seemed equally easy to work with and flavorful. But a few weeks ago, I had noticed two or three TWD members who had problems with the pie crust sort of melting in the oven, and I had a little of that problem this time. In short, I’m going to stick with my old favorite pie crust. They’re both good, but I’ve been using that one for years and I’ve always been happy with it. (I’ll put it on my blog at some point or another – probably the next pie recipe TWD makes.)

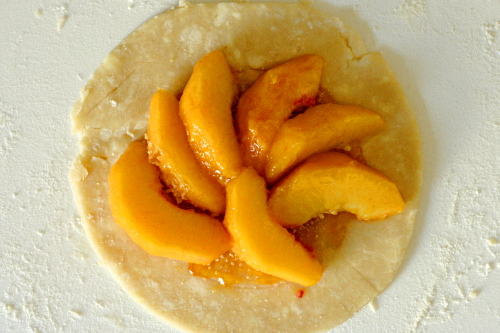
The rest of my problems with the galette were my fault. I only made a quarter of the recipe, and I’m afraid that that’s an impractically small fraction. The ratio between the area necessary to hold fillings and the area necessary to pleat the edges gets thrown off, and you end up with far more crust per filling than the recipe intended. And one of the parts of this recipe that I was very interested in was the custard topping that gets poured over the fruit, but again, with so little filling exposed, I was only able to dribble in the slightest amount of custard mix before it overflowed and made a mess.

Despite all of my foibles making this dessert, I still really enjoyed it. I can tell the potential for a really amazing dessert is there. This is another example of how Dorie takes just a few ingredients and shows them off to their best advantage.

The recipe can be found on Melissa’s website.

pain a l’ancienne

Cooks Illustrated’s Chicken with 40 Cloves of Garlic recipe is cooked through a combination of roasting and braising, which keeps the meat moist and the skin crisp. Once the chicken is cooked, the braising liquid is made into a delicious garlicky herbed sauce. I supposed you could make some creamy rich mashed potatoes to serve with the sauce, but I love to dip bits of delicious artisan breads in it. For this meal, I think you need the absolutely best bread you can get. I haven’t found a fantastic bakery in my area, so that means I have to make it myself.

I know this is supposed to be the Dinner Party Menu Ode to Cooks Illustrated, but I strayed from them for the bread. They do have a great recipe for baguettes that you should check out if you have access to it, but I wanted to try Peter Reinhart’s pain a l’ancienne. Reinhart loves this recipe – he discusses it in length in the introduction before providing his recipe later in the book. I had made it once before with mixed results.

The recipe is actually less work than many other bread recipes, especially flavorful artisanal breads. Like all of Reinhart’s recipes, it’s developed to squeeze out as much flavor as possible from the simplest list of ingredients (flour, salt, yeast, water). Instead of requiring a pre-ferment, which basically means that the dough has to be made twice, pain a l’ancienne needs only be mixed and kneaded once, and there’s not even any proofing to worry about.

The key is that the dough is made with ice water and then immediately refrigerated overnight. The yeast slowly wakes up and does its thing, making its way through the flour and releasing every bit of flavor possible. All that’s left to do the day of baking is give the dough a chance to warm up and rise some more, mold the very wet dough into some semblance of loaves, and bake.

The result is some of the best bread I’ve ever made. I can’t think of how to describe the smell, but it’s so much more than homemade bread. The flavor matches the rich smell, and the crumb is chewy and tender.

The problem I’m having with the bread is the crust. The first time I made this recipe, which was a year or two ago, I followed Reinhart’s instructions to sprinkle the parchment paper with cornmeal before putting my dough on it. The result was a bottom crust ingrained with cornmeal. It wasn’t like pizza, where you don’t even notice the few grains; the wet dough had incorporated a thick layer of cornmeal. This time, I skipped the cornmeal, which is unnecessary anyway since the bread is baked on parchment paper. However, the crust was still far too thick, much thicker than is shown in Reinhart’s photo. It’s a straightforward problem to fix by adjusting the baking time and temperatures, and I put notes in the recipe instructions for how I’ll cook it next time.

With that small problem worked out, this is a truly fantastic bread recipe. The flavor is just about unbeatable. And, again – it’s less work than other recipes. You can’t go wrong.

Pain a l’Ancienne (from Peter Reinhart’s Bread Baker’s Apprentice)

Bridget note: The only alteration I made to the recipe was to skip the cornmeal Reinhart calls for. I did put a note at the bottom about the cooking temperature and time, in order to correct the crust problem I had.

Yields 6 baguettes

6 cups (27 ounces) unbleached bread flour
2¼ teaspoons salt
1¾ teaspoons instant yeast
2¼ cups plus 2 tablespoon to 3 cups ice-cold (19 to 24 ounces) water

1. Combine the flour, salt, yeast and 19 ounces water in the bowl of the electric mixer with the paddle attachment and mix for 2 minutes on low speed. Switch to the dough hook and mix for 5 to 6 minutes on medium speed. The dough should be sticky on the bottom of the bowl but it should release from the sides of the bowl. If not, sprinkle in a small amount of flour until this occurs (or dribble in water if the dough seems too stiff and clears the bottom as well as the sides of the bowl). Lightly oil a large bowl and immediately transfer the dough with a spatula or bowl scraper dipped in water into the bowl. Mist the top of the dough with spray oil and cover the bowl with plastic wrap.

2. Immediately place the bowl in the refrigerator and chill overnight, to retard fermentation.

3. The next day, check the dough to see if it has risen in the refrigerator. It will probably be partially risen but not doubled in size (the amount of rise will depend on how cold the refrigerator is and how often the door was opened). Leave the bowl of dough out at room temperature for about 2 to 3 hours (or longer if necessary) to allow the dough to wake up, lose its chill, and continue fermenting.

4. When the dough has doubled from its original prerefrigerated size, liberally sprinkle the counter with bread flour (about ½ cup). Gently transfer the dough to the floured counter with a plastic dough scraper that has been dipped in cold water, dipping your hands as well to keep the dough from sticking to you. Avoid punching down the dough as you transfer it, to expel as little as possible of the carbon-dioxide gas that has built up in the dough during fermentation. If the dough is very wet, sprinkle more flour over the top as well as under it. Dry your hands thoroughly and then dip them in flour. Roll the dough gently in the sprinkled flour to coat it thoroughly, simultaneously stretching it into an oblong about 8 inches long and 6 inches wide. If it is too sticky to handle, continue sprinkling flour over it. Dip a metal pastry scraper into cool water to keep it from sticking to the dough, and cut the dough in half widthwise with the pastry scraper by pressing it down through the dough until it severs it, then dipping it again in the water and repeating this action until you have cut down the full length of the dough. (Do not use this blade as a saw; use it as a pincer, pinching the dough cleanly with each cut.) Let the dough relax for 5 minutes.

5. Prepare the oven for hearth baking, making sure to have an empty steam pan in place. Preheat the oven to 500 degrees, or 550 degrees if your oven goes this high. Cover the back of two 17-by-12-inch sheet pans with baking parchment. (I just used my pizza peel.) Take one of the dough pieces and repeat the cutting action, but this time cut off 3 equal-sized lengths. Then do the same with the remaining half. This should give you 6 lengths. Flour your hands and carefully lift one of the dough strips and transfer it to an inverted parchment-lined pan, gently pulling it to the length of the pan or to the length of your baking stone. If it springs back, let it rest for 5 minutes and then gently pull it out again. Place 3 strips on the pan, and then prepare another pan and repeat with the remaining strips.

6. Score the dough strips as for traditional baguettes, slashing the tops with 3 diagonal cuts. Because the dough is sticky, you may have to dip the razor blade, serrated knife or scissors in water between each cut. You may also omit the cuts if the dough isn’t cooperating. (I tried cutting, but the dough was so wet that it didn’t seem to make a difference.)

7. Take one pan to the preheated oven and carefully slide the dough, parchment and all, onto the baking stone (depending on the direction of the stone, you may choose to slide the dough and parchment off the side of the sheet pan instead of off the end); or bake directly on the sheet pan. Make sure the pieces aren’t touching (you can reach in and straighten the parchment or the dough strips, if need be). Pour 1 cup of hot water into the steam pan and close the door. After 30 seconds, spray the oven walls with water and close the door. Repeat twice more at 30-second intervals. After the final spray, reduce the oven setting to 475 degrees and continue baking. Meanwhile, dust the other pan of strips with flour, mist with spray oil, and cover with a towel or plastic wrap. If you don’t plan to bake these strips within 1 hour, refrigerate the pan and bake later or the next day.

8. The bread should begin to turn golden brown within 8 or 9 minutes. If the loaves are baking unevenly at this point, rotate them 180 degrees. Continue baking 10 to 15 minutes more, or until the bread is a rich golden brown and the internal temperature registers at least 205 degrees. (I think this is the part that didn’t work for me. I think I should have left it at the high heat and cooked it for only about 15 minutes.)

9. Transfer the hot breads to a cooling rack. They should feel very light, almost airy, and will cool in about 20 minutes. While these are cooling, you can bake the remaining loaves, remembering to remove the parchment from the oven and turn the oven up to 500 degrees or higher before baking the second round.

Other recipes part of this recommended dinner party menu:
Salad with Herbed Baked Goat Cheese
Chicken with Forty Cloves of Garlic
Sauteed Shredded Zucchini

Just about any dessert works well with this meal.
Many wines work well with this meal, but I especially like full-flavored whites such as Chardonnay, and medium-bodied reds such as Pinot Noir.

chicken with forty cloves of garlic

This chicken is the main dish of my favorite dinner party menu. But I’m not going to lie – there are good and bad aspects to making this dish for company. The advantage is that I’m pretty sure this is the best chicken I’ve ever eaten (although this comes close). It’s infused with the flavors of garlic and wine, it’s juicy, the skin is crispy, and it’s served up with a handful of roasted garlic cloves that are perfect for smearing on slices of baguette.

On the other hand, it’s fairly work-intensive. A lot of that work can be finished a few hours before dinner, but you can’t avoid some last minute cooking here. Years ago, I thought that if I had to do any cooking once my guests arrived, it meant I was being a bad host. These days, I don’t worry so much. My friends like to help, and they’re also perfectly happy to chat and drink their wine while I finish up the sauce for the chicken. I like to have a bit of a break between courses, so I’ll generally serve the salad, then finish the chicken.

But again, much of this dish can be prepared in advance. The chicken can be brined early in the day, then rinsed, dried, and refrigerated until needed. The recipe calls for a whole chicken to be cut in pieces, but I’ve used pre-cut pieces with no problem. The garlic and shallots can be roasted in advance and set aside. Of course all of the ingredients can be measured and set right where you need them. The most important thing is to relax – you fed your guests salad so they aren’t starving, they hopefully have good wine to drink, and this chicken is absolutely worth the wait.

I’m looking over the recipe right now, and I’m wondering if you could actually make everything ahead of time and just keep it in a slightly warm oven? (You’ll have to take it out to bake the goat cheese rounds if you’re making those, but that’s easy enough.) I think it would work. I’m going to try it tonight, and then I’ll update with the results.  (Update: I tried it and it was a huge failure.  Not saying it can’t be done correctly somehow, but what I did certainly didn’t work.)

Chicken with 40 Cloves of Garlic (from Cooks Illustrated)

Serves 3 to 4

CI note: Try not to purchase heads of garlic that contain enormous cloves; if unavoidable, increase the foil-covered baking time to 40 to 45 minutes so that the largest cloves soften fully. A large Dutch oven can be used in place of a skillet, if you prefer. Broiling the chicken for a few minutes at the end of cooking crisps the skin, but this step is optional. Serve the dish with slices of crusty baguette for dipping into the sauce and onto which the roasted garlic cloves can be spread.

Table salt
1 whole chicken (3½ to 4 pounds), cut into 8 pieces (4 breast pieces, 2 thighs, 2 drumsticks) and trimmed of excess fat.
Ground black pepper
3 large heads garlic (about 8 ounces), outer papery skins removed, cloves separated and unpeeled
2 medium shallots, peeled and quartered pole to pole
1 tablespoon olive oil
2 sprigs fresh thyme
1 sprig fresh rosemary
1 bay leaf
¾ cup dry vermouth or dry white wine
¾ cup low-sodium chicken broth
2 tablespoons unsalted butter

1. Adjust oven rack to middle position and heat oven to 400 degrees. Dissolve ¼-cup salt in 2 quarts cold tap water in large container or bowl; submerge chicken pieces in brine and refrigerate until fully seasoned, about 30 minutes. Rinse chicken pieces under running water and thoroughly pat dry with paper towels. Season both sides of chicken pieces with pepper.

2. Meanwhile, toss garlic and shallots with 2 teaspoons olive oil and salt and pepper to taste in 9-inch pie plate; cover tightly with foil and roast until softened and beginning to brown, about 30 minutes, shaking pan once to toss contents after 15 minutes (foil can be left on during tossing). Uncover, stir, and continue to roast, uncovered, until browned and fully tender, 10 minutes longer, stirring once or twice. Remove from oven and increase oven temperature to 450 degrees.

3. Using kitchen twine, tie together thyme, rosemary, and bay; set aside. Heat remaining 1-teaspoon oil in 12-inch heavy-bottomed ovenproof skillet over medium-high heat until beginning to smoke; swirl to coat pan with oil. Brown chicken pieces skin-side down until deep golden, about 5 minutes; using tongs, turn chicken pieces and brown until golden on second side, about 4 minutes longer. Transfer chicken to large plate and discard fat; off heat, add vermouth, chicken broth, and herbs, scraping bottom of skillet with wooden spoon to loosen browned bits. Set skillet over medium heat, add garlic/shallot mixture to pan, then return chicken, skin-side up, to pan, nestling pieces on top of and between garlic cloves.

4. Place skillet in oven and roast until instant-read thermometer inserted into thickest part of breast registers about 160 degrees, 10 to 12 minutes. If desired, increase heat to broil and broil to crisp skin, 3 to 5 minutes. Using potholders or oven mitts, remove skillet from oven and transfer chicken to serving dish. Remove 10 to 12 garlic cloves to mesh sieve and reserve; using slotted spoon, scatter remaining garlic cloves and shallots around chicken and discard herbs. With rubber spatula push reserved garlic cloves through sieve and into bowl; discard skins. Add garlic paste to skillet. Bring liquid to simmer over medium-high heat, whisking occasionally to incorporate garlic; adjust seasoning with salt and pepper to taste. Whisk in butter; pour sauce into sauceboat and serve.

Other recipes part of this recommended dinner party menu:
Salad with Herbed Baked Goat Cheese
Sauteed Shredded Zucchini
Pain a l’Ancienne (baguettes)

Just about any dessert works well with this meal.
Many wines work well with this meal, but I especially like full-flavored whites such as Chardonnay, and medium-bodied reds such as Pinot Noir.

salad with herbed baked goat cheese

I’m trying to cut down on the number of Cooks Illustrated recipes that I put in my blog. For one thing, I don’t want Chris Kimball to come over here and kick my ass. Plus, I feel like most Cooks Illustrated recipes are a no-brainer – they’re so dependable that it’s no surprise to hear another recommendation. On the other hand, I cooked almost exclusively from Cooks Illustrated for several years, so there are some recipes that I love so much that I can’t resist sharing.

In fact, I have entire dinner party menus of CI recipes to discuss. I’m going to spend the next few entries putting forth the recipes for one of my favorite meals. I’ve made this for a group of friends and for my parents, and it received great reviews both times. My parents had arrived at my house pretty pissed off after having their car broken into and getting stuck for hours trying to cross into the US from Canada, and after this meal (plus two bottles of wine and some beer), they were in much better spirits.

This salad is a great first course. It’s nice and light, but the goat cheese makes it interesting. The cheese rounds can be prepared up to a week in advance, which is always an advantage when you’re having company. I would also make the vinaigrette early in the day I plan to serve it and keep it in a jar with a tight-fitting lid. That way, when it’s time to serve the salad, I can just shake up the dressing and mix it with the greens. I almost always use bagged greens, because I hate to wash lettuce. With pre-cleaned lettuce, cheese rounds that can be formed days before you plan to serve them, and a simple vinaigrette that can be made in advance, this salad makes for the perfect opening course to an elegant dinner.

Salad with Herbed Baked Goat Cheese and Vinaigrette (from Cooks Illustrated)

Bridget note: I’ve used different herbs based on what I had available, and it was fine. I also usually forget to brush the rounds with olive oil before baking them, so if you’re stressed for time (like I always am when I have company), don’t worry too much about that step.

Serves 6

Herbed Baked Goat Cheese
3 ounces Melba toasts, white (about 2 cups)
1 teaspoon ground black pepper
3 large eggs
2 tablespoons Dijon mustard
1 tablespoon minced fresh thyme leaves
1 tablespoon chopped fresh chives
12 ounces goat cheese, firm
extra-virgin olive oil

Vinaigrette and Salad
2 tablespoons red wine vinegar
1 tablespoon Dijon mustard
1 teaspoon minced shallot
¼ teaspoon table salt
6 tablespoons extra-virgin olive oil
1 tablespoon fresh chives
Ground black pepper
14 cups hearty greens (mixed), washed and dried

1. For Goat Cheese: In food processor, process Melba toasts to fine even crumbs, about 1½ minutes; transfer crumbs to medium bowl and stir in pepper. Whisk eggs and mustard in medium bowl until combined. Combine thyme and chives in small bowl.

2. Using kitchen twine or dental floss, divide cheese into 12 evenly sized pieces. Roll each piece into a ball; roll each ball in herbs to coat lightly. Transfer 6 pieces to egg mixture, turn each piece to coat; transfer to Melba crumbs and turn each piece to coat, pressing crumbs into cheese. Flatten each ball into disk about 1½ inches wide and 1 inch thick and set on baking sheet. Repeat process with remaining 6 pieces cheese. Freeze cheese until firm, about 30 minutes. (Cheese may be wrapped tightly in plastic wrap and frozen up to 1 week.) Adjust oven rack to uppermost position; heat to 475 degrees.

3. Remove cheese from freezer and brush tops and sides evenly with olive oil. Bake until crumbs are golden brown and cheese is slightly soft, 7 to 9 minutes (or 9 to 12 minutes if cheese is completely frozen). Using thin metal spatula, transfer cheese to paper towel-lined plate and cool 3 minutes.

4. For Salad: While goat cheese is baking, combine vinegar, mustard, shallot, and salt in small bowl. Whisking constantly, drizzle in olive oil; season to taste with pepper.

5. Place greens in large bowl, drizzle vinaigrette over, and toss to coat. Divide greens among individual plates; place 2 rounds goat cheese on each salad. Serve immediately.

Other recipes part of this recommended dinner party menu:
Chicken with Forty Cloves of Garlic
Sauteed Shredded Zucchini
Pain a l’Ancienne (baguettes)

Just about any dessert works well with this meal.
Many wines work well with this meal, but I especially like full-flavored whites such as Chardonnay, and medium-bodied reds such as Pinot Noir.

croque-madame


If you’re looking for the best decadent breakfast ever, here it is. Even better than Eggs Benedict. I think. It’s basically Eggs Benedict with cheese.

The first time I made this, I thought I was making something complicated. But as I slowly worked my way through the recipe, I realized that it’s really a fancy ham and cheese sandwich. One slice of bread is slathered with swiss cheese sauce and the other slice with mustard. The sandwich is “grilled” the same way grilled cheese sandwiches are – browned on the stove with butter, and then it’s smeared with more cheese sauce and broiled until the sauce is spottily browned. The sandwich is topped with a fried egg. (Without the egg, it’s a Croque-Monsieur.)

The first time I had this, I got that heavy feeling afterwards that’s clearly a result of a meal full of fatty proteins and refined carbs. The next time, I made some efforts to lighten up the recipe. Mostly I eliminated some of the nice-but-not-necessary butter and reduced the cheese sauce. I have to admit that the most influential adjustment had to be my portion size.

It’s worth the indulgence. While it’s nigh on impossible to pick favorites, the combination of crispy bread, salty ham, spicy mustard, creamy cheese sauce and smooth yolk certainly makes this a contender for the best breakfast out there. Especially if you have plans to get in some activity later to work off some of that guilt…

Croque-madame (adapted from Gourmet March 2007, as found on epicurious)

Makes 4 servings

Bridget note: You can of course use all shredded cheese. I found it easier to only shred what was going into the sauce and to slice the rest. I’ve used both Country Crust Bread and storebought Italian bread for this recipe and enjoyed both.

3 tablespoons unsalted butter
2 tablespoons all-purpose flour
1½ cups whole milk
⅛ teaspoon salt
pinch teaspoon black pepper
pinch teaspoon freshly grated nutmeg
¼ cup (1 ounce) shredded swiss cheese
4 slices (1.5 ounces) sliced swiss cheese
8 slices firm white sandwich bread
4 teaspoons Dijon mustard
½ pound thinly sliced cooked ham (preferably Black Forest)
4 large eggs

1. Melt 2 tablespoons butter in a 1- to 1½-quart heavy saucepan over moderately low heat, then whisk in flour and cook roux, whisking, for 1 minute. Whisk in milk and bring to a boil over medium-high heat, whisking constantly. Reduce heat to low and simmer, whisking occasionally, for 5 minutes. Whisk in salt, pepper, nutmeg, and shredded cheese until cheese is melted. Remove from heat. Stir occasionally while preparing sandwiches to keep hard surface from forming on top of sauce. (Alternatively, place plastic wrap directly on surface of sauce.)

2. Adjust an oven rack to the top position and heat the broiler. Spray a baking sheet with nonstick spray.

3. Spread 1 tablespoons sauce evenly over each of 4 slices of bread, then cover evenly with remaining cheese. Spread mustard evenly on remaining 4 bread slices and top with ham, dividing it evenly, then invert onto cheese-topped bread to form sandwiches.

4. Melt ½ tablespoon butter in a 12-inch nonstick skillet over medium heat. Once melted, add the sandwiches and cook until golden, 3-4 minutes. Remove sandwiches from pan, add remaining ½ tablespoon butter, and return sandwiches, unbrowned side down, to pan. Cook until golden on second side. Transfer sandwiches to prepared baking pan. Do not wash skillet.

5. Top sandwiches with remaining sauce, spreading evenly. Broil sandwiches until sauce is bubbling and golden in spots, 2 to 4 minutes.

6. While sandwiches are broiling, heat the same nonstick pan over medium heat. Spray the pan with nonstick spray if there’s not butter leftover from browning the sandwiches. Crack eggs into skillet and season with salt and pepper. Fry eggs, covered, until whites are just set and yolks are still runny, about 3 minutes. Top each sandwich with a fried egg and serve immediately.

cappuccino cream puff rings (twd)

I pulled a Peabody this week and tweaked the TWD recipe. (Not as much or as creatively as she usually does, I admit.) Caroline chose Peppermint Cream Puff Ring as this week’s recipe, but peppermint screams Christmas to me, and I’m loving summer too much to think about Christmas right now.

In the original recipe, the filling is made from cream that’s been steeped in mint leaves. I didn’t want the mint, but I did like the steeping. I considered a tea-flavored cream filling, but ultimately decided on a cappuccino-flavored dessert with coffee cream filling. Generally, coffee flavor is incorporated into desserts using instant espresso, but since even one slice of tiramisu will keep me up for hours, I wanted my cream puff to be decaf. I heated decaf coffee and cream until it boiled, then strained out the coffee and chilled the cream. When it was cold, I whipped it and folded in sour cream. I was a little unsure about the sour cream addition, but I surprised myself by really liking the tang that it added.

I also made individual serving sized rings, instead of one large ring, taking inspiration and tips from Eliza. I wish they were a little more robust; I should have used a larger piping tip or made three rings, with one stacked on the other two, like Dorie instructs for the larger ring. Because a few other members had had problems with the pastry collapsing, I was exceedingly careful when making mine. I beat the cooked flour-butter-liquid mixture for a few seconds before adding the eggs to make sure the eggs wouldn’t get too hot, and I pricked each ring with a paring knife after baking and before putting them back into the just-turned-off oven with the door propped open for half an hour.

I topped my rings with chocolate ganache and sprinkled them with cinnamon. (Not that I ever put either chocolate or cinnamon in my cappuccino, but the flavors did end up working here.) They look a little more like donuts than I prefer, but overall, I was surprised by how much I liked these. To be honest, I made them in the evening on a night when Dave was away for dinner, and I basically ate cream puffs for dinner. And dessert.

The original recipe has been published on epicurious.