multigrain pancakes

copy-of-img_9455

This is one of those recipes that’s unabashedly multigrained. The multigrains aren’t sneaking in, trying to pretend this is a regular pancake recipe that just happens to be a little healthier. No, these pancakes are multigrain all the way.

copy-of-img_5792

They’re also, possibly, my favorite pancakes ever. I’m finding that I really enjoy recipes that have whole grain as the primary flavor.

copy-of-img_9452

The ingredient list is a little long for pancakes, and the food processor has to be used to grind up the muesli. I won’t lie that I think that’s a hassle, so what I’ve started doing is grinding the whole box of muesli at once (minus the small portion that’s added to the pancakes unground). That makes the effort involved with making these similar to a regular pancake recipe.

copy-of-img_5804

I don’t always serve these with the apple topping; they’re just as good with maple syrup. But it’s November and apples and cranberries and nuts just seem appropriate. Not only does the topping make these pancakes even more delicious and special than they already are, but it adds a nice serving of fruit to an already fiber-rich breakfast. You can’t beat that.

copy-of-img_5815

Multigrain Pancakes (from Cooks Illustrated November 2006)

Serves 4 to 6.

CI note: Familia-brand no-sugar-added muesli is the best choice for this recipe. If you can’t find Familia, look for Alpen or any no-sugar-added muesli. (If you can’t find muesli without sugar, muesli with sugar added will work; reduce the brown sugar in the recipe to 1 tablespoon.) Mix the batter first and then heat the pan. Letting the batter sit while the pan heats will give the dry ingredients time to absorb the wet ingredients, otherwise the batter will be runny. Unless you have a pastry brush with heatproof bristles, a paper towel is the best means of coating the pan surface with oil. Pancakes will hold for 20 minutes when placed on a greased rack set on a baking sheet in a 200-degree oven. Serve with maple syrup or Apple, Cranberry, and Pecan Topping.

4 teaspoons fresh lemon juice
2 cups whole milk
1¼ cups no-sugar-added muesli (6 ounces), plus an additional 3 tablespoons
¾ cup unbleached all-purpose flour (3¾ ounces)
½ cup whole wheat flour (2¾ ounces)
2 tablespoons brown sugar (light or dark)
2¼ teaspoons baking powder
½ teaspoon baking soda
½ teaspoon table salt
2 large eggs
3 tablespoons unsalted butter, melted and cooled
¾ teaspoon vanilla extract
Vegetable oil

1. Whisk lemon juice and milk together in medium bowl or 4-cup measuring cup; set aside to thicken while preparing other ingredients.

2. Process 1¼ cups muesli in food processor until finely ground, 2 to 2½ minutes; transfer to large bowl. Add remaining 3 tablespoons unground muesli, flours, brown sugar, baking powder, baking soda, and salt; whisk to combine.

3. Whisk eggs, melted butter, and vanilla into milk until combined. Make well in center of dry ingredients in bowl; pour in milk mixture and whisk very gently until just combined (few streaks of flour and lumps should remain). Do not overmix. Allow batter to sit while pan heats.

4. Heat 12-inch nonstick skillet over medium-low heat for 5 minutes. Add 1 teaspoon oil and brush to coat skillet bottom evenly. Following instructions below, add 1 tablespoon batter to gauge temperature of pan. Pour ¼ cup batter onto 3 spots in skillet, using bottom of ladle to spread batter smooth if necessary. Cook pancakes until small bubbles begin to appear evenly over surface, 2 to 3 minutes. Using thin, wide spatula, flip pancakes and cook until golden brown on second side, 1½ to 2 minutes longer. Serve immediately. Repeat with remaining batter, brushing surface of pan lightly with oil between batches and adjusting heat if necessary.
Apple, Cranberry, and Pecan Topping for Pancakes (from Cooks Illustrated November 2006)

Serves 4 to 6.

CI note: The test kitchen prefers semifirm apples such as Fuji, Gala, or Braeburn for this topping. Avoid very tart types like Granny Smith and soft varieties like McIntosh.

3½ tablespoons cold unsalted butter
3 sweet apples (medium), peeled, cored, and cut into ½-inch pieces (about 4 cups) (see note above)
Pinch table salt
1 cup apple cider
½ cup dried cranberries
½ cup maple syrup
½ teaspoon vanilla extract
1 teaspoon fresh lemon juice
¾ cup pecans, toasted and chopped coarse

Melt 1½ tablespoons butter in large skillet over medium-high heat. Add apples and salt; cook, stirring occasionally, until softened and browned, 7 to 9 minutes. Stir in cider and cranberries; cook until liquid has almost evaporated, 6 to 8 minutes. Stir in maple syrup and cook until thickened, 4 to 5 minutes. Add vanilla, lemon juice, and remaining butter; whisk until sauce is smooth. Serve with toasted nuts.

copy-of-copy-of-img_9461

thanksgiving twofer pie

copy-of-img_8894

Laurie, the administrator for TWD, gave us the option of blogging about the Thanksgiving Twofer Pie, a combination of pecan and pumpkin pie, on Thursday instead of Tuesday, under the assumption that some of us would be making it for Thanksgiving. I tried to imagine my family’s reaction if I offered something so untraditional after the turkey. My mom would raise her eyebrows, loudly, if such a thing is possible, and eat maybe half a piece. My dad would eat his portion and proclaim it good but not as good as Libby’s pumpkin pie. My brothers and sister are more easygoing, and they might actually enjoy it for what it is – something different, god forbid.

copy-of-img_8812

I admit to being a little apprehensive about the pie myself, not being a big fan of pecan pie, or even pecans, for that matter. But I’m generally game for something new, so I followed the recipe almost exactly. I did toast the pecans before adding them to the pie, and I ran out of corn syrup and substituted maple syrup for almost half of the corn syrup.  I also used a different pie crust recipe.

copy-of-img_8827

The recipe came together smoothly for me, although I will admit to a twinge of regret when I added the pecans to the wonderfully pure pumpkin pie filling. The only problem I had was that my crust became incredibly difficult to cut through after baking. I am not exaggerating when I say that I ate my pie with a steak knife. I don’t know what happened – my only guess is that the sugary pecan pie filling made its way down to the crust and crystallized. I haven’t seen anyone else mention this problem, but there was nothing unusual about the pie crust I made. Maybe the maple syrup caused the problem?

copy-of-img_8842

I was surprised by how much I really enjoyed this pie. I’m so glad that I added some maple syrup, because that flavor was really noticeable, and it was fantastic. I did think the pie was sort of, um, ugly, once sliced. I wish the layers had stayed separate. That’s okay though, it was still tasty.

copy-of-copy-of-img_8869

Vibi, who’s actually from France and therefore has no interest in Thanksgiving, was kind enough to choose this dessert for all of us American TWD members. The recipe is posted on her blog (in both English and French – just scroll down for the English version).

copy-of-copy-of-img_8896

lime meltaways

copy-of-img_8545

I’ve gotten into the annoying habit of buying a bag of limes when I only need one lime because they’re so darn expensive if you buy them singularly. And then I have to get creative trying to use up the rest of the limes. See, I was practically forced to make lime cookies.

copy-of-img_8446

There’s nothing complicated about the recipe, although for a few seconds, I wasn’t sure whether the lime juice was going to mix with the butter. You know, fat and water repelling and all. It mixed in.

copy-of-img_8447

Once the cookies come out of the oven, the recipe recommends putting them in a bag with powdered sugar and doing some shaking, until they’re evenly coated with sugar. I don’t know about this. They’re pretty fragile. Seems like you’re asking for broken cookies with this method. I just gave each one a quick dip in a bowl of powdered sugar.

copy-of-img_8480

I love lime-flavored stuff, and these were no exception. I wouldn’t have minded if they had been a little more limey – I might add just a little extra lime zest next time. Another great thing about these – this is one of those convenient recipes where you can leave the dough in the freezer until you need it. Fresh cookies with no effort!

copy-of-img_8542

Key Lime Meltaways (adapted from Martha Stewart via Smitten Kitchen)

Makes 5 dozen

You can use either regular or Key limes.

The dough, shaped into logs, can be kept in the freezer for up to 2 months.

12 tablespoons (1½ sticks) unsalted butter, room temperature
1 cup (4 ounces) powdered sugar
grated zest of 4 tiny or 2 large key limes
2 tablespoons freshly squeezed lime juice
1 tablespoon pure vanilla extract
1¾ cup plus 2 tablespoons (9.375 ounces) all-purpose flour (a.k.a. 2 cups minus 2 tablespoons)
2 tablespoons cornstarch
¼ teaspoon salt

1. In the bowl of an electric mixer fitted with the whisk attachment, cream butter and ⅓ cup (1.33 ounces) powdered sugar until fluffy. Add lime zest, juice, and vanilla; beat until fluffy.

2. In a medium bowl, whisk together flour, cornstarch, and salt. Add to butter mixture, and beat on low speed until combined.

3. Between two 8-by-12-inch pieces of parchment paper, roll dough into two 1¼-inch-diameter logs. Chill at least 1 hour.

4. Heat oven to 350F. Line two baking sheets with parchment. Place remaining ⅔ cup sugar in a resealable plastic bag. Remove parchment from logs; slice dough into ¼-inch-thick rounds. Place rounds on baking sheets, spaced 1 inch apart.

5. Bake cookies until barely golden, about 15 minutes. Transfer cookies to a wire rack to cool slightly, just three or four minutes. While still warm, place cookies in the sugar-filled bag; toss to coat. Bake or freeze remaining dough. Store baked cookies in an airtight container for up to 2 weeks.

copy-of-img_8549

bourbon pumpkin cheesecake

copy-of-img_9023

For years, I didn’t make cheesecake, because I only had a 9-inch springform pan, and I rarely had anyone around to eat 12-16 servings of cheesecake. I know cheesecake freezes well, but it sounded like a hassle, with the slicing and packaging correctly to avoid freezer burn. Then I got this little 4-inch springform pan, which has come in handy a few times, and which led to the fantastic Brown Sugar Apple Cheesecake. But a 4-inch springform cheesecake is really only big enough to whet my appetite. Dave and I had two tiny servings each of the apple cheesecake, and it wasn’t near enough.

copy-of-img_8998

The solution, of course, is more cheesecake. Pumpkin cheesecake is not only seasonal, but one of my favorite cheesecake flavors. I’ve tried a couple different recipes, all of which were good, but none struck me as the best pumpkin cheesecake ever, so I saw no reason not to try a new recipe. I chose the one on epicurious that had the most positive reviews.

copy-of-img_9004

I used a different recipe for the crust, because I didn’t have pecans, and I’m not sure I’d want them in the crust anyway. The recipe also includes a sour cream topping that I skipped because I didn’t have sour cream. And, again, it seems unnecessary.

copy-of-img_9013

I made one third of the recipe, which was a little too much for my mini springform pan, so I did some googling and figured out how to make cup-cheesecakes. I love it! They’re so cute and perfectly sized. I think next time I’ll just press the crust in the bottom of the muffin cup and not up the sides, but other than that, I was really pleased with this method. I followed Clare’s instructions and let the cheesecakes chill in the freezer for a few minutes before popping them out with a butter knife, and they came out fine, even though I had underbaked the centers.

copy-of-img_8999

One problem with pumpkin cheesecake is that it tends to look plain. This recipe recommends a sour cream topping, and I’ve seen some accompanied by recipes for bourbon whipped cream, but cheesecake is so rich that I can’t see topping it with something else that’s so rich. I think what I want to do is make a marbled cheesecake. I’m going to try separating out some of the batter before adding the pumpkin, then swirling the plain batter in the pumpkin base. I might have to tweak the filling ingredients just slightly, but I want to keep the recipe similar.

copy-of-img_9018

As is though, the flavor and texture of this cheesecake more than makes up for its lackluster appearance. It was perfect – dense and creamy with just the right balance of pumpkin and cream cheese. We finished the third of the recipe that I made in an embarrassingly short time, and it was all I could do to resist making more just two days later.

copy-of-img_9178

Update 10.14.09: The cheesecake can be successfully and easily dressed up with some swirling!  You just need to add the pumpkin to the batter last, removing some plain batter before adding the pumpkin.  Here’s what I recommend: If you want only the top to be marbled, remove 1/4 cup of plain batter before adding the pumpkin to the remaining batter.  Pour the pumpkin batter into the prepared pan, then dot the plain batter over the top and use a knife to make a marble pattern.  If you’d like the swirling to continue throughout the entire cheesecake, separate out 3/4 cup batter before adding the pumpkin to the rest, then add 1/3 of the pumpkin batter to the pan, then 1/3 of the plain batter, and swirl.  Repeat twice more.  When I tried it, I separated out the larger amount of batter before adding the pumpkin, and I didn’t notice that the texture was compromised by the higher concentration of pumpkin.

Copy of IMG_0239

Printer Friendly Recipe
Bourbon Pumpkin Cheesecake
(crust from Cooks Illustrated, filling adapted from Gourmet via epicurious.com)

To bake cheesecakes in a muffin pan, line each muffin cup with the crust mixture. Pour in the filling and bake 20-25 minutes at 350F. Cool on a rack until room temperature, then freeze for 15 minutes before using a butter knife to prop the cheesecakes out of the pan.  I’m thinking this amount of filling will made about 24 cup-cheesecakes.  You’ll probably need to increase the crust to 12 crackers, 4 tbsp sugar, 8 tbsp butter (and a teensy bit more of each spice).

Crust:
5 ounces graham crackers (9 whole crackers), broken into large pieces
3 tablespoons granulated sugar
½ teaspoon ground ginger
½ teaspoon ground cinnamon
¼ teaspoon ground cloves
6 tablespoons unsalted butter, melted

Filling:
3 (8-ounce) packages cream cheese, at room temperature
½ cup (3.5 ounces) packed light brown sugar
½ cup (3.5 ounces) granulated sugar
1 tablespoon cornstarch
1½ teaspoons cinnamon
½ teaspoon freshly grated nutmeg
½ teaspoon ground ginger
½ teaspoon salt
1½ cups canned solid-pack pumpkin
3 large eggs
2 tablespoons heavy cream
1 teaspoon vanilla
1 tablespoon bourbon liqueur or bourbon (optional)

1. Adjust oven rack to lower-middle position and heat oven to 350F. Spray bottom and sides of 9-inch springform pan evenly with nonstick cooking spray. Pulse crackers, sugar, and spices in food processor until evenly and finely ground, about fifteen 2-second pulses. Transfer crumbs to medium bowl, drizzle melted butter over, and mix with rubber spatula until evenly moistened. Turn crumbs into prepared springform pan and, using hand, spread crumbs into even layer. Using flat-bottomed ramekin or drinking glass, press crumbs evenly into pan bottom, then use a soup spoon to press and smooth crumbs into edges of pan. Bake until fragrant and browned about the edges, about 12 minutes. Cool on wire rack while making filling.

2. Working with a stand mixer fitted with a paddle attachment, or with a hand mixer in a large bowl, beat the cream cheese on medium speed, scraping down the bowl as needed, until smooth, about 2 minutes. Add the brown and granulated sugars, cornstarch, cinnamon, nutmeg, ginger, and salt to the cream cheese and beat for another 2 minutes. Mix in the pumpkin, then add the eggs one at a time, mixing until incorporated. Add the cream, vanilla, and bourbon (if using) and mix until just combined.

3. Pour the filling into the crust, smoothing the top. Bake until the center is just set and measures 155 degrees on an instant-read thermometer, 55 to 65 minutes.

4. Cool the cheesecake completely in the pan on a rack, about 3 hours. Chill, covered, until cold, at least 4 hours. Remove the sides of the pan and bring the cheesecake to room temperature before serving.

copy-of-img_9172

brown sugar apple cheesecake

copy-of-copy-of-morning-awb

I’ve been avoiding buying apples so far this fall. I like them, quite a bit in fact, but I have to pace myself. I eat a lot of fruit, and apples are pretty much the only fruit in season for a good portion of the year. I try to maximize my opportunities to eat the fruit with shorter seasons. But it’s getting to be time to move on to apples, and what better way to kick off apple season than with cheesecake? I should start using every fruit in cheesecake to kick off its season.

copy-of-img_8570

Tuesdays with Dorie made this cheesecake long before I joined, and it definitely contributed to my eventual purchase of the book. I don’t know why apple cheesecake never occurred to me before, but what a fantastic idea. Dorie has tweaked traditional cheesecake to include brown sugar, cinnamon and apple cider, and I’m sure you can imagine how well that compliments the apples.

copy-of-img_8581

The recipe went off without a hitch, despite making just 1/6 of it in a tiny but cute springform pan. With three components, it isn’t the quickest recipe to put together, but it’s worth it even before the cheesecake – because you also get to eat the batter. My favorite is when it’s just cream cheese and sugar, but I make sure I test every stage.

copy-of-img_8583

The cheesecake is delicious, although I think I’ll slice the apples a lot thinner next time because I’m picky about texture. Dorie describes the texture as middle-of-the-road as far as cheesecakes go, and I think she’s right on; it’s not exceptionally dense. The mini-cheesecake was a mistake, because I definitely did not get enough.

PS – The apples decoration on top was shamelessly copied from foodie bride.

copy-of-img_8647

Brown Sugar-Apple Cheesecake (from Dorie Greenspans’s Baking: From My Home to Yours)

For the Crust
30 gingersnaps (or a scant 2 cups graham cracker crumbs)
2 tablespoons light brown sugar
½ teaspoons ground cinnamon (optional)
½ stick (4 tablespoons) unsalted butter, melted

For the Apples
½ stick (4 tablespoons) unsalted butter
3 large Golden Delicious or Fuji apples, peeled, cored and cut into eighths
2 tablespoons (packed) light brown sugar

For the Filling
1½ pounds (three 8-ounce packages) cream cheese, at room temperature
¾ cup (packed) light brown sugar
6 tablespoons sugar
3 tablespoons apple cider
2 teaspoons pure vanilla extract
2 teaspoons ground cinnamon
3 large eggs
¾ cup sour cream
⅓ cup heavy cream

Apple jelly, for glazing, or confectioner’s sugar, for dusting (optional)

To Make the Crust:
Butter the bottom and sides of a 10-inch springform pan.

Put the gingersnaps in a food processor and whir until you have crumbs; you should have a scant 2 cups. (If you are using graham cracker crumbs, just put them in the food processor.) Pulse in the sugar and cinnamon, if you’re using it, then pour over the melted butter and pulse until the crumbs are moistened. Turn the crumbs into the springform pan and, using your fingertips, firmly press them evenly over the bottom and up the sides of the pan as far as they’ll go. Put the pan in the freezer while you preheat the oven. (The crust can be covered and frozen for up to 2 months.)

Center a rack in the oven and preheat the oven to 350 degrees F.

Remove the pan from the freezer and wrap the bottom tightly in aluminum foil, going up the sides. Place the pan on a baking sheet and bake for 10 minutes, or until the crust is set and lightly browned. Transfer to a rack to cool while you make the apples and the filling. Leave the oven at 350 degrees F.

To Make the Apples:
Melt 2 tablespoons of the butter in a large nonstick skillet over medium-high heat. When the foam subsides, toss in half of the apple slices and cook, turning once, until they are golden brown, about 3 minutes. Sprinkle the apples with 1 tablespoon of the sugar and cook them, turning, just until coated, another minute or so. Scrape the apples onto a plate, wipe out the skillet and repeat with the remaining apples. Let the apples cool while you make the filling.

Getting Ready to Bake:
Have a roasting pan large enough to hold the springform pan at hand. Put a kettle of water on to boil.

To Make the Filling:
Working with a stand mixer, preferably fitted with a paddle attachment, or with a hand mixer in a large bowl, beat the cream cheese on medium speed, scraping down the bowl often, for about 4 minutes, or until it is velvety smooth. Add the sugars and beat for another 2 minutes. Beat in the cider, vanilla, and cinnamon. Reduce the speed to low and beat in the eggs one by one, beating for 1 minute after each egg goes in. Finally, beat in the sour cream and heavy cream, beating just until the batter is smooth.
Pour about one third of the batter into the baked crust. Drain the apples by lifting them off the plate with a slotted spoon or spatula, and spoon them into the pan. Cover with the remaining batter and, if needed, jiggle the pan to even the top. Place the springform pan in the roasting pan and pour in enough boiling water to come halfway up the sides of the springform pan.

Bake the cheesecake for 1 hour and 30 to 45 minutes, covering the cake loosely with a foil tent at the 45-minute mark. The cake will rise evenly and crack around the edges, and it should be fully set except, possibly, in the very center-if the center shimmies, that’s just fine. Gently transfer the cake, still in the pan, to a cooling rack and let it cool to room temperature, then refrigerate it for at least 6 hours; overnight would be better.

Run a blunt knife around the edges of the pan to loosen the crust, open the pan’s latch and release and remove the sides.

copy-of-copy-of-day1

rugelach

copy-of-img_8773

The closest I’ve ever come to making, or even eating, rugelach is spreading jam on scraps of pie dough, rolling them up, sprinkling them with sugar, and baking them. So pretty close actually. Except that it never occurred to me to add chocolate, so I’ve been missing out.

copy-of-copy-of-img_8728

Dave loves jam+scraps of dough, so I was confident that he’d enjoy these. I was right, and he was not pleased when I sent the first batch to a soldier in Iraq. That gave me a great reason to make them again, with a few changes I had in mind.

copy-2-of-copy-of-img_8741

Dorie practically insists that we play with the filling recipe, so I took it upon myself to do so. For the first batch I followed the recipe exactly, and it was no bad thing. However, they were, if such a thing is possible, too chocolately. Not that they weren’t still delicious, but I happened to know that I added all sorts of other tasty things in the filling, and I wanted to taste all of it!

copy-of-img_8761

For the second batch, I cut the chocolate in half and reduced the jam a little, since so much of it oozed out from the first batch. And in a weird reversal, after months of replacing Dorie’s raisins with other dried fruit, I ran out of currants and substituted raisins. Still good. So many flavors playing along nicely together.

copy-of-img_8770

The recipe, chosen for TWD, can be found on Grace’s site. Changes I made include cutting the amount of chocolate in half, reducing the jam to ½ cup, and increasing the cinnamon to ¾ teaspoon. I also found that it was best to cut the dough into triangles before adding the chunks of chocolate, which blocked my pizza cutter when I added it before cutting.

copy-of-img_8767

pumpkin muffins

I’ve been on the lookout for a pumpkin quick bread recipe for a couple of years. I like quick breads to have some textural contrast with add-ins, but I couldn’t think of anything that seemed to fit with the flavors of the pumpkin. Of course Dorie could, as Kelly’s choice for this week’s TWD recipe made evident.

Dorie adds raisins and walnuts (or pecans) to her pumpkin muffins. Like I almost always do, I replaced the raisins with something else; in this case, dried cranberries. I wasn’t sure if the flavors would get along – they’re both common fall ingredients, but I don’t often see them together. I topped the muffins with pumpkin seeds instead of sunflower seeds. I’m not sure why Dorie calls for sunflower seeds; pumpkin seeds seem so perfect for these muffins.

The muffins were good. The walnuts and dried cranberries were fine as additions. However, shortly after I made them, one of my friends told me about a pumpkin muffin recipe she makes that has a lot of ginger in it, and then it occurred to me that the perfect add-in for pumpkin muffins is crystallized ginger. Now I’m looking forward to trying this combination.

Dorie’s recipe is posted on Kelly’s blog.

dimply plum cake (twd)

Deb from Smitten Kitchen recently recommended the cake that Michelle chose for TWD this week, and since I’m a Smitten Kitchen junkie, I’d been wanting to make it since then. I didn’t even realize it was Dorie Greenspan’s recipe at first, so I was excited when I saw that it was the assigned recipe. Plus, I just happened to have all of the ingredients the day it was chosen for TWD, including a bunch of plums. That never happens.

I baked the recipe in a muffin pan because muffins are more convenient to store in the freezer and grab before going to work. And I overfilled the muffin cups because I have an annoying lazy tendency. I put what seemed like an appropriate amount of batter in each cup, but I could tell after I pushed the first plum into the batter that the cups were overfilled. How hard would it have been, really, to re-portion the dough into extra muffin cups, especially considering that I only used 10 sections of the 12-cup muffin pan, and I had extra plums. And then I would have avoided making a mess of some of the muffins/cupcakes.

Not that I minded those broken bits. They gave me a great excuse to snack on cake while I finished making breakfast. I thought the cake was really good. I used lemon zest and cinnamon, but I think orange zest would be a lot better. I’m still fighting fall, but this was a good compromise between late summer and fall flavors.

Michelle has posted the recipe.

banana and peanut butter stuffed french toast

Up until very recently, whenever someone mentioned Elvis’ favorite sandwich, I thought to myself “well, no wonder he died young!” Once I actually took a moment to consider it though, the sandwich really isn’t so bad. The basic Elvis sandwich is just bananas and peanut butter, fried like a classic grilled cheese. I’d say that the grilled cheese sandwich is far worse for you. Oh, except sometimes Elvis liked to add bacon, which, okay, is a little over the top.

I realized a few months ago that I like bananas a lot more if they’re served with a bit of peanut butter (or Nutella). That reminded me of Elvis’s favorite sandwich, but I wasn’t interested in pan-frying it. Instead, I thought it would be great as French toast.

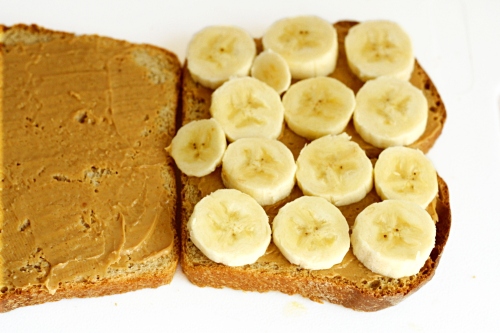
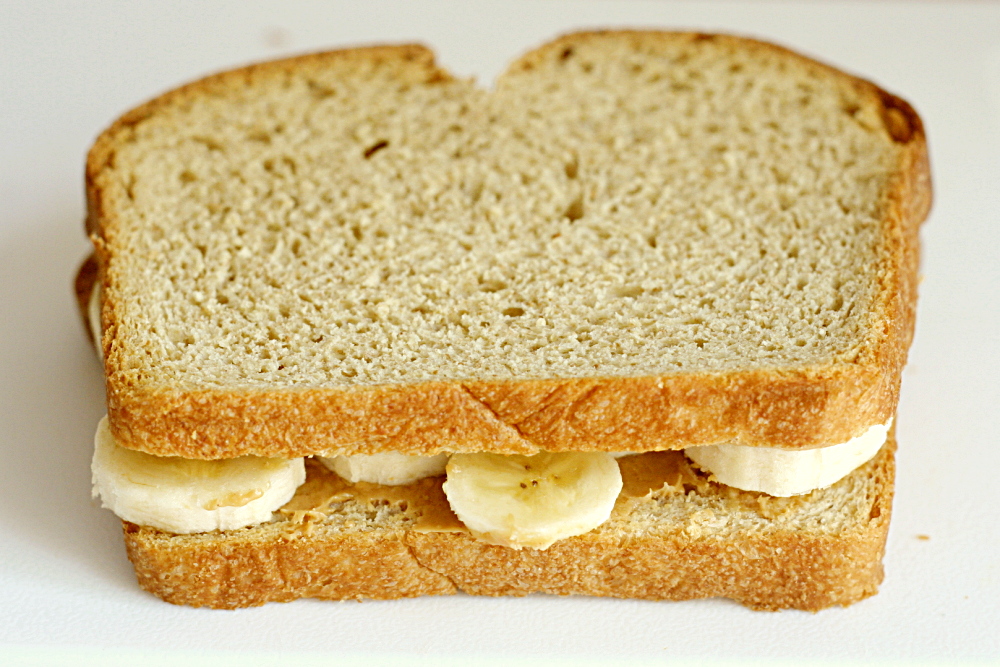
I had never made stuffed French toast, but there are plenty of recipes for different versions of it, so I was confident that it would work. First I made the basic sandwich by smearing one side of each bread slice with a thin layer of peanut butter. I wanted peanut butter on both slices so it would glue the bananas to the bread, keeping the sandwich together. I recommend a very thin layer because peanut butter can be overpowering, as well as sticky in your mouth. I used my favorite French toast recipe for the batter, but made it a little thinner because it would only be absorbed through the non-peanut butter side of the bread slices.

It worked out pretty well. I should have let the sandwich soak in the batter a little longer, and I should have cooked them on higher heat, but the flavors were really good. And there’s really nothing unhealthy about it except for a bit of butter to fry the sandwiches. I’m guessing the drug dependency was a bigger influence on Elvis’ early demise than banana sandwiches.

Elvis French Toast (adapted from Cooks Illustrated’s French Toast recipe)

4 slices sandwiches bread (I used Country Crust Bread)
2 tablespoons peanut butter (approximately)
1-2 bananas, sliced ¼-inch thick
1 large egg
1 cup milk
2 teaspoons vanilla extract
2 tablespoons granulated sugar
¼ teaspoon table salt
1 tablespoon butter

1. Spread a thin layer of peanut butter on one side of each slice of bread. Place slices of banana in a single layeron peanut butter-covered sides of two bread slices. Top with the remaining bread, peanut butter side down.

2. Heat medium nonstick skillet over medium heat for 5 minutes. Meanwhile, beat egg lightly in shallow pan or pie plate; whisk in milk, vanilla, sugar, and salt and salt, continuing to whisk until smooth. Soak sandwiches without oversaturating, about 1 minute per side. Pick up bread and allow excess batter to drip off; repeat with remaining sandwiches.

3. Swirl 1 tablespoon butter in hot skillet. Transfer prepared sandwiches to skillet; cook until golden brown, about 2 minutes on first side and 1 minute 15 seconds on the second. Serve immediately, dusting with powdered sugar.

chocolate chunkers

Just about every week, I’m reminded of why I enjoy being a member of TWD so much. The Chocolate Chunkers Claudia chose this week are no exception. I am always impressed by Dorie’s creativity.

That being said, Dorie and I do often differ on taste preferences. For example, what is with all the raisins? She puts them in everything. I do not approve. Also, peanuts. I like them, but I rarely want them in dessert. Also, this phrase: “You’ll have more crunchies than dough.” But…I love dough. Even more than crunchies.

This recipe is far more involved than my normal cookie recipes. It has quite the substantial ingredient list, and a good number of those ingredients need to be prepped in some way. At least I was able to use up my little-bits-of-leftover-chocolate stash.

She doesn’t call these “chunkers” for nothing. More crunchies than dough indeed. There’s just enough of the brownie-like batter to hold the mix-ins together. But – it works. Yes, I’d rather have a plain, rich, moist, perfect brownie, but for something super-fun and different, I like these cookies.

Claudia has the recipe posted. I substituted dried cherries (which I chopped up a bit) for the raisins and walnuts (not toasted, but they should have been) for the peanuts.