mango cream puffs

mango cream puffs 5

For the first Friday happy hour get-together we threw, I had about 24 hours notice, which works out to just a few hours in which I was both awake and at home. I got home from work fifteen minutes before our friends showed up. And yet, it went off without a hitch. I reminded Dave approximately five hundred times that night that I can clearly keep things simple when I need to.

mango cream puffs 1

The second happy hour was a different story. I had that Friday off of work, and I took advantage of it by spending just about all day cooking – and cleaning and emptying the dishwasher.

mango cream puffs 2

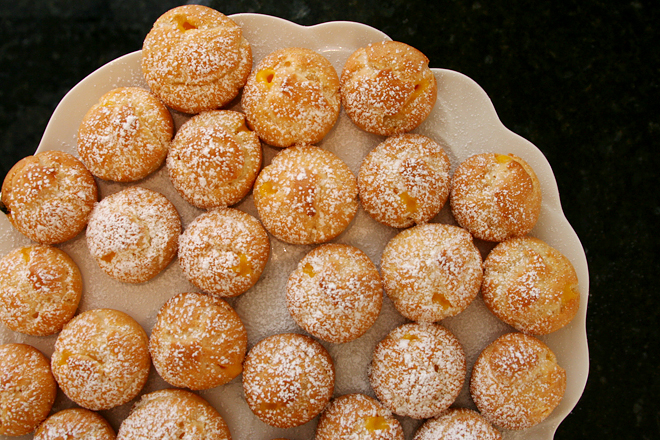
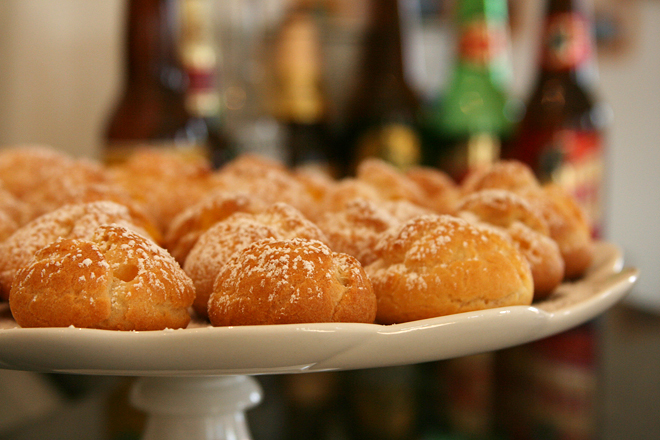
Dave has gotten into making rum cocktails lately, so I went with a Caribbean theme for the food – empanadas, bacon-wrapped stuffed dates, fried yucca root, shrimp ceviche, and cream puffs filled with mango curd. We also had an assortment of Mexican beers available for anyone who fancied themselves too manly for a cocktail.

mango cream puffs 3

It was another success, although not quite as smooth as the first. A good portion of the people we invited didn’t show, even a few who had RSVPed, and there was a ton of food leftover. Plus, apparently when you supply your guests with cocktails that taste like juice (I’ll share the recipe later; trust me that Dave has perfected it), they’ll stick around longer than the two hours we’d all joked was the limit.

mango cream puffs 4

Still, it was a great time, and I can’t wait to throw another one of these little parties. And I was not unhappy about leftovers. The empadanas were great for lunch, and the cream puffs were a perfect pre-breakfast snack the next day – after I finally got all the dishes done. There are some advantages to simpler entertaining, but to be honest, I love both.

mango cream puffs 6

Printer Friendly Recipe
Mango Cream Puffs (from Cook’s Illustrated’s Baking Illustrated via Annie’s Eats)

Makes 24-30 small cream puffs

My food processor was dirty when I made this, so I used the mixer fitted with the whisk to mix the dough. It worked well.

Dough:
2 large eggs plus 1 large egg white
5 tablespoons unsalted butter, cut into 10 pieces
2 tablespoons whole milk
6 tablespoons water
1½ teaspoons sugar
¼ teaspoon salt
½ cup (2½ ounces) all-purpose flour
Mango curd (recipe follows)

1. Whisk the eggs and egg white in a liquid measuring cup. You should have ½ cup (discard the excess). Set aside. Combine the butter, milk, water, sugar, and salt in a small saucepan. Heat over medium heat and bring to a boil, stirring once or twice. When it reaches a full boil and the butter is fully melted, remove from the heat and stir in the flour until incorporated and the mixture clears the sides of the pan. Return the saucepan to low heat and cook, stirring constantly, using a smearing motion, until the mixture is slightly shiny, looks like wet sand and tiny beads of fat appear on the bottom of the pan (the mixture should register 175-180 degrees on an instant-read thermometer).

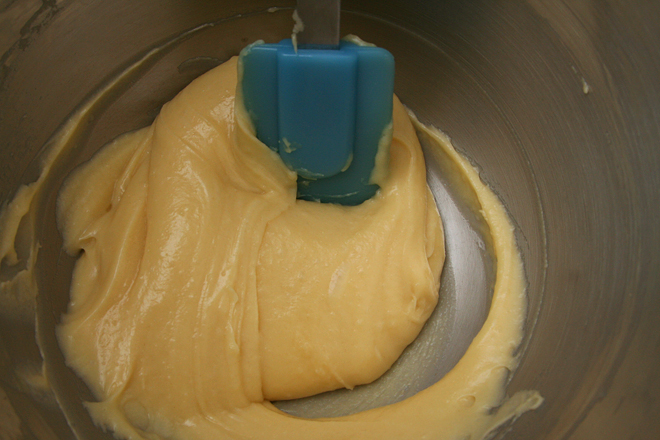
2. Immediately transfer the mixture to a food processor and process with the feed tube open to cool slightly, 10 seconds. With the machine running, gradually add the reserved eggs in a steady stream. When they have been added, scrape down the sides of the bowl, then process 30 seconds more until a smooth, thick, sticky paste forms.

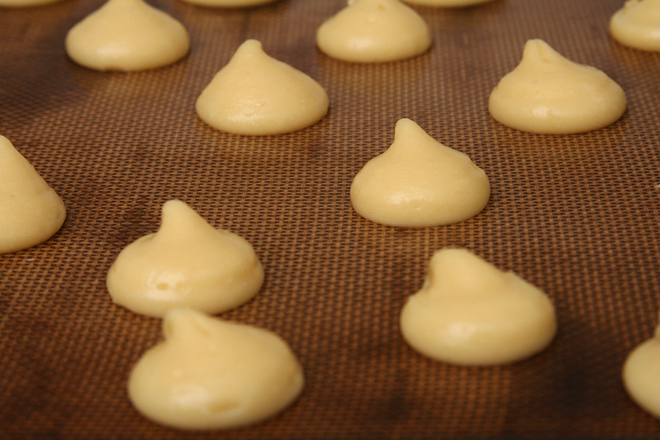
3. Place an oven rack in the middle position and preheat the oven to 425 degrees. Line a baking sheet with parchment paper. Fill a pastry bag fitted with a ½-inch plain tip with the dough. Pipe the paste into 1½-inch mounds on the prepared baking sheet, spacing them about 1 to 1¼ inches apart (you should be able to fit 24 mounds on the baking sheet). Use the back of a teaspoon dipped in water to even out the shape and smooth the surface of the piped mounds.

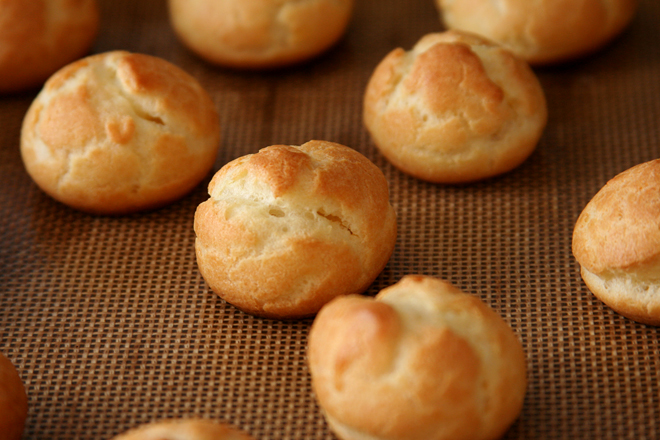
4. Bake for 15 minutes (do not open the oven door during baking). Reduce the oven temperature to 375 degrees and continue to bake until golden brown and fairly firm, 8-10 minutes longer. Remove the baking sheet from the oven. Use a paring knife, cut a ¾-inch slit into the side of each puff to release steam; return the puffs to the oven, turn the oven off, and prop open the oven door with the handle of a wooden spoon. Dry the puffs in the turned-off oven until the centers are just moist (not wet) and the puffs are crisp, about 45 minutes. Transfer the puffs to a wire rack to cool completely.

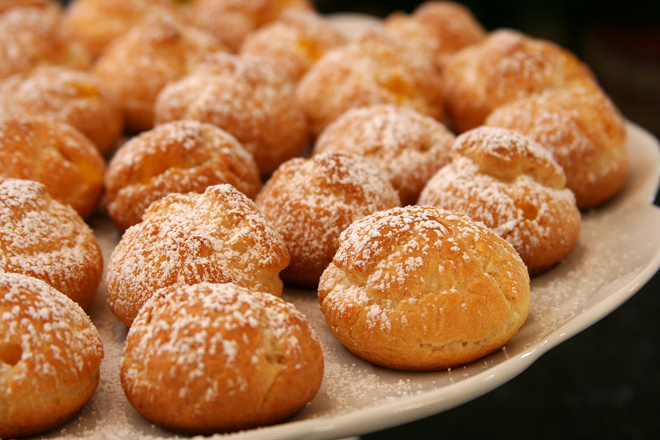
5. To fill the puffs, use the tip of a paring knife to make a small cut perpendicular to the first, creating an X in the side of each puff. Fill a pastry bag fitted with a ¼-inch plain tip with the pastry cream. Pipe some of the pastry cream through the X into the side of each puff until it starts to ooze back out. Repeat to fill all the puffs. Dust with powdered sugar and serve within several hours.

Mango Curd (from Bon Appetit via Smitten Kitchen)

Makes 1 to 1½ cups

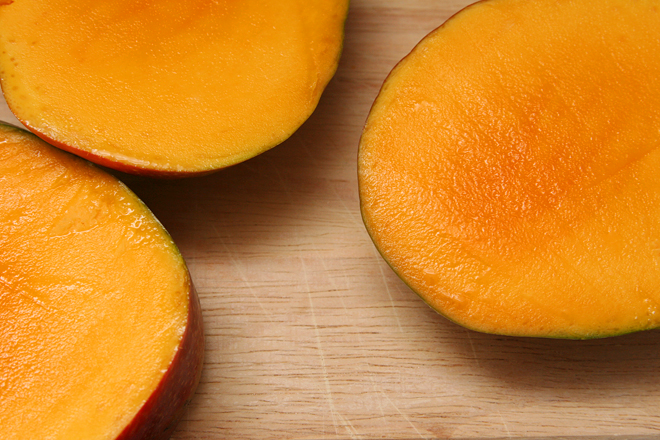
1 15-ounce ripe mango, peeled, pitted, cut into ½-inch pieces
⅓ cup (2.33 ounces) sugar
½ teaspoon cornstarch
3 tablespoons fresh lime juice
Pinch of salt
4 large egg yolks
4 tablespoons (½ stick) unsalted butter, cut into small pieces

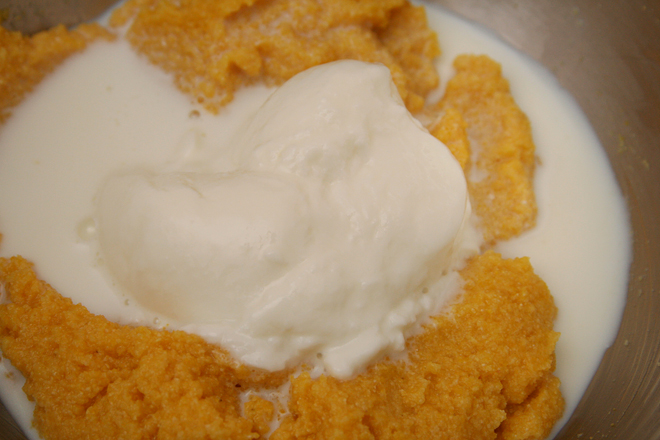
1. Puree the mango, sugar, lime juice, and salt in a food processor or blender, scraping down the sides of the work bowl as necessary. Add the yolks; puree 15 seconds longer. Strain through a sieve set over a large metal bowl, pressing on the solids with the back of a spatula to release as much puree as possible. Discard the solids in the sieve.

2. Set the metal bowl over a saucepan that contains 1 inch of simmering water (do not allow bottom of the bowl to touch the water); whisk the puree until it is thickened and a thermometer registers 170 degrees, about 10 minutes. Remove from the heat. Whisk in butter one piece at a time. Cover and refrigerate for at least 4 hours.
mango cream puffs 7

mulled wine cranberry sauce

mulled wine cranberry sauce 2

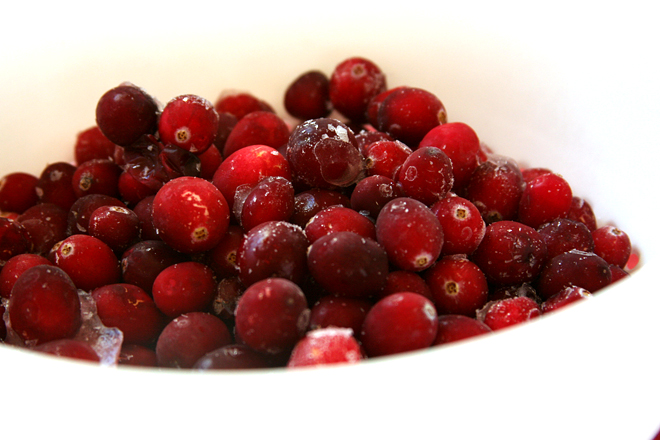
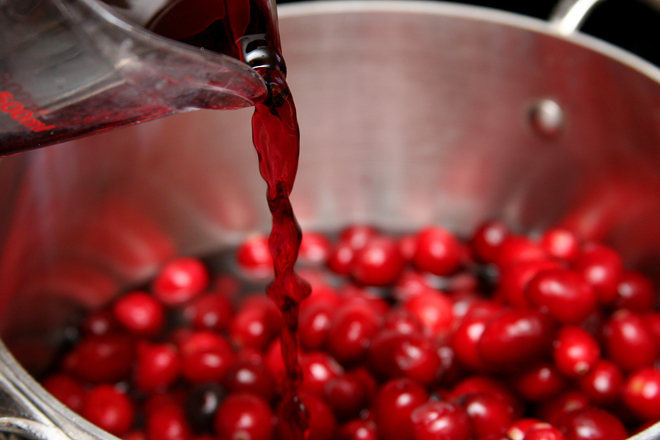
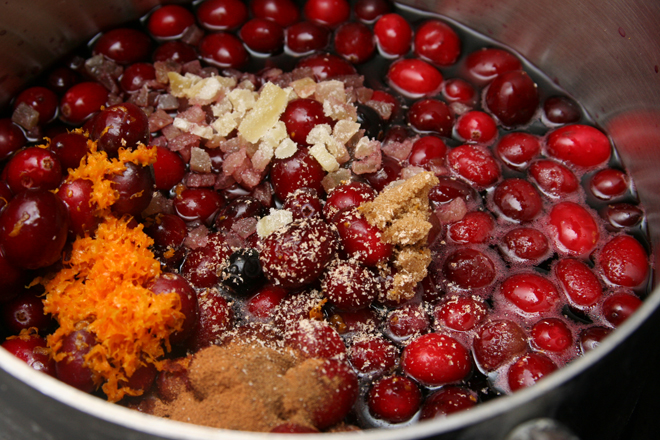
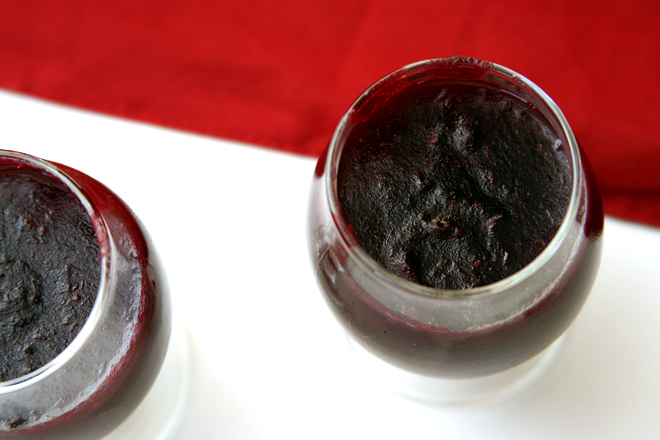
This, finally, is the cranberry sauce I’ve been looking for – the one that is worth making not just because making cranberry sauce is fun, but because this is better than anything you could buy. And it’s no more effort than any other cranberry sauce; the only difference between this and the most basic recipe is that wine is used to simmer the cranberries instead of water, and there are a handful of warm winter spices thrown in.

mulled wine cranberry sauce 4

With so much wine, you might think that the sauce ends up tasting like wine, but that isn’t the case. It tastes like something much more than the in-your-face tart and sweet of regular cranberry sauce, but it isn’t particularly boozy. It’s just deeper, more complex, with a little buzz on your tongue.

mulled wine cranberry sauce 5

Unfortunately, with half a bottle of wine stirred into one bag of cranberries, there’s no chance of claiming that all the alcohol cooks off, so this isn’t the best cranberry sauce for kids. That’s why my friend offered to bring a can of jellied cranberry sauce for her kids when I invited them over for a big turkey feast.

mulled wine cranberry sauce 6

When she forgot, we figured what the heck, what harm could a few tablespoons of winey cranberries do? Not much at all, it turns out, as her son took one spoonful of sauce, noted that there was wine in it, and pushed it aside in favor of the stuffing. So maybe it’s not for everyone, but it’s definitely my new favorite.

mulled wine cranberry sauce 7
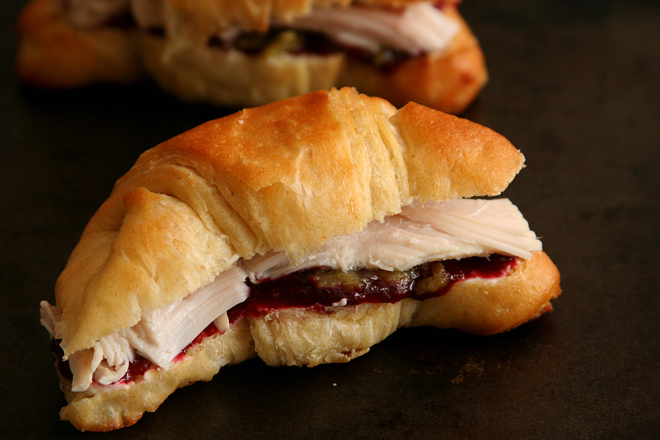
(turkey cranberry green chile sandwich on a crescent roll)

Printer Friendly Recipe
Mulled Wine Cranberry Sauce (adapted from Bon Appetit via epicurious)

I pressed the sauce through a food mill right after simmering, because I like my cranberry sauce smooth.

zest from 1 orange
1½ cups red wine
½ cup (3.5 ounces) packed brown sugar
½ cup finely chopped crystallized ginger
½ teaspoon ground cinnamon
¼ teaspoon ground cloves
¼ teaspoon ground nutmeg
12 ounces fresh cranberries

Combine all of the ingredients in a medium saucepan. Bring to a boil over medium-high heat, stirring until the sugar dissolves. Reduce the heat to low and simmer uncovered until the berries burst and the mixture thickens, about 20 minutes. Transfer sauce to bowl; chill until cold. (Can be prepared 1 week ahead. Cover and keep refrigerated.)

mulled wine cranberry sauce 3

caramel apple cheesecake bars

apple cheesecake bars 9

Fall in upstate New York, where I went to graduate school, was amazing. Even my drive through town to work was gorgeous, passing hillsides of brightly colored trees. I lived a couple blocks away from a cider mill, and Dave and I made a point to go there every year for cider, doughnuts, and squash so oddly shaped they looked deformed. It was my favorite place to buy apples too; some, like Empire and Cortland, even named for the area.

apple cheesecake bars 5

The only problem was that fall came too soon, at least for this lover of summer. It seemed like it had hardly warmed up after the long freezing winter before it started getting chilly again. For this reason, I had a strict rule of no fall-inspired foods until October – no pumpkin, no candy corn, no apples.

apple cheesecake bars 6

It’s kind of the opposite here in southern New Mexico. I’m tired of being hot and welcome the chill we’re getting in the mornings and evenings. I’m not quite ready for pumpkin – things need to cool off a bit more, so I probably will wait until October. But apples are just right.

apple cheesecake bars 3

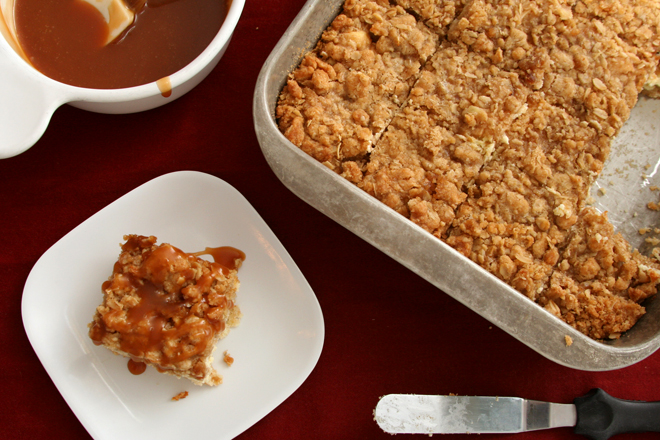
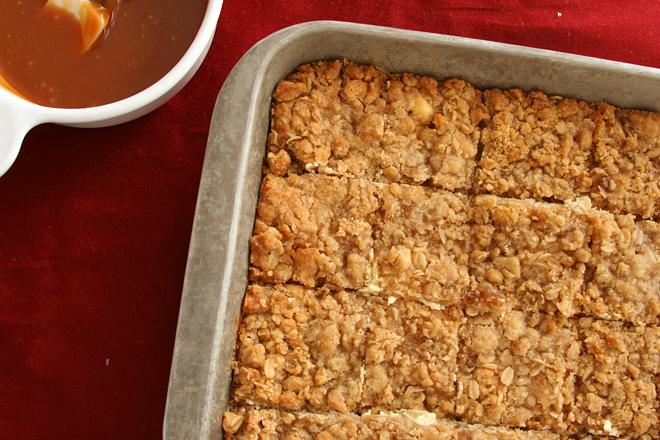
These apples are piled on top of a cookie crust and a cheesecake layer, then topped with streusel and caramel. I saw the recipe on a blog and was aghast at how rich it was until I traced it back to its original source, Paula Deen. This is my first time making one of her recipes, but my understanding it that it’s par for the course.

apple cheesecake bars 2

In this case, it definitely works. I’ll add another apple next time, because the apples were pretty balanced with the other components, and I want them to stand out more. But having those other components come forward is not a bad thing, because each one was so good. Somehow, the combination of everything didn’t make these overpoweringly sweet or unpleasantly rich.  Really, these were a perfect fall treat.

apple cheesecake bars 8

Printer Friendly Recipe
Caramel Apple Cheesecake Bars with Streusel (adapted from the Food Network via Closet Cooking; caramel sauce from Smitten Kitchen)

There are a lot of steps, but none of them are hard.

If you like to line your pans with a double layer of aluminum foil for bar cookies for easy removal, this recipe is a good candidate for that. I prefer not to, and the first bar I removed crumbled. The remainder were easy enough to get clean slices of with a spatula.

Streusel:
1 cup (7 ounces) firmly packed light brown sugar
1 cup (4.8 ounces) all-purpose flour
½ teaspoon cinnamon
⅛ teaspoon salt
8 tablespoons (1 stick) butter, room temperature
½ cup quick cooking oats

Apples:
4 Granny Smith apples, peeled, cored and finely chopped
¼ cup (1.75 ounces) sugar
½ teaspoon ground cinnamon
½ teaspoon lemon juice
pinch salt

Cookie base:
2 cups (9.6 ounces) all-purpose flour
½ cup (3.5 ounces) firmly packed brown sugar
¼ teaspoon salt
16 tablespoons (2 sticks) butter, room temperature

Cream cheese layer:
2 (8-ounce) packages cream cheese, room temperature
pinch salt
½ cup (3.5 ounces) sugar
2 large eggs
1 teaspoon vanilla extract

Caramel sauce:
½ cup (3.5 ounces) granulated sugar
¼ cup water
1 tablespoon corn syrup
3 tablespoons unsalted butter, cubes
⅛-¼ teaspoon salt
1 teaspoon lemon juice
⅓ cup heavy cream

1. Adjust a rack to the middle position and heat the oven to 350 degrees. Spray a 9-by-13-inch pan generously with cooking spray.

2. For the streusel: Add the sugar, flour, cinnamon, and salt in the bowl of a food processor fitted with the blade; pulse to combine. Add the butter and process until the mixture is crumbly. Add the oats and pulse just to combine. Transfer to a bowl and chill. Do not wash the processor bowl.

3. For the apples: In a medium bowl, mix everything. Set aside.

4. For the cookie base: Add the flour, sugar, and salt to the food processor bowl; pulse to combine. Add the butter and process until the mixture is crumbly. Press into the bottom of the prepared pan. Bake until lightly browned around the edges, about 15 minutes.

5. For the cream cheese layer: While the cookie base is baking, beat the cream cheese and salt with a mixer on medium-low speed, until softened. Add the sugar and continue mixing until the mixture is smooth. Add the eggs, one a time, mixing just until combined. Mix in the vanilla extract.

6. Pour the cream cheese mixture over the warm crust. Spread the apples over the cream cheese batter, then top with the streusel, breaking it until ¼- to ½-inch chunks. Bake until the top is browned and the cream cheese filling is set, about 30 minutes. Transfer to a wire rack and cool completely.

7. For the caramel sauce: Add the sugar, water, and corn syrup to a 2-quart saucepan. Cover and heat over medium-high heat until simmering, then remove the cover and let simmer until the mixture is honey-colored, swirling the pan occasionally at first and more often as the sugar browns. Add the butter, which will foam violently, and stir to combine. Stir in ⅛ teaspoon salt, lemon juice, and heavy cream. Once the mixture cools slightly, taste and add more salt if necessary. Let the sauce cool to room temperature before topping the bars. (Caramel can be made up to a week in advance.)

apple cheesecake bars 7

mixed berry buttermilk bundt cake

mixed berry bundt cake 11

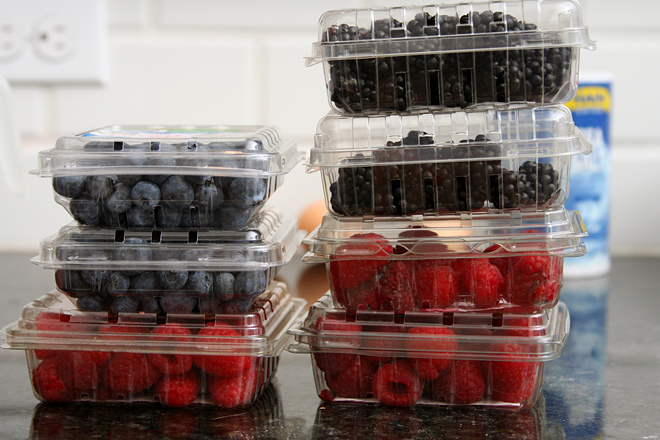
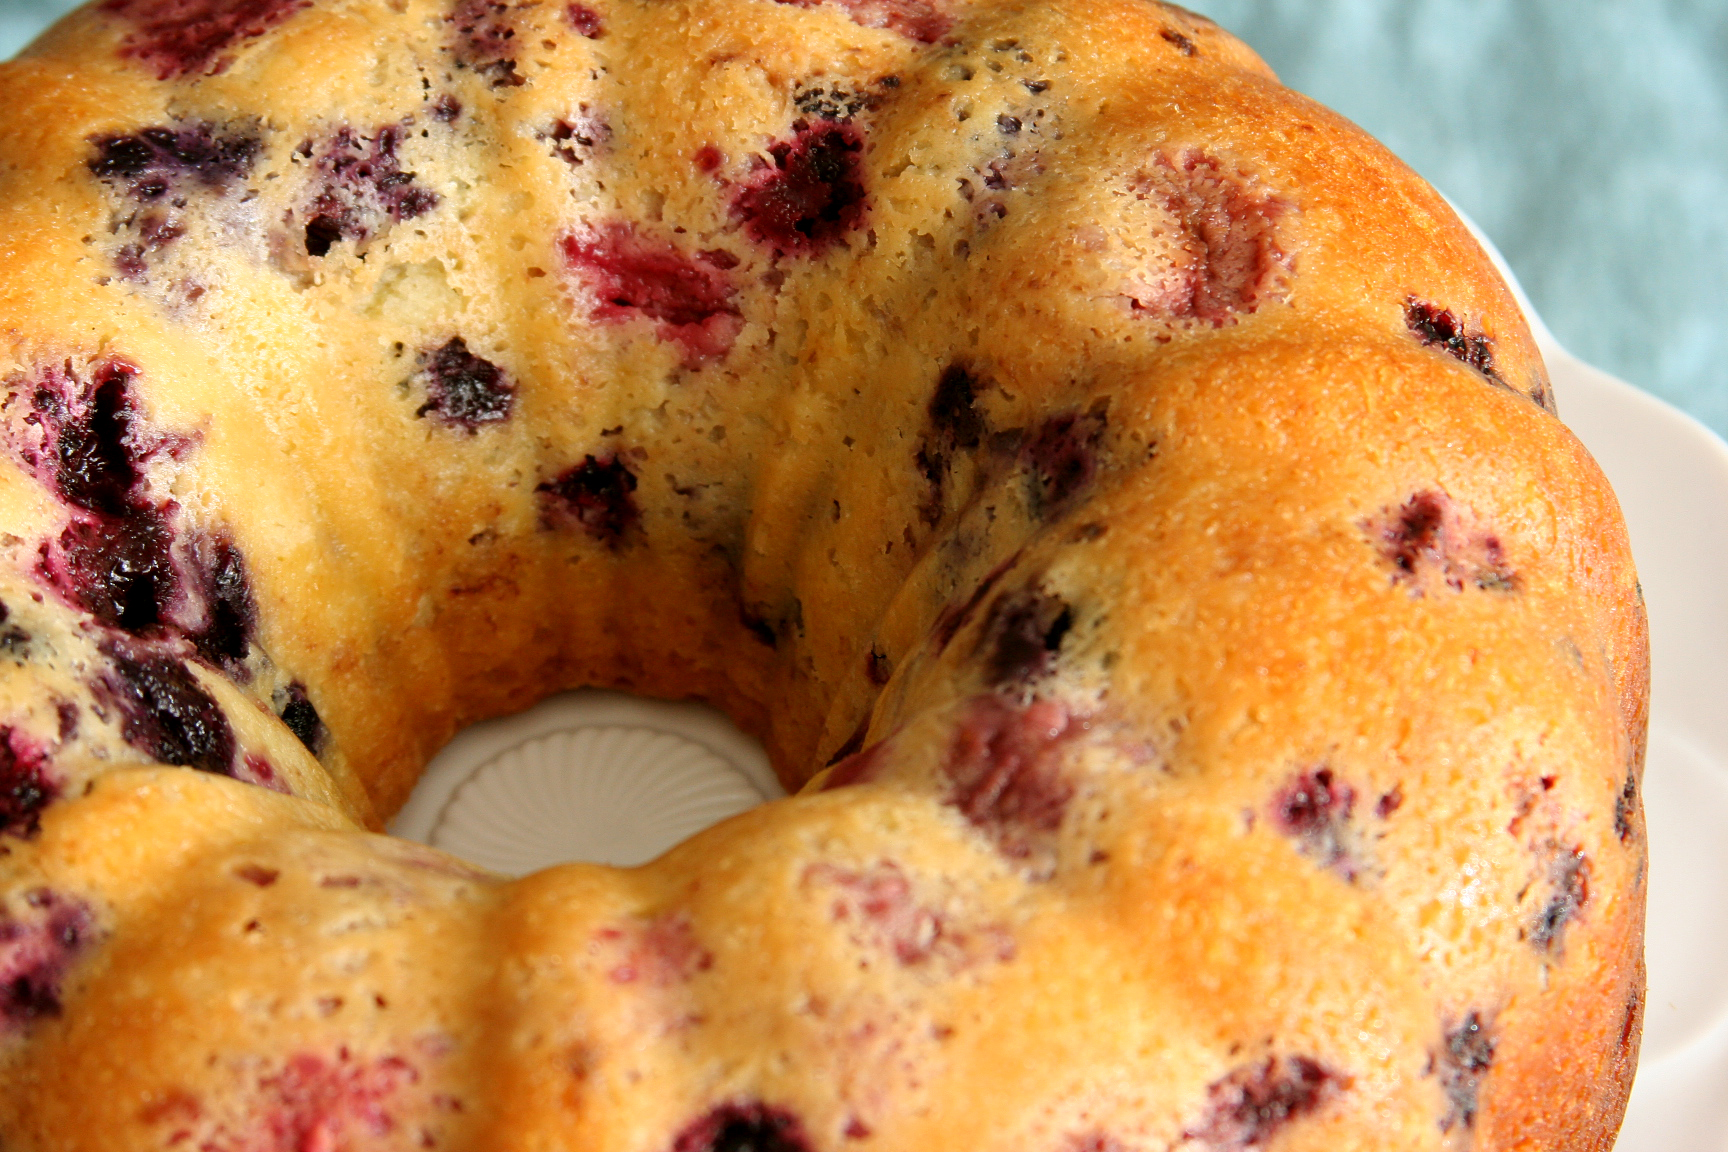
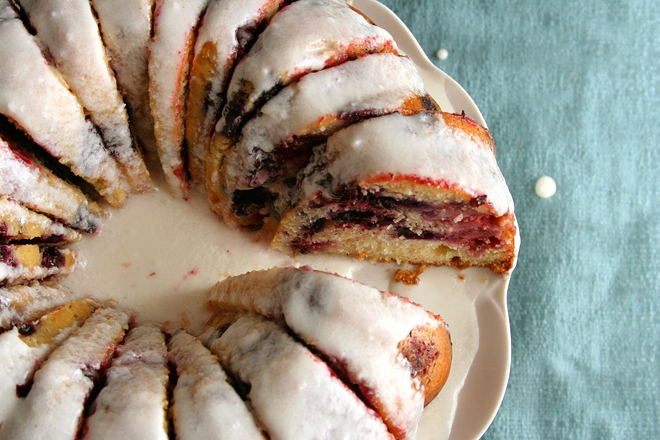
If Labor Day is the last hurrah of summer and fall officially starts September 23, what does that make the rest of September? It’s getting darker, but the leaves aren’t changing yet, and tomatoes are really picking up this time of year. Plus, there was a 2-for-1 sale on berries at the grocery store this week!

mixed berry bundt cake 1

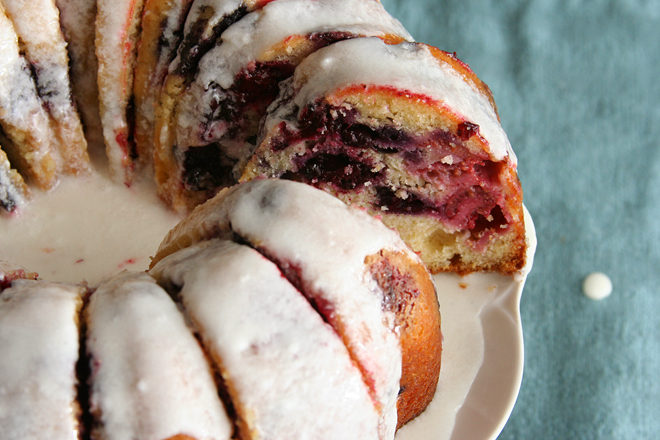
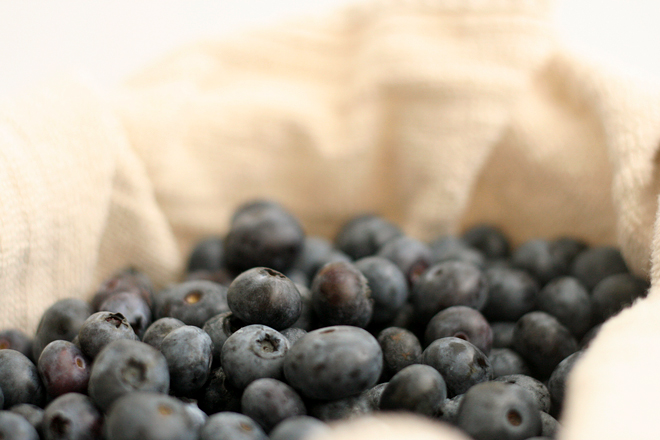
I didn’t intend to add even more berries than the recipe calls for, but I confess I got carried away by the sale. Somehow, I ended up with at least three times more berries than this cake required. Adding an extra cup to the cake didn’t make a dent in the excess, but I couldn’t resist.

mixed berry bundt cake 6

And then I was at the store a few days later, and they announced that berries were on an even better sale! It was so hard to resist, but we hadn’t finished the last batch!  Maybe I need to make more cake, before the last vestiges of summer are gone.

mixed berry bundt cake 7

Printer Friendly Recipe
Mixed Berry Buttermilk Bundt Cake (adapted from Cory Schreiber and Julie Richardson’s Rustic Fruit Desserts: Crumbles, Buckles, Cobblers, Pandowdies, and More via Smitten Kitchen)

Cake:
2½ cups (12 ounces) plus 2 tablespoons all-purpose flour
2 teaspoons baking powder
16 tablespoons (2 sticks) unsalted butter, at room temperature
zest of 1 lemon
1 teaspoon table salt
1¾ cups (12.25 ounces) granulated sugar
3 large eggs, room temperature
½ teaspoon vanilla extract
¾ cup buttermilk, room temperature
3 to 4 cups (12 to 16 ounces) mixed berries

Glaze:
1½ cups (6 ounces) powdered or confections’ sugar
juice of 1 lemon
1 tablespoon unsalted butter, very soft

1. Heat the oven to 350 degrees. Grease and flour a Bundt pan or spray with baking spray. In a medium bowl, combine the flour and baking powder.

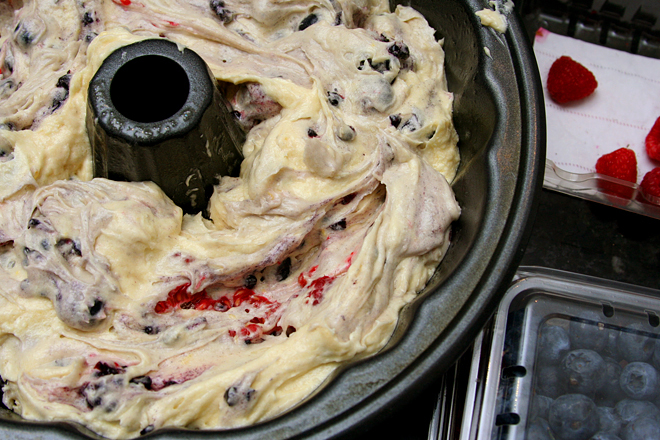
2. Place the butter, lemon zest, salt, and sugar in the bowl of an electric mixer fitted with the paddle attachment. Beat on medium-high speed for 3 minutes, until light and creamy in color. Mix in the eggs one at a time, until incorporated, then add the vanilla. With the mixer on low speed, add one-third of the flour mixture, followed immediately by half of the buttermilk, mixing just until incorporated. Repeat with another third of the flour and the rest of the buttermilk, then the last of the flour. Scrape down the sides of the bowl and mix for 15 seconds longer. Carefully fold in the berries.

3. Transfer the batter to the prepared baking pan, smoothing the top. Bake for 50-60 minutes, or until a toothpick inserted in the center comes out clean. Transfer to a wire rack to cool.

4. Combine the powdered sugar, lemon juice, and butter; whisk until smooth. Spoon over the cooled cake.

mixed berry bundt cake 10

berry tart with mascarpone cream

mascapone fruit tart 4

In late August, I always start to get a little bit panicked about the end of summer. This, despite the long six months of summer we get in southern New Mexico and despite the months of temperatures reaching nearly 100 degrees. This, despite the breathtaking beauty of upstate New York’s fall, despite the pumpkins and apples, football and fall fairs that I loved when I lived there.

mascapone fruit tart 2

But for me, fall can’t beat summer. I love being not just warm, but hot. The 4th of July is my favorite holiday. Homegrown tomatoes are my favorite food. I love wearing skirts and hate wearing pants.

mascapone fruit tart 1

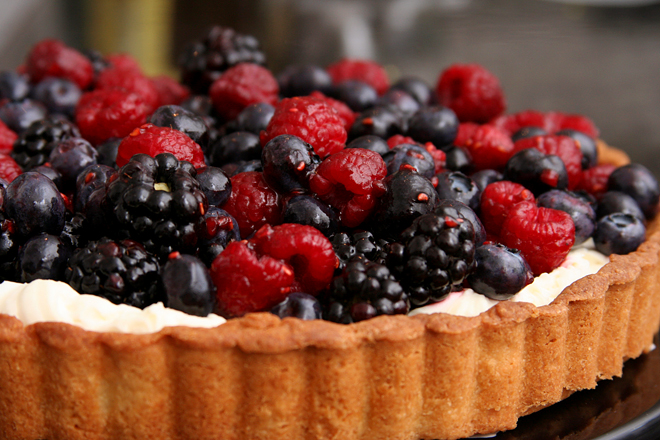
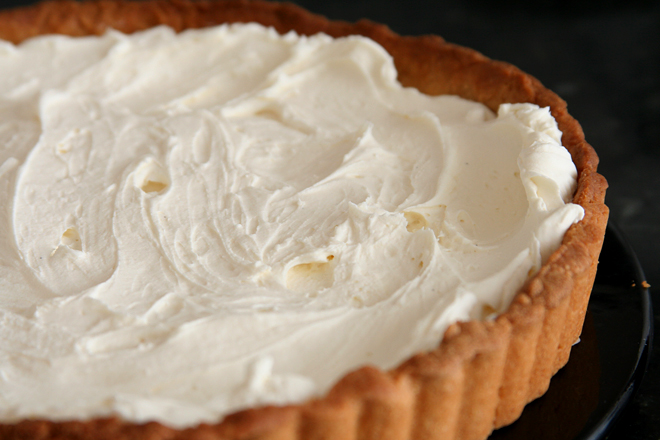
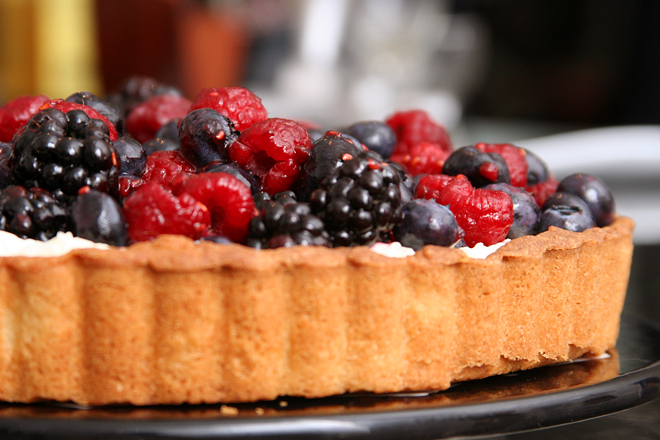
I love peaches and zucchini and berries. I already made Dave’s favorite pie once this summer, not that it isn’t good enough to have more often. But I was hosting an Italian-ish dinner party so wanted an Italian-ish dessert. This was perfect. A sweet cookie crust, a simple mascarpone-based creamy layer, lots of fresh berries, and none of that gelatinous shellack that fruit tarts often include. The custard layer was similar to pastry cream, but it required just a few minutes of mixing instead of egg-separating, heating, tempering, whisking, straining, and cooling.

mascapone fruit tart 3

It’s been a long, hot summer here. My tomato plants haven’t done well, although I’m grateful for the occasional fruit they do give. But I’m as ready as I ever am to move on to fall. I’m thinking about braising and roasting. But I can’t quite shake that tug of dread to say goodbye to my favorite season, and fresh berries are just part of the reason.

mascapone fruit tart 5

Printer Friendly Recipe
Berry Tart with Mascarpone Cream
(crust rewritten from Dorie Greenspan’s Baking: From my Home to Yours; filling adapted from Gourmet via epicurious)

Crust:
1½ cups all-purpose flour
½ cup (2 ounces) confectioners’ sugar
¼ teaspoon salt
1 stick plus 1 tablespoon (9 tablespoons) very cold (or frozen) unsalted butter, cut into small pieces
1 large egg yolk

Filling:
1 cup (8 ounces) mascarpone cheese
⅓ cup well-chilled heavy cream
¼ cup (1.75 ounces) sugar
1½ cups raspberries
1½ cups blueberries
1½ cups blackberries
2 tablespoons red currant jam or raspberry jelly
2 tablespoons dark berry liqueur such as blueberry, blackberry, or cassis or port

1. For the crust: Put the flour, confectioners’ sugar, and salt in a food processor and pulse to combine. Scatter the butter over the dry ingredients and pulse until the butter is coarsely cut, with some pieces the size of oatmeal flakes and some the size of peas. Stir the yolk with a fork and add it a little at a time, pulsing after each addition. Process in long pulses until the dough forms clumps and curds; the sound of the machine working will change. Scrape the sides of the processor bowl to incorporate any unmixed dry ingredients.

2. Grease a 9-inch fluted tart pan with a removable bottom. Press the dough evenly over the bottom and up the sides of the pan. Freeze the crust for at least 30 minutes before baking.

3. Center a rack in the oven and heat the oven to 375 degrees.

4. Spray a piece of aluminum foil with nonstick spray and fit the foil, oiled side down, tightly against the crust. Put the tart pan on a baking sheet and bake the crust for 25 minutes. Carefully remove the foil. If the crust has puffed, press it down gently with the back of a spoon. Bake for another 8 minutes or so, or until it is firm and golden brown. Transfer the tart pan to a rack and cool the crust to room temperature before filling.

5. For the filling: In a bowl with a whisk or an electric mixer, beat together the mascarpone, cream, and sugar until the mixture holds stiff peaks. Spoon the mixture into the shell, spreading it evenly.

6. In a large bowl, combine the raspberries, blueberries, and blackberries. In a small saucepan, simmer the jam and port, stirring, until reduced to about 3 tablespoons; pour over the berries. With a rubber spatula, gently stir the berries to coat evenly. Mound the berries decoratively on the mascarpone cream. The tart may be assembled 2 hours ahead and chilled; bring to room temperature and remove the sides of the pan before serving.

cornmeal pancakes with cherry compote

cornmeal cherry pancakes 8

I haven’t forgotten my New Year’s resolution this year. I haven’t done a very good job following it, but at least I haven’t forgotten.

cornmeal cherry pancakes 1

I simply wanted to use my cookbooks more often. I love buying cookbooks, and I love looking through them, and I love the cookbook shelf I had built in my kitchen, but when it comes time to choose recipes, I default to my database and the internet all too often. The spreadsheet I made to track cookbook usage this year was neglected.

cornmeal cherry pancakes 2

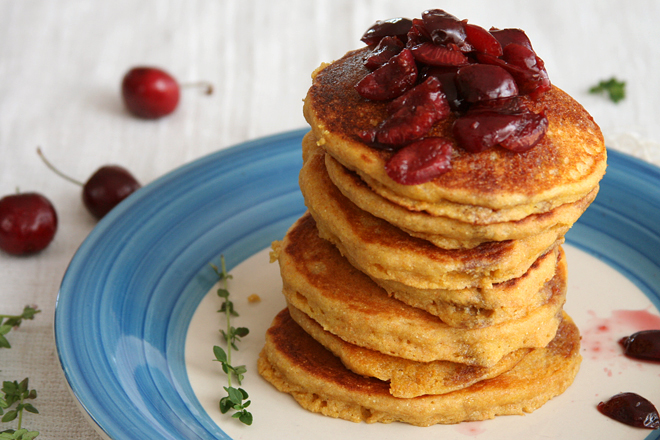
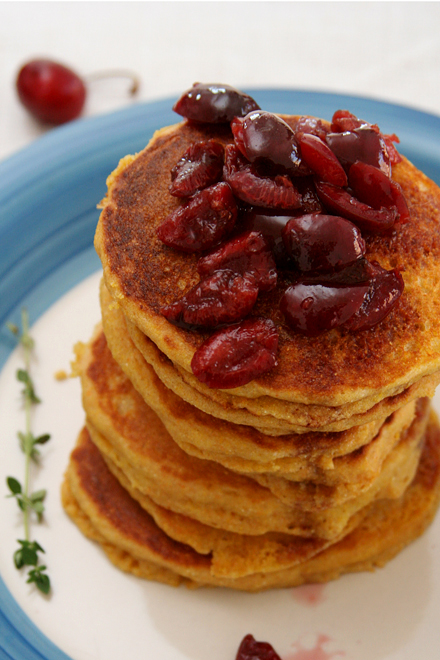
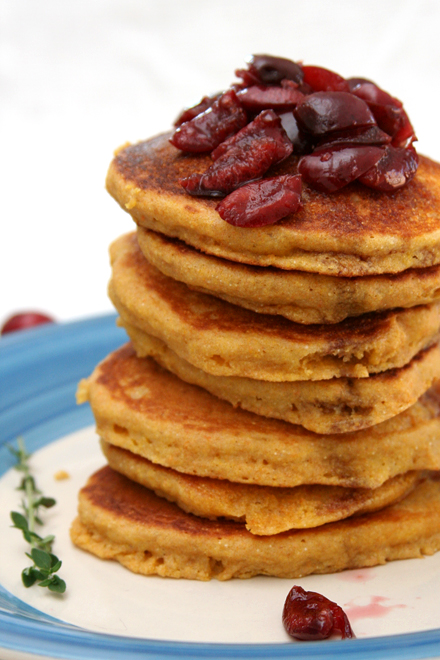
Until one night recently when, for no special reason, I sat down with a pile of cookbooks and started flipping. Other favorites got set aside as I put breakfasts, dinners, and snacks on the menu, all from one book, Sara Forte’s Sprouted Kitchen. Something snagged me about her cookbook that night, probably the healthy, quick, interesting meal ideas. Interesting, like adding thyme to cherry compote. Interesting, like making pancakes with cornmeal and honey.

cornmeal cherry pancakes 3

I should let this be a reminder of why I need to pull out my cookbooks more often. Such undiscovered treasures are hidden on those shelves! I loved the extra cornmeal crunch in these pancakes, along with the honey notes. The cherries make these a summer reminder of a winter promise I made to myself.

cornmeal cherry pancakes 6

Cornmeal Pancakes with Cherry Compote (slightly adapted from Sara Forte’s Sprouted Kitchen Cookbook)

Cherry compote:
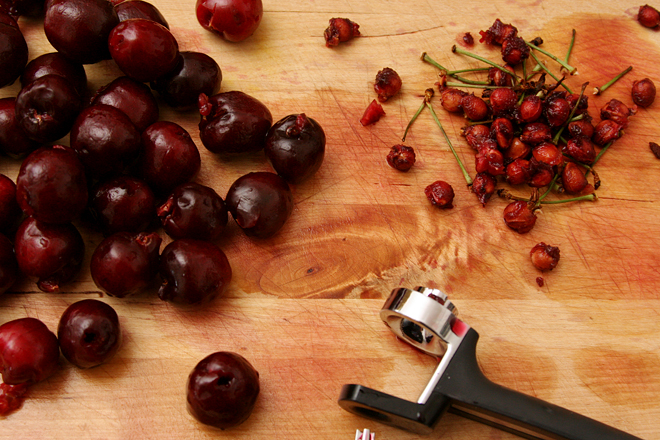
1 pound Bing cherries, seeded and quartered
2 sprigs thyme
¼ cup water
¼ cup honey
pinch salt

Pancakes:
1 cup cornmeal
2 tablespoons honey
¾ cup boiling water
¾ cup (3.6 ounces) all-purpose or whole wheat flour
1 teaspoon baking soda
1 teaspoon salt
1 egg
3 tablespoons brown or turbinado sugar
¾ cup buttermilk (or ½ cup plain yogurt and ¼ cup milk)
1 tablespoon canola oil, plus more for cooking the pancakes

1. For the compote: In a medium saucepan over medium heat, heat the cherries, thyme, and water, stirring occasionally, until the cherries start to break down, about 3 minutes. Stir in the honey and salt; set aside.

2. In a large mixing bowl, stir together the cornmeal, honey, and boiling water. Let sit 5 minutes to soften the cornmeal. Meanwhile, in a separate small bowl, mix the flour, baking soda, and salt. In a medium bowl, whisk together, the egg, sugar, buttermilk, and oil. Whisk the buttermilk mixture into the cornmeal mixture until thoroughly combined, then gently fold in the flour mixture. Let set 5 minutes.

3. Heat a non-stick skillet or a griddle over medium heat. Add a few drops of oil and spread it over the bottom of the pan. Using a ¼ cup measure, pour the pancake batter onto the hot griddle. When the pancakes are golden brown, after about 2-3 minutes, flip to cook the other side another 2-3 minutes. Keep warm in oven heated to 200 degrees.

4. While the pancakes are cooking, warm the compote; remove the sprigs of thyme. Serve the pancakes topped with compote.

cornmeal cherry pancakes 7

blackberry pie bars

blackberry pie bars 3

We planned a picnic with my sister and her family recently, and two things were certain: I wanted to make these pie bars, and my sister wanted to make potato salad. So we had the important things figured out. I ended up making pizza wraps (the first time I’d ever made wraps!), and she brought deviled eggs. We both threw some cherries into our picnic baskets, because that’s what you do in the summer.

blackberry pie bars 1

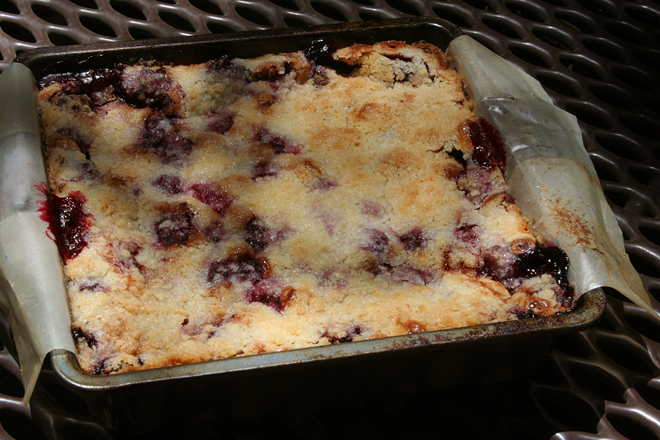
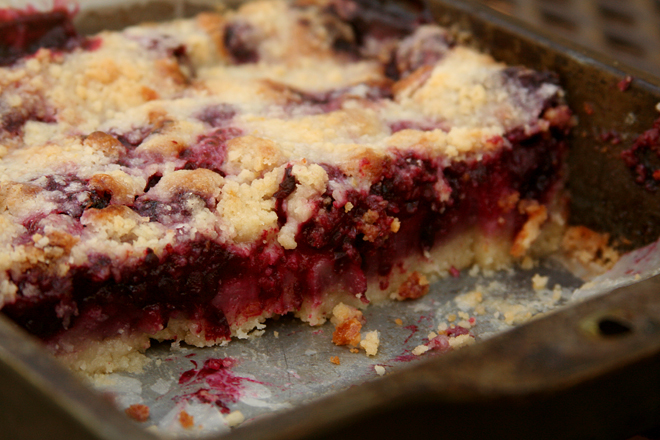
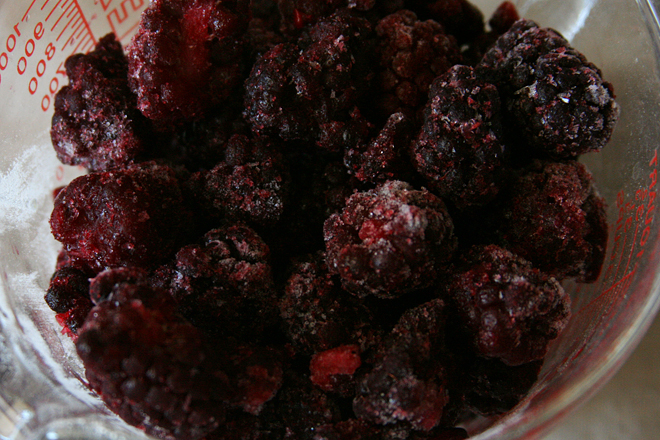
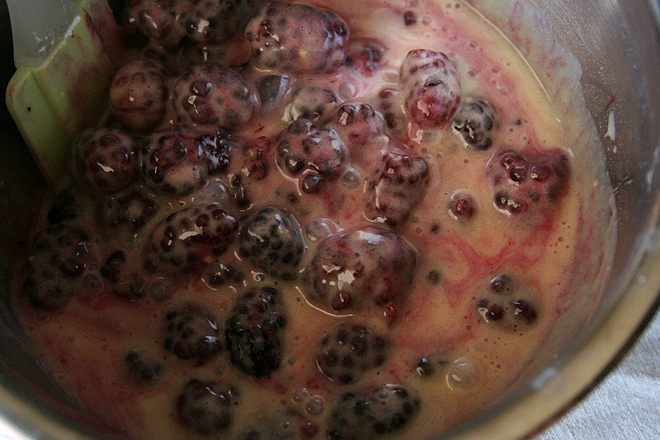
It was a nice hike in the mountains, and a nice lunch, but mostly I just wanted to get to dessert. And that wasn’t the only waiting I had to do, as these took about three times longer to bake than I was expecting. I was mystified at the time, but eventually I figured out the culprit – the blackberries that I most definitely had not gotten around to defrosting before baking.

blackberry pie bars 2

They were certainly worth waiting through the hike (which I enjoyed anyway) and the lunch (same) and the extra oven time (not so much), because they were a perfect casual summer dessert. They had the perfect balance of fruit and buttery dough.  They were the perfect cap to a great picnic in the woods.

blackberry pie bars 8

Printer Friendly Recipe
Blackberry Pie Bars (adapted from Rebecca Rather’s The Pastry Queen via Pink Parsley)

Crust and topping:
3 cups (14.4 ounces) all-purpose flour
1½ cups (10.5 ounces) sugar
½ teaspoon salt
1½ cups (3 sticks) unsalted butter, chilled

Fruit filling:
4 large eggs
2 cups (14 ounces) sugar
1 cup sour cream
¾ cup (3.6 ounces) flour
¼ teaspoon salt
zest of ½ lemon
1 teaspoon almond extract
2 (16-ounce) packages frozen blackberries, thawed and drained

1. Adjust the rack to the middle position and heat the oven to 350 degrees. Spray a 9-by-13-inch baking pan with nonstick spray.

2. To make the crust and topping, combine the flour, sugar, and salt in the bowl of a food processor. Pulse a few times to mix. Cut the butter into ½ inch cubes and add it to the flour mixture. Process until the butter is evenly distributed but the mixture is still crumbly, 30-60 seconds.

3. Reserve 1½ cups of the mixture to use as the topping. Press the remaining mixture into the bottom of the pan, and bake 12-15 minutes. Cool for at least 10 minutes.

4. To make the filling, whisk the eggs in a large bowl, then add the sugar, sour cream, flour, salt, lemon zest, and almond extract. Gently fold in the berries and spoon the mixture over the crust. Sprinkle the remaining flour mixture evenly over the filling, and bake 45 to 55 minutes, until the dough is set and lightly browned on top.

5. Cool at least 1 hour before cutting into bars, or scoop out of the pan to serve cobbler-style.

blackberry pie bars 4

goat cheese almond strawberry cheesecake

goat cheese cheesecake 5

Sometimes you just nail it. I remember years ago, when I was barely starting to get into making rustic breads, I baked the best baguettes I’d ever made. I don’t remember what meal I cooked to serve with the bread, but I distinctly remember having leftovers of the main dish while we filled up on bread. Later, despite my best efforts, I was never able to reproduce that bread.

goat cheese cheesecake 1

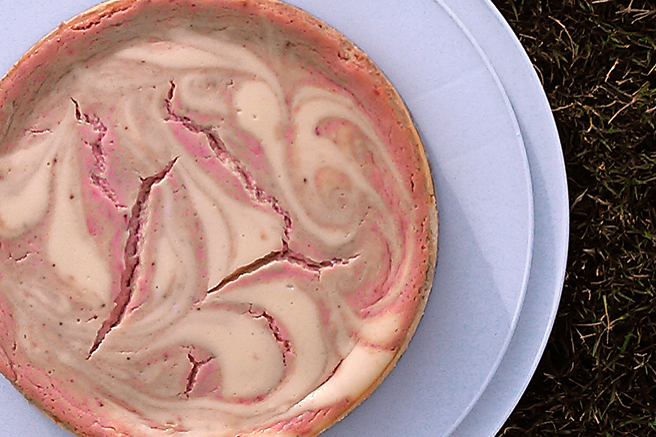
Let’s hope this cheesecake doesn’t go the way of that bread, because I nailed it again and I definitely want it to be just as good next time. It might sound like an odd idea – how could goat cheese in cheesecake be even better than cream cheese? Honestly, I don’t know; I was trying to use up a big package of goat cheese.

goat cheese cheesecake 2

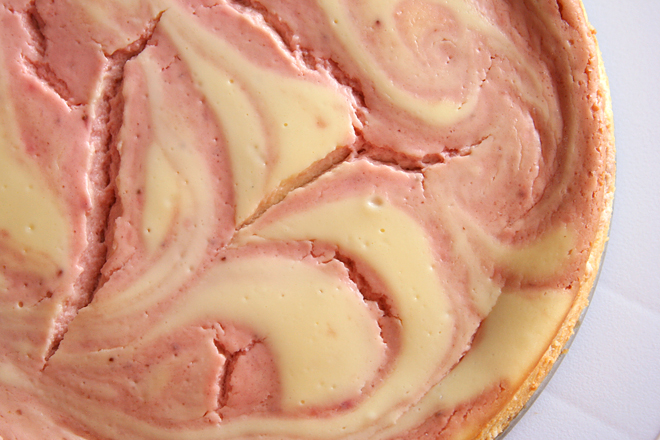
But, it was better. It was the best cheesecake I’ve ever made. Everyone who ate it raved; some said it was the best thing I’ve baked. Most said they wouldn’t have been able to taste the goat cheese if they hadn’t known it was there, and I agree; it was subtle, just a bit of extra tartness. The almond flavor wasn’t noticeable and even the strawberry was on the subtle side, but I’ll tell you this – there is not one thing I’d change about this, because it was perfection. And it had better be just as good, just as soft and creamy, next time I make it.

goat cheese cheesecake 3

Printer Friendly Recipe
Goat Cheese Almond Strawberry Cheesecake (adapted from Love and Olive Oil)

Crust:
8 ounces vanilla wafers, ground to make 2 cups crumbs
1 ounce (¼ cup) almond meal
pinch salt
5 tablespoons butter, melted

Filling:
2 (8-ounce) packages cream cheese, room temperature
8 ounces goat cheese, room temperature
1 cup (7 ounces) granulated sugar
⅛ teaspoon salt
¼ cup sour cream or Greek yogurt
2 tablespoons all-purpose flour
1 teaspoon vanilla extract
½ teaspoon almond extract
3 eggs, room temperature
6 ounces whole fresh or frozen strawberries, thawed and drained if frozen, pureed

1. For the crust: Heat the oven to 350 degrees. Spray the bottom of a springform pan with nonstick spray. Either grind the cookies with a food processor or place them in a ziptop bag and crush with a rolling pin. Add the almond meal, salt, and butter to the crumbs and stir until evenly mixed. Press the crumbs into an even layer covering the bottom of the prepared pan.

2. Bake the crust for 10 minutes, or until fragrant. Let cool on a wire rack. Reduce the oven temperature to 300 degrees.

3. For the cheesecake: With a mixer fitted with the paddle attachment (or with a hand mixer), beat the cream cheese and goat cheese at medium-low speed until smooth. Add the sugar and salt; continue mixing for about 2 minutes, until the mixture is light and creamy. Add the sour cream and flour, then vanilla and almond extracts, and the eggs one a time, mixing just until each one is incorporated.

4. Pour ¾ of the batter into the cooled crust. Mix the strawberry puree into the remaining batter. Dollop it over the plain batter in the crust and use a butter knife to gently swirl it.

5. Bake for 55 to 65 minutes or until the top is just barely jiggly. Remove the cake from the oven and place on a wire rack; run a thin knife or spatula around the edge to release the cake from the sides of the pan. Let cool completely to room temperature, then cover with plastic wrap and refrigerate overnight before serving.

goat cheese cheesecake 4

key lime bars

lime bars 6

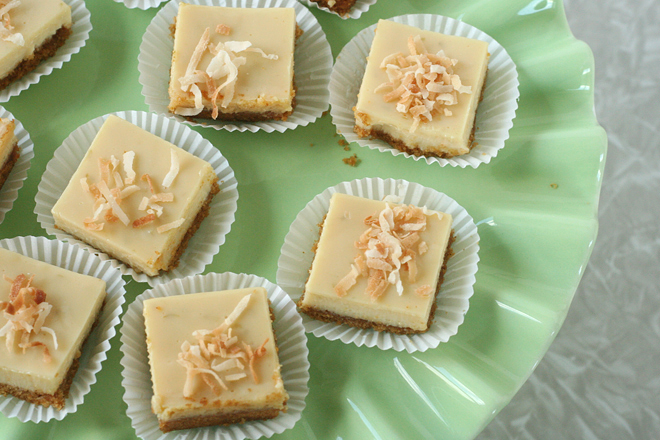
Back in the old days, I made these all the time. Whenever I needed a dessert to go with Mexican food, or I wanted to bring something to a party that was sure to be popular but wasn’t too common, or I just wanted a refreshing treat, this was my go-to. “The old days”, of course, being before I had a blog and joined Tuesdays with Dorie, which started a love affair with recipes that are shiny and new. (But not a love affair that trumps that one I already have with chocolate chip cookies, of course.)

lime bars 2

If not for having made these before, they would be just the type of dessert I love to make – something a little different, but based on familiar flavors that people enjoy. Also there is cream cheese.

lime bars 3

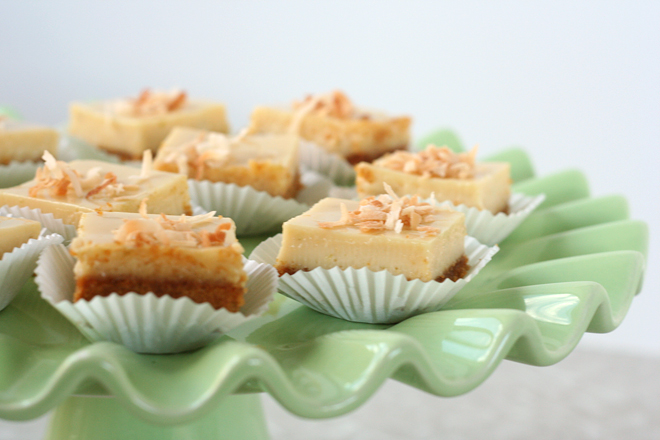
Of course my desire to constantly try new things has led me to so many fun and delicious recipes, but this one makes me a little nostalgic for the old days. It’s easy, it’s handheld, it works for any season – really, it’s such a great dessert. I would make it more often if there weren’t thousands of other great desserts calling my name.

lime bars 5

Printer Friendly Recipe
Key Lime Bars (from Cook’s Illustrated)

Crust:
5 ounces animal crackers (about 1¼ cups crumbs)
3 tablespoons light or dark brown sugar packed
pinch salt
4 tablespoons butter, melted and cooled slightly

Filling:
2 ounces cream cheese, room temperature
1 tablespoon grated lime zest
1 (14-ounce) can sweetened condensed milk
1 large egg yolk
½ cup key lime juice or regular juice (do not use bottled juice)

Garnish (optional):
shredded coconut, toasted until crisp

1. Adjust an oven rack to the middle position and heat the oven to 325 degrees. Cut about a 12-inch length of extra-wide heavy duty foil; fold the cut edges back to form a 7½-inch width. With the folded sides facing down, fit the foil securely into the bottom and up the sides of an 8-inch square baking pan, allowing the excess to overhang the pan sides. Spray the foil with non-stick cooking spray.

2. To make the crust: In the workbowl of a food processor, pulse the animal crackers until they’re broken down, about ten 1-second pulses; then process the crumbs until evenly fine, about 10 seconds. Add the brown sugar and salt; process to combine, ten to twelve 1-second pulses. Drizzle the butter over the crumbs and pulse until the crumbs are evenly moistened with butter, about ten 1-second pulses. Press the crumbs evenly and firmly into the bottom of the prepared pan. Bake until deep golden brown, 18 to 20 minutes. Cool on a wire rack while making the filling. Do not turn off the oven.

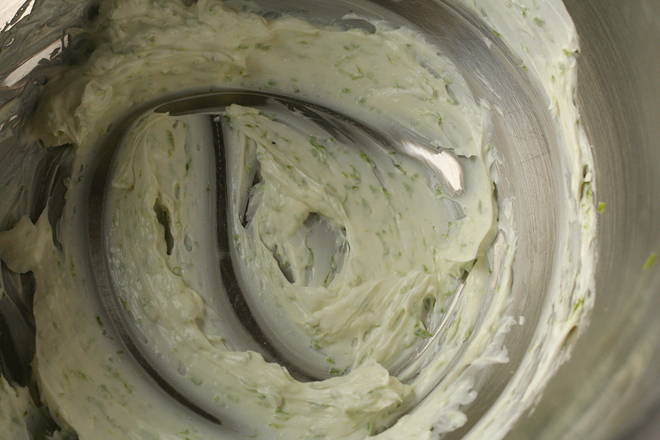
3. To make the filling: While the crust cools, in a medium bowl, stir the cream cheese, zest and salt with rubber spatula until softened, creamy, and thoroughly combined. Add the sweetened condensed milk and whisk vigorously until it’s incorporated and no lumps of cream cheese remain; whisk in the egg yolk. Add the lime juice and whisk gently until incorporated (the mixture will thicken slightly).

4. To assemble and bake: Pour the filling into the crust; spread to the corners and smooth the surface with a rubber spatula. Bake until set and the edges begin to pull away slightly from the sides, 15 to 20 minutes. Cool on a wire rack to room temperature, 1 to 1½ hours. Cover with foil and refrigerate until thoroughly chilled, at least 2 hours.
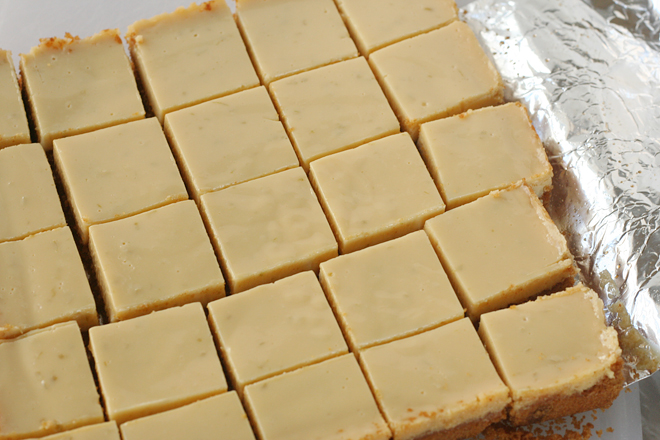
5. Loosen the edges with paring knife and lift the bars from the baking pan using the foil extensions; cut the bars into 16 squares. Sprinkle with toasted coconut if using, and serve. (Leftovers can be refrigerated up to two days; crust will soften slightly. Let stand at room temperature, about 15 minutes before serving.)
lime bars 4

rhubarb snack cake

rhubarb cake 5

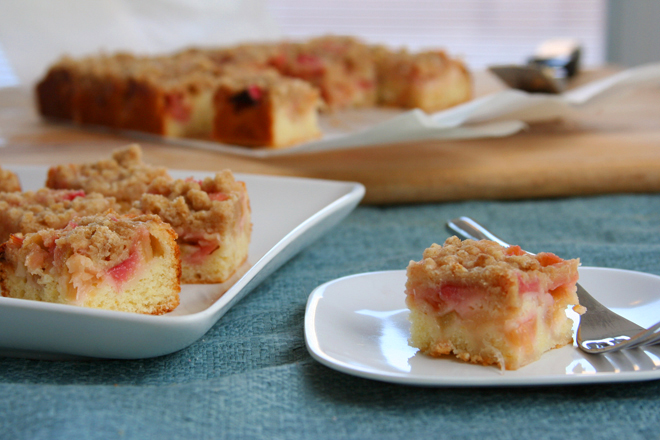
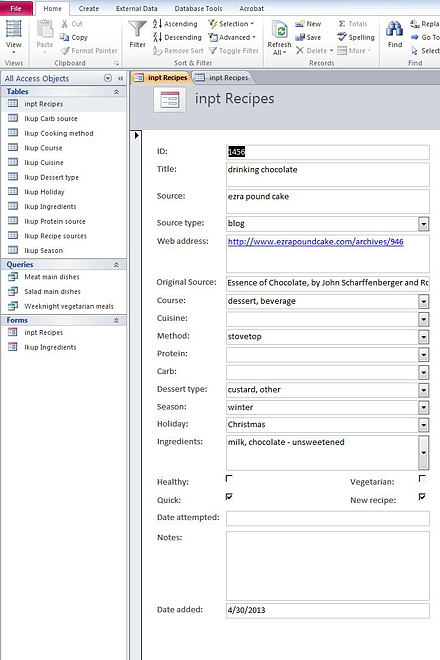
I never got around to telling you about my New Awesome Recipe Database back when it was new. It’s still awesome. But now that it’s well over a year old and has over 1500 recipes entered into it, it definitely isn’t new.

rhubarb cake 2

I love it. I built it myself, something I’d wanted to do for at least a decade. I remember getting Microsoft Access for Dummies from the library shortly after I moved out of my parents’ house for graduate school. But without anything to really push me or anyone around to help me, the project never got off the ground. It wasn’t until I had to use databases at work that it finally clicked.

rhubarb cake 3

I seem to have a bit of a natural aptitude for them, probably because I love organizing things and playing with data. There were a couple online recipe databases I could have downloaded and built upon, but they didn’t have all of the categories and features that I was looking for, so I made my own database from scratch. And almost a year and a half later, I still absolutely love it.

rhubarb cake 8

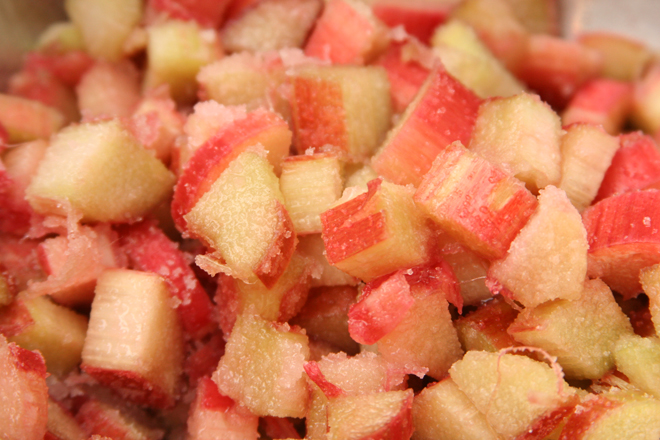
One of the ways it’s so useful is that when the grocery store carries relatively fresh-looking rhubarb, I snatch it up whether I have a plan for it or not. And then I can go to my Not-New Awesome Recipe Database and do a search of all the recipes I’ve saved over the last few years that include rhubarb.  Narrowing down to the one that only includes ingredients I already have and can be made after work takes no time at all.  The only problem, other than the tedium of entering recipes (my goal is 6 per weekday), is that searching for recipes is so easy and fun with my database that I hardly use my beautiful and inspiring cookbook collection anymore.  Until someday, when I enter those recipes into my Awesome Recipe database, and then I’ll have the best of both worlds.

rhubarb cake 7

One year ago: Shrimp Ricotta Ravioli
Two years ago: Barbecued Pulled Pork
Three years ago: Cream Cheese Spritz
Four years ago: Orange-Oatmeal-Currant Cookies
Five years ago: Snickery Squares

Printer Friendly Recipe
Rhubarb Snack Cake (adapted from Smitten Kitchen)

Makes about 24 servings

Crumb:
1 cup (4.8 ounces) all-purpose flour
¼ cup (1.75 ounces) light brown sugar
⅛ teaspoon table salt
¼ teaspoon ground cinnamon
4 tablespoons unsalted butter, melted

Cake:
1¼ pounds rhubarb, trimmed and cut into ½-inch lengths
1 tablespoon lemon juice
1⅓ cup (9.65 ounces) granulated sugar, divided
8 ounces (1 stick) unsalted butter, softened
½ teaspoon finely grated lemon zest
2 large eggs
1⅓ cups (6.4 ounces) all-purpose flour
1 teaspoon baking powder
¾ teaspoon table salt
¼ teaspoon ground ginger
⅓ cup (2.75 ounces) sour cream

1. To make the crumb mixture: In a small bowl, whisk the flour, brown sugar, salt, and cinnamon together, then stir in the melted butter. Set aside.

2. Heat the oven to 350 degrees. Spray the bottom and sides of a 9-by-13-inch baking pan with nonstick cooking spray, then line the bottom with parchment paper, extending the lengths up two opposite sides of the pan to form a sling. In a medium bowl, stir together rhubarb, lemon juice and ⅔ cup (4.67 ounces) sugar; set aside.

3. For the cake: In the bowl of a stand mixer fitted with the paddle attachment (or in a medium-sized mixing bowl with a hand-held mixer), beat the butter, remaining ⅔ cup (4.67 ounces) sugar, and the lemon zest until light and fluffy. Add the eggs, one at a time, scraping down the sides after each addition. In a small bowl, whisk together the flour, baking powder, salt and ground ginger. Add one-third of this mixture to the batter, mixing until just combined. Continue beating, adding half of the sour cream, half of the remaining flour mixture, the remaining sour cream, and then the remaining flour mixture, mixing between each addition until just combined.

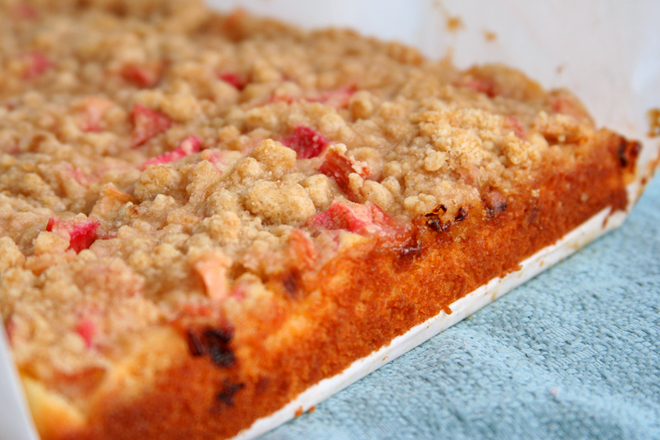
4. Spread the batter in the prepared pan. Pour the rhubarb mixture over the batter, spreading it into an even layer. Scatter the crumbs evenly over the rhubarb layer.

5. Bake the cake for 50 to 60 minutes, or until a tester comes out free of the cake batter. It will be golden on top. Cool completely in the pan on a rack. To serve, use the parchment sling to remove the cake from the pan; cut into 2-inch squares.

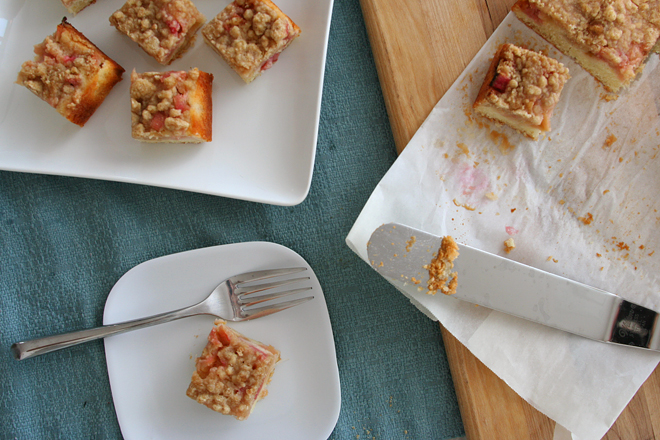
rhubarb cake 6