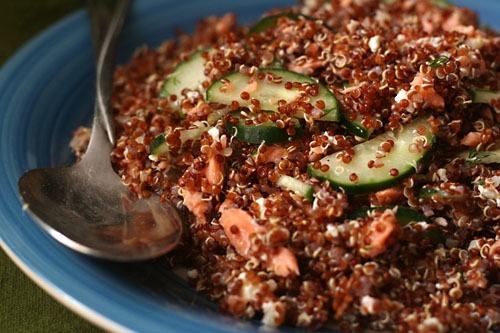
quinoa with salmon, feta, and dill

I imagine that most people have a set of ten, twenty, or maybe even thirty dinners that they regularly make. Some people might try a new recipe every couple of weeks. But for the most part, I suspect that dinner on any given night is something familiar.

Then there are a class of people who have so many recipes they want to try that they know there simply aren’t enough nights in the week, month, year, life. Every time an old favorite is made is an opportunity lost to try something new. Not that I don’t have a rotation; it’s just that meals are considered on the rotation if they’re made only once or twice a year. Something in heavy rotation might be made six or seven times per year.

This was a surprise addition to my rotation. If I didn’t think we’d like it, I wouldn’t have made it, but I didn’t know we’d like it as much as we did. Dave compared it sushi bowls, with the grain base, fish, and cucumbers, but the lemon, dill, and feta take it in a different direction.

Of course, it takes more than good flavor to be added to my rotation – dishes have to be healthy, which means no refined carbs, limited oil and butter, and plenty of protein and vegetables. Recipes also have to be easy if there’s any hope of me making them often, and the limited amount of ingredient prep required here can be accomplished while the quinoa cooks. Not only have I made this three times in the last year, I’ve made it twice in the last month – heavy rotation indeed.

One year ago: Shrimp Burgers
Two years ago: Roasted Baby Artichokes
Three years ago: Double (or Triple) Chocolate Cookies

Printer Friendly Recipe
Quinoa with Salmon, Feta, and Dill (adapted from Apple a Day)

Serves 6

You can use also fresh salmon and cook it either on the stove or in the oven. Kelsey has directions for stovetop cooking. If you use fresh salmon instead of smoked, increase the salt in the quinoa cooking water to ½ teaspoon.

While you can serve this immediately after mixing, it will be better if you give the flavors some time to meld, even just 15 minutes. This is particularly true if you’re using salty smoked salmon.

1 cup quinoa
2 cups water
¼ teaspoon salt
1 lemon, juice and zest
8 ounces smoked salmon, chopped small
1 tablespoon extra virgin olive oil
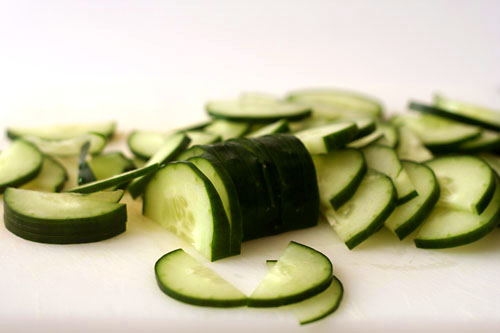
½ cucumber, quartered lengthwise and sliced ¼-inch thick
½ cup feta cheese, chopped
1 tablespoon fresh dill, minced

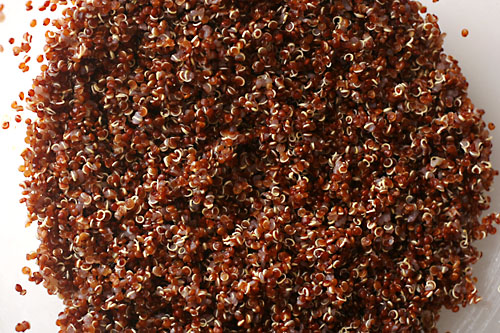
1. Place the quinoa in a fine-mesh strainer; rinse until the water no longer foams. In a medium saucepan, bring the water to a boil. Add the quinoa, salt, and the zest of the lemon. Reduce the heat to low, cover, and simmer for 15 minutes. After 15 minutes, turn the heat off; let the quinoa set, still covered, for another 5 minutes. Drain off any unabsorbed water.

2. Squeeze the juice of the lemon over the quinoa, then mix in the salmon and remaining ingredients. Serve immediately or refrigerate overnight.

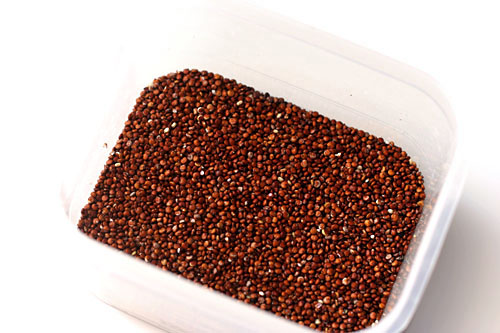
Oh yeah, I used red quinoa!  Regular quinoa will work every bit as well though.
brown rice

I thought I’d already nailed my favorite brown rice recipe, but over time, I found myself not using it. There were two issues I was having.  One was that it takes an hour and a half, and I don’t have that kind of foresight on an average weeknight.  The other problem is that it starts on the stovetop and is transferred to the oven, which sounds simple enough, but I could never remember the cooking times and didn’t want to check a recipe for a basic side dish.  I have too much else to do and think about; rice can’t be complicated.

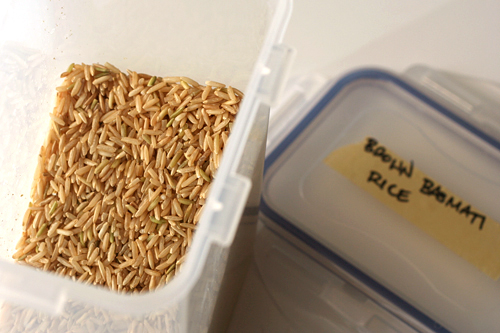
In the comments of that baked brown rice post, I was pointed toward a recipe for rice cooked like pasta. Also, Stacy recommended basmati brown rice over other varieties, claiming that it’s more fragrant and flavorful. Because the nutty scent of white rice is one of my favorite aspects of it, I was eager to try any trick to get that experience with brown rice.

This worked. The basmati rice smells sweet and nutty while it boils, exactly how white rice smells while it steams. And the best part is that it’s so simple to make that even I can get it done on an average weeknight.  That means we’ve pretty much eliminated another refined grain from our diets, with very little compromise in terms of effort or flavor.

One year ago: Chicken Fajitas
Two years ago: Anadama Bread
Three years ago: Sichuan Green Beans

Printer Friendly Recipe
Brown Rice
(adapted from Saveur via Pinch My Salt)

This recipe can be scaled up or down as much as you want.

8 cups water
1 cup rice, rinsed
2 teaspoons salt

Bring the water to a boil over high heat. Add the rice and salt; reduce the heat to medium and simmer uncovered, stirring occasionally, for 30 minutes. Drain the rice in a strainer and return it to the pot, off the heat. Cover tightly and let set for 10 minutes. Fluff with a fork; serve.

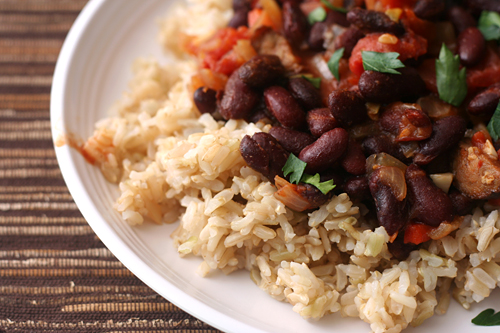
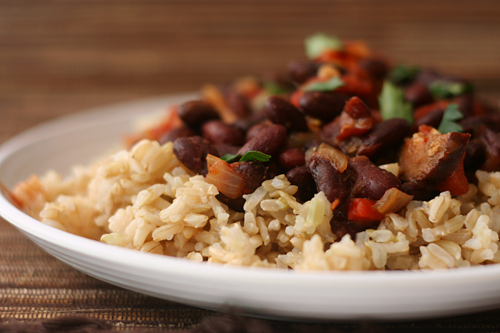
(This is Red Beans and Rice.)

strawberry daiquiri ice cream

When it comes to alcohol, I pretty much like it all. Red wine, white wine, dark beers, light beers, vodka cocktails, straight whiskey. It’s all good. I don’t drink foo-foo drinks often, only because they’re too much work to mix up at home and too low on alcohol to pay for in a bar. But that doesn’t mean I have anything against the combination of fruit and liquor.

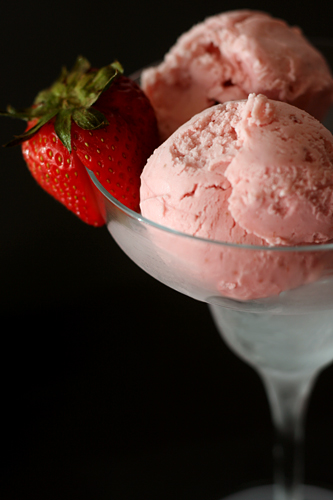
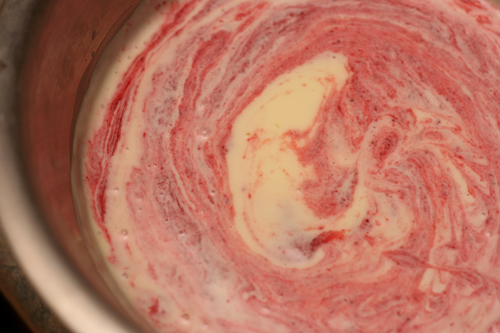
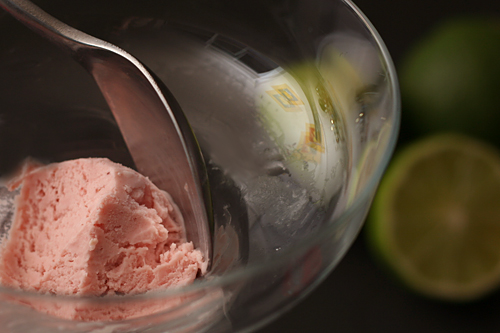
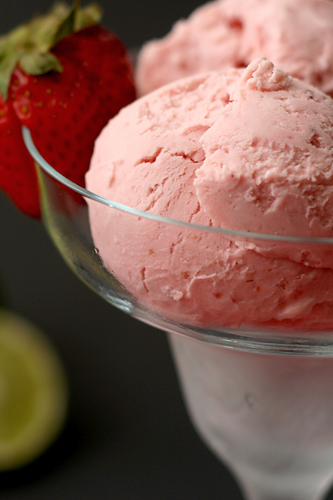
Still, doesn’t it seem like fruit puree, citrus, alcohol, and the cream that’s inevitably served, whipped, on top, would be an even better combination churned into ice cream?  The same combination of strawberries and lime, but smoother, richer, and, okay, less alcoholic.

I wish it had occurred to me earlier – like before we ate all the ice cream – to pour rum over the ice cream. Rum float!  Or to mix so much rum into the base that the ice cream doesn’t freeze completely.  Rum slushy!  Or I suppose we could keep this recipe as a dessert and not a cocktail.  If I must.

One year ago: Artichoke Ravioli
Three years ago: Blueberry Poppy Seed Brunch Cake

Printer Friendly Recipe
Strawberry Daiquiri Ice Cream (adapted from David Lebovitz’s Raspberry Ice Cream recipe in The Perfect Scoop)

Makes about 1 quart

Mine wasn’t as limey as I would have liked, so I’ve doubled both the zest and the juice from what I used. I don’t believe the extra juice will be detrimental to the smoothness of the ice cream. You could also let the half-and-half mixture steep with the zest for up to an hour before reheating it and mixing it with the yolks.

When strawberries are pureed, I often prefer to use frozen berries that have been defrosted. Because they are picked at their peak and immediately frozen, they are often of higher quality than fresh strawberries. Furthermore, they make a smoother puree.

To make this more kid-friendly, feel free to use only half the rum.  Don’t leave it all out, as it helps keep the ice cream softer.

1 cup (7 ounces) sugar, separated
Zest from 2 limes
Pinch salt
1½ cups half-and-half
1½ cups heavy cream
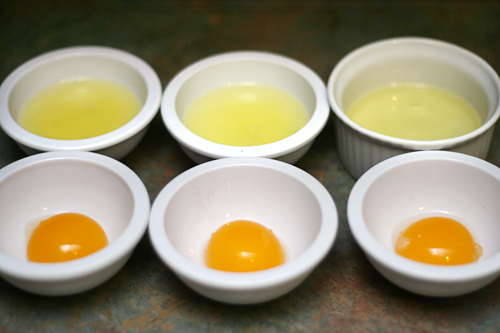
4 yolks
1½ cups (6 ounces) strawberry puree
¼ cup lime juice (2 limes)
2 tablespoons rum

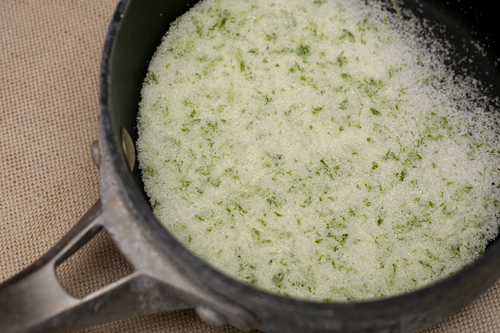
1. In a medium saucepan, rub the lime zest into ½ cup (3.5 ounces) of the sugar until fragrant. Add the half-and-half and heat the mixture over medium-high heat until it simmers. Meanwhile, pour the cream into a large bowl; set a fine-mesh strainer over the bowl.

2. In a separate medium bowl, beat the egg yolks with the remaining ½ cup (3.5 ounces) sugar. When the half-and-half simmers, very slowly pour it into the beaten egg yolks, whisking constantly. Pour the mixture back into the pot and bring just to a simmer over medium heat, still whisking constantly. Pour through the strainer into the bowl with the cream; stir to combine. Mix in the strawberry puree, lime juice, and rum. Chill until cold, at least 4 hours or up to overnight.

3. Freeze the ice cream custard in your ice cream maker according to the manufacturer’s instructions. Once frozen to the consistency of soft serve ice cream, transfer the ice cream to a chilled bowl and freeze until firm.


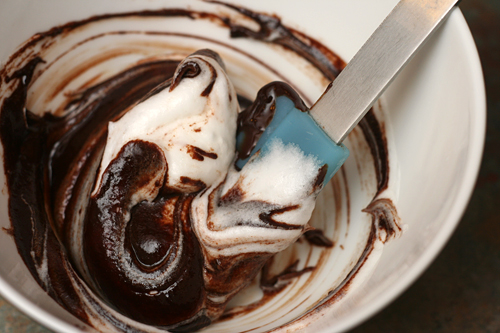
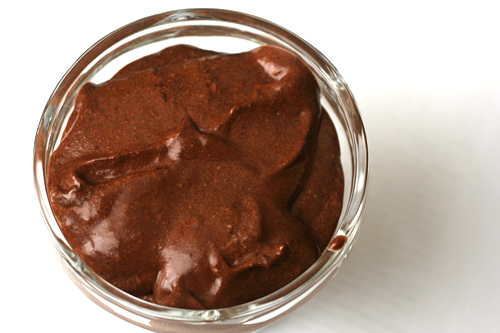
chocolate mousse comparison

I realized something potentially important with this comparison. When Dave and I and whoever else participate in comparisons, we just dive in and start throwing out adjectives. That’s never been a problem before, but this time, Dave and I had some confusion over what we each wanted in a mousse. Perhaps my tasters and I should clarify beforehand what we’re looking for. I know I wanted an exceptionally chocolately flavor and an exceptionally light texture. I don’t think Dave knew what he wanted…or even what chocolate mousse is supposed to be.

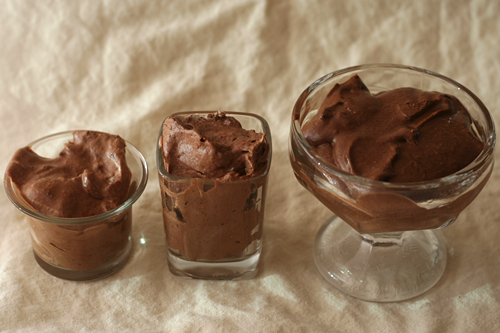
I compared David Lebovitz’s recipe from A Sweet Life in Paris (DL), Cooks Illustrated’s Premium Chocolate Mousse recipe from 2006 (CI Premium), and Cooks Illustrated’s older Chocolate Mousse recipe (found in The New Best Recipe) (CI). It drives me crazy when Cooks Illustrated publishes multiple recipes for the same thing without referencing the previous recipe. I’m always left wondering which is the better version. What better way to find out than to make them both?

DL – This recipe is simple: chocolate melted with water, egg yolks added, beaten egg whites folded in. I haven’t read A Sweet Life and couldn’t find this recipe on David’s blog, but according to Annie, he explains in his book that this is the most traditional version of chocolate mousse.

CI Premium – This recipe is designed specifically for fancy schmancy chocolate. (I was using Valrhona.) The recipe contains the chocolate, water, and eggs called for in Lebovitz’s recipe, but spices things up with cocoa (balanced by the addition of sugar), brandy, and espresso powder. Folding in whipped cream lightens the mixture.

CI – Unlike the other two recipes, this one contains butter and no water. In addition to the requisite chocolate and eggs, it includes coffee (or alcohol), vanilla, sugar and whipped cream.

DL – Lightened by only beaten egg whites and not whipped cream, this was the heaviest mousse of the three. It was thicker, grainy, and more solid, with a cocoa-like flavor (despite containing no cocoa) and a bitter aftertaste. For Dave, it was too much – too rich and too dense.  For me, it just wasn’t as light as I want my mousse.

CI Premium – This was softer and sweeter than the other mousses. Dave thought it was the most balanced.

CI – This was light and airy and chocolately, and for me, perfect in every way. I love its bittersweetness, I love the meringue bubbles that pop in my mouth, I love how it’s firm but light.

The confusion came when Dave said that none of them were as good as my standard recipe – but I hadn’t made chocolate mousse in nearly four years, and CI’s recipe from The New Best Recipe was what I used then. Furthermore, Dave’s favorite of the three was CI’s Premium recipe, because it was “puddinglike”. But a mousse shouldn’t be puddinglike (and I confess it probably hadn’t chilled long enough).

It looks like for this comparison, there is only one opinion that matters, and that is mine, of course. Good thing Cooks Illustrated’s Chocolate Mousse was so clearly the winner. Well, I was the winner too, because I got to eat three delicious chocolate mousses – and one perfect mousse – in one sitting.


left to right: CI Premium, CI, DL

One year ago: Chicken Mushroom Spinach Lasagna
Two years ago: Pecan Sour Cream Biscuits
Three years ago: Spaghetti and Meatballs

Printer Friendly Recipe
Chocolate Mousse
(from Cooks Illustrated’s The New Best Recipe)

6 ounces bittersweet or semisweet chocolate, chopped coarse
4 tablespoons (½ stick) unsalted butter
Pinch salt
1 teaspoon vanilla extract
2 tablespoons strong coffee or 4 teaspoons brandy, orange-flavored liqueur, or light rum
4 large eggs, separated
2 tablespoons sugar
½ cup chilled heavy cream, plus more for serving

1. Melt the chocolate in a medium bowl set over a large saucepan of barely simmering water or in an uncovered Pyrex measuring cup microwaved at 50 percent power for 3 minutes, stirring once at the 2-minute mark. Whisk the butter into the melted chocolate, 1 tablespoon at a time. Stir in the salt, vanilla, and coffee until completely incorporated. Whisk in the yolks, one at a time, making sure that each is fully incorporated before adding the next; set the mixture aside.

2. Stir the egg whites in a clean mixing bowl set over a saucepan of hot water until slightly warm, 1 to 2 minutes; remove the bowl from the saucepan. Beat with an electric mixer set at medium speed until soft peaks form. Raise the mixer speed to high and slowly add the sugar; beat to soft peaks. Whisk a quarter of the beaten whites into the chocolate mixture to lighten it, then gently fold in the remaining whites.

3. Whip the cream to soft peaks. Gently fold the whipped cream into the mousse. Spoon portions of the mousse into 6 or 8 individual serving dishes or goblets. Cover and refrigerate to allow the flavors to blend, at least 2 hours. (The mousse may be covered and refrigerated for up to 24 hours.) Serve with additional whipped cream.

Printer Friendly Recipe
Dark Chocolate Mousse
(from Cooks Illustrated)

8 ounces bittersweet chocolate, 62 to 70 percent cacao, chopped fine
3 tablespoons granulated sugar
2 tablespoons cocoa powder, preferably Dutch-processed
1 teaspoon instant espresso powder
7 tablespoons water
1 tablespoon brandy
3 large eggs, separated
⅛ teaspoon table salt
1 cup heavy cream, plus 2 more tablespoons (chilled)

1. Melt the chocolate, 2 tablespoons sugar, cocoa powder, espresso powder, water, and brandy in a medium heatproof bowl set over a saucepan filled with 1 inch of barely simmering water, stirring frequently until smooth. Remove from the heat.

2. Whisk the egg yolks, 1½ teaspoons sugar, and salt in a medium bowl until the mixture lightens in color and thickens slightly, about 30 seconds. Pour the melted chocolate into the egg mixture and whisk until thoroughly combined. Let cool until slightly warmer than room temperature, 3 to 5 minutes.

3. In the clean bowl of a standing mixer fitted with the whisk attachment, beat the egg whites at medium-low speed until frothy, 1 to 2 minutes. Add the remaining 1½ teaspoons sugar, increase the mixer speed to medium-high, and beat until soft peaks form when the whisk is lifted, about 1 minute. Detach the whisk and bowl from the mixer and whisk the last few strokes by hand, making sure to scrape any unbeaten whites from the bottom of the bowl. Using the whisk, stir about one-quarter of the beaten egg whites into the chocolate mixture to lighten it; gently fold in the remaining egg whites with a rubber spatula until a few white streaks remain.

4. Whip the heavy cream at medium speed until it begins to thicken, about 30 seconds. Increase the speed to high and whip until soft peaks form when the whisk is lifted, about 15 seconds longer. Using a rubber spatula, gently fold the whipped cream into the mousse until no white streaks remain. Spoon the mousse into 6 to 8 individual serving dishes or goblets. Cover with plastic wrap and refrigerate until set and firm, at least 2 hours. (The mousse may be covered and refrigerated for up to 24 hours.)

Printer Friendly Recipe
Chocolate Mousse
(from David Lebovitz via Annie’s Eats)

I just got David Lebovitz’s The Sweet Life in Paris, which contains this original recipe, in the mail. I’ve copied the recipe in his words. I also noticed that he calls for 2 tablespoons brandy or coffee, which I didn’t use.

7 ounces bittersweet or semisweet chocolate, finely chopped
3 tablespoons water
4 large eggs, at room temperature, separated
Pinch of coarse salt

1. In a medium-sized bowl set over a pan of barely simmering water, begin melting the chocolate with the water, making sure not to let it get too hot. Take the bowl off the heat when the chocolate is almost completely melted, then stir gently until smooth. Set aside.

2. In a clean, dry bowl, whip the egg whites with the salt until they form stiff peaks when you lift the whip. They should still be smooth and creamy, not grainy.

3. Stir the egg yolks into the chocolate, then fold one-third of the whites into the chocolate to lighten it up.

4. Fold the remaining egg whites into the chocolate just until there are no visible streaks of whites. Cover the bowl with plastic wrap and chill for at least 3 hours. (You can also divide the mousse into individual custard cups, ramekins, or goblets before serving.)


roasted tomato soup

When I was a kid, my friend Katie and I played a game in which we had a restaurant. We wrote up a menu and would let our parents order food from it, and then we’d bring them what they ordered. In other words, our parents paid for their food twice – once at the grocery store, and then a second time to Katie and I after we heated it up in the microwave for them.

Among other delicacies, our menu included nachos (Cheez Whiz and chips) and tomato soup. Tomato soup was probably our specialty. At Katie’s house, the Campbell’s concentrate was mixed with milk, but at my house, we added water. Katie and I were nothing if not accommodating to our customers’ preferences.

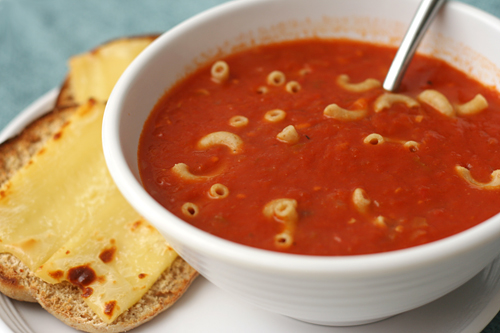
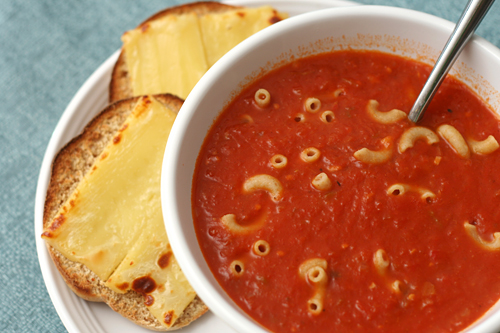
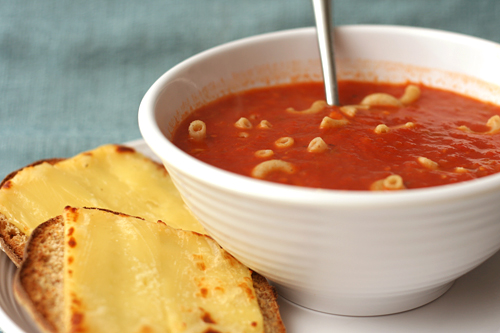
This tomato soup is not that tomato soup. It’s brighter, fresher, but still deeply flavored from the roasted tomatoes. The shallots make it just a little sweet, and a pinch of allspice adds warmth. This soup, topped with whole wheat macaroni noodles and served alongside cheese toast, is my favorite meal. It’s even worth ordering in a real restaurant.

One year ago: Masa Pancakes with Chipotle Salsa and Poached Eggs (I’m about halfway through that same bag of masa harina.)
Two years ago: Spinach Bread
Three years ago: Raspberry Bars

Printer Friendly Recipe
Roasted Tomato Soup (adapted from Cooks Illustrated)

6 servings

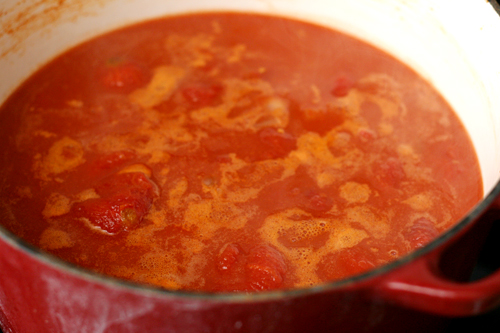
This recipe is messier without an immersion blender, but I made it that way for years. Use a large slotted spoon to transfer the solids to the blender with a cup or two of liquid and blend to puree. Pour the pureed mixture back into the liquid; stir in the brandy. You can blend everything instead of just the solids, but the soup will turn orange instead of red.

Feel free to add in a few tablespoons of cream (or pureed cottage cheese for a healthier alternative) at the end if you’re like Katie’s family and prefer your tomato soup creamy.

2 (28-ounce) cans whole tomatoes in juice
1½ tablespoons brown sugar
2 tablespoons butter
4 shallots, chopped
1 tablespoon tomato paste
⅛ teaspoon allspice
1¾ cup low-sodium chicken broth
¼ cup brandy

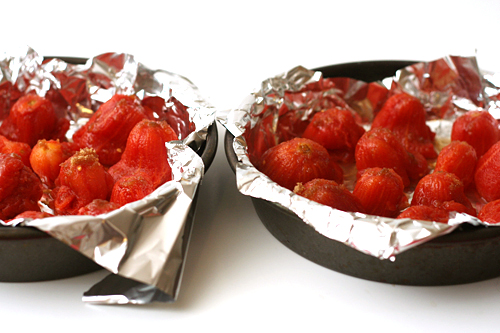
1. Adjust an oven rack to the upper middle position and heat the oven to 450 degrees. Line the bottom and sides of two 8- or 9-inch round pans with aluminum foil. Use a slotted spoon to remove the tomatoes, one by one, from their juice. Open the tomato on the side opposite the stem. Holding the tomato loosely in a fist, gently squeeze the tomato to remove most of its juice. Place the tomato stem-side up on one of the prepared pans. Repeat with the remaining tomatoes. Sprinkle the tomatoes with the brown sugar.  Roast the tomatoes until they are dry and lightly browned, about 45 minutes. Reserve the tomato juice.

2. Melt the butter in a large saucepan over medium-low heat. Add the shallots, tomato paste, and allspice to the pot; stir, then cover the pot and cook, stirring occasionally, until the shallots are soft, about 10 minutes. Add the chicken broth, reserved tomato juice, and roasted tomatoes. Bring to a simmer over medium-high heat, then reduce the heat to low, cover, and simmer 15 minutes. Use an immersion blender to puree the soup. Stir in the brandy and serve.

This recipe is in one of my earliest blog entries, but I have simplified and healthified (but not de-tastified) the soup since then, so I thought it was worth posting an updated version.

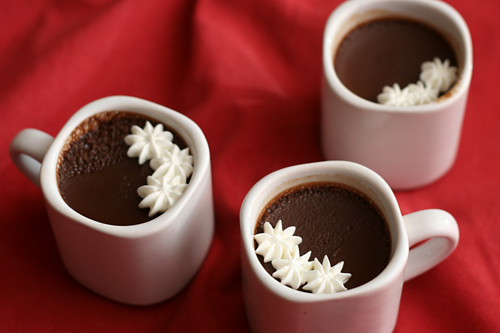
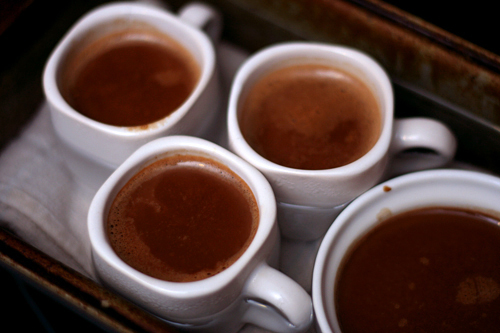
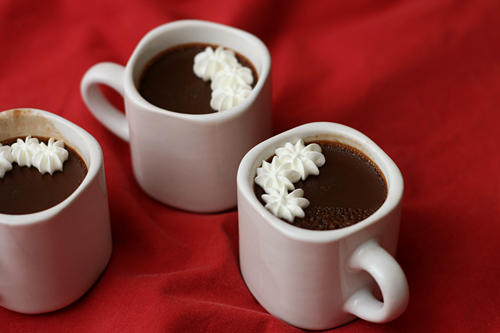
chocolate pots de creme

I optimistically bought a container of fancy full-fat yogurt to replace dessert this week, thinking that a few days without cookies and cake would do me good. I didn’t plan for the extra couple of chocolate pots de crème that would need to get eaten, and I forgot that I wanted to bake cookies to bring to work one day this week. I have good intentions of skipping dessert, but my love of baking is always my undoing.

Inasmuch as a tiny espresso mug of chocolate pot de crème can be anyone’s undoing. This simple mixture of chocolate, milk, cream, and egg yolks is rich and certainly best served in tiny servings if you want to retain any bit of those good intentions. But where’s the fun in that?

Christine chose this for Tuesdays with Dorie, and she has the recipe posted. I love how rich and creamy it is but wish the chocolate flavor was more intense.

One year ago: Toasted-Coconut Custard Tart
Two years ago: Chocolate Whiskey Cake.


strawberry buttercream

One of my favorite parts of birthdays as a kid was flipping through my mom’s stack of Wilton yearbooks to pick out my cake. I remember cakes shaped like treasure chests, dice (every guest got their own die), telephones, dollar bills, a whole scene with penguins and an igloo and a pond (that was my brother’s cake, two years in a row), so many others.

My mom, of course, used the Wilton buttercream recipe, a simple mixture of powdered sugar and solid fat (butter or shortening), with a bit of vanilla for flavor, milk to loosen it up, and meringue powder to help it set. This is what I knew as frosting as a kid; I loved it then and still do.

To some, it’s too sweet and it’s certainly grainy, and those people often prefer swiss meringue buttercreams, in which butter is mixed into a meringue built from egg whites and sugar. My first experiences with these weren’t great; I felt like I was eating lightly sweetened butter. Dorie Greenspan’s recipe, a lemon version, changed my mind, because it actually tasted like something.

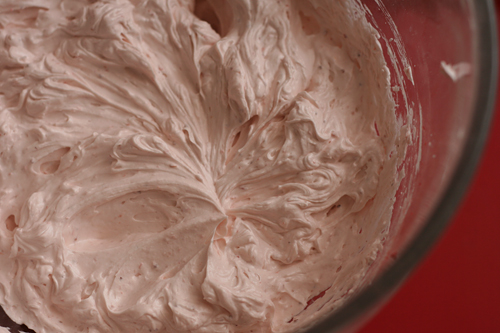
Now I love both types of frosting (is there any horribly fattening food I don’t enjoy, I wonder?), although I always add at least a couple drops of lemon juice into my meringue buttercreams to brighten their taste. But this strawberry version might just take the cake. It’s light and smooth, like all meringue buttercreams, but it has plenty of flavor from all those strawberries. I don’t think anyone will be shaping this frosting into penguins anytime soon, but it might top my next birthday cake anyway.

One year ago: Bacon-Wrapped Goat Cheese and Almond-Stuffed Dates
Two years ago: Beer-Battered Fish
Three years ago: Cream Cheese Brownies

Printer Friendly Recipe
Strawberry Buttercream (adapted from Martha Stewart via Annie’s Eats)

The original recipe calls for fresh strawberries, but I prefer to use frozen strawberries when their texture isn’t important, because they’re available year-round and always picked at the peak of their ripeness.

1 cup strawberry puree (from 8 ounces frozen defrosted strawberries)
4 large egg whites
1¼ cups (8.75 ounces) sugar
Pinch salt
24 tablespoons (3 sticks) unsalted butter, at room temperature

1. Combine the egg whites and sugar in a heatproof mixer bowl set over a pot of simmering water. Whisk until the sugar dissolves and the mixture registers 160 degrees on a candy thermometer.

2. Remove the bowl from heat and attach it to a mixer fitted with the whisk attachment. Beat on medium-high speed until stiff peaks form and the mixture has cooled to room temperature, about 8 minutes. (The bowl should be cool to the touch.)

3. Reduce the speed to medium and add the butter, 2 tablespoons at a time, whisking well after each addition. With the mixer on low, whisk in the strawberry puree, mixing just until incorporated. Use immediately, or cover and refrigerate for up to 3 days. (Bring to room temperature, and beat on low speed until smooth before using.)

This frosting topped Sky High’s Pink Lady Cake.

braised white beans with zucchini, tomatoes, and potatoes

Dave tends to have healthier food preferences than me. It was his suggestion that we eat vegetarian or seafood meals on weekdays and save meat for the weekends. My initial efforts to find a vegetarian cookbook that reflected how I liked to cook was years ago, and the pickings then, unlike now, were slim. Back then, most vegetarian cookbooks seemed to tend toward the gourmet end of the spectrum, with lengthy preparations and rare ingredients.

Jeanne Lemlin’s Vegetarian Classics was exactly what I was looking for. Generally, the dishes are quick, based on common ingredients and cooking techniques, and accessible to non-vegetarians. I liked it so much that I bought it for my sister. She’s a busy working mom with no interest in becoming a vegetarian, but I still thought this was a cookbook she’d get a lot of use of.

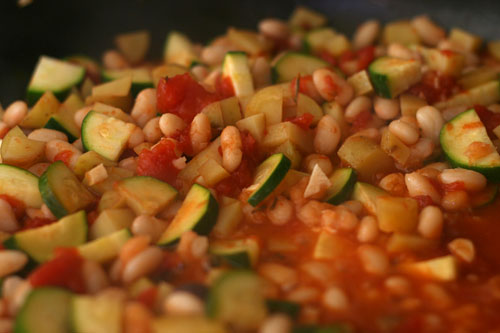
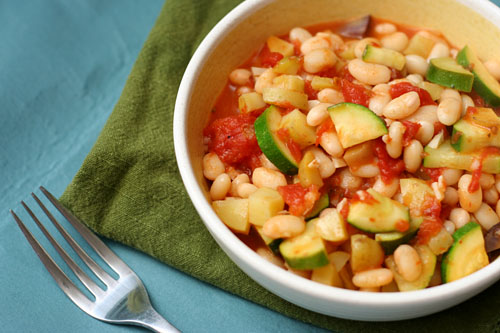
This recipe is one of my favorites from the book. It fulfills that ultimate trifecta – easy, healthy, delicious. It’s the slightest bit spicy from crushed red pepper, the zucchini is just tender, and the beans and potato soak up all of the garlicky tomato juice. And I have Dave to thank; otherwise, I don’t know that I ever would have searched out a vegetarian cookbook.

One year ago: Roasted Garlic Balsamic White Bean Dip
Two years ago: Honey Yogurt Dip
Three years ago: Apple Galette

Printer Friendly Recipe
Braised White Beans with Zucchini, Tomatoes, and Potatoes (adapted from Jeanne Lemlin’s Vegetarian Classics)

Serves 2-3

1 tablespoon extra virgin olive oil
4 garlic cloves, minced
¼ teaspoon crushed red pepper flakes
1 (14-ounce) can diced tomatoes
¼ cup water
¼ teaspoon dried rosemary, crushed
¼ teaspoon salt
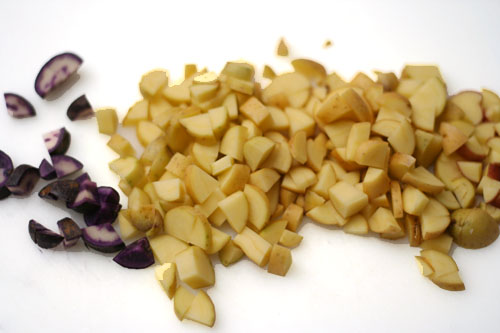
1 medium Yukon gold potato, cut into ¼-inch dice
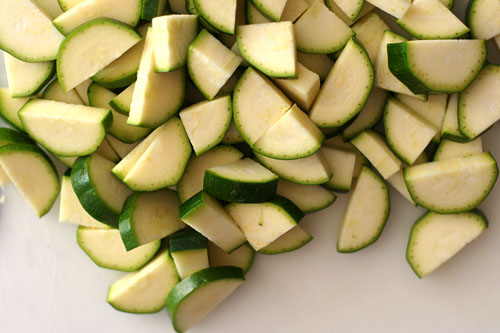
1 zucchini, quartered lengthwise and sliced into ¼-inch slices
1 (14-ounce) can Great Northern beans, rinsed and drained

1. Heat the oil, garlic, and red pepper in a 12-inch nonstick skillet over medium heat. Cook for about 30 seconds after the garlic begins to sizzle. (It should not become at all colored.) Stir in the tomatoes, water, rosemary, salt, and potatoes. Cook, covered, at a lively simmer for 15 minutes, or until the potatoes are almost cooked through.

2. Mix in the zucchini and beans. Cover the pan again and cook, stirring often, 10 minutes more, or until the zucchini and potatoes are tender. At this point check the consistency of the sauce; it should be thick and soupy, not dry or watery. Add a bit of water if the mixture doesn’t have much sauce; cook it uncovered if the juices seem watery. Serve in large pasta bowls, preferably, or on plates.

I have blogged about this recipe before, but I felt that a recipe as good as this one deserved a fresh entry.

eggplant rollatini

The only thing I can remember cooking for the last several years that turned out so badly that not only did I refuse to eat it, but even Dave did, is grilled eggplant. I don’t remember what went wrong – cook time too long? cook temp too low? too high? salt, don’t salt, cut thicker cut thinner, I don’t know – but the resulting mush of eggplant goo is all too vivid still.

I hadn’t eaten eggplant since. I’ve seen recipes in which every other component sounded like something I would enjoy, but as soon as I spotted that nefarious eggplant in the ingredient list, I scrolled right on past. I knew I’d have to try eggplant again someday. But I wasn’t ready then.

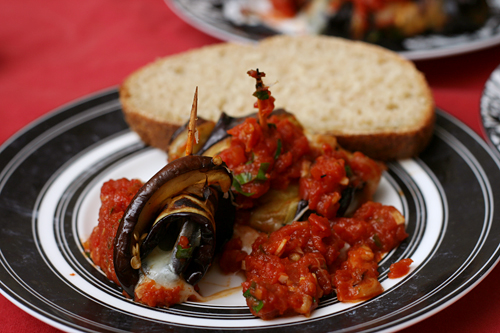
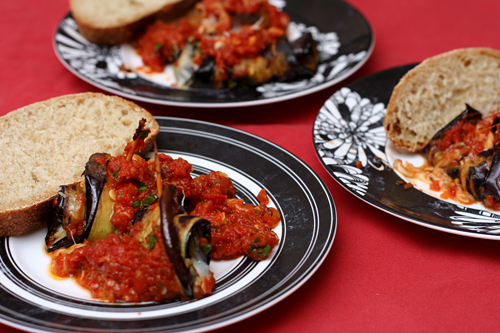
Now I am. Cheese and tomato sauce is never a bad way to ease into an ingredient. Each grilled slice of eggplant is rolled with a slice of cheese, then topped with a quick marinara sauce and heated until the flavors meld and the cheese softens. For me, they were too messy to serve as a hand-held hors d’œuvre, but instead made for a very nice plated first course. That’s right, a recipe with eggplant was very nice. I’m one step closer toward liking eggplant again.

One year ago: Pasta with Baked Ricotta and Sweet Tomato Sauce
Two years ago: Vegetarian Chili
Three years ago: Salmon Pesto Pasta

Printer Friendly Recipe
Eggplant Rollatini (adapted from Cara’s Cravings)

I just stick a pair of kitchen shears into the can of tomatoes and chop away a bit. It’s coarser than a puree, but still just fine for sauce. If you want it smoother, puree the tomatoes in the food processor.

We grilled the eggplant; I haven’t personally tried the roasting technique recommended in the original Gourmet recipe.

4 small Italian eggplants or 2 regular eggplants
Kosher salt
1 tablespoon olive oil
2 garlic cloves, finely chopped
¼ teaspoon dried hot red-pepper flakes
1 (15-ounce) can diced tomatoes, chopped, undrained
½ teaspoon salt
¼ cup coarsely chopped fresh basil
16 thin slices provolone cheese
½ ounce (¼ cup) finely grated parmesan cheese

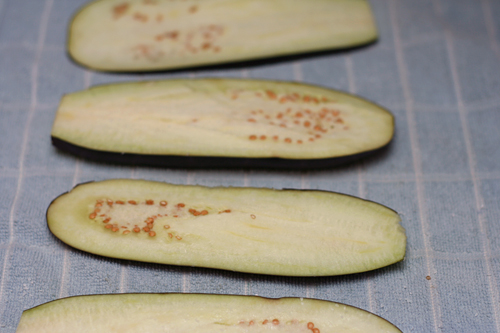
1. Peel 2 opposite long sides of each eggplant. Cut each eggplant lengthwise (to form long skinny ovals) into 1/4-inch slices. Sprinkle both sides of the slices with kosher salt; set aside for 30 minutes. Heat the oven to 425 degrees.

2. Heat the oil in a medium skillet over medium heat until it flows like water when the pan is tilted; add the garlic and red pepper flakes and cook, stirring constantly, until fragrant, about 30 seconds. Add the tomatoes and ½ teaspoon salt; cook, stirring occasionally, until thickened, 8-12 minutes. Remove from heat; stir in the basil.

3. Prepare a grill for direct-heat cooking over moderate heat (or line a large baking sheet with foil and heat the oven to 450 degrees). Brush any remaining salt crystals from the eggplant; pat the slices dry and spray both sides with nonstick spray. Grill the eggplant, turning once, until tender, about 4 minutes total (or bake for 20 minutes, turning once). Transfer to a work surface.

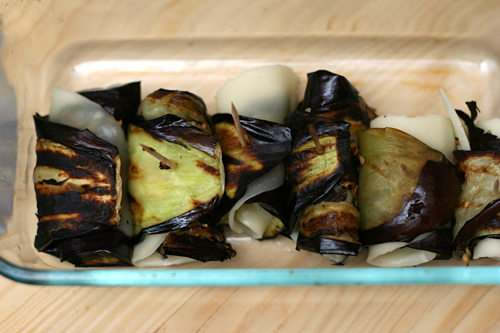
4. Top each slice of eggplant with a slice of cheese; starting at a short end, roll the eggplant and cheese into a spiral and seal with a toothpick. Repeat with the remaining eggplant and cheese. Arrange the eggplant spirals in a shallow baking pan and top with the sauce; bake until the cheese is melted, about 10 minutes.

curry coconut chickpea soup

When my parents brought home a half-grown boxer puppy, I asked them why they got such an ugly dog. With her squashed face, beady eyes, and unproportional torso, she was a far cry from the beautiful German shepherd I’d grown up with. Then we took her out to the backyard to run around and within minutes, I was exclaiming that she was the cutest thing ever! She raced back and forth, eagerly stopping by our sides for head pats. She had no tail to speak of, so instead wagged her entire butt back and forth. What a great dog (except for the drool and the farts). She certainly taught me an important lesson about how it’s what’s inside that really counts.
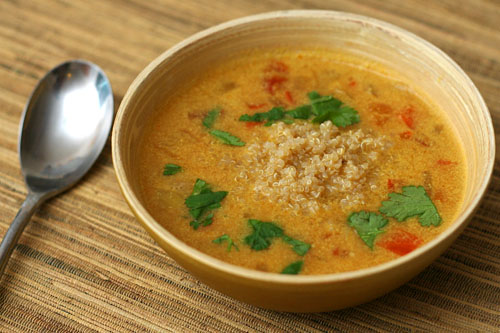
This soup might look oddly curdled to you, with random chunks of red floating on top. But I know that the mottled look is from sweet rich coconut milk, and the soup is full of healthy tomatoes and red peppers. I know that quinoa adds a bit of crunch to the soup, and chickpeas offer something to chew on.

We gave the boxer puppy an ultra-feminine name, Belle, to counteract some of her less feminine traits. And maybe that’s why this soup has such a descriptive name. Without all of those flavorful ingredients right in the title, how would you have any idea what’s in that suspicious orange-tinted broth? Your first impression might not reflect how good it really is.


(photo taken by my friend Ramie Pierce)

One year ago: Baked Ziti
Two years ago: Herbed Lima Bean Hummus
Three years ago: Maple Walnut Cupcakes

Printer Friendly Recipe
Coconut Curry Chickpea Soup (adapted from epicurious via Cook, Pray, Love)

Serves 4

1 tablespoon canola oil
1 medium onion, chopped
1 medium red bell pepper, chopped
1 jalapeño, seeded and finely chopped
salt
2 cloves garlic, finely chopped
1 teaspoon curry powder
1 teaspoon garam masala
2 cups low-sodium vegetable or chicken broth
1 (15-ounce) can chickpeas, rinsed and drained
1 cup chopped tomatoes, seeded and peeled, fresh or canned
Freshly ground black pepper, to taste
1 (14-ounce) can light coconut milk
2 tablespoons chopped fresh cilantro or parsley

1. In a medium stockpot, heat the oil over medium heat. Add the onion, bell pepper, jalapeno, and a pinch of salt; cook, stirring, until softened, about 5 minutes. Add the garlic, curry powder, and garam masala; cook, stirring constantly, until fragrant, about 30 seconds. Add the broth, chickpeas, tomatoes, ½ teaspoon salt, and black pepper; bring to a boil over high heat. Reduce the heat, cover, and simmer gently, stirring occasionally, about 20 minutes.

2. Stir in the coconut milk; continue to cook, stirring occasionally, until heated through, about 10 minutes. Garnish with the herbs; serve over rice, couscous, or quinoa, if desired.

I’m submitting this entry to Branny’s Charity Souper Bowl, in which she will donate a dollar to the American Society for the Prevention of Cruelty to Animals for each post submitted.