beef short ribs braised in tomato sauce

When my sister visits with her young kids, I like to make a dish on the first night that’s particularly kid-friendly. While they aren’t picky eaters, they love pizza and spaghetti and hot dogs as much as any other kid. But if I’m cooking, the food has to be Bridget-friendly too. In other words, it has to be fun to cook.

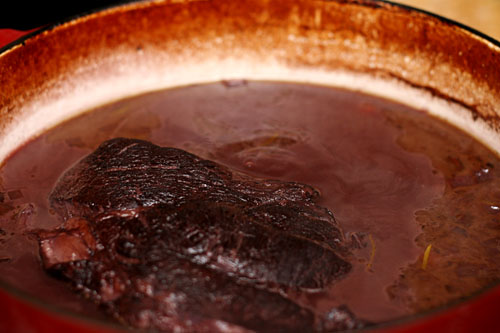
I’ve wanted to perfect a recipe like this for a long time. I had in mind something that wasn’t just tomato sauce with meat added. I wanted the meat to shine, and I wanted the sauce itself to taste distinctly meaty.

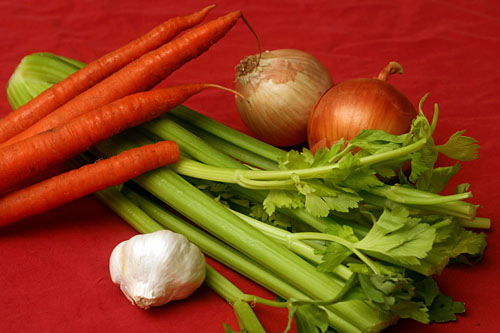
To get the intensity I was hoping for, I pulled out every umami trick I know. Beef, obviously, and all the tomatoes don’t hurt. Dried porcini mushrooms, tomato paste (added with the aromatics and browned slightly), and pancetta added layers of meaty flavor.

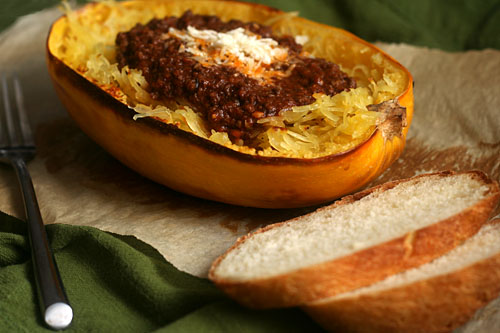
This is my favorite type of recipe to make. Ingredients are added incrementally, food gets browned and delicious, and all the while, I get to stir and inhale the aroma, stir and inhale. It gets better after the sauce has simmered for hours, and then it becomes stir and taste, stir and taste. Even better is enjoying the meal with pasta, freshly baked bread, salad, a bottle of red wine, and two rambunctious kids and their parents.

One year ago: Lighter Chicken and Dumplings
Two years ago: Chopped Salad
Three years ago: Banana Cream Pie

Printer Friendly Recipe
Beef Short Ribs Braised in Tomato Sauce

½ ounce dried porcini mushrooms
1 teaspoon olive oil
4 (3-4 pounds total) beef short ribs
salt
3 ounces pancetta, diced
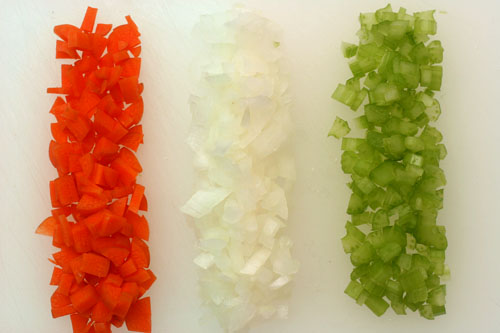
1 onion, diced small
1 carrot, diced small
3 garlic cloves, minced
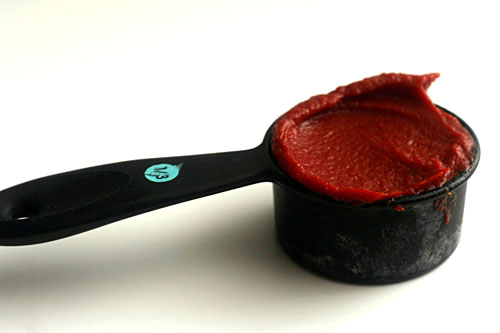
2 tablespoons tomato paste
½ teaspoon oregano
½ cup wine (red or white, just something that isn’t too sweet or oaky)
2 (28-ounce) cans whole tomatoes with their juice

1. Rinse the mushrooms to remove any dirt clinging to them. Cover them with ½ cup water in a small microwave-safe bowl. Cover the bowl with plastic wrap, poke a few holes in the plastic wrap, and microwave on high power for 30 seconds. Let stand until the mushrooms are softened, about 5 minutes. Use a fork to lift the mushrooms from the liquid; mince the mushrooms, reserving the liquid.

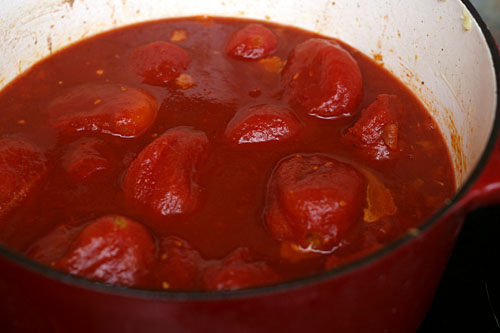
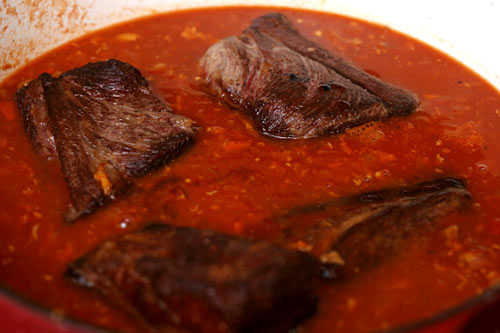
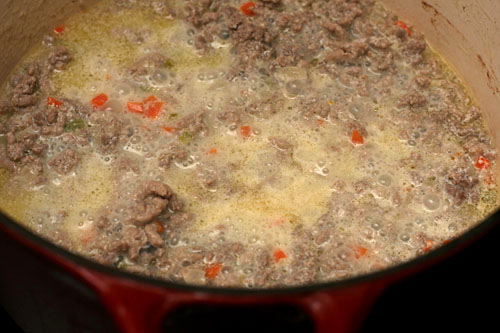
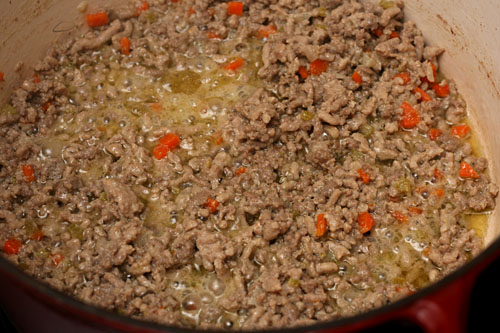
2. Season the beef ribs with salt. Meanwhile, in a 5-quart Dutch oven, heat the olive oil over medium-high heat until it flows like water when the pot is tilted. Add the beef ribs and cook, for 2-3 minutes per side, until richly browned on all sides. Remove the ribs from the pot. Lower the heat to medium and add the pancetta to the pot. Cook, stirring occasionally, until the fat is rendered and the pancetta is crisp. Use a slotted spoon to transfer the pancetta to the plate with the short ribs. Drain all but 1 tablespoon fat from the pot. Add the onions and carrots; cook, stirring occasionally, until softened and lightly browned on the edges, 6-8 minutes. Stir in the garlic, tomato paste, mushrooms, and oregano; cook, stirring constantly, until fragrant, about 30 seconds. Pour in the wine; scrape up the browned bits on the bottom of the pot. Stir in the tomatoes, beef ribs, pancetta, mushroom soaking liquid (being careful to leave any dirt behind) and 1 teaspoon salt; bring to a simmer over medium-high heat, then reduce the heat to low, cover the pot, and cook, stirring occasionally, for 2 hours. After 2 hours, remove the cover, increase the heat to medium-low, and simmer for another hour, until the beef is tender.

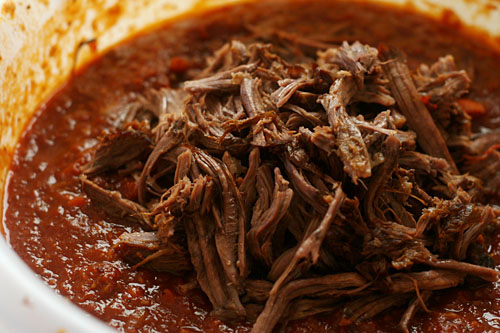
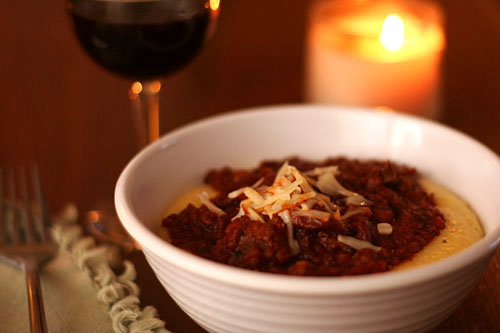
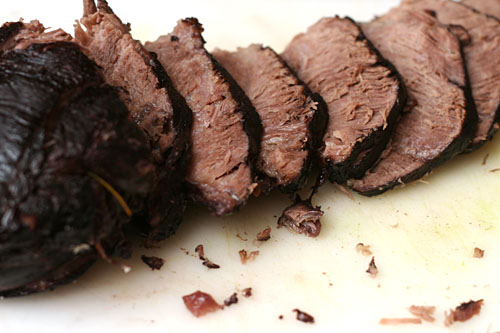
3. Transfer the ribs to a plate; shred the meat. Meanwhile, if the sauce is too thin, increase the heat to medium-high and simmer until it reaches the desired thickness. Stir the meat back into the sauce. Taste for seasoning, adding salt if necessary, and serve over pasta or polenta.
roasted chicken thighs with root vegetables

I am highly susceptible to the Sunday Sads. I start out every weekend thinking that I have infinite time before going back to work to catch up on chores, hobbies, and sleep. I make pizza and drink beer the first night. Make something fancy for dinner and drink wine the second night. Sunday, though, turns into a mad rush to catch up chores from the previous week while preparing for the upcoming week. I still want something fantastic for dinner, but not something that’s going to keep me in the kitchen all day.

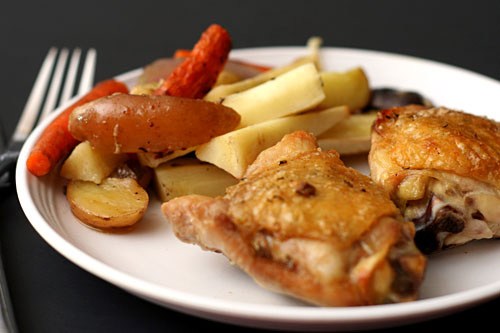
This one-dish meal is the perfect antidote to the Sunday Sads. The original recipe had a long staggered cooking method, in which the chicken roasted, then the vegetables, and then they’re combined to finish cooking. I don’t have that kind of patience on Sunday, so I cooked the whole thing in one dish at the same time. While it baked unattended, Dave and I shared a bottle of our favorite champagne – my other foolproof method of dissolving the Sunday Sads.

An easy meal is one thing, but what busy Sundays really need is something that tastes delicious. This mixture of browned potatoes, caramelized vegetables, and moist chicken that takes next to no time to put together eases the blow of facing another busy work week.

One year ago: Lamb Stew
Two years ago: German Apple Pancake

Printer Friendly Recipe
Roasted Chicken Thighs with Root Vegetables and Potatoes
(adapted from Bon Appétit)

Serves 4

The chicken thighs provide plenty of fat, probably too much, to coat the vegetables so they cook evenly. I think this would probably work with bone-in, skin-on breasts as well, or at least a mixture (with the breasts cut in half cross-wise so they cook in the same time as the thighs).

If you aren’t a fan of parsnips, replace them with more carrots or another root vegetable.

nonstick spray
1 pound medium carrots, peeled, cut into 2-inch-long, ½-inch-thick spears
1 pound parsnips, peeled, cut into 2-inch-long, ½-inch-thick spears
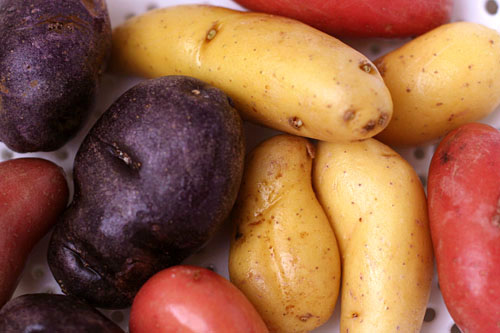
1½ pounds unpeeled medium Yukon Gold potatoes, scrubbed, cut into 2-inch-long, ½-inch-thick spears
1 onion, cut into 8 wedges
8 large chicken thighs with skin and bones
1 tablespoon coarse kosher salt
2 teaspoons dried thyme
1½ teaspoons freshly ground black pepper
¼ teaspoon freshly grated or ground nutmeg

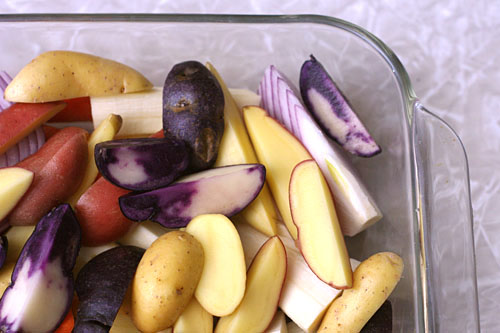
1. Preheat oven to 450°F. Mix salt, thyme, 1½ teaspoons pepper, and nutmeg in small bowl. Spray a 9×13-inch baking pan with nonstick spray. Place the carrots, parsnips, potatoes, and onion in the pan and spray with a light coating of nonstick spray. (The chicken will provide plenty of cooking fat, but you want to make sure every vegetable has at least a light coating.) Stir half of the salt mixture into the vegetables. Lay the chicken, skin-side up, over the vegetables. Rub the remaining salt mixture on the chicken and under its skin.

2. Bake until the chicken is golden and cooked through, 35-45 minutes. Serve.

red pepper risotto

This was one of the first recipes I ever made from the Food Network. Back before I had cable, I’d heard of a lot of the chefs, but I hadn’t seen any of their shows myself. Once when I was traveling, the hotel had cable, and I was transfixed.

I still remember the first shows I saw. Alton Brown, making tomato sauce; Rachael Ray, making crab salad served on endive leaves; and Emeril, making bagna cauda, red pepper risotto, beef in Barolo, and chocolate chestnut mousse. As soon as I got home, I invited a group of friends over for dinner and made the entire menu from Emeril’s episode. I even wrote reviews on the site later, the only I’ve ever written.

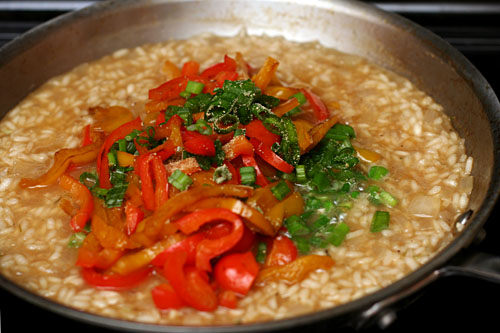
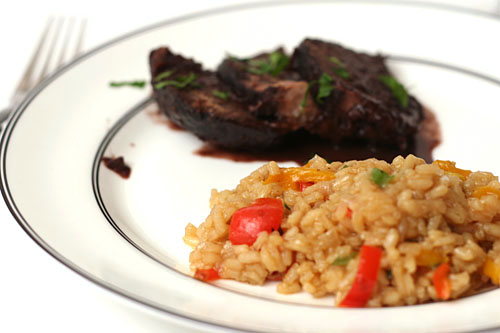
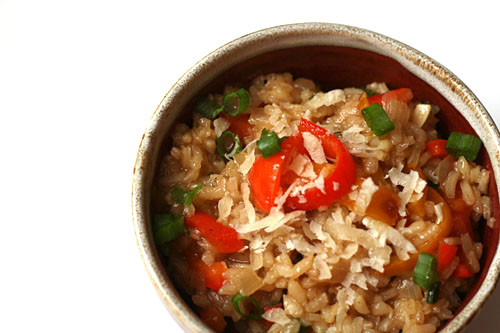
It was the first risotto I’d ever made and is still my go-to risotto recipe. It’s actually a very standard risotto – sweat onions, toast Arborio, evaporate wine, gradually add broth, stir in parmesan. I’ve tried other methods, but this one is my favorite. It’s perfectly adaptable too – I’ve added peas and leafy greens, but I still think the peppers are the best addition, especially if the risotto is being used to soak up delicious beef in Barolo juices.

One year ago: Steak au Poivre
Two years ago: Sausage Apple Hash

Printer Friendly Format
Risotto with Sweet Peppers (adapted slightly from Emeril)

6 cups chicken stock
1 tablespoon olive oil
1½ medium red bell peppers, seeded and diced
1½ medium yellow bell peppers, seeded and diced
2 tablespoons butter
½ onion, finely chopped
1 clove garlic, minced
1½ cups arborio or carnaroli rice
½ cup dry white wine
2 sprigs fresh thyme
4 scallions, green parts only, thinly sliced
1 teaspoon salt
½ teaspoon fresh cracked white pepper
1 cup grated Parmigiano-Reggiano

1. In a small saucepan, bring the stock to a simmer. Remove from the heat and cover to keep warm.

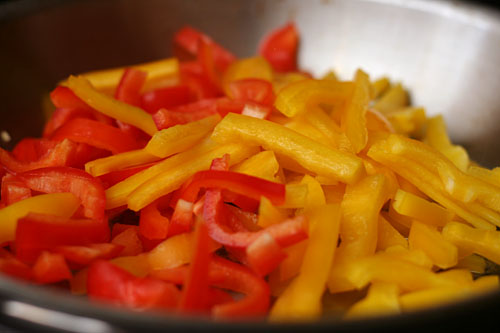
2. In a large skillet, heat the oil over medium-high heat. Add the peppers and cook, stirring frequently, until cooked through but still slightly crunchy, about 5 minutes. Remove from the heat and set aside.

3. In a large heavy saucepan, heat the butter over medium-high heat. Add the onions and cook, stirring, for 2 minutes. Add the garlic and cook until fragrant, about 30 seconds. Add the rice and cook, stirring constantly, until opaque, 2 minutes. Add the wine and cook, stirring until the rice nearly completely absorbs all the liquid, about 1 minute.

4. Reduce the heat to medium and stir in the thyme. Add 1½ cups of the hot stock, and cook, stirring frequently. Cook the risotto, adding more stock 1 cup at a time as it is absorbed, about 20 minutes total cooking time. Stir in the green onions and cooked bell peppers after 15 minutes cooking time. Season the risotto with 1 teaspoon of salt and white pepper. The rice should be slightly al dente.

5. Remove from the heat. Discard the thyme sprigs. Add the cheese, and stir well to mix. Adjust the seasoning, to taste, with salt and pepper. Serve immediately.

beef in barolo

I seem to be going through a phase. I was trying to choose what recipe to post about next, but everything I have to choose from seems so similar to Bolognese – Italian sauces based either on beef, tomatoes, or both. Maybe it’s because Dave and I are talking about visiting Italy next year, or maybe it’s because Italian beefy and/or tomatoey recipes are so perfect for winter (or what passes for winter in southeastern New Mexico).

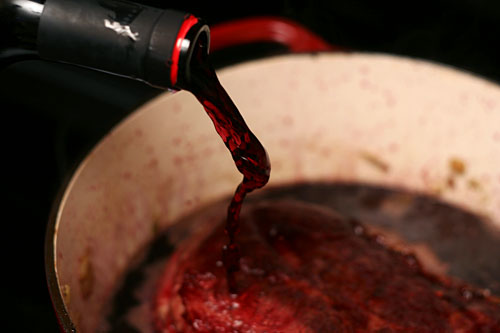
Although, if you cook the beef in Yellowtail Cabernet Sauvignon instead of Barolo, can you still call it an Italian recipe? I don’t imagine that I will ever cook with Barolo, and I certainly don’t recommend that you do either. Barolo is expensive. You’ll rarely find it for less than $50 per bottle and certainly never under $20. Don’t dump $40 worth of wine into your stew, please. And have you ever had Yellowtail’s cab? It’s perfectly drinkable, and at $5 per bottle, it’s a far more practical cooking wine.

Yes, this pot roast is cooked with 2 whole bottles of wine. It’s intensely winey – obviously. In fact, the first night we had this for dinner, I was a little taken aback. The meat is purple and the flavor is so…winey. However, the leftovers the next night were perfectly balanced, so I suspect I didn’t cook it long enough initially, especially considering that the meat wasn’t quite as tender as I like my pot roast.

But that also means that this is one of those meals that is even better when it’s made in advance. It seems to me, then, that this is the perfect meal for guests – it’s convenient and delicious, but the wine makes it fancy. Even if it isn’t fancy wine.

One year ago: English Muffins
Two years ago: Red Velvet Whoopie Pies

Printer Friendly Recipe
Brasato al Barolo – Beef Braised in Barolo (adapted from Emeril)

6 servings

Oops, I just saw that the recipe calls for 1½ bottles of wine, not the 1½ liters, or two bottles, that I thought when I made this. So yours might not be quite as winey as mine. And now you have half a bottle to sip on while you wait for the beef to cook!

1 tablespoon olive oil
1 (3-pound) boneless beef chuck roast, patted dry
Salt and freshly ground black pepper
3 ounces pancetta, diced
1 yellow onion, diced
2 medium carrots, diced
2 celery stalks, diced
3 cloves garlic, minced
1½ bottles (4½ cups) Barolo, or other dry red wine
2 cups chicken stock
2 sprigs rosemary
2 bay leaves
1 cinnamon stick
¼ cup chopped fresh parsley, for garnish

1. Heat the oven to 325 degrees.

2. In a large Dutch oven, heat the oil over medium-high heat. Sprinkle the beef with salt and pepper. Add the beef to the pot and cook, turning every 2-3 minutes, to brown on all sides. Remove from the pan. To the fat in the pan, add the pancetta and cook until browned, about 3 minutes. Add the onions, carrots, celery and a pinch of salt; cook until caramelized, about 10 minutes. Add the garlic and cook until fragrant, about 30 seconds. Return the beef to the pan and add the wine, 2 cups of the stock, rosemary, bay leaves and cinnamon stick. Bring the liquid to a simmer over medium-high heat, then cover tightly and transfer the pot to oven.

3. Cook, turning the roast every 30 minutes, until fully tender and a meat fork slips in and out of meat very easily (3½-4 hours). Remove the meat from the pan and tent with foil to keep warm.

4. Remove the rosemary, bay leaves, and cinnamon stick, and place the pot over high heat. Cook until the sauce is reduced to a consistency thick enough to coat the back of a spoon, about 10 minutes. Adjust the seasoning to taste.

5. Thinly slice the beef across the grain into ¼-inch thick slices. Serve the beef ladled with the sauce. Garnish with parsley and serve.

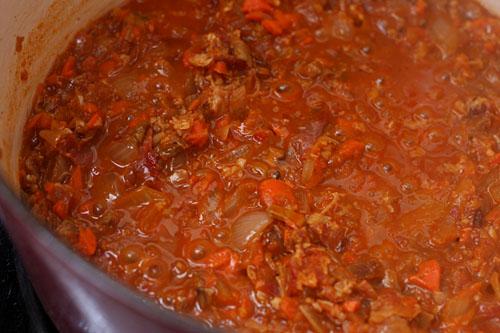
bolognese sauce comparison

(Anne Burrell’s recipe)

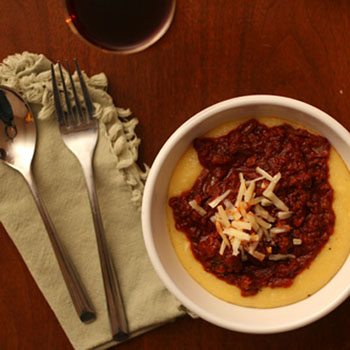
Have you ever had a traditional Bolognese sauce? Not just tomato sauce with ground meat mixed in, but one that involves milk and wine and hours of simmering. Just a few ingredients, but when they’re combined just right, the result is a complex, rich blend with incredible depth. Served over a bowl of creamy polenta with a sprinkling of parmesan cheese and a glass of good red wine on the side, there can be no more comforting, warming food.

The first Bolognese I made was Marcella Hazen’s recipe. She is to Italian food what Julia Child is to French food; certainly a trusted source. In her method, a class mirepoix (or, technically, “soffritto” in Italian) of carrots, celery and onions is lightly cooked in butter, then ground meat is added and cooked just until it loses its pink. Stir in milk and let it bubble until only its delicious fat is left in the pot, then pour over some wine and let it simmer away, and only then, finally, after an hour of slow simmering, are the tomatoes (whole, canned) added – and simmered for 3 more hours.

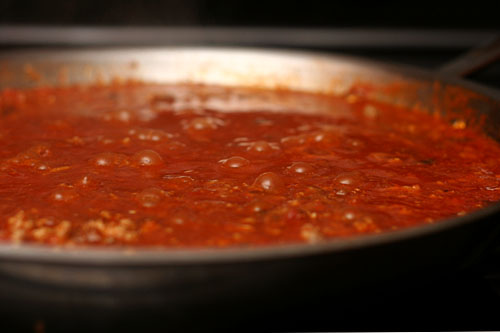
After all that, however, I found Hazan’s recipe to be a little too vegetably. But Cooks Illustrated’s recipe for classic Bolognese is identical except for a smaller amount of vegetables. With only a couple tablespoons each of onions, carrots, and celery, it almost seems like they’re not worth adding, but there isn’t a thing I would change about the recipe.

Bolognese sauce takes a lot of time, yes, but it isn’t a lot of work. It’s my favorite type of recipe, in that it’s undemanding, but if you do happen to be in the kitchen (and I always am) you can stir to your heart’s content. But I suppose the long simmering time intimidates people, because there are a crop of supposedly weeknight friendly Bolognese sauce recipes popping up. In general, I’m not a fan of these types of recipes, because what they save in cooking time they make up for in ingredient prep.

(Cooks Illustrated’s Classic Bolognese)

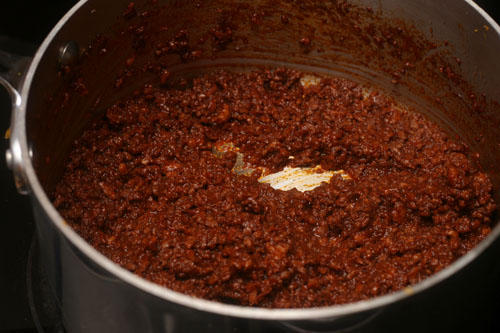
Then I kept seeing another type of Bolognese with great reviews. This one uses only tomato paste as its source of tomato flavor. And if anything can be identified as authentic in a recipe like Bolognese, it’s the tomato paste version, with a heavier meat influence and just a hint of tomatoes.

(Cooks Illustrated’s Classic Bolognese)

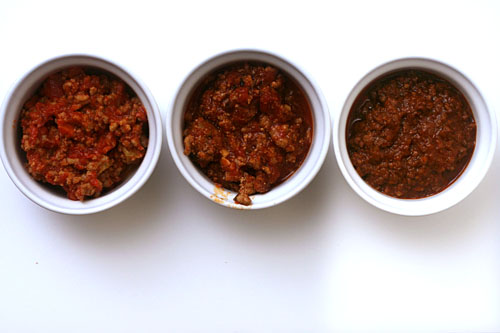
Authenticity aside, I wanted to know which was best. So I baked up three batches – my favorite version from Cooks Illustrated, their weeknight version, and Anne Burrell’s annoying (please don’t yell at me in the recipe, thank you) but well-reviewed tomato paste-based recipe.


(Anne Burrell’s recipe)

The quicker “weeknight-friendly” recipe was, as I expected, the most work, with more ingredients and dishes necessary to mimic the slow-cooked flavor of the other two recipes. However, after all that and a shorter cooking time, its flavor did nicely mimic that of the other, more tomato-rich Cooks Illustrated recipe. I don’t believe Dave could tell the difference. My only complaint was that the meat was slightly tough.

Dave had a few interesting comments about Burrell’s Bolognese. The sauce is simply a classic mirepoix, beef, wine, tomato paste, and herbs, yet Dave detected flavors of mushrooms and possibly Worchestershire sauce in it – two ingredients high in umami, the fifth basic flavor that is best described by “meaty”. In fact, mushrooms are added to CI’s quick Bolognese to increase the meaty flavor that doesn’t have time to develop through a long simmer. One thing that was obvious to both me and Dave was the unusual texture of Burrell’s sauce; to me, it seemed slightly mealy, but Dave was kinder with “fine-grained”.

(Cooks Illustrated’s Weeknight Bolognese)

Dave couldn’t choose a favorite, with his usual “different but good” response, but I’m still stuck on my classic, tomato-heavy slow-simmered method. It’s intensely rich and meaty, but it has a bright balance from the tomatoes. Burrell’s meatier sauce was delicious too, and maybe all those tomatoes aren’t quite as traditional, but, frankly, I like tomatoes. And since Bolognese – any version – is one of those dishes that improves by being made in advance and will suffer no ill effects from being frozen, I see no reason to spend extra time cooking a supposedly quicker “weeknight-friendly” version. Besides, I like watching ingredients bubble away, increasing in intensity as they decrease in volume until they settle into something delicious.

left to right: CI Classic, CI Weeknight, Anne Burrell

One year ago: Thai-Style Chicken Soup
Two years ago: Pumpkin Ginger Muffins

Printer Friendly Recipe
Classic Bolognese (from Cooks Illustrated)

Enough to top 1 pound of dried pasta

If you double this recipe – and considering how well it freezes and reheats, you should – the simmering times will need to be extended.

3 tablespoons unsalted butter
2 tablespoons minced onion
2 tablespoons minced carrot
2 tablespoons minced celery
¾ pound ground beef chuck
table salt
1 cup whole milk
1 cup dry white wine
1 (28 ounce) can whole tomatoes, packed in juice, chopped fine, with juice reserved

1. Heat butter in large, heavy-bottomed Dutch oven over medium heat; add onion, carrot, and celery and sautè until softened but not browned, about 6 minutes. Add ground meat and ½ teaspoon salt; crumble meat with edge of wooden spoon to break apart into tiny pieces. Cook, continuing to crumble meat, just until it loses its raw color but has not yet browned, about 3 minutes.

2. Add milk and bring to simmer; continue to simmer until milk evaporates and only clear fat remains, 10 to 15 minutes. Add wine and bring to simmer; continue to simmer until wine evaporates, 10 to 15 minutes longer. Add tomatoes and their juice and bring to simmer; reduce heat to low so that sauce continues to simmer just barely, with an occasional bubble or two at the surface, until liquid has evaporated, about 3 hours. Adjust seasonings with extra salt to taste and serve. (Can be refrigerated in an airtight container for several days or frozen for several months. Warm over low heat before serving.)

Printer Friendly Recipe
Bolognese Sauce (slightly rewritten to remove all of Anne Burrell’s vulgarity)

Enough to top 1 pound of dried pasta

1 large onion or 2 small, cut into 1-inch dice
2 large carrots, cut into ½-inch dice
3 ribs celery, cut into 1-inch dice
4 cloves garlic
Extra-virgin olive oil, for the pan
Kosher salt
3 pounds ground chuck, brisket or round or combination
2 cups tomato paste
3 cups hearty red wine
Water
3 bay leaves
1 bunch thyme, tied in a bundle

1. In a food processor, puree onion, carrots, celery, and garlic into a coarse paste. Heat a large pan over medium heat; add a slick of oil. Add the pureed vegetables and season generously with salt. Bring the pan to medium-high heat and cook until all the water has evaporated and they brown, stirring frequently, about 15 to 20 minutes.

2. Add the ground beef and season again generously with salt. Cook, stirring occasionally, 15-20 minutes, until browned.

3. Add the tomato paste and cook until brown, 4 to 5 minutes. Add the red wine. Cook until the wine has reduced by half, another 4 to 5 minutes.

4. Add water to the pan until water is about 1 inch above the meat. Toss in the bay leaves and the bundle of thyme and stir to combine. Bring to a boil over medium-high heat, then reduce to a simmer, stirring occasionally. As the water evaporates you will gradually need to add more, about 2 to 3 cups at a time. Simmer, stirring occasionally, for 3½ to 4 hours. Adjust the seasoning with salt and serve immediately.

Printer Friendly Recipe
Weeknight Bolognese (from Cooks Illustrated)

Enough to top 1 pound of dried pasta

½ ounce dried porcini mushrooms
1¼ cup white wine (Riesling, gewürztraminer, white zinfandel, xx)
½ small carrot, peeled and chopped into rough 1/2-inch pieces
½ small onion, chopped into rough 1/2-inch pieces
3 ounces pancetta, cut into 1-inch pieces
28 ounces whole tomatoes with juice
1½ tablespoon unsalted butter
1 small garlic clove, pressed through garlic press or minced
1 teaspoon sugar
1¼ pound meatloaf mix or equal amounts 80 percent lean ground beef, ground veal, and ground pork
1½ cup whole milk
2 tablespoons tomato paste
Salt
⅛ teaspoon ground black pepper

1. Cover porcini mushrooms with ½ cup water in small microwave-safe bowl; cover bowl with plastic wrap, cut a few steam vents with paring knife, and microwave on high power for 30 seconds. Let stand until mushrooms have softened, about 5 minutes. Using fork, lift porcini from liquid and transfer to second small bowl; pour soaking liquid through mesh strainer lined with paper towel. Set porcini and strained liquid aside.

2. Bring wine to simmer in 10-inch nonstick skillet over medium heat; reduce heat to low and simmer until wine is reduced to 2 tablespoons, about 20 minutes. Set reduced wine aside.

3. Meanwhile, pulse carrot in food processor until broken down into rough ¼-inch pieces, about ten 1-second pulses. Add onion; pulse until vegetables are broken down to ⅛-inch pieces, about ten 1-second pulses. Transfer vegetables to small bowl. Process softened porcini until well ground, about 15 seconds, scraping down bowl if necessary. Transfer porcini to bowl with onions and carrots. Process pancetta until pieces are no larger than ¼ inch, 30 to 35 seconds, scraping down bowl if necessary; transfer to small bowl. Pulse tomatoes with juice until chopped fine, 6 to 8 one-second pulses.

4. Heat butter in 12-inch skillet over medium-high heat; when foaming subsides, add pancetta and cook, stirring frequently, until well browned, about 2 minutes. Add carrot, onion, and porcini; cook, stirring frequently, until vegetables are softened but not browned, about 4 minutes. Add garlic and sugar; cook until fragrant, about 30 seconds. Add ground meats, breaking meat into 1- inch pieces with wooden spoon, about 1 minute. Add milk and stir to break meat into ½-inch bits; bring to simmer, reduce heat to medium, and continue to simmer, stirring to break up meat into small pieces, until most liquid has evaporated and meat begins to sizzle, 18 to 20 minutes. Stir in tomato paste and cook until combined, about 1 minute. Add tomatoes, reserved porcini soaking liquid, ¼ teaspoon salt, and pepper; bring to simmer over medium-high heat, then reduce heat to medium and simmer until liquid is reduced and sauce is thickened but still moist, 12 to 15 minutes. Stir in reduced wine and simmer to blend flavors, about 5 minutes.

(Cooks Illustrated’s Weeknight Bolognese)

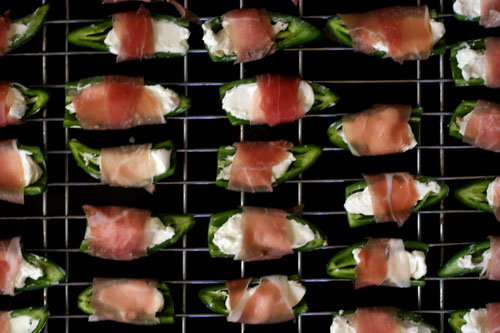
prosciutto-wrapped, neufchatel-stuffed jalapenos

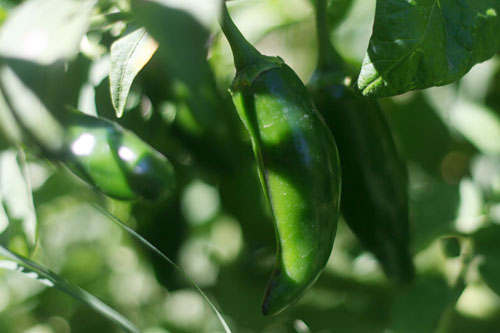
I think it’s about time to pack up my garden for the year. The last month has felt like borrowed time. Homegrown tomatoes on Halloween? Well, yes; in fact, the last few months have been the most successful in my garden because the grasshoppers who I’d been sharing my tomatoes with all summer have flown the coop. But our night lows are starting to drop to near freezing, so I’ll be lucky to get some nice red tomatoes for my burgers tonight.

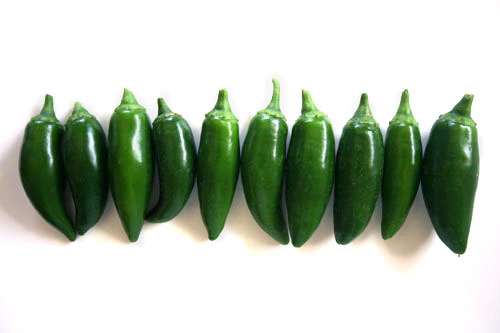
It’s no problem to use up tomatoes. If I found myself with more than I’d expected, I just made some sauce and froze it. But what easy solution is there for at least ten jalapenos per week? Jalapenos are rarely a primary flavor, and even a good batch of pico de gallo only uses a couple.

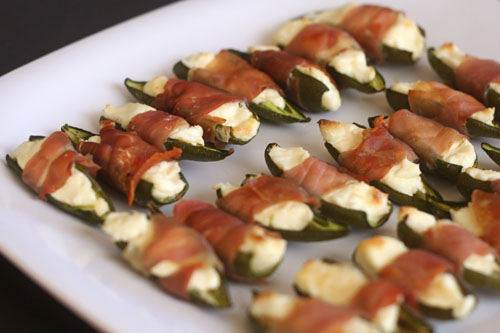
Bacon-wrapped cream cheese-stuffed jalapenos certainly use up the jalapeno bounty, but I can’t be eating a plate of cream cheese and bacon every week, even if there are vegetables hidden under all that fattening flavor. But is the fat necessary?

It turns out it isn’t. Well, some of it is, but by replacing the bacon with prosciutto and the cream cheese with (American, not French) Neufchâtel, these snacks lose a lot of fat but very little of the flavor. In fact, I preferred the prosciutto to the bacon; it’s easier to work with and bakes up crisper. I’m already looking forward to next year’s gardening season – and not just for the tomatoes this time!

One year ago: Pork Chops Loco Moco, Pumpkin Mushroom Soup, Cranberry Orange Scones, Buttermilk Scones, Pumpkin Scones
Two years ago: Chickpea and Butternut Squash Salad, Brown Sugar Apple Cheesecake, Gratin Dauphinois

Prosciutto-Wrapped, Neufchâtel-Stuffed Jalapenos

Makes 24 appetizers

If you keep gloves in the kitchen, use them when handling jalapenos.

12 jalapenos
4 ounces Neufchâtel
6 ounces prosciutto, sliced lengthwise into 24 strips

1. Adjust a rack to the middle position and heat the oven to 400 degrees. Place an oven-safe baking rack on a baking sheet.

2. Cut the stems off the jalapenos; slice them in half lengthwise and use a spoon to scoop out the seeds. Divide the cheese evenly between the jalapenos, then wrap strips of prosciutto around the jalapenos. Arrange the stuffed jalapenos on the prepared baking pan on the rack.

3. Bake for 20 minutes, until the cheese is browned in places and the prosciutto is crisp. Cool slightly before serving.

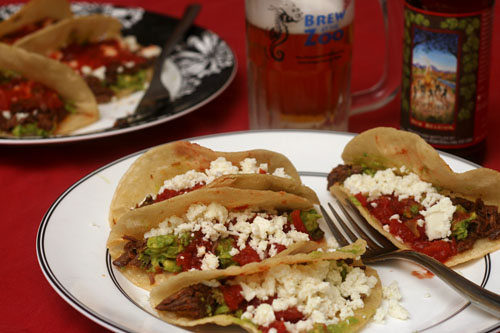
shredded beef tacos

The first few months when I moved out of my parents’ house and across the country were exciting and lonely and intense. I was lucky that I made some great friends right away. I remember the first time someone invited me over for dinner. I’d asked what he and his wife were serving, and I thought he said pea stew. I went, but I was so relieved when it was actually beef stew.

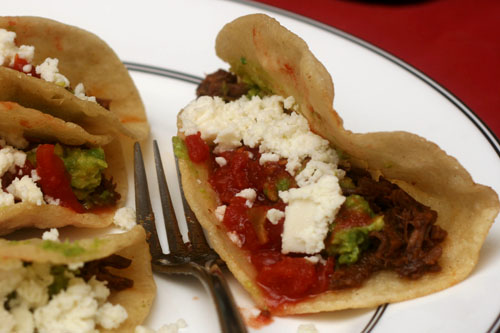
That meal turned into a weekly dinner tradition that lasted for as long as we all lived near each other. We took turns cooking and rarely made the same thing twice, but there was one favorite meal that was requested more than any other – tacos. My friend’s taco filling and accompaniments were good, but the real treat was the shells – freshly fried, still hot, and, frankly, a little greasy. I had never had home-fried taco shells before, and it was a revelation.

These days, tacos are still one of my favorite meals, but I can’t enjoy them as much without those fried shells. Even better is when they’re stuffed with this shredded beef. It’s marinated in vinegar, lime juice, and spices, then baked for hours until it falls into shreds. I’m thankful for those friends not just for helping me feel comfortable on my own, but for teaching me about the perfection of fried corn tortillas. Nothing else would be good enough accompany this intensely flavorful filling.

One year ago: Sandwich Rolls
Two years ago: Pumpkin Pancakes

Shredded Beef Tacos (slightly adapted from Use Real Butter who slightly adapted it from The Border Cookbook)

Jen discusses the cut of beef that is preferred for this recipe. Her recommended eye of chuck was not available, so I chose chuck steak. I have no complaints. Plus I didn’t need to slice it before marinating, which was a nice bonus.

You could always go with the classic cheddar-sour cream-lettuce combination for toppings, but I really love the queso fresco-avocado-salsa direction that Jen recommends.

6 servings

2 tablespoons vegetable oil
2 tablespoons white vinegar
2 tablespoons lime juice
1½ teaspoons ground cumin
1½ tsps chili powder
1 teaspoon salt
3 garlic cloves, peeled and smashed
1½ pounds chuck steak
1 cup vegetable oil
24 corn tortillas
toppings: lettuce, queso fresco, salsa, guacamole, etc.

1. In a gallon-size zip-top bag, combine the oil, vinegar, lime juice, salt, spices and garlic. Add the meat and squish the bag around to make sure the meat is fully coated. Refrigerate for at least 4 hours or overnight.

2. Adjust an oven rack to the middle position and heat the oven to 350 degrees. Dump the contents of the bag into a baking dish just large enough to fit the meat in a single layer. Cover the pan with foil; bake until the meat is tender enough to shred easily, about 2 hours. Use two forks to pull the meat into shreds. Lower the oven temperature to 250 degrees.

3. Heat the oil in an 8-inch skillet over medium heat. Slide a tortilla into the oil; use tongs to fold the tortilla in half and hold it partially open. Flip after about 1 minute. Fry for an additional minute, until the tortilla is slightly crisp. Continue with the remaining tortillas, storing the fried tortillas in the warm oven. Serve with shredded meat and desired toppings.

red kidney bean curry

When my schedule picks up, I tend to fall into a weeknight dinner rut. I think we ate pasta with chopped tomatoes and fresh mozzarella ten times during the month or so of peak tomato season. Fish tacos are in no short supply around here year-round. Red beans and rice, salmon pesto pasta, braised white beans, jalapeno-baked fish

Surely there must be new recipes for me to try that fit my tough weeknight standards – quick, light, fully balanced, vegetarian or seafood-based. And yes! This is perfect. Plus I love my one other Indian curry standard and knew there must be similar-but-different dishes out there to try.

It’s such a basic recipe – sauté aromatics and spices, add beans and other flavorings, simmer, serve over starch. It makes me wonder how many other cuisines I could do this with. I suspect I’ll be trying a few, because you can never have enough quick healthy balanced vegetarian meal ideas.

One year ago: Stuffed Mushrooms with Sun-Dried Tomatoes
Two years ago: Mulled Cider

Printer Friendly Recipe
Red Kidney Bean Curry
(adapted from Smitten Kitchen)

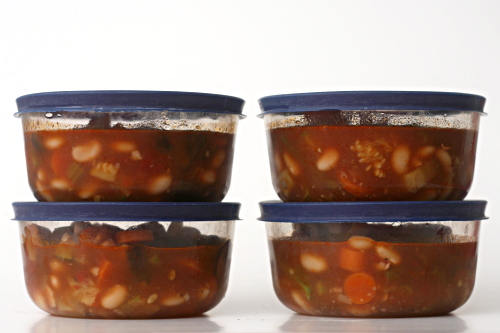
This recipe has another trait I love – it takes well to freezing. Make a large batch, freeze in portions, and your next meal is that much easier!

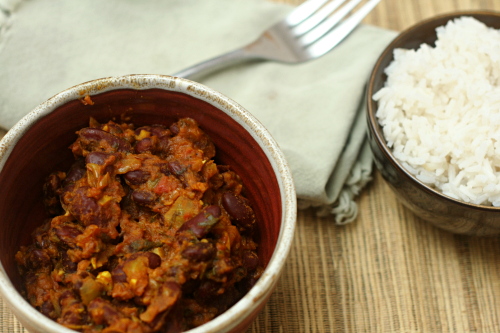
The first time I made this, it seemed a little bland so I’ve increased the spices and added garam masala. I love garam masala. I’ve also changed the tomatoes around to something that makes more sense to me.

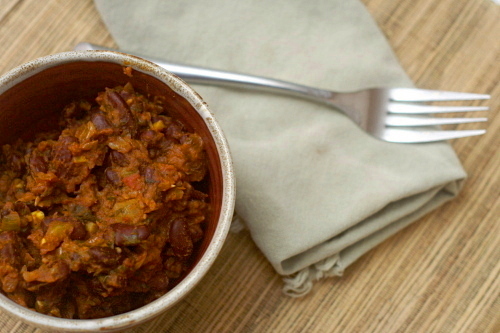
I know Deb’s looks like soup and mine looks like a paste. My only explanation is that this batch was frozen and defrosted, and I was too busy catching up on The Office episodes to see that it needed more liquid.

Serves 6

2 tablespoons olive oil
1 medium onion, finely chopped
1 jalapeno, minced
2 tablespoons chopped fresh ginger
3 cloves garlic, chopped
1 tablespoon tomato paste
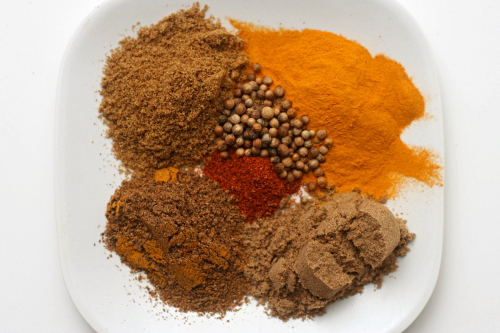
2 teaspoons ground turmeric
2 teaspoons garam masala
1½ teaspoon ground cumin
1½ teaspoon ground coriander
1 teaspoon cumin seeds
¼ teaspoon cayenne
1 (15-ounce) can diced tomatoes, with juice
2 (15-ounce) cans red kidney beans, rinsed and drained (or 3 cups cooked beans)
1 teaspoon salt
½ cup chopped fresh cilantro

In a 3-quart saucepan over medium heat, heat the oil. Add the onion and jalapeno and cook, stirring occasionally, until the onion just starts to brown at the edges, 5-8 minutes. Add the garlic, ginger, tomato paste and spices; cook, stirring constantly, until fragrant, about 1 minutes. Add the tomatoes and their juice, the beans, and the salt. Bring to a boil over medium-high heat, then decrease the heat to low and simmer uncovered for 10 minutes. Stir in the cilantro, taste for seasoning, and serve over rice or with naan.

roasted vegetable bean soup

I keep to a strict food routine at work. Yogurt and fruit for breakfast, then a whole wheat bagel, more fruit, a hard-boiled egg, a banana with peanut butter, vegetables with hummus, lettuce with feta. Nutritionally, it’s exactly what I want, and, for a while, it was exactly the flavors I wanted too. The first ten or twenty times I ate some sort of lettuce with feta, I was wowed again by how something so simple and healthy could taste so good. Bananas and peanut butter? A classic combination, and for good reason! Hard-boiled eggs – such a great balance between the rich creamy yolk and the lighter white.
As the months pass, the charm of my snack routine is wearing thin. I need more variety. I’ve tried changing lettuce types, cheese types, vegetable types, bean dip types. It isn’t enough. The only thing I truly look forward to these days is the bagel.

But I’ve been struggling with how to keep the perfect nutritional balance with completely different foods. I wasn’t thinking outside of the box. I forgot about hot food. Sure, the microwave at work is a little scary, but so is eating the same five snacks everyday for the rest of my life.

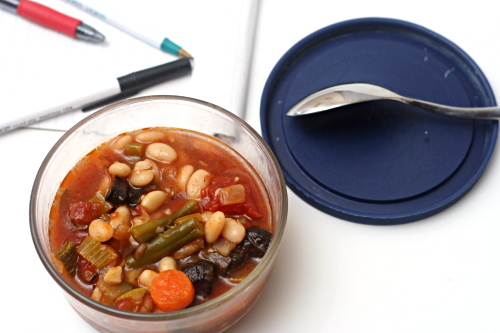
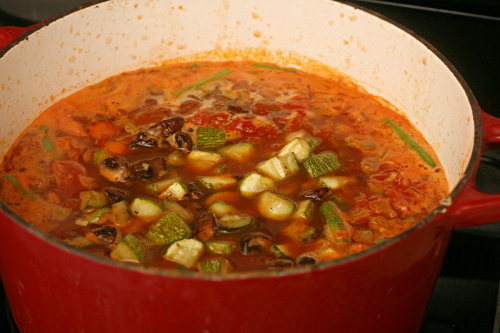
Soup with vegetables and beans is the perfect substitute for vegetables with bean dip. Ree got me started with this classic minestrone enhanced with some roasted vegetables. Not only is it healthy and delicious, but soup is so much fun to make. And it has the added bonus of warming me up after a day spent typing in my over-air-conditioned office. I see a lot more vegetable soups in my future.

One year ago: Herb-Roasted Onions
Two years ago: Roasted Carrots
(Apparently this is the time of year that I roast vegetables.)

Printer Friendly Recipe
Roasted Vegetable Bean Soup (adapted from the Pioneer Woman)

8-10 servings

Ree specifies to roast the vegetables on two sheet pans so you don’t overcrowd them. I used only one pan. The vegetables were overcrowded. I recommend using two pans, so your squash gets browned but not mushy.

I skipped the pasta that Ree calls for (and therefore decided not to call this minestrone – even though I realize that pasta isn’t what makes a soup minestrone). For one thing, it doesn’t fit into my nutritional specifications (see above re: strict rules for food at work). For another, pasta in soup doesn’t make for good leftovers. And finally, pasta in soup like this is just a tease for me; one morsel of pasta in every other bite just isn’t enough.

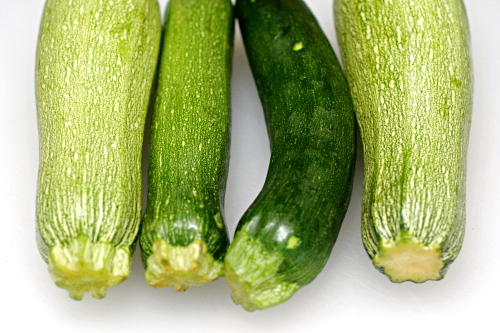
2 zucchini, diced into ½-inch cubes
2 summer squash, diced into ½-inch cubes
8 ounces white mushrooms, quartered
2 tablespoons olive oil
salt
2 carrots, sliced
1 onion, diced
3 stalks celery, sliced
2 cloves garlic, minced
1 tablespoon tomato paste
8 cups low-sodium chicken broth
1 (14.5-ounce) can diced tomatoes, undrained
2 (15-ounce) cans cannellini beans, rinsed
1 cup green beans, cut into 1-inch pieces
parmesan cheese, shaved

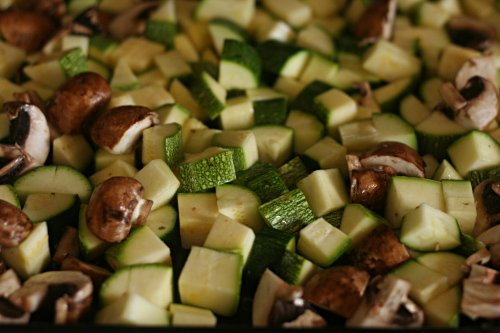
1. Adjust the oven racks to the lower-middle and upper-middle position; heat the oven to 500 degrees. Toss the zucchini, squash, and mushrooms in a bowl with 1 tablespoon of olive oil and a sprinkling of kosher salt. Divide the vegetables between two baking sheets and roast in the hot oven for 5 to 10 minutes, or until brown and black parts begin to show. Remove from the oven and set aside.

2. Meanwhile, in a 5-quart Dutch oven, heat another tablespoon of olive oil over medium heat. Add the carrots, onions, and celery; cook until just beginning to brown, about 8 minutes. Add the garlic and tomato paste and cook, stirring constantly, until fragrant, about 30 seconds.

3. Pour in the broth, tomatoes with their juice, and 1 teaspoon salt; bring to a boil over medium-high heat. Add the cannellini beans and green beans; simmer for fifteen minutes, until the green beans are just tender. Stir in the roasted vegetables. Taste for seasoning, adding more salt if necessary. Serve with parmesan.

beer-marinated flank steak

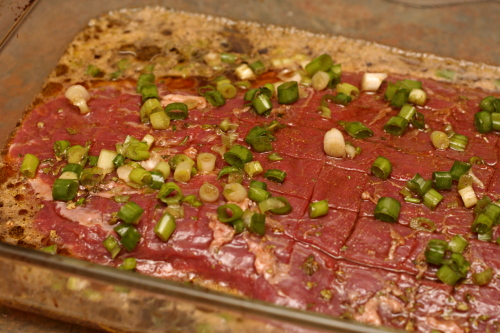
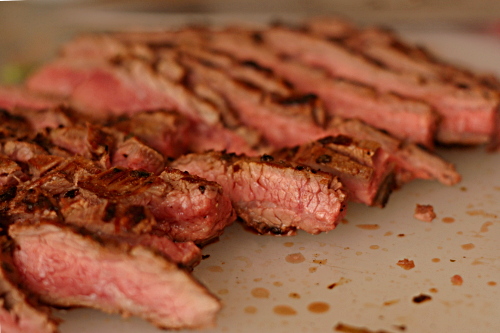
Generally, I’m not a fan of making marinades. I enjoy the flavor, but something about chopping and measuring ingredients just to put them in a bag with some meat for a few hours isn’t satisfying for me. I like the part of cooking that involves heat, when things get soft or crisp, turn golden brown, intensify in flavor. I like the part of cooking that involves eating. The first step of marinating doesn’t include any of the fun stuff.

At least, in this recipe, it involves beer. And very little chopping and not much measuring. This is my kind of marinade.

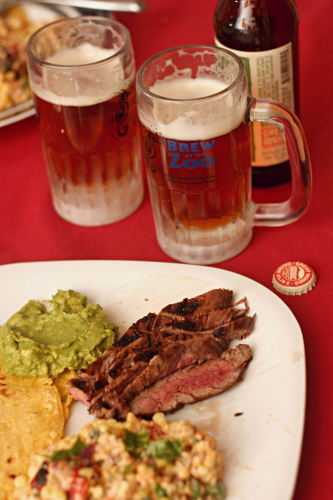
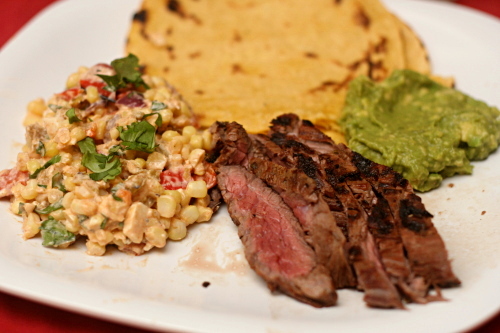
It tastes like my kind of marinade too. While the beer in the recipe caught my eye first, it was the Worcestershire sauce that reeled me in, because I love the stuff. The combination of the two made for a flank steak that was not just great-tasting, but was a beautiful burnished brown on the outside with the perfect amount of pink inside. My first time cooking flank steak was a definite success, which in retrospect, should have been obvious from the beginning, because beer makes everything better, even making marinades.

One year ago: Quick Baking Powder Pizza Crust
Two years ago: Mashed Potatoes with Kale

Printer Friendly Recipe
Beer-Marinated Flank Steak (from Bon Appetit via Apple a Day)

Serves 6

2 1⅓-pound flank steaks
1 tablespoon dried oregano
2 teaspoons ground cumin
Coarse kosher salt
¼ cup extra-virgin olive oil
1¼ cups thinly sliced green onions (about 6)
1 12-ounce bottle dark beer
½ cup Worcestershire sauce

1. Using sharp knife, lightly score flank steaks about ⅛ inch deep on both sides in a crisscross pattern at ½-inch intervals. Place steaks in 13x9x2-inch glass baking dish. Sprinkle steaks on both sides with oregano and cumin and generous amount of coarse salt and freshly ground pepper. Drizzle olive oil over both sides of steaks, rubbing oil and spices into meat. Add green onions, beer, and Worcestershire sauce, turning steaks several times to coat both sides. Cover and chill at least 3 hours, turning occasionally. (Can be made 1 day ahead. Keep chilled.)

2. Prepare barbecue (medium-high heat). Brush grill rack lightly with oil. Grill steaks to desired doneness, 3 to 4 minutes total per side for medium-rare, turning steaks ¼ turn after 1½ minutes to form crisscross grill marks, if desired. Transfer steaks to cutting board; let rest 5 minutes. Thinly slice steaks across grain. Transfer to platter and serve.