buckeyes

copy-of-img_0634

To thank our wedding party, Dave and I gave them gift bags of foods from various places where we’d lived. Among other treats, there was wine from the Finger Lakes region, where we were living at the time and where we got married, salsa from New Mexico, where I grew up, and there was supposed to be buckeyes, representing Ohio, where Dave is from. I made the buckeyes a week or so before the wedding, packaged them into treat boxes, and painstakingly wrapped each box with a ribbon. But I stored them incorrectly, and when Dave and I were getting ready for the rehearsal dinner, where we gave the gifts, we found that they were…unfit to eat. Ugh, that sucked.
copy-of-img_0534a

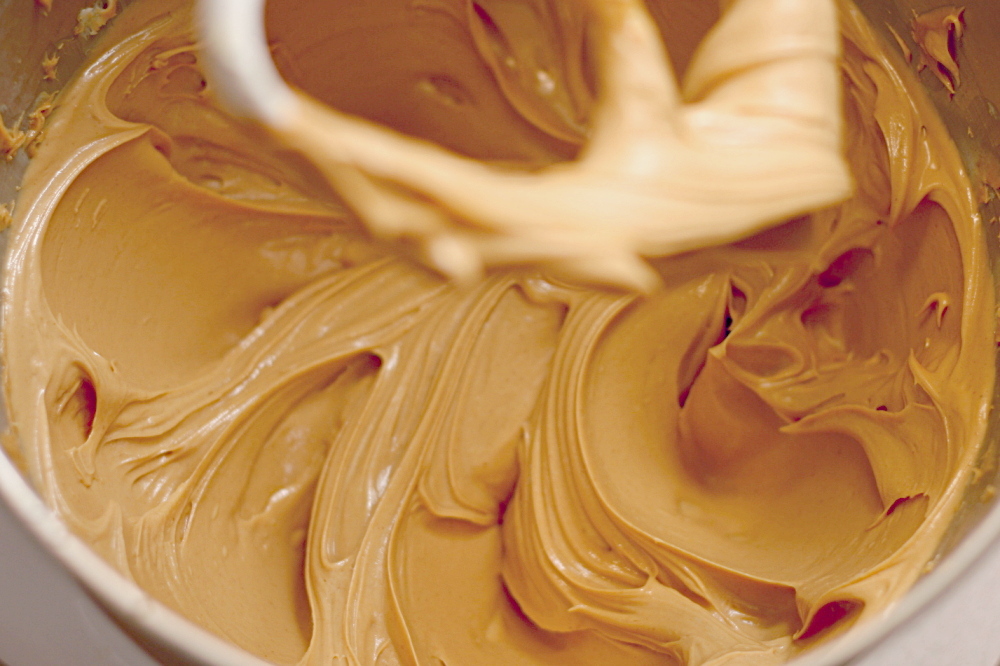
The buckeyes were a pain in the first place, because there was apparently a typo in the recipe I used. Buckeyes are simply peanut butter, butter, powdered sugar, and vanilla, mixed together, rolled into balls, then dipped in chocolate. Unfortunately, the recipe I used calls for twice as much powdered sugar as it should. As a result, I had to scramble and add more peanut butter and butter, and I had twice as many buckeyes as I had intended.

copy-of-img_0535

This time went more smoothly, because I knew how much powdered sugar to add. Actually, it was surprisingly easy and only a little bit tedious. The recipe still makes a good amount of buckeyes, 4 or 5 dozen, depending on how big you roll them.

copy-of-img_0539

These are certainly the most decadent of the candy recipes I made this week. I’ve always been a fan of the peanut butter and chocolate combination, so I find them a little difficult to resist. Hopefully everybody else does too, so I don’t eat them all myself!
copy-of-img_0599

Buckeyes

Makes 4 to 5 dozen

8 tablespoons (1 stick) unsalted butter, softened
1 (16-ounce) jar creamy peanut butter
1 tablespoon vanilla extract
3 cups (12 ounces) powdered sugar
16 ounces seimisweet chocolate, chopped

1. In a standing mixer fitted with paddle attachment, beat butter on medium-low speed until creamy. Add peanut butter and continue mixing until fully blended. Blend in vanilla. With the mixer on low speed, gradually add the powdered sugar. Mix on medium-low speed until fully blended. It should have the texture of very thick cookie dough.

2. Roll the peanut butter mixture into 1-inch balls, and place the balls on a parchment- or wax paper-lined baking sheet. Push a toothpick into each ball. Put the peanut butter balls in the freezer and chill until hard, at least 4 hours.

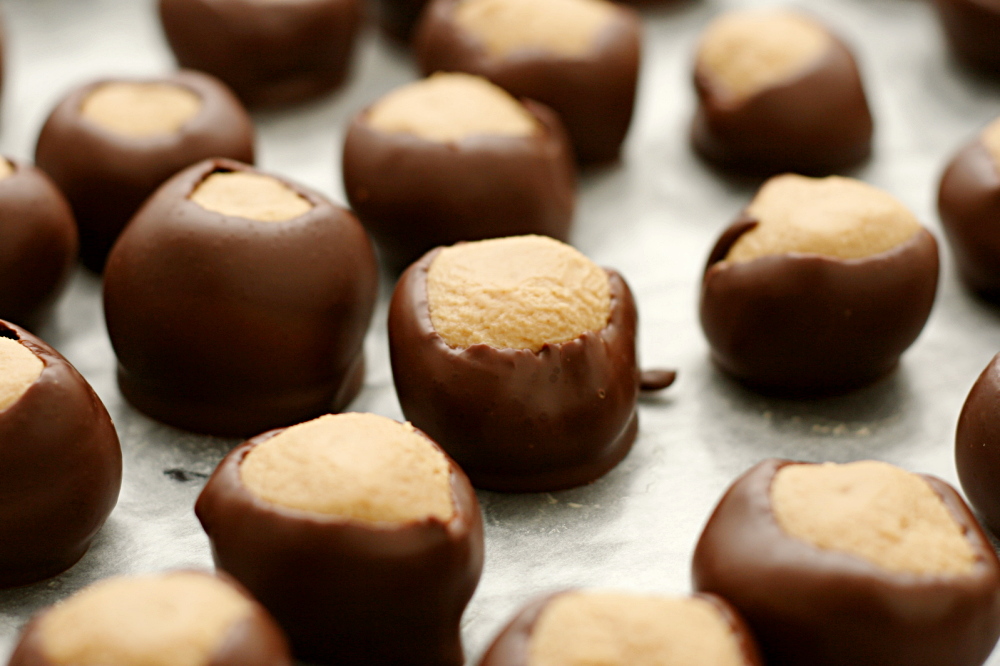
3. Melt the chocolate in a large heatproof bowl set over a saucepan of almost-simmering water, stirring occasionally, until smooth. Using the toothpick as a handle, dip each peanut butter ball in chocolate, leaving a section of peanut butter uncoated. Place chocolate covered balls on parchment or wax paper and remove the toothpick. Once the peanut butter has softened, you can use a finger to smooth over the hole from the toothpick.  Buckeyes can be stored, loosely covered, at room temperature for at least a week.

copy-of-img_0629

candied orange peel

copy-of-img_0648

I don’t usually do much baking around the holidays. I bake so much anyway, what would I possibly do with more treats? So I’m not sure what possessed me to make five types of candy (in one day!) this year. I’m blaming Jen and all of her flawless confections.

copy-of-img_0544

This candied orange peel is her recipe. I’ve made candied orange peel once before. It didn’t knock my socks off, and I kicked myself for not using Jen’s recipe.

copy-of-img_0552
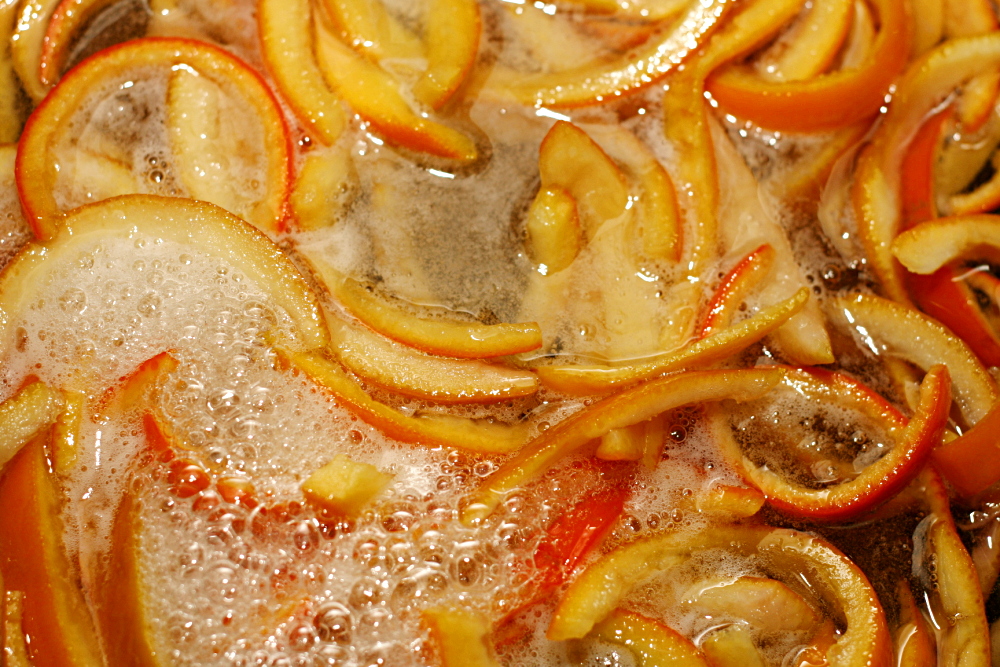
Candied orange peel, like most of the candy recipes I made yesterday, seems easy in theory but ends up involving a significant investment of time. (Or maybe it just seems that way when you wait until the last minute and have to make all of your candy recipes in one day.) Boiling the orange peel three times is no big deal, and simmering them in sugar syrup doesn’t take any effort. But juicing, cleaning, and slicing the oranges took more time and made a bigger mess than I had counted on.

copy-of-img_0553

I dipped about half of my orange peels in chocolate. The others I packaged into gift bags with some granulated sugar to (hopefully) keep them from sticking together.

copy-of-img_0595

I liked the peels far more than I was expecting. In fact, I thought at first that I was making them just for fun. I tried not to let it bother me than no one might actually eat them. But they might be my favorite of the candy recipes I made. I’m especially happy with the chocolate dipped ones. The bittersweet chocolate counters the sweetened peel so nicely. I think I’m going to go grab just one more…

copy-of-img_0600

Candied Orange (Citrus) Peel (slightly reworded from Use Real Butter)

4 oranges, peel of (or any thick skinned orange)
3 cups (21 ounces) sugar
1 cup water

1 cup (7 ounces) sugar for rolling
or
8 ounces chocolate for dipping

1. Cut the oranges in half across their equators and juice them. Cut each half in half again and take a spoon to scrape the pulp out, living a clean pith. You can remove some of the pith if you want, but it isn’t necessary because the candying process with remove (or at least overpower) the bitterness. Cut the peels into ⅛ to ¼ inch strips.

2. Place peels in a large saucepan and cover with cold water. Heat on high until water comes to a boil. Drain. Repeat heating and draining twice more.

3. Combine sugar and water in the saucepan and boil over high heat until temperature reaches 230F. Add the peels and reduce the heat to a simmer, about medium-low. Simmer until peels are translucent (30 minutes or longer).

4. Remove peels from syrup and roll in sugar if desired, and set on rack to dry for several hours. Once the peel is dry, you can dip in dark chocolate – shake off excess, and place on foil, wax paper, or baking sheet to dry. Store in a tupperware, or if not chocolate dipped, store in sugar.

copy-of-img_0623

sausage apple hash

copy-of-img_0473

I’m not the most creative cook ever. You may have noticed that most recipes on my blog are from some other source – very few are my own creations, and even those are pretty much just heavily adapted versions of ideas I got somewhere else. So when I am actually creative, I’m very proud of myself.

copy-of-img_0460

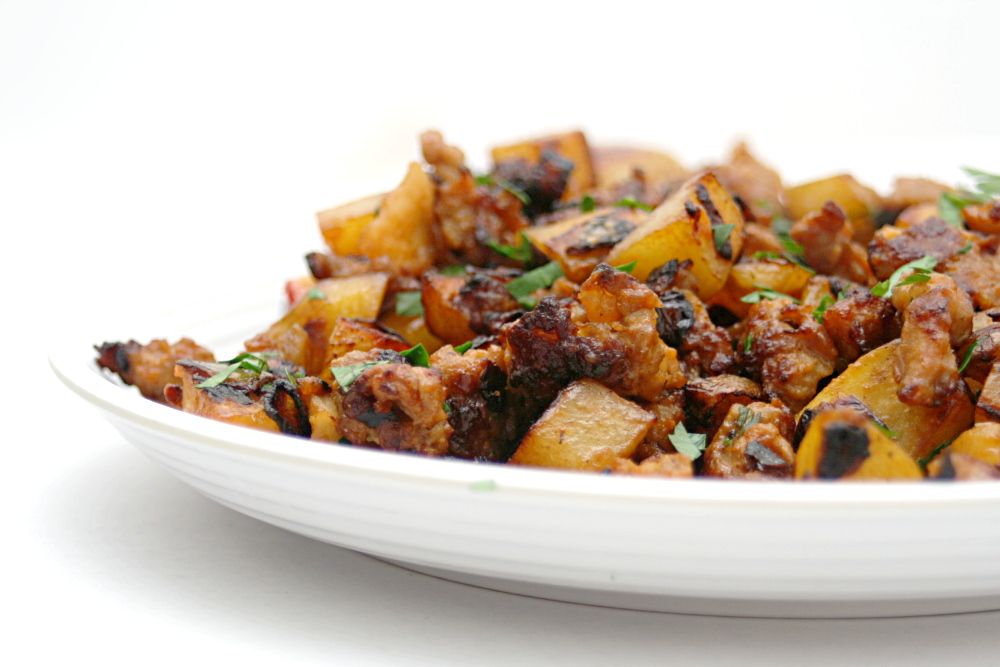
I saw this sausage apple hash on Mark’s blog last summer, and put off making it until apple season. I decided to add potatoes to Mark’s recipe – that would make this a complete meal, and potatoes just seemed to make good sense here. I was pleased with my mild creativity.

Oh, except when I read the recipe closer, I saw that it originally included potatoes, and Mark just left them out for convenience. Phooey. So much for it being my own idea.

copy-of-img_0465

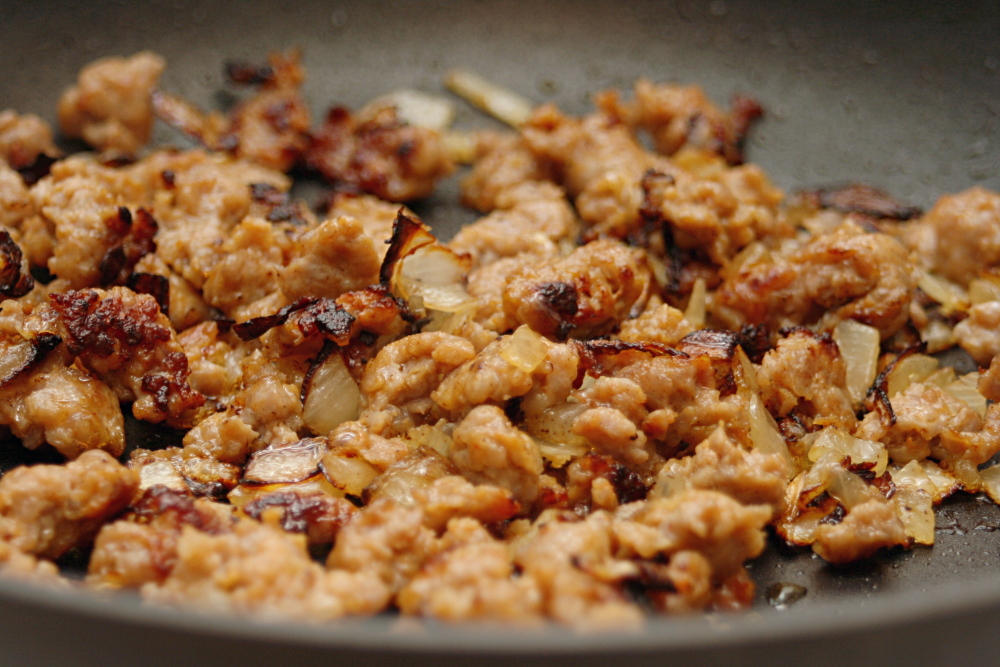
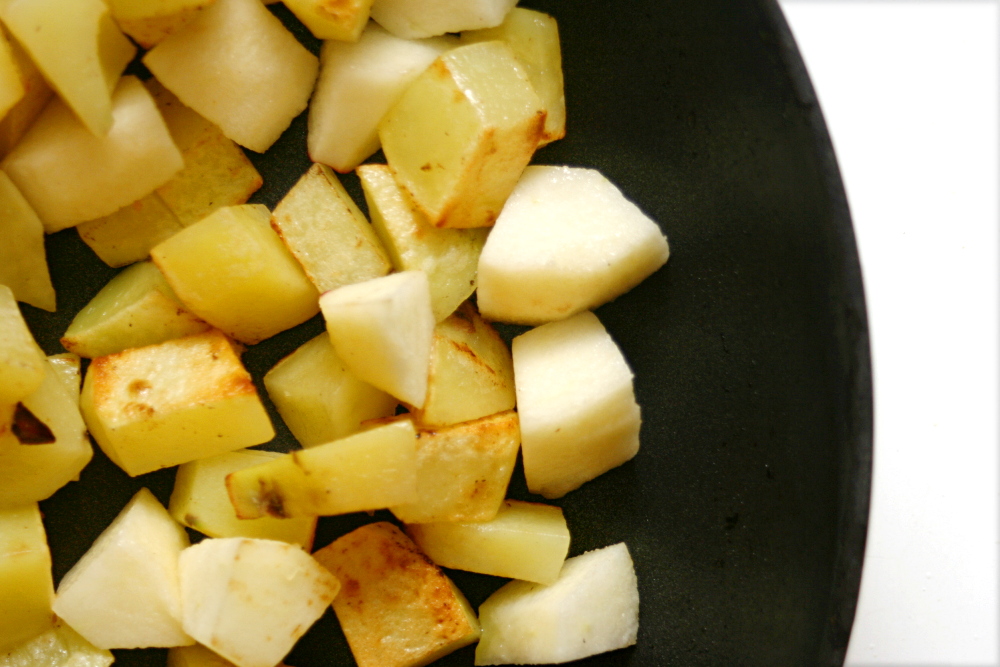
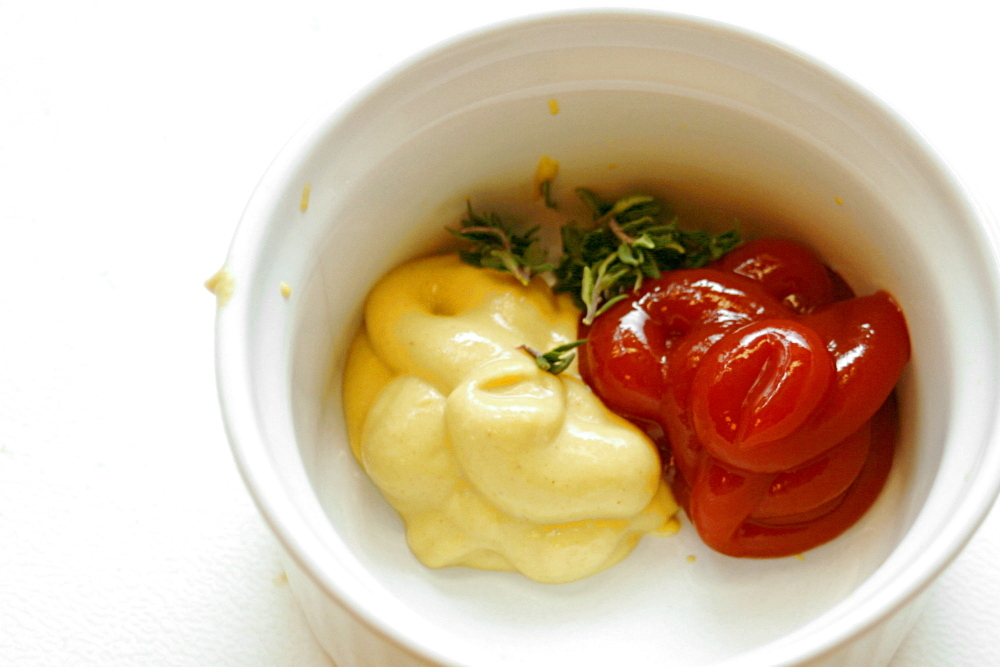
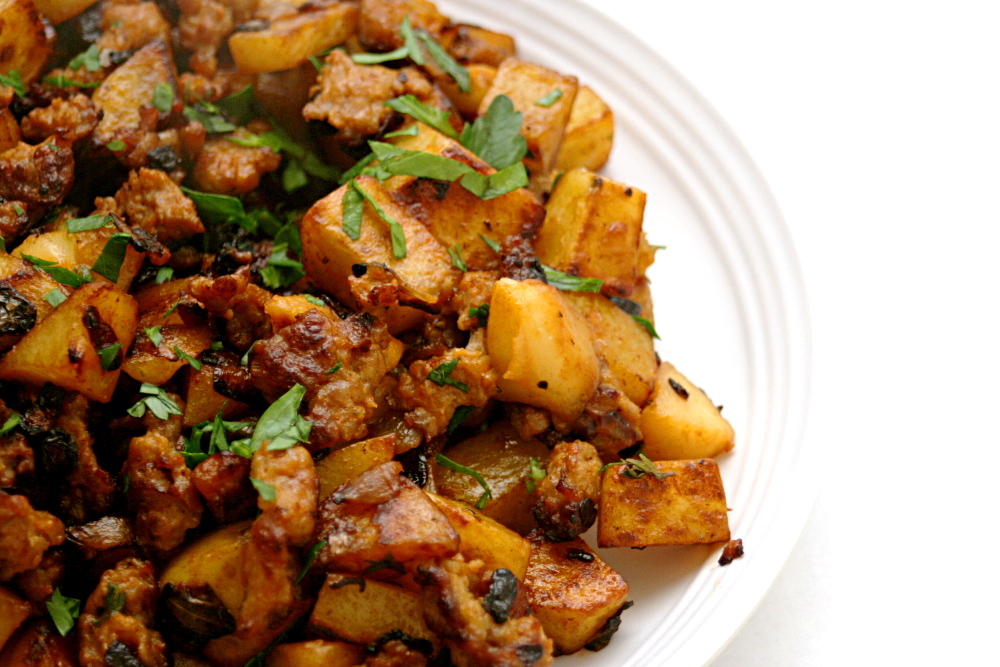
Oh well, at least I was right that potatoes were a good fit for this. The sausage and onion are sautéed together until browned (or until the onions are black if you’re me and Mark), then the potatoes and apples are sautéed until browned and cooked through. Then everything is mixed and a simple sauce of ketchup, mustard, and thyme is stirred in. I raised my eyebrows at the ketchup and mustard, but they gave the hash nice tang and spice.

copy-of-img_0468

The whole thing was very good, and pretty easy. I think there’s a lot of room for adaptations too, if you do happen to be the creative type. I was thinking that squash would be a nice addition, or maybe a poached egg served on top.  Or bacon instead of sausage.  Things to think about for next time.

copy-of-img_0472

One year ago: Lemon Squares

Sausage and Apple Hash (from Mark’s No Special Effects)

2 tablespoons extra-virgin olive oil
1 large yellow onion, chopped
1 pound Italian sausage (bulk, or links with casings removed)
1½ pounds russet potatoes, cubed
1 large apple, such as Rome or Braeburn, peeled and cut into 1/2-inch dice
2 tablespoons tomato ketchup
2 tablespoon Dijon mustard
2 tablespoons water
½ teaspoon dried thyme
2 tablespoons chopped fresh flat-leaf parsley

Heat half the oil in a large skillet over medium-high heat. When the oil is hot, add the sausage and onion and cook, breaking up the sausage, until the sausage is golden brown, about 8-10 minutes. Park the sausage and onions into a separate dish.

Add the remaining oil in the skillet, then add the apples and potatoes. Cook until the apples are golden brown, about 10-12 minutes. (I covered the pan for a bit in the beginning because I was worried about the potatoes cooking through.) Meanwhile, mix the ketchup, mustard, thyme, parsley, and water in a small bowl. Return the sausage and onions to the skillet and stir in the ketchup mixture. Cook until the hash has browned nicely, about another 5 minutes. Season to taste with more salt and pepper before serving.

chocolate truffles

copy-of-img_1354

You know how at the end of every month, you think to yourself some variation of “December already?! What happened to November?!” I have a trick for making the days of the month crawl by: make a commitment to write a blog entry every day for a month. Instead, you’ll be thinking “only a third of the way done? There’s still 20 more blog entries to write!” and “yes, only four more days!”

copy-of-img_1330

In all honesty though, this was a valuable experience. My primary goal of cleaning out my “To Blog” folder was achieved. But, not because everything got put into the blog. On the contrary, a lot of recipes were moved into the “Probably Not” folder. If I couldn’t find anything to say about a recipe after considering it every day for a month, it’s time to admit that it isn’t worth writing about.

copy-of-img_1334

I started the month with a recipe that’s languished on my hard drive for several months before I finally blogged about it, and I’ll end it the same way. I first made Robert Linxe’s truffles in February. They were good, but what really caught my eye about the recipe was his insistence that it be made with Valrhona chocolate. I’m all about using the best ingredients that are available and affordable, but generally I think the choice of ingredients should be left up to the baker. Insisting on a certain expensive hard-to-find brand of chocolate seems unnecessarily snobby.

copy-of-copy-of-img_1328

So I set out to determine how big a factor chocolate quality really is. My plan was to get four chocolates of widely different quality and compare truffles made with each. I was thinking of using Baker’s Chocolate, Ghirardelli, Scharffen Berger, and Valrhona, or possibly using Hershey’s or Nestlé instead of the Sharffenberger. That plan did not work out. I needed to keep the bitterness of each chocolate approximately the same to make sure we were comparing chocolate brand instead of level of sweetness. That limited my options, and I ended up with the following brands – El Rey, Ghirardelli, Nestlé, Scharffen Berger. I was too lazy to make the extra trip to Williams-Sonoma for Valrhona.

copy-of-img_1335

What I found was that the favorite brand was largely a matter of personal preference. I had seven people tasting the truffles, and we discussed the differences between each as we tasted. I also found that it’s much easier to detect small differences in flavor when you’re focused completely on the food. As soon as my family decided we were done tasting and ready to just eat, I stopped paying attention to the subtle flavors of the chocolates.

copy-of-img_1358

Scharffen Berger had a fruity taste and was the favorite of my mom and brother. Ghirardelli was a little metallic at first and was more bitter than Scharffen Berger. The Nestle was similar to Ghirardelli but with a hint of fruit and a little waxiness. It was the favorite of my dad and sister. El Rey was a bit grainy and was more bitter than the others. It was Dave’s favorite, but my brother didn’t like it much. (I didn’t record my favorite or my brother-in-law’s, and this was months ago so I don’t remember. D’oh!)

Really, I think you could use any chocolate that you like. If Valrhona is your favorite, go for it, but you’ll make some delicious truffles with good ol’ Ghirardelli, or even a fancy bar of Nestlé.

copy-of-img_1365

Robert Linxe’s Chocolate Truffles (from Gourmet via Smitten Kitchen)

Makes about 60 truffles (Linxe says not to double the recipe)

I have not found that this makes anywhere near 60 truffles. I tend to make the truffles small, about ¾-inch diameter, and I only get about 30 with this recipe. I noticed some of the reviewers on epicurious had a similar result.

I skipped the 3 ounces of chocolate for the pre-cocoa coating, because I didn’t want to mix the chocolates, and I was only making ¼ of each recipe, and that would have meant I needed melt ¾ ounces of chocolate, and that sounded like a hassle.

11 ounces Valrhona chocolate (56% cacao)
⅔ cup heavy cream
Valrhona cocoa powder for dusting

Finely chop 8 ounces of the chocolate and put in a bowl.

Bring heavy cream to a boil in a small heavy saucepan. Make sure your pan is small, so you’ll lose the least amount of cream to evaporation, and heavy, which will keep the cream from scorching. Linxe boils his cream three times – he believes that makes the ganache last longer. If you do this, compensate for the extra evaporation by starting with a little more cream.

Pour the cream over the chocolate, mashing any big pieces with a wooden spoon.

Then stir with a whisk in concentric circles (don’t beat or you’ll incorporate air), starting in the center and working your way to the edge, until the ganache is smooth.

Let stand at room temperature until thick enough to hold a shape, about 1 hour, then, using a pastry bag with a 3/8-inch opening or tip, pipe into mounds (about ¾ inch high and 1 inch wide) on parchment-lined baking sheets. When piping, finish off each mound with a flick of the wrist to soften and angle the point tip. Freeze until firm, about 15 minutes.

Meanwhile, melt 3 more ounces of the same Valrhona and smear some on a gloved hand. Gently rub each chilled truffle to coat lightly with chocolate. The secret to a delicate coating of chocolate is to roll each truffle in a smear of melted chocolate in your hand. Linxe always uses gloves.

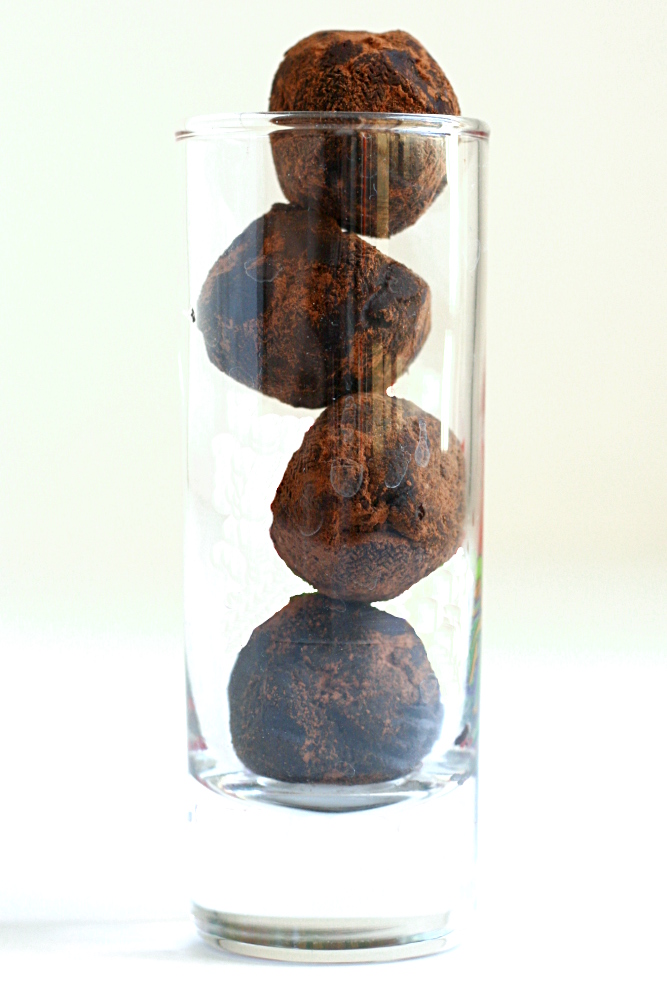
Toss the truffles in unsweetened Valrhona cocoa powder so they look like their namesakes, freshly dug from the earth. A fork is the best tool for tossing truffles in cacao. Shake truffles in a sieve to eliminate excess cacao.

Store truffles in the refrigerator.

roasted brussels sprouts

copy-of-img_9499

I know that diets don’t work – that it’s all about getting into a healthy routine and establishing healthy habits. But I find that sometimes the healthy routine could use a little kickstart. And I like to name the kickstart.  A few years ago, I undertook Pudge Eradication. I spent a few months counting calories and increasing my workouts, eradicated some pudge, and kept up the healthy eating routine for a few years. Until I moved and was unemployed for the better part of a year, and then my eating habits went downhill fast. Now that I’m working part-time, I find that I eat so much healthier on the days that I work than I do on the days at home. I’ve decided that it’s time for another healthy routine kickstart. I shall be calling it “Stop Being a Fatass, You Idiot.”

copy-of-img_9484

And so I roasted my Brussels sprouts instead of braising them in cream. It really isn’t a big sacrifice – while they’re absolutely amazing braised in cream, they’re fantastic roasted as well.

copy-of-img_9488

Since Ina’s recipe for roasted carrots was so simple and great, I figured I’d stick with her for roasted Brussels as well. The second time I made these, I had larger sprouts, so I cut them in half. I think I like them halved better – there’s a flat side that browns nicely because it lies right on the pan.

copy-of-img_9494

And hey, just a little olive oil to make some delicious vegetables, served alongside Deb’s mustard roasted potatoes topped with an egg. It’s not super-duper crazy healthy, but the goal is easy – just don’t be a fatass. This qualifies.

copy-of-img_9505

Roasted Brussels Sprouts (adapted slightly from Ina Garten)

Serves 6

1½ pounds Brussels sprouts, halved if large
3 tablespoons good olive oil
¾ teaspoon kosher salt
½ teaspoon freshly ground black pepper

Preheat oven to 400F.

Cut off the ends of the Brussels sprouts and pull off any yellow outer leaves. Mix them in a bowl with the olive oil, salt, and pepper. Transfer them to a sheet pan and roast for 35 to 40 minutes, until crisp outside and tender inside. Shake the pan from time to time to brown the Brussels sprouts evenly. Sprinkle with more kosher salt and serve hot.

chanterelle salad with speck and poached eggs

copy-of-img_9413

I don’t know if there could be a less appetizing name for a more delicious food than there is for Speck. When I hear Speck, I think of Star Trek or maybe dust particles – I do not think of spicy smoked ham.

copy-of-img_9404

I almost dismissed the Speck in this recipe entirely. I figured that proscuitto or pancetta, both of which I can get at my regular grocery store, would make a convenient substitute. But then I was right near an Italian butcher, and it was no big thing to go in and grab some Speck. I’m glad I did, because I love the stuff. I wish I’d had some proscuitto to taste alongside it, because I feel like I liked the Speck more than I normally do proscuitto, but I haven’t eaten enough proscuitto to really remember.

copy-of-img_9390

After my first uncertain egg on salad experience, I seem to have become somewhat enamored with the idea. In this salad, I really enjoyed the warm savory egg on the tart dressed greens. The Speck, sautéed until crispy, was of course delicious. I wasn’t crazy about the cooked chanterelles in the salad – they seemed a little too chewy to fit in with the other ingredients. Dave really liked them though.

copy-of-img_9393

I didn’t follow the recipe exactly – I had just made fresh bread, so I skipped the toasting step. I also made a different dressing. As if one hard-to-find ingredient in the recipe wasn’t enough, you’re also supposed to reduce Vin Santo, an Italian dessert wine, for the vinaigrette, and mix it with walnut oil. I made a simple balsamic vinaigrette and was happy with it.

copy-of-img_9409

Notwithstanding the chewy mushrooms, this salad was very good. This was a nice, light meal that left me plenty of room to eat some of the chocolate chip cookies that I have coming out the wazoo.

copy-of-img_9411

Warm Chanterelle Salad with Speck and Poached Eggs (from Bon Apetit December 2008 )

6 tablespoons olive oil, divided
4 fresh thyme sprigs
3 garlic cloves, divided
1 pound fresh chanterelles, cleaned, cut into ⅓-inch thick slices
nonstick cooking spray
4 ounces ⅛-inch-thick slices Speck, rind trimmed
6 ¾-inch-thick slices ciabatta or pain rustique
½ teaspoon salt
6 large eggs
2 small heads butter lettuce, coarsely torn (about 11 cups)
6 cups mâche or arugula (3½ ounces)
Vinaigrette

Preheat oven to 500F. Combine 4 tablespoons oil and thyme in large bowl. Press 2 garlic cloves into oil with garlic press; whisk to blend. Add chanterelles and toss to coat. Sprinkle with salt and pepper.

Spray rimmed baking sheet with nonstick spray. Spread mushroom mixture on sheet. Roast mushrooms until tender, stirring occasionally, about 6 minutes.

Cut Speck crosswise into ¼-inch-thick strips. Heat 1 tablespoon oil in small skillet over medium-high heat. Add Speck; sauté until crisp, 4 minutes. Drain on paper towels.

Toast ciabatta slices until golden; rub with remaining garlic clove. Drizzle with 1 tablespoon oil. Halve each slice lengthwise.

Fill large skillet with water and bring to boil. Add ½ teaspoon salt. Crack eggs, 1 at a time, into custard cup, then slide egg from cup into water; reduce heat to low. Poach eggs until whites are set and yolks are softly set, 3 to 4 minutes.

Meanwhile, toss lettuce and mâche with enough vinaigrette to coat. Mound salad on 6 plates. Using slotted spoon, remove eggs from water, dab with paper towels to absorb excess liquid, and place atop salads. Garnish with mushrooms and Speck. Place ciabatta fingers around salad and serve immediately.

Balsamic Vinaigrette (from Cooks Illustrated)

Serves 4

¼ cup balsamic vinegar
2 tablespoons sherry vinegar , or wine vinegar
½ teaspoon table salt
¼ teaspoon ground black pepper
⅔ cup olive oil

Whisk first 2 ingredients with salt and pepper in a small bowl. Gradually whisk in oil, so the vinaigrette emulsifies. Serve.

rice pudding

copy-of-img_8780

I thought Tuesdays with Dorie was going to mutiny this week. Isabelle chose rice pudding for us to make, but the recipe has a mistake in it regarding the cooking time, and Dorie was traveling without an internet connection and wasn’t able to give us a heads up until many of us had already had frustrating experiences.

copy-of-img_8720

Even worse, the recipe was suspicious from the beginning. Dorie uses just ¼ cup of rice to thicken 3¼ cups of milk, far less rice than most rice pudding recipes use. Plus, the instructions actually say that the pudding will be thin when it’s taken off of the stove, but it’ll thicken once it chills. I don’t think Dorie meant that it should be quite this thin.

copy-of-img_8674

Unsurprisingly, my “pudding” never thickened. I left it in the fridge for two days, too irritated to think about it, until I realized that I could just put it back on the stove and try cooking it longer and maybe it would thicken. And eventually it did. Once Dorie was able to let the group know about the typo, I realized that the cooking time was indeed supposed to be longer than what the book says.

copy-of-img_8713

In the end, the rice pudding was pretty good. I wouldn’t say that it was any better or worse than the only other time I’ve had rice pudding. At least there was chocolate this time.  Rice pudding just isn’t really my thing though. I kept thinking to myself, “why is there rice in my pudding?” Dave wondered why anyone would eat rice pudding when they could be eating tapioca pudding. He has a good point.

Isabelle has posted Dorie’s rice pudding recipe. Keep in mind that you’ll need to cook it for 55 minutes or so, until the texture is pudding-like. The ratio of rice to milk does work.

copy-of-img_8785

baked eggs with spinach and mushrooms

copy-of-img_8611

There’s nothing not to like about this recipe. It’s eggs-on-stuff, and I love eggs-on-stuff, especially when the stuff is onions, mushrooms, and spinach. And then it’s sprinkled with parmesan. What a perfect flavor combination.

copy-of-img_8608

You know the only thing this recipe is lacking? Carbs. Ah, starch. Carbs in any form would be good, but I’m thinking especially of either adding cubed parboiled potatoes with the onions, or serving the whole thing on top of toast. Or hash browns.

And that gives me an excuse to make this again…soon.

copy-of-img_8610

Baked Eggs with Spinach and Mushrooms (from Gourmet June 2004 via Smitten Kitchen)

Serves 4

10 ounces baby spinach leaves
¼ cup finely chopped onion
1 garlic clove, finely chopped
2 tablespoons unsalted butter
5 ounces mushrooms, thinly sliced (2 cups)
⅓ cup heavy cream
¼ teaspoon salt
¼ teaspoon black pepper
⅛ teaspoon freshly grated nutmeg
4 large eggs
2 tablespoons finely grated parmesan

Put oven rack in upper third of oven and preheat oven to 450F.

Bring ½ inch water to a boil in a 10- to 12-inch ovenproof heavy skillet (not cast-iron), then add half of spinach and cook, turning with tongs, until wilted, about 30 seconds. Add remaining spinach and wilt in same manner, then cook, covered, over moderately high heat until spinach is tender, about 2 minutes. Drain in a colander and cool under cold running water. Gently squeeze handfuls of spinach to remove as much liquid as possible, then coarsely chop.

Wipe skillet dry, then cook onion and garlic in butter over moderately low heat, stirring, until softened, 2 to 3 minutes. Add mushrooms and increase heat to moderate, then cook, stirring, until mushrooms are softened and have exuded liquid, about 3 minutes. Stir in cream, salt, pepper, nutmeg, and chopped spinach and bring to a simmer. Remove skillet from heat and make 4 large indentations in spinach mixture. Break an egg into each indentation and bake, uncovered, until egg whites are set but yolks are still runny, 7 to 10 minutes. Lightly season eggs with salt and pepper, then sprinkle with cheese.

mashed potatoes

copy-of-copy-of-img_8991

I have a pet peeve about mashed potatoes. I hate when they’re boiled after they’re peeled. It drives me crazy when people peel them, slice them really thin, and then boil them. I think they absorb so much water and then, after being mashed, they just can’t get their flavor back.

Clearly, based on how many of their recipes are my favorites, I’m a big fan of Cooks Illustrated, and their recipe for mashed potatoes was the start of that. My friend had checked The New Best Recipe out of the library, and I was at her place flipping through it when I saw the recipe for mashed potatoes, which called for the potatoes to be boiled in their skins. I loved the idea – how it maximizes the flavor of the potatoes. But, I hated peeling hot just-boiled potatoes.

copy-of-img_8983

This new recipe improves upon that idea by steaming the potatoes – so it’s just the tiniest bit more effort (because the potatoes need to be rinsed halfway through steaming) as a normal mashed potato recipe, but it makes such a difference! Seriously, I tasted these potatoes, before butter or salt or any of that goodness was added, and the flavor was – it was pure potato! Exactly what you want!

Adding melted butter first, before the liquid, coats the starch with fat so it can’t absorb the liquid, and liquid absorption is what leads to gluey mashed potatoes. Heating the milk before adding it to the potatoes just makes good sense – it keeps the potatoes from getting cold.

I know most people don’t use a recipe when they make mashed potatoes. But they should! Don’t you want amazing mashed potatoes every single time you make them? And all you have to do to get there is steam the potatoes instead of boiling them, and add melted butter before adding liquid. There’s no excuses!

copy-of-img_8989

Fluffy Mashed Potatoes (from Cooks Illustrated)

CI note: This recipe works best with either a metal colander that sits easily in a Dutch oven or a large pasta pot with a steamer insert. To prevent excess evaporation, it is important for the lid to fit as snugly as possible over the colander or steamer. A steamer basket will work, but you will have to transfer the hot potatoes out of the basket to rinse them off halfway through cooking. For the lightest, fluffiest texture, use a ricer. A food mill is the next best alternative. Russets and white potatoes will work in this recipe, but avoid red-skinned potatoes.

Bridget note: I don’t have a metal colander or a pasta pot, but a cheapo steamer seems to work just fine. I also don’t have a ricer or a food mill, but I actually like the texture that a potato masher provides. Really, the key is the steaming.

2 pounds Yukon Gold potatoes (4 to 6 medium), peeled, cut into 1-inch chunks, rinsed well, and drained
4 tablespoons unsalted butter, melted
table salt
⅔ cup whole milk, warm
ground black pepper

1. Place metal colander or steamer insert in large pot or Dutch oven. Add enough water for it to barely reach bottom of colander. Turn heat to high and bring water to boil. Add potatoes, cover, and reduce heat to medium-high. Cook potatoes 10 minutes. Transfer colander to sink and rinse potatoes under cold water until no longer hot, 1 to 2 minutes. Return colander and potatoes to pot, cover, and continue to cook until potatoes are soft and tip of paring knife inserted into potato meets no resistance, 10 to 15 minutes longer. Pour off water from Dutch oven.

2. Set ricer or food mill over now-empty pot. Working in batches, transfer potatoes to hopper of ricer or food mill and process, removing any potatoes stuck to bottom. Using rubber spatula, stir in melted butter and ½ teaspoon salt until incorporated. Stir in warm milk until incorporated. Season to taste with salt and pepper; serve immediately.

asian peanut dip

copy-of-copy-of-img_80881

I keep my eye out for vegetables dips that aren’t ridiculously unhealthy. The thing is, when I serve some sort of meat that’s finger food, I don’t like to serve a vegetable that requires silverware. The perfect accompaniment is crudité (snobby way of saying vegetables eaten as a snack) with a dip, but most dips are nothing more than seasoned mayonnaise and sour cream. Not that I don’t love mayonnaise and sour cream, but I don’t always want to think of the dip as a treat.

copy-of-img_8078

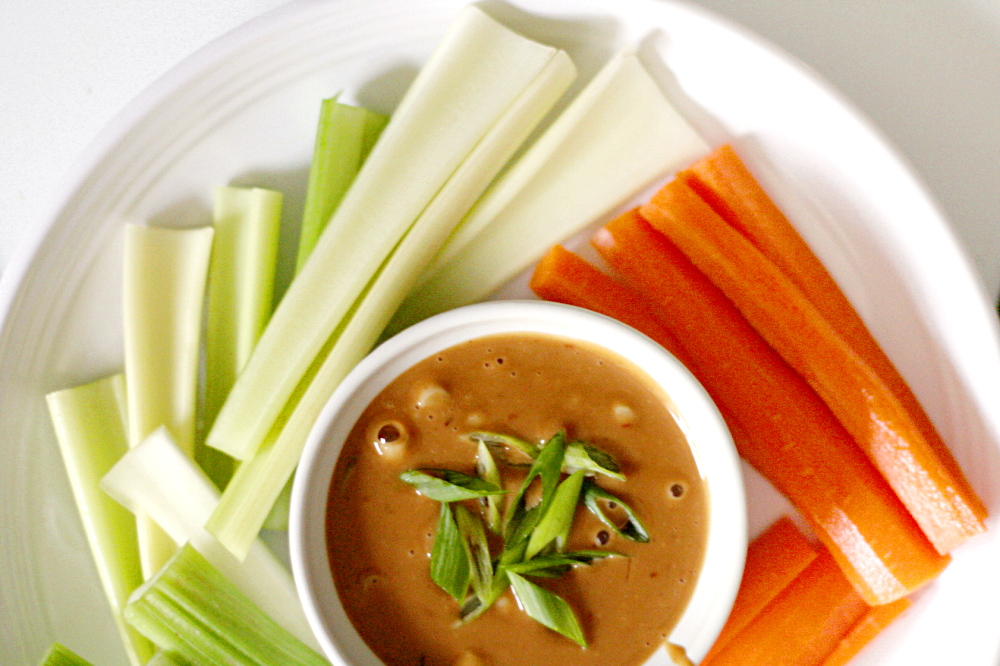
I’ve found one vegetable dip that’s a little healthier, and now I have another one. When struggling to figure out what to serve with the shrimp tempura recipe I was testing for Cooks Illustrated, I remembered that my friend had recently made this great spicy peanut dip on a camping trip. She got the recipe from Backpacker magazine, but when I searched on the internet, I saw that there were many similar recipes, most just as easy as the one we had the on the trip. There were slight variations between each, and I decided to stick with the Backpacker magazine one because it uses rice vinegar instead of lime juice for its acidity, which I’d really enjoyed.

copy-of-img_8020

(Clearly at the time I didn’t realize I’d blog about this at some point, or I would have taken a more flattering/interesting photo.)

The recipe, designed as it is to be made outdoors on a single-burner backpacking stove, is simple. I’ve tweaked the instructions just slightly, to bring the most flavor out of the red pepper and to tame the bite of the garlic. I also increased the seasoning and decreased the amount of red pepper flakes. It seemed far spicier when I made it at home than it did on the trip, maybe because I heated the flakes in oil first. And of course we didn’t add the scallions when we were camping – who brings scallions on a multi-day canoeing trip?

copy-of-img_8080

Usually, we adapt our favorite meals to be appropriate outdoors. I think this is the first time I’ve adapted a backpacking recipe for home, but this is a great recipe to have. I know peanut butter isn’t exactly a low-fat ingredient, but it’s a heck of a lot healthier than mayonnaise or sour cream, and this dip is just as good as more decadent vegetable dips.

copy-of-img_8086

Asian Peanut Dip (adapted from Backpacker Magazine)

Serves 4

1 teaspoon canola or vegetable oil
1 garlic clove, minced
½ teaspoon red pepper flakes
½ cup water
½ cup peanut butter, creamy or chunky
4 tablespoons soy sauce
2 tablespoons rice vinegar
1 scallion, sliced
salt to taste

In a small saucepan over medium heat, heat oil, garlic, and red pepper flakes. Cook, stirring frequently, until garlic is fragrant, 1-2 minutes. Add water, increase heat to high, and bring to boil. When water boils, remove pan from heat and add peanut butter, stirring until smooth. Stir in remaining ingredients (saving some scallion slices for garnish, if desired). Return to heat and continue stirring for 2-4 minutes until mixture is thickened. Serve warm or cold with crackers or crudité.