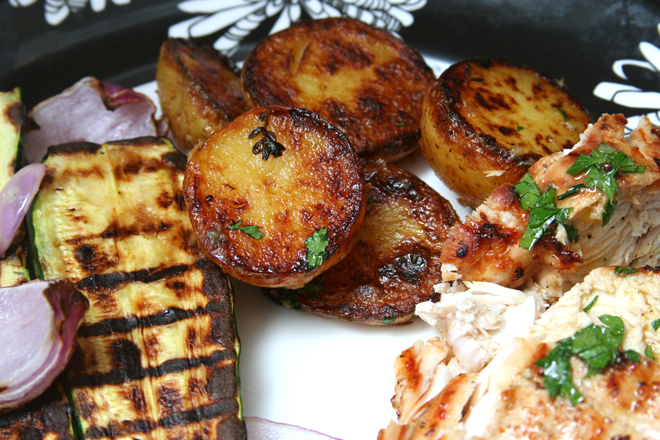
beef barbacoa

barbacoa 8

I am going through a taco phase, and it might have started out with these. Well, mostly I just really like tacos, because who doesn’t, but things have ramped up in recent weeks. We’ve had all sorts of tasty fillings recently, but it’s hard to beat barbacoa.

barbacoa 2

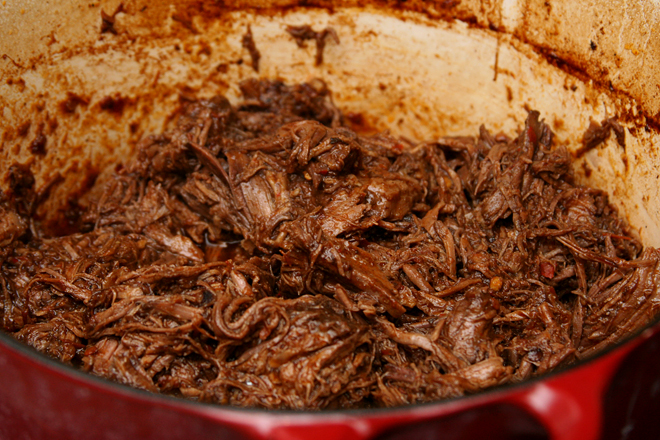
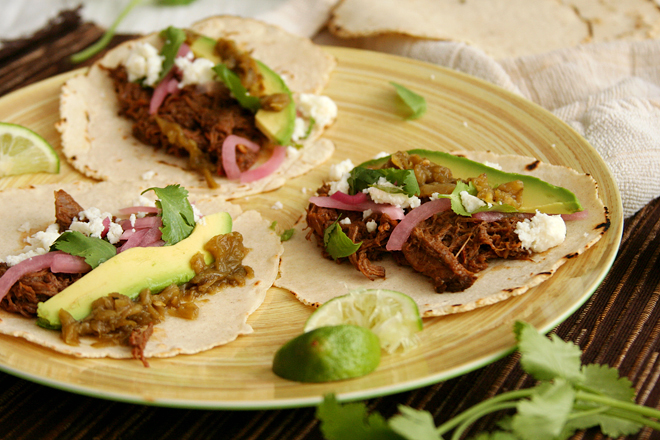
Barbacoa has so many satisfying flavors – it’s a little sweet, a little sour with a squeeze of lime juice, plenty meaty of course. It definitely has a spicy kick. It’s coated in a rich layer of sauce that delivers loads of flavor, with nothing left behind in the pot.

barbacoa 3

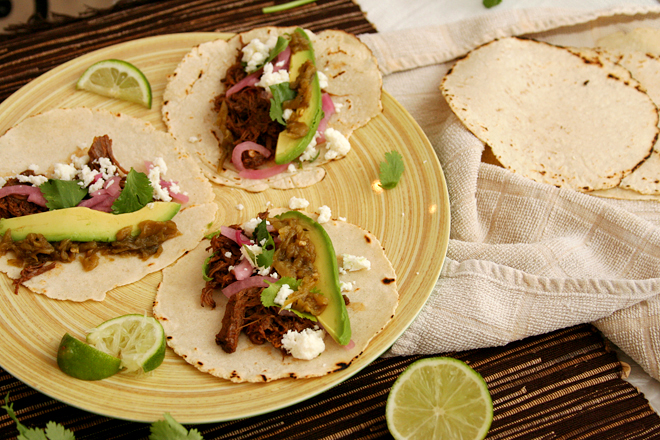
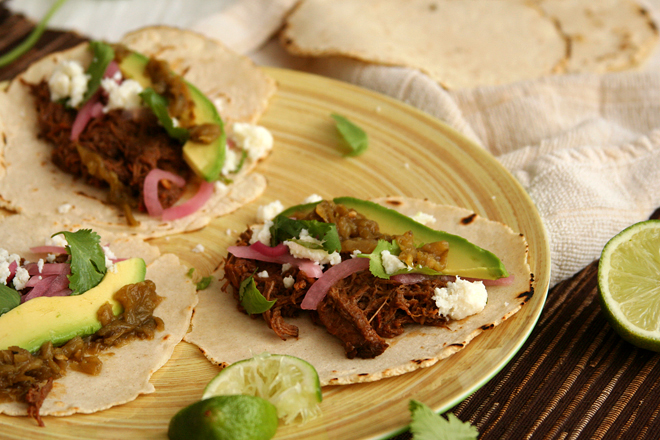
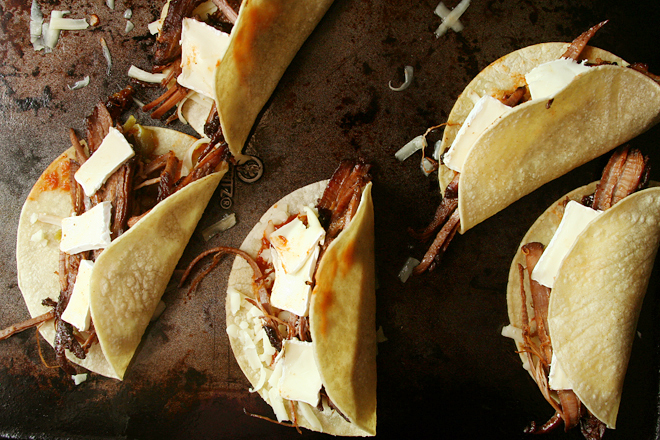
It only gets better with toppings. Avocado is arguably my favorite part of most tacos (not these; the barbacoa wins by a mile), and queso fresco is the perfect salty fresh compliment to the rich meat. Those two and a wedge of lime are my only requirements, but pickled onions and a smattering of cilantro are nice too.

barbacoa 4

This isn’t a hard recipe, although it’s far from fast. The long ingredient list looks worse than it is. There’s a lot of spices, chiles, and condiments, but nothing other than an onion and some garlic require a cutting board. Not even the beef needs to be sliced or cut into cubes. What I thought was going to be a significant project took me about half an hour.

barbacoa 6

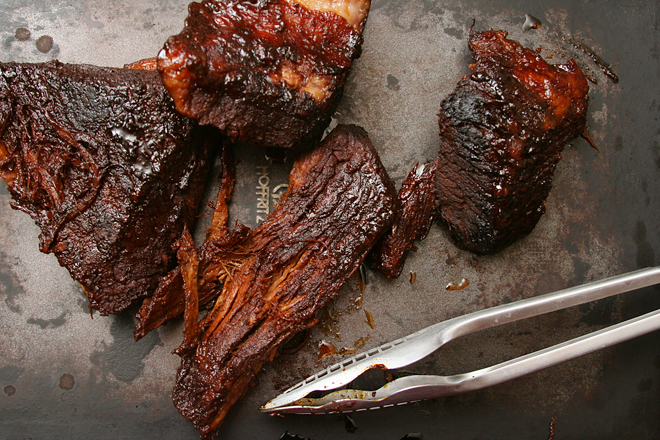
Of course, you don’t actually get to eat until almost 5 hours layer, after the beef has become tender and rich and the broth has been reduced down to a sauce. It’s getting warm out and you might not want to leave your oven on for four hours while the beef cooks, but the result is worth some air-conditioning. Plus, it reheats great, maybe even better than it was the first day. I have to admit that I haven’t really been in a taco phase, just a barbacoa phase. I’ve got one more batch stored in the freezer, and I can’t wait.

barbacoa 9

One year ago: California Roll Burgers
Two years ago: Basic Coleslaw
Three years ago: Quinoa Tabbouleh
Four years ago: Fresh Strawberry Scones
Five years ago: Ricotta Spinach and Tofu Ravioli

Printer Friendly Recipe
Beef Barbacoa
(very slightly adapted from The Food Lab on Serious Eats)

About 6 servings

I think the crockpot is a definite possibility here, but it’ll take you a lot longer to reduce the liquid to a sauce after the cooking time.  You’ll still need to brown the oxtails and onions beforehand, because that adds tons of flavor.  That’s an easy tradeoff to save 4 hours of oven use when the weather’s warm!

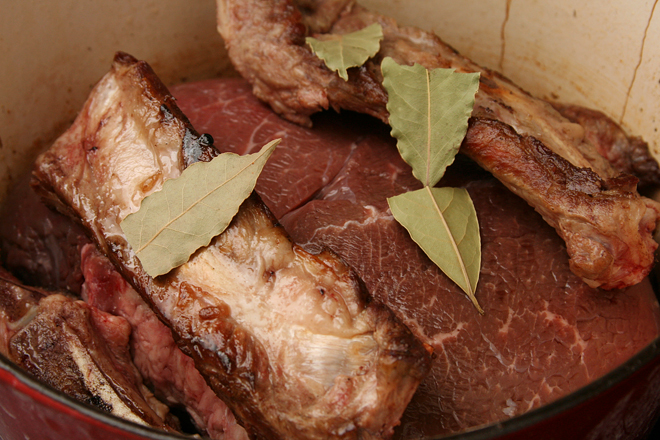
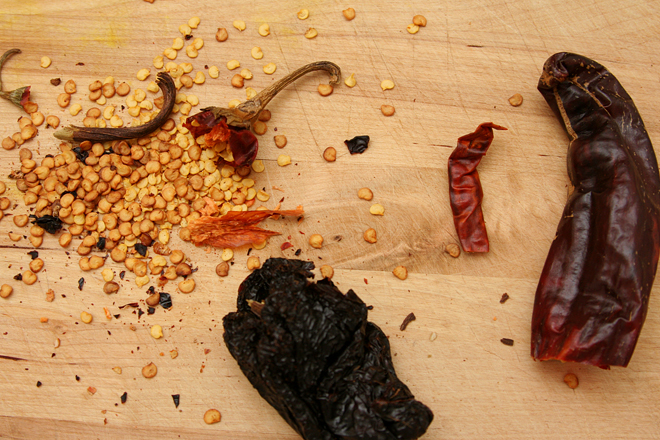
If you can’t find these exact types of chiles, any combination of mild, fruity and bright-tasting chiles will do, such as guajillo or Colorado.  I used a New Mexico, an ancho, and an arbol chile.  I couldn’t find oxtails either, so I used beef ribs.

1 whole dried New Mexico, costeño, or choricero chili, seeds and stem removed
1 whole chile ancho or pasilla, seeds and stem removed
1 whole chile negro, seeds and stem removed
4 cups low-sodium chicken stock, divided
3 tablespoons vegetable or canola oil, divided
1 pound oxtails
1 small onion, diced
6 medium cloves garlic, peeled and smashed
2 teaspoons ground cumin
½ teaspoon ground cloves
2 teaspoons dried oregano
4 chipotle chiles packed in adobo, chopped, with 2 tablespoons adobo sauce
¼ cup apple cider vinegar
2 teaspoons fish sauce
1 whole chuck roast (about 4 pounds)
Kosher salt and freshly ground black pepper
2 whole bay leaves
Kosher salt
Warm corn tortillas, avocados, queso fresco, pickled onions, cilantro, salsa, limes, and other condiments for serving

1. Adjust an oven rack to the lower-middle position and preheat the oven to 275 degrees. Place the dried chiles in the bottom of a large Dutch oven and heat over high heat. Cook, turning the chiles with tongs occasionally, until fragrant and toasted, about 3 minutes. Transfer the chiles to a small saucepan and cover with 2 cups of chicken broth. Bring to a boil over high heat, reduce to a simmer, and cook until chiles are completely tender, about 15 minutes. Set aside.

2. Meanwhile, heat 1 tablespoon of oil in the now-empty Dutch oven over high heat until shimmering. Cook the oxtails until they’re well-browned on all sides, about 8 minutes total. Remove the oxtails and set aside. Reduce the heat to medium.

3. Add the remaining two tablespoons oil and heat along with the onions and garlic, and cook, stirring frequently, until deep brown and just starting to burn, about 10 minutes. Add the cumin, cloves, and oregano, and cook, stirring constantly until fragrant, about 30 seconds. Add the chipotle chiles, vinegar, and remaining chicken broth. Scrape up the browned bits from the bottom of the pan, simmer until reduced by about half, then transfer the entire contents to the jar of a blender.

4. Add the soaked chiles and their liquid to the blender along with the fish sauce. Start the blender on low (be careful of blowups!) and slowly increase the speed to high. Puree until smooth, about 1 minute. Set aside.

5. Place the beef roast in the Dutch oven. Add the browned oxtails, 2 teaspoons salt, 1 teaspoon black pepper, the bay leaves, and the sauce. Bring to a boil over high heat. Place the lid on the pot, slightly cracked, then transfer to the oven. Cook, turning the beef occasionally, until completely tender and a cake tester or metal skewer inserted into the meat shows little to no resistance, about 4 hours. Discard the bay leaves and oxtails (meat from oxtails can be eaten if desired). Transfer the chuck to a large plate. Return the Dutch oven to the stovetop, and cook, stirring frequently, over medium-high heat until the liquid is reduced to about 1½ cups, about 5 minutes.

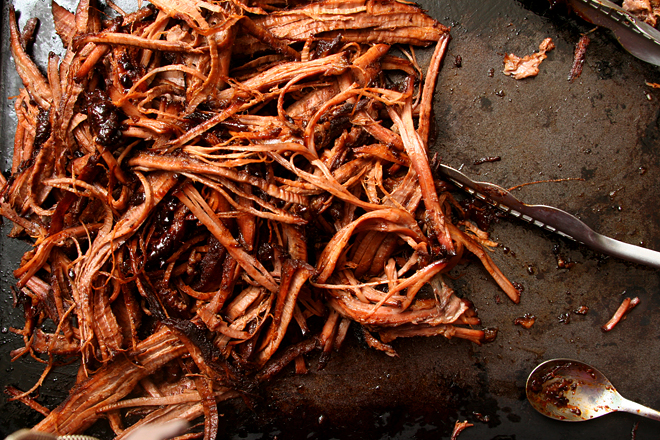
6. Beef can be shredded and served immediately or transferred to a sealed container along with the liquid and refrigerate up to five days. When ready to serve, shred into large chunks with your fingers or two forks. Return the beef to a pot along with the sauce. Bring to a simmer and cook, gently stirring and folding until the beef is hot, tender, and coated in sauce. Season to taste with salt. Serve immediately, piling the beef into warm corn tortillas with onions, queso fresco, avocados, cilantro, salsa, limes, or other condiments as desired.
barbacoa 10

braised potatoes

braised potatoes 5

I don’t live in a world (okay, a town) where there are duck fat fries. People are always raving about them – except for the few who claim they’re not all that – but my opportunities to try duck fat anything have been limited. So I do what I usually do when I can’t find a restaurant to serve me something I want to try: I make it myself.
duck fat potatoes 3

Not that I set out to cook with duck fat; mostly I just stumbled onto a container of it at Whole Foods on my last visit to see my parents in Albuquerque. Also I didn’t exactly make fries, but close enough.

braised potatoes 1

On my first attempt to discover what makes potatoes cooked in duck fat so popular, I simply melted a half-inch or so of the fat in a nonstick pan, added the potatoes cut-side down, and let them cook until they were tender inside and nicely browned on the flat edges. They were just fine, but I didn’t see what the fuss was about.

braised potatoes 2

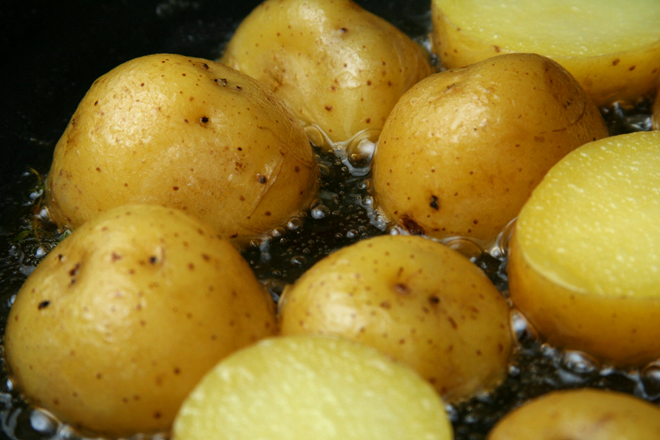
I was planning to give it another try one evening – after all, I had a container of duck fat with no other plans for it – when, a few hours before dinner, I read about Cook’s Illustrated’s braised new potato recipe in their latest issue. In this technique, the potatoes are cooked in a mixture of water, seasonings, and fat (the original recipe uses butter). The water tenderizes the potatoes, and when it evaporates, the potatoes brown in the fat.

braised potatoes 3

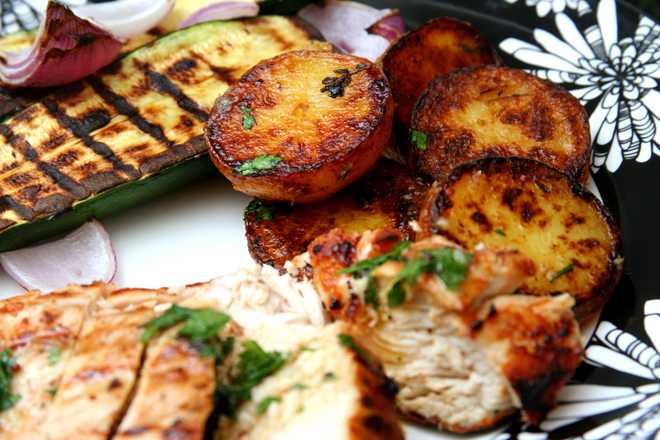
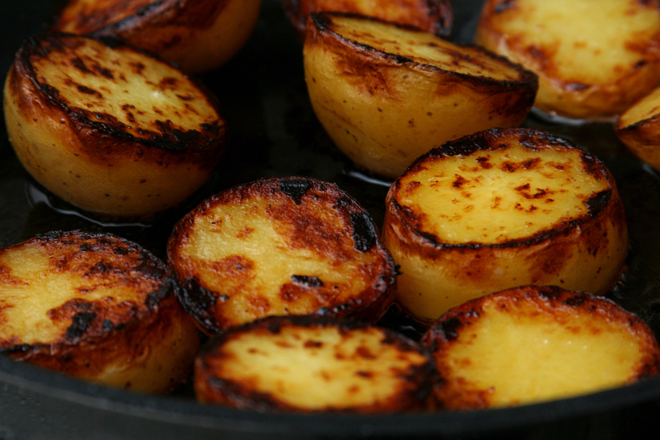
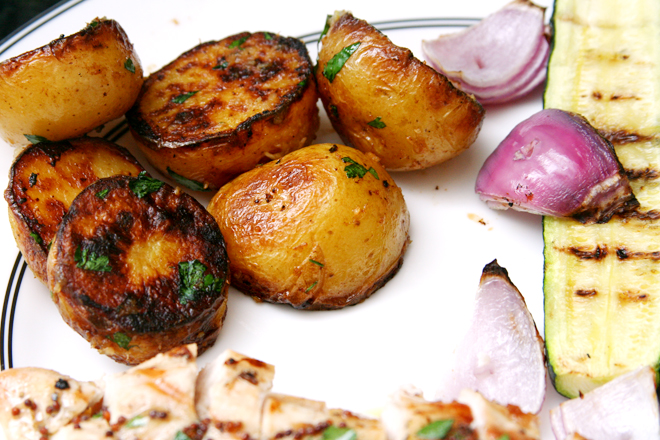
These are now a contender for my favorite potatoes ever. I still haven’t tried it with butter, which I’m sure is delicious, but the duck fat makes the kitchen smell like the best of Thanksgiving.  The inside of the potatoes are soft and creamy, and the flat edge is crisp and browned.  I see what all the fuss is about now.

braised potatoes 4

One year ago: California Roll Burgers
Two years ago: Lemon Bar (comparison of 3 recipes)
Three years ago: Grilled Artichokes
Four years ago: Fresh Strawberry Scones
Five years ago: Asparagus and Arugula Salad with Cannellini Beans and Balsamic Vinegar

Printer Friendly Recipe
Braised Red Potatoes with Lemon (from Cooks Illustrated)

Did I mention that they’re almost entirely hands-off?

1½ pounds small red potatoes, unpeeled, halved
2 cups water
3 tablespoons unsalted butter
3 garlic cloves, peeled
3 sprigs fresh thyme
¾ teaspoon salt
1 teaspoon lemon juice
¼ teaspoon pepper
2 tablespoons minced fresh chives

1. Arrange the potatoes in a single layer, cut-side down, in a 12-inch nonstick skillet. Add the water, butter, garlic, thyme, and salt and bring to a simmer over medium-high heat. Reduce the heat to medium, cover, and simmer until potatoes are just tender, about 15 minutes.

2. Remove the lid and use a slotted spoon to transfer the garlic to a cutting board; discard the thyme. Increase the heat to medium-high and vigorously simmer, swirling pan occasionally, until the water evaporates and the butter starts to sizzle, 15-20 minutes. When it’s cool enough to handle, mince the garlic to a paste.  Transfer the paste to a bowl and stir in the lemon juice and pepper.

3. Continue to cook the potatoes, swirling the pan frequently, until the butter browns and the cut sides of the potatoes turn spotty brown, 4 to 6 minutes longer. Off the heat, add the garlic mixture and chives and toss to thoroughly coat. Serve immediately.

braised potatoes 7

brisket and brie tacos

brisket tacos 5

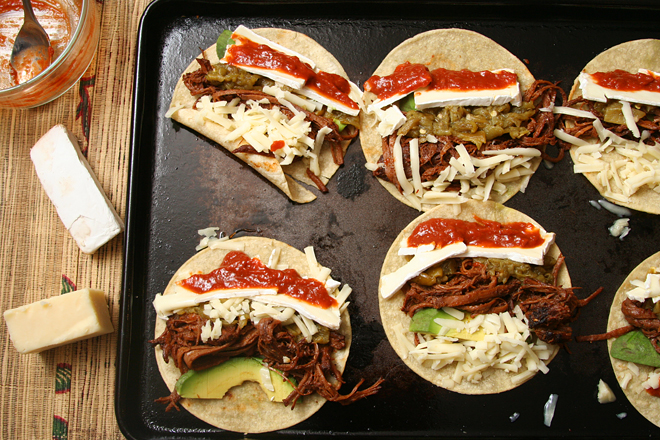
My stubbornness knows no bounds or logic, as was evident in the cooking of this brisket. First, I refused to buy Dr. Pepper to use as a braising liquid. Dave and I don’t drink soda, and I’m not really into the whole high fructose corn syrup thing, so I didn’t want to buy a bottle only to use a fraction of it. Beer and honey would provide all the acidity and sweetness the brisket needed.

brisket tacos 2

I’m also not all that into the crockpot. I like it for certain things, particularly broth, but if I’m home anyway, usually I like the firmer texture and added browning of braising meats in the oven. This has always worked great for pot roast and stews, but I’m not sure it was the best method for much leaner brisket, which can more easily dry out.

brisket tacos 4

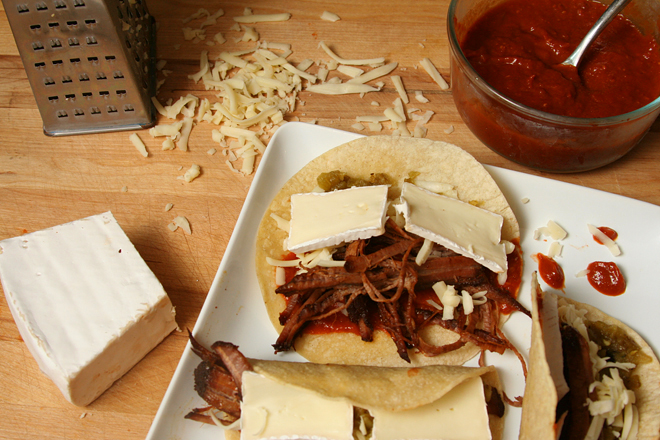
Not that I have any complaints though. Topping the tacos with brie certainly solves any potential problems the low fat content of the meat might have introduced. With a sweet and spicy barbecue sauce, stretchy Monterey jack cheese, and slices of creamy avocado, these tacos had plenty going on, despite or because of my stubborn changes.

brisket tacos 9

One year ago: Pizza with Prosciutto, Goat Cheese, and Roasted Tomatoes
Two years ago: Strawberry Daiquiri Ice Cream
Three years ago: Chicken Fajitas
Four years ago: Pasta with Roasted Red Pepper Sauce
Five years ago: Blueberry Poppy Seed Brunch Cake

Printer Friendly Recipe
Brie and Brisket Tacos (adapted from Rebecca Rather’s Pastry Queen via Confections of a Foodie Bride)

Serves 4, with leftover brisket

No one seems to brown brisket. I don’t know why that is, but I browned mine.

Brisket:
1 tablespoon canola or vegetable oil
1 (3-pound) brisket
salt
ground black pepper
1 tablespoon chili powder
3 cloves garlic, minced or pressed through a garlic press
1 (12-ounce) medium-dark beer
2 tablespoons honey

Raspberry chipotle barbecue sauce:
1 tablespoon olive oil
1 medium yellow onion, chopped
2 cloves garlic, minced or pressed through a garlic press
½ cup ketchup
1 chipotle chile in adobe sauce, minced
2 tablespoons lemon juice
¼ cup raspberries, fresh or frozen
1½ tablespoons Worcestershire sauce
1½ teaspoons dijon mustard
½ teaspoon salt
¼ teaspoon black pepper

Toppings:
12 corn tortillas, warmed
4 ounces brie, thinly sliced
1 cup (4 ounces) Monterey jack cheese

1. For the brisket: Heat the oven to 325 degrees. Heat the oil in a 5-quart Dutch oven over medium-high heat. Pat the meat dry, season it generously with salt, pepper, and the chili powder. Transfer the brisket to the Dutch oven and cook, without moving, for about 3 minutes, until deeply browned. Flip and brown the second side. Transfer the meat to a plate. Discard any fat in the pan (but leave the cooked-on brown bits).

2. Add the garlic to the pan and cook, stirring constantly, until fragrant, about 30 seconds. Pour the beer into the pot, scraping up the sticky brown bits on the bottom of the pot. Stir in the honey, then add the meat. Bring to a simmer over medium-high heat. Cover the Dutch oven and transfer it to the oven. Cook for 3 hours, turning every hour or so.

3. For the sauce: In a medium saucepan over medium heat, heat the oil until it runs like water when the pan is tilted. Add the onion; cook, stirring occasionally, until it just starts to brown around the edges, about 8 minutes. Add the garlic and cook, stirring constantly, until fragrant, about 30 seconds. Add the ketchup, chile, lemon juice, raspberries, Worcestershire sauce, mustard, salt, and pepper. Bring to a simmer, then reduce the heat to low, cover, and cook for 10 minutes. Puree, either with an immersion blender in the saucepan or by transferring the sauce to a blender.

4. When the brisket is tender, either slice it or shred it, leaving behind large chunks of fat. Layer brisket, sauce, brie, and Monterey jack cheese in the tortillas (plus Hatch green chile and avocado if you can’t imagine tacos with them). Serve immediately.

brisket tacos 6

stuffed mascarpone strawberries

mascarpone strawberries 7

We moved into the new house! And less than a week later, we went on vacation! And now we’re back, and although we don’t have internet or television at home, and there are no curtains or pictures hung, and we haven’t bought mirrors for the bathrooms, it’s safe to say that we’re settling in. The kitchen is unpacked and has been through multiple rounds of tweaking, and what else matters?

mascarpone strawberries 4

With the move, the vacation, and a couple big projects at work, March got a little crazy. It started off with a visit from a friend, here to interview for a job at our company. Which, by the way, she got, so she and her husband will be moving out to our little New Mexican town sometime this summer. After her interview, we showed her around town, but there really isn’t much to see, so we spent most of the evening hanging out at home, drinking wine and eating a nice meal.

mascarpone strawberries 2

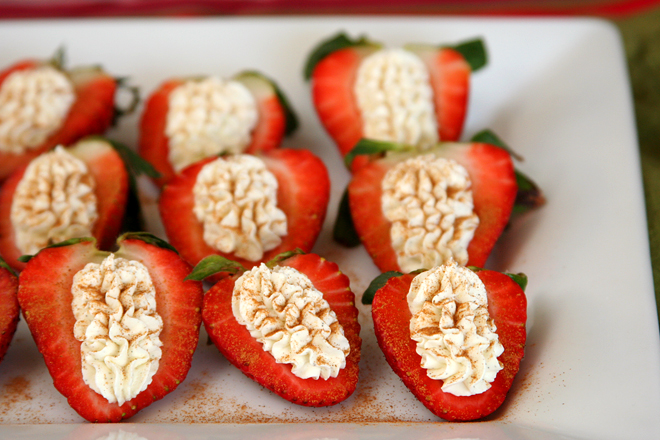
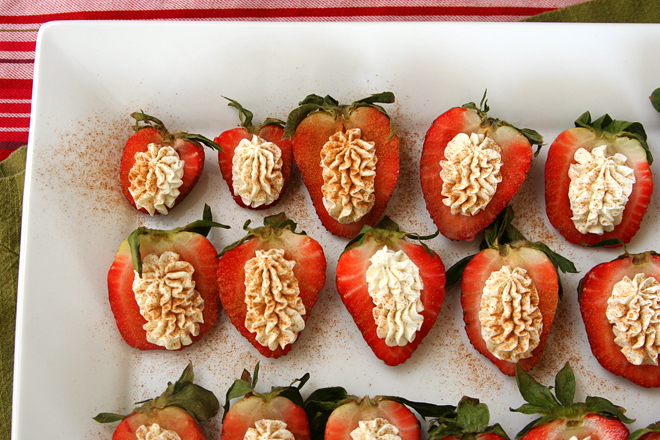
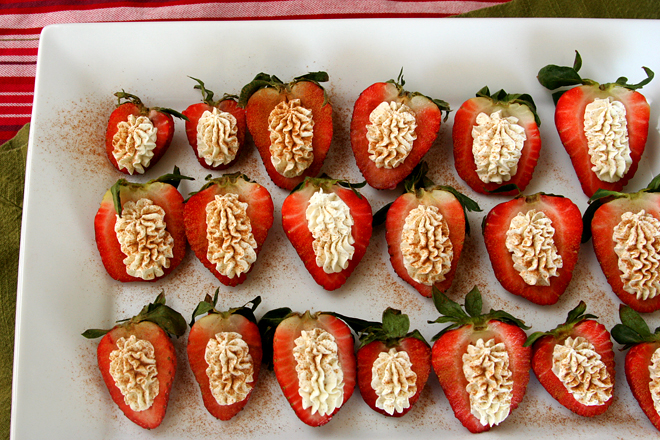
I’d forgotten that she eats like a bird, so I’m glad I kept dessert light. Fruit is a nice ending to a meal of salad, shrimp, bread, and lasagna, but plain fruit is a snack that I eat several times a day. Stuffing the berries with a lightly sweetened and spiced creamy mixture was the perfect way to make these a treat worthy of being called dessert. Plus, it was easy, and last month, easy was extremely important.

mascarpone strawberries 8

One year ago: Strawberry Lemonade Bars
Two years ago: Chocolate Chunk Oatmeal Cookies with Dried Cherries and Pecans
Three years ago: Vodka Gimlet
Four years ago: Black Bean Squash Burritos
Five years ago: Scotch Eggs

Printer Friendly Recipe
Stuffed Mascarpone Strawberries (adapted from The Quinces and the Pea via Pink Parsley)

1 pound strawberries, rinsed and dried
½ cup mascarpone cheese
⅓ cup heavy whipping cream
2 tablespoons sugar
1 vanilla bean, scraped
½ teaspoon cardamom
cinnamon, for sprinkling

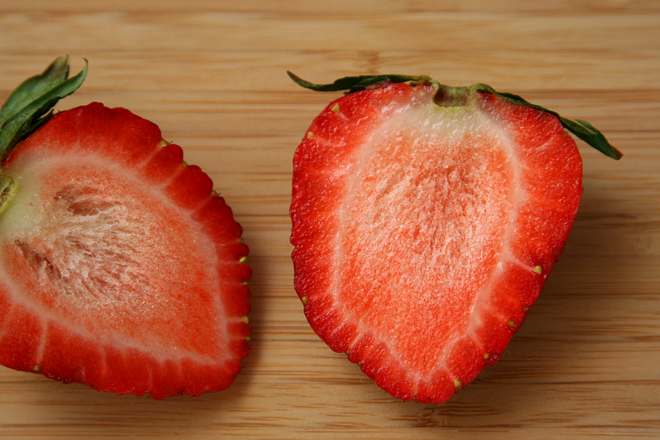
1. Halve each strawberry through the stem-end, and use a melon baller or paring knife to scoop out part of the middle.

2. In a medium bowl, beat the mascarpone, cream, sugar, vanilla, and cardamom until soft peaks form. Using a piping bag fitted with corner snipped off (or a round tip), fill each strawberry with the cream. Sprinkle lightly with cinnamon; serve.

mascarpone strawberries 6

chipotle shrimp

chipotle shrimp 4

One of the disadvantages-that-isn’t of living in New Mexico is that, with year-round access to a freezer full of Hatch green chiles, pretty much every other chile gets neglected. In the first three years after we moved here, I didn’t cook with poblanos, serranos, anaheims, or even chipotle chiles.  Hatch green (and, not as often, red) chile was the focus.

chipotle shrimp 1

This year we spent four hours peeling, seeding, chopping, and freezing Hatch green chiles only to realize afterward that this batch was a dud, with no flavor at all.  It’s unfortunate, but our pizzas, burgers, and beans have all been disappointing since we’ve started rationing out last year’s far superior chiles.  We’re impatient for next year’s harvest, but we’ve got five months to go.

chipotle shrimp 2

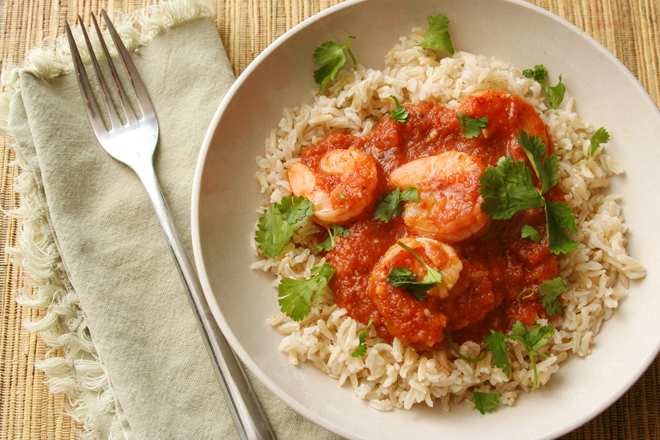
The upside is a resurgence of alternate chiles in our kitchen. Last week I made some smoky guacamole with roasted red peppers and poblanos, and chipotles are no longer languishing in the back of the freezer, forgotten. This recipe is a significant contribution to the disappearing chipotles, because any dish that takes twenty minutes to deliver a healthy bowl of spicy sauce and shellfish is going to be a favorite. Next year, it’ll be even better, when I use chipotles together with Hatch chiles, but for now, chipotles are all I’ve got.

chipotle shrimp 3

One year ago: Tomato and Four Cheese Lasagne
Two years ago: Shrimp Canapés a la Suede
Three years ago: Mediterranean Pepper Salad
Four years ago: Chocolate Whiskey Cake
Five years ago: Raspberry Bars

Printer Friendly Recipe
Chipotle Shrimp (adapted from Rick Bayless’s Mexican Everyday via Pink Parsley)

Serves 4 as a main course

1 (28-ounce) can diced fire-roasted tomatoes in juice
2-3 canned chipotles en adobo
1 tablespoon chipotle canning sauce
1 tablespoon vegetable oil
3 garlic cloves, minced or pressed through a garlic press
salt
2 pounds shrimp, peeled and deveined
1 cup rice, cooked (about 3 cups cooked rice)
about ¼ cup loosely packed, roughly chopped cilantro

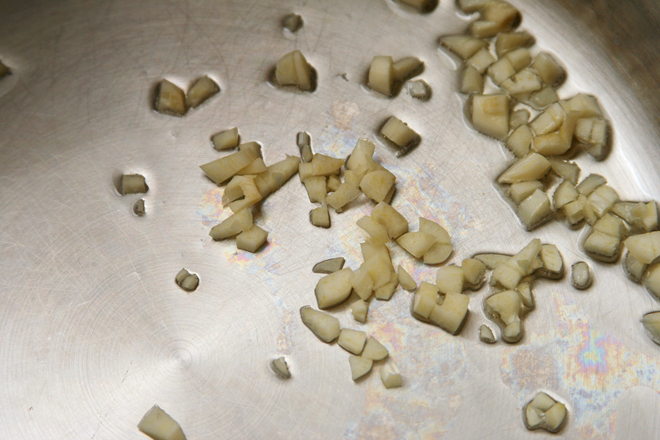
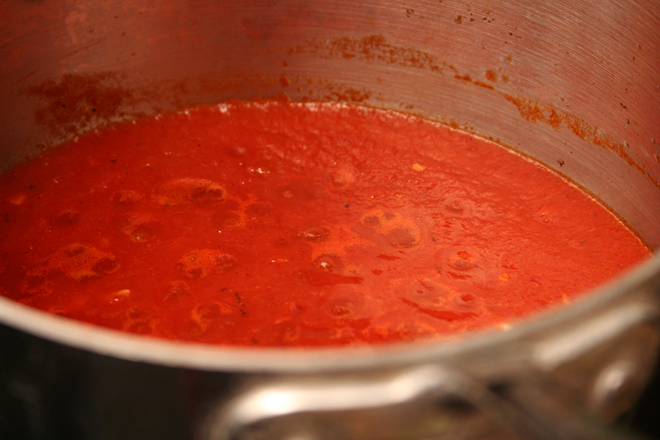
1. Process the tomatoes, chipotle chiles, chipotle sauce, and ½ teaspoon salt in the blender until pureed.

2. Heat the oil in a large skillet over medium heat. Add the garlic and stir until fragrant, about 1 minute. Add the tomato mixture and cook, uncovered, for about 5 minutes, stirring frequently. Taste and season with salt if necessary.

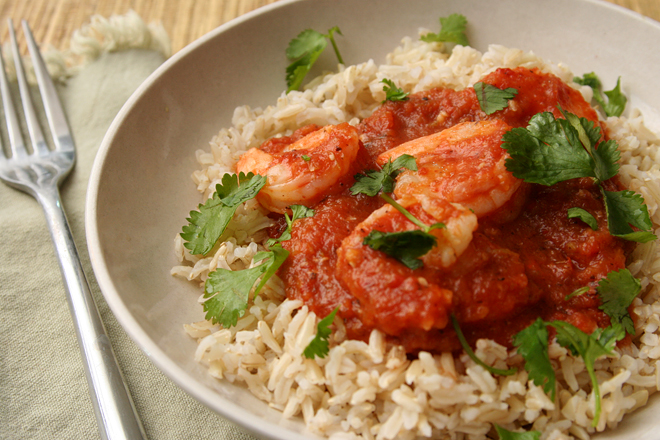
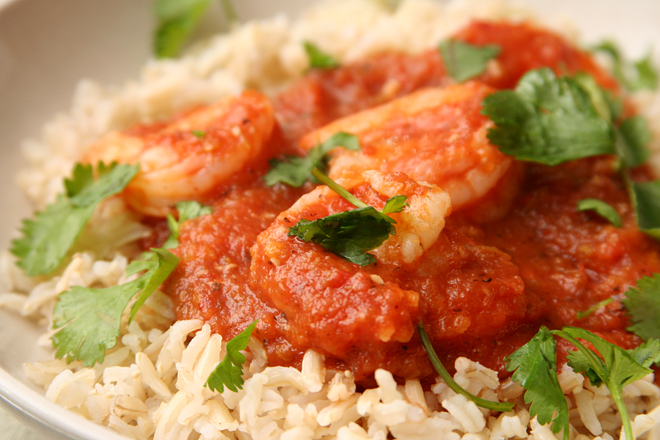
3. Add the shrimp to the pan, and cook, stirring constantly, until the shrimp are pink and curled up, about 6 minutes. Serve over rice with cilantro.

chipotle shrimp 5

green pig macarons (green tea macarons with vanilla bean swiss meringue buttercream)

pig macarons 14

These might have come out okay in the end, but it was looking bleak at first – and in the middle, and even a bit toward the end. I might have been overly confident when I agreed to make shaped macarons, with just one previous attempt at the notoriously finicky cookie. To make matters worse, the inspiration blog entry was written in Hebrew.

pig macarons 1

I’m not the first person to make shaped macarons, but most people are using the traditional method for macarons, the one I used last year, in which egg whites are beaten with granulated sugar until stiff peaks form, then almond meal and powdered sugar are folded into the mixture. It’s fussy – the egg whites need to be aged overnight, just the right amount of folding is necessary to deflate the meringue just so, and the piped batter needs to sit at room temperature for an hour before baking. Annie promised to have a simpler, more dependable method, and I wanted to try it.

pig macarons 2

In this method, half of the egg whites are mixed into the almond meal and powdered sugar; the other half are whipped into a meringue with hot sugar syrup, then folded into the pasty almond meal mixture. The cookies are piped and baked immediately.

pig macarons 5

It sounded simple enough, but things started going wrong early on. First I ran out of almond meal, which I discovered after I’d measured out egg whites, sugar, and water to the gram. I had some slivered (not blanched; they still had skins) almonds in the pantry, so I ground those up and mixed them into the batter. One obstacle was overcome.

pig macarons 6

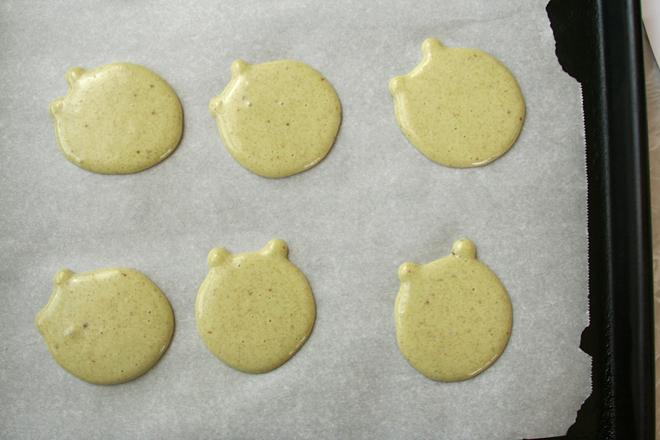
My next mistake was adding too much of the meringue mixture to the almond meal mixture. You’re only supposed to add as much of the meringue mixture for “thick ribbons to batter to run off the spatula”, but that required all of the meringue for me, and at that point, the batter was too loose, and the cookies spread when I piped them.

pig macarons 7

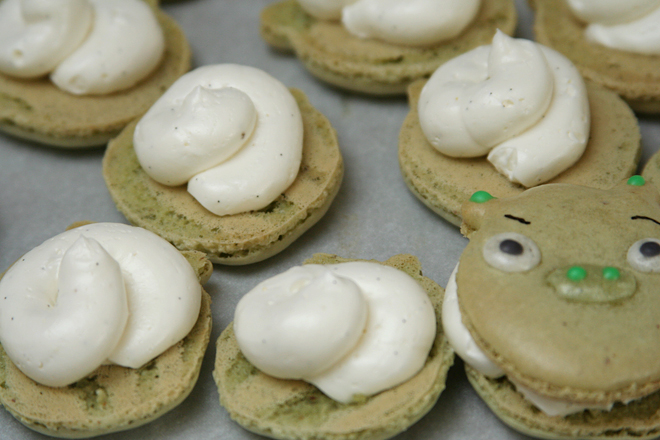
My next problem – there was always a next problem on this particular day – was trying to get the nose and ears on top of the main body of the cookie. Eventually I found that the best method seemed to be baking the plain macarons for the specified time, then piping the nose and ears on the firm surface of the cookie and rebaking them for a few minutes until the smaller portions set. The cookies seemed no worse for the extra time in the oven.

pig macarons 10

It’s a good thing that the Angry Birds pigs aren’t pristine shapes even in their original format on the game, because my cookies were anything but round, with ears of indeterminate size and shape. Sometimes the ears blended right into the rest of the cookie; sometimes the noses caved in. And by this point, my kitchen was covered in macaron batter, which, by the way, turns into concrete when it dries, and my bread dough was overrising while seemingly infinite batches of macarons hogged the oven.

pig macarons 11

The piggie faces, thankfully, were mostly saved by the addition of nostrils and pupils. Eyebrowns drawn on with a edible marker didn’t hurt either. And I think it speaks volumes about the dependability of this recipe that with all my foibles, the macarons rose enough to somewhat form those elusive foamy feet. (Not that my troubles were completely over.) But while they might not be as pristine as I had intended, the 6-year-old birthday boy didn’t seem to mind. I’m going to call this kitchen battle conquered, though it wasn’t easy.

pig macarons 13

One year ago: Chocolate Sugar Cookies
Two years ago: Fettuccini Alfredo
Three years ago: Toasted Vegetable Subs
Four years ago: Red Velvet Cake (comparison of 5 recipes)
Five years ago: Vanilla Frosting (comparison of 4 recipes)

Printer Friendly Recipe
Green Pig Macarons (Green Tea Macarons with Vanilla Bean Swiss Meringue Buttercream) (adapted from Thomas Keller and Sebastien Rouxel’s Bouchon Bakery via Annie’s Eats)

Makes 24 sandwich cookies

The very small amounts of almond meal, powdered sugar, and egg whites are for the white eyes. If you’re just making regular green tea macarons, you can skip that.

Where I went wrong with the batter was adding too much meringue. Once I got to the point where I had thick ribbons of batter, it was definitely too much meringue and the batter was too loose, spreading on the baking sheet. All I can recommend to correct this, until I gain more experience with macaron-making, is that you watch for VERY thick ribbons of batter falling off the spatula.

Green tea cookies:
212 grams almond meal, plus 16 grams
212 grams powdered sugar, plus 16 grams
1½ teaspoons matcha powder
82 and 90 grams egg whites, plus 6 grams (about 6 eggs total)
236 grams granulated sugar, plus ¼ teaspoon
158 grams water

Vanilla bean buttercream:
2 egg whites
½ cup (3.5 ounces) granulated sugar (vanilla sugar if you have it)
pinch table salt
12 tablespoons (1½ sticks) unsalted butter, softened
seeds from ½ vanilla bean
1 teaspoon vanilla extract

1. For the cookies: Preheat the oven to 350 degrees and place a rack in the middle of the oven. Line baking sheets with parchment paper. Fit one pastry bag with a ½-inch round tip and two with ¼-inch round tips (for the white eyes and the green ears and nose).

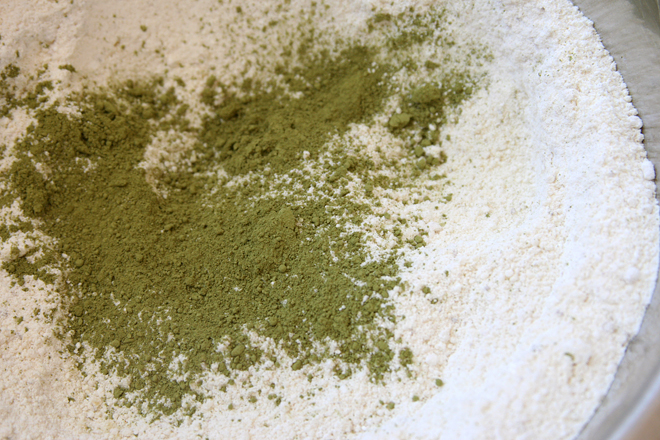
2. In a large bowl, combine the 212 grams almond meal, 212 grams powdered sugar, and matcha powder. Whisk together to blend and break up any clumps. Make a well in the center of the dry ingredients and pour in 82 grams of the egg whites. Blend the egg whites into the dry ingredients until evenly mixed. The mixture will be thick and paste-like. For the white eyes, in a small bowl, mix together the 16 grams of powdered sugar, 16 grams of almond meal, and 6 grams of egg whites.

3. Combine 236 grams granulated sugar and the water in a small saucepan over medium-high heat. When the temperature is around 210 degrees, combine the 90 gram portion of egg whites with ¼ teaspoon sugar in the bowl of a stand mixer. Begin whipping on medium-low speed. Continue whipping the whites on medium speed until they form soft peaks. If soft peaks are achieved before the syrup reaches the target temperature, reduce the speed to low to keep the whites moving.

4. Once the syrup reaches 248 degrees, immediately remove it from the heat. Increase the mixer speed to medium and pour the syrup down the side of the bowl in a slow drizzle until fully incorporated. Increase the mixer speed to medium-high and whip the meringue until stiff, glossy peaks form.

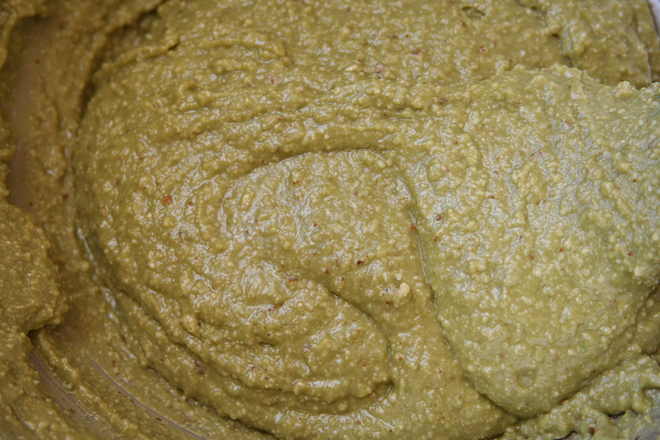
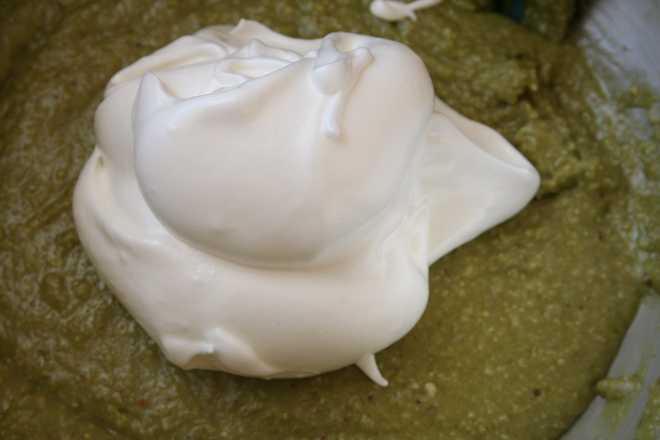
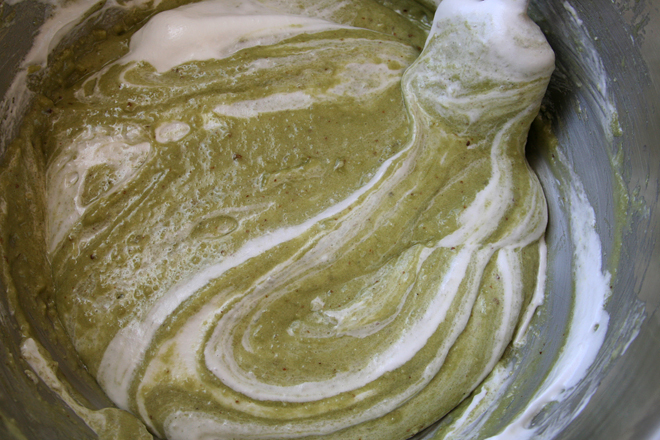
5. Add one third of the meringue mixture to the bowl with the almond mixture with the matcha. Fold in gently until the mixture is smooth. A bit at a time, gently fold in the remaining meringue until the batter is smooth and runs in thick ribbons off of the spatula. You may not need all of the meringue, so add it gradually. Repeat the process with the white batter.

6. Add most of the green batter to the pastry bag with the ½-inch tip. Hold the bag perpendicular to the baking sheet about ½-inch above the surface of the pan. Steadily pipe rounds about 1¼- to 1½-inches in diameter. The batter may create small peaks immediately after piping, but if it is the correct texture these will smooth themselves away after a minute or two. If the batter is too stiff, the peaks will remain and the tops of the shells may not be totally smooth. If the batter is too thin, the rounds will spread further.

7. For the ears: Transfer some green batter to a piping bag with a ¼-inch tip. Pipe small ears adjacent to the larger circles of batter.

8. Transfer the baking sheet to the oven and immediately reduce the temperature to 325 degrees. Bake for 9-12 minutes, until the tops are smooth and set and “feet” have formed around the bottom.

9. Transfer the white batter to a piping bag with an ⅛-inch tip. Remove the baked cookies from the oven and immediately pipe on a green nose in the middle of the circle and 2 white eyes to the side of the nose. Return the cookies to the oven for 3-4 minutes, until the nose and eyes are set. Add noses and eyes only to every other batch; the backs of the sandwiches will just need ears.

10. Transfer the baking sheet with the cookies to a cooling rack; cool 5 minutes, then peel the cookies away from the parchment and transfer to a cooling rack. Repeat as needed with the remaining batter, replacing the parchment paper with each batch, bringing the oven temperature back up to 350 degrees before baking each sheet.

11. For the buttercream: In the bowl of a stand mixer (or a large bowl if using a hand-held mixer), combine the egg whites, sugar, and salt. Set the bowl over a pot of simmering water, making sure the bottom of the bowl does not touch the water. Whisk constantly until the mixture reaches 160 degrees.

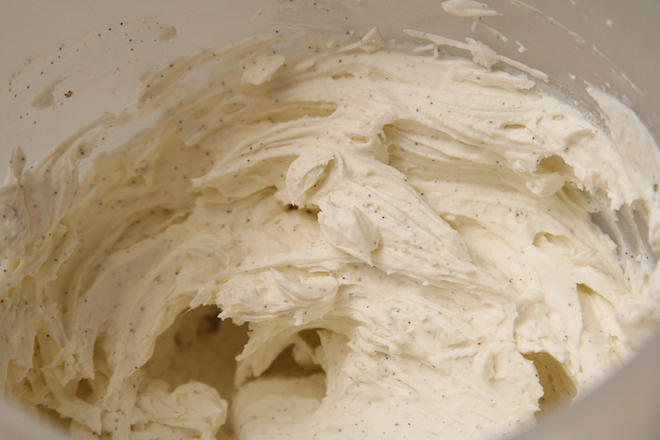
12. Fit the mixer with the whisk attachment; beat the egg white mixture on medium-high speed until stiff peaks form and it has cooled to room temperature, about 8 minutes. Reduce the mixer speed to medium and add the butter 2 tablespoons at a time, adding more once each addition has been incorporated. Increase the mixer speed to medium-high and beat until the buttercream is thick and smooth, 3-5 minutes. Add the vanilla seeds and extract; mix until incorporated.

13. To assemble: Pipe the buttercream onto the flat sides of half of the cookies. Top with the remaining cookies. Serve immediately or cover and store overnight in the refrigerator (bring to cool room temperature before serving).

Thirteen steps, and I forgot to tell you how to make the project-saving eyes and nostrils. Powdered sugar + milk + food coloring, stirred until smooth and dripped off the end of a toothpick.  Tedious, but it got the job done.

pig macarons 15

cinnamon macarons with apple buttercream

apple cinnamon macarons 4

Macarons have been all the rage recently, and yet, I’ve had no real desire to make them myself. This, even though they’re known to be finicky, and I do love making my life unnecessarily complicated. But while I do love a challenge, I don’t particularly love meringue cookies.

apple cinnamon macarons 1

This is probably because I’ve never gotten them quite right, as they always seem to be chewy in the center instead of crisp the whole way through. Maybe the precise directions included with many macaron recipes could help me avoid this pitfall. If not, at least they’d be filled with swiss meringue buttercream.

apple cinnamon macarons 2

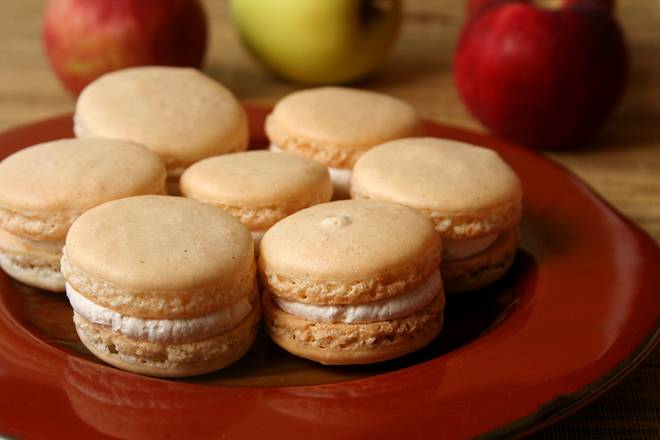
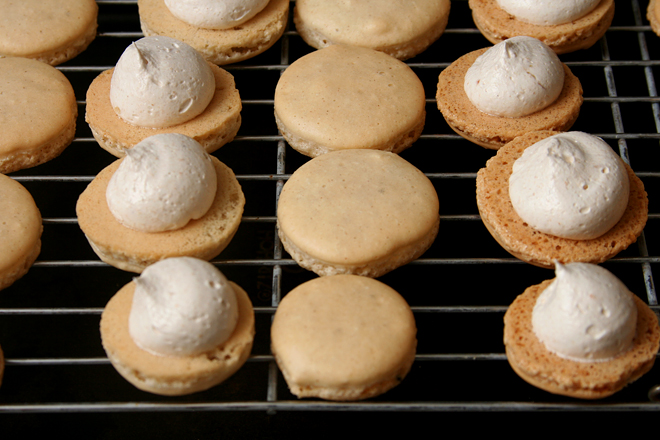
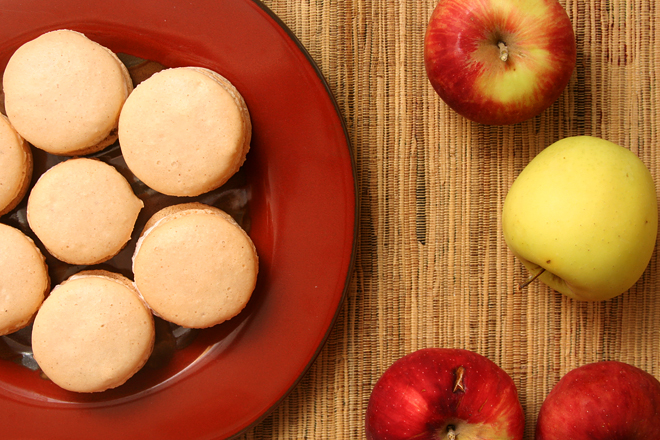
One of the hallmarks of good macarons is the foamy feet around the bottom edge, which show that your macarons rose up in the oven instead of spreading out. When I started to see those feet form, I made Dave come over to look through the oven window with me and give me a high-five. I was also happy with the smooth tops of the cookies, and it goes without saying that I was happy with the apple buttercream, which was noticeably and pleasantly appley.

apple cinnamon macarons 3

The only problem? A chewy center. I guess practice makes perfect. Fortunately, I think it’s safe to say that meringues are good enough to make again.

apple cinnamon macarons 6

One year ago: Butternut Squash Risotto
Two years ago: Pomegranate Glazed Salmon
Three years ago: Sun-Dried Tomato Jam
Four years ago: Sushi Bowls

Printer Friendly Recipe
Cinnamon Macarons with Apple Buttercream (adapted from Tartelette)

Makes about 20 sandwich cookies

For a lot of meringue-making tips, read Tartelette’s article.

Meringues:
110 grams blanched almonds or almond meal
200 grams powdered sugar
½ teaspoon cinnamon
100 grams egg whites (from about 3 large eggs), aged overnight
25 grams sugar
Pinch salt

Apple buttercream:
4 egg whites
1¼ cups (8.75 ounces) granulated sugar
Pinch salt
24 tablespoons (3 sticks) unsalted butter, softened
⅓ cup apple butter
1 teaspoon vanilla extract

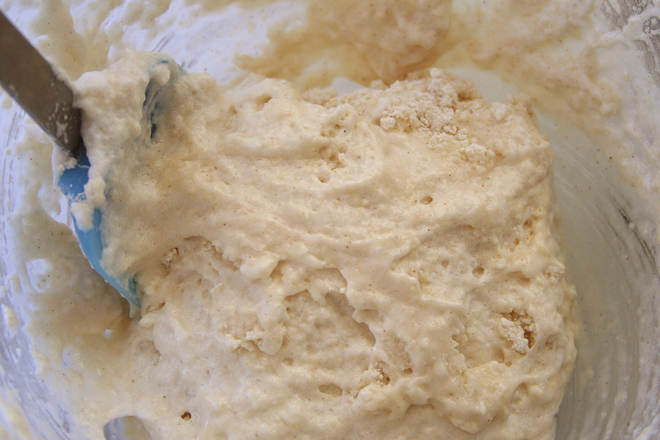
1. In a food processor, process the almonds and powdered sugar until the nuts are finely ground. In a stand mixer fitted with the whisk attachment (or a large bowl with a handheld mixer), beat the egg whites, sugar, and salt on medium-high speed (high speed if using a stand mixer) until soft peaks form. Use a large rubber spatula to fold the nut mixture into the egg mixture. After about 50 folds, the batter should be evenly mixed, with no streaks of egg white.

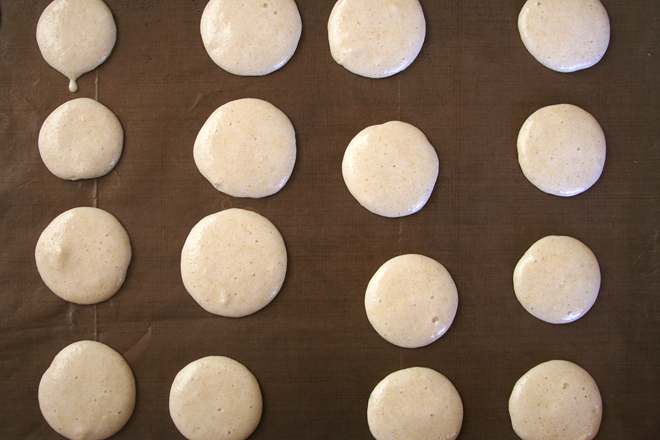
2. Line 2 baking sheets with parchment paper or silicone mats. Spray the lined sheets lightly with cooking spray. Transfer the batter to a piping bag fitted with a wide (about ½-inch) round tip. Pipe quarter-sized rounds onto the prepared pans, leaving about an inch between rounds. Gently rap the baking sheet against the counter to pop any large bubbles. Set the piped dough aside for 1 hour.

3. Adjust a rack to the middle position and heat the oven to 300 degrees. Bake one sheet at a time until the cookies are lightly browned around the bottom edges, about 15 minutes. Transfer the baking sheet to a wire rack; cool for about 5 minutes, then use a thin spatula to transfer the cookies from the pan to the wire rack. Cool completely before filling.

4. In the bowl of a stand mixer (or a large bowl if using a hand-held mixer), combine the egg whites, sugar, and salt. Set the bowl over a pot of simmering water, making sure the bottom of the bowl does not touch the water. Whisk constantly until the mixture reaches 160 degrees.

5. Fit the mixer with the whisk attachment; beat the egg white mixture on medium-high speed until stiff peaks form and it has cooled to room temperature, about 8 minutes. Reduce the mixer speed to medium and add the butter 2 tablespoons at a time, adding more once each addition has been incorporated. Increase the mixer speed to medium-high and beat until the buttercream is thick and smooth, 3-5 minutes. Add apple butter and vanilla; mix until incorporated.

6. Pipe the buttercream onto the flat sides of half of the cookies.  Top with the remaining cookies.  Serve immediately or cover and store overnight in the refrigerator (bring to cool room temperature before serving).

apple cinnamon macarons 5

black bean-roasted zucchini-goat cheese enchiladas

zucchini goat cheese enchiladas 7

I had a tough week last week. One day I woke up to little ants crawling all over the kitchen. One afternoon I went to the dentist feeling smug about how often I’ve been flossing and left with an appointment to get three cavities filled. One morning I noticed blisters on my waist that were suspiciously familiar – because they’re exactly like the case of shingles* I had just a few weeks ago. The list goes on from there.

zucchini goat cheese enchiladas 3

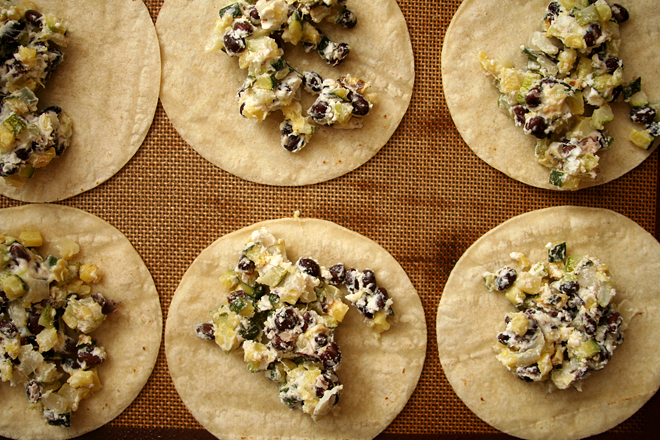
I also learned that I definitely do not have time to make enchiladas on a weeknight, even if the sauce is made in advance. Mixing the filling, heating tortillas, rolling and baking is too much to fit in on top of the daily dose of exercise, laundry, and spraying the kitchen with Raid.

zucchini goat cheese enchiladas 5

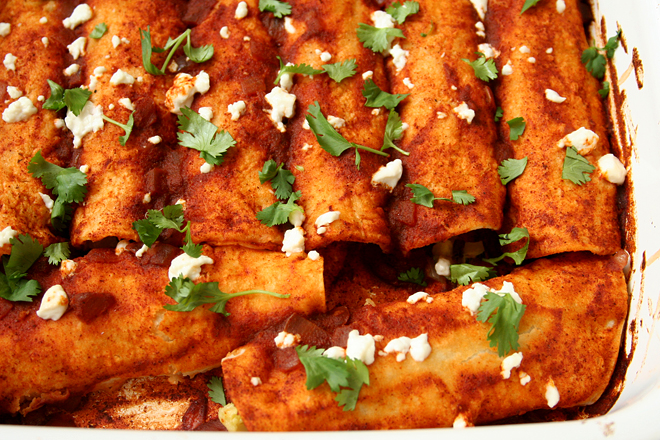
I guess if all’s well that ends well, you could say I had a great week. After a series of challenging days, nothing could have been more relieving than a night spent sipping wine with friends – even if it’s for a wine appreciation class, we’re all furiously scribbling notes, and technically we’re not supposed to be swallowing the wine. And when I got home from class, a delicious dinner was ready, because I’d skipped a workout the day before to fill and roll and all Dave had to do was transfer the enchiladas to the oven while I was out drinking wine. Maybe last week wasn’t so bad after all.

zucchini goat cheese enchiladas 6

(*Getting shingles isn’t fun, but I’m extremely lucky that I only get mild cases.)

One year ago: Fried Eggs with Garlic Yogurt Sauce
Two years ago: Steak Sandwiches
Three years ago: Pumpkin Cupcakes (comparison of 3 recipes)
Four years ago: Pain Ordinaire

Printer Friendly Recipe
Black Bean-Roasted Zucchini-Goat Cheese Enchiladas (filling adapted from Sprouted Kitchen; sauce from America’s Test Kitchen’s Healthy Family Cookbook via Prevention RD)

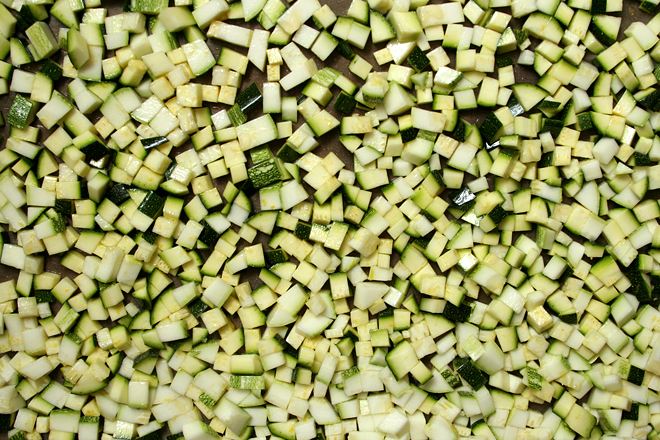
I roasted the zucchini on a baking sheet immediately after dicing them, but because zucchini is so wet, I think they would benefit from being sprinkled with about a teaspoon of salt, then allowed to drain for half an hour or so before roasting. If you have one, spinning them dry in a salad spinner would also help them pick up more roasted brown color in the oven. On the other hand, the enchiladas were delicious without this extra step.

Serves 4

Enchiladas:
3 large zucchini, cut into ¼-inch dice
1 small onion, coarsely chopped
1 tablespoon extra virgin olive oil, divided
zest from 1 lemon
1 teaspoon kosher salt
1 (15-ounce) can black beans, rinsed and drained
5 ounces goat cheese, divided
12 corn tortillas

Sauce:
1 teaspoon canola oil
½ small onion, finely chopped
2 cloves garlic, minced
1½ tablespoons chili powder
½ tablespoon ground cumin
1 teaspoon sugar
¼ cup water
1 (8-ounce) can tomato sauce
black pepper, to taste

For serving:
2 avocados, diced
½ cup minced cilantro
lime wedges

1. Heat the oven to 450 degrees. On a large rimmed baking sheet, combine the zucchini, onion, oil, lemon zest, and salt. Roast, stirring occasionally, until the zucchini is softened and maybe slightly browned, about 30 minutes. Transfer to a large bowl; stir in the black beans and 4 ounces of goat cheese. Reduce the oven temperature to 350 degrees.

2. While the zucchini roasts, heat 1 teaspoon of canola oil in a medium saucepan over medium heat. Add the onion and cook until translucent and slightly browned around the edges, stirring occasionally, about 8 minutes. Add the garlic, chili powder, cumin, and sugar; cook, stirring constantly, until fragrant, about 1 minute. Add the water and tomato sauce. Increase the heat to medium-high, bring to a simmer, then reduce the heat to medium-low. Maintain a low simmer until slightly thickened, 5 to 10 minutes, stirring occasionally.

3. To soften the tortillas, brush or spray them with a light layer of oil. Arrange 6 tortillas in a single layer on a baking sheet; transfer to the oven and cook for about 3 minutes; flip the tortillas and continue baking for 2 more minutes, until the tortillas are pliable. Repeat with the remaining tortillas.

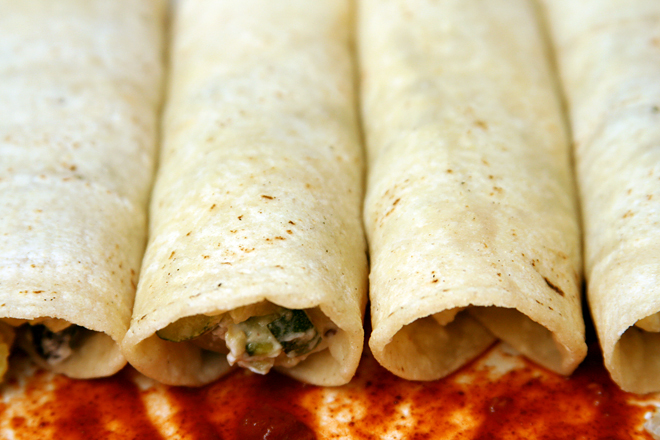
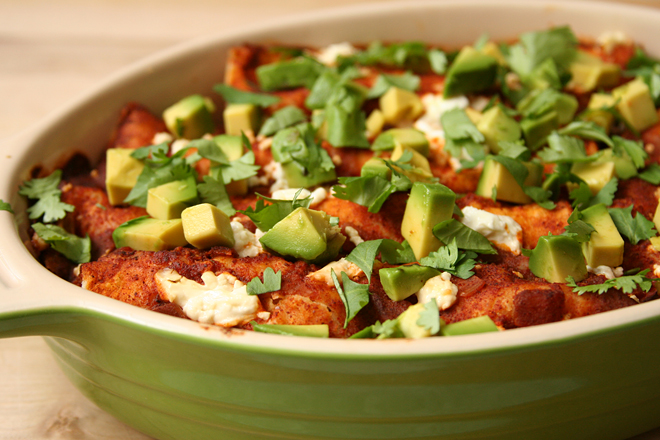
4. Spread a thin layer of sauce over the bottom of a 9-by-13-inch baking dish. Divide the filling evenly between the tortillas. Roll the tortillas over the filling, arranging the filled tortillas seam-side down in the baking dish. Cover the rolled tortillas with the remaining enchilada sauce. Sprinkle the remaining 1 ounce of goat cheese over the top of the sauce. Bake uncovered for 25-30 minutes, until the enchiladas are evenly heated. Let set for 5 minutes before serving with chopped avocado, cilantro, and lime.

zucchini goat cheese enchiladas 10

mediterranean chopped salad

mediterranean chopped salad 4

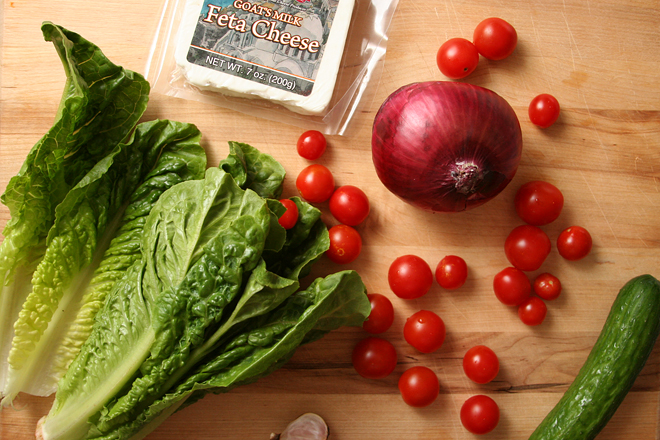
I made this salad for the first time the very day that I posted about how I hate making salads because it always takes so dang long. (And indeed, tonight I made a salad for dinner that included no less than 16 ingredients.) This salad, however, breaks the pattern.

mediterranean chopped salad 1

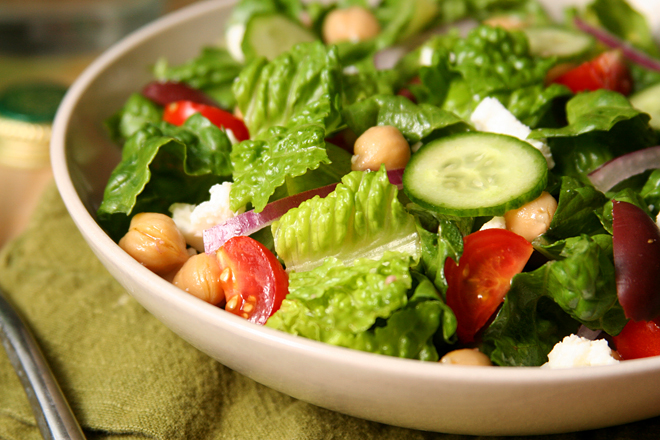
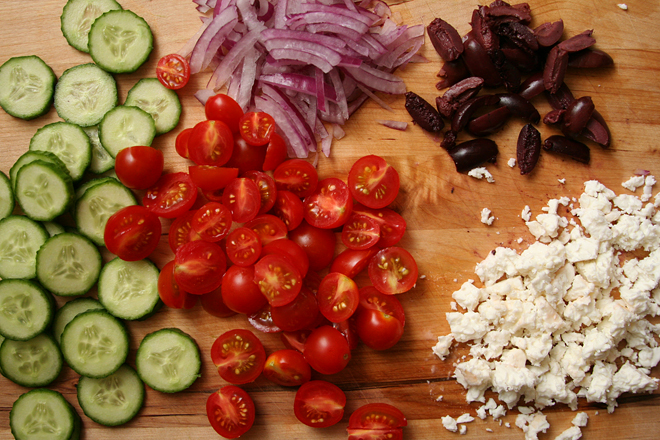
It helps that the chickpeas can be dumped out of a can. Sometimes I buy pre-crumbled feta, and that’s one less ingredient that needs chopped. While I don’t love seeding and chopping olives, my handy dandy cherry pitter (that has never been used on cherries) speeds up that process.

mediterranean chopped salad 3

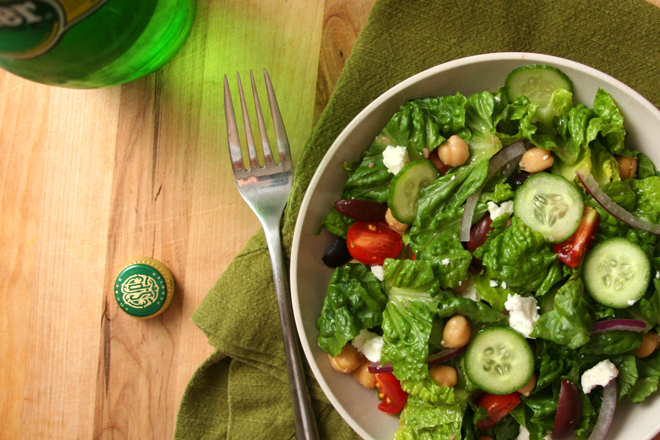
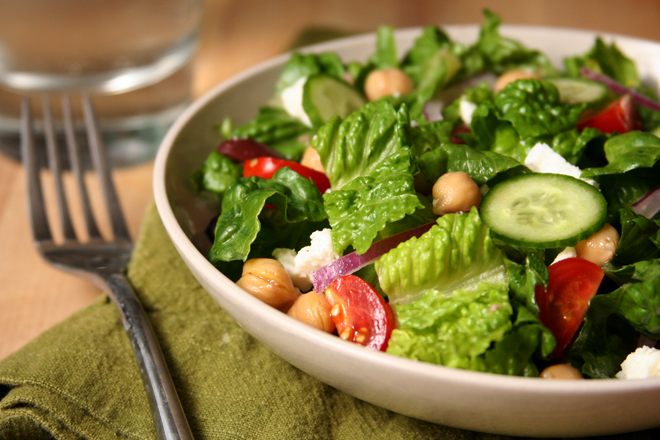
There are still a good handful of ingredients that must be prepped, to be sure, but it is among the quicker dinner salad recipes I make. And it’s such a great combination; chickpeas, olives, feta, and cucumbers are a classic, to be sure, but for good reason. For as good as this tastes and as quick as is to make, it’s one of the best salad values for your time. And that makes it my new favorite.

mediterranean chopped salad 5

One year ago: Cook’s Illustrated’s Ultimate Banana Bread
Two years ago: Cheesecake (comparison of 3 recipes)
Three years ago: Risotto with Swiss Chard
Four years ago: Gazpacho

Printer Friendly Recipe
Mediterranean Chopped Salad (from Cook’s Illustrated)

Serves 4 as a main dish

I have never added the parsley; nothing against it, I just didn’t notice it in the ingredient list. Also, I like my salads on the vinegary side, so I usually cut the olive oil short.

1 medium cucumber, peeled, halved lengthwise, seeded, and cut into ½-inch dice (about 1¼ cups)
1 pint grape tomatoes, quartered (about 1½ cups)
Table salt
3 tablespoons extra virgin olive oil
3 tablespoons red wine vinegar
1 medium garlic clove, minced or pressed through garlic press (about 1 teaspoon)
1 (14-ounce) can chickpeas, drained and rinsed
½ cup chopped pitted kalamata olives
½ small minced red onion (about ¼ cup)
½ cup roughly chopped fresh parsley
1 romaine heart, cut into ½ inch pieces (about 3 cups)
4 ounces feta cheese, crumbled (about 1 cup)
Ground black pepper

1. Combine cucumber, tomatoes, and 1 teaspoon salt in colander set over bowl and let stand 15 minutes.

2. Whisk oil, vinegar, and garlic together in large bowl. Add drained cucumber and tomatoes, chickpeas, olives, onion, and parsley; toss and let stand at room temperature to blend flavors, 5 minutes.

3. Add romaine and feta; toss to combine. Season with salt and pepper and serve.

mediterranean chopped salad 6

pepper-crusted salmon with wasabi dipping sauce

wasabi salmon 4

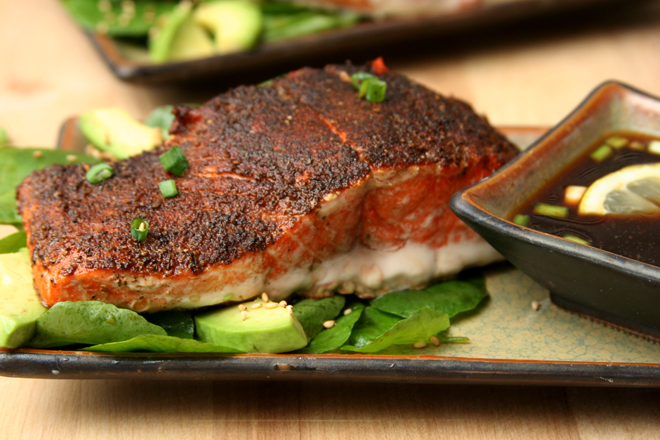
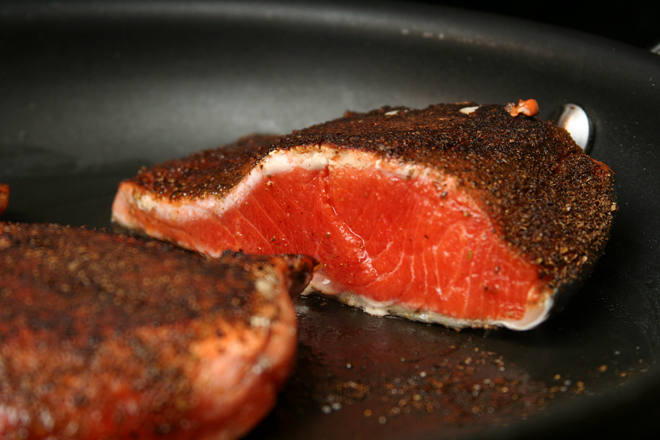
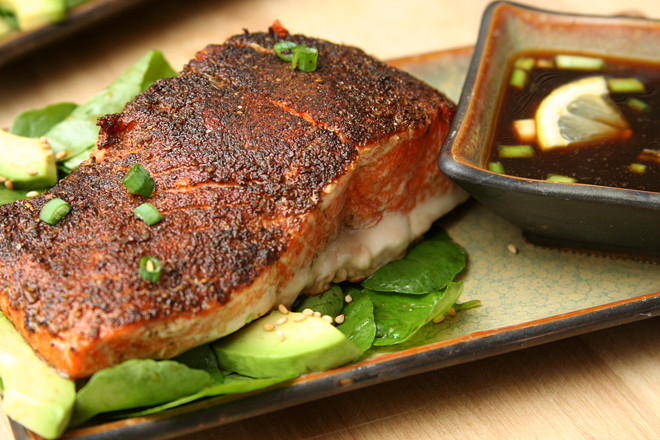
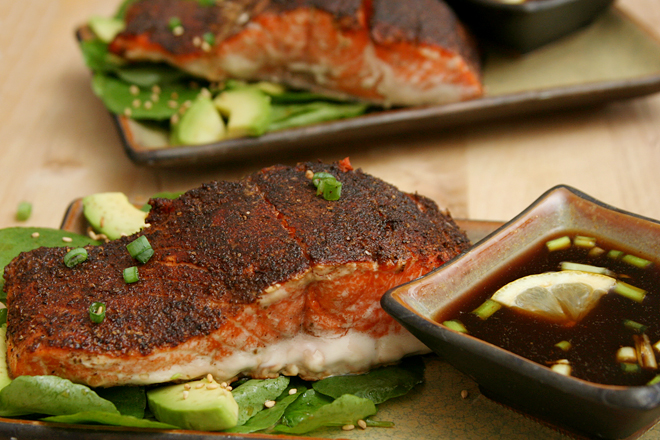
This is one of the best new meals I’ve made recently. The salmon was perfectly browned on top but still juicy in the middle. The Old Bay and lemon were interesting matches with the wasabi and ginger, but it definitely worked. The watercress and avocado salad I served the salmon with was the perfect bright balance to the umami-rich fish and soy sauce dip. The meal had a few of my favorite sushi components, with the fish, wasabi, and avocado, but it went a different direction with the salad and Old Bay.

wasabi salmon 1

It was an unusually light weekend dinner for us. Usually those tend to include a lot more carbs and red meat. It isn’t rare that they also require a serious investment of time in the kitchen, and this recipe differs from that routine as well.

wasabi salmon 2

In fact, there is absolutely no reason this wouldn’t fit right in with our weekday routine of healthy and quick meals. And that’s good news, because there are more weeknights than weekends, and that means more opportunities to make this dish.

wasabi salmon 5

One year ago: Dulce de Leche Cupcakes
Two years ago: Beer-Marinated Flank Steak
Three years ago: Zucchini Bread
Four years ago: Chocolate Whopper Malted Drops

Printer Friendly Recipe
Pepper-Crusted Salmon with Wasabi-Lemon Dipping Sauce (adapted from Steven Raichlen’s Planet Barbecue! via epicurious and from Cook’s Illustrated’s Glazed Salmon recipe)

Serves 4

I served this with Avocado and Watercress Salad (without the apple), and it was absolutely perfect.

For the sauce:
1 tablespoon wasabi powder
1 tablespoon water
1 tablespoon grated fresh ginger
juice of 1 lemon
½ cup soy sauce
1 scallion, white and green parts, minced

For the salmon:
2 tablespoons Old Bay seasoning
½ teaspoon kosher salt
1 teaspoon sugar
¼ teaspoon cornstarch
4 (8-ounce) salmon fillets
coarsely ground black pepper
1 tablespoon canola oil

1. Heat the oven to 300 degrees. In a small bowl, mix the wasabi powder and water until smooth. Set aside for 10 minutes to enhance the wasabi flavors, then add the remaining sauce ingredients.

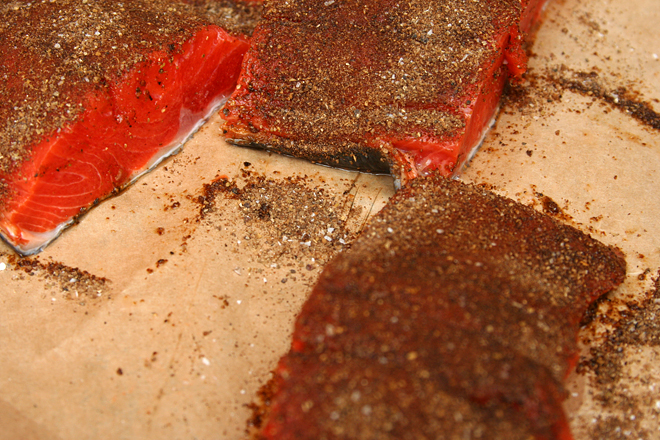
2. In a small bowl, combine the Old Bay, salt, sugar, and cornstarch. Rub into the flesh (not the skin) of the salmon. Season with a generous layer of coarsely ground black pepper, pressing the pepper into the salmon.

3. Heat the oil in a nonstick 12-inch oven-proof skillet over medium-high heat. Transfer the salmon to the pan, flesh-side down. Cook without moving for 1 minute, then flip and cook for another minute. Transfer the skillet to the oven; cook 8-10 minutes, or until the thickest part of the salmon reaches an internal temperature of 125 degrees. Serve immediately.

wasabi salmon 3