summer fresh tomato sauce

tomato sauce 5

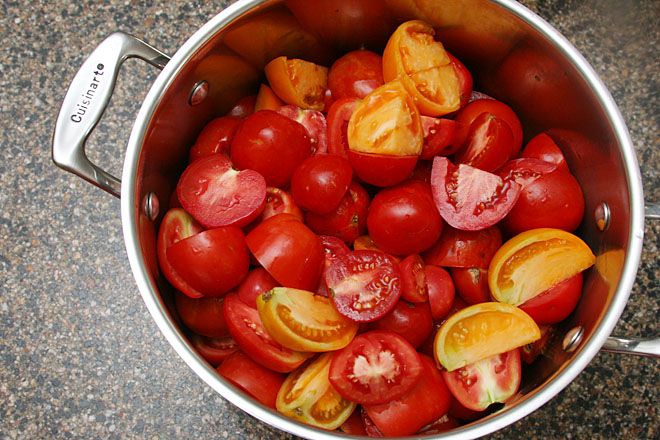
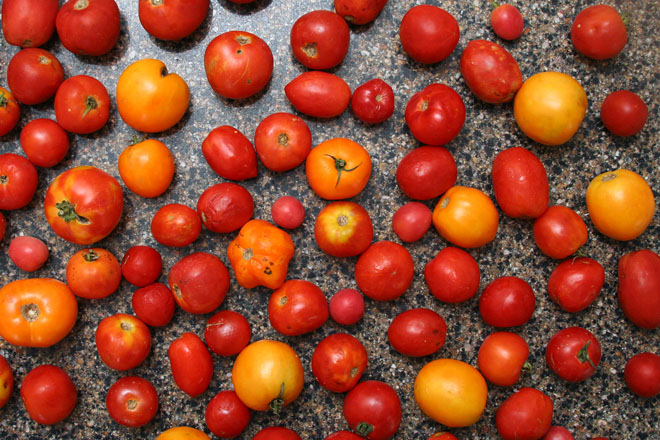
My requirements for the perfect tomato sauce made from fresh tomatoes were very specific – the same issues that everyone has with removing enough liquid from the tomatoes without cooking away all the fresh flavor that makes them so special, plus one more – I did not want to peel the tomatoes. I hate peeling tomatoes. I hate using a vegetable peeler to peel them, and I hate cutting an X into the bottom of each one, then boiling them, then dipping them in cold water, and then pulling the peels off. I cooked sixteen pounds of tomatoes into this batch of sauce, which was well over fifty tomatoes. I do not want to individually peel fifty tomatoes.

tomato sauce 1

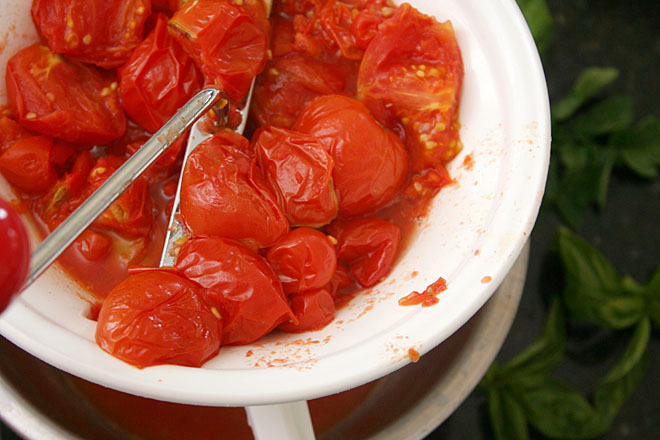
This recipe satisfies all of those requirements, with an added bonus – you don’t even have to core the tomatoes. The tomatoes, very roughly chopped, are cooked down slightly to soften them, then pressed through a food mill – the mill strains out the seeds, cores, and peels. For a batch this large, it’s still a somewhat tedious process, but nothing compared to the prospect of coring and peeling each tomato individually.

tomato sauce 2

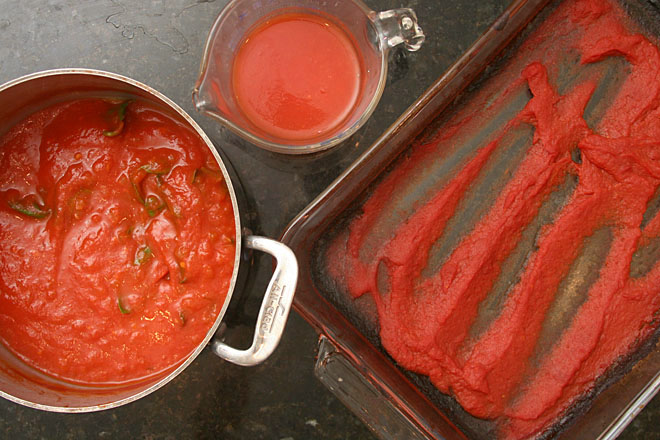
From there, the fresh tomato puree is divided into three portions – one portion is simmered on the stovetop with aromatics until it reaches a sauce consistency. Another is kept fresh, with no cooking at all. If just these two portions were combined, the resulting sauce would be too liquidy, so the final portion is transferred to a baking pan and roasted until it’s thick and slightly caramelized.

tomato sauce 8

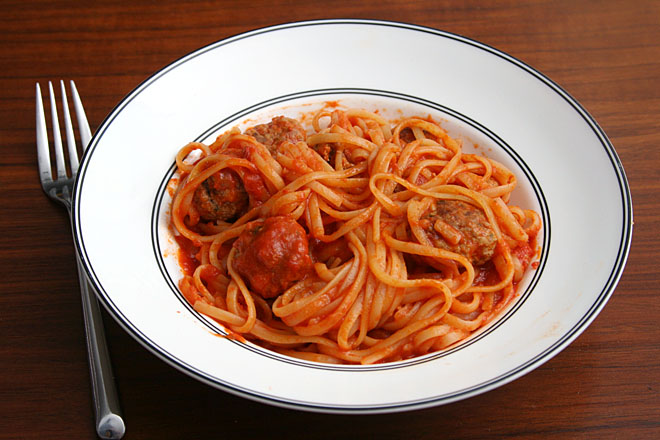
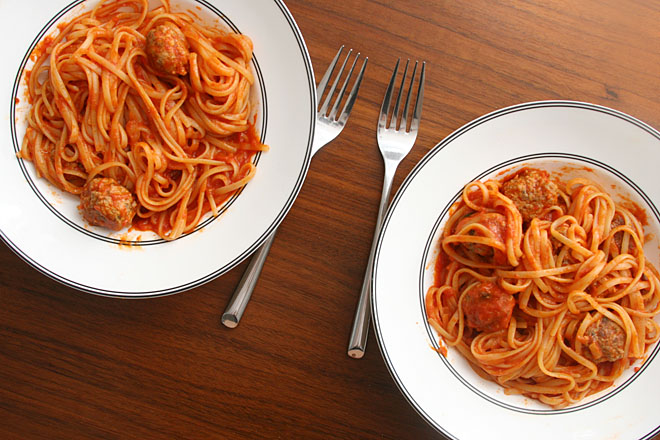
These three mixtures each have something different to offer to the final sauce, and the combination of them makes a sauce with the best that tomatoes have to offer in any form – the bright summeriness of uncooked tomatoes, the deep savoriness of roasted tomatoes. It’s thick enough for anything you’d normally use tomato sauce for – meatballs and spaghetti like we did here, pizza, lasagna. All that, and the only real work you have to do is quarter the tomatoes and push them through a food mill. This has become my summer staple, with extra in the freezer to hoard as long as I can stand.

tomato sauce 9

Printer Friendly Recipe
Summer Fresh Tomato Sauce
(slightly adapted from Serious Eats)

The original recipe starts with 25 pounds of tomatoes. The largest batch I’ve made was 16 pounds, but I’ve also made much smaller batches with just a handful of tomatoes. I’ve based my recipe on ten pounds because it’s a nice round number.

While the recipe recommends any variety of tomato, I’d be hesitant to use all cherry tomatoes, which could make the sauce too sweet. Also, wetter variety of tomatoes will take longer to reduce to a sauce or paste consistency.

If you’re scaling this recipe up or down, put about 40% of the puree in the oven, leave 10% uncooked, and cook the remaining 50% on the stove.

Makes about 1 quart of sauce, although it will depend on the type(s) of tomatoes used

10 pounds tomatoes, any variety, quartered, or halved if small
1 tablespoon olive oil
1 small yellow onion, chopped fine
salt
1 clove garlic, minced
2 sprigs fresh basil
1 small tomato plant cutting with about 5 leaves attached (optional)

1. Heat the oven to 300 degrees. In a large (7- or 8-quart) stockpot over medium heat, cook the tomatoes, covered, until they begin to soften and release their liquid. (You may need to do this in multiple batches, depending on the size of your largest pot and the size of the batch you’re making.) Transfer the tomatoes to a food mill on the finest setting set over a large bowl and press the tomatoes through. Discard the skins and seeds that accumulate in the food mill.

2. Spray two 9-by-13-inch (or similarly sized) baking pans with cooking spray (or grease lightly with olive oil). Pour 3½ cups of tomato puree into each of the pans. Transfer the pans to the oven and roast, stirring occasionally, until the puree has reduced to a paste and leaves a clean trail when a spatula is dragged through it, 2 to 4 hours.

3. Pour another 1½ cups of tomato puree into a small container. Set aside.

4. In a large saucepan over medium heat, cook the onion and a pinch of salt, stirring occasionally, until translucent, 4 to 5 minutes. Add the garlic and cook, stirring constantly, until fragrant, about 1 minute. Add the remaining tomato puree and cook, stirring very occasionally, until thick enough to coat the back of a spoon, 1 to 2 hours. Remove from the heat, add the basil and tomato leaves (if using) and set aside for about 5 minutes. Remove the basil and tomato leaves and discard them.

5. Combine the three mixtures, and add salt to taste. Serve, refrigerate for up to 5 days, or freeze.
tomato sauce 4

julia child’s boeuf bourguignon

boeuf bourguignon 6

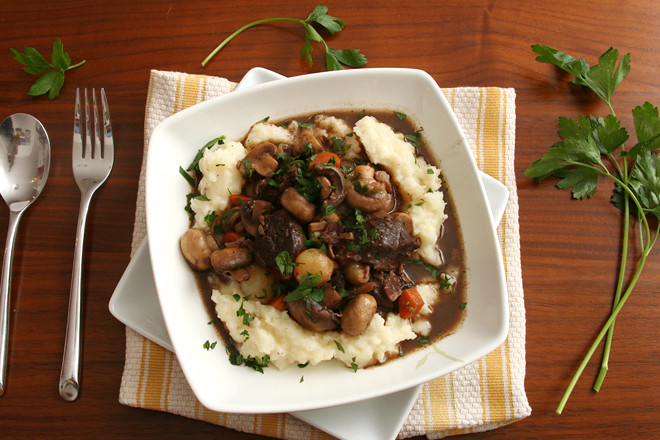
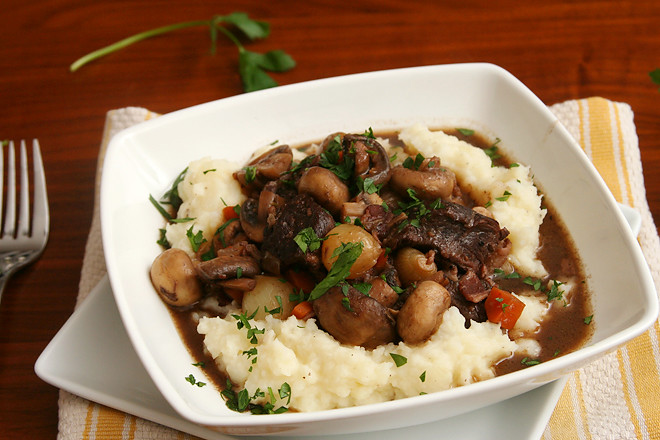
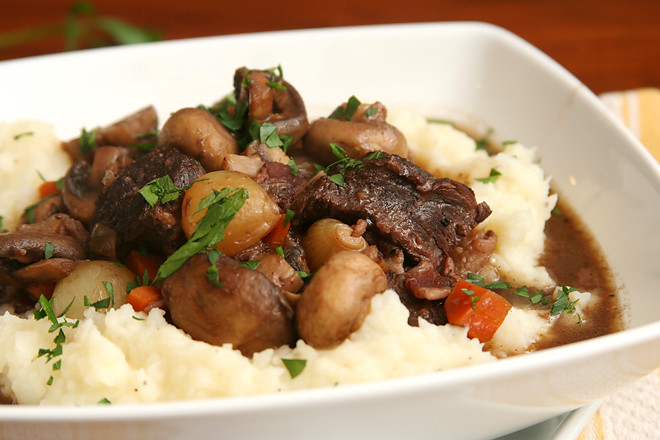
I wanted winey beef stew. I knew there were easier recipes out there, and maybe even better recipes, but Julia Child’s boeuf bourguignon is a bucket list recipe for me. I guess sometimes I can’t resist using every pot and skillet I own just to make one dish.
boeuf bourguignon 3

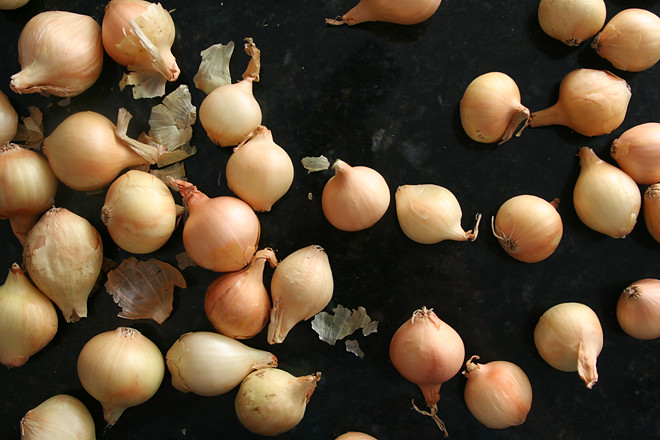
But it was worth it for one single thing I learned from this recipe: how to enjoy pearl onions. The French seem to love using them in their fancy braises, but I’ve never liked their texture in the coq au vin or other beef burgundy recipes I’ve tried. Instead of the quick saute most recipes call for, Julia braises them in broth for almost an hour. At the end, they’re meltingly tender – okay, maybe they’re mushy. But that’s a lot better than the feeling that there are crunchy eyeballs in my stew. They also soak up meaty flavor from the broth, which doesn’t hurt matters.

boeuf bourguignon 1

Other than that, the stew was very good, but probably not any better than my favorite pot roast recipe. Am I allowed to say that about one of Julia Child’s most famous recipes? It’s not that it wasn’t good, because I always really enjoy braising beef in wine. It’s just that I also enjoy using one pot for that braise. But now I can check this one off the bucket list, and that, plus those soft pearl onions, makes this a win.

boeuf bourguignon 7

Julia Child’s Boeuf Bourguignon (adapted from Mastering the Art of French Cooking)

Serves 4

I liked the onions a lot, but I would have preferred the mushrooms cooked until they were drier and browner.

6 ounces (about 6 slices) bacon, sliced ¼-inch thick
2 tablespoons vegetable oil, divided
3 pounds chuck roast, trimmed, cut into 2-inch cubes
salt
1 large or 2 small carrots, cut into ½-inch dice
1 medium onion, diced
ground black pepper
2 tablespoons flour
1 (750-liter) bottle medium red wine, such as pinot noir, cotes du rhone, or chianti
2 cups beef broth, plus ½ cup to cook the onions
1 tablespoon tomato paste
2 cloves garlic, smashed
1 bay leaf
4 tablespoons butter, divided
24 pearl onions, peeled (or frozen)
1 sprig fresh thyme
1 small bay leaf
4 sprigs parsley, plus more for garnish
1 pound mushrooms, halved or quartered in large

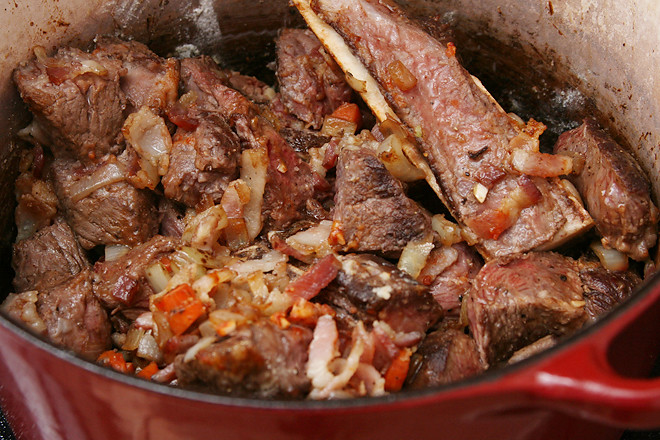
1. Heat the oven to 450 degrees. In a medium saucepan over high heat, bring the bacon and 6 cups of water to a simmer. Reduce the heat to medium and simmer for 10 minutes. Drain and dry the bacon. In a 5-quart Dutch oven over medium heat, cook the bacon until it’s slightly browned, 2 to 3 minutes. Use a slotted spoon to remove it from the pot, leaving the rendered fat in the pot; set the bacon aside.

2. Add 1 tablespoon of oil to the pot with the bacon fat and heat over medium-high heat until just smoking. Season the beef generously with salt. Add half of the beef in a single layer, leaving space between each piece. Cook without moving until the bottom side is browned, about 2 minutes. Rotate each piece, searing and rotating until all sides are browned. Transfer to a plate and repeat with the remaining beef.

3. Add the carrots and diced onion to the pot and cook until lightly browned, about 2 minutes. Return the beef and bacon to the pot with the vegetables; add 1 teaspoon salt and ¼ teaspoon ground black pepper; stir to combine. Sprinkle the flour evenly over the mixture; stir to evenly distribute the flour. Transfer the pot to the oven and cook for 4 minutes. Stir, then cook in the oven for an additional 4 minutes. Transfer the Dutch oven back to the stove. Reduce the oven temperature to 325 degrees.

4. Add the wine and 2 cups of broth to the pot with the beef and vegetables. Add the tomato paste, garlic, and herbs. Bring to a simmer over medium-high heat. Cover the pot, transfer it to the oven, and cook until the meat is tender, 2½ to 3 hours, stirring about once an hour.

5. Meanwhile, in a medium skillet over medium heat, melt 2 tablespoons butter. Add the pearl onions and cook, stirring frequently, until they’re browned. Add ½ cup of broth, the thyme, bay leaf, parsley, and a generous sprinkling of salt, then cover the skillet, reduce the heat to low, and cook until the onions are very tender, about 40 minutes. If there is any liquid left in the pan at this point, let it evaporate. Set aside.

6. In a medium skillet over high heat, heat 2 tablespoons butter and the oil. Add the mushrooms and cook, stirring constantly, until they are lightly browned, 4 to 5 minutes. Set aside.

7. Remove the Dutch oven from the oven. Strain the liquid into a separate saucepan, returning the beef and bacon to the Dutch oven or a serving dish. Add the mushrooms and onions to the beef. Skim the liquid in the saucepan of fat and simmer until it’s reduced to about 2½ cups and is thick enough to lightly coat a spoon. Pour the reduced sauce over the meat and vegetables. Serve, topped with minced parsley.

boeuf bourguignon 8

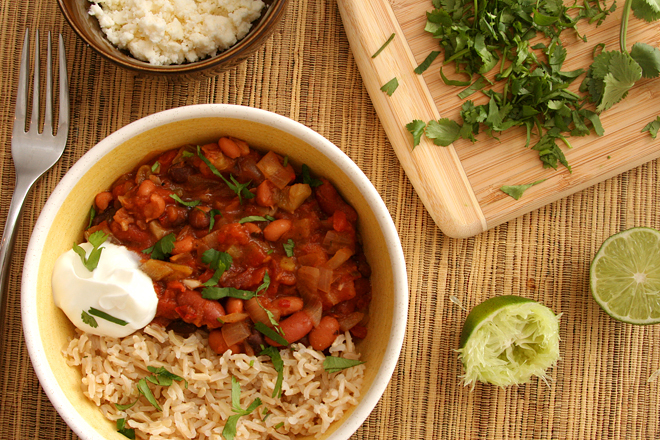
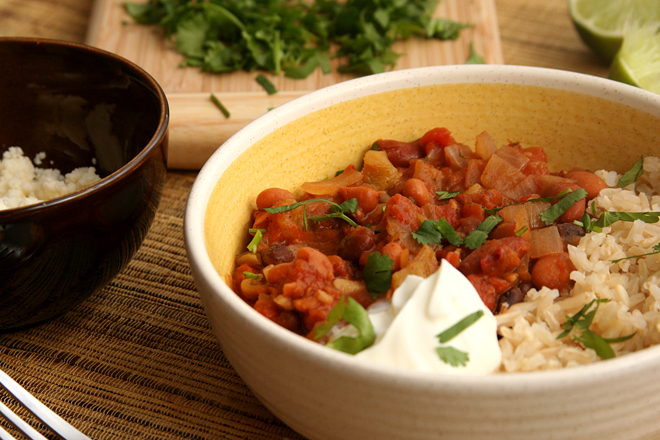
spicy mexican beans and rice

mexican rice and beans 6

It’s been a long road since I shared something vaguely similar to this recipe, well over six years ago. At the time, I said that I had a goal to make more crockpot recipes. Since then, I have made exactly three crockpot recipes worth sharing, and one of those I’ve never made again. In general, I’m more into low-and-slow oven cooking than crockpotting. Heck, I recently even made “crockpot” pulled “pork” (it was venison; still delicious) in the oven.

mexican rice and beans 1

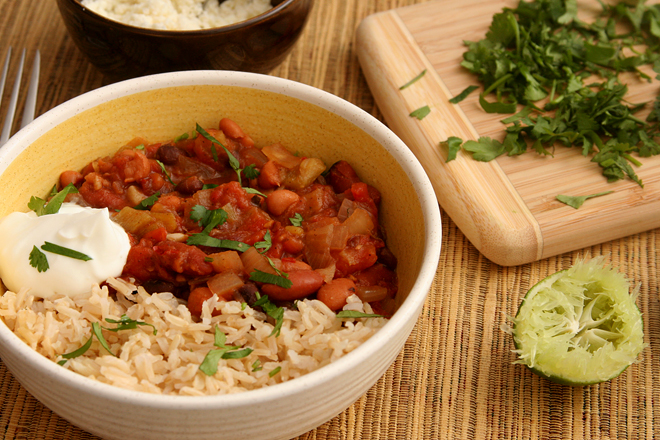
The long road of not-crockpotting has led me to adapt my old favorite crockpot recipe for the stove. The way the original recipe is written, with bone-in chicken thighs, the crockpot is a good choice. However, I always make this as an easy, healthy, vegetarian weeknight meal, leaving the chicken out. Why spend 10 hours, the whole day when I’m away for work, slow-cooking canned beans with some seasonings?

mexican rice and beans 3

So instead of adapting stovetop or oven recipes for the crockpot like most people do, I’ve adapted a crockpot recipe for the stove. I replaced the chicken soup mix with aromatics and spices, the chicken with a greater variety of beans, and the fresh tomatoes with canned tomatoes (in season year round!). It really isn’t any harder than the crockpot recipe was, and it tastes just as good.  With this new crockpot-less recipe, it might be time to retire my crockpot entirely.  Surely I can think of another fun new kitchen tool that I don’t really need to take up that cabinet space, right?

mexican rice and beans 5

Printer Friendly Recipe
Spicy Mexican Beans and Rice

8 servings

2 tablespoons vegetable or olive oil
1 large or 2 small to medium onions, diced
salt
4 cloves garlic, minced
2 teaspoons chili powder
1 teaspoon cumin
½ teaspoon oregano
½ cup green chile, roasted, peeled, and diced
2 chipotle chiles, minced
2 (15-ounce) cans black beans, drained and rinsed
1 (15-ounce) can kidney beans, drained and rinsed
1 (15-ounce) can pinto beans, drained and rinsed
1 (14-ounce) diced tomatoes
1 cup chicken broth
juice from 1 lime
6 cups cooked rice from 2 cups uncooked rice
cilantro, minced
optional toppings: queso fresco or cheddar cheese, diced avocado, Greek yogurt or sour cream

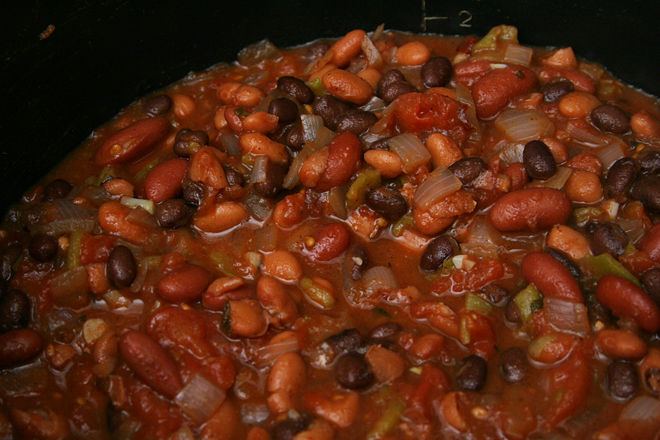
Heat the oil in a large saucepan over medium heat. Add the onion and a pinch of salt and cook, stirring occasionally, until just beginning to brown at the edges, about 8 minutes. Add the garlic, chili powder, cumin, and oregano; cook, stirring constantly, until fragrant, about 30 seconds. Add the green chile, chipotle chiles, beans, tomatoes, and broth; cover, bring to a simmer, then reduce the heat to low and lightly simmer until the flavors are blended, at least 20 minutes or up to an hour if you aren’t in a hurry. If the mixture is too liquidy, remove the cover, increase the heat to medium, and simmer until the desired thickness is reached. Taste and add salt if necessary. Stir in the lime juice. Serve over rice, topped with cilantro and other toppings as desired.

mexican rice and beans 8

brussels sprouts and kale salad with pecorino and almonds

brussels sprouts kale salad 11

I never would have served my dad kale six months ago. For his whole life, he’s been a classic meat and potatoes guy, heavy on the meat. He’d put vegetables on his plate every night, and he’d always eat them – all two forkfuls that he’d served himself.

brussels sprouts kale salad 2

He made a sudden switch last fall in an attempt to lower his cholesterol and blood pressure. (It worked, by the way.)  However, he didn’t just start eating more vegetables and less meat. He didn’t become a pescatarian, or even a vegetarian. No, he went all the way from meat and potatoes to vegan – vegan with no fat, not even from avocados.

brussels sprouts kale salad 8

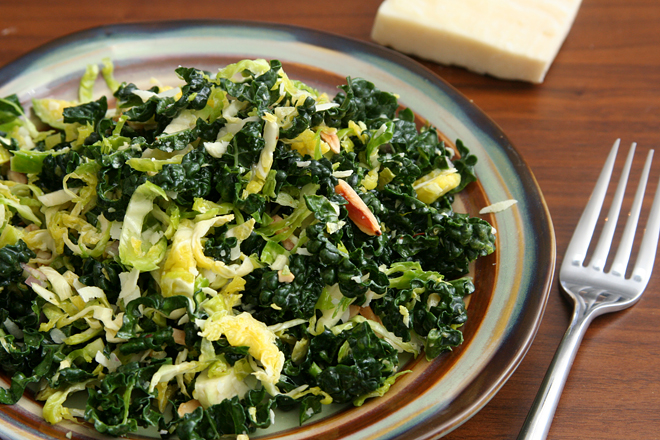
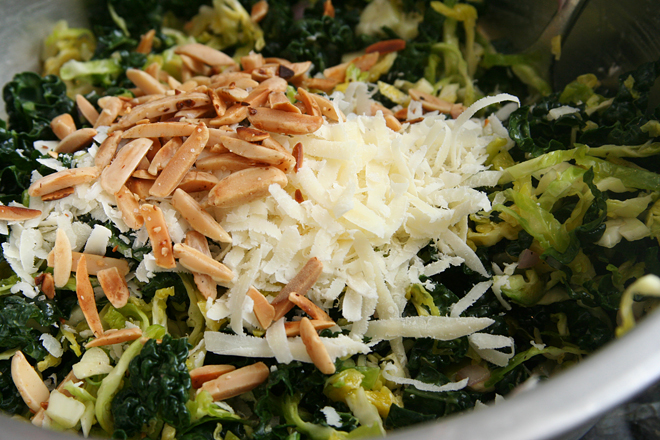
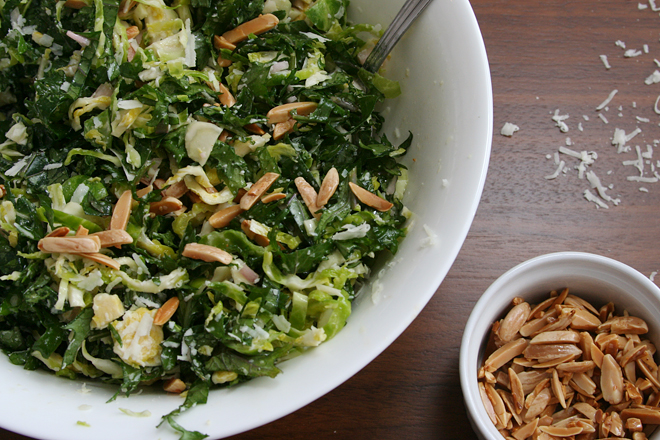
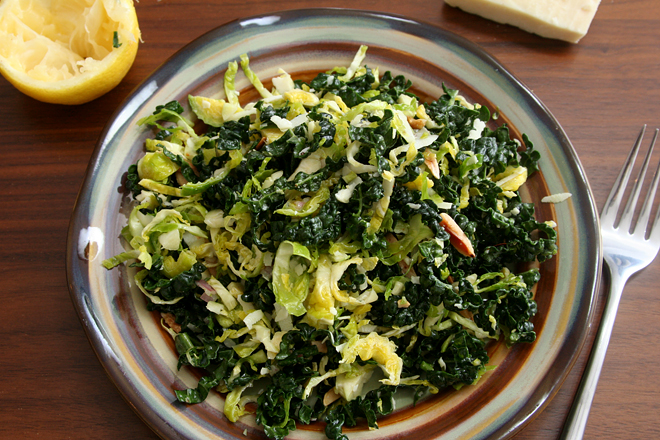
He’s loosened up the rules quite a bit since then, although I get the idea that rice and beans still play a big role in his diet. So when my parents visited, I took a chance and served my new favorite salad, almost a slaw of thinly sliced Brussels sprouts and Tuscan kale. It’s bright from lemon juice, but the pecorino provides a bit of richness. I love the crunch of the almonds. It’s a strange world, although not a bad one, where I am comfortable feeding my dad kale but not the Italian sausage dish that was the main course of this meal.

brussels sprouts kale salad 4

Printer Friendly Recipe
Brussels Sprouts Kale Salad with Pecorino (adapted from Bon Appétit via epicurious)

6 to 8 servings

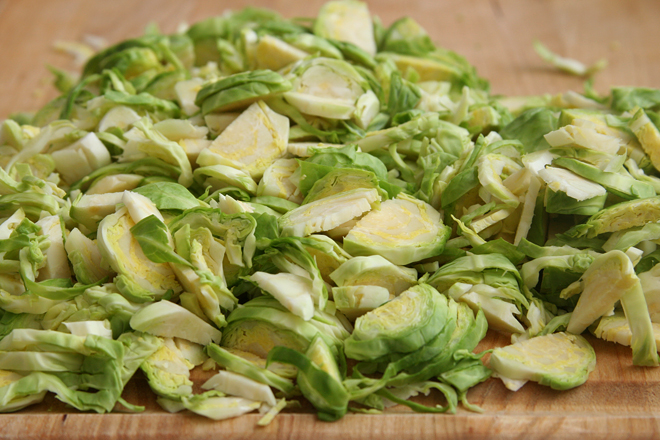
Slicing the Brussels Sprouts isn’t as tedious as it sounds; it’ll probably take you ten minutes. However, the slicing blade on a food processor should do the trick too.

1 teaspoon plus ¼ cup extra-virgin olive oil, divided
½ cup slivered almonds, coarsely chopped
¼ cup fresh lemon juice
2 tablespoons Dijon mustard
1 small shallot, minced
1 small garlic clove, finely grated
¼ teaspoon kosher salt plus more for seasoning
Freshly ground black pepper
16 ounces Brussels sprouts, trimmed, halved and sliced thin
2 bunches Tuscan kale (about 8 ounces total), center stem discarded, leaves thinly sliced
1 cup (2 ounces) finely grated Pecorino

1. In a small skillet over medium heat, heat 1 teaspoon of the olive oil. Add the almonds and toast, stirring constantly, until browned and fragrant, 2-4 minutes. Transfer the almonds to a plate; set aside.

2. In a small bowl, mix the lemon juice, mustard, shallots, garlic, salt, and pepper. Whisk in the remaining olive oil.

3. Combine the Brussels sprouts, kale, dressing, almonds, and pecorino. Serve immediately or cover and chill for up to 8 hours.

brussels sprouts kale salad 9

roasted cauliflower soup with feta

cauliflower feta soup 5

While spinach with feta hasn’t quite reached the level of “Oh my god, if I eat this one more time, I’ll go crazy”, it’s certainly a far cry from the “wow, I can’t believe how delicious something as simple as the combination of spinach and feta is.” (Seriously, if you haven’t tried it, check it out – feta is creamy and salty and briny, so it covers all of the bases that a good salad dressing does.) After I eat a banana with peanut butter about halfway through my workday afternoons, when the only snacks I have left are spinach with feta and vegetables with hummus, I think to myself, “well, that’s it, the rest of the afternoon’s snacks are just to be endured and not enjoyed.”

cauliflower feta soup 1

I don’t always, or even often, for that matter, want to spend part of my weekend making snacks for the week, but it’s occasionally worth it for some variety. This soup covers the same basic nutritional bases as spinach with feta would – vegetables and dairy protein. Surely raw spinach has more fiber and nutrients than roasted and boiled cauliflower, but let’s not overthink things.

cauliflower feta soup 2

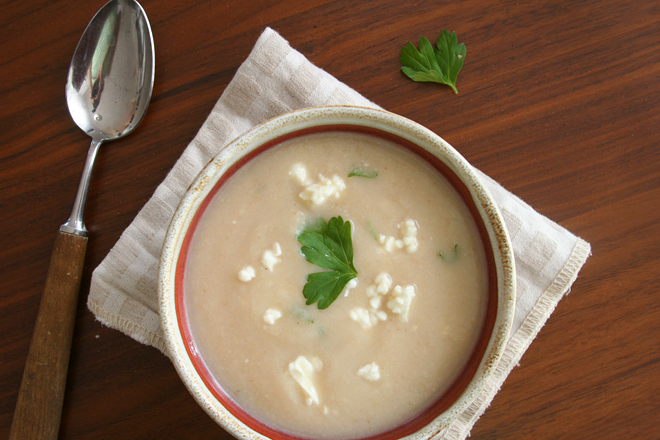
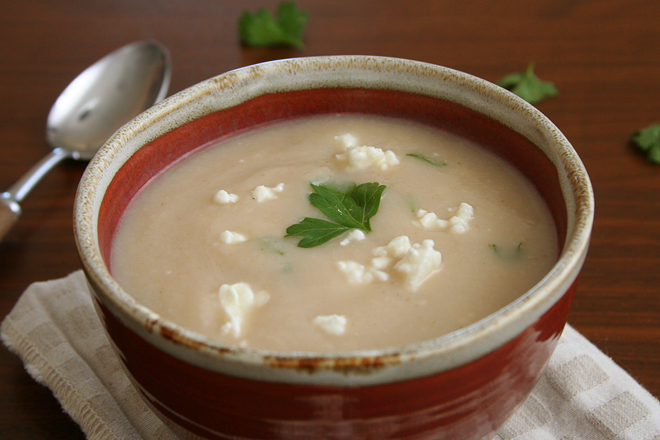
The important thing is that I actually look forward to eating this every day, instead of wavering between disinterest and dread. And not just because it isn’t the same thing I’ve eaten everyday for the last three years – it’s a great soup. The pureed cauliflower makes it seem rich and creamy, while the feta and squeeze of lemon juice brighten up the flavors. Having something to look forward to when you’re six hours into a nine-hour workday is worth a bit of extra cooking on the weekend.

cauliflower feta soup 4

Printer Friendly Recipe
Roasted Cauliflower Soup with Feta (adapted from Two Peas and Their Pod)

1 head of cauliflower, cut into 1 to 2-inch florets
2 tablespoons olive oil, divided
Salt
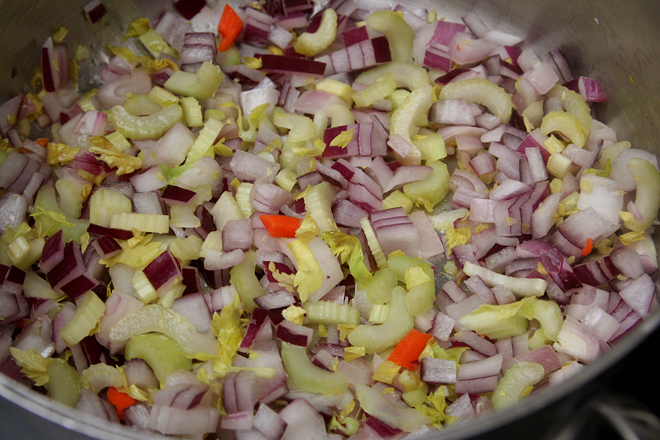
2 stalks celery, diced
1 onion, diced
3½ cups vegetable or chicken broth
2 sprigs thyme
2 ounces feta
1 tablespoon lemon juice
2 tablespoons parsley, minced

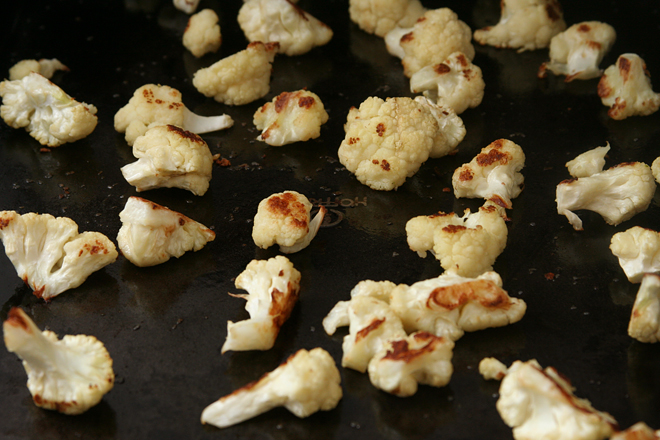
1. Place a rimmed baking sheet in the oven and heat the oven to 400 degrees. When the oven is hot, remove the baking sheet, add one tablespoon of olive oil plus a generous sprinkling of salt, then the cauliflower. Spray the top of the cauliflower with cooking spray. Roast, stirring twice, for 20-25 minutes, until a couple sides of each floret are deeply browned.

2. In a 5-quart pot, heat the remaining 1 tablespoon oil over medium heat. Add the celery, onion, and a pinch of salt; cook, stirring occasionally, until softened and the onion is translucent, 6-8 minutes. Add the roasted cauliflower, broth, and thyme. Bring to a simmer over medium-high heat, then reduce the heat to medium-low and simmer for 20 minutes. Puree, either with an immersion blender or in batches with a stand-up blender.

3. Stir the feta, lemon juice, and parsley into the soup. Taste for seasoning, adjusting as necessary, and serve immediately. (Can also be made several days in advance.)

cauliflower feta soup 3

kale salad with currants, pine nuts, and parmesan

kale salad with currants 6

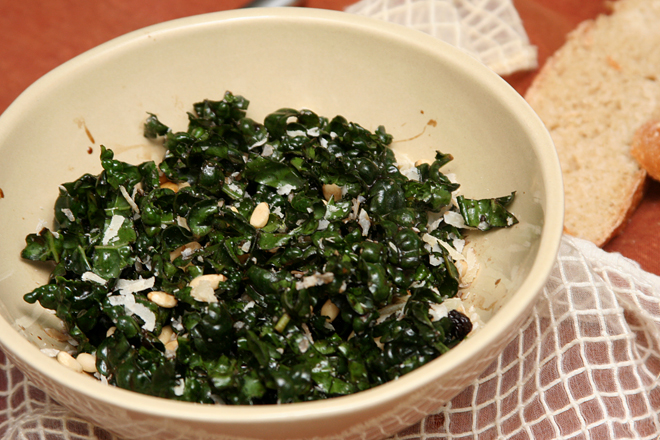
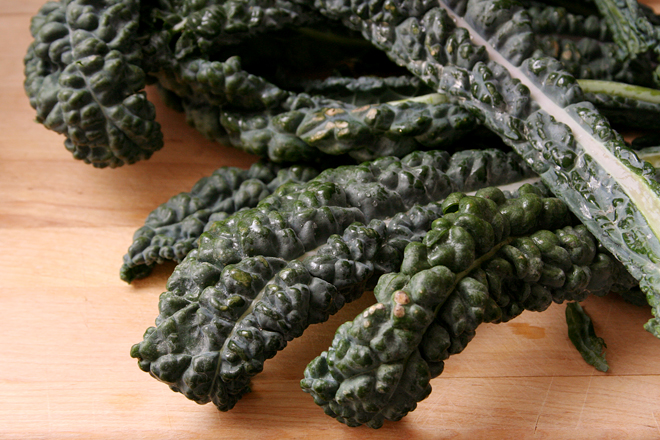
So, it turns out that I really like kale. It isn’t at all something I eat just because it’s dark green and probably really good for me. I like the flavor, earthy and vegetal together. I like the texture, how cooked kale is still chewy, unlike spinach which almost immediately turns to mush, and how raw kale doesn’t get soggy. And I like the convenience – it stays fresh for a while in the fridge and you can make salads with it days ahead of time, and they get better instead of worse.

kale salad with currants 2

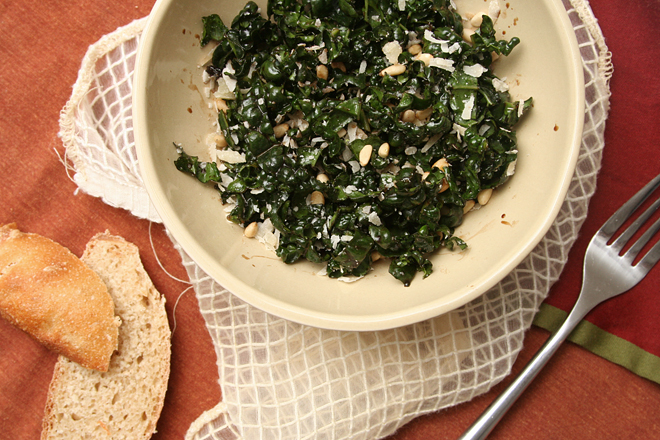
I made this for a pizza party I hosted. The party started right after work, plus I had to deal with the pizza dough, so making salad right beforehand wasn’t an option. I took a risk and served kale; I wasn’t sure how it would go over, but I assumed there were enough friendly flavors in this salad to please most palates.

kale salad with currants 3

The salad might not have been as popular as the Nutella banana pizza or mascarpone-stuffed strawberries, but people seemed to like it.  There were leftovers, but that was okay, because even several days after I’d made the salad, it was still crisp and delicious. Plus it meant more kale for me – and I really like kale.

kale salad with currants 4

Printer Friendly Recipe
Kale Salad with Pine Nuts, Currants, and Parmesan (adapted from Bon Appetit via epicurious)

3 tablespoons balsamic vinegar
2 tablespoons dried currants
1 tablespoon unseasoned rice vinegar
1 tablespoon honey
1 tablespoon extra-virgin olive oil
1 teaspoon salt
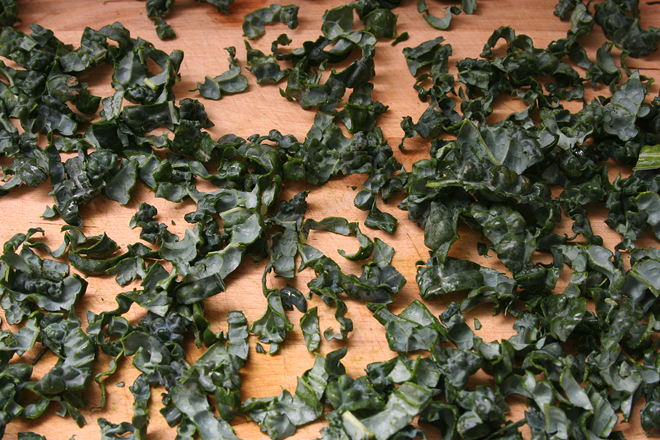
2 bunches Tuscan (lacinato) kale (about 1 pound), center ribs and stems removed, leaves thinly sliced crosswise
2 tablespoons pine nuts, lightly toasted
Parmesan cheese shavings

1. Place the vinegar and currants in a small pot; bring to a simmer over medium-high heat, then remove from the heat. Let soak 15-30 minutes, while you prepare the other ingredients; drain, reserving vinegar.

2. Whisk vinegar leftover from soaking the currants, the rice vinegar, honey, oil, and salt in large bowl. Add the kale, currants, and pine nuts; toss to coat. Let marinate 20 minutes at room temperature, or cover and refrigerate overnight. Season to taste with salt and pepper. Sprinkle cheese shavings over salad and serve.

kale salad with currants 5

tomato soup with chicken meatballs and pasta

tomato soup meatballs 8

I have been loyal to the first homemade tomato soup recipe I ever made. It was ten years ago, when I was just starting to up my cooking game. I’ve seen so many tomato soup recipes since then, but I’ve never felt any temptation to stray. My favorite recipe was comfortingly familiar, and I always knew that I’d be disappointed about any other recipe.

tomato soup meatballs 2

Apparently, adding meatballs to tomato soup puts it in a different category, so I’m willing to try it, even though there are more similarities than differences between the two recipes. The flavor base of my old favorite is shallots, which are cooked in butter with tomato paste until the mixture is dark and caramelized. Canned tomatoes are roasted until they’re dry and lightly browned before being stirred into aromatics along with the canning juice and chicken broth.

tomato soup meatballs 3

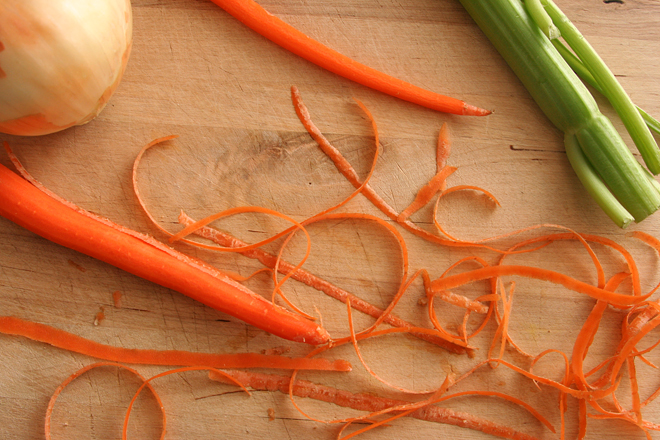
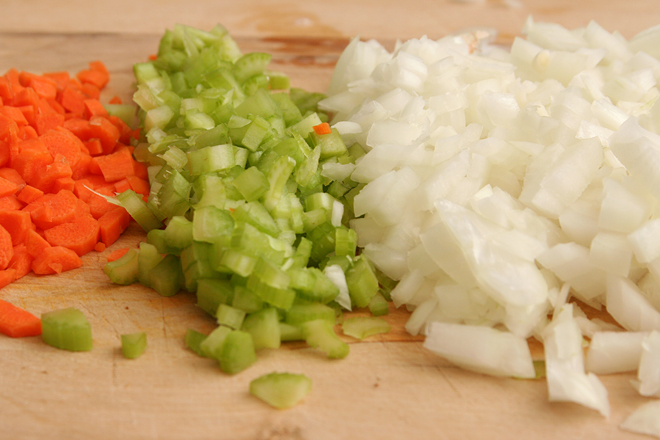
Replace the butter with olive oil and the shallots with a combination of onions, carrots, and celery, cook them a bit less, skip the tomato paste and add the tomatoes without roasting them, and you’ve got this new soup. The flavor is lighter, but I enjoyed it nearly as much and might actually prefer it once in a while.

tomato soup meatballs 4

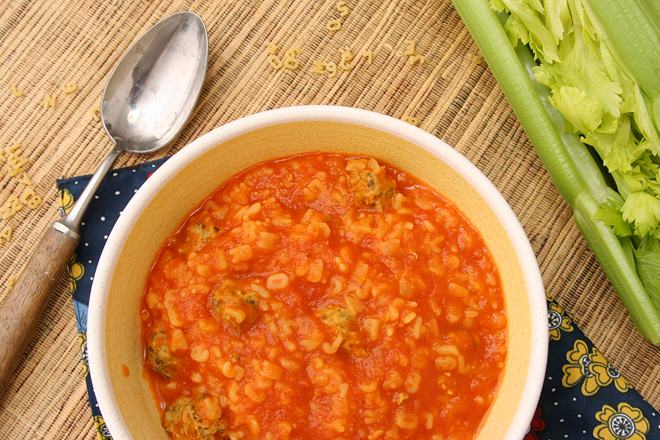
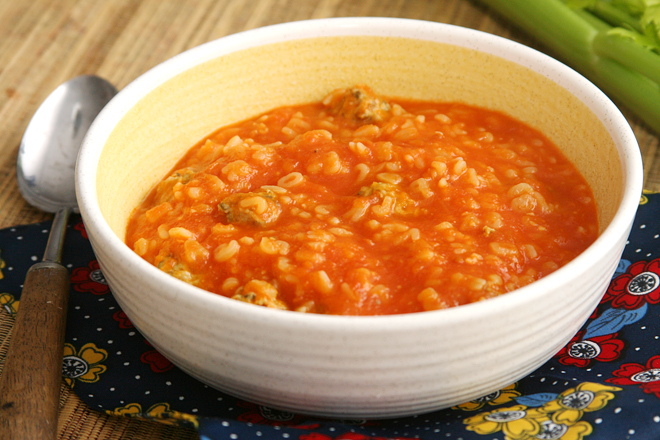
The meatballs, of course, are a fun addition, and together with the pasta, put this almost in the spaghettio’s category. I’d say it’s different enough not to compare to my standard recipe, but I just compared them. And that’s okay, because they’re both so great.

tomato soup meatballs 6

Printer Friendly Recipe
Tomato Soup with Pasta and Meatballs (adapted from America’s Test Kitchen Light and Healthy 2011)

4 servings

My meatballs ended up looking more like chicken-flavored pesto than pesto-flavored chicken, which might be because my homemade pesto has less oil (and therefore more basil per volume) than store-bought versions. Still, I’ve increased the chicken slightly. The soup could use more meatballs anyway.

I’ve probably made this slightly less healthy by increasing the pasta, but the original amount (4 ounces) was just a tease.

I usually cook with canned whole tomatoes instead of diced, because they break down more. I just chop them by sticking a pair of kitchen shears in the can and snipping away.

Meatballs:
8 ounces ground dark chicken (or a mix of dark and light meat)
3 tablespoons pesto
3 tablespoons fresh bread crumbs
⅛ teaspoon salt

Soup:
1 tablespoon olive oil
1 onion, diced
1 large carrot, peeled and diced
1 large celery rib, diced
Salt
3 cloves garlic, minced
2½ cups reduced-sodium chicken broth
1 (28-ounce) can diced tomatoes or whole tomatoes, chopped
6 ounces uncooked small pasta, such as ditalini or alphabet noodles

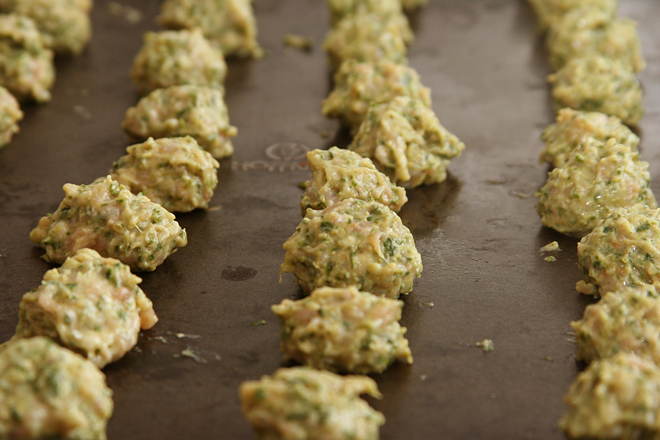
1. In a medium mixing bowl, combine the chicken, pesto, bread crumbs, and salt. Mix thoroughly, then form into approximately forty ½-inch balls. Chill until needed.

2. In a 3- or 4-quart saucepan, heat the oil over medium heat. Add the onion, carrot, celery, and ¼ teaspoon salt. Cover and cook, stirring occasionally, for 10 minutes, then uncover and cook until the mixture is dry, about 5 minutes. Add the garlic and cook, stirring constantly, until fragrant, about 1 minute. Add the chicken broth and tomatoes; bring to a simmer over medium-high heat, then reduce the heat to medium-low, cover, and simmer for 20 minutes to blend the flavors. Taste for seasoning and add salt if necessary.

3. Use an immersion blender to puree the soup, or transfer it in batches to a stand-up blender to puree, then return the soup to the pot. Bring to a boil over medium-high heat and add the meatballs and pasta. Cook, stirring frequently, until the noodles are tender and the meatballs are cooked through, about 10 minutes. Serve.

tomato soup meatballs 7

butternut squash soup with spiced creme fraiche

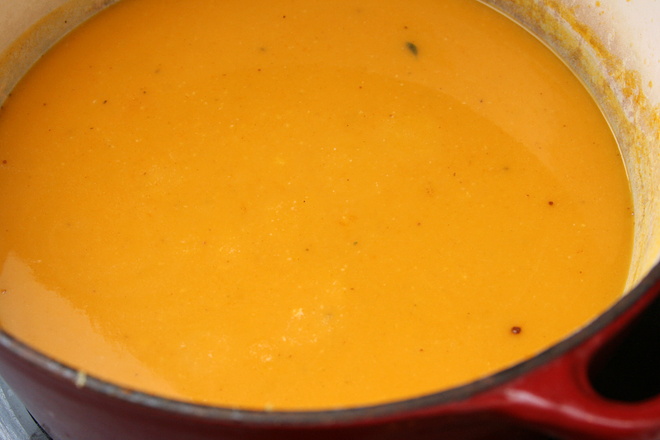
butternut squash soup 6

I made this pumpkin mushroom soup a couple days ago using butternut squash instead of pumpkin, and it occurred to me that what was a pumpkin phase four years ago is now a butternut squash phase. I’ve been buying about two a week, and I’ve made all sorts of good stuff, like ravioli, chili, and lentil goat cheese salad. I was going to make squash kale pizza tonight, but some friends are getting together for dinner instead. I’m contributing butternut squash and green chile gratin. I thought about bringing this salad, but I already had it on the menu for next week anyway, so I know I’ll get to eat it soon.

butternut squash soup 2

Butternut squash soup has kind of been on my radar to make, but I tried a recipe a few years ago that was good but nothing special, so I hadn’t gone back to the idea since. I ended up making this for a Saturday night dinner that I wanted to be as fall-y as possible. It was the perfect idea for a first course before roast chicken with potatoes and pan-roasted Brussels sprouts and carrots. Even better, a friend of mine was hosting a fall-themed dinner later that week and didn’t have time to test out a soup recipe, so I was able to help her out.

butternut squash soup 4

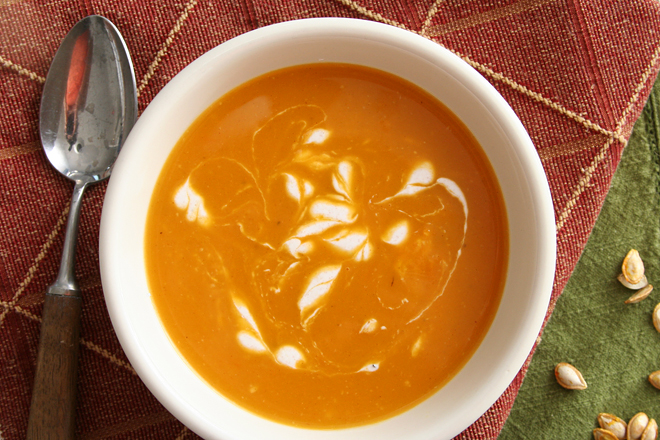
I loved the soup, Dave loved the soup, my friend loved the soup, and then later that week, the rest of our group of friends said they loved the soup, several asking for the recipe. It’s kind of a subtle set of flavors, with nothing jumping out individually, but everything works well together. The star anise is interesting; if you think about it when you’re eating, it’s evident, but it and the cinnamon and nutmeg are balanced by the savory bay and thyme. The tart garnish (I made crème fraiche for the party but used Greek yogurt at home) was a nice complement since the soup is on the sweet side. I’m so glad I have a great butternut squash soup recipe after all these years – and it makes perfect sense that I would find it in the middle of a butternut squash phase.

butternut squash soup 5

Printer Friendly Recipe
Butternut Squash Soup with Spiced Creme Fraiche (slightly adapted from Allison Vines-Rushing and Slade Rushing’s Southern Comfort via epicurious)

The original recipe calls for the big spices to be tied up in a cheesecloth bundle before being added to the soup. I’m sure they’re easier to remove before blending this way, but fishing out a few spices from a pot of soup seemed easier to me than digging out the cheesecloth from the pantry.

1 large butternut squash, peeled, seeded, and cubed
1 tablespoon olive oil
Salt and pepper
2 tablespoons unsalted butter
4 large shallots, sliced
8 garlic cloves, peeled and smashed
½ teaspoon ground white pepper
1 bay leaf
1 thyme sprig
1 star anise
4 whole peppercorns
½ cup white wine
8 cups chicken or vegetable broth
½ cup heavy cream
1 tablespoon sugar
1 teaspoon salt
¼ teaspoon ground cinnamon
¼ teaspoon freshly grated nutmeg
Spiced Crème Fraîche, for accompaniment

1. Place a rimmed baking sheet in the oven; heat the oven to 425 degrees. When it’s hot, remove the pan from the oven and spread the olive oil evenly over the surface. Transfer the squash and a generous sprinkling of salt and pepper to the hot baking sheet; stir to coat. Roast the squash until browned on at least one side, about 25 minutes, stirring once.

2. Meanwhile, heat the oil in a large pot over medium heat. Add the shallots and cook, stirring occasionally, until the edges start to brown, 6-8 minutes. Add the garlic, pepper, bay, thyme, star anise, and peppercorns; cook, stirring constantly, until fragrant, about 1 minute. Add the wine and cook, scraping the bottom of the pot, until reduced by half. Add the roasted squash, broth, cream, sugar, salt, cinnamon, and nutmeg. Increase the heat to medium-high and bring to a simmer, then reduce the heat to medium-low; cover and simmer for 20 minutes.

3. Remove and discard the bay, thyme, star anise, and peppercorns. Puree the soup, either with an immersion blender or by transferring it in batches to a standup blender. Taste for seasoning and serve immediately, topped with Spiced Crème Fraîche. (Soup can be chilled for several days and reheated.)

Spiced Crème Fraîche

I actually don’t know how much of a difference the spices make, but I did like the tart dairy with the soup. Greek yogurt, sour creme, and crème fraîche will all work just fine.

1 cup crème fraîche
¼ teaspoon salt
¼ teaspoon freshly ground black pepper
¼ teaspoon freshly grated nutmeg
¼ teaspoon ground ginger

Mix all ingredients.

butternut squash soup 7

beef barbacoa

barbacoa 8

I am going through a taco phase, and it might have started out with these. Well, mostly I just really like tacos, because who doesn’t, but things have ramped up in recent weeks. We’ve had all sorts of tasty fillings recently, but it’s hard to beat barbacoa.

barbacoa 2

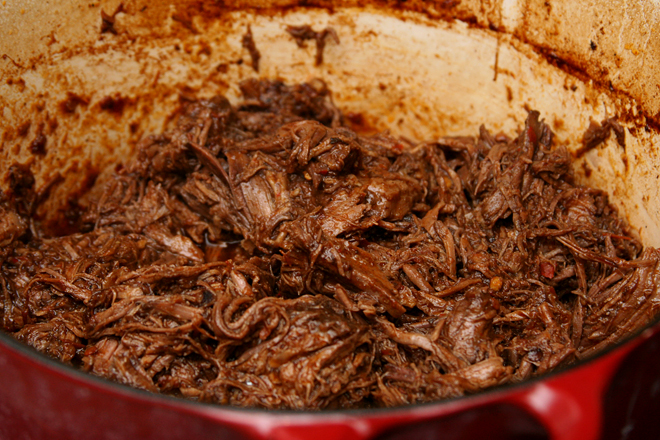
Barbacoa has so many satisfying flavors – it’s a little sweet, a little sour with a squeeze of lime juice, plenty meaty of course. It definitely has a spicy kick. It’s coated in a rich layer of sauce that delivers loads of flavor, with nothing left behind in the pot.

barbacoa 3

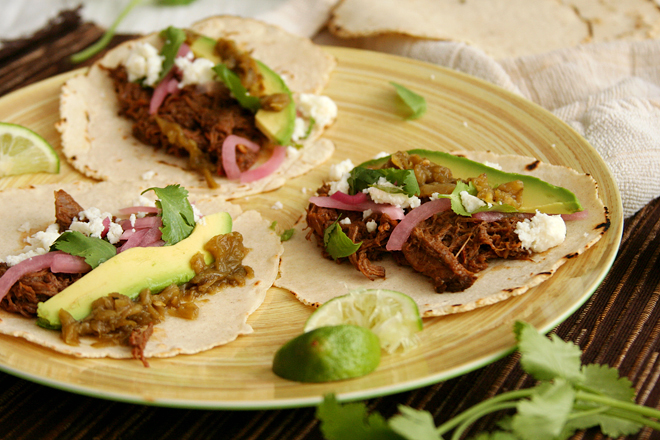
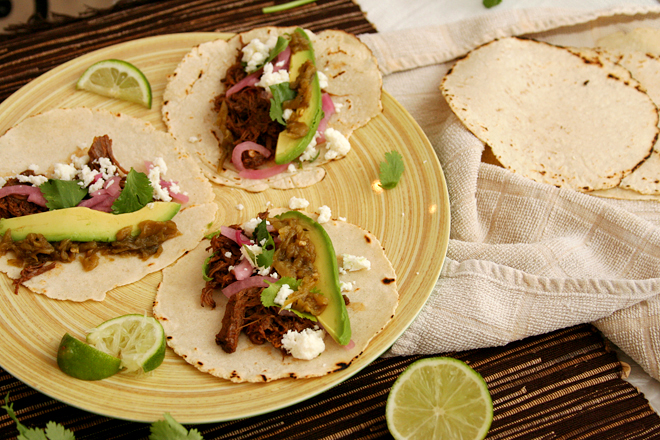
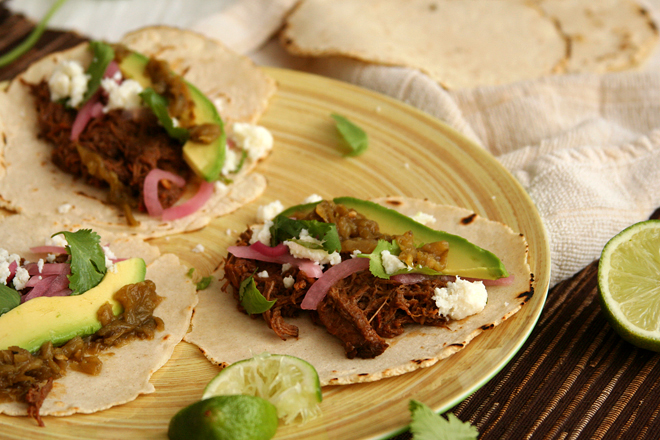
It only gets better with toppings. Avocado is arguably my favorite part of most tacos (not these; the barbacoa wins by a mile), and queso fresco is the perfect salty fresh compliment to the rich meat. Those two and a wedge of lime are my only requirements, but pickled onions and a smattering of cilantro are nice too.

barbacoa 4

This isn’t a hard recipe, although it’s far from fast. The long ingredient list looks worse than it is. There’s a lot of spices, chiles, and condiments, but nothing other than an onion and some garlic require a cutting board. Not even the beef needs to be sliced or cut into cubes. What I thought was going to be a significant project took me about half an hour.

barbacoa 6

Of course, you don’t actually get to eat until almost 5 hours layer, after the beef has become tender and rich and the broth has been reduced down to a sauce. It’s getting warm out and you might not want to leave your oven on for four hours while the beef cooks, but the result is worth some air-conditioning. Plus, it reheats great, maybe even better than it was the first day. I have to admit that I haven’t really been in a taco phase, just a barbacoa phase. I’ve got one more batch stored in the freezer, and I can’t wait.

barbacoa 9

One year ago: California Roll Burgers
Two years ago: Basic Coleslaw
Three years ago: Quinoa Tabbouleh
Four years ago: Fresh Strawberry Scones
Five years ago: Ricotta Spinach and Tofu Ravioli

Printer Friendly Recipe
Beef Barbacoa
(very slightly adapted from The Food Lab on Serious Eats)

About 6 servings

I think the crockpot is a definite possibility here, but it’ll take you a lot longer to reduce the liquid to a sauce after the cooking time.  You’ll still need to brown the oxtails and onions beforehand, because that adds tons of flavor.  That’s an easy tradeoff to save 4 hours of oven use when the weather’s warm!

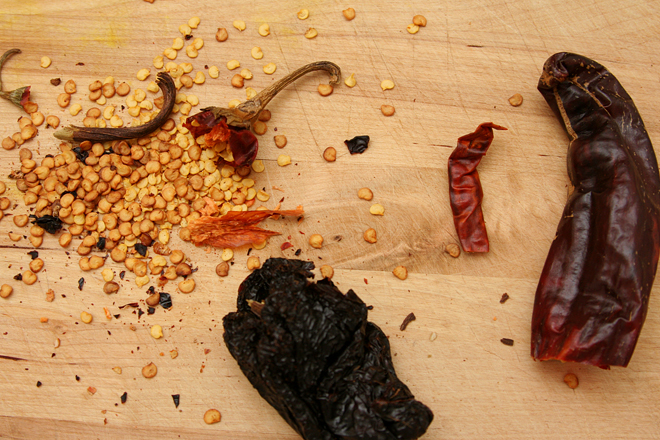
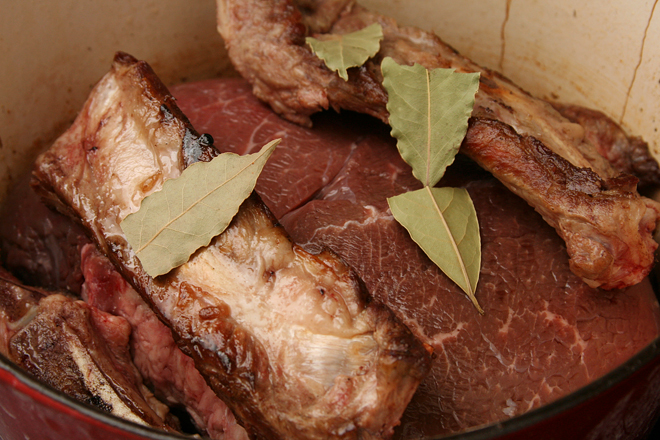
If you can’t find these exact types of chiles, any combination of mild, fruity and bright-tasting chiles will do, such as guajillo or Colorado.  I used a New Mexico, an ancho, and an arbol chile.  I couldn’t find oxtails either, so I used beef ribs.

1 whole dried New Mexico, costeño, or choricero chili, seeds and stem removed
1 whole chile ancho or pasilla, seeds and stem removed
1 whole chile negro, seeds and stem removed
4 cups low-sodium chicken stock, divided
3 tablespoons vegetable or canola oil, divided
1 pound oxtails
1 small onion, diced
6 medium cloves garlic, peeled and smashed
2 teaspoons ground cumin
½ teaspoon ground cloves
2 teaspoons dried oregano
4 chipotle chiles packed in adobo, chopped, with 2 tablespoons adobo sauce
¼ cup apple cider vinegar
2 teaspoons fish sauce
1 whole chuck roast (about 4 pounds)
Kosher salt and freshly ground black pepper
2 whole bay leaves
Kosher salt
Warm corn tortillas, avocados, queso fresco, pickled onions, cilantro, salsa, limes, and other condiments for serving

1. Adjust an oven rack to the lower-middle position and preheat the oven to 275 degrees. Place the dried chiles in the bottom of a large Dutch oven and heat over high heat. Cook, turning the chiles with tongs occasionally, until fragrant and toasted, about 3 minutes. Transfer the chiles to a small saucepan and cover with 2 cups of chicken broth. Bring to a boil over high heat, reduce to a simmer, and cook until chiles are completely tender, about 15 minutes. Set aside.

2. Meanwhile, heat 1 tablespoon of oil in the now-empty Dutch oven over high heat until shimmering. Cook the oxtails until they’re well-browned on all sides, about 8 minutes total. Remove the oxtails and set aside. Reduce the heat to medium.

3. Add the remaining two tablespoons oil and heat along with the onions and garlic, and cook, stirring frequently, until deep brown and just starting to burn, about 10 minutes. Add the cumin, cloves, and oregano, and cook, stirring constantly until fragrant, about 30 seconds. Add the chipotle chiles, vinegar, and remaining chicken broth. Scrape up the browned bits from the bottom of the pan, simmer until reduced by about half, then transfer the entire contents to the jar of a blender.

4. Add the soaked chiles and their liquid to the blender along with the fish sauce. Start the blender on low (be careful of blowups!) and slowly increase the speed to high. Puree until smooth, about 1 minute. Set aside.

5. Place the beef roast in the Dutch oven. Add the browned oxtails, 2 teaspoons salt, 1 teaspoon black pepper, the bay leaves, and the sauce. Bring to a boil over high heat. Place the lid on the pot, slightly cracked, then transfer to the oven. Cook, turning the beef occasionally, until completely tender and a cake tester or metal skewer inserted into the meat shows little to no resistance, about 4 hours. Discard the bay leaves and oxtails (meat from oxtails can be eaten if desired). Transfer the chuck to a large plate. Return the Dutch oven to the stovetop, and cook, stirring frequently, over medium-high heat until the liquid is reduced to about 1½ cups, about 5 minutes.

6. Beef can be shredded and served immediately or transferred to a sealed container along with the liquid and refrigerate up to five days. When ready to serve, shred into large chunks with your fingers or two forks. Return the beef to a pot along with the sauce. Bring to a simmer and cook, gently stirring and folding until the beef is hot, tender, and coated in sauce. Season to taste with salt. Serve immediately, piling the beef into warm corn tortillas with onions, queso fresco, avocados, cilantro, salsa, limes, or other condiments as desired.

barbacoa 10

lentil tacos

lentil tacos 5

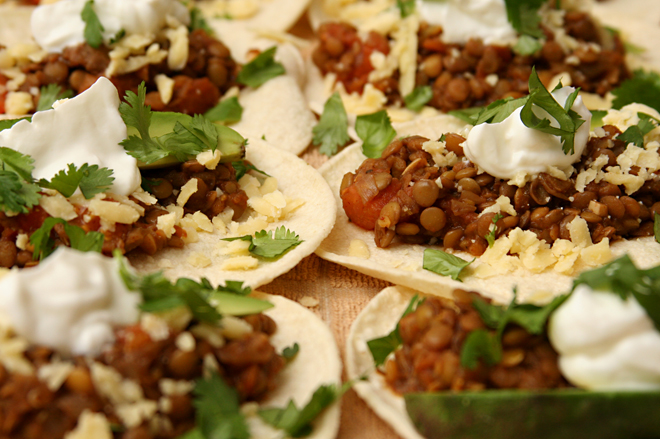
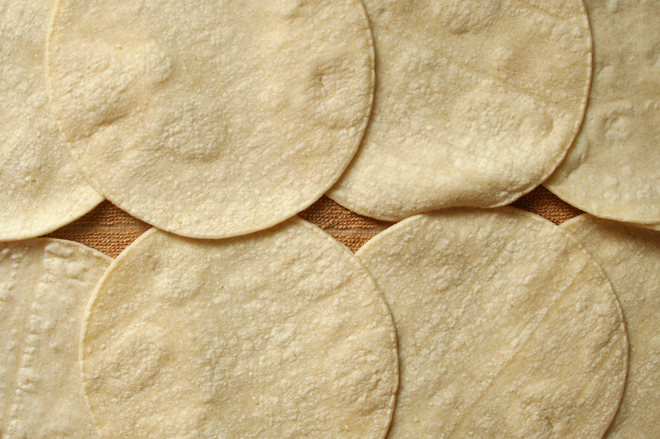
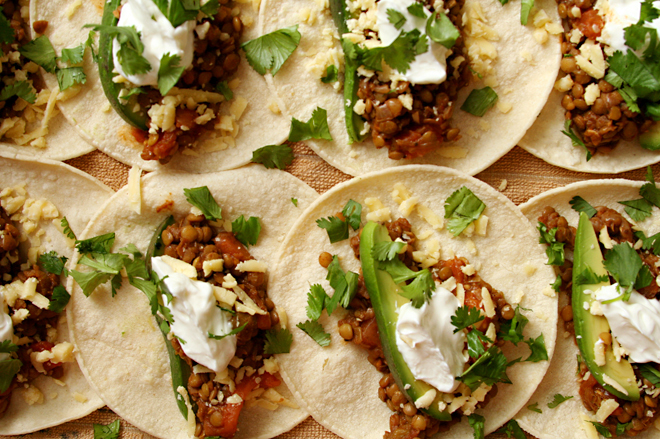
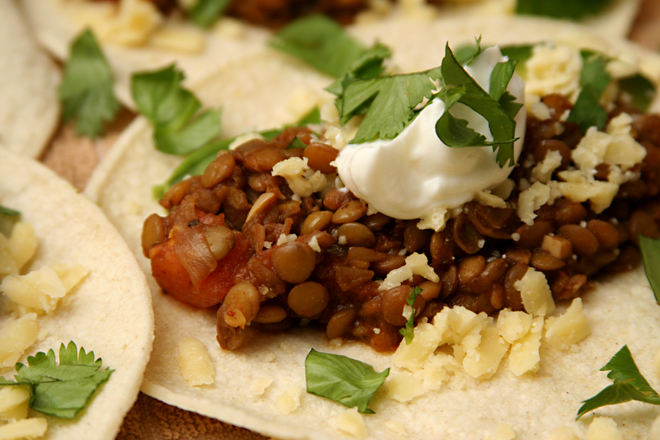
While I loved these tacos, the real news here is that I’ve figured out how to soften corn tortillas without requiring a lot of fat or a lot of effort. I’m not saying they’re as good as fried tortillas, but in a healthy pinch, they’ll more than do. They still have the corny flavor I love and hold a generous scoop of gloppy filling, so I’m very pleased.

lentil tacos 4

I’ve started replacing flour tortillas with corn tortillas, at least for healthy weekday meals, saving the refined flour and partially hydrogenated fat-containing flour tortillas for weekend splurges. (And no, I do not want to make my own tortillas. Even I have limits, especially when the tortillas I can buy in New Mexico taste so good, partially hydrogenated fat notwithstanding.) Not only are they healthier, but they taste better. But I struggled for years with corn tortillas’ tendency to crack when folded, unless they were (deliciously) saturated with oil.

lentil tacos 2

I’d tried heating them on the grill, but they cracked as soon as they started to cool. I tried wrapping them in foil and heating them in the oven, but that didn’t solve the problem. I tried wrapping them in a damp cloth in a warm oven, which was an improvement, as the tortillas on the top and bottom of the stack were moist enough to fold without cracking, but those in the middle still broke.

lentil tacos 3

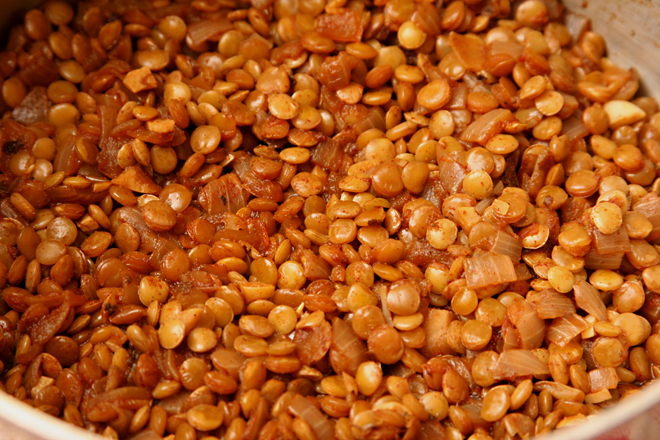
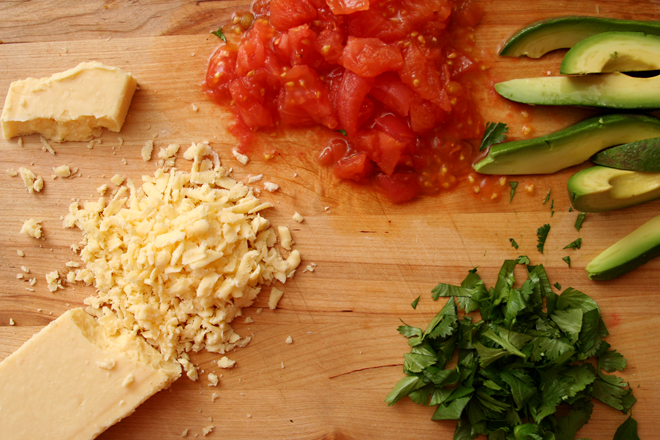
The trick, I’ve found, is to lay a damp dishtowel on a baking sheet, spread the tortillas over it in a single layer, then top with a second damp cloth. Heat the whole configuration in a warm oven while you make your filling. Then take the tortillas out of the oven, remove the top cloth, dollop on your chili-spiced lentils and some traditional-for-good-reason toppings, and dinner is easy, healthy, and delicious.

lentil tacos 7

One year ago: Brown Rice
Two years ago: Pizza with Figs, Prosciutto, Gorgonzola, Balsamic, and Arugula
Three years ago: Anadama Bread
Four years ago: Marshmallows

Printer Friendly Recipe
Lentil Tacos (adapted from epicurious via Prevention RD)

Serves 4

With such a soft filling, these tacos really need a topping with some crunch.  I think very thinly sliced cabbage would be perfect, but lettuce would work well too. In a pinch, I’ve used coarsely chopped mung bean sprouts, and that wasn’t bad at all.

2 teaspoons olive oil
1 yellow onion, finely chopped
1 garlic clove, minced
1 tablespoon chili powder
2 teaspoons ground cumin
1 teaspoon dried oregano
1 cup dried lentils, rinsed
½ teaspoon salt
2 cups low-sodium vegetable or chicken broth
2 tablespoons minced fresh cilantro
10 taco-sized corn tortillas
toppings: cheese, avocado, salsa, tomato, lettuce

1. In a 3- or 4-quart saucepan, heat the oil over medium heat. Add the onion and sauté, stirring occasionally, until just browned around the edges, about 8 minutes. Add the garlic and spices; cook, stirring constantly, for about a minute, until fragrant. Add the lentils, salt, and broth; cover and simmer for 25-30 minutes, until the lentils are tender. Uncover; simmer for 6-8 minutes, until mixture is thickened. Using a potato masher or wooden spoon, break up some of the lentils. Stir in the cilantro.

2. While the lentils cook, heat the oven to 275 degrees. Arrange a dampened dishtowel on a baking sheet. Spread the tortillas over the towel in a single layer (some overlap is expected), then top with a second dampened dishtowel. Heat in the oven for 10 minutes, until the tortillas are warm and soft.

3. Divide the filling and toppings evenly among the tortillas. Serve immediately.

lentil tacos 6