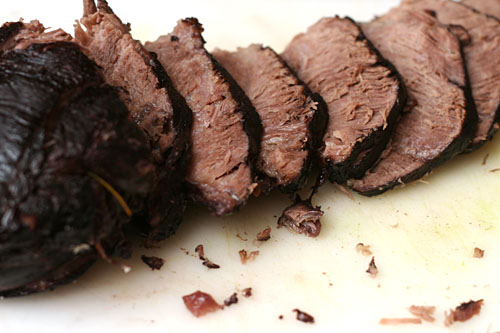
wine braised beef

wine braised beef 7

I don’t really consider myself a team player. I’ve never been excited about sharing or compromise (which makes me really fun to live with, as you can imagine). And yet, in the last several months, two good friends have asked me to collaborate with them on big projects.

wine braised beef 1

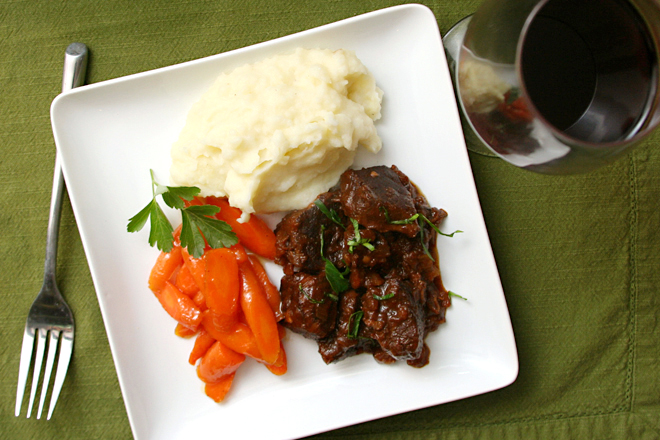
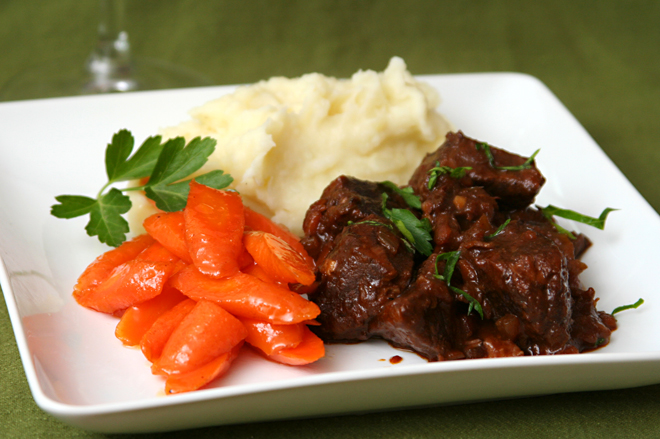
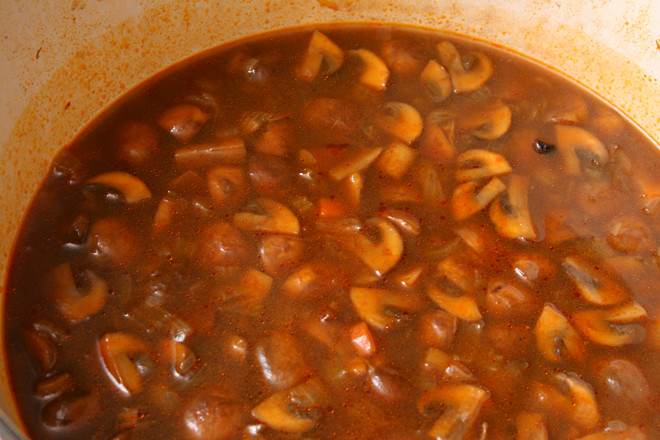
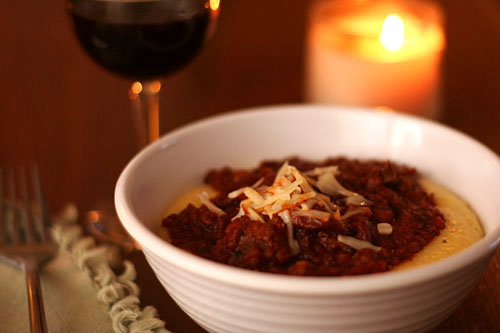
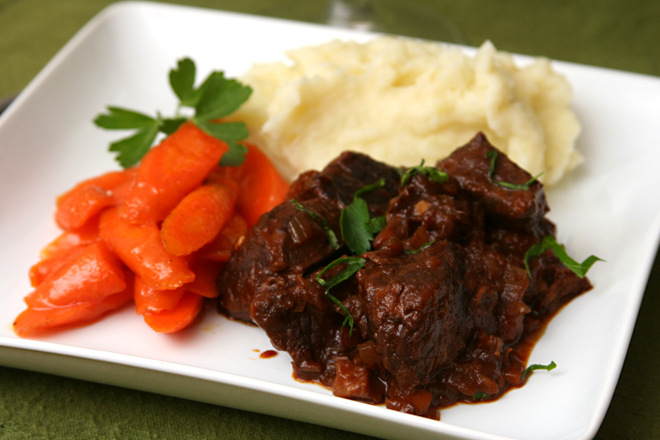
The first was a dinner party for twenty women. It didn’t need to be fancy or involved, except that we wanted it to be. Through a long series of emails, discussing the merits of lasagna versus baked stuffed chicken versus braised meat, we finally decided on a “deconstructed stew” theme, with glazed carrots, mashed potatoes, and beef slow-cooked in a pot of simmering wine and broth. And then just for kicks, we added pesto palmiers, cheese and crackers, mushroom farro soup, orange cream tarts, truffles, and cranberry bliss bars to the menu. Also mulled wine and flavored waters.

wine braised beef 3

Around this time, the call for proposals to present at the BlogHer Food conference was released, and Brady had asked me if I was interested in submitting a proposal with her about free photo post-processing software programs. Of course I was! Brady and I got our proposal accepted, and so we’re traveling to Seattle the second week of June to talk about editing photos, and, most importantly, doing it using free software.

wine braised beef 4

Surprisingly, to myself at least, both projects have been unqualified successes. The dinner party was great fun, to plan, to prepare, to serve, and to eat, and my friend invited me to host with her again next year, so I couldn’t have been too hard to work with! Brady and I are still in the beginning stages of planning our presentation for the BlogHer Food conference, but just the fact that our proposal was accepted is a positive sign of our ability to work together. Maybe I’m not so bad to team up with after all.

wine braised beef 6

One year ago: Toasted Almond Scones
Two years ago: Honey Wheat Cookies
Three years ago: Honey Yogurt Dip
Four years ago: Green Chile Chicken Enchiladas

Printer Friendly Recipe
Wine-Braised Beef

Serves 4-6

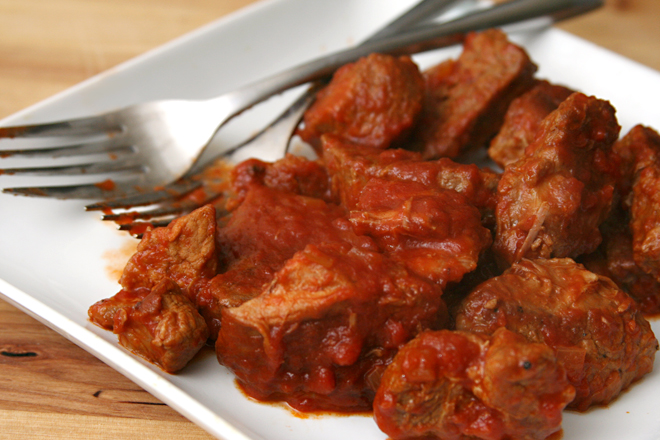
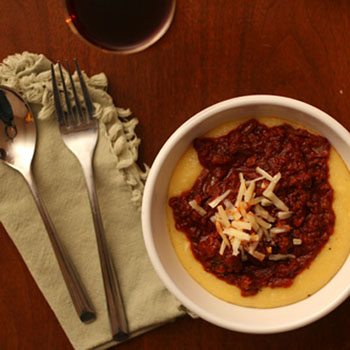
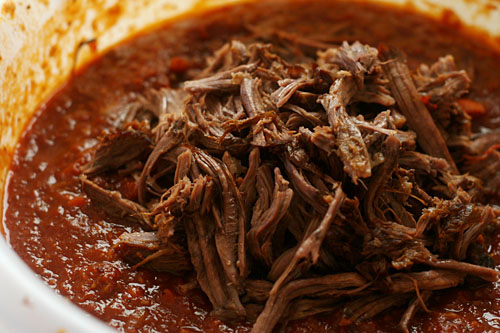
The goal was that the main dish be stew-like without being stew. It was going to be served on plates, so it couldn’t be too saucy, but we wanted meltingly tender chunks of beef. A cheaper cut of meat so we could serve a crowd was definitely a bonus. It also doesn’t hurt that there’s no last-minute work and it can be made in advance and actually improves with being stored overnight.

I’m a big fan of Yellowtail’s wine for recipes like this. It’s cheap but pretty good. I used a Shiraz/Cabernet Sauvignon blend.

1 tablespoon canola oil
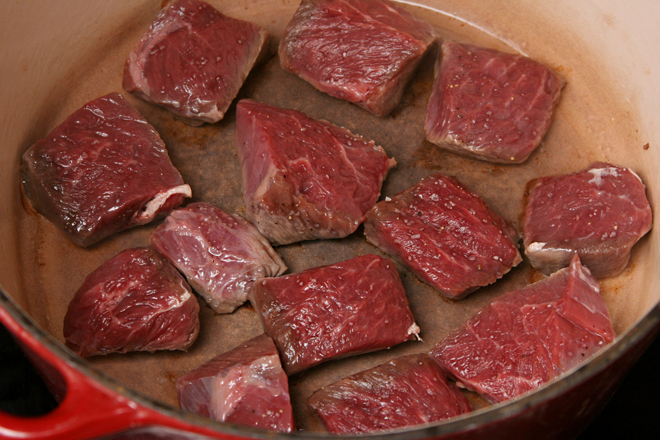
1 (3 to 3½-pound) boneless beef chuck roast, cut into 2-inch cubes
Salt and freshly ground black pepper
1 ounce pancetta, diced into ⅛-inch cubes
1 yellow onion, diced fine
1 medium carrot, diced fine
1 celery stalk, diced fine
3 cloves garlic, minced
1½ cups dry red wine
1½ cups chicken broth
1 (15-ounce) can diced tomatoes, with juice
1 sprig thyme
2 tablespoons butter, room temperature
2 tablespoons all-purpose flour
2 tablespoons chopped fresh parsley, for garnish

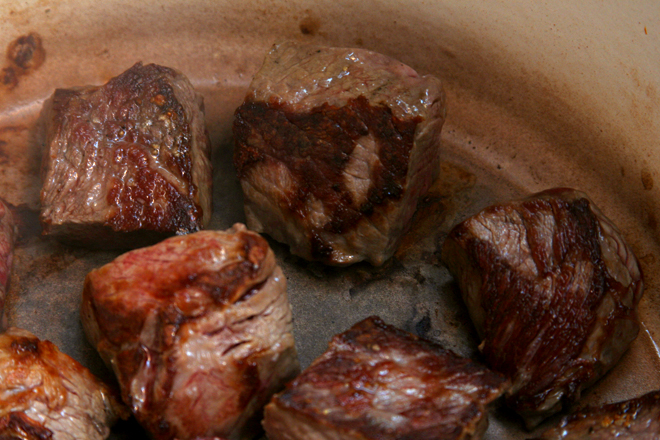
1. Heat the oil in a 5-quart Dutch oven over medium-high heat. Pat the meat dry, season it generously with salt and pepper, and arrange the pieces, without touching, in the Dutch oven. (You may need to do this in two batches.) Cook the meat, without stirring or flipping, for 2-3 minutes, until the bottoms are deeply browned. Turn the chunks of meat and brown a second side. Transfer the meat to a plate. Discard any fat in the pan (but leave the cooked-on brown bits).

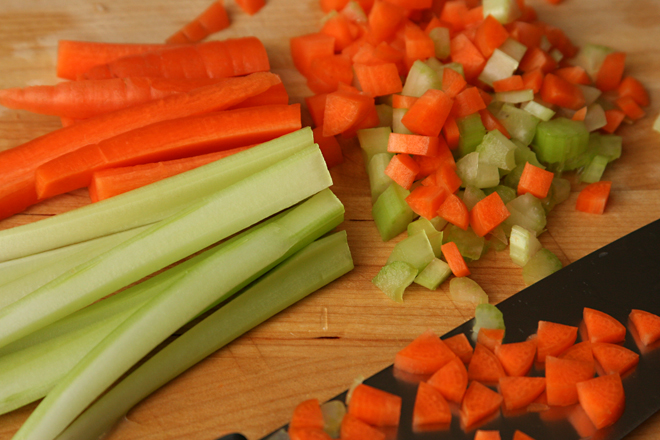
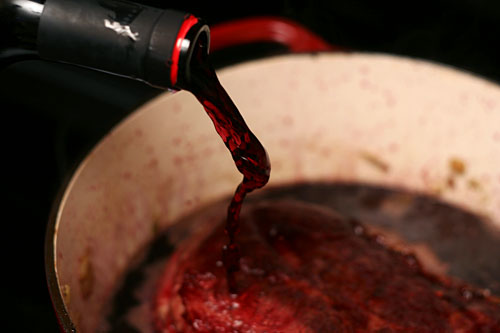
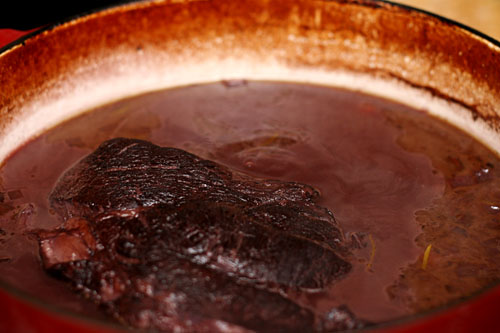
2. In the same pot over medium heat, cook the pancetta until fat starts to render, 3-5 minutes. Add the onion, carrot, and celery; cook, stirring occasionally, until the edges of the onions start to brown, about 6 minutes. Add the garlic; cook and stir for about one minute. Pour the wine into the pot, scraping up the sticky brown bits on the bottom of the pot. Add the stock, tomatoes with their juice, thyme sprig, and reserved meat back to the pot. Increase the heat to medium-high and bring to a simmer. Once the liquid simmers, reduce the heat to low, partially cover the pot, and simmer slowly until the meat is tender, about 3 hours.

3. Mix the butter and flour in a small bowl until smooth. Remove the thyme sprig from the pot. Whisk the butter/flour paste into the sauce. Increase the heat to medium to medium-high and simmer, uncovered, until the sauce is thickened. Serve, topping each portion with a sprinkling of parsley.
wine braised beef 5

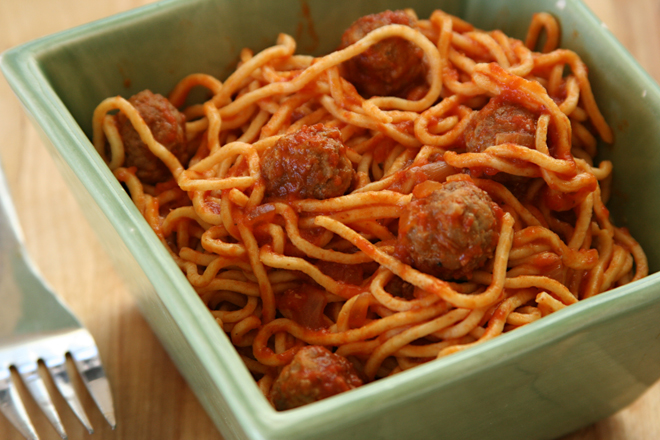
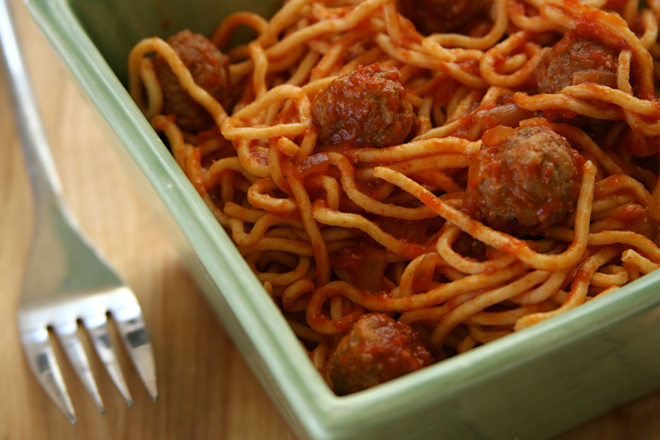
pasta with tiny meatball sauce

tiny meatball sauce 15

I haven’t been this excited about a cookbook in a while. This is the type of cookbook that makes me eager to get into the kitchen, particularly because I want to make every recipe in the book. I thought I would start with one of the most involved recipes, one of those “choose your own adventure” recipes that has you page flipping to find all the different components.

tiny meatball sauce 11

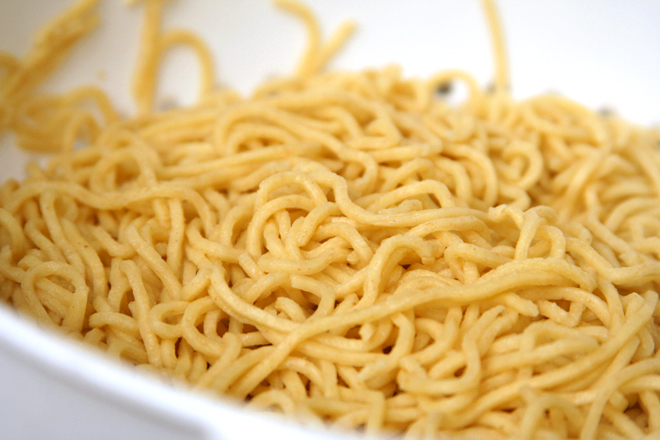
The first is fresh pasta, which I’ve made before, but the recipe in the book differed from my usual with the inclusion of semolina, salt, nutmeg, and, most significantly, oil. Once the pasta was cooked and sauced, I didn’t notice the extra flavorings, but the oil seemed to make rolling easier. I also made a new shape that required less rolling and cooked up pleasantly toothsome.

tiny meatball sauce 1

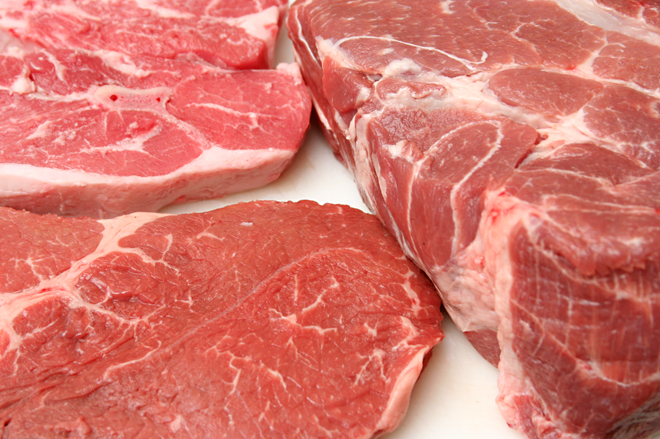
The second part is the sauce, which is a slow-cooked meat sauce, but with a twist. Instead of simmering the sauce with ground meat, or with beef meant to be shredded and added back to the sauce, the meat is kept in this sauce through hours of simmering, and then is removed. And not added back in. The meat is not part of the sauce, it’s just there to infuse it with flavor. It’s like you’re making tomato broth.

tiny meatball sauce 2

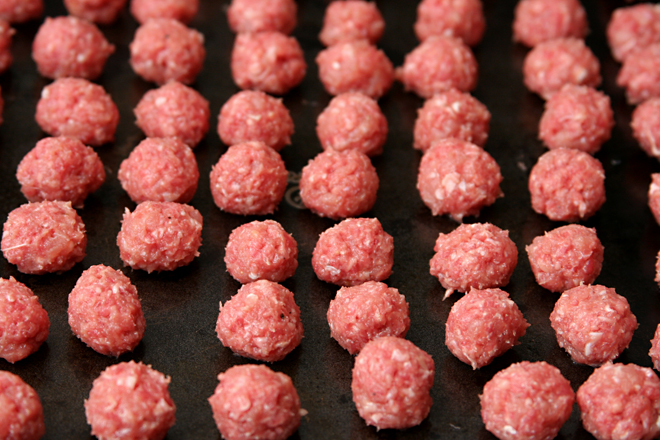
The last part, then, is the tiny meatballs. It’s a simple mixture, no bread for tenderizing, just meat, seasoning, and an egg to bind it. The recipe instructs you to form the meatballs “just larger than a chickpea”, but I’m not insane and would prefer to stay that way, so my tiny meatballs were about twice that size, and still plenty tiny for me. Twelve ounces of meat turned into 72 tiny meatballs.

tiny meatball sauce 7

I loved the tiny meatballs. I can see myself making them again sometime, even though I do not love forming tiny meatballs. I’ve also started to add a dribble of olive oil into my pasta dough, although I skip the semolina, nutmeg, and salt for simplicity’s sake.

tiny meatball sauce 8

While I enjoyed everything about the sauce – the flavor, the plateful of tomatoey meat we ate as an appetizer, the fun of braising – I’ll make it differently in the future. The original recipe calls for three types of meat, and it’s impractical for most home cooks to buy small portions of a variety of meats. Instead, I’ll just stick to our favorite – lamb – and I’ll use a bony cut like blade chops, because I suspect the bone will add even more flavor to the sauce than the meat did.

tiny meatball sauce 9

Obviously making a slow-braised sauce, homemade pasta, and forming 72 tiny meatballs is not an insignificant amount of effort. But it was the most fun I’ve had in the kitchen in months, with the added bonus that I learned some new tricks. I can’t wait to choose another recipe from my favorite new cookbook and do it again.

tiny meatball sauce 14

One year ago: Curry Coconut Chickpea Soup
Two years ago: Baked Ziti
Three years ago: Fresh Ginger and Chocolate Gingerbread
Four years ago: Deviled Eggs with Tuna

Printer Friendly Recipe
Maccheroni alla Chitarra with Ragù all’Abruzzese and Palottine, aka Pasta with Tiny Meatball Sauce (completely rewritten but hardly changed from Domenica Marchetti’s The Glorious Pasta of Italy)

Serves 8

I went ahead and bought three different types of meat for this, but I don’t think it’s necessary. Pick your favorite and buy just that one cut.

I don’t usually cook with veal, so I used 8 ounces ground beef plus 4 ounces ground pork plus ⅛ teaspoon gelatin, dissolved in the egg, in the meatballs instead.

Ragù:
2 (28-ounce) cans whole tomatoes with their juice
2 tablespoons olive oil
6 ounces boneless beef chuck roast, cut into four equal pieces
6 ounces boneless pork shoulder, cut into three equal pieces
6 ounces boneless lamb shoulder cut into three equal pieces
Salt
Freshly ground black pepper
1 onion, finely diced

Pasta:
4 cups (18 ounces) all-purpose flour
2 tablespoons semolina flour
1 teaspoon table salt
Pinch ground nutmeg
6 large eggs
2 tablespoons extra virgin olive oil

Meatballs:
12 ounces ground veal
½ teaspoon salt
Pinch freshly grated nutmeg
1 large egg, lightly beaten
Vegetable oil for cooking

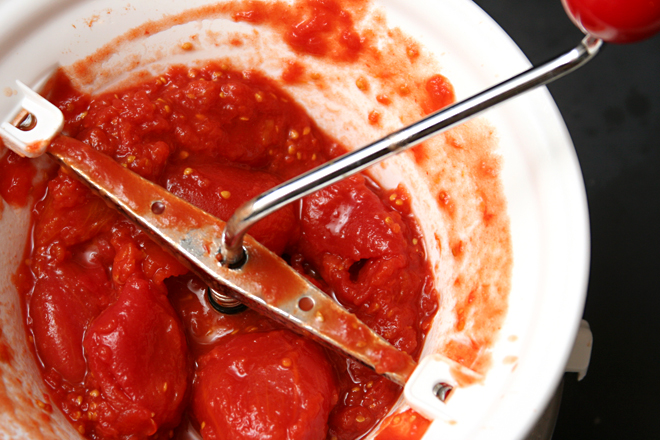
1. For the ragù: If you have a food mill, press the tomatoes through the disk with the smallest holes, discarding the solids. If you don’t have a food mill, puree the tomatoes in a food processor or blender.

2. Generously season the meat with salt and black pepper. In a 5-quart Dutch oven over medium-high heat, heat the oil until it just starts to smoke. Add the meat and cook, without moving, until deeply browned on one side, about 2 minutes. Rotate the meat and brown on the second side. Transfer the meat to a plate.

3. Reduce the heat to medium, add the onion, and cook, stirring occasionally, until the onion softens but does not brown, about 4 minutes. Add the tomatoes, raise the heat to medium-high, and bring to a simmer. Add the meat back to the pot, reduce the heat to medium-low, and simmer, uncovered, for about 3 hours, until the meat is tender and the sauce is thickened. Remove the meat before using the sauce; reserve for another use (or just eat it right then, because it’s delicious).

4. For the pasta: Place the flours, salt, and nutmeg in the bowl of a food processor; pulse to combine. Add the eggs and oil; process until the mixture clumps together in large crumbs. Form a small portion of dough into a ball; if it’s too dry to stick together, add up to 2 tablespoons more oil; if it’s sticky, add up to ½ cup more flour. Wrap the dough in plastic wrap and set it aside for 30 minutes to rest.

5. Divide the dough into 8 portions. Work with one at a time, keeping the others covered with plastic wrap or a damp dishtowel. Flatten the dough and pass it through a pasta roller on the widest setting. Fold the dough in thirds, like a letter, and roll it through the widest setting again. Repeat the rolling and folding 3-4 more times, until the dough is smooth. Flour the dough (with semolina flour if you have it) as much as needed to prevent sticking. Adjust the pasta roller to the next-thinnest setting and roll the dough through twice, then repeat on the third-thinnest setting. Thin the dough to the fourth-narrowest setting on your pasta roller. Repeat the rolling, folding, and thinning with the remaining balls of dough. Pass each strip of dough through the thin cutters on the pasta roller to form long noodles that are approximately square in cross section.

6. For the meatballs: Use your hands to evenly combine the veal, salt, nutmeg, and egg. Form the mixture into balls about ½-inch in diameter.

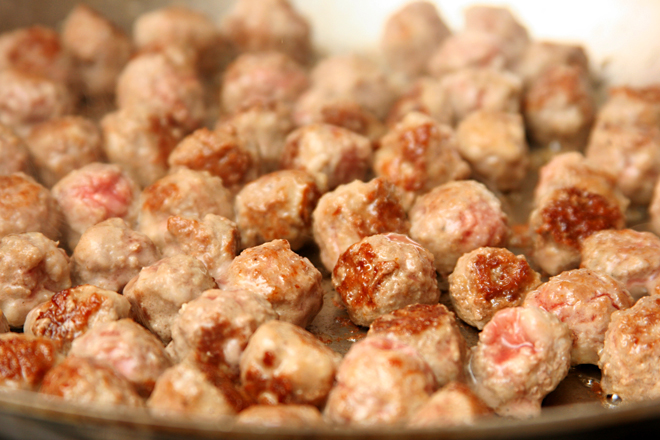
7. In a 12-inch skillet, heat 3 tablespoons oil over medium-high heat until almost smoking. Add the meatballs, and cook until well browned a couple sides, about 4 minutes, turning about once a minute with a spatula. Transfer to the pot with the ragù; keep warm.

8. Bring a large pot of water to a boil. Add about a tablespoon of salt and the pasta and cook until al dente, about 5 minutes. Drain, reserving about a cup of the cooking water.

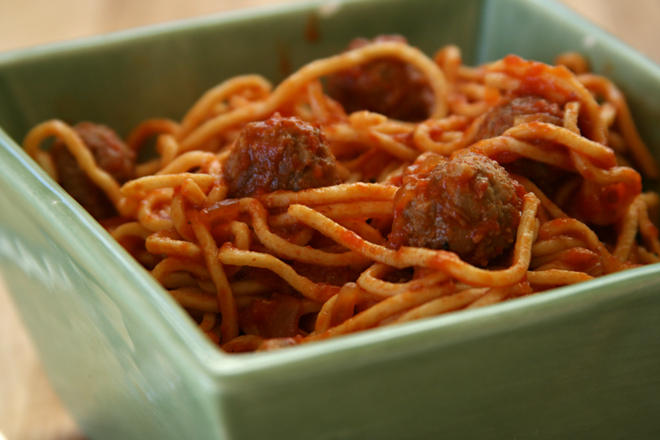
9. Return the drained pasta to the pot; toss with about two-thirds of the sauce and meatballs, adding some of the reserved cooking water if the sauce is too thick. Transfer the pasta to a warmed serving bowl (or individual bowls) and spoon the remaining sauce over the top. Serve immediately, with parmesan and crushed red pepper flakes to pass.

tiny meatball sauce 13

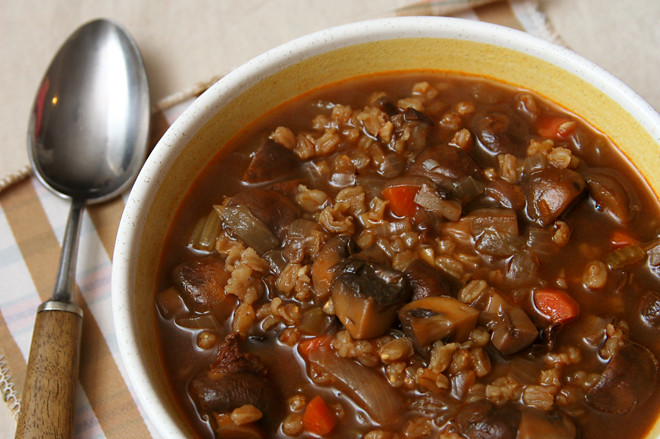
mushroom farro soup

mushroom farro soup 6

What a difference a few drops of vinegar make. I sat down to eat my soup and couldn’t shake the thought that it was missing something. It seemed like enough salt, but I thought maybe if I dribbled in some umami-y soy sauce, that would do the trick. On the way to the cabinet, I saw the bottle of sherry vinegar that I’d put on the counter to add to the soup and forgotten about it. It turns out, that’s exactly what the soup needed.

mushroom farro soup 3

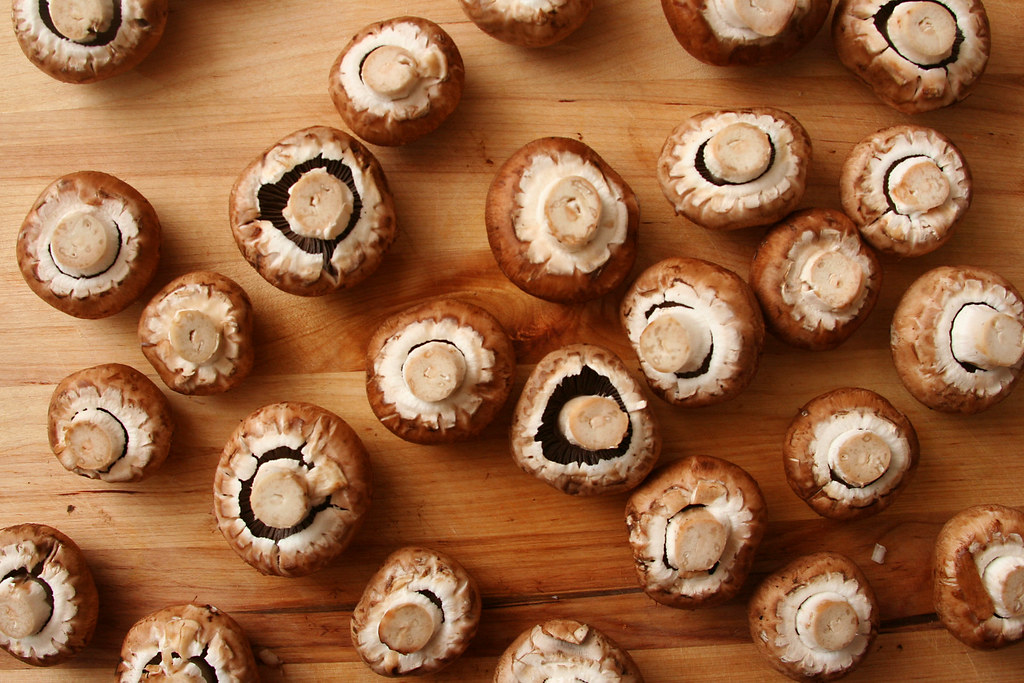
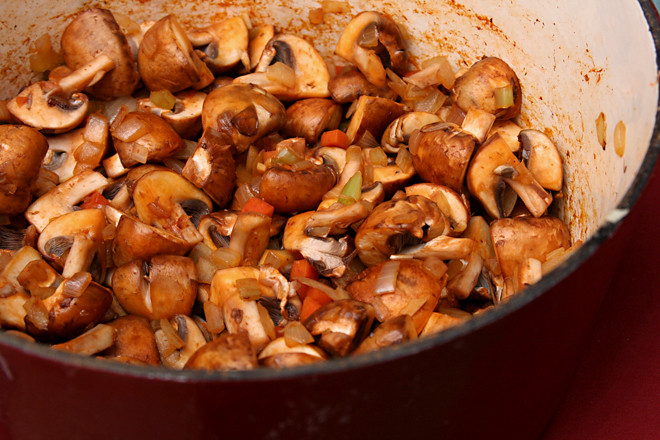
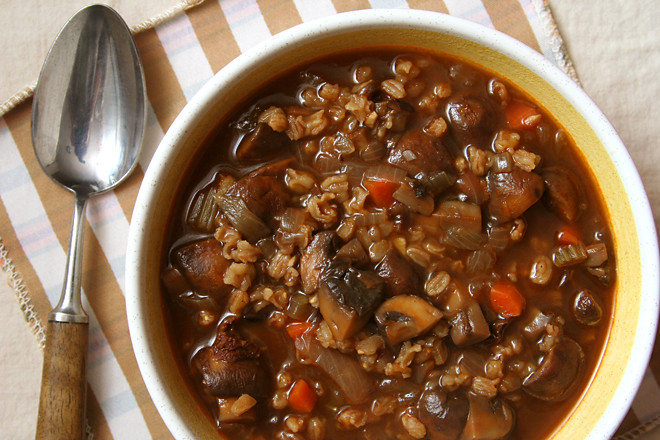
It isn’t that the soup is so bad without it, not by any means. With a flavor base of browned onions and carrots, then garlic and tomato paste, and finally a pile of sliced fresh mushrooms, there’s plenty of sweet and meat flavors (although no actual meat). A pinch of truffle salt didn’t hurt matters either, and porcini mushrooms along with their rehydrating broth take the mushroominess up another notch.

mushroom farro soup 4

Farro gives the soup substance, and altogether it adds up to a dark, deeply flavored soup that is, nonetheless, missing something. A spoonful of sherry (or red wine) vinegar adds a touch of brightness that balances the rich flavors of the mushrooms. And then the soup is just right.

mushroom farro soup 5

One year ago: Red Pepper Risotto
Two years ago: Brussels Sprouts Braised in Cream
Three years ago: Sausage Apple Hash

Printer Friendly Recipe
Mushroom Farro Soup (adapted from The New York Times via Smitten Kitchen)

4 servings

I added a stalk of celery too, because I had some in the fridge. I wouldn’t buy it just for this recipe though.

Feel free to substitute barley or wheat berries for the farro, but you’ll need to adjust the cooking time for different grains.

The photos of the final soup are of leftovers. Overnight, the farro soaks up some of the broth, making a thicker soup with softer grains. The soup is wonderful fresh, but I might even prefer it leftover.

¼ ounce dried porcini mushrooms, rinsed
1 tablespoon olive oil
1 medium onions, diced fine
1 medium carrot, diced fine (or 1 carrot and 1 stalk of celery)
2 cloves garlic, minced
2 teaspoons tomato paste
1 pounds cremini mushrooms, sliced ⅛-inch thick
¼ cup sherry
2 cups broth (I prefer chicken)
½ cup farro, rinsed
Salt and black pepper
2 teaspoons sherry vinegar

1. Place the dried mushrooms in a small bowl with ½ cup water; cover the bowl with plastic wrap, use a paring knife to make about 5 holes in the plastic wrap, and microwave on high for 30 seconds. Set aside for 10 minutes to let the mushrooms soften. Use a fork to lift the softened mushrooms out of the liquid. Mince the mushrooms and strain the liquid through a coffee filter to remove grit, reserving the strained liquid. (This is the official method; I never do it this way, I just let the grit settle to the bottom of the liquid and leave the bit of gritty liquid behind when I use the liquid later in the recipe.)

2. In a large saucepan, heat the oil over medium heat. Add the onions and carrots and cook, stirring occasionally, until the onions just start to brown around the edges, about 8 minutes. Add the garlic and tomato paste; cook, stirring constantly, until fragrant, about 30 seconds.

3. Add the fresh mushrooms; cook, stirring occasionally, until they release their liquid, 3-5 minutes. Increase the heat to medium-high and cook until the liquid evaporates and the mushrooms just begin to brown, about 10 minutes. Add the sherry; scrape up any browned bits on the bottom of the pan. Add the broth, farro, minced porcini, the liquid leftover from soaking the mushrooms, 2 teaspoons salt, and ½ teaspoon pepper. Bring to a simmer over high heat, then reduce the heat to medium and simmer for about 40 minutes, until the farro is tender. (The soup can be stored at this point for up to 5 days. Heat on the stove over medium heat just before serving.) Stir in the sherry vinegar. Add more salt and pepper if necessary; serve.

mushroom farro soup 7

lentil marinara

lentil marinara 5

When my coworker came back to work after spending weeks in the hospital (and in my small town, that means a hospital over two hours away from home) with his sick newborn baby, I figured they could use a home-cooked meal. I thought tomato soup, homemade bread, and some nice cheese to make grilled sandwiches would be the perfect comfort food. Unfortunately, it would require a trip to the store and a couple free hours to cook, and when I saw how exhausted my friend was, I figured getting something to him soon was more important than getting the perfect meal to him.

lentil marinara 1

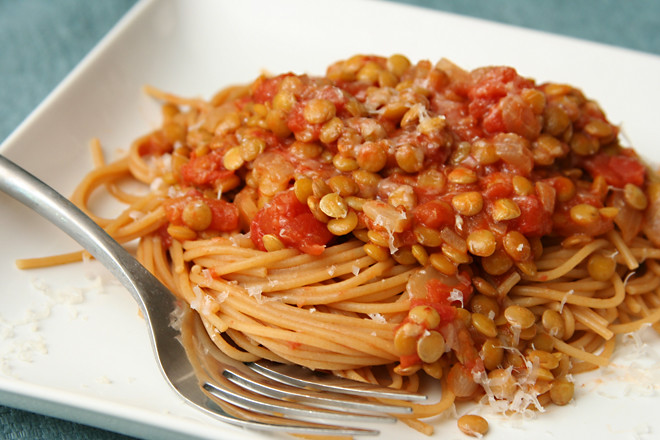
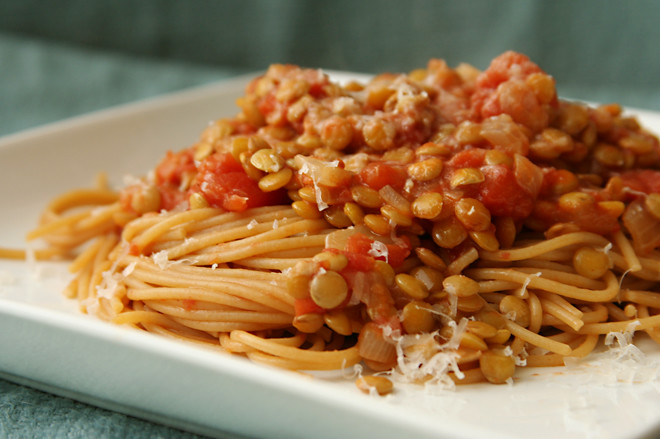
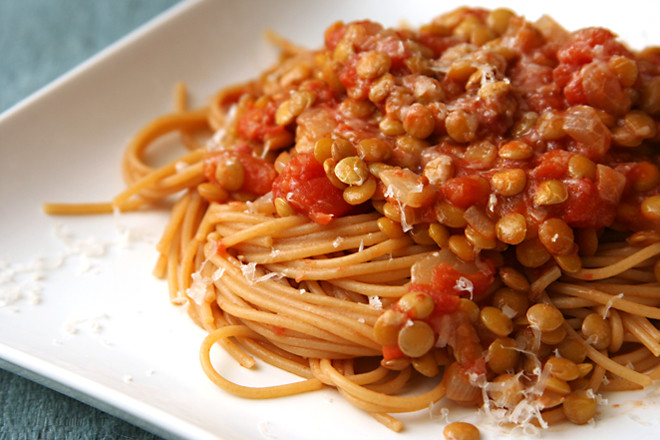
So I made extras of what I was having for dinner that night. Spaghetti is warm and familiar, so fits the comfort food bill, and who doesn’t like the pasta and tomato sauce combination? The lentils, though, might seem strange to some people.

It makes perfect sense to me, because lentils are a great protein source, and while I can’t claim that they taste like beef, there is something meaty-like about them. Besides, what’s more comforting than knowing that your dinner is not only delicious, it’s healthy?

lentil marinara 2

And now I have another friend who needs comfort food after the death of her father on Thanksgiving day. Unfortunately, I can’t just bring her my leftovers, because she lives a thousand miles away. I don’t think virtual comfort food is quite the same, but at least she’ll know I’m thinking about her and her family and wishing them the best during a difficult time.

lentil marinara 3

One year ago: Pasta with Brussels Sprouts and Pine Nuts
Two years ago: Thai-Style Chicken Soup
Three years ago: Pumpkin Ginger Muffins

Printer Friendly Recipe
Lentil Marinara (adapted from Branny Boils Over)

6-8 servings

I simmered this for 30-45 minutes, but, if you have the time, I suspect that a longer simmering time while covered would really help the lentils absorb the tomato flavor.

I like canned whole tomatoes for sauce because they break down better, but if you don’t mind larger tomato chunks in your sauce, diced tomatoes will work fine. I chop canned whole tomatoes by sticking kitchen shears into the can and snipping away.

Update 4/23/12 – I’ve made this a couple more times, and I’ve decided that it’s probably too heavy on the lentils.  Using up a whole bag at once is nice, but 8 ounces of lentils for 2 cans of tomatoes will make a tastier sauce.

2 tablespoons oil
1 onion, diced
4 garlic cloves, minced
¼ teaspoon red pepper flakes
½ teaspoon oregano
¼ cup white or red wine
2 (28-ounce) cans whole tomatoes, coarsely chopped
1 (1-pound) bag brown lentils, rinsed and picked over
3 cups water
1 teaspoon salt

1. In a large saucepan over medium heat, heat the oil until it flows like water when the pan is tilted. Add the onion and a pinch of salt and cook, stirring occasionally, until the onion just starts to brown around the edges, about 8 minutes. Add the garlic and red pepper flakes and cook, stirring constantly, until fragrant, about 30 seconds.

2. Add the wine, scraping any browned residue on the bottom of the pan. Increase the heat to medium-high and add the remaining ingredients. Bring to a simmer, then reduce the heat to medium-low and cook, stirring occasionally, about 30 minutes, until the lentils are tender and the sauce is thickened.

lentil marinara 4

barbecued pulled pork

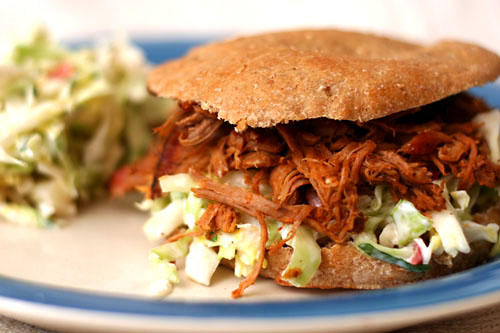
The best part of barbecuing a whole pork shoulder on the grill is that you are forced to spend all day outside tending the grill. I can’t think of many better ways to spend a Saturday. We started the grill before breakfast, then spent the rest of the day in the backyard.  First we drank coffee, then some water because you have to to survive, even on weekends, and then it was time for afternoon margaritas, and then we capped it off with beer, because what else are you going to drink with pulled pork?

The truth is that while you do need to keep a constant-ish eye on the grill, you don’t need to spend much time actually doing anything with it. Once the pork is cooking, it takes just a couple of seconds every hour or so to add a handful of fresh coals. A thermometer is key to monitor the temperature, although a cheap oven thermometer – which is what I used – will work just fine.  And if you do find the temperature varying widely, it won’t ruin your pork; just let it slowly come down to the right temperature range or add more coals to bring it up and continue cooking. Cooking a whole pork shoulder on the grill is a simple and forgiving process, even if it does take a long time.

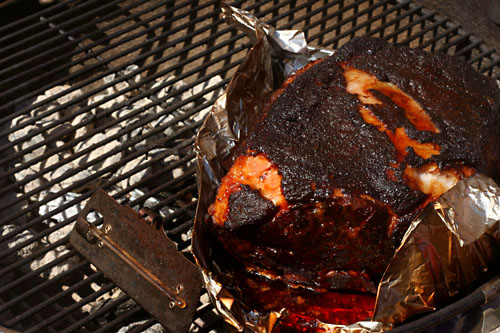
I know the question everyone is asking: Is it really better than crockpot pulled pork? Well, of course it is. Crockpot pulled pork, especially using the same spice rub, is incredible – flavorful, tender, and easy easy easy. Barbecued pulled pork isn’t as moist and as a result, its flavor seems more concentrated. It’s still easy to pull, but it has more chew than crockpot pulled pork, which can get mushy if you’re not careful. The biggest difference were the outside bits of the roast, which were deeply browned and crisp. (This is not the same thing as the blackened top in the photo below, which is a thick layer of fat that I discarded.) Dave and I filled up on those while I was still shredding the roast. But the best part of making pulled pork on the grill as opposed to in the crockpot is that while one method frees you up to do chores and run errands all day, the other keeps you in the backyard with a book and a beer.

One year ago: Home Corned Beef and Corned Beef Hash
Two years ago: Orange Oatmeal Currant Cookies
Three years ago: Hash Browns with Sauteed Vegetables and Poached Eggs

Printer Friendly Recipe
Barbecued Pulled Pork (spice rub from Cooks Illustrated)

Serves a lot

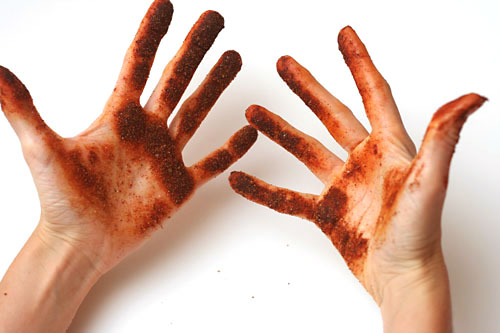
The least messy way I’ve found to add the spices to the meat is to line a rimmed baking sheet with a large piece of plastic wrap. Set the pork on the plastic wrap; add the spice rub, rotating the meat to rub all sides. Wrap the plastic wrap around the meat, then wrap another layer of plastic around in the opposite direction.

I use all of the spice rub on one roast, but if you think it’ll be too much, save half for another use. It’ll keep in the pantry for months.

Spice Rub:
1 tablespoon ground black pepper
1-2 teaspoons cayenne pepper
2 tablespoons chili powder
2 tablespoons ground cumin
2 tablespoons dark brown sugar
1 tablespoon dried oregano
4 tablespoons paprika
2 tablespoons table salt
1 tablespoon granulated sugar
1 tablespoon ground white pepper

1 (6-8 pound) bone-in pork shoulder

1. Combine all of the ingredients in the spice rub. At least one day, and up to three days, before cooking the pork, rub the spice rub onto all sides of the pork (see note). Wrap the pork in a double layer of plastic wrap. Refrigerate overnight or up to three days.

2. About 10 hours before you plan to serve the pork, remove it from the refrigerator; let it set at room temperature for 1 hour. Meanwhile, soak 4 wood chunks (or 4 cups of wood chips) in water for an hour.

3. About 20 minutes before you’re ready to grill, light about 30 charcoal briquettes (half a chimney starter). Once the coals are covered with a layer of ash, dump them into a pile on one side of the grill, then top with ¼ of the wood chunks or chips. Open the bottom vents completely. Place the meat, fat side up, on a double layer of aluminum foil with the edges folded up or in a 9×13-inch disposable aluminum baking pan. Place the meat on the side of the grill opposite the coals. Put the lid on the grill with the vents opposite the coals; adjust vents to be ¾ open.

4. Use a grill or oven thermometer to monitor the temperature of the grill, which should remain between 200 and 250 degrees. Add fresh coals, about 8 every hour, when the temperature drops. Add more wood chips an hour after you start cooking, then again at the 2- and 3-hour mark. (Don’t worry if the top of the meat blackens; you’ll discard that layer of fat anyway.)

5. After about 5 hours, when the internal temperature of the pork reaches 165 degrees, wrap it completely in foil. Continue cooking until the internal temperature of the pork is 195 degrees, another 2-3 hours.

6. Remove the pork from the grill and let it set at room temperature, covered, for one hour.

7. Place the pork on a large rimmed baking sheet. Remove and discard the thick layer of fat. Use your fingers or forks to shred the remaining meat. Serve.

pasta e fagioli

Living in southern New Mexico, I’m out of touch with all of the weather systems the rest of the country gets. The weather here is always the same – sunny, dry, cold at night and warm in the afternoon (hot at night and hotter in the afternoon in the summer), windy in the spring. So even though I know most of you are burned out on cold and snow, I’m very excited right now that we’ve gotten a taste of real winter here.

And, even better, a snow day. A snow day! Not that it takes much snow to get a snow day here, but that’s even better – a snow day with no shoveling to do!

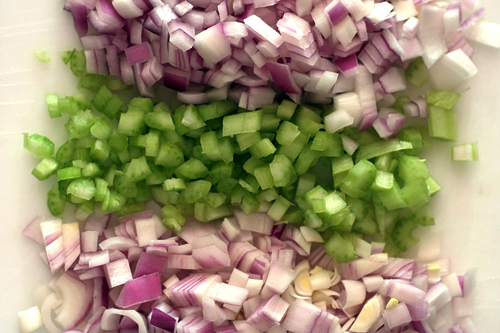
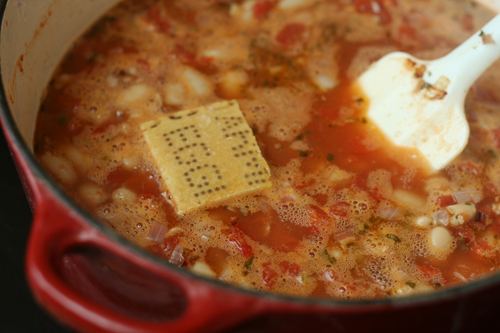
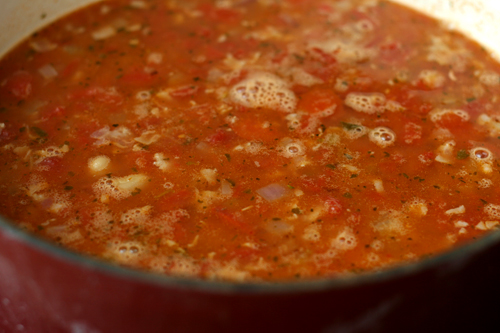
The first time I made this soup was years ago, and it was just as cold that day. I remember that Dave and I went to a political rally in Ithaca, and afterward, we were talking while I made the soup, and I got distracted and added the pepper flakes twice. Sadly, that ruined the soup. It was almost inedibly spicy; so much for the careful balance of flavors I was hoping for.

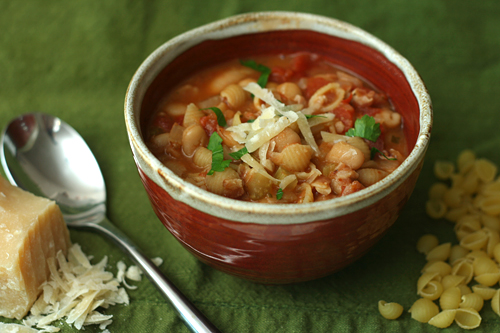
The soup is a whole lot better when you make it correctly. Just a bit spicy, all mixed in with tomatoes and vegetables and beans. A warm hearty bowl of soup is the perfect way to cap off a snow day.

One year ago: Butternut Squash Macaroni and Cheese
Two years ago: Tofu Croutons
Three years ago: Deviled Eggs with Tuna

Printer Friendly Recipe
Pasta e Fagioli (from Cooks Illustrated)

I added 2 cups less water than the recipe calls for. I’m sure the original recipe is fine too; I was just in the mood for something thicker. If you do this, make sure you decrease the salt to ½ teaspoon.

1 tablespoon extra-virgin olive oil, plus more for drizzling
3 ounces pancetta or bacon, chopped fine
1 medium onion, chopped fine
1 celery rib, chopped fine
4 medium garlic cloves, minced or pressed through garlic press
1 teaspoon dried oregano
¼ teaspoon red pepper flakes
3 anchovy fillets, minced to paste
1 (28-ounce) can diced tomatoes with liquid
1 piece Parmesan cheese rind, about 5 inches by 2 inches
2 (15½-ounce) cans cannellini beans, drained and rinsed
3½ cups homemade or low-sodium chicken broth
2½ cups water
salt
8 ounces small pasta
¼ cup chopped fresh parsley leaves
ground black pepper
2 ounces (1 cup) grated Parmesan cheese

1. Heat the oil in a large Dutch oven over medium-high heat until shimmering but not smoking, about 2 minutes. Add the pancetta and cook, stirring occasionally, until it’s beginning to brown, 3 to 5 minutes. Add the onion and celery; cook, stirring occasionally, until the vegetables are softened, 5 to 7 minutes. Add the garlic, oregano, red pepper flakes and anchovies; cook, stirring constantly, until fragrant, about 1 minute. Add the tomatoes, scraping up any browned bits from bottom of the pan. Add the cheese rind and beans; bring to a boil, then reduce the heat to low and simmer to blend the flavors, 10 minutes.

2. Add chicken the broth, water and 1 teaspoon salt; increase the heat to high and bring to a boil. Add the pasta and cook until tender, about 10 minutes (refer to package instructions to better estimate pasta cooking time).

3. Discard the cheese rind. Off the heat, stir in 3 tablespoons of the parsley; adjust the seasoning with salt and pepper. Ladle the soup into individual bowls; drizzle each serving with olive oil and sprinkle with a portion of the remaining parsley. Serve immediately, passing the grated parmesan separately.
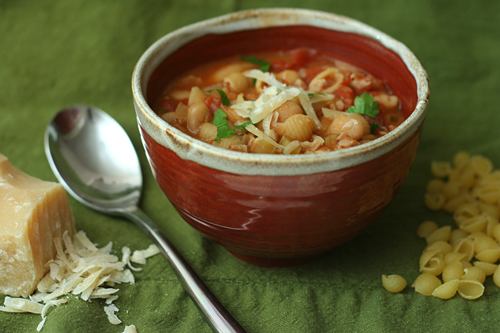
curry coconut chickpea soup

When my parents brought home a half-grown boxer puppy, I asked them why they got such an ugly dog. With her squashed face, beady eyes, and unproportional torso, she was a far cry from the beautiful German shepherd I’d grown up with. Then we took her out to the backyard to run around and within minutes, I was exclaiming that she was the cutest thing ever! She raced back and forth, eagerly stopping by our sides for head pats. She had no tail to speak of, so instead wagged her entire butt back and forth. What a great dog (except for the drool and the farts). She certainly taught me an important lesson about how it’s what’s inside that really counts.

This soup might look oddly curdled to you, with random chunks of red floating on top. But I know that the mottled look is from sweet rich coconut milk, and the soup is full of healthy tomatoes and red peppers. I know that quinoa adds a bit of crunch to the soup, and chickpeas offer something to chew on.

We gave the boxer puppy an ultra-feminine name, Belle, to counteract some of her less feminine traits. And maybe that’s why this soup has such a descriptive name. Without all of those flavorful ingredients right in the title, how would you have any idea what’s in that suspicious orange-tinted broth? Your first impression might not reflect how good it really is.


(photo taken by my friend Ramie Pierce)

One year ago: Baked Ziti
Two years ago: Herbed Lima Bean Hummus
Three years ago: Maple Walnut Cupcakes

Printer Friendly Recipe
Coconut Curry Chickpea Soup (adapted from epicurious via Cook, Pray, Love)

Serves 4

1 tablespoon canola oil
1 medium onion, chopped
1 medium red bell pepper, chopped
1 jalapeño, seeded and finely chopped
salt
2 cloves garlic, finely chopped
1 teaspoon curry powder
1 teaspoon garam masala
2 cups low-sodium vegetable or chicken broth
1 (15-ounce) can chickpeas, rinsed and drained
1 cup chopped tomatoes, seeded and peeled, fresh or canned
Freshly ground black pepper, to taste
1 (14-ounce) can light coconut milk
2 tablespoons chopped fresh cilantro or parsley

1. In a medium stockpot, heat the oil over medium heat. Add the onion, bell pepper, jalapeno, and a pinch of salt; cook, stirring, until softened, about 5 minutes. Add the garlic, curry powder, and garam masala; cook, stirring constantly, until fragrant, about 30 seconds. Add the broth, chickpeas, tomatoes, ½ teaspoon salt, and black pepper; bring to a boil over high heat. Reduce the heat, cover, and simmer gently, stirring occasionally, about 20 minutes.

2. Stir in the coconut milk; continue to cook, stirring occasionally, until heated through, about 10 minutes. Garnish with the herbs; serve over rice, couscous, or quinoa, if desired.

I’m submitting this entry to Branny’s Charity Souper Bowl, in which she will donate a dollar to the American Society for the Prevention of Cruelty to Animals for each post submitted.

beef short ribs braised in tomato sauce

When my sister visits with her young kids, I like to make a dish on the first night that’s particularly kid-friendly. While they aren’t picky eaters, they love pizza and spaghetti and hot dogs as much as any other kid. But if I’m cooking, the food has to be Bridget-friendly too. In other words, it has to be fun to cook.

I’ve wanted to perfect a recipe like this for a long time. I had in mind something that wasn’t just tomato sauce with meat added. I wanted the meat to shine, and I wanted the sauce itself to taste distinctly meaty.

To get the intensity I was hoping for, I pulled out every umami trick I know. Beef, obviously, and all the tomatoes don’t hurt. Dried porcini mushrooms, tomato paste (added with the aromatics and browned slightly), and pancetta added layers of meaty flavor.

This is my favorite type of recipe to make. Ingredients are added incrementally, food gets browned and delicious, and all the while, I get to stir and inhale the aroma, stir and inhale. It gets better after the sauce has simmered for hours, and then it becomes stir and taste, stir and taste. Even better is enjoying the meal with pasta, freshly baked bread, salad, a bottle of red wine, and two rambunctious kids and their parents.

One year ago: Lighter Chicken and Dumplings
Two years ago: Chopped Salad
Three years ago: Banana Cream Pie

Printer Friendly Recipe
Beef Short Ribs Braised in Tomato Sauce

½ ounce dried porcini mushrooms
1 teaspoon olive oil
4 (3-4 pounds total) beef short ribs
salt
3 ounces pancetta, diced
1 onion, diced small
1 carrot, diced small
3 garlic cloves, minced
2 tablespoons tomato paste
½ teaspoon oregano
½ cup wine (red or white, just something that isn’t too sweet or oaky)
2 (28-ounce) cans whole tomatoes with their juice

1. Rinse the mushrooms to remove any dirt clinging to them. Cover them with ½ cup water in a small microwave-safe bowl. Cover the bowl with plastic wrap, poke a few holes in the plastic wrap, and microwave on high power for 30 seconds. Let stand until the mushrooms are softened, about 5 minutes. Use a fork to lift the mushrooms from the liquid; mince the mushrooms, reserving the liquid.

2. Season the beef ribs with salt. Meanwhile, in a 5-quart Dutch oven, heat the olive oil over medium-high heat until it flows like water when the pot is tilted. Add the beef ribs and cook, for 2-3 minutes per side, until richly browned on all sides. Remove the ribs from the pot. Lower the heat to medium and add the pancetta to the pot. Cook, stirring occasionally, until the fat is rendered and the pancetta is crisp. Use a slotted spoon to transfer the pancetta to the plate with the short ribs. Drain all but 1 tablespoon fat from the pot. Add the onions and carrots; cook, stirring occasionally, until softened and lightly browned on the edges, 6-8 minutes. Stir in the garlic, tomato paste, mushrooms, and oregano; cook, stirring constantly, until fragrant, about 30 seconds. Pour in the wine; scrape up the browned bits on the bottom of the pot. Stir in the tomatoes, beef ribs, pancetta, mushroom soaking liquid (being careful to leave any dirt behind) and 1 teaspoon salt; bring to a simmer over medium-high heat, then reduce the heat to low, cover the pot, and cook, stirring occasionally, for 2 hours. After 2 hours, remove the cover, increase the heat to medium-low, and simmer for another hour, until the beef is tender.

3. Transfer the ribs to a plate; shred the meat. Meanwhile, if the sauce is too thin, increase the heat to medium-high and simmer until it reaches the desired thickness. Stir the meat back into the sauce. Taste for seasoning, adding salt if necessary, and serve over pasta or polenta.

gingerbread cake

I’m very aware when putting up Christmas decorations that they’re going to need to be taken back down soon enough. I keep my decorations minimal. A 2-foot tree I bought in college, one string of lights, some pretty candles. When we get back from visiting our families a week after Christmas and start dreading the return to work on Monday, it’ll only take a few minutes to pack up the holidays until next year. I won’t make treats for that.

But I did make treats for decorating. It hardly seems worth it, since it took us longer to dig the box of Christmas stuff out of the garage than it did to spread the cheer around the living room, but everything is more fun with food. Gingerbread is the perfect accompaniment to Pandora’s Holiday Jazz station and the ceramic trees my Grandma gave me ten years ago.

I’ve never had a bad gingerbread, but this one – dense and spicy and moist – is just perfect for December. Maybe I will make another batch when we put the decorations away…

One year ago: Brussels Sprouts Braised in Cream
Two years ago: Candied Orange Peel

Printer Friendly Recipe
Gingerbread (from Claudia Fleming via Smitten Kitchen)

Please note that this cake is better if made a day in advance. After removing it from the pan, let it cool completely, then wrap it tightly in plastic wrap.

Cooks Illustrated recently published a recipe for gingerbread that’s very similar to this, except they stir the batter a bit more to give it more structure, to avoid the sinking that’s evident in the photo above.

1 cup oatmeal stout or Guinness Stout
1 cup dark molasses (not blackstrap)
½ teaspoon baking soda
2 cups (9.6 ounces) all-purpose flour
1½ teaspoons baking powder
2 tablespoons ground ginger
1 teaspoon ground cinnamon
¼ teaspoon ground cloves
¼ teaspoon freshly grated nutmeg
Pinch of ground cardamom
3 large eggs
1 cup (7 ounces) packed dark brown sugar
1 cup (7 ounces) granulated sugar
¾ cup vegetable oil
confectioners sugar for dusting
lightly sweetened whipped cream for serving (optional)

1. Preheat oven to 350°F. Generously butter a bundt pan and dust with flour, knocking out excess.

2. Bring the stout and molasses to a boil in a 2-quart saucepan and remove from heat. Whisk in baking soda; cool to room temperature.

3. Sift together the flour, baking powder, and spices in a large bowl. Whisk together the eggs and sugars in a separate bowl. Whisk the oil, then the molasses into the egg mixture. Add the egg mixture to the flour mixture; whisk until combined.

4. Pour the batter into the prepared pan and rap the pan sharply on counter to eliminate air bubbles. Bake in the middle of the oven until a tester comes out with just a few moist crumbs adhering, about 50 minutes. Cool cake in pan on a rack 5 minutes. Turn out onto rack and cool completely.

5. Serve cake, dusted with confectioners sugar, with whipped cream, if desired.

R.I.P. This cake stand, which I broke 30 seconds after taking these pictures.

beef in barolo

I seem to be going through a phase. I was trying to choose what recipe to post about next, but everything I have to choose from seems so similar to Bolognese – Italian sauces based either on beef, tomatoes, or both. Maybe it’s because Dave and I are talking about visiting Italy next year, or maybe it’s because Italian beefy and/or tomatoey recipes are so perfect for winter (or what passes for winter in southeastern New Mexico).

Although, if you cook the beef in Yellowtail Cabernet Sauvignon instead of Barolo, can you still call it an Italian recipe? I don’t imagine that I will ever cook with Barolo, and I certainly don’t recommend that you do either. Barolo is expensive. You’ll rarely find it for less than $50 per bottle and certainly never under $20. Don’t dump $40 worth of wine into your stew, please. And have you ever had Yellowtail’s cab? It’s perfectly drinkable, and at $5 per bottle, it’s a far more practical cooking wine.

Yes, this pot roast is cooked with 2 whole bottles of wine. It’s intensely winey – obviously. In fact, the first night we had this for dinner, I was a little taken aback. The meat is purple and the flavor is so…winey. However, the leftovers the next night were perfectly balanced, so I suspect I didn’t cook it long enough initially, especially considering that the meat wasn’t quite as tender as I like my pot roast.

But that also means that this is one of those meals that is even better when it’s made in advance. It seems to me, then, that this is the perfect meal for guests – it’s convenient and delicious, but the wine makes it fancy. Even if it isn’t fancy wine.
One year ago: English Muffins
Two years ago: Red Velvet Whoopie Pies

Printer Friendly Recipe
Brasato al Barolo – Beef Braised in Barolo (adapted from Emeril)

6 servings

Oops, I just saw that the recipe calls for 1½ bottles of wine, not the 1½ liters, or two bottles, that I thought when I made this. So yours might not be quite as winey as mine. And now you have half a bottle to sip on while you wait for the beef to cook!

1 tablespoon olive oil
1 (3-pound) boneless beef chuck roast, patted dry
Salt and freshly ground black pepper
3 ounces pancetta, diced
1 yellow onion, diced
2 medium carrots, diced
2 celery stalks, diced
3 cloves garlic, minced
1½ bottles (4½ cups) Barolo, or other dry red wine
2 cups chicken stock
2 sprigs rosemary
2 bay leaves
1 cinnamon stick
¼ cup chopped fresh parsley, for garnish

1. Heat the oven to 325 degrees.

2. In a large Dutch oven, heat the oil over medium-high heat. Sprinkle the beef with salt and pepper. Add the beef to the pot and cook, turning every 2-3 minutes, to brown on all sides. Remove from the pan. To the fat in the pan, add the pancetta and cook until browned, about 3 minutes. Add the onions, carrots, celery and a pinch of salt; cook until caramelized, about 10 minutes. Add the garlic and cook until fragrant, about 30 seconds. Return the beef to the pan and add the wine, 2 cups of the stock, rosemary, bay leaves and cinnamon stick. Bring the liquid to a simmer over medium-high heat, then cover tightly and transfer the pot to oven.

3. Cook, turning the roast every 30 minutes, until fully tender and a meat fork slips in and out of meat very easily (3½-4 hours). Remove the meat from the pan and tent with foil to keep warm.

4. Remove the rosemary, bay leaves, and cinnamon stick, and place the pot over high heat. Cook until the sauce is reduced to a consistency thick enough to coat the back of a spoon, about 10 minutes. Adjust the seasoning to taste.

5. Thinly slice the beef across the grain into ¼-inch thick slices. Serve the beef ladled with the sauce. Garnish with parsley and serve.