chicken gyros

chicken gyros 14

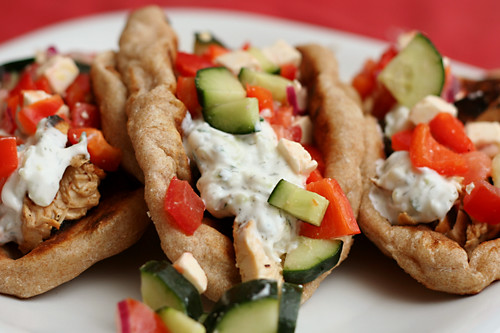
Elly’s chicken gyros are so very popular for good reason – it’s a simple recipe with exceptional results. I, of course, can’t keep anything simple. After I made Elly’s recipe a few times, I noticed how similar it is to chicken fajitas – marinated chicken wrapped in flat bread with vegetables. My favorite chicken fajita recipe has a few tricks up its sleeve that I love, so I started incorporating those into Elly’s chicken gyro recipe.

chicken gyros 1

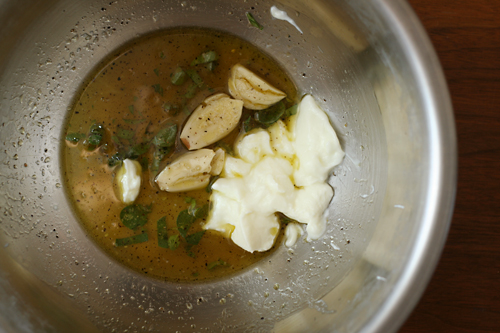
My favorite trick is saving a portion of the marinade (before mixing it with raw meat, of course) to stir into the cooked and shredded chicken, reviving any flavors that might be lost during cooking. Another portion of the marinade is stirred into the vegetables, brightening their flavor while the vinegar tames the onion’s bite. I also insist on taking advantage of everyone’s favorite cooking method – fire. I love grilling the chicken and then toasting the pita over the remaining coals.

chicken gyros 2

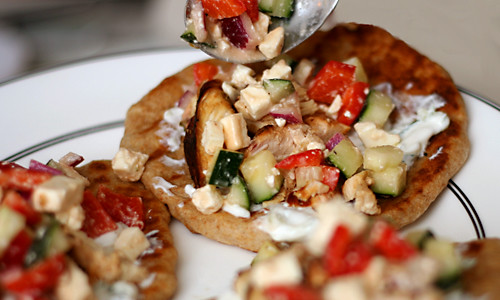
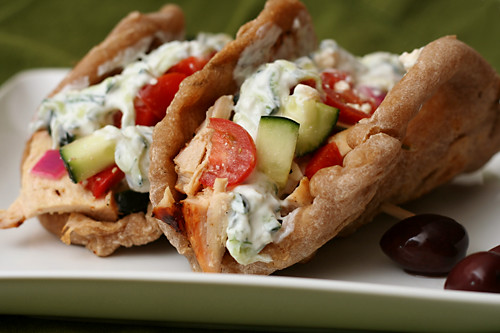
I’m fairly certain that traditionally, gyros aren’t topped with red peppers and feta, and the first few times I made this recipe, I served those on the side as part of Mediterranean Pepper Salad. But each time, more and more of the salad made its way onto the gyro, and eventually I stopped keeping them separate at all. With the vegetables right on top of the marinated grilled chicken and toasted flatbread, topped with tart white sauce, these were even more similar to chicken fajitas, except – dare I say – even better.

chicken gyros 5

One year ago: Croissants (Martha Stewart’s recipe)
Two years ago: Rhubarb Scones
Three years ago: Pita (cook these right on the grill instead of baking!)

Printer Friendly Recipe
Chicken Gyros (adapted from Elly Says Opa and from Cooks Illustrated’s Chicken Fajita recipe)

Greek yogurt is often sold in 7-ounce containers. If you don’t have extra plain yogurt around to use in the marinade, using 2 tablespoons of the Greek yogurt meant for the tzatziki recipe in your marinade won’t hurt your tzatziki at all.

Chicken:
¼ cup juice from 1 to 2 lemons
2 tablespoons olive oil
3 medium garlic cloves, crushed
1 tablespoon red wine vinegar
1 teaspoon sugar
table salt and ground black pepper
2 tablespoons plain yogurt
3 boneless, skinless chicken breasts (about 1½ pounds), trimmed of fat, tenderloins removed, pounded to ½-inch thickness

Tzatziki:
½ cucumber, unpeeled, shredded
½ teaspoon kosher salt
7 ounces Greek yogurt
1 tablespoon freshly squeezed lemon juice
½ tablespoon white wine vinegar
½ tablespoon minced fresh dill (optional)
1 clove garlic, minced
¼ teaspoon freshly ground black pepper

For serving:
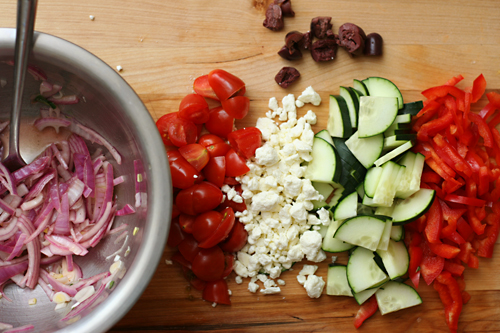
½ red onion, quartered lengthwise and sliced thinly
1 large red bell pepper, quartered lengthwise and sliced thinly
½ cucumber, quartered lengthwise and sliced thinly
1 tomato, chopped medium, or 1 cup grape tomatoes, halved
½ cup feta, crumbled
4-6 (6-inch) pocketless pitas

1. In a medium bowl, whisk together the lemon juice, oil, garlic, vinegar, sugar, 1 teaspoon salt, and ¾ teaspoon pepper. Reserve 3 tablespoons of the marinade in a small bowl; set aside. Add the yogurt and another teaspoon salt to the remaining marinade. Place the chicken in the marinade; cover with plastic wrap and refrigerate 15 minutes.

2. Meanwhile, using a large chimney starter, ignite 6 quarts of charcoal briquettes and burn until the coals are fully ignited, about 20 minutes. Empty the coals into the grill, spreading them in a single layer; place an additional 20 unlit coals over the lit coals on one side of grill to create a two-level fire. Position the grill grate over the coals and heat the grate for 5 minutes; scrape clean with a grill brush. (For a gas grill, light all burners and turn to high, cover, and heat the grill until hot, about 15 minutes; scrape the grill grate clean with a grill brush. Leave one burner on high heat while turning the remaining burner(s) down to medium.)

3. For the tzatziki: Place the cucumber in a strainer set over a medium bowl and add the salt. Set aside for at least 15 minutes to drain. Transfer the cucumber to a clean kitchen towel and squeeze dry. Combine the drained cucumber with the yogurt, lemon juice, vinegar, dill, garlic, and pepper.

4. Add 2 tablespoons of the reserved marinade to a bowl; add the sliced onion to the marinade. Set aside to lightly pickle while you prepare the remaining toppings. Mix all of the vegetables and feta into the bowl with the onion.

5. Remove the chicken from the marinade and place it smooth side down on the hotter side of the grill; discard the remaining marinade. Cook the chicken until it’s well browned, 4 to 5 minutes; using tongs, flip the chicken and continue grilling until it’s no longer pink when cut into with a paring knife or an instant-read thermometer inserted into the thickest part registers about 160 degrees, 4 to 5 minutes longer. Transfer to a plate; cover to keep warm.

6. Working in 2 or 3 batches, place the pitas in a single layer on the cooler side of the now-empty grill and cook until warm and lightly browned, about 20 seconds per side (do not grill too long or the pitas will become brittle). As the pitas are done, wrap them in a kitchen towel or a large sheet of foil.

7. Slice the chicken into ¼-inch strips and toss with the remaining tablespoon of reserved marinade in another bowl; arrange the chicken and vegetables on a large platter and serve with the warmed pitas.
chicken gyros 8

barbecued pulled pork

The best part of barbecuing a whole pork shoulder on the grill is that you are forced to spend all day outside tending the grill. I can’t think of many better ways to spend a Saturday. We started the grill before breakfast, then spent the rest of the day in the backyard.  First we drank coffee, then some water because you have to to survive, even on weekends, and then it was time for afternoon margaritas, and then we capped it off with beer, because what else are you going to drink with pulled pork?

The truth is that while you do need to keep a constant-ish eye on the grill, you don’t need to spend much time actually doing anything with it. Once the pork is cooking, it takes just a couple of seconds every hour or so to add a handful of fresh coals. A thermometer is key to monitor the temperature, although a cheap oven thermometer – which is what I used – will work just fine.  And if you do find the temperature varying widely, it won’t ruin your pork; just let it slowly come down to the right temperature range or add more coals to bring it up and continue cooking. Cooking a whole pork shoulder on the grill is a simple and forgiving process, even if it does take a long time.
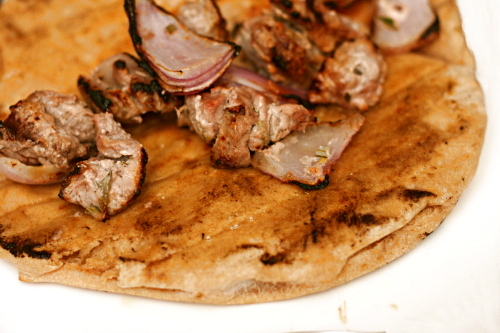
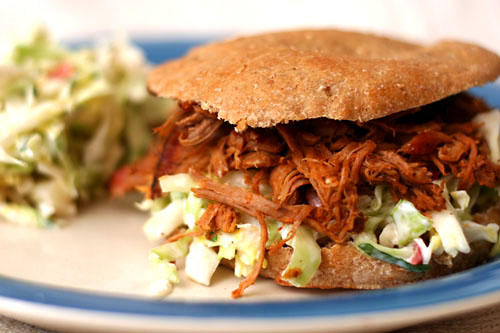
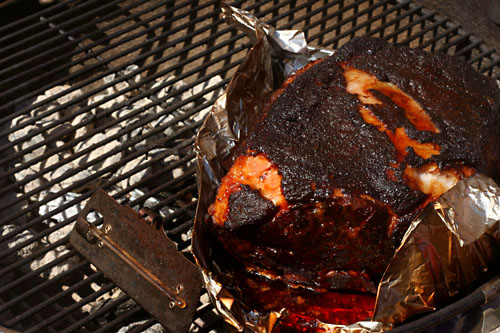
I know the question everyone is asking: Is it really better than crockpot pulled pork? Well, of course it is. Crockpot pulled pork, especially using the same spice rub, is incredible – flavorful, tender, and easy easy easy. Barbecued pulled pork isn’t as moist and as a result, its flavor seems more concentrated. It’s still easy to pull, but it has more chew than crockpot pulled pork, which can get mushy if you’re not careful. The biggest difference were the outside bits of the roast, which were deeply browned and crisp. (This is not the same thing as the blackened top in the photo below, which is a thick layer of fat that I discarded.) Dave and I filled up on those while I was still shredding the roast. But the best part of making pulled pork on the grill as opposed to in the crockpot is that while one method frees you up to do chores and run errands all day, the other keeps you in the backyard with a book and a beer.

One year ago: Home Corned Beef and Corned Beef Hash
Two years ago: Orange Oatmeal Currant Cookies
Three years ago: Hash Browns with Sauteed Vegetables and Poached Eggs

Printer Friendly Recipe
Barbecued Pulled Pork (spice rub from Cooks Illustrated)

Serves a lot

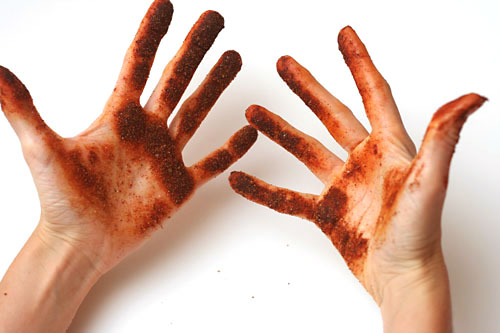
The least messy way I’ve found to add the spices to the meat is to line a rimmed baking sheet with a large piece of plastic wrap. Set the pork on the plastic wrap; add the spice rub, rotating the meat to rub all sides. Wrap the plastic wrap around the meat, then wrap another layer of plastic around in the opposite direction.

I use all of the spice rub on one roast, but if you think it’ll be too much, save half for another use. It’ll keep in the pantry for months.

Spice Rub:
1 tablespoon ground black pepper
1-2 teaspoons cayenne pepper
2 tablespoons chili powder
2 tablespoons ground cumin
2 tablespoons dark brown sugar
1 tablespoon dried oregano
4 tablespoons paprika
2 tablespoons table salt
1 tablespoon granulated sugar
1 tablespoon ground white pepper

1 (6-8 pound) bone-in pork shoulder

1. Combine all of the ingredients in the spice rub. At least one day, and up to three days, before cooking the pork, rub the spice rub onto all sides of the pork (see note). Wrap the pork in a double layer of plastic wrap. Refrigerate overnight or up to three days.

2. About 10 hours before you plan to serve the pork, remove it from the refrigerator; let it set at room temperature for 1 hour. Meanwhile, soak 4 wood chunks (or 4 cups of wood chips) in water for an hour.

3. About 20 minutes before you’re ready to grill, light about 30 charcoal briquettes (half a chimney starter). Once the coals are covered with a layer of ash, dump them into a pile on one side of the grill, then top with ¼ of the wood chunks or chips. Open the bottom vents completely. Place the meat, fat side up, on a double layer of aluminum foil with the edges folded up or in a 9×13-inch disposable aluminum baking pan. Place the meat on the side of the grill opposite the coals. Put the lid on the grill with the vents opposite the coals; adjust vents to be ¾ open.

4. Use a grill or oven thermometer to monitor the temperature of the grill, which should remain between 200 and 250 degrees. Add fresh coals, about 8 every hour, when the temperature drops. Add more wood chips an hour after you start cooking, then again at the 2- and 3-hour mark. (Don’t worry if the top of the meat blackens; you’ll discard that layer of fat anyway.)

5. After about 5 hours, when the internal temperature of the pork reaches 165 degrees, wrap it completely in foil. Continue cooking until the internal temperature of the pork is 195 degrees, another 2-3 hours.

6. Remove the pork from the grill and let it set at room temperature, covered, for one hour.

7. Place the pork on a large rimmed baking sheet. Remove and discard the thick layer of fat. Use your fingers or forks to shred the remaining meat. Serve.

fig-glazed burgers with onion jam

We’ve gotten into a loose routine with our weekend meals. Friday is usually some sort of pizza, unless we get takeout sushi; Saturday with its meat-carb-vegetable makeup is the only day of the week I bother with side dishes; and Sunday is something sandwich-like. I’m not going to say that sandwich night is my favorite, but there’s something undeniably happy-making (or maybe that’s the Sunday champagne habit) about carbs and their fillings, whether its tacos, gyros, burgers, or whatever else.

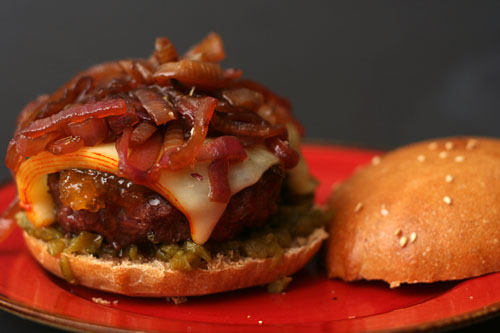
We’re pretty attached to our backyard these days, so Sunday sandwiches are usually cooked on the grill. Not that I’m bored of green chile cheeseburgers (or that I won’t put green chile on a fig-glazed burger), but there are so many great burger ideas out there, it would be a shame to stick to one favorite. This is just the first on a long list of great options.

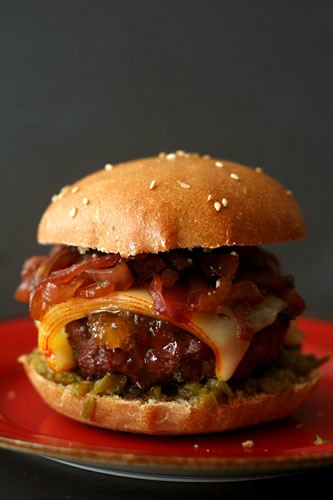
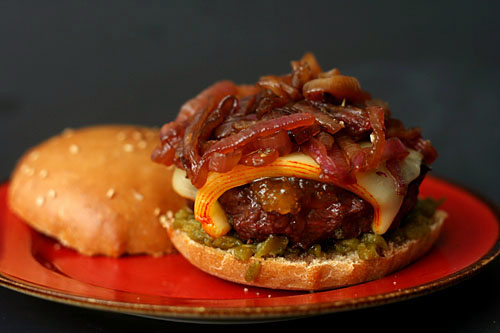
It’s odd that I chose the sweet plus meat burger off of that list, since it isn’t a combination I often crave. Or it wasn’t. It might be now. It doesn’t hurt that it’s also mixed with vinegary onion jam and melty cheese. Our Sunday dinner sandwich habit might turn into a Sunday fig-glazed burgers habit.

One year ago: Pizza with Figs, Prosciutto, Gorgonzola, Balsamic, and Arugula (oddly similar flavors)
Two years ago: Pasta with Cauliflower, Walnuts, and Ricotta Salata
Three years ago: Creamy Buttermilk Coleslaw (This is no longer my favorite classic coleslaw. I’ll post the new recipe soon.)

Printer Friendly Recipe
Fig-Glazed Burgers with Red Onion Jam (adapted from Southern Living via Pink Parsley)

Makes 4 burgers

I like my burgers a little smaller, so I made six out of this amount of meat mixture instead of four.

Red onion jam:
1 teaspoon olive oil
1 large red onion, sliced thin
Pinch salt
2 tablespoons brown sugar
¼ cup balsamic vinegar
¾ teaspoon chopped fresh thyme

Cheeseburgers:
1½ pounds ground chuck
2 tablespoons chopped fresh oregano
1 teaspoon kosher salt
1 tablespoon Dijon mustard
¼ teaspoon garlic powder
½ teaspoon ground black pepper
3 tablespoons fig preserves
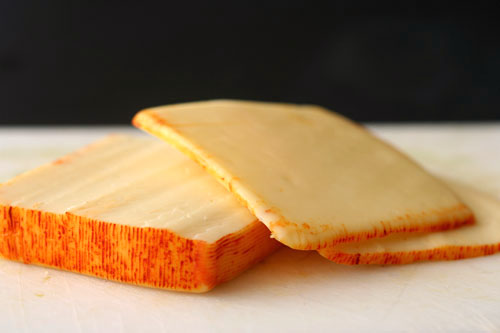
4 (½-oz) Muenster cheese slices
4 hamburger buns, split and toasted

1. In a large skillet, heat the oil over medium-high heat until it flows like water when you tilt the pan. Add the onions and salt; cook, stirring often, for 5 minutes, until the onions are just golden around the edges. Reduce the heat to medium-low; add the sugar, vinegar, and thyme; cover and cook 10 minutes, until the onion is tender and most of the liquid is absorbed.

2. Gently mix the beef, oregano, salt, mustard, garlic powder, and black pepper. Divide the mixture into four portions and shape each one into a ½-inch thick patty. Form a divot in the center of each patty.

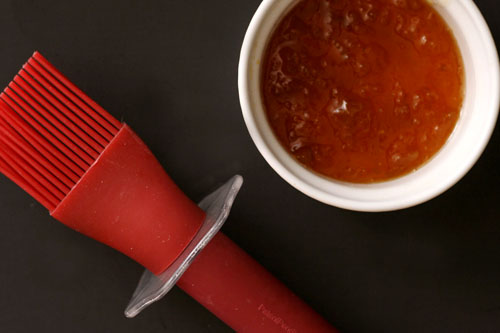
3. Prepare a medium-hot grill. Using a paper towel, grease the grates with vegetable oil. Grill the patties for 5 minutes; flip, and continue grilling another 5 minutes. Brush each patty with fig preserves and top with a slice of cheese. Grill an additional 2 minutes, or until the beef is cooked and the cheese is melted. Serve on buns with onion jam.

eggplant rollatini

The only thing I can remember cooking for the last several years that turned out so badly that not only did I refuse to eat it, but even Dave did, is grilled eggplant. I don’t remember what went wrong – cook time too long? cook temp too low? too high? salt, don’t salt, cut thicker cut thinner, I don’t know – but the resulting mush of eggplant goo is all too vivid still.

I hadn’t eaten eggplant since. I’ve seen recipes in which every other component sounded like something I would enjoy, but as soon as I spotted that nefarious eggplant in the ingredient list, I scrolled right on past. I knew I’d have to try eggplant again someday. But I wasn’t ready then.

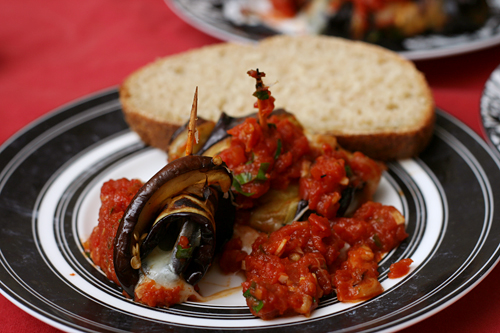
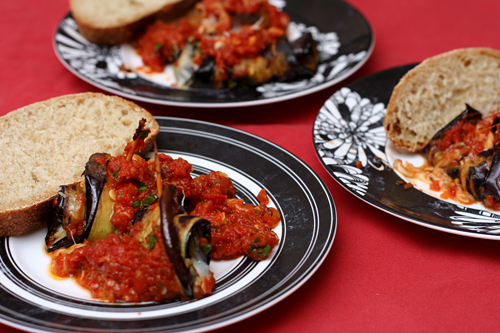
Now I am. Cheese and tomato sauce is never a bad way to ease into an ingredient. Each grilled slice of eggplant is rolled with a slice of cheese, then topped with a quick marinara sauce and heated until the flavors meld and the cheese softens. For me, they were too messy to serve as a hand-held hors d’œuvre, but instead made for a very nice plated first course. That’s right, a recipe with eggplant was very nice. I’m one step closer toward liking eggplant again.

One year ago: Pasta with Baked Ricotta and Sweet Tomato Sauce
Two years ago: Vegetarian Chili
Three years ago: Salmon Pesto Pasta

Printer Friendly Recipe
Eggplant Rollatini (adapted from Cara’s Cravings)

I just stick a pair of kitchen shears into the can of tomatoes and chop away a bit. It’s coarser than a puree, but still just fine for sauce. If you want it smoother, puree the tomatoes in the food processor.

We grilled the eggplant; I haven’t personally tried the roasting technique recommended in the original Gourmet recipe.

4 small Italian eggplants or 2 regular eggplants
Kosher salt
1 tablespoon olive oil
2 garlic cloves, finely chopped
¼ teaspoon dried hot red-pepper flakes
1 (15-ounce) can diced tomatoes, chopped, undrained
½ teaspoon salt
¼ cup coarsely chopped fresh basil
16 thin slices provolone cheese
½ ounce (¼ cup) finely grated parmesan cheese

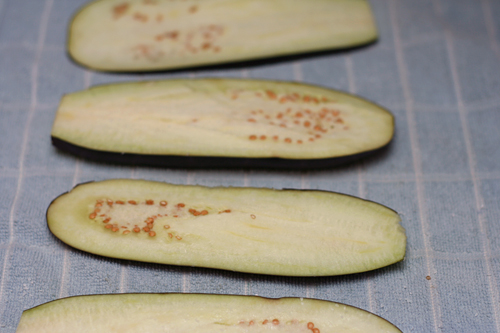
1. Peel 2 opposite long sides of each eggplant. Cut each eggplant lengthwise (to form long skinny ovals) into 1/4-inch slices. Sprinkle both sides of the slices with kosher salt; set aside for 30 minutes. Heat the oven to 425 degrees.

2. Heat the oil in a medium skillet over medium heat until it flows like water when the pan is tilted; add the garlic and red pepper flakes and cook, stirring constantly, until fragrant, about 30 seconds. Add the tomatoes and ½ teaspoon salt; cook, stirring occasionally, until thickened, 8-12 minutes. Remove from heat; stir in the basil.

3. Prepare a grill for direct-heat cooking over moderate heat (or line a large baking sheet with foil and heat the oven to 450 degrees). Brush any remaining salt crystals from the eggplant; pat the slices dry and spray both sides with nonstick spray. Grill the eggplant, turning once, until tender, about 4 minutes total (or bake for 20 minutes, turning once). Transfer to a work surface.

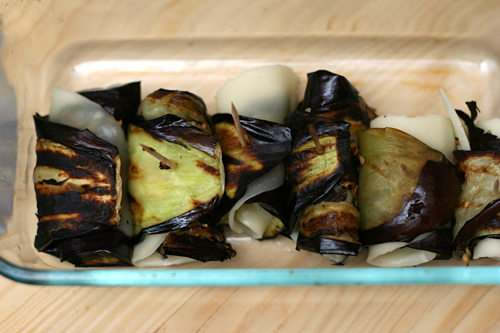
4. Top each slice of eggplant with a slice of cheese; starting at a short end, roll the eggplant and cheese into a spiral and seal with a toothpick. Repeat with the remaining eggplant and cheese. Arrange the eggplant spirals in a shallow baking pan and top with the sauce; bake until the cheese is melted, about 10 minutes.

whiskey compound butter

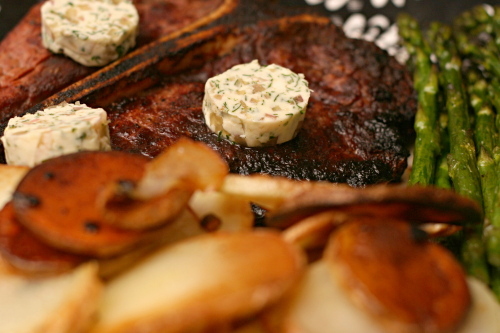
I love grilled steaks – who doesn’t? – but I do miss the fond left behind on the pan when you pan-fry steaks. Nothing beats the sauce you can make by adding some alcohol, herbs, and cream to the scraped up bits of meat left on the pan. The grilling equivalent is compound butters, and I won’t say no to those either.

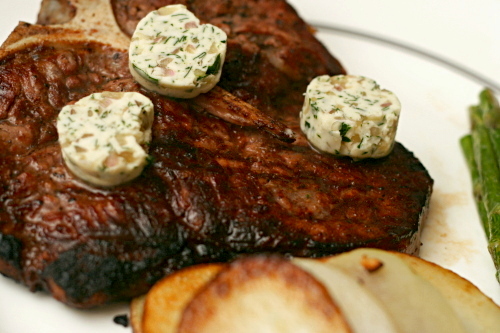
I also don’t say no to whiskey – at least when it’s mixed with butter to top my steak. Between the shallots, alcohol, and herbs, this compound butter has nearly everything my favorite pan sauces do. And unlike a pan sauce, which requires some last minute frenzy, a compound butter can be made hours (days! weeks! months!) in advance. Most importantly, it’s accompanying a beautiful charcoal-grilled steak.

One year ago: Twice-Baked Potato Cups
Two years ago: Banana and Peanut Butter Stuffed French Toast

Printer Friendly Recipe
Whiskey Compound Butter
(adapted from epicurious.com)

Makes enough to top 6-8 steaks

1 shallot, minced
1 tablespoon whiskey or bourbon
8 tablespoons (1 stick) unsalted butter, softened
1 tablespoon minced parsley
½ teaspoon Worcestershire sauce
½ teaspoon Dijon mustard
¼ teaspoon sea salt
black pepper to taste

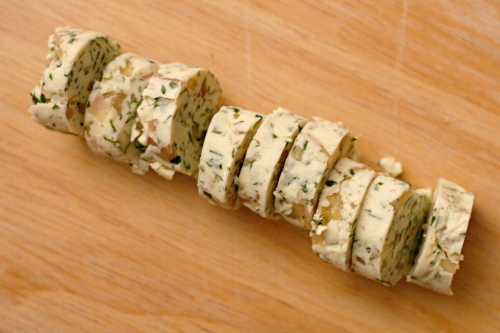
Combine the shallot and whiskey; let rest for about 15 minutes. Meanwhile, add the remaining ingredients to the bowl of a stand mixer. Mix well. On a 12-by-8 inch square of wax paper, drop butter in spoonfuls to form a log. Roll butter in wax paper and smooth out to form a round log. Refrigerate until hard and easy to slice into round, coin-shaped pieces, at least three hours. Serve with grilled steak.

grilled corn salad

It’s green chile season! My sister recently told me that, for her, fall in New Mexico means green chiles roasting, the state fair, and the Balloon Fiesta. Fall isn’t so bad out here, even without rolling hills of trees that turn brown, red, pink, maroon, orange, yellow. I will miss the crisp air, pumpkins, apples, and chill days of fall on the East coast, but when I was out there, I missed green chile. So I win either way.

The only problem is that I tend to get into a hoarding pattern with my annual green chile supply. I buy them every fall when they come into season, roast them, and freeze them to last until the following September. And then, aside from the occasional huevos rancheros, I mostly ignore them, because what if I run out? This is a mindset I’m determined to get out of. Not only is that not the kind of life I want to lead, but, as Jen warns, they seem to get hotter as they’re frozen for longer periods.

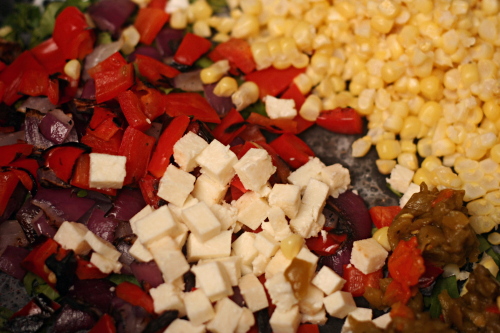
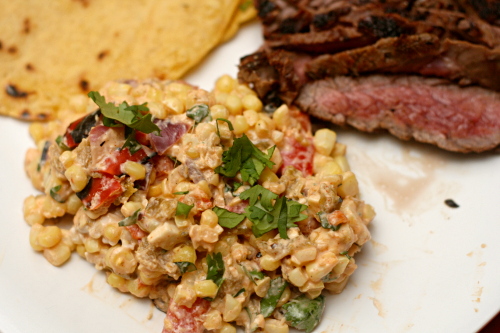
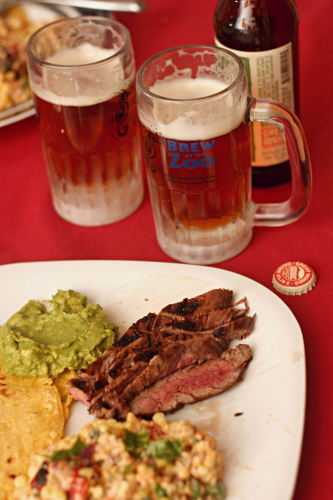
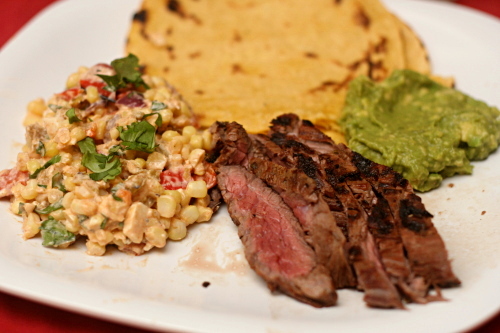
This corn salad doesn’t even call for green chile, but I had some leftover from the previous day’s burgers, so I went ahead and added them. They’ve been in the freezer for about a year, and maybe that’s why the dish ended up so, um, kind of painful to eat, actually. The heat was somewhat dulled by the dairy in the recipe, and once I smooshed the corn into a tortilla with some flank steak, it was downright edible. Not that the corn even needed extra flavor, what with having been grilled and mixed with chili powder, cilantro, lime juice and salty cotija. But I need to use up some of these chiles in my freezer to make room for the new crop!

One year ago: Pickled Coleslaw
Two years ago: Sausage and Red Pepper Hash

Printer Friendly Recipe
Grilled Corn Salad (from Bobby Flay via Savory Spicy Sweet)

I used a not-nonstick skillet on the stove instead of a cast iron pan on the grill, and I substituted greek yogurt for the crème fraiche. And I added an ounce or two of very spicy diced Hatch green chiles, plus some diced red pepper and red onion.

8 ears fresh corn, silks removed, husk on, soaked in cold water 30 minutes
canola oil
salt and freshly ground black pepper
¼ cup creme fraiche
2 limes, juiced and 1 zested
1 tablespoons ancho chili powder
¼ cup chopped fresh cilantro leaves
¼ cup grated cotija cheese

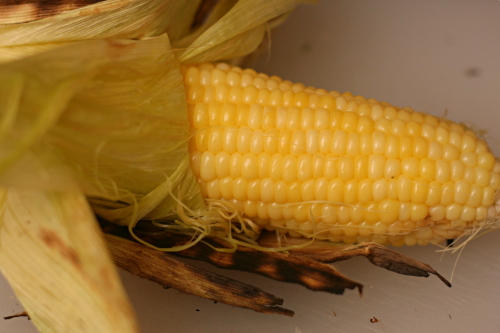
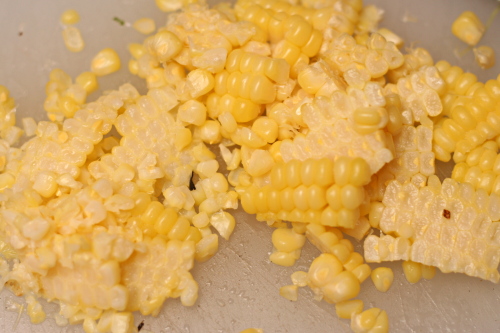
1. Heat grill to high. Grill corn until charred on all sides, 10 or so minutes. Take off the grill and remove the kernels with a sharp knife. While you are cutting the corn, put a cast iron skillet on the grill to heat.

2. Add the corn and the remaining ingredients to the hot pan and cook, stirring occasionally, until creamy and heated through. Serve.

beer-marinated flank steak

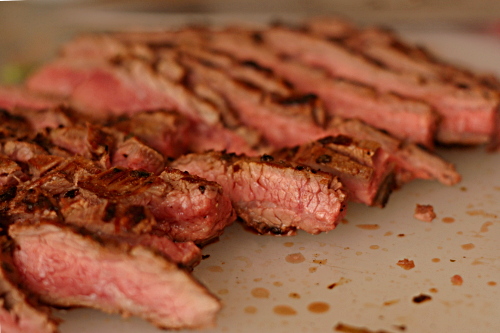
Generally, I’m not a fan of making marinades. I enjoy the flavor, but something about chopping and measuring ingredients just to put them in a bag with some meat for a few hours isn’t satisfying for me. I like the part of cooking that involves heat, when things get soft or crisp, turn golden brown, intensify in flavor. I like the part of cooking that involves eating. The first step of marinating doesn’t include any of the fun stuff.

At least, in this recipe, it involves beer. And very little chopping and not much measuring. This is my kind of marinade.

It tastes like my kind of marinade too. While the beer in the recipe caught my eye first, it was the Worcestershire sauce that reeled me in, because I love the stuff. The combination of the two made for a flank steak that was not just great-tasting, but was a beautiful burnished brown on the outside with the perfect amount of pink inside. My first time cooking flank steak was a definite success, which in retrospect, should have been obvious from the beginning, because beer makes everything better, even making marinades.

One year ago: Quick Baking Powder Pizza Crust
Two years ago: Mashed Potatoes with Kale

Printer Friendly Recipe
Beer-Marinated Flank Steak (from Bon Appetit via Apple a Day)

Serves 6

2 1⅓-pound flank steaks
1 tablespoon dried oregano
2 teaspoons ground cumin
Coarse kosher salt
¼ cup extra-virgin olive oil
1¼ cups thinly sliced green onions (about 6)
1 12-ounce bottle dark beer
½ cup Worcestershire sauce

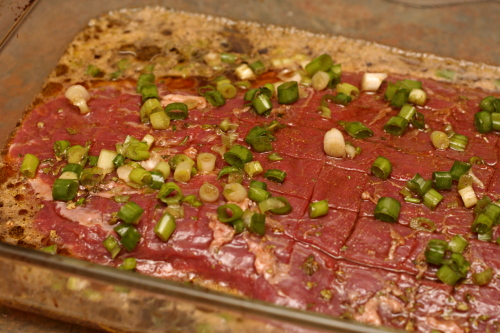
1. Using sharp knife, lightly score flank steaks about ⅛ inch deep on both sides in a crisscross pattern at ½-inch intervals. Place steaks in 13x9x2-inch glass baking dish. Sprinkle steaks on both sides with oregano and cumin and generous amount of coarse salt and freshly ground pepper. Drizzle olive oil over both sides of steaks, rubbing oil and spices into meat. Add green onions, beer, and Worcestershire sauce, turning steaks several times to coat both sides. Cover and chill at least 3 hours, turning occasionally. (Can be made 1 day ahead. Keep chilled.)

2. Prepare barbecue (medium-high heat). Brush grill rack lightly with oil. Grill steaks to desired doneness, 3 to 4 minutes total per side for medium-rare, turning steaks ¼ turn after 1½ minutes to form crisscross grill marks, if desired. Transfer steaks to cutting board; let rest 5 minutes. Thinly slice steaks across grain. Transfer to platter and serve.

yogurt-marinated lamb kebabs

I actually made this back in February, but I figured most of the world was covered in snow in February and thus, not doing much grilling. Haha, suckers, grilling season lasts year round in the desert!

Well, year round unless there’s an extra dose of heat in the summer, in which case you’re huddled inside cozied up with your air conditioner. The spring isn’t so good either, because you have to dodge the shingles that the wind blows off the neighbor’s roof. And when it does rain in the summer, it tends to be right at dinner time. So maybe the desert isn’t any better for grilling than anywhere else.

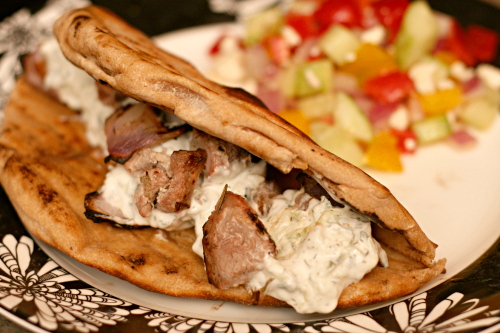
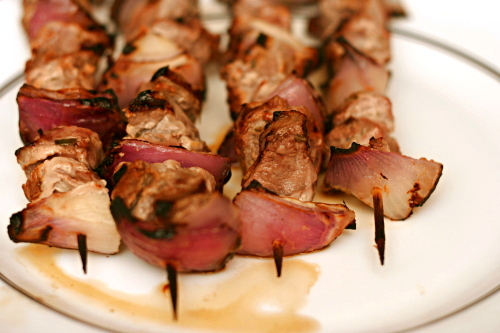
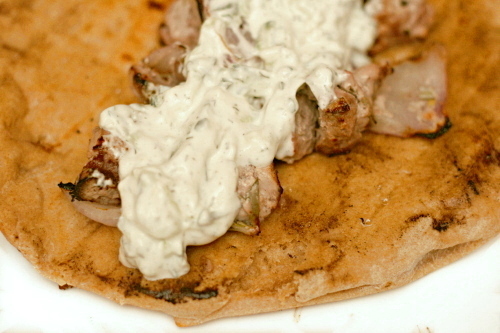
But the heat, rain, and wind are worth it, because you get meals like this. You just can’t do this with a broiler. The lamb is so tender and flavorful, tzatziki makes everything better, and pita cooked right on the grill is becoming one of my favorite things ever. Forget perfect grilling weather – this meal is worth grilling in the snow for.

One year ago: Experiments with chocolate chip cookies
Two years ago: Comparison of three white cake recipes

Printer Friendly Recipe
Yogurt-Marinated Lamb Kebabs (from Ina Garten via Smitten Kitchen)

1 pound plain yogurt (regular or lowfat)
¼ cup olive oil, plus more for brushing grill
1 teaspoon lemon zest
¼ cup freshly squeezed lemon juice (2 lemons)
5 tablespoons fresh whole rosemary leaves, chopped
1 teaspoon kosher salt
½ teaspoon freshly ground black pepper
2 pounds top round lamb
1 red onion

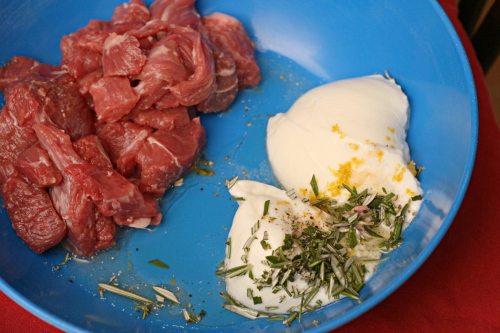
1. Combine the yogurt, olive oil, lemon zest and juice, rosemary, salt, and pepper in a large, non-reactive bowl. Cut the lamb in 1½-inch cubes and add it to the yogurt, making sure it is covered with the marinade. Cover the mixture with plastic wrap and refrigerate overnight or for up to two days.

2. Prepare a medium-hot grill. Cut the red onion into 8 pieces and separate each piece into three or four sections. Loosely thread three or four pieces of lamb onto skewers alternately with sections of onion. Sprinkle both sides of the lamb cubes with salt and pepper. Place the skewers on the hot grill and cook for 10 to 15 minutes, turning two or three times, until the lamb is medium-rare. Serve with grilled pitas and tzatziki.

Tzatziki (adapted more liberally from Ina Garten and Smitten Kitchen)

1 hothouse cucumber, unpeeled, seeded, shredded
1 teaspoon kosher salt
14 ounces Greek yogurt
2 tablespoons freshly squeezed lemon juice
1 tablespoon white wine vinegar
1 tablespoon minced fresh dill
1½ teaspoons minced garlic
½ teaspoon freshly ground black pepper

1. Place the cucumber in a strainer set over a medium bowl and add the salt. Set aside for at least 15 minutes to drain. Transfer the cucumber to a clean kitchen towel and squeeze dry.

2. Combine the cucumber, yogurt, lemon juice, vinegar, dill, garlic, and pepper.

grilled potato and vegetable salad

Last year I said, “You know what always makes me twitchy? Hearing people talk about how they just have sooo many zucchini or tomatoes or whatever from their garden.”

Squeeeee!!!! And now I am one of those people! I am I am I am I am!!!

Okay, sort of. I have hundreds of tomatoes growing, but they won’t. turn. red. Aaargh! I only had enough green beans for one meal, but it looks like there will be a steady supply of jalapenos and chile peppers starting soon. I wouldn’t say that I get more zucchini than I know what to do with – my single plant offers about one squash per week (after being suitably sexed up of course), which is just right for us.

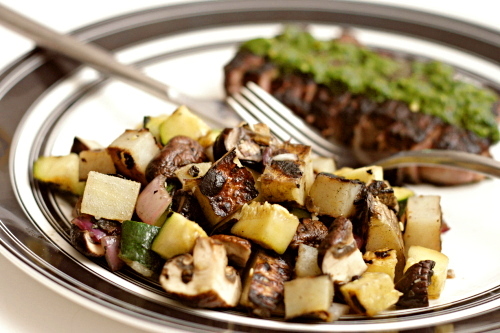
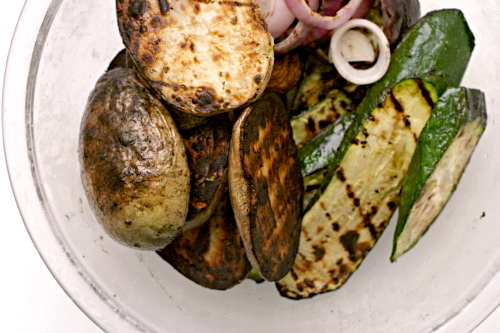
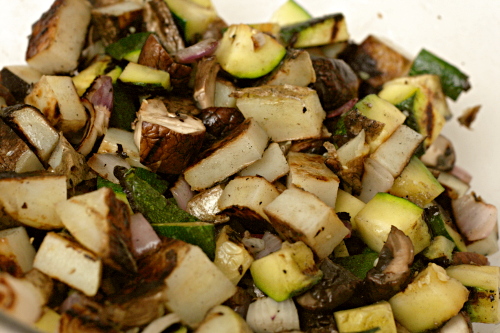
And it’s just right in this dish. When I’m cooking something on the grill, it always makes more sense to me to make the whole meal on the grill. It can be difficult to find interesting grilled side dishes though. I had made grilled potatoes and grilled vegetables many times before, but mixing the two together and adding dressing to make a salad was more fun than eating them separately. It’s a perfect side for so many meat dishes, and it’s the perfect way to use my one zucchini per week.

One year ago: Tortellini Soup with Carrots, Peas, and Leeks
Two years ago: Summer Rolls

Printer Friendly Recipe
Grilled Potato and Vegetable Salad (adapted from Bon Apetit via epicurious)

Serves 4 to 6

You can also try microwaving the oiled potatoes in a covered bowl for a few minutes before grilling, if you’re concerned about the centers cooking all the way through. Sometimes I do this; sometimes I don’t.

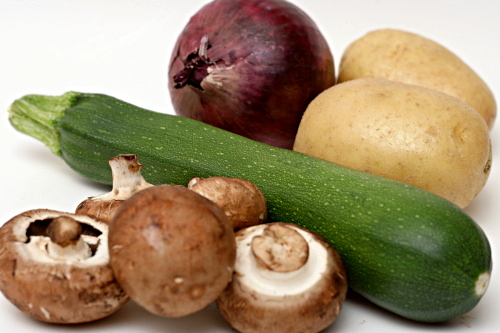
2 pounds asparagus, red onions, mushrooms, summer squash, and/or red peppers
8 ounces Yukon Gold potatoes, unpeeled, sliced ½-inch thick
salt and freshly ground black pepper
2 tablespoons olive oil
3 tablespoons fresh lemon juice
1 shallot, minced
1 tablespoon fresh herbs (such as parsley, chives, and/or basil)
3-4 tablespoons extra virgin olive oil

1. Prepare the vegetables – trim the asparagus; cut the onions into ½-inch slices, keeping the rings together; leave the mushrooms whole; cut the squash on a bias into half-inch slices; cut the bottom and top off the peppers and cut the middle section in half length-wise. Season the vegetables and potatoes with salt and pepper and brush with olive oil.

2. Whisk the lemon juice, shallot, herbs, and a pinch of salt and pepper in a small bowl. Gradually whisk in the extra virgin olive oil.

3. Prepare a grill to medium heat. Lay the vegetables in a single layer on the rack and grill until browned and tender, about 8 minutes per side for potatoes, 6 minutes per side for peppers and onions, 4 minutes per side for mushrooms and squash.

4. Chop the cooked vegetables and potatoes into ½-inch cubes; place them in a large bowl. Add the vinaigrette and toss to combine. Serve warm or at room temperature.

tacos al pastor

I try not to be picky. I like to call myself ‘particular’ – about the quality of ingredients and the care put into the preparation of a dish; Dave calls it persnickety. But eliminating whole categories of food from my diet because of a random childhood prejudice seems like a perfect way to cheat myself out of great food; not to mention how annoying pickiness is to the people around you. I’ve known people who wouldn’t eat hot liquids, eggs, anything with vinegar, seafood, mushrooms, you name it. I will eat pretty much anything – even green peppers, if I have to.

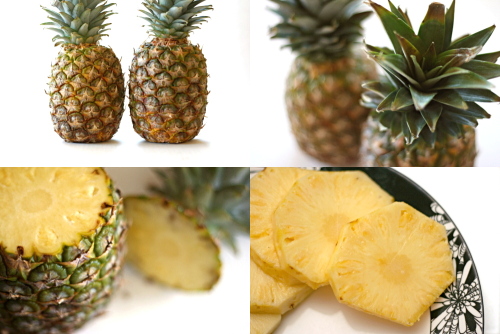
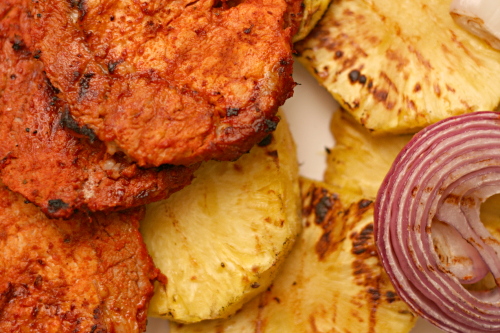
But there are some things I have trouble with (even besides green peppers), and fruit with meat is one of them. Those chicken salads with grapes in them don’t sound appetizing at all, and other than the occasional strawberry and spinach salad, fruit with lettuce doesn’t tempt me. But pineapple with pork is a combination I can hardly get enough of, especially when the pineapple is prepared to its maximum potential – grilled.

There is one thing to beware of when it comes to pineapple and meat though. Pineapple makes meat mushy. It has an enzyme in it that doesn’t just tenderize meat, it nearly dissolves it. The original recipe recommended marinating the pork for up to a day, but I, and the epicurious reviewers, knew better. I left the pineapple out of the marinade until we started heating up the grill. It was perfect, resulting in pork so tender it reminded me of dark chicken meat, but without even a hint of mush.

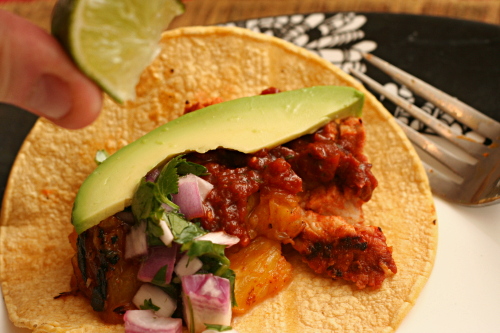
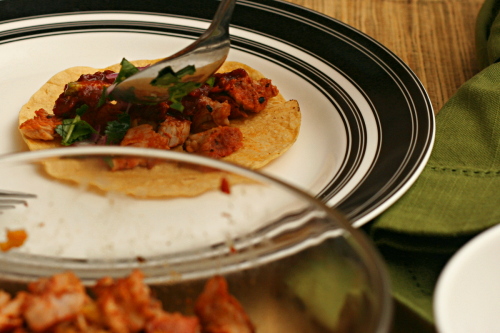
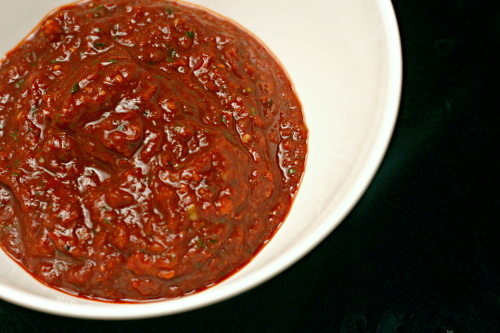
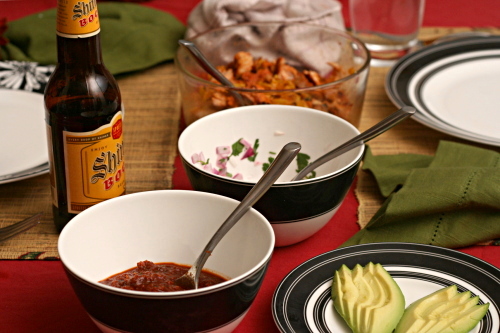
With a smorsgasbord of toppings, each bite of taco hit every flavor note: sweet pineapple-marinated pork, spicy salsa, tart onions, creamy avocado, all combined on corn tortillas, because everything is better on a tortilla – even meat and fruit mixtures.

One year ago: Crockpot Chicken Broth
Two years ago: Chicken with Forty Cloves of Garlic

Printer Friendly Recipe
Tacos al Pastor
(adapted slightly from Bon Apetit via epicurious)

I can never get corn tortillas to be soft and malleable enough to fold into tacos without deep-frying them. Heating them on the grill made them soft enough to fold, but they were too chewy. Maybe if I wrapped them in foil and heated them in the grill? Or brushed them with oil before heating them? Enlighten me.

1 pineapple, peeled, cut crosswise into ½-inch-thick rounds
1 large onion, halved
½ cup fresh orange juice
¼ cup distilled white vinegar
¼ cup guajillo chile powder
3 garlic cloves, halved
2 teaspoons coarse kosher salt
1 teaspoon dried oregano (preferably Mexican)
1 teaspoon ground cumin
1 large or 2 small chipotle chiles and 1 to 2 teaspoons adobo from canned chipotle chiles in adobo
2½-to 3-pounds boneless pork loin, cut into ½-inch slices

Garnishes:
½ red onion, finely chopped
2 tablespoons lime juice from 1-2 limes
½ cup minced cilantro
Smoky Two-Chile Salsa (recipe follows)
1 avocado, sliced, mashed (with salt and lime juice), or diced
corn tortillas
lime wedges

1. Coarsely chop 2 pineapple slices, removing core; thoroughly puree in a blender. Pour the pineapple juice into a storage container and chill until ready to use. Cover and chill the remaining pineapple.

2. Coarsely chop half the onion; place chopped onion in blender. Add the orange juice, vinegar, chile powder, garlic, salt, oregano, cumin, and chipotle chiles; puree marinade until smooth. Place the sliced pork in a large resealable plastic bag. Add the marinade and the seal the bag, releasing excess air. Chill at least 4 hours and up to 1 day. About half an hour before the grill is ready, add the reserved pineapple juice to the marinating meat.

3. Mix the onion and lime juice; set aside. Just before serving, stir in the cilantro.

4. Heat a grill to medium-high heat. Grill the pineapple slices until warm and slightly charred, 4 to 6 minutes per side. Grill the pork, with some marinade still clinging to it, until it’s slightly charred and cooked through, 2 to 4 minutes per side. Grill some onion until charred. Transfer the pineapple and pork to a work surface; chop pineapple into ½-inch cubes, discarding cores. Chop (or shred) the pork. Transfer the pork and pineapple to a platter or serving bowl; toss to combine. Grill the tortillas until warm and slightly charred, about 10 seconds per side.

5. Serve the pork and pineapple with the pickled onion mixture, Smoky Two-Chile Salsa, avocado, warm tortillas, and lime wedges.

Smoky Two-Chile Salsa

8 large dried guajillo chiles or New Mexico chiles, stemmed, seeded, coarsely torn
2 cups hot water
½ medium onion, halved lengthwise through core end
3 garlic cloves, peeled
1 teaspoon adobo from canned chipotles in adobo
¼ cup chopped fresh cilantro
2 teaspoons fresh lime juice from 1 lime
coarse kosher salt

1. Place the torn chiles in a bowl. Add the hot water and soak for at least 2 hours or overnight. Drain the chiles, reserving the soaking liquid.

2. Heat a small nonstick skillet over medium heat. Add the onion and garlic to the dry skillet; cook until browned in spots, about 6 minutes for garlic and 10 minutes for onion. (I grilled the onion instead of browning it in a skillet, which I recommend as long as you have time to make the salsa right before serving.) Trim the core from the onion; place the onion and garlic in a blender. Add the drained chiles, 1 cup soaking liquid, 1 chipotle chile, 1 teaspoon adobo, cilantro, and lime juice; puree until smooth. Transfer to a bowl, seasoning to taste with coarse salt.