garlic-mustard glazed skewers

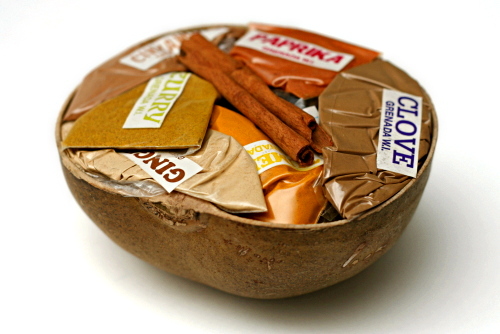
My parents went to Bolivia, Hungary, Hawaii, New Zealand, Romania, Costa Rica, China, Panama, and Peru, and all I got was these lousy spices. Okay, actually, they’re pretty nice spices, especially the saffron (and three mystery spices) my mom just brought back from the Istanbul spice market. Besides, when your parents go on 2-3 international trips per year, you don’t need a cheap T-shirt from each place. Spices, tea, and the occasional funky hat for Dave are perfect.

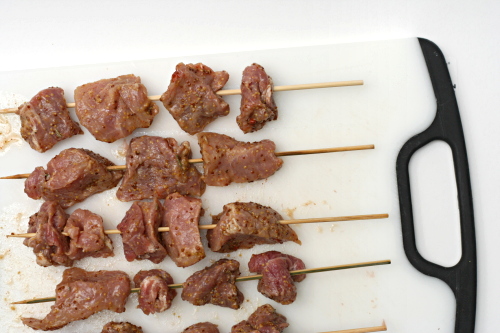
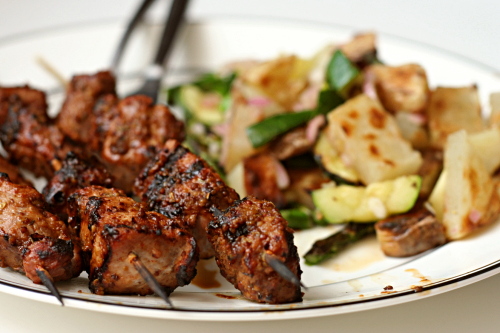
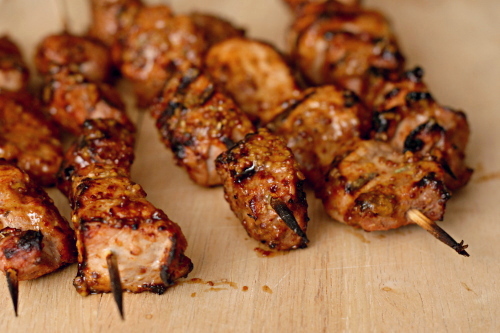
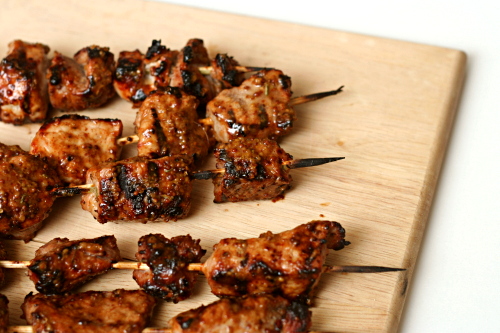
And it was a good thing I had a random set of spices from various foreign countries, because I was out of my normal paprika supply, and it would have been very very sad to miss out on this recipe. My gosh, this was good. Mustardy, garlicky, vinegary, herby – so many complimentary flavors.

Even better, I stumbled upon this weird grilled potato and vegetable salad to go with it that I was expecting to be just edible, and what do you know, it ended up being fantastic.  In all, another Saturday night dinner that knocked my socks off. That’s happened more and more since we got the grill, and I am not complaining one bit.

One year ago: Seafood Lasagna
Two years ago: Vanilla Ice Cream

Printer Friendly Recipe
Garlic-Mustard Glaze (adapted from Bobby Flay via Smitten Kitchen)

Makes about ¾ cup of glaze, or enough to cover and baste 2 pounds of meat

I used pork, but Deb used chicken (I think) and Bobby Flay uses beef tenderloin. Just be sure you choose a cut that is appropriate for fast cooking. Your cooking time will depend on the type of meat you use.

¼ cup whole grain mustard
2 tablespoons Dijon mustard
4 cloves garlic, crushed
2 tablespoons white wine vinegar
1 tablespoon low-sodium soy sauce
1 tablespoon honey
1 tablespoon finely chopped fresh rosemary leaves
2 teaspoons Spanish paprika
¼ teaspoon kosher salt
¼ teaspoon freshly ground black pepper
2 pounds meat, cubed

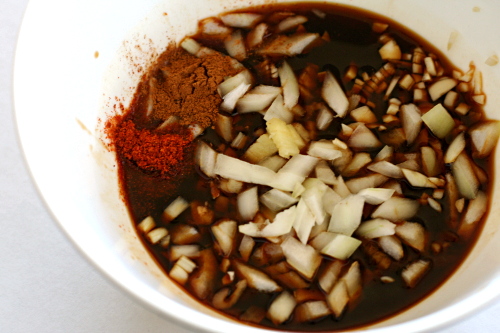
1. In a small bowl, whisk together all of the ingredients except the meat. Reserve ¼ cup of the glaze; add the meat to the remaining glaze, cover, and refrigerate for at least 30 minutes and up to 4 hours before using.

2. Prepare a medium-hot fire. Grill the meat, turning three times and brushing with the reserved glaze, for 4 to 8 minutes, until golden brown, slightly charred, and cooked to your desired level of doneness. Let the meat rest for 5 minutes before serving.
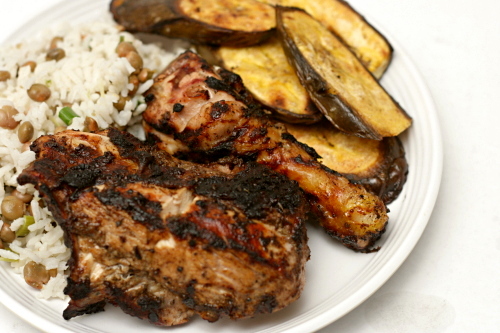
jamaican jerk chicken

Sometimes (most times) I get cranky after going to the grocery store here. It isn’t a bad little store, but it just doesn’t have the selection I had in Philadelphia. I’m spoiled. I miss good seafood and more cheese options than I know what to do with and organic produce and looseleaf tea.

One thing I do have available now, in my southern New Mexican town, is good tortillas, half an aisle dedicated to salsa, dependably perfect avocados, and a selection of fresh chiles. (Okay, so here’s another reason why I get cranky at the grocery store. They were out of Scotch Bonnets, and I had to go to Walmart, and I hate going to multiple stores, and I hate Walmart. Stop being out of stuff, grocery store.)

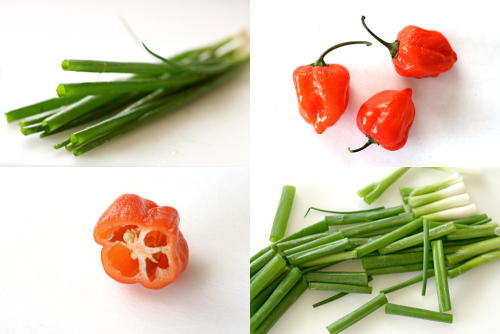
Not that jerk sauce has many chiles in it – when you’re talking about Scotch bonnets, you’ll only be needing a couple, even if they are tiny. They pack a powerful heat punch, and when combined with all sorts of other flavorful ingredients – rum, malt vinegar, onions, garlic thyme fall spices sugar pepper – they make one heck of a flavorful sauce.

The combination of ingredients was new for me, so I was excited. And I think that’s something I need to keep in mind when I get frustrated about how I don’t have the variety of food choices I used to – that even if I can’t find some ingredients and I can’t make some dishes as a result, there are still an infinite amount of great meals I can make by mixing up the food I can find in different ways. Jerk chicken is a perfect example of a dish that uses readily available ingredients to make something that is not only restaurant-quality good, but is interesting and fun as well.

One year ago: Mushroom Salad
Two years ago: Pigs in a Blanket

Printer Friendly Recipe
Jamaican Jerk Chicken (from Bon Apetit, but really epicurious)

8 servings

3 tablespoons dark rum
2 tablespoons water
½ cup malt vinegar
10 green onions, chopped
4 garlic cloves, peeled, chopped
2 tablespoons dried thyme
2 Scotch bonnet chiles or habanero chiles with seeds, chopped
2 tablespoons vegetable oil
4 teaspoons ground allspice
4 teaspoons ground ginger
4 teaspoons ground cinnamon
2 teaspoons ground nutmeg
2 teaspoons salt
2 teaspoons ground black pepper
2 teaspoons dark brown sugar
1 cup ketchup
3 tablespoons soy sauce
about 6 pounds bone-in, skin-on chicken parts
½ cup fresh lime juice

1. Boil rum and 2 tablespoons water in a small saucepan for 3 minutes.

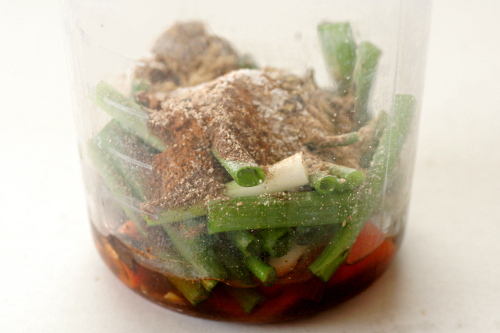
2. Transfer the rum mixture to a blender; add the vinegar, green onions, garlic, thyme, chiles, oil, spices, salt, pepper, and sugar; blend until almost smooth. Transfer 2 tablespoons of the jerk seasoning to a small bowl; mix in the ketchup and soy sauce to make the sauce. (Jerk seasoning and sauce can be made 1 day ahead; cover separately and refrigerate.)

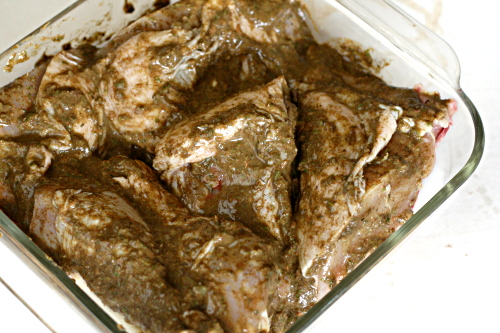
3. Arrange the chicken in a large roasting pan or baking dish. Pour the lime juice over the chicken; turn to coat. Spoon the jerk seasoning over the chicken and rub it into the chicken. Cover and refrigerate for at least 4 hours, turning occasionally. (Can be prepared 1 day ahead. Keep refrigerated.)

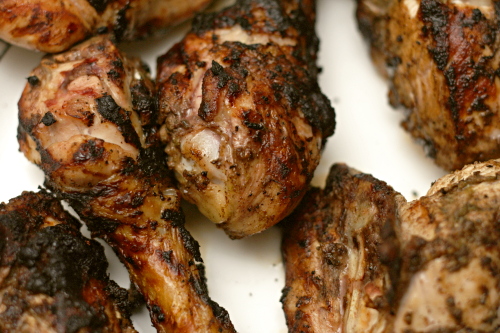
4. Prepare a two-level grill (more coals on one side than the other). Remove the chicken from the jerk seasoning marinade; sprinkle with salt and pepper. Place the chicken, skin side down, on the hot side of the grill; grill for about 2 minutes, until seared. Move the chicken to the cooler side of the grill and continue to cook, turning occasionally, for about 15 minutes, until the breasts measure 160 degrees on an instant read thermometer and the legs and thighs read 165 degrees. Serve with the jerk sauce.

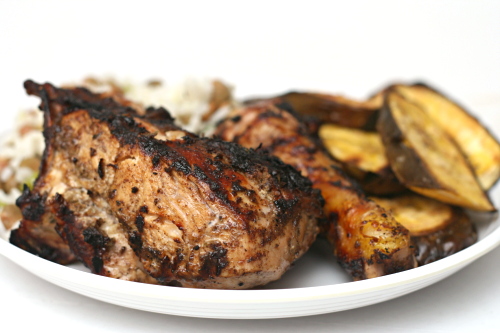
I was excited to find plantains when I made this, so maybe I should stop complaining about my grocery store. I sliced and grilled them, unpeeled. They were fantastic dipped in the jerk sauce – kind of like dipping French fries in ketchup, only more…more everything.  More good.

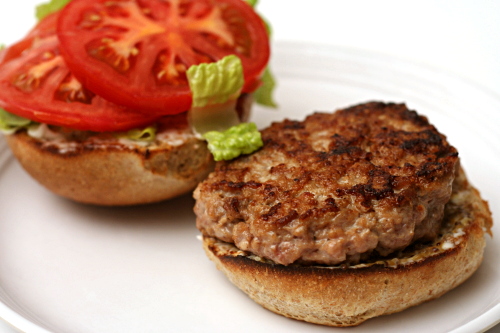
turkey burgers

Working full-time sure is…time-consuming, isn’t it? I haven’t figured out yet what has to give. (First choice – chores!) Cooking, blogging, photography, gardening, exercising…sleeping. It’s hard to balance everything. It’s possible that I should cut down on meals that require grinding your own meat, huh?

Well, I would consider that, except that these burgers were so perfect. I made beef burgers a week later (also with home-ground meat – stop the insanity!), and I enjoyed the turkey burgers so much more. And I love beef, so it wasn’t a prejudice.

But once you add good buns and your various toppings, the turkey burgers don’t taste significantly different from beef burgers. These have about half the fat of good beef burgers, so that’s another advantage, although what I mostly care about is that I thought their texture was smoother and more cohesive, and their taste was at least as good.

Grinding your own meat isn’t as hard as it might sound, and you almost definitely have the equipment. All you have to do is cut your meat into chunks, freeze it until it’s firm, and process it in the food processor. Then you mix in a few tasty additions, sear them up in a pan and enjoy a perfect burger. Make some extra to freeze, just in case Future You has a rough day at work and needs an easy meal.

One year ago: Croissants (Tartine)
Two years ago: Franks and Beans

Printer Friendly Recipe
Turkey Burgers (not really adapted from Cooks Illustrated)

Cooks Illustrated recommends 6 ounce burgers; I prefer mine significantly smaller. If you do too, don’t forget to reduce the cooking time.

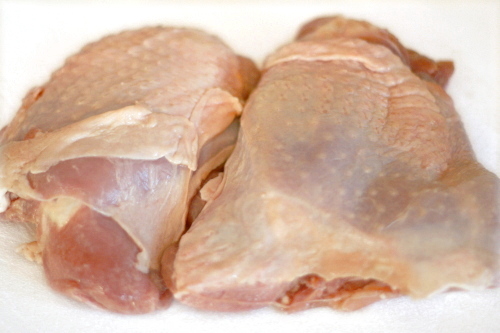
2 pounds skin-on, bone-in turkey thighs or 1½ pounds skinless, boneless thighs
½ teaspoon salt
½ teaspoon black pepper
2 teaspoons Worcestershire sauce
2 teaspoons Dijon mustard
1 tablespoon vegetable or canola oil

1. If using skin-on, bone-in turkey thighs, remove the meat from from the skin and bones. Cut the thighs into 1-inch chunks and arrange in a single layer on a baking sheet. Freeze until somewhat firm, about 30 minutes.

2. Working in 3 batches, place the semifrozen turkey chunks in a food processor fitted with the steel blade; pulse until the largest pieces are no bigger than 1/8-inch, twelve to fourteen 1-second pulses.

3. Transfer the ground meat to a medium bowl. Stir in the salt, pepper, Worcestershire sauce, and mustard until blended and divide the meat into 4 portions. Lightly toss one portion from hand to hand to form a ball, then lightly flatten the ball with your fingertips into a 1-inch-thick patty. Repeat with the remaining portions.

4. Heat a large, heavy skillet (preferably cast iron or stainless steel with an aluminum core) over medium heat until very hot, 4 to 5 minutes. Swirl the oil in the pan to coat the bottom. Add the burgers and cook over medium heat without moving them until the bottom of each is dark brown and crusted, about 5 minutes. Turn the burgers over; continue to cook until the bottom is light brown but not yet crusted, 4 to 5 minutes longer. Reduce the heat to low, position the cover slightly ajar on the pan to allow steam to escape, and continue to cook 5 to 6 minutes longer, or until the center is completely opaque yet still juicy or an instant-read thermometer inserted from the side of the burger into the center registers 160 degrees. Remove from the pan and serve immediately. (Alternatively, grill the burgers over a medium-low fire (you can hold your hand about 5 inches above the grill surface for 5 seconds) until dark spotty brown on the bottom, 7 to 9 minutes. Turn the burgers over; continue grilling 7 to 9 minutes longer.)

grilled artichokes

When it comes to groceries, I’m not particularly thrifty. I don’t know if my old grocery store (the much-missed Wegman’s) even had sales, and if they did, it wasn’t on anything I was buying. I see more sales at my new grocery store; I don’t plan my shopping around them, but I can’t always resist them either.

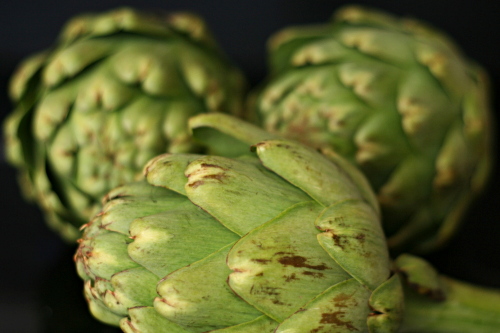
Fresh artichokes for 69 cents each! That is a deal that is not to be passed up, especially when I was keeping an eye out for some fancy sides to compliment my celebration lamb.

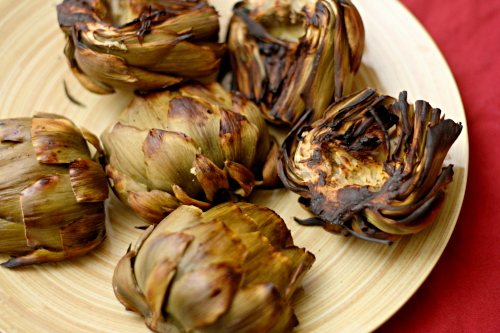
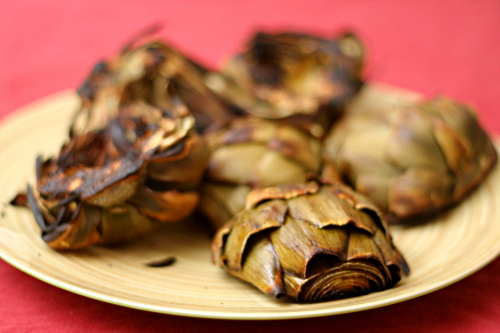
When Dave and I grill, we like to cook the whole meal on the grill, so I definitely wanted to grill the artichokes. Katie’s recipe uses the perfect approach, because the artichokes are steamed in foil packets first, and then unwrapped and seared over a hot flame. The artichokes end up both perfectly tender and decorated with beautiful grill marks.

Artichokes aren’t as time-consuming to prepare as I used to think, but they’re still pretty messy to eat. You remove individual leaves and scrape the meaty edible part off with your teeth, until you get to that delicious heart. Artichokes are good on their own, but they’re even better with a decadent dipping sauce; we used the sauce that was served with the lamb. It made a perfect compliment to perfect artichokes that accompanied a perfect meal.

Two years ago: Asparagus and Arugula Salad with Cannellini Beans

Grilled Artichokes (adapted from Good Things Catered)

Katie added extra lemon to the packets and served the grilled artichokes with cherry tomatoes. It makes for a beautiful presentation, but didn’t compliment the flavors I was serving these with. However, it serves as a great example of how easily this recipe can be adapted to the meal you’re serving.

Serves 4

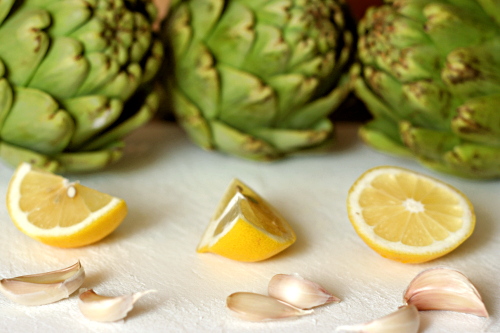
8 cloves garlic, smashed and peeled
4 globe artichokes
salt and pepper
1 lemon, quartered
about 2 tablespoons olive oil

1. Prepare a two-level fire, where one side of the grill is hotter than the other.

2. Tear off four 12-inch pieces of aluminum foil. Place two cloves of garlic in the center of each square of foil.

3. Working with one artichoke at a time, cut the stem off and the top 1½ inches of leaves. Cut the sharp tips off of the outside leaves. Halve the artichoke and carve out the fuzzy purple choke. Place the artichoke halves in one square of foil, season with salt and pepper, squeeze one lemon quarter over it, and drizzle with about 1½ teaspoons of oil. Enclose the artichoke in the foil. Repeat with the remaining three artichokes.

4. Place the foil packets on the cooler side of the grill and cook, rotating occasionally, for 25-30 minutes, until the center of the artichokes are tender. Remove the artichokes from the foil and place, cut side down, on the hot side of the grill. Cook for about 2 minutes, until seared.

5. Serve immediately, with a dipping sauce if desired.

stuffed butterflied leg of lamb

I got some big news last week. I finally got something I’ve wanted for a long time, and life is going to change drastically. I’m a little worried about when I’ll find the time to do the things I like to do – the baking, blogging, and exercising due to the baking – but I’m sure it will be worth it.

I’m not pregnant.

I do, however, have a job; a real one, with 40 hours of work per week and benefits and a retirement plan and everything. See, I’ve kept this on the down-low because I was embarrassed by it, but since I finished graduate school several years ago, I’ve been unemployed or partially employed. But those days are over now.
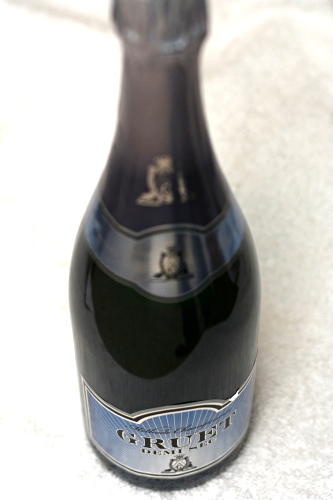
This was cause for celebration around here, which means that Dave and I have been drinking generous amounts of our favorite champagne. It also means we had an excuse for a fancy dinner. I got to decide whether that meal would be eaten in or out, and it wasn’t a hard decision for me – we don’t exactly live in area known for its restaurants, and spending Saturday night at home, drinking wine, watching the NBA playoffs, and grilling with Dave is pretty much my perfect evening.
What to make? Lamb, of course. I was deciding between two recipes, and Dave told me to pick the easier one. Yes, the easier option included trimming, butterflying, pounding, rolling, and tying the roast. And then I got to hand it off to Dave to cook…while I worked on the sauce. And the sides.

But in the end, what a great meal. Served with great wine, shared with a great husband, celebrating great news.

Two years ago: Hash Browns with Sauteed Vegetables and Poached Eggs

Printer Friendly Recipe
Stuffed Butterflied Leg of Lamb with Caramelized Lemon Jus
(adapted slightly from Bon Apetit via epicurious; suggested by Cara)

Serves 4-6

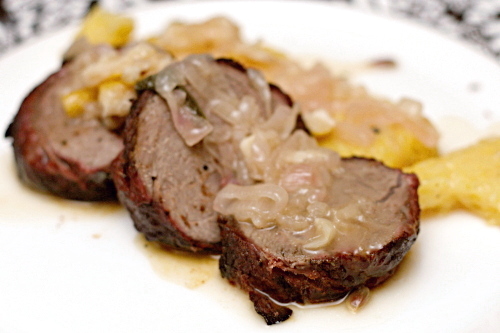
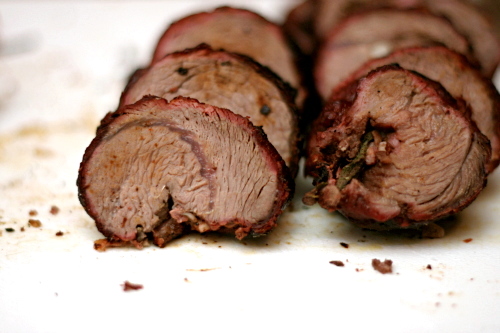
You can probably tell from the photos that my lamb isn’t cooked to rare. Oops. Next time.

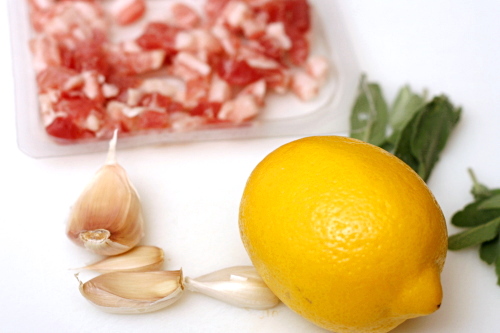
4-to 4½-pound boneless leg of lamb, shank end removed
salt and pepper
4 large garlic cloves; 3 chopped, 1 sliced
1 teaspoon finely grated lemon zest
20 fresh sage leaves (about), divided
4 ounces thinly sliced pancetta (Italian bacon)
3 tablespoons fresh lemon juice
3 tablespoons extra-virgin olive oil

1. Trim the silver skin and as much fat as possible from the lamb. Butterfly the lamb by making one ¾-to 1-inch-deep full-length cut in each thick portion of the lamb (do not cut through to work surface). Cover the lamb with a sheet of plastic wrap. Using a rolling pin or meat pounder, pound to an even 1- to 1½-inch thickness (lamb will be about 8×19 inches).

2. Remove the plastic wrap and season lamb evenly with salt and pepper, chopped garlic, and lemon zest. Top with 15 sage leaves, spaced evenly apart, then cover with the pancetta. Starting at a long side, fold the lamb in half. Tie the lamb tightly at 2-inch intervals into a long roll. Then, using a small knife, make slits in the lamb and insert a slice of garlic and a piece of sage leaf into each slit. Season the lamb with salt and pepper. (Lamb can be prepared 1 day ahead. Wrap tightly in plastic wrap and refrigerate.)

3. Whisk the lemon juice and oil in a small bowl; season with salt and pepper. Brush the lemon juice mixture all over the lamb and let stand at room temperature 1 hour.

4. Prepare a medium-hot grill. Place the prepared lamb on the grill and sear on all sides, 1 to 2 minutes per side. Continue to grill, brushing with the lemon juice mixture and rotating the lamb about every 5 minutes, until a thermometer inserted into the thickest part registers 130°F for rare.

5. Transfer the lamb to a cutting board, cover it loosely with foil, and let it rest for 10 minutes. Slice the lamb into ½-inch thick slices. Serve immediately with Caramelized Lemon Jus.

Caramelized Lemon Jus

1 large lemon, cut into ½-inch-thick slices
¼ cup extra-virgin olive oil
3 large shallots, thinly sliced (about 1 cup)
10 large fresh sage leaves
1 garlic clove, thinly sliced
3 tablespoons sugar
¾ cup dry white wine
¼ cup vodka
2 cups beef broth

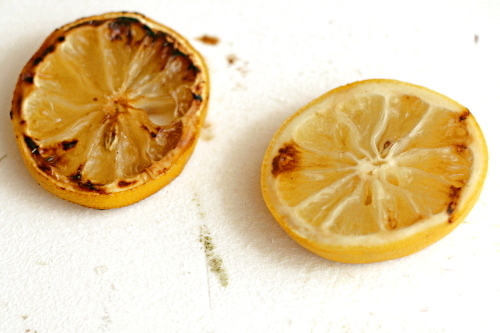
1. Prepare a medium-hot grill. Grill the lemon slices until charred, about 4 minutes per side. Transfer to plate; chop coarsely.

2. Heat the olive oil in a heavy medium saucepan over medium-high heat. Add the shallots and sauté until translucent, about 5 minutes. Add the sage leaves, garlic, and grilled lemon pieces with any juices, then the sugar. Cook until the shallots start to color, about 5 minutes. Add the wine and vodka. Using a long wooden skewer, ignite the liquors and let them burn off, about 4 minutes. Add the beef broth and bring to a boil. Reduce the heat to medium; simmer until jus is reduced to 3 cups, about 15 minutes. Season with salt and pepper. (Can be made 1 day ahead. Cover and chill. Rewarm before serving.)

chicken fajitas

I guess they don’t call it “manning” the grill for nothing. Why is it that so many men who have no interest in cooking inside are willing to stand outside and grill? I really thought I’d be the one doing the grilling around here, just like I do the ovening and the stoving, but so far, it’s all Dave. I kind of feel like I should get some practice cooking over fire too, but I can never resist the opportunity to clean up the kitchen or work on the sides or, let’s be honest, mix up my favorite cocktail, while Dave takes care of the cooking.
But while he does enjoy the actual grilling, he really isn’t into the reading the recipe part of the procedure. That means there are constant calls asking me what the next step is. Is there any funny business with the coals? How long does everything cook? What should be on the hotter and on the cooler sides of the grill? And on and on.

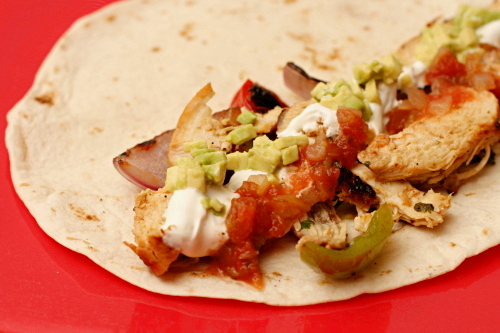
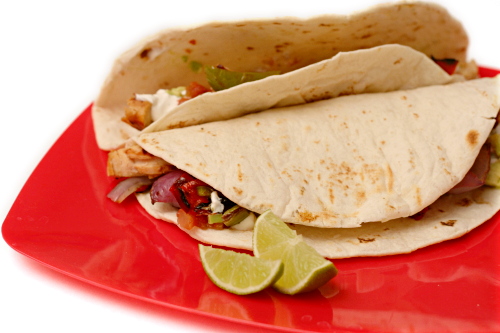
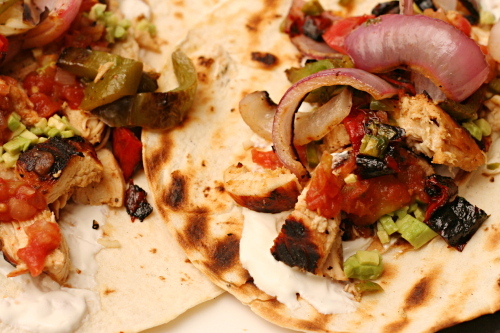
And since this is a Cooks Illustrated recipe, there are a fair amount of details to straighten out. But with only 15 minutes of marinating and 10 minutes of grilling, this really is an easy recipe. And what’s so great about it, besides the obvious – charred flavor on everything from the chicken to the vegetables to the tortillas, is the hit of marinade everything gets after it’s cooked. You marinate the meat beforehand, like you’d expect, and then when it comes off the grill, you dump some more flavor on it, as well as on the vegetables. It makes the whole thing taste fresh and citrusy.

One of the things that makes Dave and I such a great team is that we tend to love the same recipes, like this one. Plus, while he mans the grill, I can rush in to wash his tongs for him, bring a clean plate, or, maybe, if the sides are done and the kitchen is reasonably clean and my cocktail is mixed up, stand over the fire and admire the sunset with my husband. Grilling has more advantages than just great food.

One year ago: Pasta with Roasted Red Pepper Sauce
Two years ago: Cinnamon Rolls

Printer Friendly Recipe
Chicken Fajitas (from Cooks Illustrated)

Serves 4 to 6

CI’s note: The chicken and vegetables in these fajitas are only mildly spicy. For more heat, include the jalapeno seeds and ribs when mincing. When you head outside to grill, bring along a clean kitchen towel or a large piece of foil in which to wrap the tortillas and keep them warm as they come off the grill. Although the chicken and vegetables have enough flavor to stand on their own, accompaniments (guacamole, salsa, sour cream, shredded cheddar or Monterey Jack cheese, and lime wedges) can be offered at the table.

My note: I think the oil can be significantly reduced, especially in the part of the marinade used to flavor the vegetables and chicken after they’re cooked.

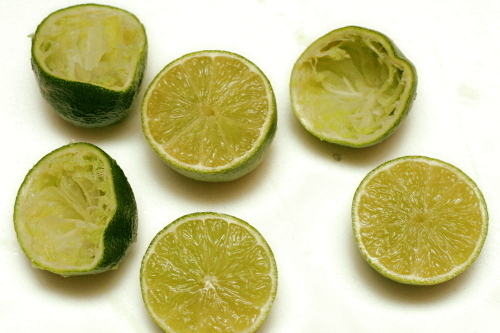
⅓ cup juice from 2 to 3 limes
6 tablespoons vegetable oil
3 medium garlic cloves, minced
1 tablespoon Worcestershire sauce
1½ teaspoons brown sugar
1 jalapeno, seeds and ribs removed, minced
1½ tablespoons minced fresh cilantro leaves
table salt and ground black pepper
3 boneless, skinless chicken breasts (about 1½ pounds), trimmed of fat, tenderloins removed, pounded to ½-inch thickness
1 large red onion (about 14 ounces), peeled and cut into ½-inch-thick rounds (do not separate rings)
1 large red bell pepper (about 10 ounces), quartered, stemmed, and seeded
1 large green bell pepper (about 10 ounces), quartered, stemmed, and seeded
8-12 (6-inch) flour tortillas

1. In a medium bowl, whisk together the lime juice, 4 tablespoons oil, garlic, Worcestershire, brown sugar, jalapeno, cilantro, 1 teaspoon salt, and ¾ teaspoon pepper. Reserve ¼ cup marinade in a small bowl; set aside. Add another teaspoon salt to the remaining marinade. Place the chicken in the marinade; cover with plastic wrap and refrigerate 15 minutes. Brush both sides of the onion rounds and the peppers with the remaining 2 tablespoons oil and season with salt and pepper.

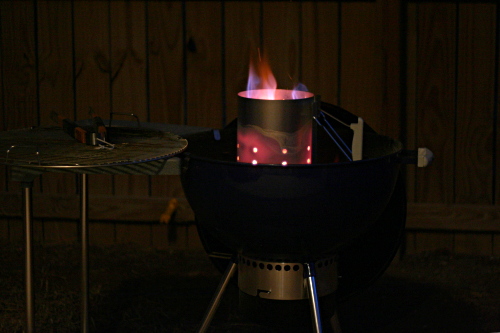
2. Meanwhile, using a large chimney starter, ignite 6 quarts of charcoal briquettes and burn until the coals are fully ignited, about 20 minutes. Empty the coals into the grill, spreading them in a single layer; place an additional 20 unlit coals over the lit coals on one side of grill to create a two-level fire. Position the grill grate over the coals and heat the grate for 5 minutes; scrape clean with a grill brush. (For a gas grill, light all burners and turn to high, cover, and heat the grill until hot, about 15 minutes; scrape the grill grate clean with a grill brush. Leave one burner on high heat while turning the remaining burner(s) down to medium.)

3. Remove the chicken from the marinade and place it smooth side down on the hotter side of the grill; discard the remaining marinade. Place the onion rounds and peppers (skin side down) on the cooler side of the grill. Cook the chicken until it’s well browned, 4 to 5 minutes; using tongs, flip the chicken and continue grilling until it’s no longer pink when cut into with a paring knife or an instant-read thermometer inserted into the thickest part registers about 160 degrees, 4 to 5 minutes longer. Meanwhile, cook the peppers until spottily charred and crisp-tender, 8 to 10 minutes, turning once or twice as needed; cook the onions until tender and charred on both sides, 10 to 12 minutes, turning every 3 to 4 minutes. When the chicken and vegetables are done, transfer them to a large plate; tent with foil to keep warm.

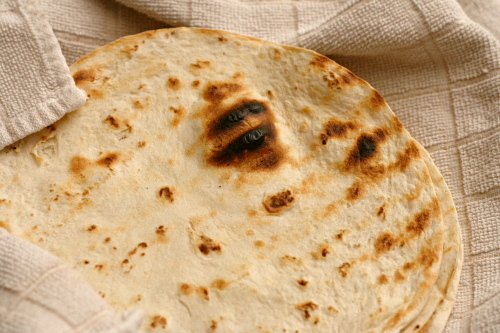
4. Working in 2 or 3 batches, place the tortillas in a single layer on the cooler side of the now-empty grill and cook until warm and lightly browned, about 20 seconds per side (do not grill too long or the tortillas will become brittle). As the tortillas are done, wrap them in a kitchen towel or a large sheet of foil.

5. Separate the onions into rings and place them in a medium bowl; slice the bell peppers lengthwise into ¼-inch strips and place them in the bowl with the onions. Add 2 tablespoons reserved unused marinade to the vegetables and toss well to combine. Slice the chicken into ¼-inch strips and toss with the remaining 2 tablespoons reserved marinade in another bowl; arrange the chicken and vegetables on a large platter and serve with the warmed tortillas.

honey ginger pork tenderloin

So is the rest of the country grilling yet? Dave and I bought a grill in the middle of January, which, in southern New Mexico, is not at all bad grilling weather. And if you’re feeling jealous about our 70-degree sunshine because you’ve been buried in snow for months, keep in mind that the average high in July is 96 degrees. But it’s a dry heat!

For years, I’ve had to ignore the majority of food magazines in July and August because all of the recipes are designed for grilling. My apartment lifestyle didn’t mesh with my desire to cook outside.

Not anymore! Dave and I have grilled every weekend since we got the grill, and I think that we could possibly be getting the hang of it. Maybe.

After my lifelong grilling drought, I’ve been trying to make as many different recipes as possible – fish, steaks, burgers, boneless skinless chicken, bone-in skin-on chicken, lamb roasts, bacon-wrapped dates, all sorts of vegetables and potatoes, bread, and on and on. We’re grilling machines. This recipe knocked our socks off enough to make it two weekends in a row.

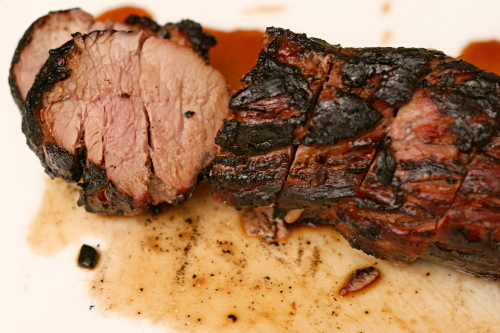
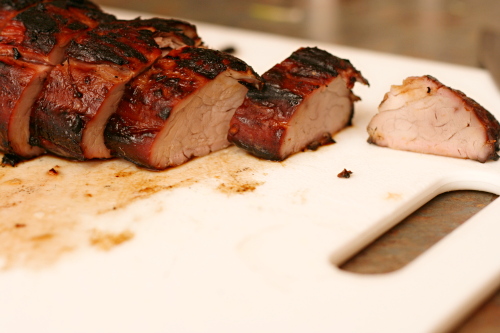
It’s simple too – you mix up a few ingredients, add the pork, and set it in the fridge while you go enjoy your perfect-hiking-weather-in-January. Then you get back from hiking, shower, drink a glass of wine (or take a nap, in Dave’s case), and fire up the grill. While it heats, skewer up some potatoes and vegetables. Spend 20 minutes cooking outside, then sit down to a fantastic, easy, smoky, flavorful meal with some more wine. Toast to the weekend and to winters in the desert.

One year ago: Spinach Bread
Two years ago: Classic Pound Cake (but, I think I’ll stick to this other pound cake from now on, with or without bourbon)

Printer Friendly Recipe
Honey-Gingered Pork Tenderloins (adapted from Gourmet via epicurious.com)

Serves 4-6

¼ cup honey
¼ cup soy sauce
¼ cup oyster sauce
2 tablespoons packed brown sugar
1 tablespoon plus 1 teaspoon minced peeled fresh gingerroot
1 tablespoon minced garlic
1 tablespoon ketchup
¼ teaspoon onion powder
¼ teaspoon cayenne
¼ teaspoon cinnamon
two ¾-pound pork tenderloins, trimmed of silver skin

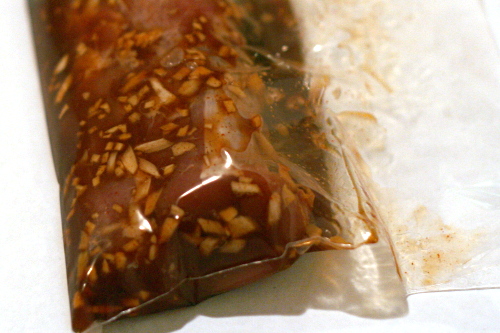
1. In a small bowl, whisk together all of the ingredients except the pork. Add the pork and the marinade to a gallon-size zipper-top bag and refrigerate for at least 8 hours or up to 1 day.

2. Prepare a medium-hot grill. (You should be able to hold your hands 5 inches above the grate for 3 to 4 seconds.) Remove the pork from the marinade, reserving the marinade.

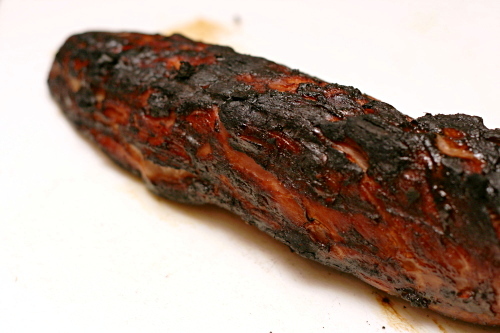
3. Grill the pork, basting with the reserved marinade, for 12 minutes, turning a quarter turn every 3 minutes. Discard marinade. Continue to cook pork, turning every minute or so, until an instant-read thermometer inserted into the thickest part of the tenderloin measures 145 degrees or the meat is slightly pink at the center. Let the pork rest 5 minutes before slicing.