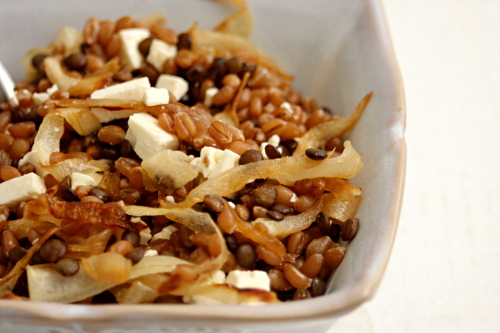
wheat berries with caramelized onions, feta, and lentils

Copy of IMG_0628

I’m really looking forward to moving to New Mexico. There’s absolutely nothing wrong with Philadelphia; any unhappiness I had here was my own deal and not a result of the location. But I am excited about having a fresh start somewhere.

Copy of IMG_0597

I am a little concerned about the grocery store situation. I have been majorly spoiled the last few years by always living near a Wegman’s. If you’re not familiar, suffice to say that it’s a great store, with a huge selection and high quality. When a recipe says that an ingredient can be found in “any well-stocked grocery store”, I’ve never had to worry about how I’d get a hold of it.

Copy of IMG_0613

The town we’re moving to, though, is small and isolated. It has just one grocery store. My initial explorations during our visit there over the summer indicated that it isn’t terrible but it isn’t great. I should be able to find, say, goat cheese, but only one type.

Copy of IMG_0606

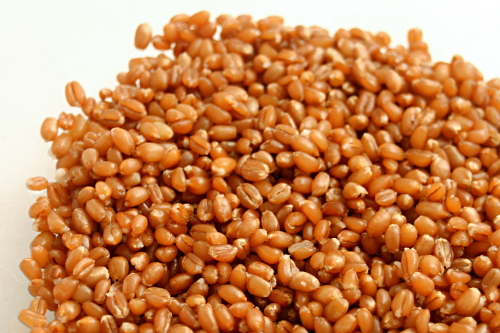
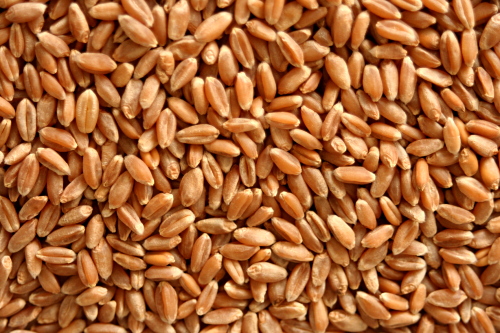
So I’ve been trying to take advantage of the wide selection of my current store while I can, by buying random unusual ingredients that I’m pretty sure I won’t be able to find after the move. My plan was actually to buy farro, but I guess even Wegman’s has its limits because they didn’t have it. I almost went with quinoa, since it’s familiar and safe, but I managed to talk myself into trying wheat berries instead.

Copy of IMG_0618

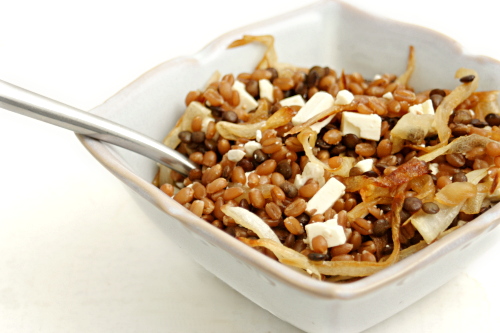
Well, I don’t know about farro, but wheat berries are certainly delicious. They’re nutty, and the texture was chewy, not unpleasantly crunchy or mushy. The sweet caramelized onions were a great compliment, and then the salty feta was perfect on top of all of that. The whole thing was just so good, and I couldn’t believe how healthy it was to boot. I sure hope I can find wheat berries and feta after we move because I want to be making this meal a lot!

Copy of IMG_0621

One year ago: Bacon-Wrapped Pork Tenderloin Medallions

Printer Friendly Recipe
Wheat Berries with Caramelized Onions, Lentils, and Feta (adapted a bit from Orangette; wheat berry cooking method from Deborah Madison’s Vegetarian Cooking for Everyone)

2-3 servings

You might not need a recipe here, because you’re just combining grains and lentils with caramelized onions and feta. If you already have favorite ways to cook grains, lentils, and onions, you should absolutely feel free to use those. In case you don’t, I’ll provide my preferred methods here.

You can probably skip the lentils if you don’t want to deal with an extra ingredient. Also, I haven’t tried it myself, but I don’t see why you couldn’t just add them to the wheat berries at the point when the wheat has 25 minutes of cooking left. Just make sure there’s enough water in the pot.  (Update 6/14/11: You can definitely cook the lentils in the same pot as the wheat berries. I’ve also used farro in this recipe now, which is convenient because it cooks in the same amount of time as lentils.)

I think you could use almost any grain here, as long as you adjust the cooking time. Quinoa would definitely be good (and would make this meal gluten-free).

¾ cup wheat berries
salt
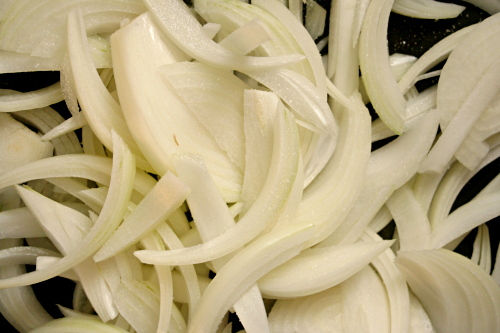
2 onions, sliced
1 tablespoon olive oil
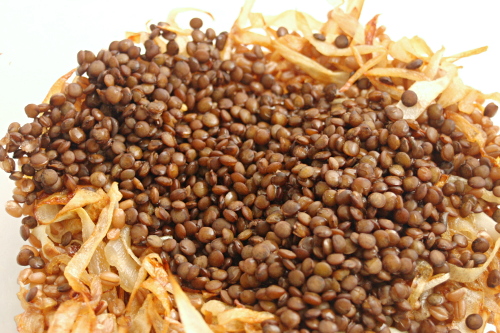
½ cup lentils, preferably lentils de puy, picked over and rinsed
4 ounces feta cheese, crumbled
hot sauce (optional)
lemon wedges (optional)

1. Soak the wheat berries in water for at least an hour and up to overnight. Put them in a pot with enough water to cover by a few inches. Bring to a boil, then lower the heat, cover the pot, and simmer until they’re tender, 1 to 2 hours. Add ½ teaspoon salt once they’ve started to soften.

2. Heat the oil in a large nonstick skillet over medium-high heat. Add the onions and ¼ teaspoon salt, reduce the heat to medium, and cook, stirring somewhat frequently, until they just start to brown, about 8 minutes. Reduce to heat to medium-low and continue to cook and stir until the onions are evenly golden brown, about 20 minutes longer.

3. Put the lentils into a small saucepan. Add 3 cups of cold water and ¼ teaspoon salt. Bring to a boil over medium-high heat, then reduce the heat and simmer until tender but not falling apart, about 20 to 25 minutes. Drain.

4. Combine the wheat berries, caramelized onions, lentils, and feta. Adjust the seasonings if necessary and serve with either hot sauce or lemon wedges, if desired.
Copy of IMG_0625

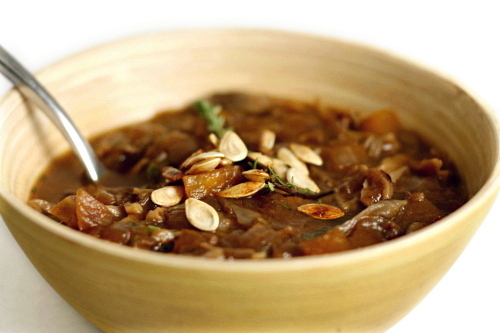
pumpkin and mushroom soup

Copy of IMG_0331

Cooking déjà vu: When you start to make a recipe and then think, “Wait a minute…this seems familiar…have I made this before?!” Generally not a great sign because if you don’t remember it, perhaps it wasn’t worth remembering.

Copy of IMG_1266

I actually found pictures of this soup from last year, when I’d apparently made it and decided it wasn’t worth sharing. But I didn’t understand how a recipe like this could be anything but good – mushrooms and squash seem like a great match that can only get better with the addition of fall herbs and spices.

Copy of IMG_0315

I don’t think I did too much differently this time – cooked the vegetables longer until they were nice and browned maybe, and this time I stirred in some pureed pumpkin at the end, whereas before I’d just used diced squash at the beginning.

Copy of IMG_0318

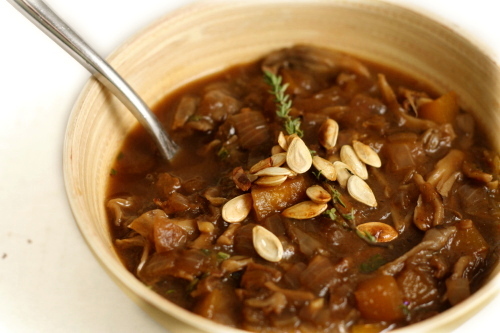
The pureed squash made a huge difference in texture, thickening the soup so much it resembled stew. It was so hearty and delicious, and you’d never guess that there’s no meat in it, especially with that deep brown color. I was right to try this recipe again, because the woodsy mushrooms and the earthy squash are an unbeatable combination.

Copy of IMG_0328

One year ago: Sugar Cookies (for decorating)

Printer Friendly Recipe
Pumpkin and Mushroom Soup (adapted quite a bit from Moosewood Restaurant Cooks at Home)

Serves 4

I kind of feel like this should be called “Squash and Mushroom Soup” because it seems like other types of squash are used more in savory recipes than pumpkin is. You can really use any type of squash you want, as long as it has a similar texture. The same goes for the fresh mushrooms – I used maitake, but cremini, shiitake, button, whatever, they all work.

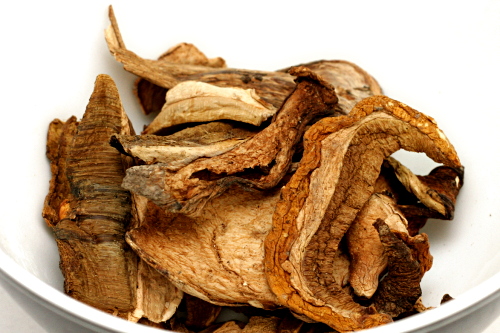
½ ounce dried porcini mushrooms, rinsed
water
2 tablespoons olive oil
1 medium onion, diced
salt and ground black pepper
1 small pie pumpkin, peeled and diced
12 ounces mushrooms, cut into bite-sized pieces
2 cloves garlic, minced
1/2 teaspoon thyme leaves
1 teaspoon sage leaves, minced
pinch nutmeg
¼ cup Marsala or dry sherry
2 cups chicken or vegetable broth
½ cup cooked pureed pumpkin (like the stuff from a can)

1. Place the dried mushrooms in a small saucepan and add enough water to cover. Bring to a boil over medium-high heat, then immediately turn off the heat. Set aside.

2. Heat the oil in a large saucepan or Dutch oven (not nonstick) over medium heat. Add the onions and a pinch of salt and cook, stirring occasionally, until just beginning to brown at the edges, about 8 minutes. Add the squash, mushrooms, ½ teaspoon salt and ¼ teaspoon ground black pepper and continue cooking and occasionally stirring until the mushrooms release their liquid, it evaporates, and the vegetables brown, about 15 minutes.

3. Meanwhile, use a fork to lift the rehydrated porcini mushrooms from the liquid and finely chop them. Save the liquid.

4. Add the porcini, garlic, herbs, and nutmeg and cook, stirring constantly, until fragrant, about 30 seconds. Pour in the wine and cook until it nearly evaporates, scraping the bottom of the pan to release the browned bits.

5. Add the broth, pumpkin, and mushroom soaking liquid (either strain it through a coffee filter or just be careful to leave the grit behind with a bit of liquid) and bring the soup to a simmer over medium heat. Adjust the seasonings and serve.

Copy of IMG_0335

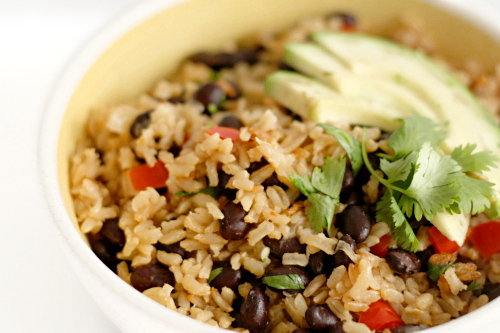
brown rice with black beans

Copy of IMG_0357

Of all the whole grains, brown rice has been the hardest for me to accept. I realize now that I’d been cooking it wrong for years. I just couldn’t seem to cook it through all the way, and I tried a bunch of different recipes, but it was always crunchy.

Copy of IMG_0345

Then sometime last year, Cooks Illustrated sent me a recipe to test for them for brown rice with andouille, and not only does it have andouille, which, come on, andouille, delicious, but at the time I was religiously making every recipe they sent for me to test. (It got to the point where I’d get the magazines and I’d already have made half the recipes. I’ve since slacked off.) So I only made the recipe because I felt like I had to, plus of course the andouille. But it was fantastic, just so, so good. It was a revelation for me, because it was the first brown rice I’d made that was not just edible, but delicious.

Copy of IMG_0344

But that isn’t the recipe I’m telling you about today. Ha! When the magazine issue came out, it had a few other variations, and one is just perfect for me. Brown rice, black beans and a bunch of aromatics, how healthy and tasty does that sound?

Copy of IMG_0347

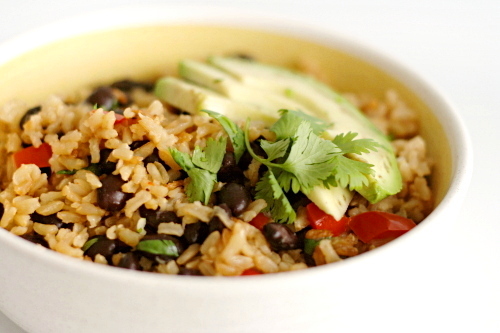
The first time I made it, I followed the directions fairly closely, just adding the scraped-off kernels of one cob of corn at the end of cooking. That was a great addition, especially visually. Corn isn’t in season anymore, so I skipped it this next time. I doubled the black beans the second time, because you can never go wrong with more black beans. I also added an avocado and wow! I mean, it goes without saying that avocado improves almost anything, but it was particularly complimentary with this.

Copy of IMG_0354

If you’ve ever had doubts about brown rice, this recipe will make a believer out of you. And if you’re already a convert, this dish will be a great addition to your repertoire.

Copy of IMG_0355

One year ago: Sushi Bowls

Printer Friendly Recipe
Brown Rice with Black Beans and Cilantro
(from Cooks Illustrated)

I like to double the black beans. Corn, either cut off of the cob or 1 cup frozen and defrosted, is a good addition stirred in with the black beans. One diced avocado is delicious added with the cilantro. I used red pepper, because I like them better than green.

Serves 4 to 6

4 teaspoons olive oil
1 medium onion, chopped fine (about 1 cup)
1 green bell pepper, chopped fine
3 garlic cloves, minced
1 cup low-sodium chicken broth
2¼ cups water
1½ cups brown rice, long-grain
1 teaspoon salt
1 (15.5-ounce) can black beans, drained and rinsed
¼ cup chopped fresh cilantro leaves
¼ teaspoon ground black pepper
1 lime, cut into wedges

1. Adjust oven rack to middle position; heat oven to 375 degrees. Heat oil in large Dutch oven over medium heat until shimmering. Add onion and pepper and cook, stirring occasionally, until well browned, 12 to 14 minutes. Stir in garlic and cook until fragrant, 30 seconds.

2. Add broth and water; cover and bring to boil. Remove pot from heat; stir in rice and salt. Cover and bake rice until tender, 65 to 70 minutes.

3. Remove pot from oven, uncover, fluff rice with fork, stir in beans, and replace lid; let stand 5 minutes. Stir in cilantro and black pepper. Serve, passing lime wedges separately.

white bean avocado sandwich

Copy of IMG_8653

I believe that people are what they think they are, which is just a less fancy way of saying that you can do just about anything you think you can do. I remember in high school, I consistently got an 89% in my classes, and I always wondered why I hadn’t worked just a bit harder to get an A. But I knew myself as a B+ student, so I worked just hard enough to get a B+.

Copy of IMG_8622

Early on in college, more by luck than design, I got straight A’s one semester. And then I knew I could do it – from then on, I was a pretty solid A student.

Copy of IMG_8627

Lately I’ve been thinking of myself as an indulgent eater. I see so many people on strict diets – raw food, clean food, low carb, vegan. I don’t, and never plan to, follow any of these eating philosophies. I eat refined flours and sugars, red meat and full-fat cheeses, butter and alcohol. When I compared myself to these people, I felt lax in my eating habits. And once I started believing I ate poorly, my eating habits did, indeed, decline.

Copy of IMG_8634

But the truth is, more of the time, I eat very healthfully. All of those treats above? You’ve heard it before – moderation. Most of my snacks are fresh fruit and vegetables. My tiny daily bagel is 100% whole grain. We rarely eat meat on weekdays, and I don’t drink alcohol on weekdays. I do eat dessert every single day, but we’re talking one, maybe two, small cookies.

Copy of IMG_8638

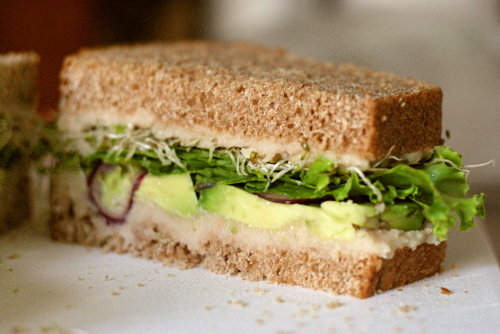
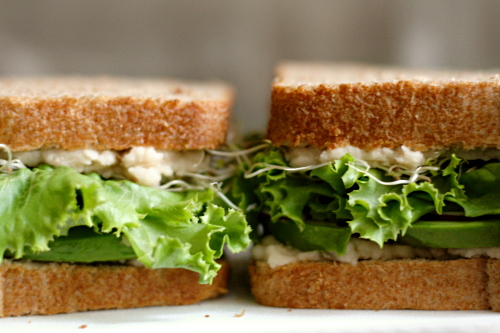
I need to remember that I do follow a good diet regularly, so that making healthy choices is easier. This sandwich, introduced to me by the same friend whose recipes for pumpkin muffins and peanut dip I love, is a perfect example of how I like to eat. Whole grains, beans, and lots of vegetables. It’s easy, filling, portable, and most importantly – delicious.

Copy of IMG_8641

One year ago: Green Chile Rellenos

Printer Friendly Recipe
White Bean Avocado Sandwich

Serves 4

I’ve tried mushing the beans up with a potato masher, but I really do prefer the creamy smooth texture a food processor provides. Also, one thing I’ve learned after making this a few times is to overseason the beans. The seasonings in the beans are flavoring the entire sandwich, so add the lemon juice, salt, and pepper until just past how you’d normally prefer them. Because I’m apparently salt-crazy, I also give the avocado slices a light sprinkling of salt, as well as squeeze some more lemon juice over them.

1 (15-ounce) can white beans, drained and rinsed
1 lemon
salt and pepper
8 slices hearty whole-grain sandwich bread
1 avocado, quartered, peeled, and sliced thin
a few leaves of leaf lettuce, torn into sandwich-sized pieces
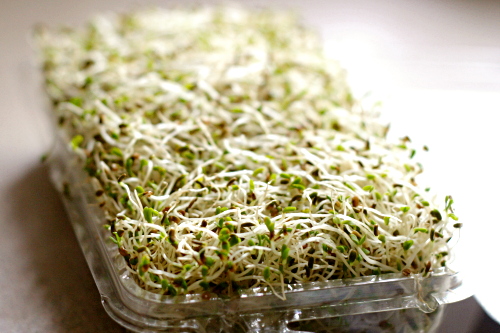
some alfalfa sprouts
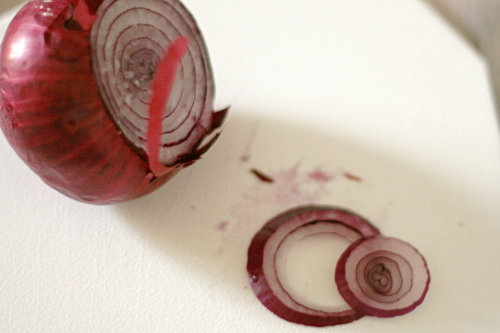
a bit of red onion, sliced thin

1. In a food processor, puree the beans until they’re completely smooth. Season with lemon juice, salt and pepper to taste (see note).  I took notes on about how much of everything to add and then lost them, but I think a reasonable place to start is 2 tablespoons lemon juice, ¼ teaspoon salt, and ⅛ teaspoon pepper.

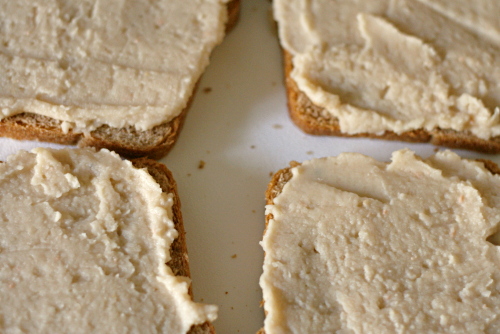
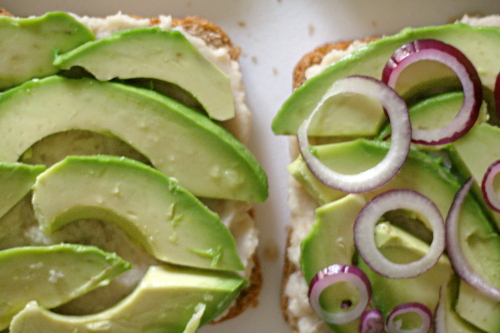
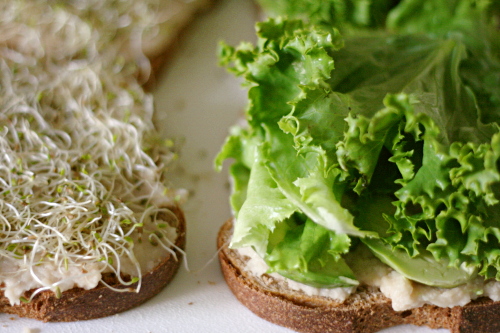
2. Thickly spread one side of each piece of bread with the bean mixture. Top four of the bread slices with slices of avocado, a bit of onion, and plenty of lettuce. Press some sprouts into the bean mixture on the other four slices of bread. Place the sprout-bread, spout side down (duh) on the other-stuff-bread, slice the sandwich in half if you want, and enjoy.

Copy of IMG_8649

roasted butternut squash salad with cider vinaigrette

Copy of IMG_0065

It’s hard to believe that most years, I’m anti-anything fall until October 1st. Not this year. September included pumpkin breakfasts, apple desserts, and plenty of pumpkin beer. Granted, the weather was pretty warm in September and the trees were still green so it didn’t feel much like fall, but it didn’t feel like summer either.

Copy of IMG_0045

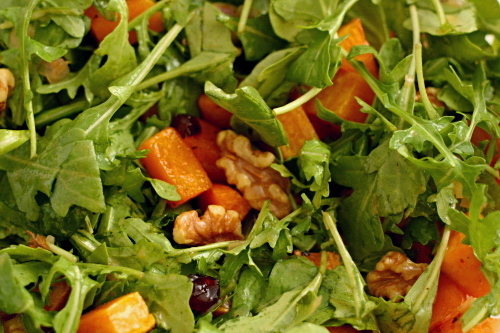
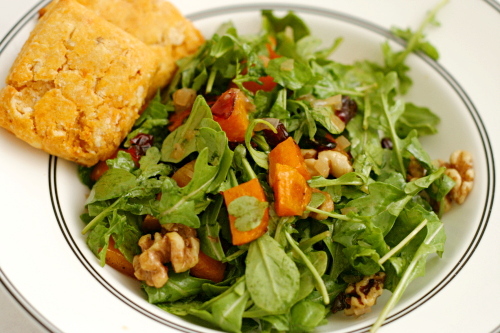
That all changed on October 1st, when I had to turn the heat on for the first time, and our dinner complimented the cool, crisp weather – salad with roasted butternut squash, cranberries, walnuts, and dressing made from reduced apple cider, served with sweet potato biscuits.

Copy of IMG_0049

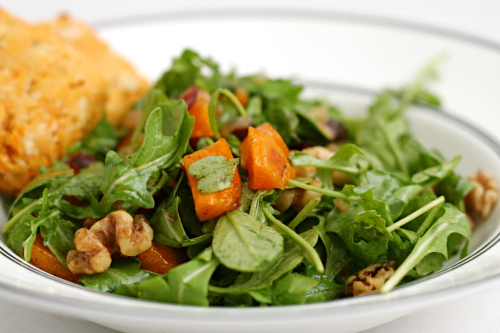
Every ingredient in the salad is maximized. The squash, seasoned and drizzled with maple syrup, is roasted until it’s caramelized. The walnuts are toasted, and so are the cranberries, which was a trick I hadn’t seen before. The cider, reduced to less than a third of its initial volume, is mixed with acidic cider vinegar and emulsifying mustard to form the base of the dressing.

Copy of IMG_0062

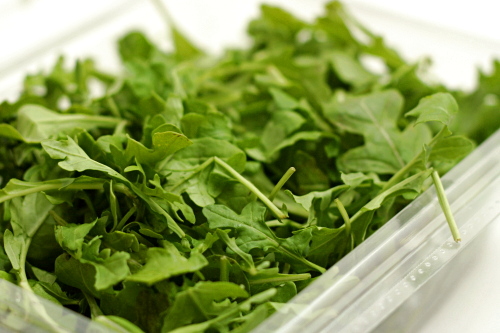
It was delicious; so good, in fact, that I made again the next day for lunch. It was sweet, but also tangy from the dressing, a bit bitter from the walnuts, and spicy from the arugula. I also like that the hot squash and dressing slightly wilt the arugula – it shrinks it a bit, so it doesn’t take so darn long to eat a nice bowl full of greens. Which is a good thing, because then I can eat more of it.

Copy of IMG_0063

One year ago: Spinach, Artichoke, and Red Pepper Strata

Printer Friendly Recipe
Roasted Butternut Squash Salad with Warm Cider Vinaigrette
(adapted just slightly from Barefoot Contessa)

I used less oil. I didn’t measure the amount, but I’m guessing it was ¼ cup; I only ever use enough oil to just balance the acidity. Also, I liked to let the dressing and squash cool just a few minutes before mixing them with the greens. I forgot the cheese the first time I made the salad, when I photographed it.

1 (1½-pound) butternut squash, peeled and ¾-inch) diced
good olive oil
1 tablespoon pure maple syrup
kosher salt and freshly ground black pepper
3 tablespoons dried cranberries
½ cup walnuts halves
¾ cup apple cider or apple juice
2 tablespoons cider vinegar
2 tablespoons minced shallots
2 teaspoons Dijon mustard
4 ounces baby arugula, washed and spun dry
¾ cup freshly grated Parmesan

1. Preheat the oven to 400F.

2. Place the butternut squash on a sheet pan. Add 2 tablespoons olive oil, the maple syrup, 1 teaspoon salt and ½ teaspoon pepper and toss. Roast the squash for 15 to 20 minutes, turning once, until tender. Add the cranberries and walnuts to the pan for the last 5 minutes.

3. While the squash is roasting, combine the apple cider, vinegar, and shallots in a small saucepan and bring to a boil over medium-high heat. Cook for 6 to 8 minutes, until the cider is reduced to about ¼ cup. Off the heat, whisk in the mustard, ½ cup olive oil, 1 teaspoon salt, and ½ teaspoon of pepper.

4. Place the arugula in a large salad bowl and add the roasted squash mixture, the walnuts, and the grated Parmesan. Spoon just enough vinaigrette over the salad to moisten and toss well. Sprinkle with salt and pepper and serve immediately.

Copy of IMG_0064

stuffed mushrooms with sun-dried tomatoes

Copy of IMG_9931

I’ve started my annual football season tradition of planning to eat snacks on Sundays instead of a full dinner, which will invariably last two weeks before I forget all about it and go back to planning a meal and then whining that “I don’t feel like cooking, I just wanna relax!” My life is so hard.

Copy of IMG_9913

But it can be tricky to come up with snacks that are really good but not so filling that I can’t graze on them for a while. (Translation: I’d like to be eating cheese and bread and sausage and mayonnaise-based dips and chips and cookies and, you know, tasty delicious things like that. But I also want my pants to fit.)

Copy of IMG_9924

Stuffed mushrooms are a good example of something that seems like it should be fairly healthy, but on closer inspection, is often full of cheese, and not just any cheese, but that most-delicious and fattening of examples – cream cheese.

Copy of IMG_9919

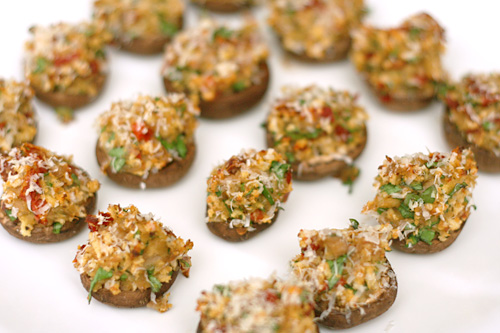
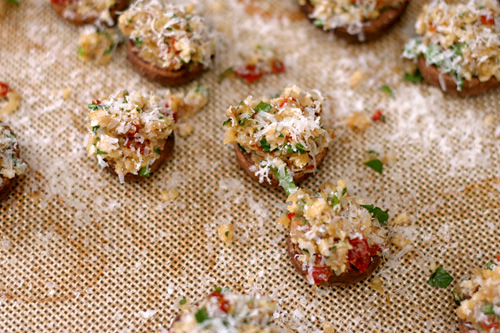
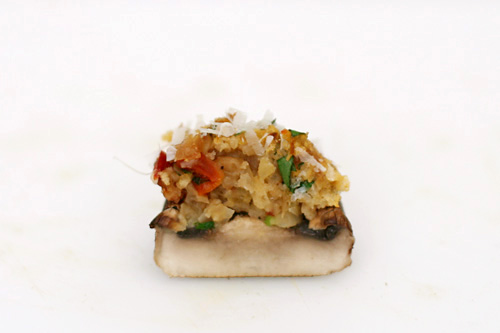
Fortunately, this recipe keeps it light by skipping the cheese, flavoring the filling with just shallots, parsley, and sun-dried tomatoes, with bread crumbs used for bulk and just a sprinkle of parmesan grated on top for an accent.

Copy of IMG_9922

Even though it was just Dave and I watching football together on a Sunday afternoon, and we had a few other snacks, I made the full recipe. But it turns out these stuffed mushrooms aren’t the type of snack that you graze on throughout an afternoon, because they were so darn good that we snarfed them up immediately. And since they’re not very filling, you can eat a bunch of them and still have plenty of room for some hummus!

Copy of IMG_9929

One year ago: Roasted Carrots

Printer Friendly Recipe
Mushrooms Stuffed with Sun-Dried Tomatoes
(adapted from Gourmet via Smitten Kitchen)

The only minor change I’ll make to this recipe, to bring it from really damn good to perfect, is to sprinkle the inside of the mushrooms with a bit of salt before roasting them the first time. Not so much to eliminate more liquid, but just to season them. (Even Dave agreed with this, and he isn’t as salt-crazy as I am.)

Makes 18

½ ounce sun-dried tomatoes (about 5)
2 tablespoons olive oil
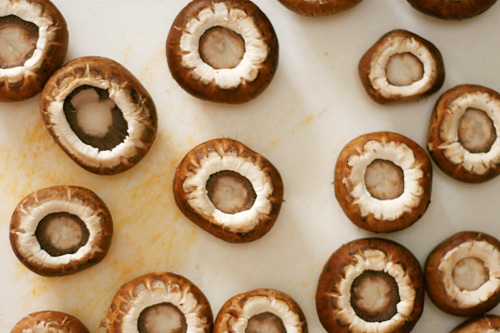
18 white mushrooms, caps reserved, stems pulled out and chopped fine
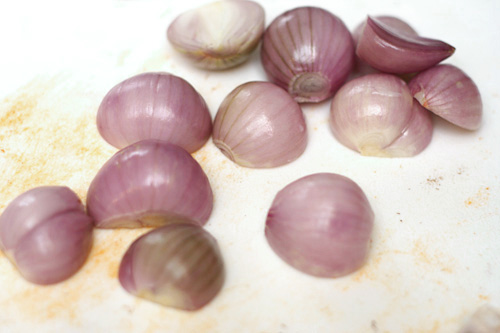
½ cup finely chopped shallots
2 garlic cloves, minced
⅓ cup fine dry bread crumbs
1 large egg yolk, beaten lightly
¼ cup fresh parsley leaves, washed well, spun dry, and minced
½ teaspoon dried basil, crumbled
2 tablespoons freshly grated Parmesan

1. Preheat oven to 400°F.

2. If your tomatoes are packed in oil, rinse them before chopping them finely. If they’re not packed in oil, soak them in a small bowl in hot water to cover for 5 minutes. Reserving 1 tablespoon soaking liquid, drain tomatoes well and chop fine.

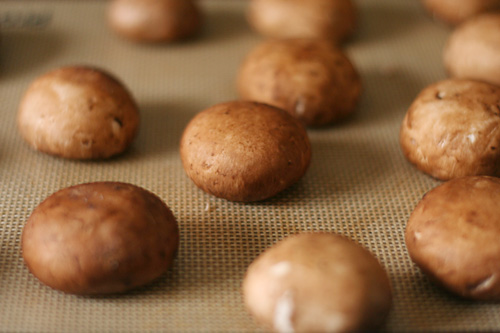
3. Lay mushroom caps, stems removed, face down on baking sheet either lightly sprayed with cooking spray or lined with parchment paper. Bake them approximately 10 minutes, or until their liquid puddles underneath. Remove from the oven. Carefully pour off liquid that has gathered in the bottom of the pan, and then again, carefully, turn mushroom caps over so they are ready to be filled.

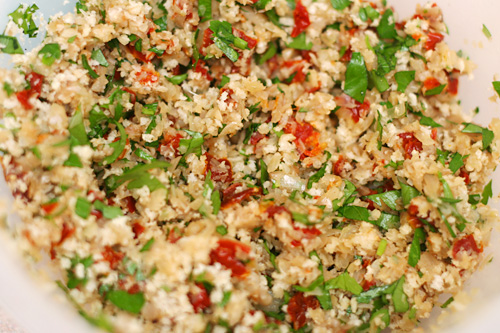
4. In a small skillet heat oil over moderate heat until hot but not smoking and cook chopped mushrooms stems, shallots and garlic, stirring until shallots are softened. In a bowl stir together mushrooms mixture, bread crumbs, tomatoes, reserved soaking liquid, yolk, parsley, basil, and salt and pepper to taste. Mound stuffing in reserved mushroom caps and arrange caps in a lightly greased shallow baking dish, or the same parchment-lined pan you’ve roasted your mushrooms in. Sprinkle mushrooms with Parmesan and bake in middle of oven 15 minutes.

Copy of IMG_9937

bran muffins

Copy of IMG_7107

Everything I eat is evaluated based on its ratio of nutrition to flavor. That sounds tedious but it isn’t. It’s really just answering one simple question that I think most of us ask before we dig in: Is it worth it?

Copy of IMG_7017

For example, macaroni and cheese: very indulgent, but also very delicious. Definitely worth it, at least once in a while.

Copy of IMG_7022

Raw carrots? Very healthy, but, eh, not my favorite thing to eat. I tend to ignore them unless there’s nothing else. But add some hummus, and you’ve increased the flavor significantly without decreasing the nutrition drastically, and hey, I’ll eat that.

Copy of IMG_7100

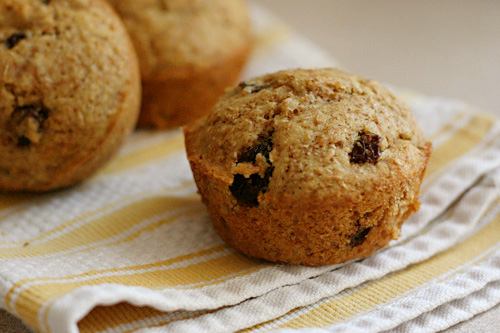
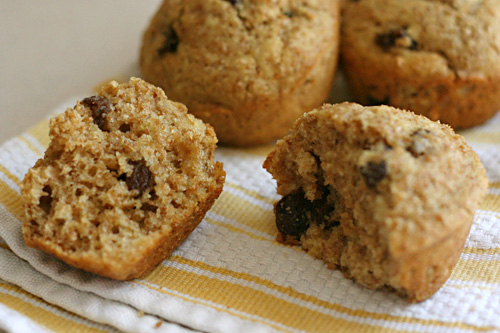
Sometimes I forget that something can be both ridiculously good for you and ridiculously good. And something like these muffins comes along, perfect in every way, both taste and health, and I’m oh-so-pleasantly reminded. Nutrition to flavor ratio? Off the charts.

Copy of IMG_7104

One year ago: Pain Ordinaire

Printer Friendly Recipe
Moist Bran Muffins
(from the King Arthur Flour’s Whole Grain Baking)

Makes about 18

Note that this is a two-day process, as the dough needs to set overnight before baking. Fortunately, at that point it can actually wait in the refrigerator for several days.

I’ve used both raisins and dried cranberries in these, and both are good. Of course most any dried fruit would work. I’ve also used clementine juice instead of orange juice, and that worked just fine.

¾ cup boiling water
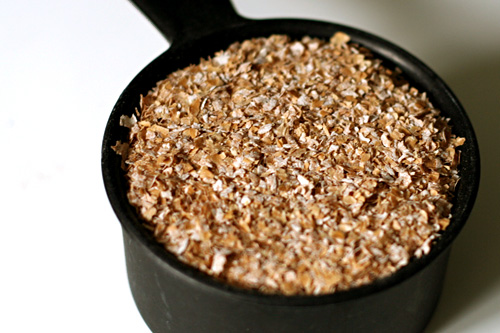
1¼ cups unprocessed wheat bran, divided
¾ cup dried fruit, chopped if large raisins
¾ cup packed light or dark brown sugar
¼ cup vegetable oil
2½ cups whole wheat flour, traditional or white whole wheat
1 teaspoon baking soda
½ teaspoon baking powder
1 teaspoon salt
1 large egg
¾ cup buttermilk
½ cup orange juice

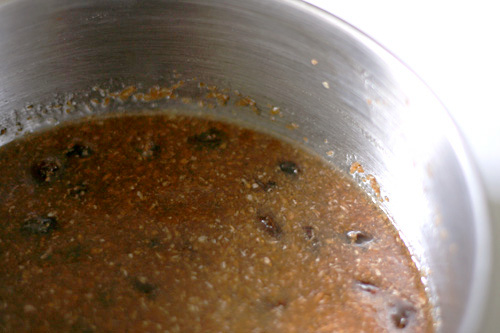
1. Pour boiling water over ¾ cup of the bran cereal in a small mixing bowl. Add the raisins, brown sugar and oil. While the bran mixture cools, blend together the flour, baking soda, baking powder, and salt in a large mixing bowl.

2. Beat the egg with the buttermilk and orange juice in a large measuring cup. Add this mixture to the dry ingredients. Stir in remaining ½ cup bran cereal, and then the bran-raisin mixture. Cover the bowl and refrigerate overnight.

3. The next day, preheat the oven to 375 degrees. Lightly grease a muffin tin. Fill each cup two-thirds full. Bake the muffin until a tester comes out clean, about 23 to 26 minutes.

4. Remove from oven and allow to cool in pan for 5 minutes, then turn out onto a rack to finish cooling, or serve warm.

Copy of IMG_7111

100% whole wheat sandwich bread

Copy of IMG_8503

My guidelines for nutrition can pretty much be summed up by:

  1. Only eat when hungry. But don’t eat too much.
  2. Don’t eat processed crap.
  3. Eat as many fruits and vegetables as you can stand.
  4. Don’t be a baby about whole grains.

Copy of IMG_8488
I’ve been getting worse and worse about that last one recently. I’ve walked by Reinhart’s book on whole grain breads in the bookstore so many times and never even bothered to pick it up. It’s just that white bread, made well, is so darn good, you know? I’m not talking about Wonder Bread or something, I mean a nice sweet tender sandwich bread or a fantastic complex rustic baguette.

Copy of IMG_8491

But my interest was sparked when I saw the whole wheat bagels that Stefany made from this book. They look at least as good as any bagels I’ve made – but they’re so much healthier.  Within a week, I tried the recipe, was pleased with the results, and bought the book.

Copy of IMG_8494

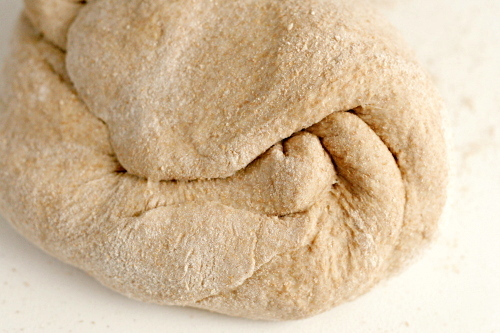
It’s Peter Reinhart, so we’re not talking about the most simple recipes here. In general, they’re two day affairs. The first day, you mix two things. One is a thick paste of whole wheat flour, liquid, and salt, and the other one is a mixture of whole wheat flour, liquid, and yeast. These both set overnight (or longer, if necessary) and are incorporated into the rest of the dough the next day. On the day of baking, you follow essentially a normal bread-baking procedure, from mixing and kneading, through rising, shaping, proofing, and baking.

Copy of IMG_8498

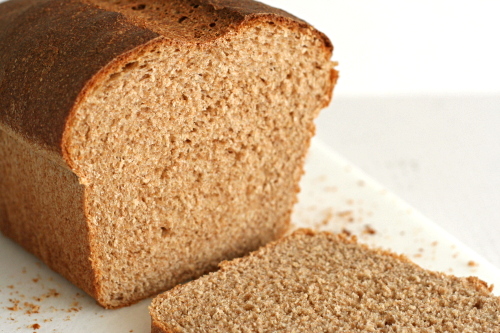
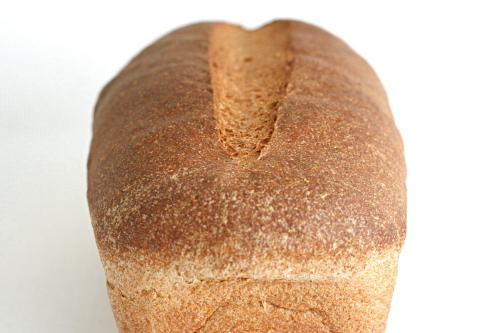
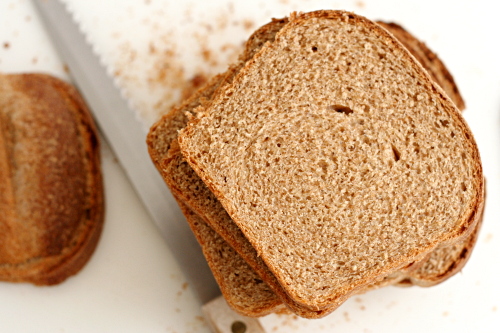
Most homemade whole wheat bread recipes call for, at most, half whole wheat flour. This recipe uses 100% whole wheat flour, and it’s as good as any of those other recipes. It’s tender and light, just like you want from a sandwich bread. And it tastes seriously good. Obviously it tastes whole wheaty, but it has more to it than that. The long soaks from the pre-doughs give the bread a full flavor that includes sweetness and a bit of acidity. I am officially hooked on 100% whole wheat breads.

Copy of IMG_8500

One year ago: Lemon Pancakes with Blueberry Syrup

Printer Friendly Recipe
100% Whole Wheat Sandwich Bread (from Peter Reinhart’s Whole Grain Breads)

Reinhart also has a “Transitional Whole Wheat Sandwich Bread” that is made the same way, except it uses white unbleached bread flour in the biga. If you decide to make this version instead, keep in mind that you’ll need a little less water when working with white flour (1-2 teaspoons per ounce of flour).

Soaker:
1¾ cups (227 grams) whole wheat flour
½ teaspoon (4 grams) salt
¾ cup plus 2 tablespoons (198 grams) milk, buttermilk, yogurt, soy milk, or rice milk

1. Mix all of the soaker ingredients together in a bowl for about 1 minute, until all of the flour is hydrated and the ingredients form a ball of dough.

2. Cover loosely with plastic wrap and leave at room temperature for 12 to 24 hours. (If it will be more than 24 hours, place the soaker in the refrigerator; it will be good for up to 3 days. Remove it 2 hours before mixing the final dough to take off the chill.)

Biga:
1¾ cups (227 grams) whole wheat flour
¼ teaspoon (1 gram) instant yeast
¾ cup (170 grams) filtered or spring water, at room temperature (about 70F)

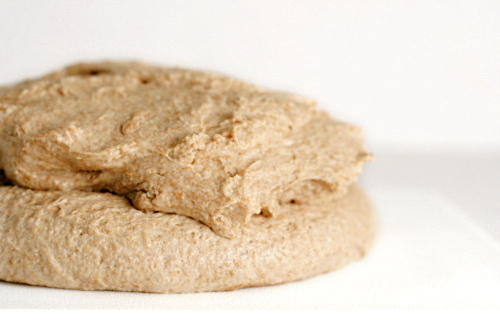
1. Mix all the biga ingredients together in a bowl to form a ball of dough.  Using wet hands, knead the dough in the bowl for 2 minutes to be sure all of the ingredients are evenly distributed and the flour is fully hydrated. The dough should feel very tacky. Let the dough rest for 5 minutes, then knead it again with wet hands for 1 minute. The dough will become smoother but still be tacky.

2. Transfer the dough to a clean bowl, cover tightly with plastic wrap, and refrigerate for at least 8 hours and up to 3 days.

3. About 2 hours before mixing the final dough, remove the biga from the refrigerator to take off the chill. It will have risen slightly but need not have risen significantly in order to use it in the final dough.

Final dough:
All of the Soaker
All of the biga
7 tablespoons (56.5 grams) whole wheat flour, plus extra for adjustments
5/8 teaspoon (5 grams) salt
2¼ teaspoons (7 grams) instant yeast
2¼ tablespoons (42.5 grams) honey or agave nectar
1 tablespoon (14 grams) unsalted butter, melted, or vegetable oil

1. Using a metal pastry scraper, chop the soaker and the biga into 12 smaller pieces each (sprinkle some of the extra flour over the pre-doughs to keep the pieces from sticking back to each other).

2. If mixing by hand, combine the soaker and biga pieces in a bowl with all of the other ingredients except the extra flour and stir vigorously with a mixing spoon or knead with wet hands until all of the ingredients are evenly integrated and distributed into the dough. It should be soft and slightly sticky; if not, add more flour or water as needed.

If using a stand mixer, put the pre-dough pieces and all of the other ingredients except the extra flour into the mixer with the paddle attachment (preferable) or dough hook. Mix on slow speed for 1 minute to bring the ingredients together into a ball. Switch to the dough hook and mix on medium-low speed, occasionally scraping down the bowl, for 2 to 3 minutes, until the pre-doughs become cohesive and assimilated into each other. Add more flour or water as needed until the dough is soft and slightly sticky.

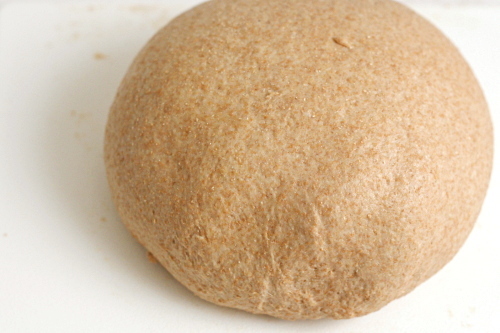
3. Dust a work surface with flour, then toss the dough in the flour to coat. Knead by hand for 3 to 4 minutes, incorporating only as much extra flour as needed, until the dough feels soft and tacky, but not sticky. Form the dough into a ball and let it rest on the work surface for 5 minutes while you prepare a clean, slightly oiled bowl.

4. Resume kneading the dough for 1 minute to strengthen the gluten and make any final flour or water adjustments. The dough should have strength and pass the windowpane test, yet still feel soft, supple, and very tacky. Form the dough into a ball and place it in the prepared bowl, rolling to coat with oil. Cover loosely with plastic wrap and let rise at room temperature for approximately 45 to 60 minutes, until it is about 1½ times its original size.

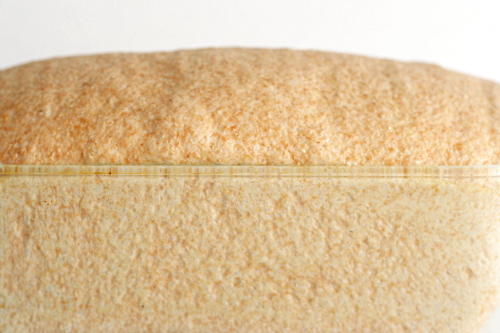
5. Transfer the dough to a lightly floured work surface.  To shape it for a loaf pan, pat it out to a square approximately 1-inch thick, then roll the dough into a cylinder.  Place the dough in a greased 4 by 8½-inch bread pan. Cover the dough loosely with plastic wrap and let rise at room temperature for approximately 45 to 60 minutes, until it is about 1½ times its original size.

6. Preheat the oven to 425F. When the dough is ready to bake, place it in the oven and bake for 20 minutes. Rotate the loaf 180 degrees and continue baking for another 20 to 30 minutes, until the loaf is a rich brown on all sides, sounds hollow when thumped on the bottom, and registers at least 195F in the center.

7. Transfer the bread to a cooling rack and allow it to cool for at least 1 hour before serving.

Copy of IMG_8506

pickled coleslaw

Copy of IMG_6584

Salads can be tricky, because if I’m eating a big bowl of vegetables, it better be healthy, you know? But there’s the whole salad dressing issue. Vinaigrette is the standard lighter option, but even it’s usually based on olive oil.

Coleslaw is no exception to the salad dressing problem. Many coleslaws are simply cabbage, mayonnaise and seasoning. Not only is this a little plain for my taste, but it turns coleslaw into a full-on indulgence. Even my favorite buttermilk coleslaw recipe includes a bit of mayonnaise and sour cream (which could probably be replaced by plain yogurt), although the base of the dressing is lowfat buttermilk.

Copy of IMG_6553

A lot of people don’t even like creamy coleslaws, preferring vinegar-based slaws instead. I like both types, and at first I thought these vinegar dressings were the no-fat answer for coleslaw, until I found out that most involve oil, like a typical vinaigrette does.

Copy of IMG_6547

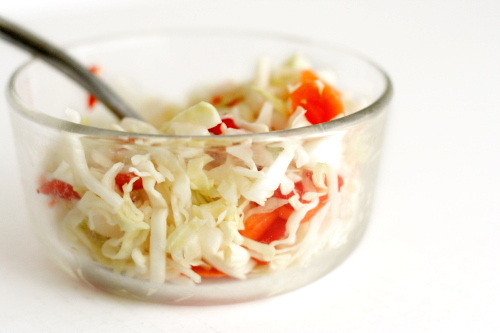
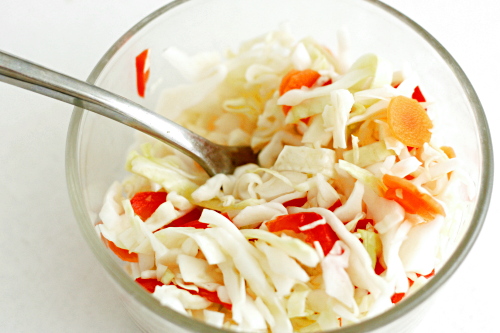
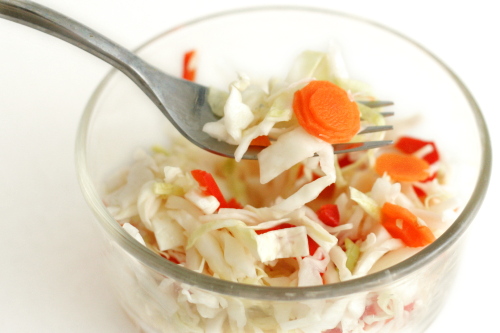
The solution, it turns out, is pickled coleslaw. The cabbage here is mixed with nothing but vinegar, water, sugar and salt. Those ingredients have to be heated to dissolve the sugar, then cooled so they don’t wilt the cabbage. Then they’re mixed with the shredded cabbage and a few other vegetables (sadly, I didn’t have a cucumber around when I made this, so I had to skip it), and refrigerated overnight – or for longer, if need be.

Copy of IMG_6556

What a great way to eat a big bowl of vegetables. Since I’m not worried by a wee bit of sugar, there’s nothing for me to feel guilty about here. And it isn’t just about being healthy – it tastes great too. It’s tart without being too sour and has a wonderful crunch. Even Dave, pickle-hater that he is, enjoyed it. Gotta love a salad without compromise.

Copy of IMG_6583

One year ago: Mashed Potatoes with Kale

Pickled Coleslaw (from Deb Perelman for NPR)

Makes 8 to 10 servings

Brine:
1½ cups distilled white vinegar
1½ cups water
⅓ (2.33 ounces) cup sugar
2½ tablespoons kosher salt

Slaw:
1 small head green cabbage
1 red bell pepper, cored, seeded and thinly sliced into 1- to 2-inch pieces
1 carrot, peeled and very thinly sliced
1 kirby cucumber, thinly sliced

Bring brine ingredients to a boil in a 2-quart nonreactive saucepan over moderate heat, stirring until sugar is dissolved. (Use a pan of stainless steel, glass and enameled cast iron; avoid pure aluminum and uncoated iron, which can impart an unpleasant taste to recipes with acidic ingredients) Transfer to a 3- to 4-quart nonreactive bowl and cool completely. To speed this process up, you can set the bowl over a second bowl of ice water, and stir, which will quickly chill the brine.

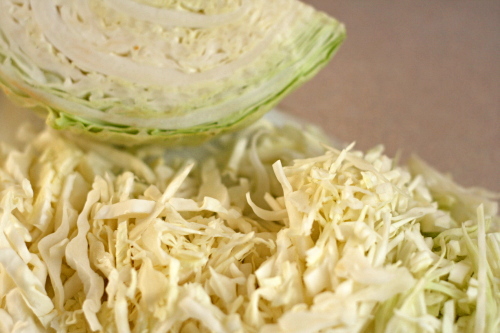
Halve, core and halve again the head of cabbage, then finely slice it with a knife, or run the quarters through a food processor fitted with a slicing blade.

Toss sliced cabbage, bell pepper, carrot and cucumber in bowl with brine. Cover with lid or plastic wrap, and refrigerate, tossing the ingredients once or twice in a 24-hour period. After one day in the brine, the coleslaw is ready to serve. It keeps for up to 1 week, chilled.

Copy of IMG_6586

vegetable curry

Copy of IMG_7904

I’m particular about cookbooks. I’ve gotten into the habit of buying one hopefully comprehensive cookbook per cuisine. It started with Julia Child’s Mastering the Art of French Cooking and Marcella Hazen’s Essentials of Classic Italian Cooking, then it was Corinne Trang’s Essentials of Asian Cooking, and most recently, Julie Sahni’s Classic Indian Cooking.

Copy of IMG_7885

The thing is, I’ve hardly made anything from any of these. I’ve barely even opened Indian Cooking since I got it for Christmas this year, and to be honest, I’m really not bothered by this. It makes me happy just knowing that I have them, and that someday, hopefully sooner rather than later, I’ll find the time and discipline to learn what I can from each one.

Copy of IMG_7889

In fact, I’ve only made a couple of Indian dishes ever, but that was all I needed to be convinced that I’ll love it; I enjoy the basic flavors and ingredients so much. One of my favorites is a vegetable curry dish from Cooks Illustrated, but every time I made it, I was surprised by how long it took. I wanted something simpler that I could reasonably make on a weeknight.

Copy of IMG_7892

Then I found a recipe for Aloo Gobi that had a lot of the same ingredients, except less of them, plus a simpler cooking method. It has potatoes in it, as does the CI recipe, but since I wanted to serve my curry mixture over rice, I decided that I could eliminate the potatoes. I also wanted this to be a one-dish meal, but the original didn’t have any protein. Exchanging the potatoes for chickpeas killed two birds with one stone.

Copy of IMG_7898

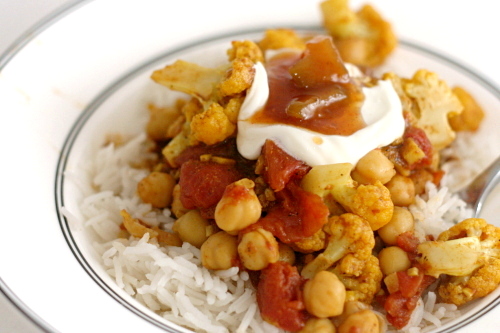
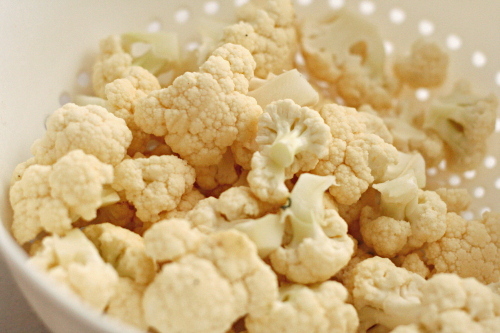
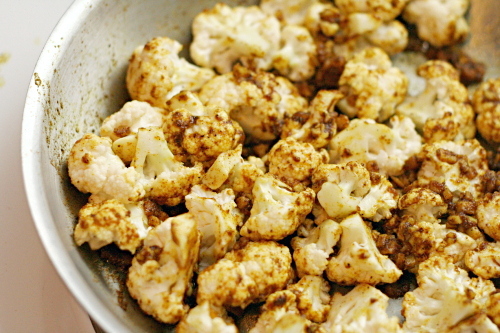
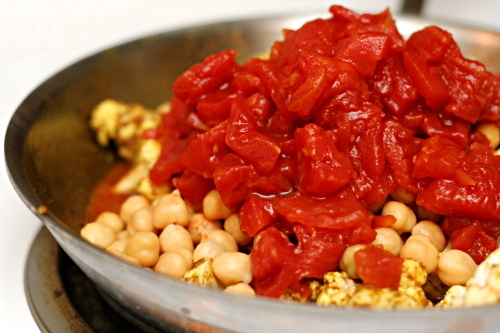
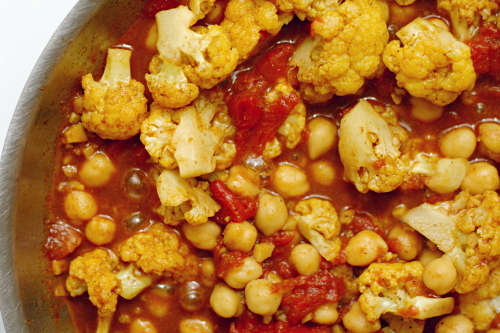
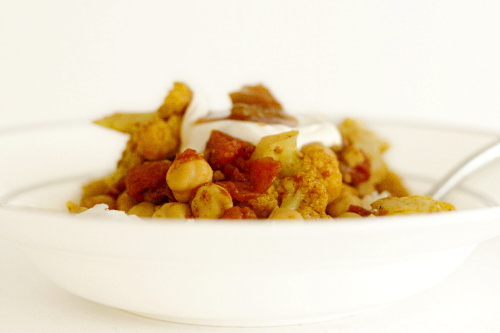
The recipe starts out with sautéing all sorts of delicious aromatics – garlic and ginger of course, but also spices, including curry powder and garam masala. Garam masala is seriously delicious stuff. It’s a blend, so brands will vary, but I’ve been perfectly happy with McCormick’s. Then I added cauliflower, which is my favorite vegetable, and then tomatoes and chickpeas. One ingredient I love after another. At the end, peas are stirred in.

Copy of IMG_7900

This was exactly what I was looking for. It has similar ingredients to the Cooks Illustrated recipe that I enjoyed so much, but it’s easy enough to make on a weeknight. Aloo gobi  has similar flavors, but this version has the right nutritional balance for a one-pot meal. I wonder how many more great Indian dishes I can discover by actually looking through a cookbook?

Copy of IMG_7905

One year ago: Grits, Onion, and Cheese Souffles

Printer Friendly Recipe
Vegetable Curry

Serves 3-4

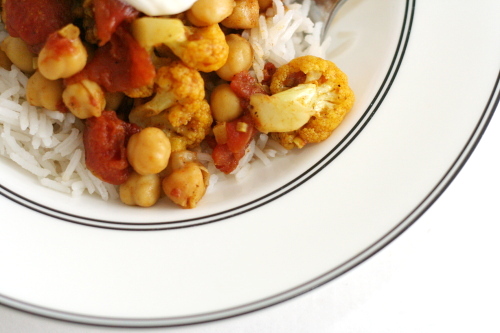
I love this over basmati rice (I like to put a cinnamon stick and some cloves in the pot with the rice cooks) and topped with mango chutney and plain yogurt.

I didn’t have peas when I photographed this. Also, I used too much of the spices; the recipe below calls for less than I used, so if yours looks a little different from the pictures, that may be the reason.

1 tablespoon canola oil
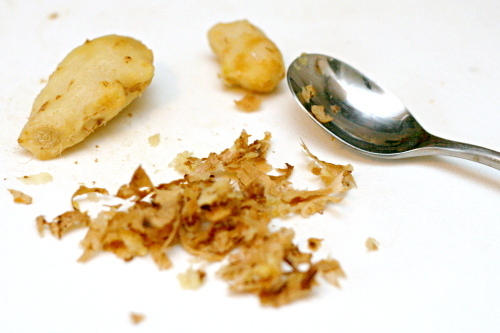
1 tablespoon minced or grated ginger
3 large garlic cloves, finely chopped
1 teaspoons garam masala
2 teaspoons curry powder
Salt
½ medium head cauliflower, cut into small-medium sized florets
1 (15-ounce) can diced tomatoes
1 (15-ounce) can chickpeas, drained and rinsed
4 ounces (about ¾ cup) frozen peas

1. In a large skillet, heat the canola oil over medium heat. Add the garlic, ginger, garam masala, and curry powder. Cook until fragrant, 1-2 minutes, stirring constantly.

2. Add the cauliflower and toss to incorporate with the spices, then stir in ½ teaspoon salt, the chickpeas, and the tomatoes with their liquid. Cover the pan and simmer over medium heat for 10 to 15 minutes, until the cauliflower is tender, stirring occasionally. Stir in the peas, cover again, and continue simmering for 2-3 minutes, until the peas are heated through. Serve over rice, topped with plain yogurt and mango chutney, if desired.
Copy of IMG_7902