ricotta spinach (and tofu) ravioli

A while ago, I wrote a comment on someone else’s blog about how tofu’s bad reputation comes from people trying to substitute tofu for tastier but fattier ingredients, like cheese and meat. And it’s true – I love tofu in recipes where it belongs – hot and sour soup, moo shu, peanut sesame noodles, stir fry. But, it turns out that I’m a hypocrite, because just a few days before I wrote that comment, I had made ravioli filling with ricotta, spinach, parmesan, and, yes, tofu.

This filling is a holdover from my brief stint as a brown rice-eating, refined sugar-avoiding health nut. The lifestyle wasn’t a keeper, but this recipe is. The trick is to process the tofu in a food processor before adding the other ingredients to ensure that the tofu is absolutely smooth. I also like the spinach processed, or at least very finely chopped, because the texture of cooked spinach is potentially stringy unless chopped finely.

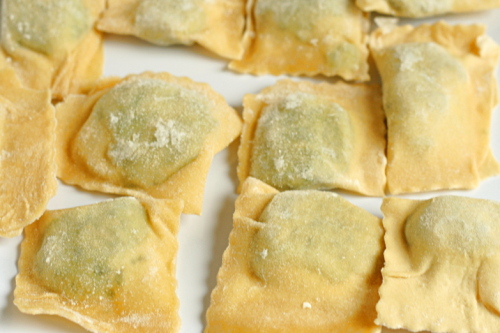
This is my most successful attempt at making homemade ravioli. (And it was all done between 9pm and midnight on a Friday, because I’m a nut.) I made the dough by hand instead of using the food processor, since I’ve been more successful with hand-kneaded dough in the past. The picture is all out of whack – I was supposed to use 3 eggs and 2 cups of flour, this is 3 cups of flour and 2 eggs. I figured out the screw-up just in time.

In the past, I’ve always rolled out pasta dough for ravioli to the thinnest setting, but then they’re impossibly delicate. I kept the pasta just a bit thicker this time. I was also careful to form wider sheets of pasta, which meant I could form square raviolis instead of rectangles. It’s a small issue, but I was excited about the squares. For nice square ravioli, make sure you start rolling the dough by feeding the widest edge through first. Not only does this make for prettier ravioli, but the pasta sheets don’t become as long and difficult to handle.

The thicker dough made far better ravioli than I’ve made before! This is the first time I’ve been able to boil ravioli without it immediately tasting watery. The dough remained firm, and the ravioli, both the filling and the pasta, were delicious. The tofu doesn’t detract from the filling at all, and while I can’t say that it’s adding any flavor of its own, it sure is a healthy filler ingredient.

Spinach Ricotta Tofu Ravioli (dough ingredients and ravioli forming instructions from Cooks Illustrated; dough mixing and rolling method from Marcella Hazan; filling recipe is my own creation)

The instructions look long, but that’s only because I copied and pasted Marcella Hazan’s very detailed pasta instructions from her lasagna recipe. It’s not nearly as complicated as it looks.

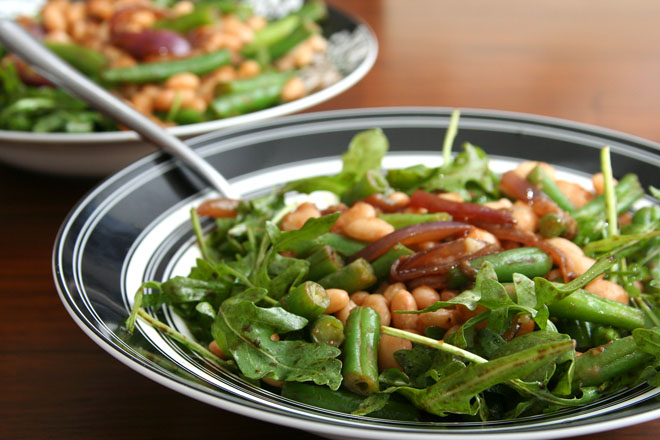
I’m not providing you with a sauce recipe. I’ve been using a simple tomato sauce with these.

Ravioli take well to freezing. I didn’t eat any of these the day I formed them. I immediately flash froze them, and they’ve made for some handy easy meals in the weeks since.

For the dough:
2 cups (10 ounces) unbleached flour
3 large eggs

For the filling:
10 ounces fresh spinach
12 ounces firm tofu
15 ounces ricotta cheese
¾ cup (1.5 ounces) grated parmesan cheese
1 teaspoon salt
ground black pepper

For the pasta:

Pour the flour onto a work surface, shape it into a mound, and scoop out a deep hollow in its center. Break the eggs into the hollow.

Beat the eggs lightly with a fork for about 2 minutes as though you were making an omelet. Draw some of the flour over the eggs, mixing it in with the fork a little at a time, until the eggs are no longer runny. Draw the sides of the mound together with your hands, but push some of the flour to one side, keeping it out of the way until you find you absolutely need it. Work the eggs and flour together, using your fingers and the palms of your hands, until you have a smoothly integrated mixture. If it is still moist, work in more flour.

When the mass feels good to you and you think it does not require any more flour, wash your hands, dry them, and run a simple test: Press you thumb deep into center of the mass; if it comes out clean, without any sticky matter on it, no more flour is needed. Put the egg and flour mass to one side, scrape the work surface absolutely clear of any loose or caked bits of flour and of any crumbs, and get ready to knead.

Return to the mass of flour and eggs. Push forward against it using the heel of your palm, keeping your fingers bent. Fold the mass in half, give it a half turn, press hard against it with the heel of your palm again, and repeat the operation. Make sure that you keep turning the ball of dough always in the same direction, either clockwise or counterclockwise, as you prefer. When you have kneaded it thus for 8 full minutes and the dough is as smooth as baby skin, it is ready for the machine.

Cut the ball of dough into 6 equal parts.

Spread clean, dry, cloth dish towels over a work counter near where you’ll be using the machine.

Set the pair of smooth cylinders, the thinning rollers, at the widest opening. Flatten one of the pieces of dough by pummeling it with your palm, and run it through the machine. Fold the dough twice into a third of its length, and feed it by its narrow end through the machine once again. Repeat the operation 2 or 3 times, then lay the flattened strip of pasta over a towel on the counter. Since you are going to have a lot of strips, start at one end of the counter, leaving room for the others.

Take another piece of dough, flatten it with your hand, and turn it through the machine exactly as described above. Lay the strip next to the previously thinned one on the towel, but do not allow them to touch or overlap, because they are still moist enough to stick to each other. Proceed to flatten all the remaining pieces in the same manner.

Close down the opening between the machine’s rollers by one notch. Take the first pasta strip you had flattened and run it once through the rollers, feeding it by its wider end. Do not fold it, but spread it flat on the cloth towel, and move on to the next pasta strip in the sequence.

When all the pasta strips have gone through the narrower opening once, bring the rollers closer together by another notch, and run the strips of pasta through them once again, following the procedure described above. You will find the strips becoming longer, as they get thinner, and if there is not enough room to spread them out on the counter, you can let them hand over the edge. Continue thinning the strips in sequence, progressively closing down the opening between the rollers one notch at a time. This step-by-step thinning procedure, which commercial makers of fresh pasta greatly abbreviate or skip altogether, is responsible, along with proper kneading, for giving good pasta its body and structure. Continue thinning the pasta until the second-to-last setting.

For the filling:

Place cleaned spinach leaves and any water that clings to them in a nonreactive soup kettle. (If you’re using pre-washed bagged spinach, add 2 tablespoons water to the pot). Cover and cook over medium heat until spinach wilts, about 5 minutes. Cool spinach slightly and squeeze out the excess liquid; set aside.

Process the tofu in a food processor until smooth. Add the spinach and pulse to combine and finely chop. Add the remaining filling ingredients and pulse to combine.

To form ravioli:

Your sheets should be approximately 4 inches across. Place small balls of filling (about one rounded teaspoon each) in a line one inch from the bottom of the pasta sheet. Leave one and one-quarter inches between each ball of filling. Fold over the top of the pasta and line it up with the bottom edge. Seal bottom and the two open sides with your finger. Use fluted pastry wheel to cut along the two sides and bottom of the sealed pasta sheet. Run pastry wheel between balls of filling to cut out the ravioli.

To cook ravioli:

Bring 4 quarts water to boil in a large stockpot. Add salt and half the pasta. Cook until doubled edges are al dente, 4-5 minutes. With a slotted spoon, transfer ravioli to warmed bowls or plates; add sauce of choice. Meanwhile, put remaining ravioli in boiling water and repeat cooking process. (Or bring two pots of water to boil and cook both batches simultaneously.) Serve immediately. (Alternatively, after draining the boiled ravioli, layer them in a baking dish with sauce and put them in a warmed oven until ready to serve.)

asparagus and arugula salad with cannellini beans and balsamic vinegar

The combination of my upcoming beach trip and Tuesdays With Dorie has prompted a series of main dish salads for dinner. I’m surprising myself by how much I’m enjoying it. I was especially surprised by this salad, which I expected to be edible but not special. I’m so glad I chose the recipe even though I wasn’t excited about it, because it was so good that now I’m waiting for an opportunity to make it again.

arugula green beans white beansupdated photo 1/12/2015, with green beans substituted for asparagus

The salad is composed of two rather distinct parts. The base is a bed of arugula, dressed with a very simple balsamic vinaigrette. This is topped with a mixture of red onions that have been browned, asparagus that is sautéed just until tender, and cannellini beans, all of which is dressed with the same vinaigrette. It’s an unusual but delicious combination.

I did drastically reduce the arugula. The recipe calls for 14 ounces (although I’m unsure if this is before or after it’s stemmed), but even one whole 5-ounce bag of pre-washed arugula seemed like a lot. Five ounces ended up being the perfect amount. That’s the only change I made, and I even used a cheapo balsamic vinegar, with no noticeable adverse affects on the salad.

Last time I made salad, I flaked out on the meal-planning and made bread to go with it, even though croutons are a primary feature of Caesar salads. This time, I didn’t serve anything else with the salad and realized half-way through eating it that there was no carbs involved anywhere. Next time I swear I’ll get it right.

Asparagus and Arugula Salad with Cannellini Beans and Balsamic Vinegar (from Cooks Illustrated May 2003)

Serves 4 to 6 as a first course or 2 to 3 as a main dish

5 tablespoons extra-virgin olive oil
½ medium red onion, sliced 1/8 inch thick (about 1 cup)
1 pound asparagus, trimmed of tough ends and cut on diagonal into 1-inch pieces)
Table salt and ground black pepper
1 can (15 ounces) cannellini beans, rinsed and drained (about 1½ cups)
2 tablespoons balsamic vinegar, plus 2 teaspoons
14 ounces arugula (1 large bunch), washed, dried, and stemmed (about 6 cups lightly packed)

1. Heat 2 tablespoons oil in 12-inch nonstick skillet over high heat until beginning to smoke; stir in onion and cook until beginning to brown, about 1 minute. Add asparagus, ¼ teaspoon salt, and ¼ teaspoon pepper; cook until asparagus is browned and tender-crisp, about 4 minutes, stirring once every minute. Off heat, stir in beans; transfer to large plate and cool 5 minutes.

2. Meanwhile, whisk remaining 3 tablespoons oil, vinegar, ¼ teaspoon salt, and 1/8 teaspoon pepper in medium bowl until combined. In large bowl, toss arugula with 2 tablespoons dressing and divide among salad plates. Toss asparagus mixture with remaining dressing, place a portion over arugula, and serve.

hash browns with sauteed vegetables and poached eggs

I’ve become enamored with poached eggs lately. They’re such a great topping for so many breakfast ideas. Besides eggs benedict, I like to serve them on toast with a bit of cheddar cheese sprinkled over. Hash browns and a bed of sautéed vegetables is my favorite poached eggs base.

The trick to great hash browns is to use starchy potatoes like russets, but to rinse some of the outside starch off of the shreds, then thoroughly dry them before starting to cook. Because I consider this breakfast one of my healthier options, I use olive oil for cooking both the vegetables and the potatoes, although vegetable oil and butter are also good choices. How often you stir the potatoes depends on how you like your hash browns. If you want a crispy base and a tender interior within a bed of potatoes, pack the shreds into a medium-size pan and leave them alone until the bottom browns, 5-6 minutes. Then flip the whole mound over and brown the second side. I tend to put the potatoes in a large skillet and stir every few minutes. After 10-15 minutes, they’re pretty evenly split between crispy browned and tender.

The vegetables you use are completely adaptable. My favorite combination is red onion, red peppers, and mushrooms. This time I used spinach instead of the red peppers, and I loved it. I like the vegetables chopped so that I can get some of each in one bite, so pretty small. (I’m particular about how vegetables are chopped anyway.)

Mound some cooked potatoes on a plate, spread the sautéed vegetables over it, and top with a poached egg – it’s a perfect combination of flavors and nutrition. Once the egg is cut into, warm yolk drips down and blends with the potatoes, and your morning is off to a terrific start.

Hash Browns, Sautéed Vegetables, and Poached Eggs (Poached Egg recipe from Cooks Illustrated)

Serves 2

1½ tablespoons olive oil
6-8 cremini or button mushrooms, halved if large and sliced thin
salt
½ small red onion, halved and sliced thin
1½ ounces spinach, cleaned and chopped very coarse
ground black pepper
1 pound russet potatoes, peeled and washed
2-4 eggs, each cracked into a small handled cup
2 tablespoons white vinegar

1. Heat oven to 200 degrees, then turn it off. Place 2 large plates in warm oven.

2. Heat ½ tablespoon of olive oil in a large nonstick skillet over medium-high heat. When shimmering but not smoking, add mushrooms and a pinch of salt. Cook, stirring occasionally, until liquid released by mushrooms has evaporated. Add onion and cook until browned at edges. Add spinach and cook, stirring constantly, until just wilted. Season with salt and pepper to taste and transfer to a bowl. Put bowl in warmed oven.

3. While vegetables cook, shred potatoes in food processor with shredding blade or on large holes of box grater. Rinse thoroughly in a strainer, then move to a clean kitchen towel and squeeze and pat dry.

4. Heat 1 tablespoon olive oil in the same skillet (no need to wash) over medium heat until shimmering but not smoking. Add potatoes and ¼ teaspoon salt and mix thoroughly. Cook potatoes, stirring every 2-3 minutes, until slightly browned and cooked throughout, a total of 15-20 minutes.

5. While potatoes cook, fill an 8- to 10-inch nonstick skillet nearly to the rim with water, add 1 teaspoon salt and the vinegar, and bring the mixture to boil over high heat. Lower the lips of each cup just into water at once; tip eggs into boiling water, cover, and remove from heat. Poach until yolks are medium-firm, exactly 4 minutes. For firmer yolks (or for extra large or jumbo eggs), poach 4 ½ minutes; for looser yolks (or for medium eggs), poach 3 minutes.

6. While eggs are cooking, divide potatoes between warmed plates. Top with sautéed vegetables. With a slotted spoon, carefully lift and drain each egg over skillet, then lay each over vegetables. Season to taste with salt and pepper and serve immediately.

caesar salad

I almost never make salads. Not because I don’t like them, but because I don’t like them as a side dish. To me, salad doesn’t coordinate well with other dinner items. I do like when it’s served before a meal, or as a meal.

I went the route of serving Caesar salad as a meal the day that I made the peanut butter torte. I figured that if I was going to eat peanut butter and cream cheese and oreos and chocolate and whipped cream for dessert, something was going to have to give.

In one of Alton Brown’s first Good Eats episodes (um, before the show was very good), he discussed the original Caesar salad recipe, which was built tableside at a restaurant by chef Cesar Cardini. The recipe starts with a thin coating of oil on the lettuce, then salt, pepper, more oil, lemon juice, and a coddled egg. I’m not all about this method. I like to at least attempt to emulsify my salad dressing ingredients, and I also think that putting oil directly on the leaves keeps the other ingredients from flavoring the lettuce. Instead, I whisked the dressing ingredients thoroughly, then dressed the leaves with the mixture.

The only ingredient in this recipe that struck me as unusual was the coddled egg. Coddled eggs are cooked in boiling water for about one minute, so, yeah, they’re still mostly raw. I didn’t tell Dave about the raw-ish egg in the salad, and I tried not to think about it myself. I’m not worried about salmonella, I’m just grossed out by eating raw egg white. But I really don’t think the salad would have been as good without it. The egg gives the dressing not only smoothness and body, but a pleasant rich, but not overwhelmingly eggy, flavor.

Alton’s croutons are really exceptional. I had my doubts that grinding the garlic into the oil and then straining the oil to toast the bread in would add enough garlic flavor, but they were extremely garlicky and delicious.

Because I’m a flake, and I forgot while planning this meal that one of the key parts of Caesar salad is the croutons, I made Deb’s pizza bianca to go with the salad. I used my pizza dough recipe instead of the one she gives (although they’re very similar) and followed the directions in the recipe for forming the dough. (Keep in mind that Deb rolled her dough out much thinner.) Also, because Peter Reinhart’s constant reminders that a slow rise is better for artisan breads has stuck with me, I made the dough the day before (with less yeast) and let it rise in the refrigerator overnight. The next day I took it out and let it come to room temperature, then shaped it and put it back in the fridge until I wanted to bake it. It was very good. The only thing I’ll change next time is to use less olive oil on the top, because “Oh my god, there’s a fire in the oven!” aren’t words Dave likes to hear from me when I’m cooking.

Hail Caesar Salad (from Alton Brown’s Good Eats)

Bridget note: I made a few changes to the recipe. I dried the bread as slices instead of cut up into bite-size pieces, because they were easier to cut once they were dried. I didn’t use kosher salt. I found 2 cups of water to be far too little to be able to cover the eggs. I probably used a bit more Worcestershire sauce and Parmesan cheese.

1 loaf day old Italian bread
3 garlic cloves, mashed
9 tablespoons extra virgin olive oil
¼ teaspoon plus 1 pinch kosher salt
2 eggs
2 heads romaine lettuce, inner leaves only
7 grinds black pepper
1 lemon, juiced
6 drops Worcestershire sauce
¼ cup grated Parmesan cheese

Heat oven to 350 degrees.

Cut ½ to ¾-inch croutons from the loaf of bread and place on a baking sheet and put into the oven until dry but not browned.

Use a mortar and pestle to mash the garlic with 4 tablespoons of oil and 1/4 teaspoon kosher salt. Strain the oil into a skillet over medium heat. Add the dried croutons and fry, tossing constantly until all of the oil is absorbed and the croutons turn gold. Set aside.

Bring 2 cups water to a boil in a small saucepan. Add the eggs and cook for 1 minute. Chill in ice water to halt cooking. Set aside.

In a very large bowl, tear lettuce and toss with 3 tablespoons of olive oil. Sprinkle with the remaining kosher salt and the black pepper. Add the remaining olive oil. Toss well. Add the lemon juice and Worcestershire sauce. Break in the eggs. Toss until a creamy dressing forms. Toss in Parmesan cheese and serve with croutons.

sichuan green beans

I’m not very good at mise en place. I know that isn’t a sign of a particularly good cook, but I must be getting better lately because the kitchen isn’t so messy when I’m done cooking. I didn’t do a good job with this recipe though. I read “cook beans for 5-8 minutes” and I think Perfect! I’ll have just enough time to mince garlic, chop ginger, get the pork out of the fridge, measure out 3 liquids and 5 powders for the sauce, and slice the scallions! While stirring frequently. Dork.

Sichuan green beans was one of my favorite meals to make when I lived alone, and I still make it fairly often for me and Dave. It’s a quick, easy, balanced, healthy one pot meal. The recipe (according the Cooks Illustrated article) is based on a traditional Chinese meal involving deep-fried green beans. This recipe gets the same effect with just a couple tablespoons of oil over very high heat. The beans are cooked until they’re shriveled and blackened. It sounds like they’d be overcooked and soggy, but I swear they’re not. They’re crisp and sweet. It’s similar to what you get when you roast vegetables.

I did a quick scan on the internet of similar recipes, but I can see immediately that they’re not going to get the same sweet crunchiness out of the green beans. One steams the beans separately, one adds water to the pan to steam/boil them in the pan, one sautés them for a few minutes over medium heat. Bland (and extra work and dishes), boring, raw. No good. The high heat searing is necessary to get the most flavor out of the beans. I tried using Chinese long beans for this recipe once, but I actually didn’t like it as much. Besides costing far more than regular green beans, they weren’t as sweet.

The rest of the recipe is no problem. Cook some ground pork, add garlic and ginger, stir in some sauce ingredients, serve over white rice. You can leave the pork out and add shiitakes instead. This would make a nice side dish, but doesn’t have any protein source for a full meal. Either way, just make sure you do your chopping and measuring before you do your cooking. Otherwise you’ll be scrambling around like a dork, like I was.

Stir-Fried Sichuan Green Beans (from Cooks Illustrated January 2007)

Serves 4 as a side dish or 2 as a main course

CI note: To make this dish vegetarian, substitute 4 ounces of shiitake mushrooms, stemmed and minced, for the pork. If using mushrooms, you will need to add a teaspoon of oil to the pan in step 3 before adding the mushrooms. The cooking of this dish goes very quickly, so be sure to have all of the ingredients prepped before you start. Serve this dish with steamed white rice.

2 tablespoons soy sauce
1 tablespoon dry sherry
1 teaspoon sugar
½ teaspoon cornstarch
¼ teaspoon ground white pepper
¼ teaspoon red pepper flakes
¼ teaspoon dry mustard
2 tablespoons water
2 tablespoons vegetable oil
1 pound green beans, ends trimmed, cut into 2-inch pieces
¼ pound ground pork
3 medium cloves garlic, minced or pressed through a garlic press (about 1 tablespoon)
1 tablespoon minced fresh ginger
3 scallions, white and light green parts sliced thin
1 teaspoon toasted sesame oil

1. In small bowl, stir together soy sauce, sherry, sugar, cornstarch, white pepper, pepper flakes, mustard, and water until sugar dissolves; set aside.

2. Heat oil in 12-inch nonstick skillet over high heat until just smoking. Add beans and cook, stirring frequently, until crisp-tender and skins are shriveled and blackened in spots, 5 to 8 minutes (reduce heat to medium-high if beans darken too quickly). Transfer beans to large plate.

3. Reduce heat to medium-high and add pork to now-empty skillet. Cook, breaking pork into small pieces, until no pink remains, about 2 minutes. Add garlic and ginger; cook, stirring constantly, until fragrant, 15 to 20 seconds. Stir sauce to recombine and return beans to pan with sauce. Toss and cook until sauce is thickened, 5 to 10 seconds. Remove pan from heat and stir in scallions and sesame oil. Serve immediately.

Per Serving:
Cal 200; Fat 14 g; Sat fat 3 g; Chol 20 mg; Carb 12 g; Protein 8 g; Fiber 4 g; Sodium 680 mg

whole wheat pasta with greens, beans, tomatoes, and garlic chips

copy-of-dscn4711.jpg

Dave recently told me that he’d prefer to eat less meat. Because I do all of the meal planning and cooking, we generally have an understanding that I get control over what we eat. On the other hand, Dave is so open-minded about what we eat that it’s fair for him to offer up some opinions.

And our meat intake has increased in the last few months. We used to eat meat around 1-3 times per week, and lately we’ve been eating vegetarian around 1-3 times per week. Because I have more free time lately, I’ve been more adventurous with my cooking, and because I don’t have as much experience cooking with meat, it’s more challenging for me. (In other words, I’m not very good at it.)

But Dave’s right, we should eat less meat. For our health, for our budget, for the environment.

This recipe for whole wheat pasta with greens, beans, tomatoes, and garlic chips is definitely Dave’s type of meal.

copy-of-dscn4709.jpg

This is only a quarter of the kale the recipe calls for, or just under one serving. (I cut the recipe in half, and accidentally only bought half as much kale as I needed.) Hey, he asked for more vegetables…

The pasta, wholesome though it is, is surprisingly flavorful. A dish like this lends itself well to personalization. I left out the olives, because they’re one of Dave’s few food hang-ups. Because I only made half the recipe for the two of us, I’m left with half a can of beans and half a can of tomatoes leftover. I plan on doubling those ingredients in the future so I can use the whole can. I only used half the amount of kale the recipe calls for, which was convenient because it was one bunch. I could see how more would be good, although I don’t know if I’d want twice as much.

The recipe did take longer to prepare than I prefer for a weeknight pasta dish. Using bags of pre-washed spinach would cut down on prep time and cooking time. The garlic chips are a nice addition, but could also be skipped to save time.

All in all, this was a great tasting dish with lots of vegetables and no meat, as per Dave’s request.

copy-of-dscn4716.jpg

Whole Wheat Pasta with Greens, Beans, Tomatoes, and Garlic Chips (from Cooks Illustrated November 2005)

Serves 4 to 6

CI note: If you can’t find a 13.25-ounce package of Ronzoni, the winner of our tasting, use ¾ pound of a whole wheat pasta of your choice. If you like, pass extra-virgin olive oil for drizzling over the finished pasta. For a vegetarian dish, substitute vegetable broth for chicken broth.

Variation: Spinach can be substituted for the greens. Replace kale or collards with two 10-ounce bags of crinkly-leaf spinach, trimmed, chopped into 1-inch pieces, and rinsed, water still clinging to leaves (about 16 cups), and reducing chicken broth to ¾ cup. After adding second half of spinach to pan, cook for 2 minutes, until spinach is completely wilted. Continue with recipe as directed.

3 tablespoons olive oil
8 cloves garlic, 5 cloves sliced thin lengthwise, 3 cloves minced or pressed through garlic press (1 tablespoon)
Table salt
1 medium onion, diced small (about 1 cup)
½ teaspoon hot red pepper flakes
14 cups kale (loosely packed) or collard greens (1 to 1½ pounds), thick stems trimmed, leaves chopped into 1-inch pieces and rinsed, water still clinging to leaves
1½ cups low-sodium chicken broth
1 can (14½ ounces) diced tomatoes, drained
1 can (15 ounces) cannellini beans, drained and rinsed
¾ cup pitted kalamata olives, roughly chopped
13¼ ounces whole wheat spaghetti
2 ounces Parmesan cheese, finely grated (about 1 cup), plus additional for serving
Ground black pepper

1. Heat oil and sliced garlic in 12-inch straight-sided sauté pan over medium-high heat. Cook, stirring and turning frequently, until light golden brown, about 3 minutes. Using slotted spoon, transfer garlic to plate lined with paper towels. Sprinkle lightly with salt.

2. Add onion to pan; cook until starting to brown, about 5 minutes. Add minced garlic and red pepper flakes; cook, stirring constantly, until garlic is fragrant, about 30 seconds.

3. Add half of greens to pan; using tongs, toss occasionally, until starting to wilt, about 2 minutes. Add remaining greens, broth, and ¾ teaspoon salt; cover (pan will be very full); increase heat to high and bring to strong simmer. Reduce heat to medium and cook, covered, tossing occasionally, until greens are tender, about 15 minutes (mixture will be somewhat soupy). Stir in beans and olives.

4. Meanwhile, bring 4 quarts water to boil in Dutch oven over high heat. Add spaghetti and 1 tablespoon salt; cook until pasta is just shy of al dente. Drain pasta and return to pot. Add greens mixture to pasta, set over medium-high heat, and toss to combine. Cook until pasta absorbs most of liquid, about 2 minutes. Stir in 1 cup Parmesan; adjust seasoning with salt and pepper. Serve immediately, passing garlic chips, extra-virgin olive oil, and Parmesan separately.

sushi

14.jpg

Sometimes I don’t know what gets into me. Last week, I became determined to make my own sushi. But what possible good could this serve? I certainly wasn’t expecting to exceed the quality of the sushi restaurants I’ve been to. I couldn’t, or at least didn’t want to, make it any healthier. And with the specialized tools and ingredients I’d need to buy, homemade sushi promised to be similar in price to eating out. Finally I realized that I wanted to make sushi for the simplest of reasons – for fun.

But I was intimidated. I had difficulty finding precise recipes for sushi rolls. I also wanted to make a variety of rolls with a minimum of ingredients. Not being a spontaneous cook, I did a lot of research and took notes on exactly what I’d need to buy and prepare.

I decided to stick to one fish type (tuna, this time) for four different rolls. I made adapted versions of Philadelphia rolls (fish, cream cheese, cucumber), California rolls (fish, cucumber, avocado), spicy tuna rolls (tuna, avocado, scallion, spicy mayonnaise), and sort of a spider roll (tuna, tempura bits, cucumber), plus a few nigiri.

I settled on Alton Brown’s sushi rice recipe. The rice is cooked similar to standard long-grain rice, except without salt, and then a mixture of rice vinegar, salt, and sugar is poured over the cooked rice and folded in. The rice must be fanned while it cools so that the starches on the surface…something. I can’t remember. Just fan it until it’s near room temperature, and be gentle with stirring. I used a paper plate to fan the rice. If you have an electric fan nearby, that would work great.

2b.jpg

Obviously the fillings must be prepared before any rolling starts. I’m not usually great at mise en place, but I didn’t have a choice this time. This picture shows, clockwise from the upper left, mayonnaise mixed with ancho chile powder, toasted sesame seeds, tempura bits, cucumber, scallion, cream cheese, and avocado. I never did mix in enough chile powder to make the mayonnaise spicy enough, plus I should have used more mayonnaise. For the tempura, I simply mixed up a bit of batter and fried it. I peeled one strip of cucumber and not the other two, and I do prefer it peeled. The avocado I brushed with lemon juice so that it wouldn’t brown.

43.jpg

Alton’s California roll recipe recommends cutting the nori (seaweed) sheets in half. At first I didn’t, which is what this picture shows. However, they should be smaller. You don’t want to spiral your fillings, you just want to enclose them. I found half a sheet to be a little too small for the amount of filling I used, but a full sheet was far too big.

51.jpg

The relatively more simple method of rolling is shown above, where everything, including the rice, is inside the nori. Slightly more complicated is the inside-out roll, where the rice is on the outside.

61.jpg

Except that, it didn’t actually end up being more complicated. I was pleasantly surprised when it actually…worked.

71.jpg

Look at that, a sushi burrito. Mmm…sushi burrito. Unfortunately, sushi isn’t, in fact, eaten in burrito form. It is cut into “bite-size” pieces. Except I don’t know whose bite-size, because sushi rolls are always way too big for me. Anyway, cutting the rolls was the only part of the process that was really frustrating, and I recognize that the problem is my dull knives, but I don’t have an immediate solution. I found that a serrated knife worked better on the inside-out rolls.

8.jpg

…My display needs some work. By this point, I was frustrated with the cutting and worried about the raw fish sitting at room temperature while I figured out how the hell to make sushi. Plus sushi rice? Is sticky. Moving around individual pieces inevitably resulted in rice stuck to my hands and the plate. I decided aesthetics be damned, it was time to eat.

Overall, it was good. Probably as tasty as a restaurant’s, although obviously not nearly as pretty. I’m sure I can improve on that with time, even though I don’t plan on buying any special platters for sushi. I’ll make it again, at least until I use up the ingredients I had to buy. As far as a cost comparison goes, Dave and I generally spend $30-40 on a sushi dinner, and including the special equipment and ingredients that I won’t need to buy again for a while, this meal was $25. Next time I’ll use a cheaper fish, and I can probably make sushi for under $10. The preparation should also be far easier now that I’ve done it once. But I don’t see this becoming a regular thing for me. I think I’ll leave sushi-making to the professionals.

Sushi recipes/method

Serves 2

Sushi rice (adapted from Alton Brown)

1 cup sushi or short grain rice
1 cup water
1 tablespoons rice vinegar
1 tablespoons sugar
½ teaspoon salt

Rinse rice.

Place the rice and water into a medium saucepan and place over high heat. Bring to a boil, uncovered. Once it begins to boil, reduce the heat to the lowest setting and cover. Cook for 15 minutes. Remove from the heat and let stand, covered, for 10 minutes.

Combine the rice vinegar, sugar and salt in a small bowl and heat in the microwave on high for 30 to 45 seconds. Transfer the rice into a large wooden or glass mixing bowl and add the vinegar mixture. Fold and cut thoroughly to combine and coat each grain of rice with the mixture. Fan until rice is near room temperature. Do not refrigerate.

Ingredient preparation

Mix ¼ teaspoon of ancho chile powder into 1 tablespoon mayonnaise
Toast and cool 2 teaspoons sesame seeds
Tempura-mix 1 tablespoon flour, 1 tablespoon ice water, 1 teaspoon egg – cook in hot oil
Seed and peel cucumber and cut 3 ¼-square strips
Cut green part of green onion
Shape ¾ ounce cream cheese into strip
Cut nori in half crosswise (or not…see text)
Peel and pit avocado, cut into 2 strips, brush with lemon juice to prevent browning
Cut fish into strips

Rolling

Fill medium-sized bowl with cold water. Cover bamboo mat with plastic wrap.

Regular rolls:
Lay 1 sheet of nori, shiny side down, on the plastic covered mat. Wet your fingers with water and spread ½ cup of the rice evenly onto the nori, leaving 1 inch of far side bare. Lay filling near edge of mat closest to you. Grab the edge of the mat closest to you, keeping the fillings in place with your fingers, and roll it into a tight cylinder, using the mat to shape the cylinder. Lay it seam side down while you form the other rolls. Cut into 6-8 pieces.

Inside-out rolls:
Lay 1 sheet of nori, shiny side down, on the plastic covered mat. Wet your fingers with water and spread ½ cup of the rice evenly onto the nori. Sprinkle the rice with sesame seeds (optional). Turn the sheet of nori over so that the rice side is down. Lay filling near edge of mat closest to you. Grab the edge of the mat closest to you, keeping the fillings in place with your fingers, and roll it into a tight cylinder, using the mat to shape the cylinder. Lay it seam side down while you form the other rolls. Cut into 6-8 pieces.

Fillings:
“Philadelphia”: cream cheese, fish, cucumber
“California”: fish, avocado, cucumber, sesame seeds
“Spicy tuna”: avocado, fish, mayonnaise (1 tbsp), green onion (1 stalk, green parts only)
“Spider”: fish, cucumber, tempura

four soups

1-copy.jpg

I have backlog of soups to be blogged, so I’m going to throw them all into one soupfest entry.

First up is lentil soup, which I was excited about because I found the fancy French lentils, but it seems like I’m cursed to never quite have all the right ingredients for this soup. The first time I made it, I was entrenched in step 3, after the vegetables are softened and the lentils are darkened, adding the wine, and running out of wine. Eh. I played around with some other acidic ingredients, and ended up with a delicious but teensy bit vinegary soup. This time it was chicken broth that I ran out of. Chicken broth! I never run out of chicken broth! I carefully monitor my Better Than Bouillon supply because I loooove Better Than Bouillon. Bummer. I substituted some vegetable (not better than) bouillon. Still a damn good soup. And healthy! The only non-healthy item in the whole thing is a few slices of bacon. That’s nothing.

4-copy.jpg

Next up is white chicken chili. This is the second time I’ve made this recipe, and I seem to remember liking it more the first time. It was far from bad this time – look at all that flavory goodness, how could it be bad?

2-copy.jpg

I just didn’t feel excited about it. Maybe it would have been as simple as adding salt. Another possibility is that adding 50% more beans than the recipe called for made the soup a little bland. I will make it again, but it’s on trial.

5-copy.jpg

Poor cream of mushroom soup. It’s been relegated to nothing more than an ingredient in bad casseroles, so when I saw a recipe for the real deal, I did a double take. People actually eat mushroom soup? Unheard of! Dave and I are both big mushroom fans, so I was excited about this soup. Unfortunately, it just didn’t deliver. It wasn’t bad, it was just so dominated by pureed mushrooms. It was a little intense, even for mushroom lovers like us. Maybe because I used all cremini mushrooms instead of the button mushrooms that the recipe calls for? Whatever, next time I’ll be trying this highly recommended recipe.

6-copy.jpg

And finally, we have my favorite of these four soups. I served this hot and sour soup with the potstickers, which we’re a little crazy about, so this soup had a tough job standing up to that. But it holds it’s own, oh yes. I loved the moo shu I made a few weeks ago, and this has most of the same ingredients, but in soup form. I also really like when tofu is used in recipes where it’s actually the original ingredient, instead of covering for some maligned but more flavorful meat. Mmm, and black vinegar. This is good stuff. And I’m all about the texture that the cornstarch gives the soup. It doesn’t thicken it to a paste, it just provides a little body. The soup has so many strong and contrasting flavors, I just love it. And, it’s healthy! In fact, it’s so light, that I don’t know if I can recommend serving it as a meal on its own. I made the full recipe, we ate it with potstickers for two meals, and then we snacked on it throughout the week. I wasn’t complaining about having hot and sour soup around all week!

So there you have it – a January’s worth of soups. Yum!

Hearty Lentil Soup (from Cooks Illustrated)

Lentils du Puy, sometimes called French green lentils, are our first choice for this recipe, but brown, black, or regular green lentils are fine, too. Note that cooking times will vary depending on the type of lentils used. Lentils lose flavor with age, and because most packaged lentils do not have expiration dates, try to buy them from a store that specializes in natural foods and grains. Before use, rinse and then carefully sort through the lentils to remove small stones and pebbles. The soup can be made in advance. After adding the vinegar in step 2, cool the soup to room temperature and refrigerate it in an airtight container for up to 2 days. To serve, heat it over medium-low until hot, then stir in the parsley.

Makes about 2 quarts, serving 4 to 6

3 slices bacon (about 3 ounces), cut into ¼-inch pieces
1 large onion, chopped fine (about 1½ cups)
2 medium carrots, peeled and chopped medium (about 1 cup)
3 medium cloves garlic, minced or pressed through garlic press (about 1 tablespoon)
1 can (14½ ounces) diced tomatoes, drained
1 bay leaf
1 teaspoon minced fresh thyme leaves
1 cup lentils (7 ounces), rinsed and picked over
1 teaspoon table salt
ground black pepper
½ cup dry white wine
4½ cups low-sodium chicken broth
1½ cups water
1½ teaspoons balsamic vinegar
3 tablespoons minced fresh parsley leaves

1. Fry bacon in large stockpot or Dutch oven over medium-high heat, stirring occasionally, until fat is rendered and bacon is crisp, 3 to 4 minutes. Add onion and carrots; cook, stirring occasionally, until vegetables begin to soften, about 2 minutes. Add garlic and cook until fragrant, about 30 seconds. Stir in tomatoes, bay leaf, and thyme; cook until fragrant, about 30 seconds. Stir in lentils, salt, and pepper to taste; cover, reduce heat to medium-low, and cook until vegetables are softened and lentils have darkened, 8 to 10 minutes. Uncover, increase heat to high, add wine, and bring to simmer. Add chicken broth and water; bring to boil, cover partially, and reduce heat to low. Simmer until lentils are tender but still hold their shape, 30 to 35 minutes; discard bay leaf.

2. Puree 3 cups soup in blender until smooth, then return to pot; stir in vinegar and heat soup over medium-low until hot, about 5 minutes. Stir in 2 tablespoons parsley and serve, garnishing each bowl with some of remaining parsley.

White Chicken Chili (from Cooks Illustrated)

Adjust the heat in this dish by adding the minced ribs and seeds from the jalapeño as directed in step 6. If Anaheim chiles cannot be found, add an additional poblano and jalapeño to the chili. This dish can also be successfully made by substituting chicken thighs for the chicken breasts. If using thighs, increase the cooking time in step 4 to about 40 minutes. Serve chili with sour cream, tortilla chips, and lime wedges.

Serves 6 to 8

3 pounds bone-in, skin-on chicken breast halves, trimmed of excess fat and skin
Table salt and ground black pepper
1 tablespoon vegetable oil
3 medium jalapeño chiles
3 poblano chiles (medium), stemmed, seeded, and cut into large pieces
3 Anaheim chile peppers (medium), stemmed, seeded, and cut into large pieces
2 medium onions, cut into large pieces (2 cups)
6 medium cloves garlic, minced or pressed through garlic press (about 2 tablespoons)
1 tablespoon ground cumin
1½ teaspoons ground coriander
2 (14.5-ounce) cans cannellini beans, drained and rinsed
3 cups low-sodium chicken broth
3 tablespoons fresh lime juice (from 2 to 3 limes)
¼ cup minced fresh cilantro leaves
4 scallions, white and light green parts sliced thin
1. Season chicken liberally with salt and pepper. Heat oil in large Dutch oven over medium-high heat until just smoking. Add chicken, skin side down, and cook without moving until skin is golden brown, about 4 minutes. Using tongs, turn chicken and lightly brown on other side, about 2 minutes. Transfer chicken to plate; remove and discard skin.

2. While chicken is browning, remove and discard ribs and seeds from 2 jalapeños; mince flesh. In food processor, process half of poblano chiles, Anaheim chiles, and onions until consistency of chunky salsa, ten to twelve 1-second pulses, scraping down sides of workbowl halfway through. Transfer mixture to medium bowl. Repeat with remaining poblano chiles, Anaheim chiles, and onions; combine with first batch (do not wash food processor blade or workbowl).

3. Pour off all but 1 tablespoon fat from Dutch oven (adding additional vegetable oil if necessary) and reduce heat to medium. Add minced jalapeños, chile-onion mixture, garlic, cumin, coriander, and ¼ teaspoon salt. Cover and cook, stirring occasionally, until vegetables soften, about 10 minutes. Remove pot from heat.

4. Transfer 1 cup cooked vegetable mixture to now-empty food processor workbowl. Add 1 cup beans and 1 cup broth and process until smooth, about 20 seconds. Add vegetable-bean mixture, remaining 2 cups broth, and chicken breasts to Dutch oven and bring to boil over medium-high heat. Reduce heat to medium-low and simmer, covered, stirring occasionally, until chicken registers 160 degrees (175 degrees if using thighs) on instant-read thermometer, 15 to 20 minutes (40 minutes if using thighs).

5. Using tongs, transfer chicken to large plate. Stir in remaining beans and continue to simmer, uncovered, until beans are heated through and chili has thickened slightly, about 10 minutes.

6. Mince remaining jalapeño, reserving and mincing ribs and seeds (see note above), and set aside. When cool enough to handle, shred chicken into bite-sized pieces, discarding bones. Stir shredded chicken, lime juice, cilantro, scallions, and remaining minced jalapeño (with seeds if desired) into chili and return to simmer. Adjust seasonings with salt and pepper and serve.

Per Serving:
Cal 370; Fat 6 g; Sat fat 1 g; Chol 115 mg; Carb 25 g; Protein 52 g; Fiber 7 g; Sodium 710 mg

Creamy Mushroom Soup (from Cooks Illustrated)

To make sure that the soup has a fine, velvety texture, puree it hot off the stove, but do not fill the blender jar more than halfway, as the hot liquid may cause the lid to pop off the jar.

Makes 8 cups, serving 6 to 8

6 tablespoons unsalted butter
6 large shallots, minced (about 3/4 cup)
2 small cloves garlic, minced (about 1 1/2 teaspoons)
½ teaspoon ground nutmeg, freshly grated
2 pounds white button mushrooms, wiped clean and sliced 1/4 inch thick
3½ cups chicken stock or canned low-sodium chicken broth
4 cups hot water
½ ounce dried porcini mushrooms, rinsed well
1/3 cup dry sherry or Madeira
1 cup heavy cream
2 teaspoons lemon juice from 1 lemon
Table salt and ground black pepper

Sauteed Wild Mushroom Garnish (optional)
2 tablespoons unsalted butter
8 ounces shiitake mushrooms or chanterelle, oyster, or cremini mushrooms, stems
trimmed and discarded, mushrooms wiped clean and sliced thin
Table salt and ground black pepper

1. Melt butter in large, heavy-bottomed Dutch oven over medium-low heat; when foaming subsides, add shallots and saute, stirring frequently, until softened, about 4 minutes. Stir in garlic and nutmeg; cook until fragrant, about 1 minute longer. Increase heat to medium; add sliced mushrooms and stir to coat with butter. Cook, stirring occasionally, until mushrooms release liquid, about 7 minutes. Reduce heat to medium-low, cover pot, and cook, stirring occasionally, until softened and mushrooms have released all liquid, about 20 minutes. Add chicken stock, water, and porcini mushrooms; cover and bring to simmer, then reduce heat to low and simmer until mushrooms are fully tender, about 20 minutes longer.

2. Pour soup into a large bowl. Rinse and dry Dutch oven. Puree soup in batches in blender until smooth, filling blender jar only halfway for each batch. Return soup to Dutch oven; stir in Madeira and cream and bring to simmer over low heat. Add lemon juice, season to taste with salt and pepper, and serve with sauteed mushroom garnish, if desired. (Can be cooled to room temperature and refrigerated up to 4 days.) If making ahead, add cream at serving time.

3. For the Sauteed Wild Mushroom Garnish (optional): Heat butter in medium skillet over low heat; when foam subsides, add mushrooms and sprinkle with salt and pepper. Cover and cook, stirring occasionally, until mushrooms release their liquid, about 10 minutes for shiitakes and chanterelles, about 5 minutes for oysters, and about 9 minutes for cremini. Uncover and continue to cook, stirring occasionally, until liquid released by mushrooms has evaporated and mushrooms are browned, about 2 minutes for shiitakes, about 3 minutes for chanterelles, and about 2 minutes for oysters and cremini. Sprinkle a portion of mushrooms over individual bowls of soup and serve.

Hot and Sour Soup (from Cooks Illustrated)

To make slicing the pork chop easier, freeze it for 15 minutes. We prefer the distinctive flavor of Chinese black vinegar; look for it in Asian supermarkets. If you can’t find it, a combination of red wine vinegar and balsamic vinegar approximates its flavor. This soup is very spicy. For a less spicy soup, omit the chili oil altogether or add only 1 teaspoon.

Serves 6 to 8 as an appetizer

7 ounces extra-firm tofu, drained
4 tablespoons soy sauce
1 teaspoon toasted sesame oil
3 tablespoons cornstarch, plus an additional 1 1/2 teaspoons
1 boneless, center-cut, pork loin chop (1/2 inch thick, about 6 ounces), trimmed of fat and cut into 1 inch by 1/8-inch matchsticks
3 tablespoons cold water, plus 1 additional teaspoon
1 large egg
6 cups low-sodium chicken broth
1 cup bamboo shoots (from one 5-ounce can), sliced lengthwise into 1/8-inch-thick strips
4 ounces fresh shiitake mushrooms, stems removed, caps sliced 1/4 inch thick (about 1 cup)
5 tablespoons black Chinese vinegar or 1 tablespoon red wine vinegar plus 1 tablespoon balsamic vinegar (see note above)
2 teaspoons chili oil (see note above)
1 teaspoon ground white pepper
3 medium scallions, sliced thin

1. Place tofu in pie plate and set heavy plate on top. Weight with 2 heavy cans; let stand at least 15 minutes (tofu should release about ½ cup liquid). Whisk 1 tablespoon soy sauce, sesame oil, and 1 teaspoon cornstarch in medium bowl; toss pork with marinade and set aside for at least 10 minutes (but no more than 30 minutes).

2. Combine 3 tablespoons cornstarch with 3 tablespoons water in small bowl and mix thoroughly; set aside, leaving spoon in bowl. Mix remaining ½ teaspoon cornstarch with remaining 1 teaspoon water in small bowl; add egg and beat with fork until combined. Set aside.

3. Bring broth to boil in large saucepan set over medium-high heat. Reduce heat to medium-low; add bamboo shoots and mushrooms and simmer until mushrooms are just tender, about 5 minutes. While broth simmers, dice tofu into ½-inch cubes. Add tofu and pork, including marinade, to soup, stirring to separate any pieces of pork that stick together. Continue to simmer until pork is no longer pink, about 2 minutes.

4. Stir cornstarch mixture to recombine. Add to soup and increase heat to medium-high; cook, stirring occasionally, until soup thickens and turns translucent, about 1 minute. Stir in vinegar, chili oil, pepper, and remaining 3 tablespoons soy sauce; turn off heat.

5. Without stirring soup, use soupspoon to slowly drizzle very thin streams of egg mixture into pot in circular motion. Let soup sit 1 minute, then return saucepan to medium-high heat. Bring soup to gentle boil, then immediately remove from heat. Gently stir soup once to evenly distribute egg; ladle into bowls and top with scallions.

Per Serving:
Cal 120; Fat 5 g; Sat fat 1 g; Chol 12 mg; Carb 12 g; Protein 8 g; Fiber 1 g; Sodium 1110 mg

two dips

11.jpg

This post comes too late. Two days ago, everyone was planning their snacks for the Superbowl. Today, we’re recovering from overeating, overdrinking, and how did the Giants beat the Patriots? But I think these dishes have their place on any day. Now that I’ve tried them myself and can attest to their success, I offer them to you.

First, a dip for crudite that is healthy and tasty. I am not one to sacrifice flavor to make low-fat dishes; I’d rather eat less of great food than more of subpar food. But if I can get great flavor and good nutrition in one dish, I won’t complain. Most dips use mayonnaise and sour cream as a base – two foods that are almost pure fat. This dip uses pureed cottage cheese as a base, plain yogurt for acidity, and a (relatively) small amount of mayonnaise for tartness. The star of the show is sundried tomatoes, with garlic singing backup. It was a really great dip – I was surprised that we ate that whole plate of vegetables.

21.jpg

The other dip I have to offer is a chemical-free queso. My favorite queso recipe used to be 8 ounces of Velveeta + 1 can of condensed cream of mushroom soup + 1 can of Ro-tel tomatoes. However, I am now adverse to processed foods. Why eat “cheese product” when I can eat cheese? So I set out to make queso reminiscent of my favorite recipe, but without the processed ingredients. It was easy cheesy. (Heehee.) Same taste, real food. Gotta love that.

If you want to add interest to your vegetables, or enjoy chips with spicy melted cheese goodness, but don’t want to compromise your health, you have two new options.

Sun-dried Tomato Dip (adapted from epicurious)

Makes about 2 cups

4 garlic cloves, unpeeled
¼ teaspoon salt
12 oil-packed sun-dried tomatoes, drained
1 cup cottage cheese
1/3 cup plain yogurt
¼ cup mayonnaise

Place garlic in dry skillet over medium heat. Cook, stirring occasionally, until spotty golden brown. Remove peels and discard. Mince garlic in food processor with salt. Add tomatoes and process until chopped. Add cottage cheese and process until smooth. Add remaining ingredients and process to blend. Season with salt. (Can be made 1 day ahead. Chill.)

Serve with vegetables.

Queso

Makes about 2 cups

The jalapeno could be added with the tomatoes, or with the butter. I wasn’t sure how spicy the dip would be without it, so I waited until the end to add it.

Cheddar adds flavor but can be grainy when melted. Monterey jack cheese melts smoothly.

1 tablespoon butter
1½ tablespoon flour
1 cup milk
1 (10-ounce) can Ro-tel diced tomatoes and green chiles, undrained
2 ounces cheddar cheese, shredded
2 ounces Monterey jack cheese, shredded
¼ teaspoon salt
1 jalapeno, minced

Melt butter over medium heat. Once it foams, whisk in flour. Whisk constantly for 1 minute, then gradually whisk in milk. Bring mixture to boil over medium heat, stirring occasionally. Once boiling, reduce heat to medium and simmer for 5 minutes, stirring occasionally. Stir in tomatoes and chiles and bring to a simmer. Add remaining ingredients. Stir until cheese melts. Serve with tortilla chips.

potstickers

11.jpg


I am not good at timing my cooking. I had grand plans for these potstickers to be part of an all day sporadic eating event during the NFL championship games. We’d eat potstickers in the first game, hot and sour soup at the beginning of the second game, and dessert sometime later. But my timing is so bad that I ended up sitting down with a plate full of potstickers right during halftime of the first game. Boring!

My plan got another wrench thrown in it after our first plate of potstickers, when we looked at each other and both said “we want more!” It’s always like that when I make potstickers – neither of us can ever get enough!

Another thing that’s great about potstickers is that they adapt to your schedule. You can make the filling and then forget about it until you’re ready, even if it isn’t until the next day. You can fill the potstickers and then forget about them for months! This time, I filled enough for our first serving, and then filled some more when we decided that we absolutely had to have more. I left the rest of the filling in the fridge overnight, formed more dumplings the next afternoon, and steamed them when we wanted to eat dinner. I was planning on freezing some for later, but it was clear early on that that wasn’t happening.

3.jpg

And you know what else? They’re actually healthy. Look at those ingredients – 3 cups minced cabbage, scallions, egg whites. Two tablespoons of oil in the whole thing, and to be honest, you won’t need that much with a good nonstick pan. I bet I only used a few teaspoons. So we can eat all we want!

2.jpg

Pork and Cabbage Dumplings – Wor Tip (from Cooks Illustrated)

We prefer to use gyoza wrappers. You can substitute wonton wrappers, but the cooking time in step 4 will be reduced from 10 minutes to 5 or 6 minutes and note that the yield will increase to 40 potstickers (see chart below Step 4 for more information). These dumplings, also known as potstickers, are best served hot from the skillet; we recommend that you serve the first batch immediately, then cook the second batch. To freeze, place filled, uncooked dumplings in the freezer in a single layer on a plate until frozen, then transfer to a storage bag. There’s no need to thaw frozen dumplings; just proceed with the recipe.

Makes 24 dumplings, 6 first course servings

Filling
3 cups minced napa cabbage leaves (about ½ medium head)
¾ teaspoon table salt
¾ pound ground pork
4 minced scallions (about 6 tablespoons)
2 egg whites, lightly beaten
4 teaspoons soy sauce
1½ teaspoons minced or grated fresh ginger
1 medium garlic clove, minced or pressed through a garlic press (about 1 teaspoon)
1/8 teaspoon ground black pepper

Dumplings
24 round gyoza wrappers (see note)
2 tablespoons vegetable oil
1 cup water, plus extra for brushing
1. For the filling: Toss cabbage with the salt in colander set over a bowl and let stand until cabbage begins to wilt, about 20 minutes. Press the cabbage gently with rubber spatula to squeeze out any excess moisture, the transfer to a medium bowl. Add the remaining filling ingredients and mix thoroughly to combine. Cover with plastic wrap and refrigerate until mixture is cold, at least 30 minutes or up to 24 hours.

2. For the dumplings: Working with 4 wrappers at a time (keep the remaining wrappers covered with plastic wrap), follow the photos below to fill, seal, and shape the dumplings using a generous 1 teaspoon of the chilled filling per dumpling. Transfer the dumplings to a baking sheet and repeat with the remaining wrappers and filling; you should have about 24 dumplings. (The dumplings can be wrapped tightly with plastic wrap and refrigerated for up to 1 day, or frozen for up to 1 month. Once frozen, the dumplings can be transferred to a zipper-lock bag to save space in the freezer; do not thaw before cooking.)

3. Line a large plate with a double layer of paper towels; set aside. Brush 1 tablespoon of the oil over the bottom of a 12-inch nonstick skillet and arrange half of the dumplings in the skillet, with a flat side facing down (overlapping just slightly if necessary). Place the skillet over medium-high heat and cook the dumplings, without moving, until golden brown on the bottom, about 5 minutes.

4. Reduce the heat to low, add ½ cup of the water, and cover immediately. Continue to cook, covered, until most of the water is absorbed and the wrappers are slightly translucent, about 10 minutes. Uncover the skillet, increase the heat to medium-high, and continue to cook, without stirring, until the dumpling bottoms are well browned and crisp, 3 to 4 minutes more. Slide the dumplings onto the paper towel-lined plate, browned side facing down, and let drain briefly. Transfer the dumplings to a serving platter and serve with scallion dipping sauce (see related recipe). Let the skillet cool until just warm, then wipe it clean with a wad of paper towels and repeat step 3 with the remaining dumplings, oil, and water.

Choosing the Right Wrap
Tasters preferred the slightly chewy texture of gyoza-style wrappers to thinner wonton wrappers, but both styles produced terrific potstickers. Although we developed our recipe using round wrappers, square or rectangular wrappers can be used as well. Here’s how to adjust filling amount and steaming time. Because the smaller wrappers yield more dumplings, you’ll need to cook them in multiple batches.

Instructions for different size wrappers:
Round gyoza (3¾ inches diameter), fill with 1 rounded tablespoon, steam for 10 minutes
Round wonton (3¾ inches diameter), fill with 1 rounded tablespoon, steam for 6 minutes
Square wonton (3 3/8 inches square), fill with 2 rounded teaspoons, steam for 6 minutes
Rectangular wonton (3¼ inches by 2¾ inches), fill with 1 rounded teaspoon, steam for 5 minutes

Scallion Dipping Sauce

The sauce can be refrigerated overnight.

Makes ¾ cup

¼ cup soy sauce
2 tablespoons rice vinegar
2 tablespoons mirin
2 tablespoons water
1 teaspoon chili oil (optional)
½ teaspoon toasted sesame oil
1 medium scallion , white and green parts, minced

Combine all ingredients in bowl and serve.