crepe manicotti with ragu and bechamel

crepe manicotti 5

As we adjust to life with a toddler, I’m finding myself tending toward simpler meals, not weekend projects. Which is to say, I made these manicotti months ago, when that toddler was a baby who couldn’t move and therefore didn’t follow me around in the kitchen emptying all the cabinets. It’s too bad for her, because she’d love these.

crepe manicotti 1

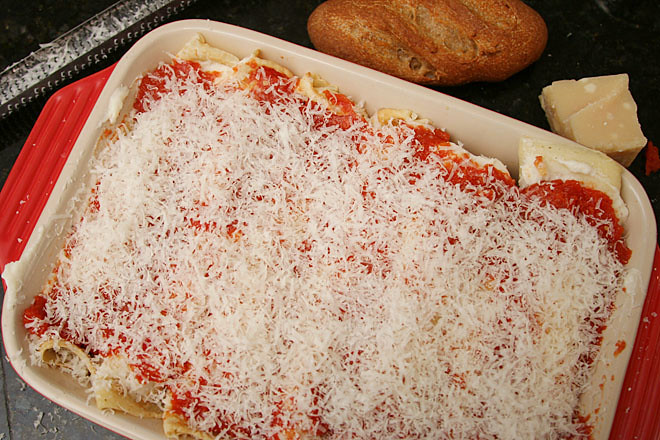
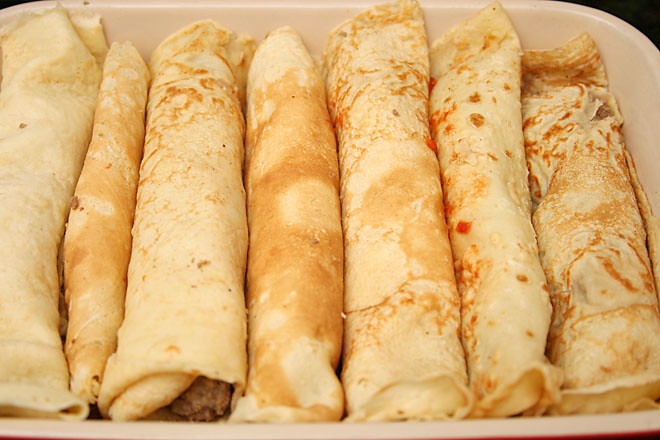
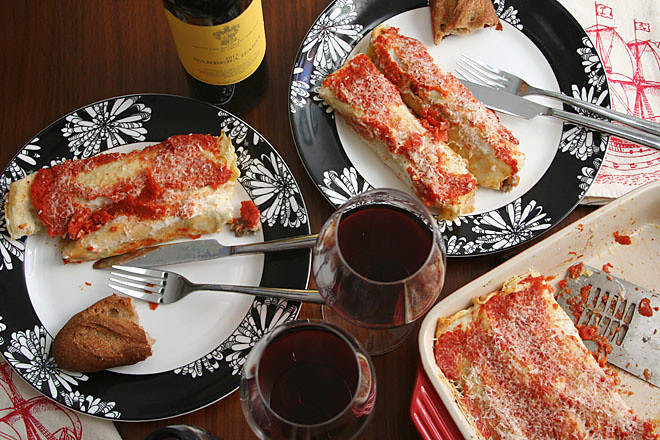
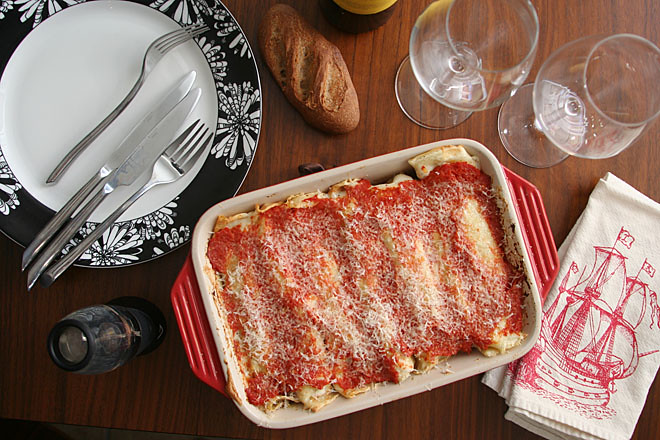
Instead of stuffing a meatball-like mixture into a pasta tube, these are crepes filled with a meat sauce mixed with thick bechamel. It’s rich and creamy, holding its shape without being dry or chewy. There’s no mozzarella, but between the bechamel and the crepes, there’s plenty of dairy. A generous grating of flavorful parmesan tops the dish.

crepe manicotti 4

As delicious as these were, I do think they’d benefit from more sauce, which I’ve indicated in the recipe below. I’d also put all of the bechamel inside the crepes instead of leaving a portion for spreading between the stuffed crepes and the tomato sauce. For better or worse, it’ll be a while before I get a chance to make these again with those changes. In the meantime, I’ll be putting all my storage containers back in the cabinets.

crepe manicotti 3

Printer Friendly Recipe
Crepe Manicotti with Ragu and Bechamel (adapted from Serious Eats)

I don’t remember what meat I used for this, but I’m sure it wasn’t the veal recommended in the original recipe. It was probably pure beef.

For the Ragù:
2 tablespoons extra-virgin olive oil
1 large onion, diced fine
1 medium carrot, diced fine
4 cloves garlic, minced
2 pounds ground beef, divided
Kosher salt and freshly ground black pepper
1 cup dry white wine
1 cup whole milk
1 bay leaf
2 fresh rosemary sprigs

For the Crepes:
2 cups (10 ounces) all-purpose flour
4 large eggs
2½ cups whole milk
salt
2 tablespoons unsalted butter, melted

For the Béchamel:
4 tablespoons unsalted butter
4 tablespoons all-purpose flour
2 cups whole milk
Kosher salt and freshly ground black pepper
Pinch freshly grated nutmeg

To Assemble:
3 cups tomato sauce
parmesan cheese

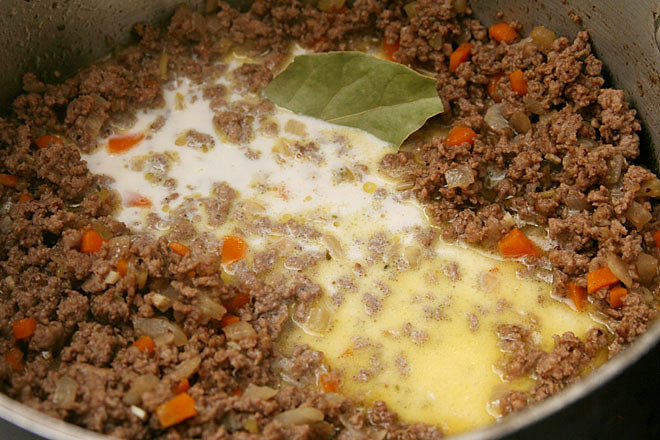
1. For the ragu: In a large Dutch oven over medium heat, heat the olive oil. Add the onions and carrots; cook, stirring occasionally, until softened but not browned, about 6 minutes. Add the garlic; cook, stirring constantly, until fragrant, about 1 minute. Add half of the ground beef and ½ teaspoon salt; cook, stirring frequently to break the meat into small pieces, until well browned, 8 to 10 minutes. Add the remaining meat; stirring to break up the meat, cook just until no longer pink, about 5 minutes. Add the wine; simmer until the wine is syrupy, about 5 minutes. Add the milk, bay leaf, and rosemary; bring the liquid to a simmer, then reduce the heat and simmer, stirring occasionally, until the ragu is thick and the meat is tender, about 30 minutes. Discard the bay leaf and rosemary. If necessary, season with additional salt and pepper.

2. For the crepes: Add the flour, egg, milk, and ¼ teaspoon salt to a blender canister; blend until smooth. Heat a 9-inch nonstick skillet over medium heat. Brush the pan with a thin layer of melted butter. Pour about ¼ cup of batter into the pan; swirl to evenly coat the bottom of the pan. Cook until the top looks dry, about 1 minute. Flip the crepe and continue to cook until the second side is dry, about 30 seconds. Transfer to a plate. Repeat with the remaining batter, brushing the pan with butter each time, stacking the cooked crepes on a plate.

3. For the bechamel: In a medium saucepan over medium heat, melt the butter. When the foaming subsides, add the flour and cook, stirring constantly, for 1 minute. Whisking constantly, slowly add the milk. Increase the heat to medium-high and bring to a simmer, whisking constantly. When the mixture simmers, reduce the heat to medium-low, add the salt, pepper, and nutmeg, and simmer 5 minutes. Combine with the meat sauce.

4. To assemble: Cover the bottom a 9-by-13-inch baking dish with 1 cup of tomato sauce. Divide the meat mixture evenly between the crepes; roll the crepes and place seam-side down over the sauce in the pan. Spread the remaining tomato sauce evenly over the manicotti. Top with a generous layer of grated parmesan. Bake until lightly browned, about 25 minutes. Let rest for 10 minutes before serving.
crepe manicotti 6

Save

green bean salad with anchovies and peperoncini

green bean anchovy salad 4

I’m seeing anchovies in recipes more and more often, almost always with the disclaimer that they don’t make things taste fishy; instead, they increase the umami background in a dish. Used with discretion, they make food taste fuller and more balanced without standing out themselves. I became convinced of this years ago, but it seemed like people were still reluctant to recommend their use for fear of scaring off the fish-adverse.

green bean anchovy salad 1

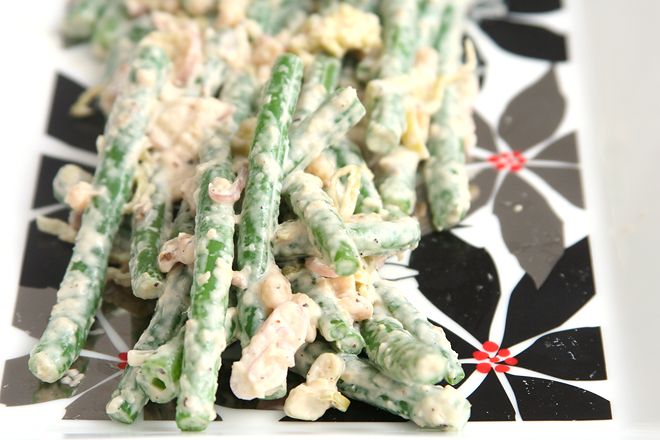
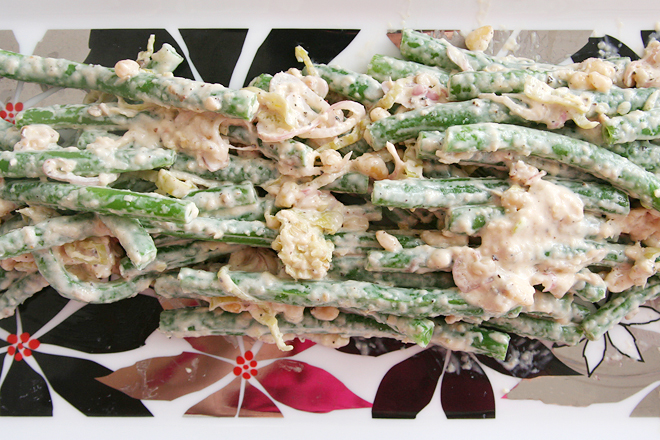
Even here, with anchovies in the title, they’re not overbearing. Dave, who used to hate anchovies, had no problems with this salad. I love anchovies, so I loved this. Plus, it’s almost like a green bean-based caesar salad, and what’s not to enjoy there?

green bean anchovy salad 2

That being said, if you’re nervous about too much fishy flavor, just use two or three anchovies instead of six. (You’ll want to taste the dressing to make sure it’s salty enough though.) But I hope you’ll try it with some anchovies, because they really have a lot to offer to a dish. If you let it, this recipe can be a great introduction to a new ingredient.

green bean anchovy salad 3

Green Bean Salad with Anchovies and Peperoncini (rewritten but not really adapted from J. Kenji Lopez-Alt’s The Food Lab)

I replace half of the mayonnaise with Greek yogurt. I was also too lazy to properly blanch the green beans, so I just boiled them for two minutes instead of four and then drained them and let them cool at room temperature.

Kosher salt
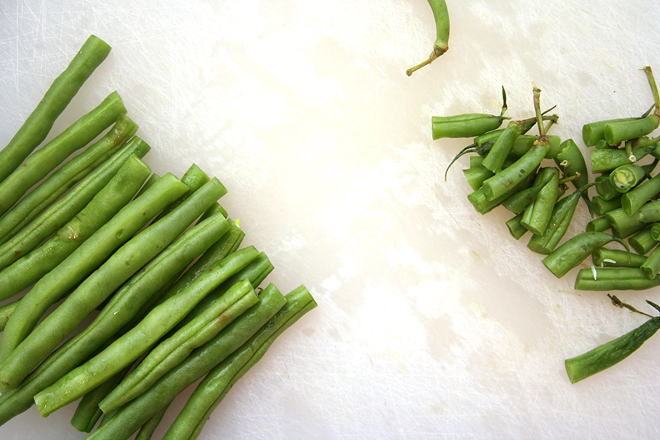
2¼ pounds green beans, trimmed
½ cup mayonnaise
6 whole anchovy filets, chopped into a paste
2 ounces (about 1 cup) grated parmesan cheese
2 tablespoons fresh juice from 1 lemon
2 teaspoons Worcestershire sauce
Freshly ground black pepper
½ cup sliced pepperoncini, drained
2 medium shallots, finely sliced
¼ cup toasted pinenuts

1. In a large pot, bring 4 quarts of water and 1 tablespoon salt to a boil. Add the green beans and cook until they’re bright green and mostly tender with a slight crisp bite in the center, about 4 minutes. Drain the green beans and transfer them to a bowl of ice water. Let chill for about 5 minutes, until cold, then dry on paper or dish towels.

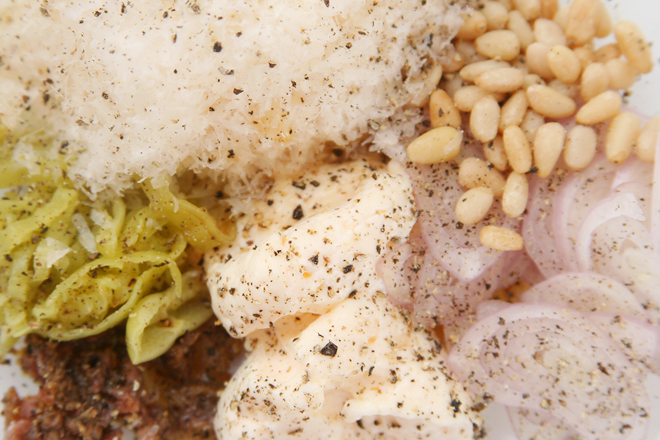
2. In a small bowl, combine the mayonnaise, parmesan, lemon juice, worcestershire sauce, and a generous grinding of black pepper. Coat the green beans with the dressing. Add the pepperoncini and shallots and stir to combine. Top with the pine nuts; serve.

Save

butternut squash and goat cheese ravioli with sage browned butter

goat cheese squash ravioli 7

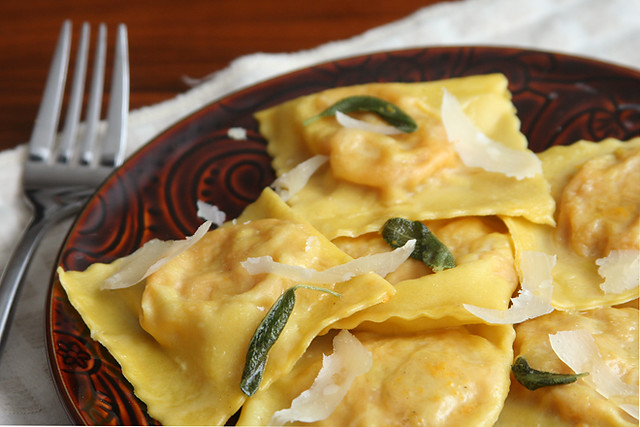
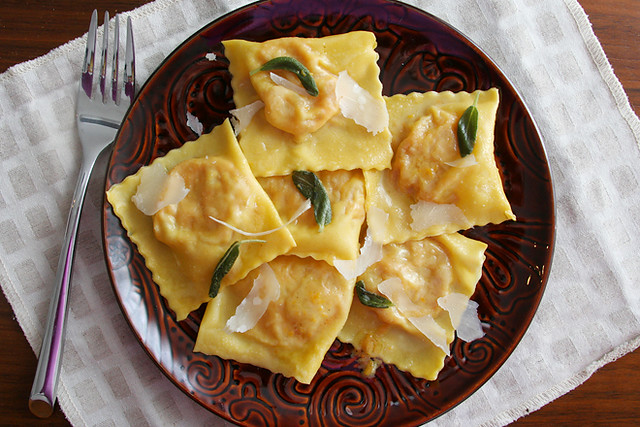
On that fateful homecoming from visiting my in-laws for Thanksgiving, this is what I’d planned to have for dinner. The ravioli were already filled and formed in the freezer, just requiring a quick drop in simmering water and a trip through a skillet of butter. But coming home to disaster made even that seem overwhelming; instead, we ate toppingless chili from the freezer in between shop-vaccing up buckets of water.

goat cheese squash ravioli 2

These are still in the freezer, and at least that’s one advantage of this mess. Actually, my freezer is stuffed to the brim now. In the absence of any other outlet for that stereotypical late pregnancy nesting urge, I cooked. I cooked until the freezer in the rental house was overflowing, then I transferred some meals to our home freezer, and cooked some more.

goat cheese squash ravioli 3

We’ve moved back home now, but there’s plenty of work to do before the house is back to normal. I have a feeling I’ll be very, very grateful to have a freezer full of food once I have a newborn on top of a million house chores. This meal, combining some of my favorite ingredients, will be saved for something special – maybe the day we get doors installed.

goat cheese squash ravioli 5

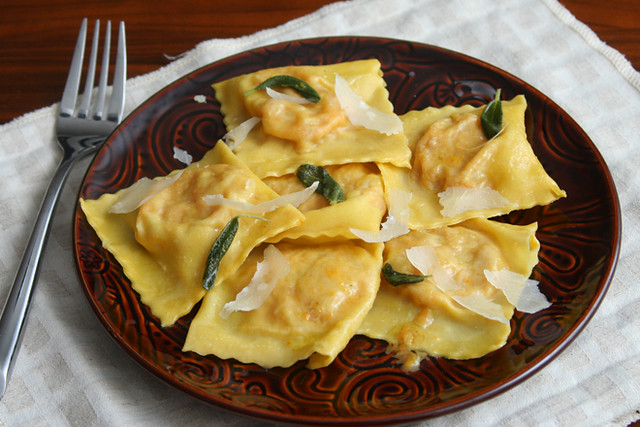
Butternut Squash, Goat Cheese, and Pancetta Ravioli with Sage Browned Butter

Serves 8 as a first course or 4 as a main course

I made my pasta using this method and the following ingredients: 5 ounces flour, pinch salt, 1 egg, 2 egg yolks, and ½ teaspoon olive oil.

6 ounces pancetta, diced into ¼-inch cubes
1 onion, diced fine
salt
1 small butternut squash, peeled, diced into ½-inch cubes
1 teaspoon fresh thyme leaves, minced
5 ounces goat cheese
pinch nutmeg
2 ounces (1 cup) grated parmesan
8 ounces fresh pasta, rolled to the second-to-last setting on a pasta roller
6 tablespoons unsalted butter, melted
12 sage leaves, sliced

1. In a 12-inch nonstick skillet over medium heat, cook the pancetta until crisp, about 8 minutes. Using a slotted spoon, transfer the pancetta to a large bowl. Drain the fat in the pan into a small bowl. Transfer 1 tablespoon of fat back to the pan and add the onions. Cook, stirring occasionally, until the onions are lightly browned around the edges, about 8 minutes. Transfer the onions to the bowl with the pancetta. Add another 1 tablespoon reserved pancetta fat to the pan; add the squash. Cover the pan and cook, stirring occasionally, until the squash is browned and tender, about 15 minutes. Use a potato masher to lightly mash the squash, then transfer it to the bowl with the onions and pancetta. Add the thyme, goat cheese, nutmeg, parmesan, and additional salt to taste to the bowl; stir to combine.

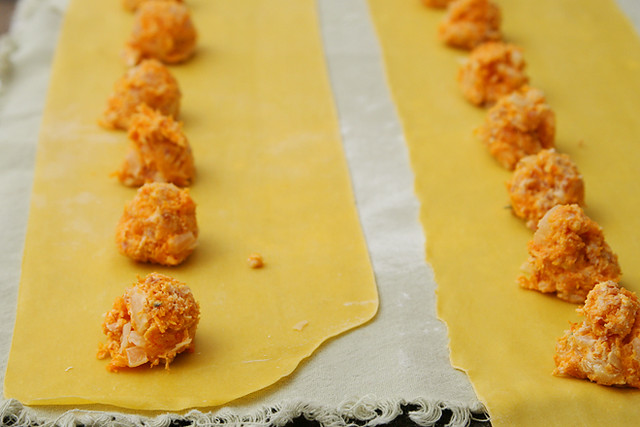
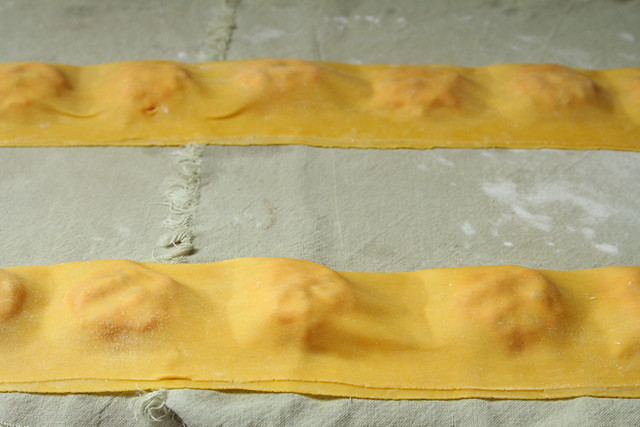
2. Place one rounded tablespoon of filling every 2 inches along the length of a pasta sheet. Use a pastry brush dipped in water to wet the pasta along the long edges and between the filling. Fold the pasta sheet lengthwise over the filling, pressing around each ball of filling to seal the two layers of pasta together. Use a pizza cutter to cut between the filling to form squares of ravioli. Store the ravioli on a dry dish towel. Repeat with the remaining dough and filling. (Ravioli can be formed several hours in advance and covered and refrigerated or can be flash-frozen, then transferred to freezer bags and frozen for several weeks. Do not defrost before cooking.)

3. In a large skillet, brown the butter with sage and a generous pinch of salt. Bring a large pot of water to a boil; add a tablespoon of salt and lower the heat until the water is at a lively simmer. Boil the ravioli in small batches for about 2 minutes. Use a slotted spoon to transfer the ravioli from the cooking water to the butter; simmer and shake over medium-high heat until the ravioli are evenly coated. Serve immediately, with additional parmesan if desired.

goat cheese squash ravioli 6

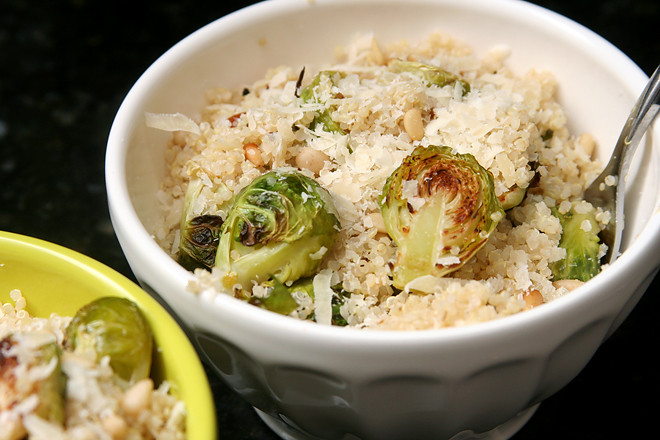
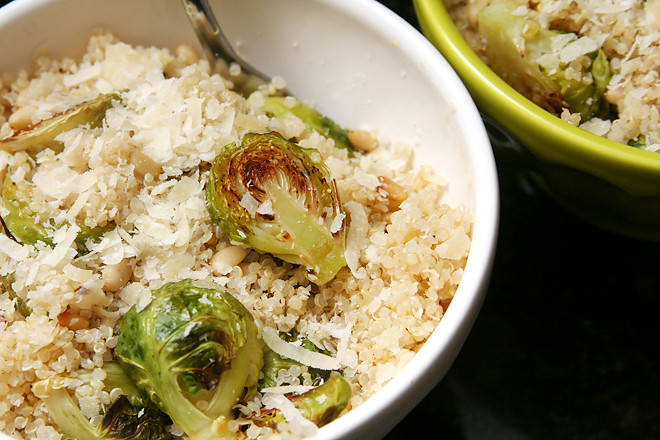
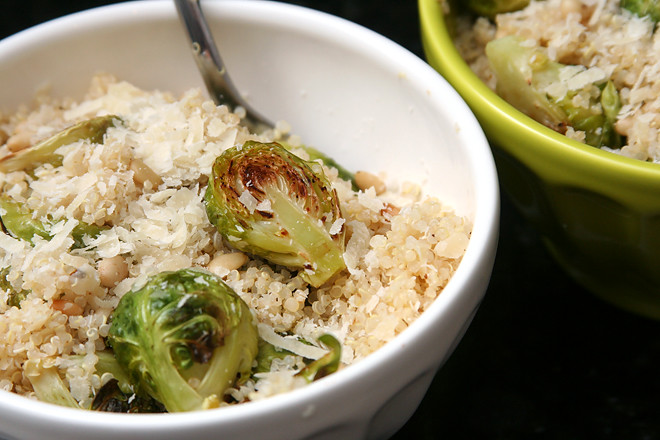
quinoa with roasted brussels sprouts, pine nuts, and parmesan

quinoa brussels sprouts pine nuts 4

We had a great visit with family over Thanksgiving, but not nearly so nice a homecoming. Instead of the hour or two of relaxing we were picturing after a long day of travel home, we had half an inch of water covering the entire house, caused by a leak in the hose that feeds the refrigerator’s icemaker. This also put a kink in my plans to eat healthier after a week of pie, cookies, and cheesecake.

quinoa brussels sprouts pine nuts 1

Fortunately, I hoard freezer meals. If I make a recipe that freezes well and makes enough for multiple meals, I freeze some, but then I have trouble convincing myself to ever eat them. What if I need those one day?

quinoa brussels sprouts pine nuts 2

Well, I need them now. We ate hastily defrosted chili in between stunned shop-vaccing the first night, squash-black bean burritos the next night while we watched contractors cut into the walls and set out fans, and four cheese lasagna over the weekend when we were staying in a hotel but had an out-of-town friend’s housekey.

quinoa brussels sprouts pine nuts 3

I’m quickly depleting my freezer stash, so while things are somewhat stabilized and we’re living at home in our torn up house before reconstruction begins, I’m still keeping things very simple. This has become a staple. It’s not quite as easy as dumping a ziploc bag of stew into a pot and heating it up, but it’s straightforward enough to make in a kitchen full of boxes in between doing load after load of laundry. Best of all, it tastes like comfort food to us – maybe not tomato soup and grilled cheese level of comfort, but close enough for something so healthy. But now it’s time to start thinking about building my freezer stash back up to help get us through reconstruction.

quinoa brussels sprouts pine nuts 6

Printer Friendly Recipe
Quinoa with Roasted Brussels Sprouts, Pine Nuts, and Parmesan (adapted from a recipe I adapted from Gourmet)

Serves 4

1½ cups water
salt
1 cup quinoa, rinsed and drained
2 pounds brussels sprouts, trimmed and halved lengthwise
black pepper
2 tablespoons olive oil, divided
½ cup (6 ounces) pine nuts
2 cloves garlic, minced
¼ teaspoon red pepper flakes
3 tablespoons lemon juice
1 cup (2 ounces) parmesan, shredded

1. Place a rimmed baking sheet in the middle of the oven and heat the oven to 450 degrees. In a large saucepan over high heat, bring the water and ½ teaspoon salt to a boil. Add the quinoa, reduce the heat to low, cover, and cook for 15 minutes. Without removing the lid, remove the pot from the heat and set aside for another 15 minutes.

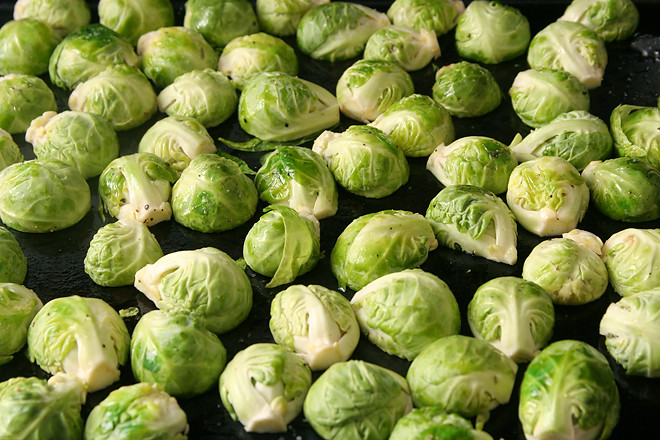
2. While the quinoa cooks, remove the heated baking sheet from the oven and spread 1 tablespoon of oil over its surface. Place the brussels sprouts on the sheet, generously season with salt and pepper, and stir to coat with the oil. Arrange the sprouts cut-side down. Transfer to the oven and cook for 12 minutes.

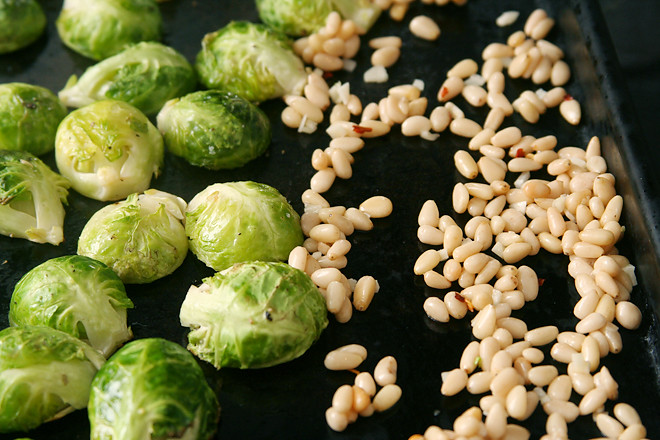
3. Meanwhile, in a small bowl, combine the remaining 1 tablespoon olive oil, the pine nuts, garlic, and red pepper flakes. After the brussels sprouts have roasted for 12 minutes, add the pine nut mixture to the baking sheet and roast for an additional 2-3 minutes, until the brussels sprouts are browned and tender and the nuts are just toasted. (Keep an eye on the nuts; they burn easily.)

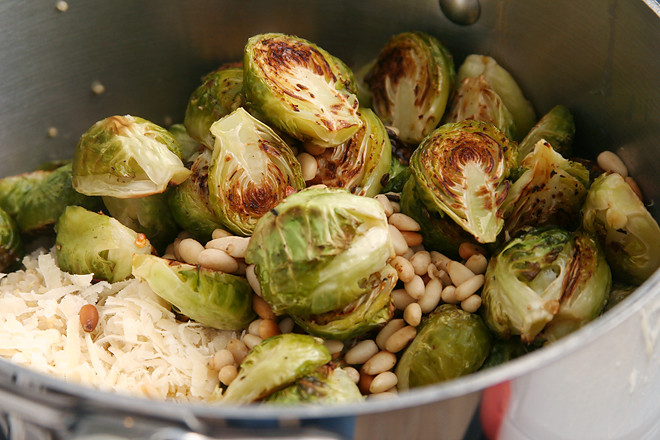
4. Stir the lemon juice into the quinoa, then add the roasted sprouts and pine nuts and the parmesan. Stir to combine; serve immediately.

quinoa brussels sprouts pine nuts 5

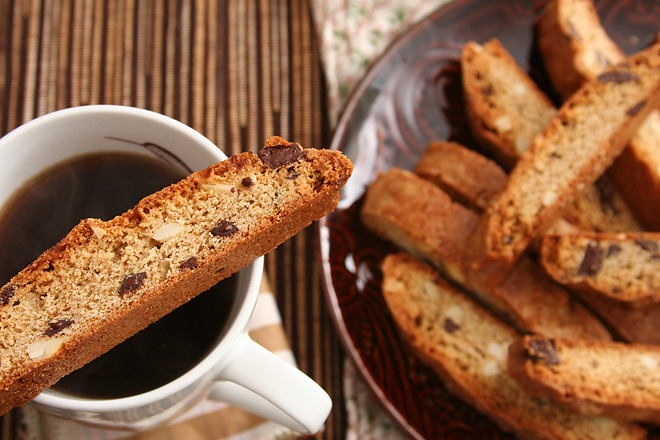
mocha biscotti

cappuccino biscotti 5

My brother isn’t a coffee drinker, but when he travels with me and Dave, he indulges our desire for fancy coffee every morning. In Oregon last fall, he tried a variety of drinks, from the oversugared coffee slushy to a fancy shakerato. He was just going along with the crowd though; none of the drinks seemed to impress him.

cappuccino biscotti 2

In Iceland this summer, however, he settled on one drink, getting a swiss mocha every day with our morning pastries. I hadn’t tried a mocha since high school, but these were good – the bitter espresso balances the sweet hot cocoa. My favorite has always been a good cappuccino, but I even ordered my own mocha one afternoon.

cappuccino biscotti 3

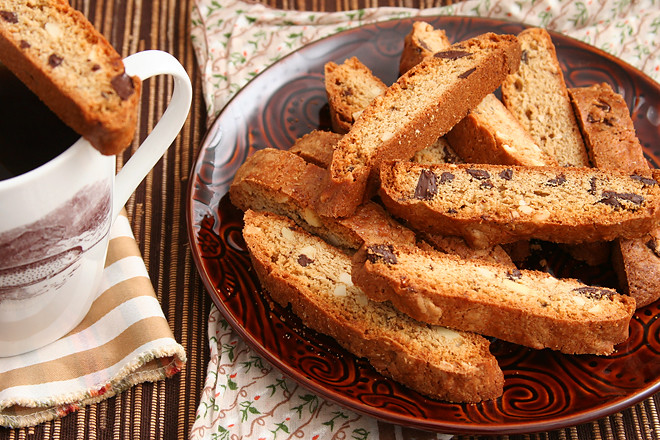
Coffee is often added to chocolate desserts to enhance the chocolate flavor, but it was the coffee that I wanted to stand out here. With plenty of espresso powder and a shot of Kahlua, I think I succeeded. Even a non-coffee drinker would like these – although my brother can no longer count himself in that crowd, because now he makes mochas a regular treat even when he’s not on vacation.

cappuccino biscotti 4

Printer Friendly Recipe
Mocha Biscotti

Makes about 40 biscotti

3¼ cups (15.6 ounces) all-purpose flour
1 tablespoon baking powder
3 large eggs
8 tablespoons (1 stick) unsalted butter, melted
1¼ cups (8.75 ounces) sugar
½ teaspoon salt
1 tablespoon vanilla extract
1 tablespoon Kahlua or coffee liqueur
4 teaspoons espresso powder
6 ounces (about 1 cup) bittersweet chocolate chips or chopped chocolate
3 ounces (about ⅔ cup) slivered almonds

1. Adjust a rack to the middle position and heat the oven to 325 degrees. Line a baking sheet with parchment paper or a silicone mat. In a medium bowl, combine the flour and baking powder. Break the eggs into a small bowl or measuring cup, but do not whisk them together.

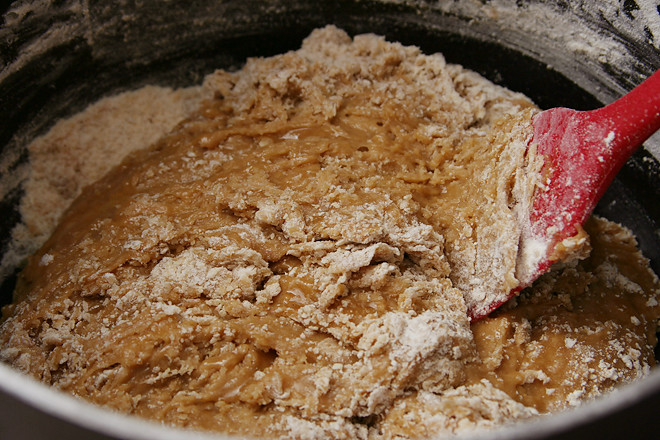
2. In a large pot over medium-low heat, heat the butter until it’s just melted. Remove the pot from the heat and stir in the sugar, then the salt, vanilla, Kahlua, and espresso powder. Stir in the egg yolks, then the egg whites, reserving about 1 tablespoon of egg white to use for an egg wash. Stir in the flour mixture until almost combined, then add the chocolate and almonds, folding until evenly combined and there are no pockets of dry flour.

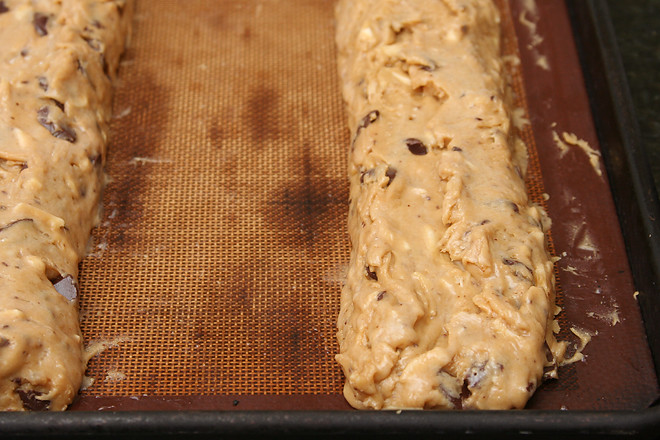
3. Divide the dough into two portions and shape each into a log that is 2-inches wide and as long as your baking sheet. The dough is very sticky; it’s easiest to use a spatula and butter knife to push the dough into position instead of trying to use your hands.

4. Transfer the baking sheet to the oven and bake until just golden, 30-35 minutes. Transfer the pan to a cooling rack and let the loaves cool on the baking sheet for about 5 minutes, then use two spatulas to transfer the loaves from the pan to the cooling rack. Cool completely, about 30 minutes.

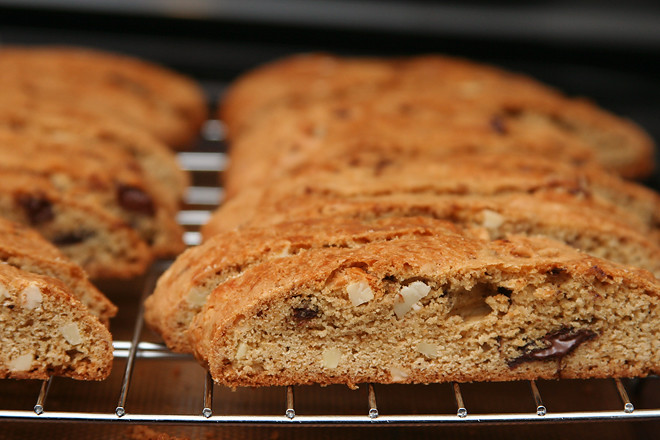
5. Place an oven-proof cooling rack on a rimmed baking sheet. Use a sharp knife to cut the loaves into ½-inch slices, on the diagonal if desired. Transfer half of the biscotti to the cooling rack in the pan, spaced about ¼-inch apart. Transfer the pan to the oven and bake for 15 minutes, until the edges just start to brown. (This baking step is to crisp the biscotti, but they’ll still feel somewhat soft when they’re hot.) Repeat with the remaining biscotti. (You can bake all of the biscotti at once if two pans fit on one level in your oven or if you have cooling racks that stack.) Let the biscotti cool completely on the rack before serving.
cappuccino biscotti 7

slow ferment pizza dough

pizza dough 9

Since I make pizza once every two weeks or so, it’s only natural that my dough recipe has evolved over the years. The recipe I’ve been using lately doesn’t bear much resemblance to my favorite from several years ago beyond the obvious flour, water, and yeast. My current favorite couldn’t be easier to make – with a few caveats.

pizza dough 2

The first is that it’s best if you think ahead – far ahead, if you can. I usually mix the dough on Monday night to cook it on Friday night. That being said, if I didn’t decide I wanted pizza until Thursday, I’d still use this recipe, with just a one-night rest.

pizza dough 4

The second is that I’m using flour I special-ordered from Italy. I’ve entered the deep end, where flour for pizza is no longer taken out of the grocery budget, it comes out of my fun money allowance. But then I tried the recipe with bread flour (King Arthur), and to be honest, it was so good that it doesn’t seem like the special flour is worth the splurge.

pizza dough 5

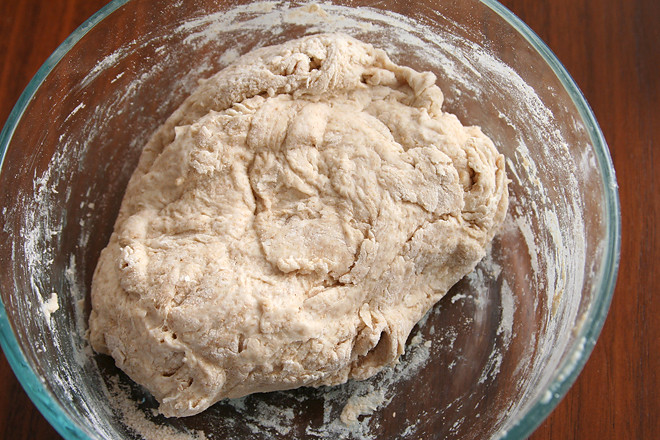
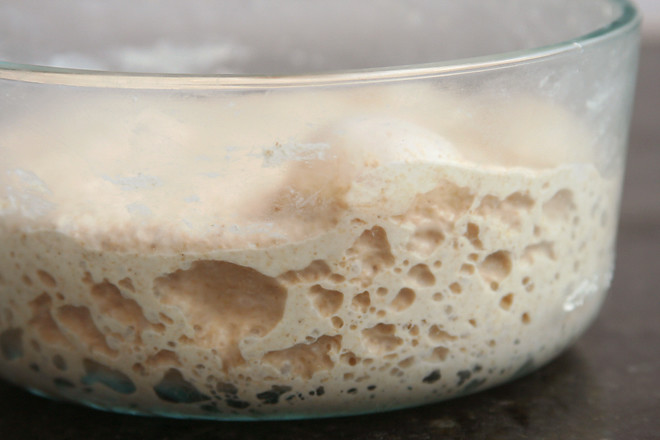
So, thinking in advance helps, and fancy flour might help, but after that, it’s just mixing up flour, water, yeast, sugar, and salt. I don’t bother with a whole wheat pre-dough; I just use half whole wheat flour in the dough, and the long wait in the fridge is plenty of time to soften the grains. I also don’t put much effort into kneading the dough. I mix it, put it in the fridge overnight, and spend a minute or two kneading it once it’s evenly hydrated. If you’d rather do all the work up front and forget about it for a few days, you can just knead it longer right after you mix it up.

pizza dough 6

Then it sits in the back of the fridge until I’m ready for it at the end of the week. I come home from work on Friday, take the dough out to warm up, and go sit in my favorite chair with a book and my cat. An hour or two later, somewhat refreshed, the dough is easy to stretch out to a circle and ready to top.

pizza dough 14

Another pizza splurge I indulged in last year was a Baking Steel. It does make homemade pizza better, and I recommend it, but of course a pizza stone will do a fine job too. With the Baking Steel, it gets so hot that the dough crisps and browns within a few minutes, so I put it on a high rack and turn the broiler on when the pizza goes in. This is not recommended with a stone, since the direct heat could cause it to crack (heck, in my experience, anything causes them to crack!).

pizza dough 15

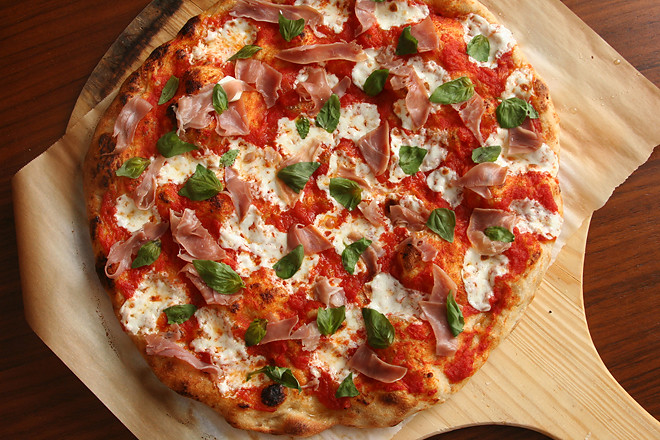
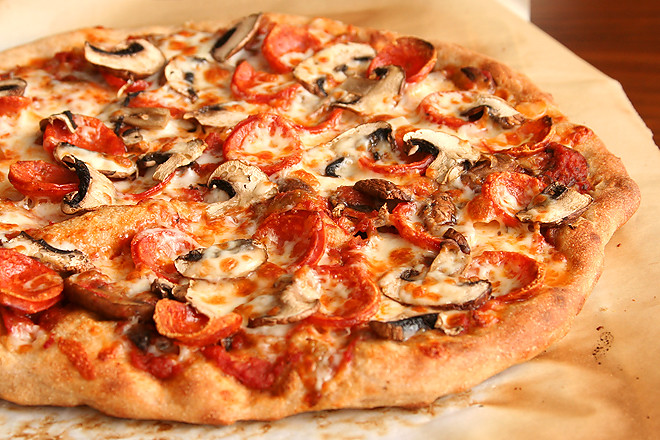
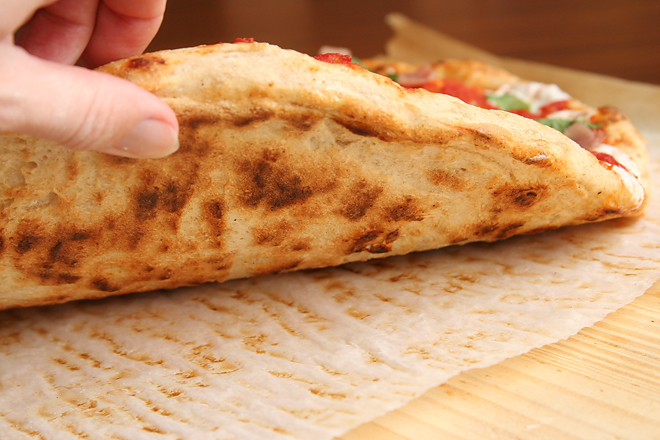
And then you’ve got pizza as good as you can get with a home oven. The bottom is crisp and browned, the middle is full of bubbles, the dough has great flavor on its own, even without whatever delicious toppings you pile on top. I’ve been making this new favorite for almost a year, and I have no plans to change it up – but you never know. There’s always something new to try, so maybe in a few years, I’ll be sharing yet another new and improved pizza method.

pizza dough 13

Printer Friendly Recipe
Slow Ferment Pizza Dough
(adapted from Serious Eats’ Cold-Fermented Pizza Dough)

I’ve reduced the yeast from Kenji’s recipe, because with the full amount, my fermented dough was developing an unpleasant sour aroma.

Whether baking on a steel or a stone, I’ve found that the dough is easiest to transfer to the oven with parchment paper, but it crisps and browns better if the paper is removed once the dough sets. Furthermore, a baking steel is hot enough to burn the paper after a couple minutes in the oven, creating a mess.

10 ounces (2 cups) bread flour or 00 flour
10 ounces (2 cups) whole wheat flour
2 teaspoon salt
⅔ teaspoon yeast
½ teaspoon sugar
1¾ cups water

1. In a medium bowl, combine all of the ingredients until there are no dry bits remaining. Tightly cover and store in the refrigerator, at least overnight or up to 5 days. The following day, knead the dough for about a minute, until it’s smooth and elastic. Cover and refrigerate. (Alternatively, the dough can be kneaded for about 5 minutes right after mixing, with no additional kneading necessary.)

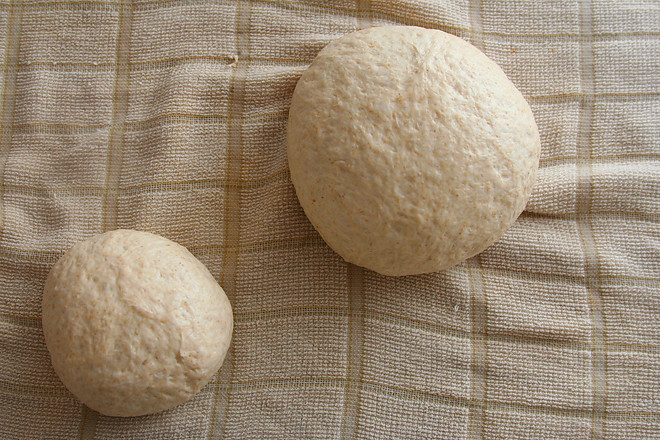
2. About two hours before baking, remove the dough from the refrigerator. Use a dough scraper or rubber spatula to transfer the dough from the bowl to a damp dishtowel or a lightly floured surface. Use a knife to divide the dough in half. Shape each portion into a ball. Cover the dough balls loosely with plastic wrap; leave at room temperature for 1½ to 2 hours, until the dough is easily stretched.

3. About 45 minutes before baking the pizzas, place a baking steel (about 6 inches from the broiler) or pizza stone (lowest rack) in the oven; heat the oven to its hottest setting. Line a pizza peel or the back of a baking sheet with parchment paper.

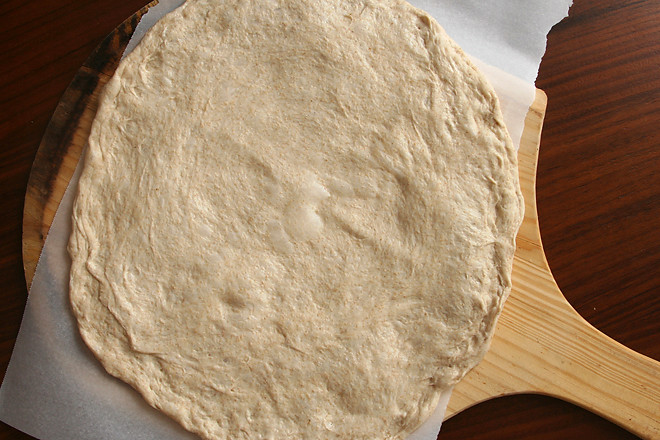
4. Stretch one portion of dough to a 10- to 12-inch round; lay it on the parchment paper. If necessary to even out thick areas and fix the shape of the dough, pull the edges to an even circle. Top with desired toppings.

5. Transfer the pizza on the parchment paper to the heated steel or stone. If using a steel, immediately turn the oven off and the broiler on to its hottest setting. After 1 minute, use a metal spatula to lift the pizza while using tongs to remove the parchment paper. Continue cooking until the cheese is bubbling and the bottom of the crust is spottily browned, about 4 additional minutes for a baking steel or 6-7 minutes for a baking stone. Use the metal spatula and pizza peel to remove the pizza from the oven and transfer it to a cooling rack. Cool for about 5 minutes before cutting and serving. Repeat with the remaining dough.
pizza dough 10

crostini topped with ricotta and braised zucchini

zucchini ricotta crostini 6

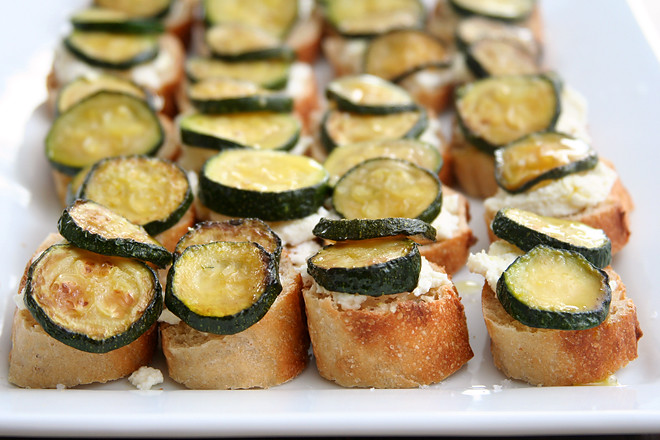
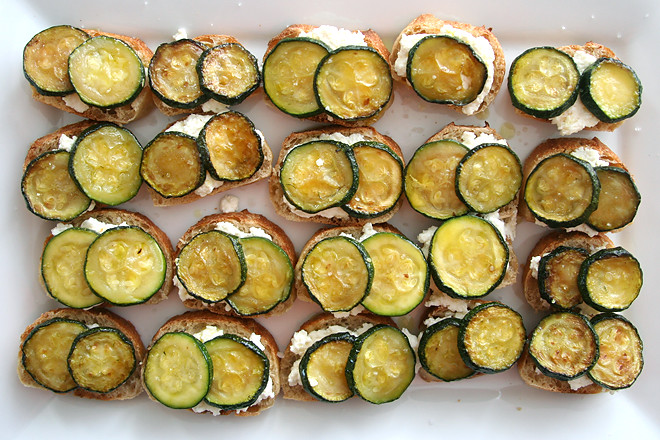
I often prepare elaborate multicourse meals just for me and Dave. Almost invariably, when I ask him to name his favorite course, it’s the meat, and just as often, mine is the carbs, although sometimes I make an exception for artichokes. This meal left me with a tough choice – bread is always a favorite, especially topped with cheese and vegetables cooked well, but I was also really pleased with the sauce I’d made from my homegrown tomatoes to serve over pasta. Dave, unsurprisingly, chose the ribeye.

zucchini ricotta crostini 4

I was being stingy with the tomato sauce, both because it took longer to prepare and because my garden gives me more zucchini than tomatoes, so I certainly ate the most of this one. It might seem bland – neither ricotta nor zucchini is known for their strong flavors – but good bread, a generous drizzle of olive oil, and a sprinkle of large-grained sea salt add plenty of interest.

zucchini ricotta crostini 5

Considering that these toasts include a starch, a protein, and a vegetable, I could have skipped the pasta (and hoarded the sauce instead) and meat entirely! Dave might have missed his steak, but I certainly wouldn’t have minded filling up on these. Who needs multiple courses when the first one is so good?

zucchini ricotta crostini 7

Printer Friendly Recipe
Crostini with Ricotta and Braised Zucchini (inspired by Annie’s Eats; zucchini adapted from Rachel Eats via Orangette)

Makes about 24 small toasts, depending on the size of your bread

If you have a flaked salt, kosher or Maldon, it adds a fun crunch when sprinkled on top.

2 tablespoons extra virgin olive oil, plus more for drizzling
1 clove garlic, peeled and smashed
3 small to medium zucchini (about 12 ounces), ends trimmed, sliced ¼-inch thick
¼ teaspoon salt, plus more for sprinkling
1 small sprig basil, leaves removed and torn (optional)
1 (12-inch) baguette, sliced ¼-inch thick
1½ cups ricotta cheese

1. In a medium nonstick skillet, heat the oil and garlic over medium-low heat, stirring occasionally, until the garlic is lightly golden, 4-5 minutes. Remove and discard the garlic. Add the zucchini and salt to the skillet; cook, stirring occasionally, until the zucchini is softened and lightly browned in spots, 25-30 minutes. Stir in the basil leaves, if using.

2. Meanwhile, heat the broiler. Arrange the bread in a single layer on a baking sheet. Broil until just golden. Flip each slice of bread and return the baking sheet to the oven; lightly toast the second side.

3. Spread some ricotta over each slice of toast. Top with a layer of zucchini, then drizzle with olive oil and sprinkle with salt.

zucchini ricotta crostini 3

pizza with zucchini, goat cheese, and lemon

zucchini goat cheese pizza 3

Thank god for my zucchini plant. Despite some cucumber beetles and slugs, it is growing quite nicely. This is in contrast to most of my other plants. The tomatoes, peppers, and cucumber plants are all just barely holding on, and of course I can’t figure out what’s wrong with them. Seeing the huge, green zucchini plant and cutting off a zucchini every few days makes me feel much better.

zucchini goat cheese pizza 1

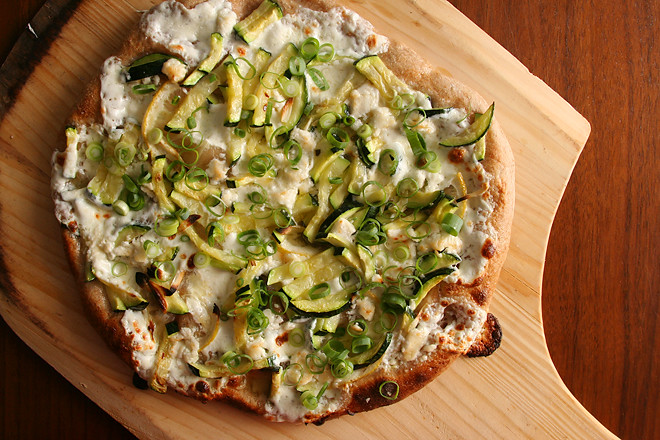
Almost all of my zucchinis so far have gone into enchiladas with goat cheese and black beans, but I saved one for a light, summery pizza. The zucchini is julienned and salted to draw out liquid, so it doesn’t waterlog the pizza. If you’re lucky, it might brown a bit in the oven too.

zucchini goat cheese pizza 2

I’m not completely sold on the slices of lemon called for in the original recipe; even sliced paper-thin, they still caused a few shockingly lemony bites. I did like the hit of tartness though, so I think a quick squeeze of lemon juice on the just-baked pizza would be a nice substitute. I’ll have to try that next time; since my garden apparently won’t be producing gazpacho ingredients, I’ll just make more zucchini pizza.

zucchini goat cheese pizza 4

Printer Friendly Recipe
Pizza with Zucchini, Goat Cheese, and Lemon Pizza (adapted from The Food Lab)

Makes one 10-inch pizza

I use a baking steel, not a baking stone. I’ve found that it makes for a lighter crust with a crisper base. However, if you leave the parchment paper on the steel under the broiler for the full five minutes, it will burn to a blackened flaky crisp. After one minute under the broiler, I use a spatula to lift the edge of the pizza and pull out the parchment paper with tongs.

¾ pound pizza dough (⅓ of this recipe)
1 small zucchini
1 clove garlic, minced
½ teaspoon salt
2 teaspoons olive oil
4 ounces fresh mozzarella, diced into 1-inch cubes
2 ounces goat cheese, crumbled
2 teaspoons lemon juice
2 scallions, thinly sliced

1. Place a pizza stone on a rack about 5 inches below the broiler and heat the oven as high as it goes for at least 45 minutes. Shape the dough into a ball; cover and set aside for about 30 minutes to allow the gluten to relax.

2. Slice the zucchini into rounds ⅛-inch thick, then slice each round into slivers ⅛-inch thick. In a small bowl, combine the zucchini, garlic, and salt; set aside for 30 minutes.

3. Drain the zucchini, then transfer it to a kitchen towel; squeeze it as dry as possible. Transfer the zucchini back to the empty bowl, add the oil, and stir to evenly coat it.

4. Gently flatten the dough, then pick it up and stretch it out to about 10 inches, trying to keep it as circular as possible. Curl your fingers and let the dough hang on your knuckles, moving and rotating the dough so it stretches evenly. If it tears, piece it together. If the dough stretches unevenly, put it down and gently tug on the thick spots.

5. Line a pizza peel (or the back of a baking sheet) with parchment paper and transfer the round of dough to the peel, rearranging it to something reasonably circular. Top with the mozzarella, then the zucchini and goat cheese. Transfer the pizza with the parchment paper to the hot pizza stone.

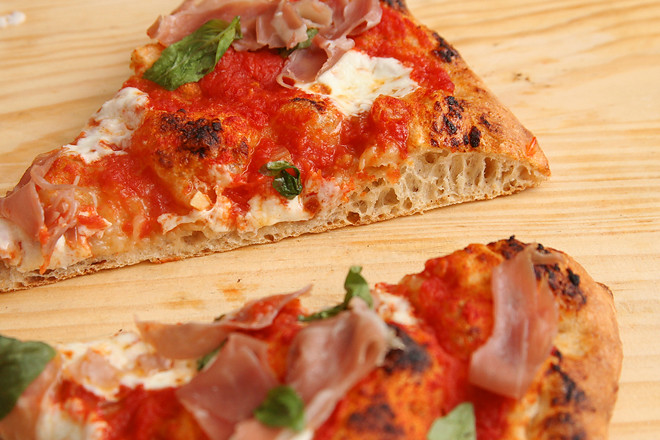
6. Immediately turn the oven off and the broiler on (to high, if yours has settings). Bake the pizza for about 5 minutes, until the bottom crust is spotty browned. Transfer the pizza to a cooling rack and drizzle the lemon juice evenly over the top, then evenly distribute the scallions over the pizza. Cool about 5 minutes before slicing and serving.
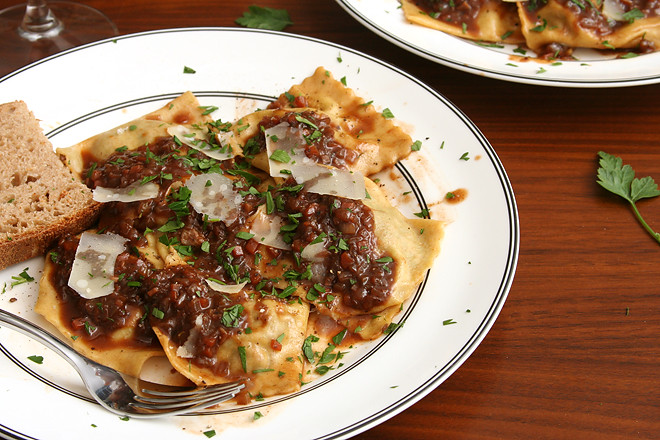
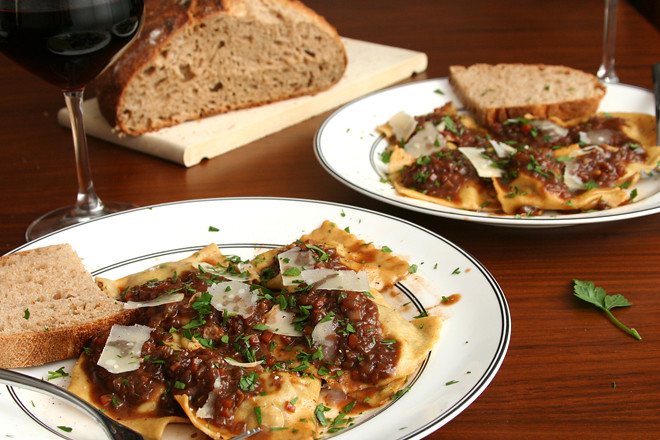
goat cheese and braised lamb shank ravioli

lamb goat cheese ravioli 6

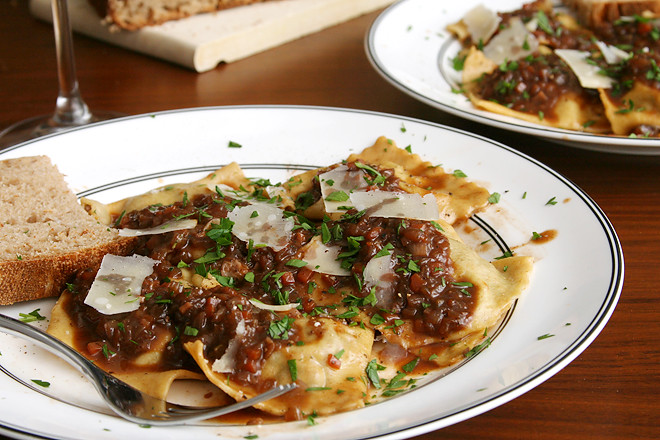
I do use my pasta roller for dishes other than ravioli – but not often. I make the occasional lasagna when I can carve out half a day, but cut pastas like fettuccine are rare. Homemade ravioli lets me get some of the creative flavor variations of lasagna with less – although not insignificant – effort.

lamb goat cheese ravioli 1

Some of my favorite ravioli recipes lend themselves to a nice plated first course, particularly the ones with fillings based on vegetables. But with braised meat as the star of this one, it’s rich enough to be the main course. I think the slight funkiness of goat cheese is the perfect complement to the gamey lamb.

lamb goat cheese ravioli 3

I didn’t want to lose or overpower any of that wonderful lamb flavor, so I reduced the winey braising liquid down to a sauce. Instead of using a starch for thickener, which could turn the sauce pasty and dull the flavor, I used gelatin. This makes a sauce that forms a glossy coating on the pasta. A little soy sauce (you could also use fish sauce) amplifies the meatiness of the whole dish. This is definitely a dish worthy of getting out the pasta roller.

lamb goat cheese ravioli 5

Printer Friendly Recipe
Braised Lamb and Goat Cheese Ravioli

Makes about 32 ravioli, serving 4 as a main course or 8 as a first course

I made my pasta using this method and the following ingredients: 5 ounces flour, pinch salt, 1 egg, 2 egg yolks, and ½ teaspoon olive oil.

1½ teaspoon gelatin powder
2 cups chicken broth
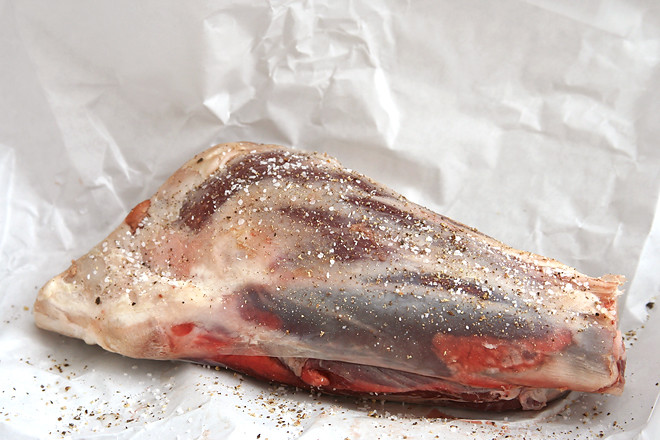
2 (1-pound) lamb shanks
olive oil
salt and pepper
1 large carrot, diced fine
1 celery stalk, diced fine
1 onion, diced fine
2 cloves garlic, minced
1 tablespoon tomato paste
1 cup unoaked red wine
1 sprig rosemary
2 sprigs thyme
1½ teaspoons soy sauce
10 ounces goat cheese
1 egg
¼ cup (½ ounce) grated parmesan cheese, plus more for serving
8 ounces fresh pasta, rolled to the second-to-last setting on a pasta roller

1. Heat the oven to 300 degrees. In a measuring cup, sprinkle the gelatin over the chicken broth.

2. Heat a large Dutch oven over medium-high heat. Season the lamb generously with salt and pepper. Add a drizzle of oil to the pot and add the lamb shanks; cook, without moving, until darkly browned on bottom, about 2 minutes, then turn and brown on all sides. Transfer the lamb to a plate. Reduce the heat to medium and add the carrots, celery, and onions to the pot; cook, stirring constantly, until softened and lightly browned, 3-4 minutes. Add the garlic and tomato paste, and cooking, stirring constantly, until fragrant, about 1 minute. Add the red wine and scrape up any browned bits stuck to the bottom of the pot. Add the broth with gelatin, rosemary, thyme, and browned lamb to the pot. Cover the pot and transfer to the oven. Cook until the lamb is tender and can be easily shredded, about 3 hours, turning the lamb shanks every hour.

3. Transfer the lamb to a clean plate. When cool enough to handle, remove the meat from the bones and finely chop it.

4. Remove the rosemary and thyme from the liquid remaining in the pot and discard. Over medium-high heat, simmer until the liquid in the pot is reduced to ½ cup, about 8 minutes. Add the soy sauce. Cover and set aside.

5. Combine the shredded lamb, goat cheese, egg, and ¼ cup parmesan cheese.

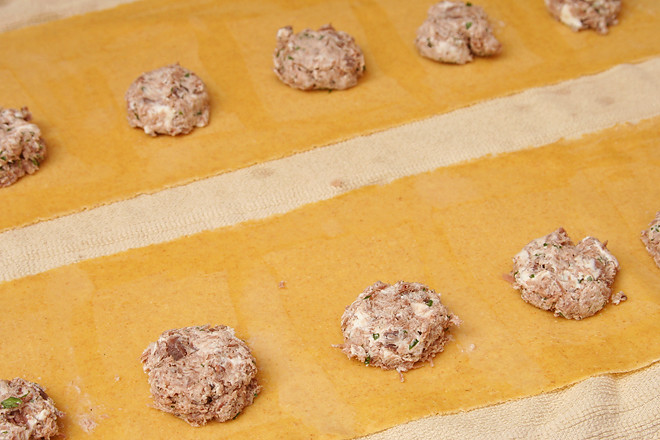
6. Place one rounded tablespoon of filling every 2 inches along the length of a pasta sheet. Use a pastry brush dipped in water to wet the pasta along the long edges and between the filling. Fold the pasta sheet lengthwise over the filling, pressing around each ball of filling to seal the two layers of pasta together. Use a pizza cutter to cut between the filling to form squares of ravioli. Store the ravioli on a dry dish towel. Repeat with the remaining dough and filling. (Ravioli can be formed several hours in advance and covered and refrigerated or can be flash-frozen, then transferred to freezer bags and frozen for several weeks. Do not defrost before cooking.)
7. Bring a large pot of water to a boil; add a tablespoon of salt and lower the heat until the water is at a lively simmer. Boil the ravioli in small batches until al dente, 2 to 3 minutes, using a skimmer or large slotted spoon to remove the ravioli from the boiling water and transfer them directly to a serving platter or individual plates or pasta bowls. Top with the sauce and addition parmesan and serve immediately.

lamb goat cheese ravioli 4

fresh pasta with braised quail

quail pasta 7

I have never seen a Meyer lemon for sale where I live. My local store used to stock blood oranges in the winter and rhubarb in the spring, but I didn’t see either this year. Sheets of nori? I’ve started ordering them online, along with golden syrup, peppermint extract, a big container of sprinkles, espresso powder, 00 Italian flour, herbal tea, looseleaf black and green tea, passionfruit concentrate, and my favorite brand of soy sauce. Living in a small town has its disadvantages.

quail pasta 3

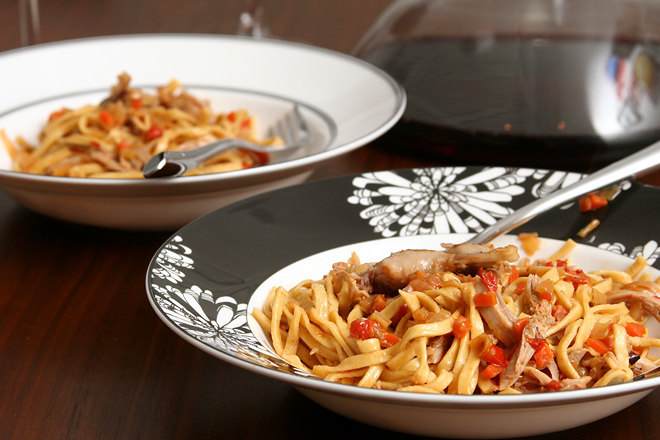
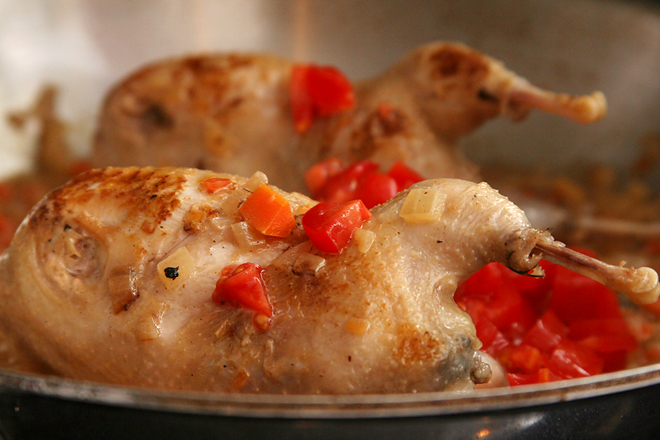
But I seem to have a steady supply of game meats. I’ve bought quail a few times, and this is my favorite way to use it (which isn’t to say that chicken drumsticks or thighs wouldn’t also be great in this dish). What I’ve learned about quail is that they are so tiny that it can be hard to find the meat. As someone who doesn’t much appreciate messing around with their food as they eat it, a salad topped with a whole quail was frustrating (although pretty).

quail pasta 4

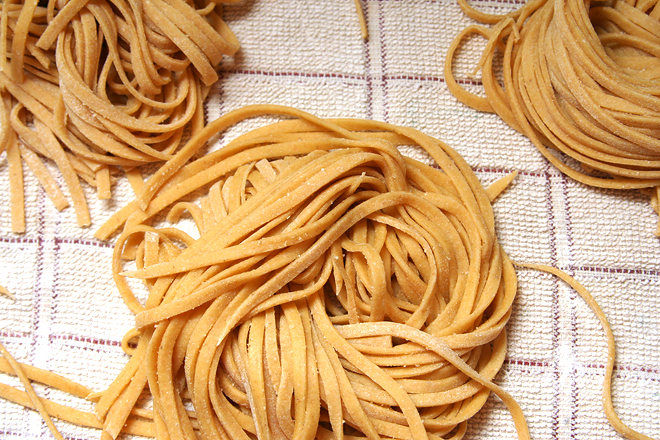
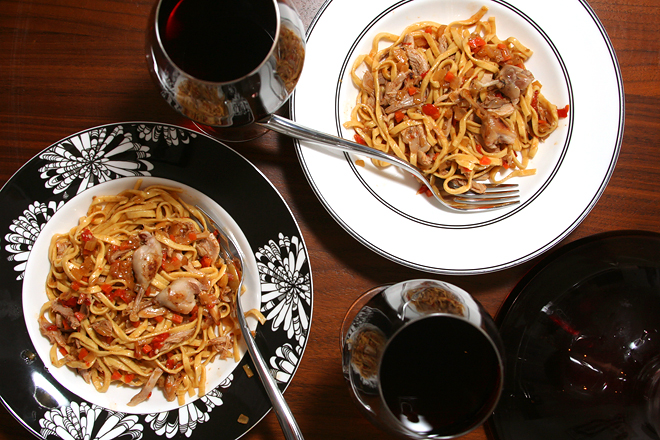
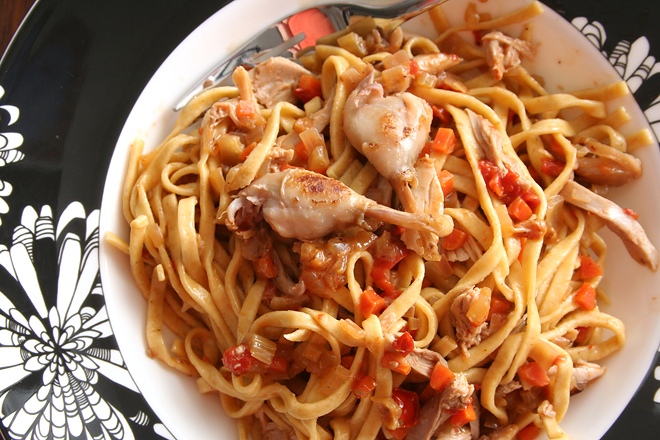
This pasta dish, with so little in it besides the quail, cooks it down to its essence. What sauce there is is concentrated quail stock. It’s intensely savory. It coats the pasta in the thin layer, with bits of shredded quail meat dispersed throughout. You can garnish the dish with teeny tiny drumsticks. And, amazingly, this is a dish I can actually find all the ingredients for in my little town.

quail pasta 8

Printer Friendly Recipe
Fresh Pasta with Braised Quail (adapted from Marcella Hazen’s Marcella Cucina via epicurious)

Serves 4

4 whole quail, washed and dried
salt and pepper
2 tablespoons extra virgin olive oil
1 shallot, minced
½ stalk celery, minced
½ medium carrot, minced
1 fresh sage leaf, minced
6 rosemary leaves (remove from 1 sprig), chopped very fine
½ cup dry white wine
1 roma tomato, diced small
1 pound fresh pappardelle or fettuccine
½ cup (1 ounce) freshly grated parmesan cheese, plus more for serving

1. Season the quail generously with salt and pepper. Heat a large not-nonstick skillet over medium-high heat. Add the oil and quail, and cook without moving for 3-4 minutes, until well browned. Flip the quail; continue to cook until all sides are browned, propping the quail against the sides of the pan if necessary. Transfer the browned quail to a plate.

2. Reduce the heat to medium and add the vegetables and herbs; cook, stirring constantly, until they are fragrant and lightly browned, 1-2 minutes. Add the wine and use a spatula to scrape up any browned bits on the bottom of the pan. Reduce the heat to medium-low, return the quail to the skillet, and cover. Cook, turning occasionally, for 20 minutes. Add the tomato, cover, and cook for another 20-25 minutes, adding water as necessary to keep the pan from drying out, until the meat can easily be removed from the bones.

3. Remove the quail from the pan and shred the meat, discarding the bones. If desired, reserve the drumsticks with their meat for garnish.

4. Meanwhile, bring a large pot of salted water to a boil. Cook the pasta until just tender, 2-4 minutes or according to package instructions. Drain, reserving ½ cup of pasta cooking water.

5. Add the shredded quail meat, pasta, ¼ cup pasta cooking water, and parmesan to the pan with the sauce. Toss the contents together until well mixed, adding more pasta water if necessary to loosen the sauce. Serve immediately, topped with additional parmesan and the reserved drumsticks.

quail pasta 6