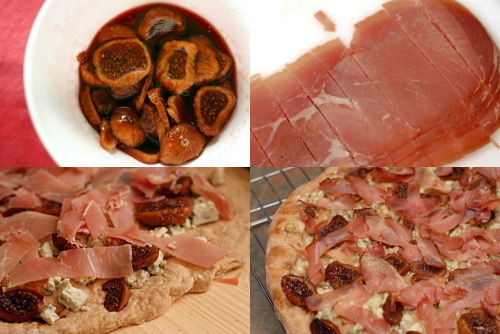
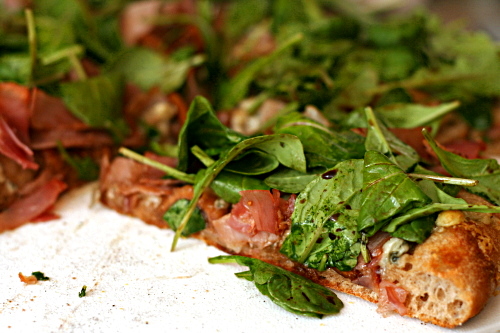
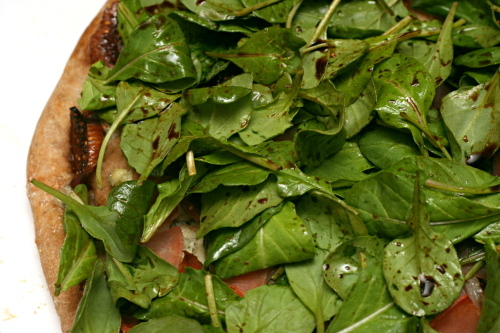
pizza with figs, prosciutto, gorgonzola, balsamic, and arugula

I went to dinner at a fancy pizza place with my parents and Dave a few months ago, and my dad ordered a pizza that seemed appropriate for him – cheeseburger.  Because the more meat, the better!  Hold the vegetables please, is generally his motto.  Oh, I laughed and laughed when his pizza arrived covered in lettuce.  He scraped it right off.

Not that I’ve been much better about the idea of salad on pizza.  It’s a pretty popular concept, but so far I’ve wanted to keep my bread and cheese unadulterated by large amounts of greenery.

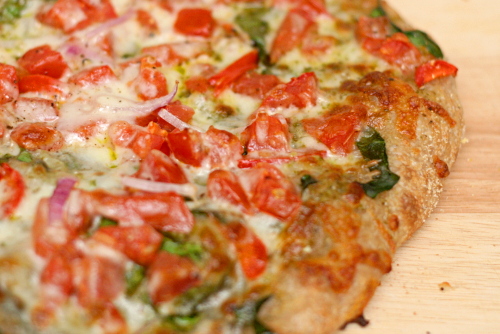
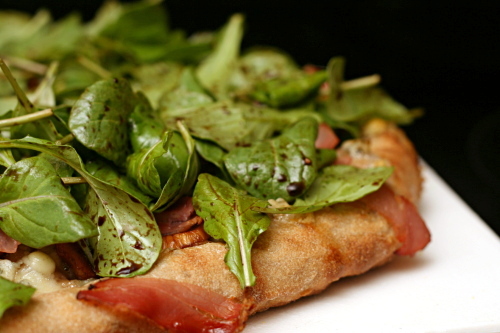
I guess when you’re already putting figs on pizza (oh, how I’d love to see my dad’s face if there were figs on his pizza!), arugula doesn’t seem so weird by comparison.  It turns out that the figs and arugula work really well together.  The figs add sweetness, the prosciutto saltiness, the arugula freshness, and the blue cheese…um…stinky-feetiness?  But in a good way.  In a very, very good way, in fact.

One year ago: Brandied Berry Crepes
Two years ago: Breakfast Strata with Sausage, Mushrooms, and Monterey Jack

Printer Friendly Recipe
Pizza with Figs, Prosciutto, Gorgonzola, Balsamic, and Arugula (adapted from Bon Appetit via epicurious)

The original recipe calls for fresh figs; since I used dried, I soaked them in port for a while to plump them.  However, I’m not sure this is necessary.

Makes 1 12-inch pizza, serving about 3 people

6 small fresh figs, cut into thin slices
2 tablespoons balsamic vinegar, divided
cornmeal (for sprinkling)
12 ounces (¾ pound) pizza dough (⅓ of this recipe), after its first rise
1 cup crumbled Gorgonzola cheese (about 4 ounces)
3 ounces thinly sliced prosciutto, cut into strips
2 teaspoons extra-virgin olive oil
3 ounces stemmed arugula

1. Place a pizza stone on the bottom rack of the oven and preheat the oven to 500ºF. Put the figs in a medium bowl and drizzle 1 tablespoon of the vinegar over them. Set aside.

2. Gently flatten the dough, then pick it up and stretch it out, keeping it as circular as possible. Curl your fingers and let the dough hang on your knuckles, moving and rotating the dough so it stretches evenly. If it tears, piece it together. If the dough stretches too much, put it down and gently tug on the thick spots.

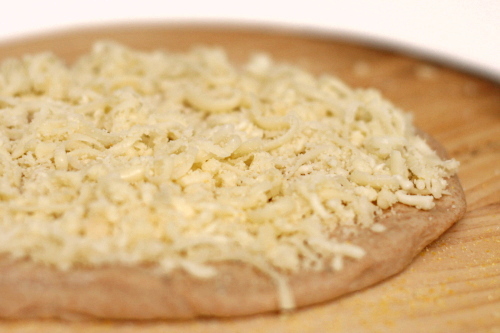
3. Dust a pizza peel with cornmeal and transfer the round of dough to the peel. Rearrange the dough to something reasonably circular; stab it several times with a fork. Top the pizza with the cheese, figs, and prosciutto.

4. Transfer the pizza from the peel to the hot stone. Bake for 8-10 minutes, until the crust is spotty brown. Let the pizza cool on the peel for about 5 minutes.

5. Meanwhile, whisk the remaining 1 tablespoon vinegar with the oil and a pinch of salt and pepper; toss the arugula with the dressing. Spread the salad evenly over the pizza. Slice and serve.
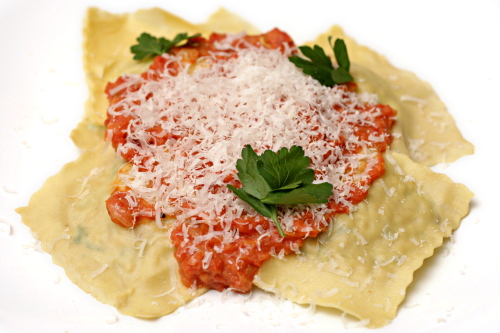
artichoke ravioli

Spring break was last week. I miss it already.

On the other hand, I’m apparently bad at spring break. I had plans to do all these big things, and then when I didn’t get every single one of them done, to perfection, every day, I got all annoyed. Plus, you know what I did instead of work? Chores. I hate chores, and I like my job, so…forget what I said about missing spring break.

I’m sure it’s a surprise to no one that the one thing I did find time for was cooking. I kept to the mostly-healthy, mostly-vegetarian routine we normally stick to on weekdays instead of going for the all-out, life-is-a-celebration, let’s-eat-meat-and-drink-wine routine we tend toward on the weekends. And I realized that another reason I often stick to vegetarian meals on weekdays is that they’re easier.

Not so with ravioli, of course. Once you mix and knead the pasta dough, roll it out, make your filling, fill the ravioli, cook the ravioli, make your sauce – well, that adds up to a nice project for a day off from work.

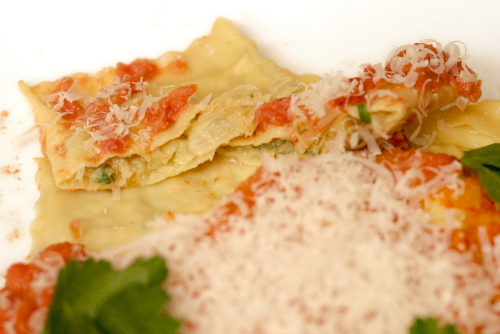
Fortunately, the end result of this one is definitely worth avoiding chores over. The artichokes are subtle, but not invisible. The sauce is rich, but not heavy. And the fresh pasta – well, it’s fresh pasta. You can’t go wrong.

It’s meals like this that make me miss spring break.

One year ago: Cooks Illustrated’s Perfect Chocolate Chip Cookies
Two years ago: Spinach Feta Pine Nut Tart

Printer Friendly Recipe
Artichoke Ravioli With Tomatoes
(adapted from Gourmet via Smitten Kitchen)

4 to 6 servings

This is a good time to utilize your food processor if you have one. I think the best order to process the ingredients in (to avoid cleaning the bowl in between uses) is parmesan, onions, artichoke mixture, tomatoes. You could also make the pasta dough in the food processor, although I’ve had better luck using the stand mixer or kneading by hand.

Ravioli take well to freezing.  Just freeze them in a single layer on a flour-dusted baking sheet.  Once they harden on the pan, transfer them to freezer bags.

Pasta:
6 ounces (1¼ cups) all-purpose flour, plus more for dusting the work surface
2 large eggs

Filling:
2 tablespoons unsalted butter, cut into pieces
1 onion, chopped (½ cup)
2 (14-ounce) cans quartered artichoke hearts, drained
2 ounces (1 cup) finely grated Parmigiano-Reggiano
½ cup chopped fresh flat-leaf parsley
1 large egg
½ teaspoon salt
½ teaspoon black pepper
½ teaspoon freshly grated nutmeg

Sauce:
2 tablespoons unsalted butter
1 onion, minced
1 (28-ounce) can diced tomatoes
½ teaspoon salt
¼ teaspoon black pepper
2 ounces (1 cup) finely grated Parmigiano-Reggiano
2 tablespoons heavy cream

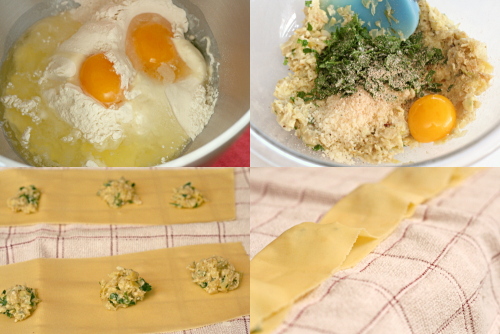
1. For the pasta: Add the flour and egg to the bowl of a stand mixer fitted with the paddle attachment. Mix on low speed until thoroughly incorporated. Change to the dough hook and knead for 5-6 minutes, until smooth. Add flour as necessary – the dough shouldn’t be sticky.  Shape the dough into a ball and wrap it in plastic wrap. Let the dough rest for at least 30 minutes. (You can also mix and knead the dough by hand. It’s easiest – less messy – in a large, wide bowl.)

2. For the filling: In a 12-inch skillet over medium heat, melt the butter. When the foam subsides, add the onion and sauté, stirring occasionally, until golden, about 6 minutes. Add the artichoke hearts and continue cooking while stirring occasionally, until they’re tender, 8 to 10 minutes. Transfer the artichoke mixture to the food processor (scraping but not washing the pan), and process in pulses until the artichokes are coarsely chopped. Stir in the parmesan, parsley, yolk, salt, pepper, and nutmeg.

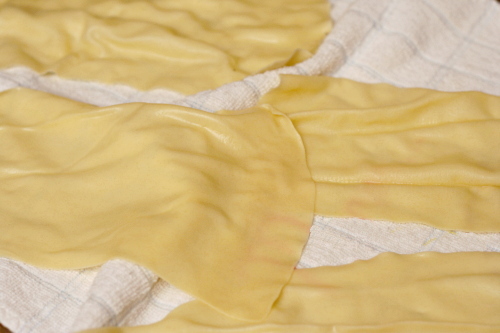
3. Divide the dough into 6 balls. Work with one ball of dough at a time and leave the others covered with a damp dishtowel. Flatten the dough slightly, then roll it through the widest setting on a pasta roller. Fold it in thirds like a piece of paper going into an envelope, then roll it through the pasta roller again, feeding it with one of the open sides first. If at any point the dough is sticky, brush it with flour. Repeat the folding into thirds and rolling a few times. Without folding, run the pasta through the widest setting once more. Adjust the pasta roller to the next-thinner setting and roll the dough through the machine. Continue to gradually thin the dough until the second-to-last setting. Brush it with flour if the dough starts to stick at all. If the strip of dough becomes too long to handle, cut it into two shorter strips and work with each strip separately. Repeat the rolling, folding, and thinning with the remaining balls of dough, laying the sheets of pasta on dishtowels.

4. For the sauce: Melt the butter in the now-empty skillet over medium heat. When the foaming subsides, add the onion and sauté until just golden around the edges, about 5 minutes. Add the tomatoes with their juice and the salt and simmer over low heat until the sauce is thickened, 15-20 minutes. Stir in the pepper, most of the parmesan and the heavy cream. Set aside.

5. The pasta sheets should be approximately 4 inches across. Place small balls of filling (about one rounded teaspoon each) in a line one inch from the bottom of the pasta sheet. Leave one and one-quarter inches between each ball of filling. Fold over the top of the pasta and line it up with the bottom edge. Seal the bottom and the two open sides with your finger. Use a fluted pastry wheel to cut along the two sides and bottom of the sealed pasta sheet. Run pastry wheel between balls of filling to cut out the ravioli.

6. Bring 4 quarts of water to boil in a large stockpot. Add about a tablespoon of salt and half of the pasta. Cook until doubled edges are al dente, 3-4 minutes. With a slotted spoon, remove the ravioli from the pot and transfer them to warmed bowls or plates. Keep warm in a warm oven while the remaining ravioli are boiled. Top the ravioli with sauce and the remaining parmesan; serve immediately.

chicken mushroom spinach lasagna

I’m hardcore – I made an Emeril recipe more complicated. I did skip a few of his steps, so maybe I’m not completely ridiculous.

It’s just that if I’m going to go through all the trouble of making lasagna, with cooking chicken, stirring béchamel, layering and baking, I might as well go all the way – homemade pasta and damn good chicken.

So there was no cooking of boneless skinless chicken breasts in a dry pan – weird, isn’t it, that I’m not a fan of dry tasteless meat. Heck no, I roasted those suckers – bone-in, skin-on, thankyouverymuch. And before that, I brined them – hey, it’s a step that takes about 2 minutes of effort and you ensure fully seasoned, moist meat. Why not do it?

But if I’m going to add homemade pasta and brined, roasted, shredded chicken to an already ambitious recipe, I probably needed to cut some corners somewhere. Since I can’t seem to convince myself to enjoy cooked spinach, I decided to skip the cooking and blanching of the spinach and just add shredded baby spinach directly to the béchamel. I wasn’t able to use quite as much, but that’s okay – it was still a colorful, healthy, easy addition.

Okay, so I guess I only skipped one little step in Emeril’s recipe. Oh wait, I also mixed all the chicken and parmesan into the sauce, so I was really only layering two things – sauce and noodles. That probably saved 30 seconds or so of effort. That’s okay, I had fun making the lasagna, and I was completely confident that the extra bit of work I put into it would give me a perfect result, and, yes, it did.

One year ago: Deli-Style Rye Bread
Two years ago: (Almost) No-Knead Bread

Printer Friendly Recipe
Chicken, Mushroom and Spinach Alfredo Lasagna (adapted from Emeril Lagasse)

This is how I made the lasagna, but there are some things you could do differently. The original recipe keeps the chicken and some of the parmesan separate from the béchamel, laying pasta-béchamel-cheese-chicken instead of just alternating pasta and chickeny parmesany béchamel, like I did.

Also, the type of pasta you use is entirely up to you. You could use the no-cook dry noodles or buy fresh noodles or make your own. And I don’t know for sure that fresh homemade noodles need to be blanched for lasagna, but the one time I skipped that step was a disaster.

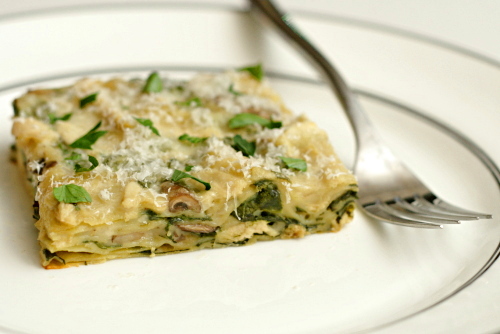
One more thing – the original recipes calls for double these ingredients to be layered into a 9- by 13-inch pan, but I was concerned that I’d have overflow. While my lasagna is a little on the short side, I think twice this height would have been too much for my standard 9- by 13-inch pan. But maybe the quantity of ingredients that I used would make an ideal 8- by 8-inch lasagna?

6 to 8 servings

1 teaspoon vegetable oil
1 pound chicken breasts, bone-in, skin-on, trimmed of excess fat and skin
salt and pepper
4 tablespoons (1 stick) unsalted butter
8 ounces button mushrooms, thinly sliced
2 large shallots, finely chopped
4 cloves minced garlic
¼ cup all-purpose flour
3½ cups milk
¼ teaspoon freshly ground black pepper
¼ teaspoon freshly grated nutmeg
4 ounces spinach, stemmed, washed, sliced into ¼-inch ribbons
3 ounces (1½ cups) grated Parmesan, divided
fresh lasagna noodles (if homemade, use 1 egg + ⅔ cup (3.2 ounces) flour, kneaded and rolled to the
next-to-thinnest setting on a pasta roller, blanched as described here)

1. (Optional) Stir 2 tablespoons salt into 2 cups cold water until it dissolves. Add the chicken; refrigerate for 30 minutes, then remove the chicken from the brine and pat it dry.

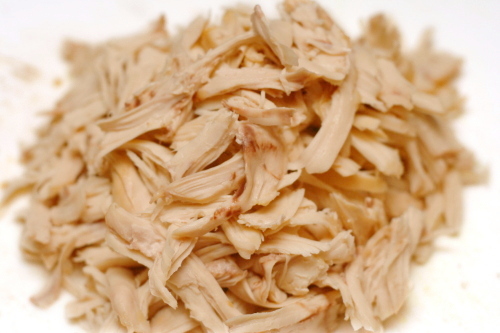
2. Adjust an oven rack to the middle-low position and heat the oven to 450ºF. Heat a small oven-safe skillet over medium-high heat. Add the oil and swirl to coat the bottom of the pan; place the chicken breast in the pan skin-side down. Cook without moving until well-browned, about 5 minutes. Turn the chicken over and move the pan to the oven. Roast until an instant-read thermometer inserted into the thickest part of the chicken measures 160ºF or the juices run clear when small cut is made in the chicken. Remove the pan from the oven and set aside. When the chicken has cooled enough to handle, remove and discard the skin (or eat it, because it’s crisp and delicious!) and shred the meat with your fingers or two forks. Decrease the oven temperature to 375ºF.

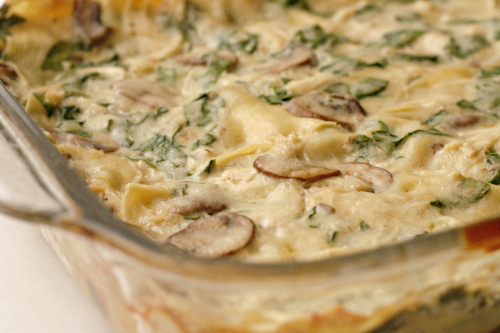
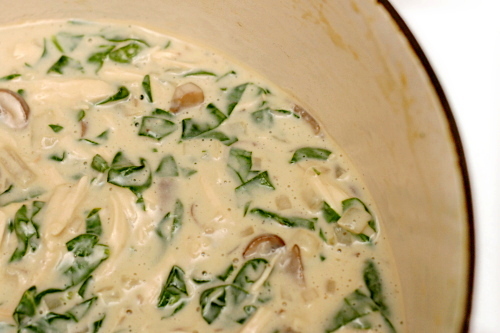
3. Béchamel: Melt the butter in a large saucepan over medium heat. Add the mushrooms and cook, stirring often, until their liquid has evaporated and the mushrooms are slightly browned, about 5 to 7 minutes. Add the shallots to the pan and sauté until soft and translucent, 3 to 4 minutes. Stir in the garlic and sauté for about 30 seconds, until fragrant. Add the flour and cook, stirring with a wooden spoon, to make a light roux, about 1 minute. Whisking constantly, slowly add the milk and continue to cook, stirring occasionally, until thickened, 5 minutes. Add ¾ teaspoon of the salt, the pepper, nutmeg, spinach and 2½ ounces (1¼ cups) of the Parmesan and cook, stirring, until thickened, about 2 minutes, then add the shredded chicken. Taste the sauce to decide if it needs more salt. Remove the béchamel from the heat and place a piece of plastic wrap directly on the surface until ready to assemble the lasagna.

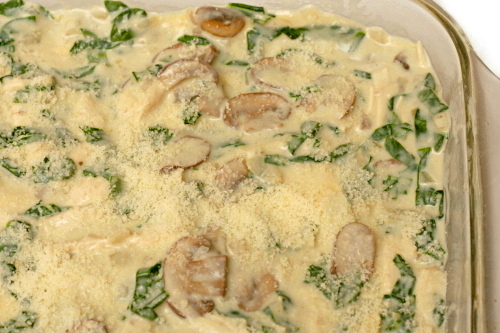
4. Spray a 9 by 13-inch pan with nonstick spray, and spread about ¼ cup of the béchamel sauce on the bottom of the dish, avoiding any large chunks of chicken. Arrange a single layer of noodles evenly over the sauce. Then alternate layering béchamel and noodles until you run out of noodles – I was able to make 4 layers, I believe. End with the remaining béchamel and sprinkle the top with the remaining parmesan.

5. Cover the pan with aluminum foil and bake for 20 minutes. Remove the foil and continue baking for about 20 minutes, until bubbly. Let the lasagna rest for about 10 minutes before slicing and serving.

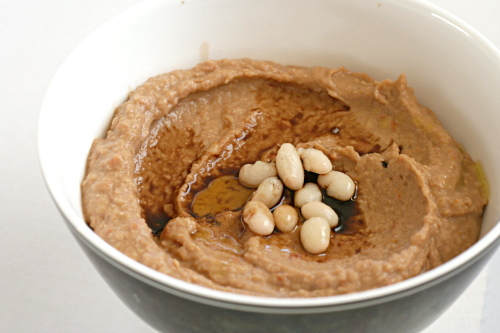
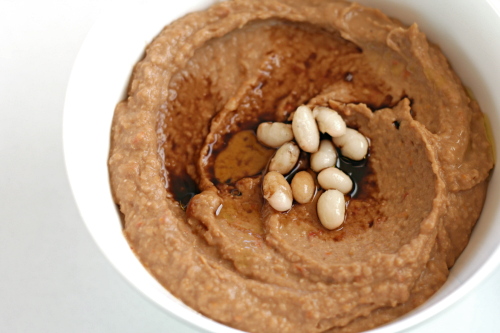
roasted garlic balsamic white bean dip

No matter how hard I try, I can’t get excited about the Thanksgiving feast. Turkey, stuffing, cranberries – I don’t know, they’re all just fine, but Thanksgiving isn’t the eat-until-you-pop day for me that it is for a lot of people. I do love the idea of a free for all food day though. I also love football, so the Super Bowl tends to be my big overeating event.

But even a day of unapologetic binging requires some vegetables. Besides the ubiquitous salsa and guacamole, that is. Since I was already treating myself, I suppose I could have made a delicious mayonnaise and sour cream based dip, but I wanted to leave plenty of belly space for the brownies, meatball sliders, and that guacamole, so I stuck to a light bean dip for the vegetables.

The problem with bean dip is that it’s always a battle between how healthy it is and how much flavor it has. If you don’t want to add cream cheese or butter or nut butters, it can be difficult to find ingredients to bump up the flavor.

Three strong flavors help make this white bean dip interesting – roasted garlic, sun-dried tomatoes, and balsamic vinegar. The result? A bean dip worth filling up on.

One year ago: Vegetarian Chili
Two years ago: Salmon Pesto Pasta

Printer Friendly Recipe
Roasted Garlic White Bean Balsamic Dip (adapted substantially from Bon Appetit via epicurious)

1 head of garlic, outer papery skin removed
½ teaspoon extra virgin olive oil
4 sun-dried tomatoes packed in oil
¼ teaspoon kosher salt
1 (15-ounce) can white beans (cannellini, navy, great northern), drained and rinsed
pinch black pepper
1 tablespoon balsamic vinegar plus extra for drizzling
1 tablespoon oil from jar of sun-dried tomatoes

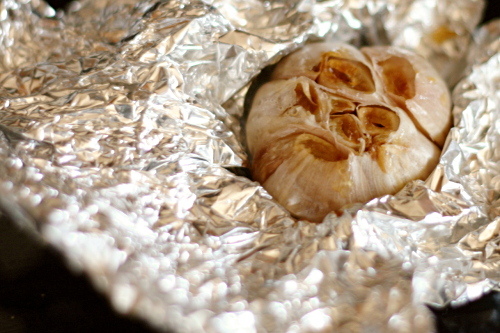
1. Adjust an oven rack to the middle position and heat the oven to 400ºF. Cut ¼-inch off of the top of the bulb of garlic. Place the bulb in an 8-inch square of foil and drizzle with ½ teaspoon of the oil. Wrap the garlic in the foil and roast until soft, about 40 minutes.

2. When the garlic is cool enough to handle, squeeze the cloves from their peels and put them in the bowl of a food processor. Add the tomatoes and salt; process until smooth. Add the beans and pepper and continue processing. With the machine running, pour in the balsamic vinegar and sun-dried tomato oil. Adjust the seasonings if necessary, and serve, drizzling with more balsamic vinegar.

pasta with baked ricotta and sweet tomato sauce

I’m all about taking water out of ingredients. Zucchini, eggplant, cabbage, tomatoes, tofu, even bread for French toast. Water doesn’t contribute flavor, so if it isn’t improving texture, I have no use for it.

In this recipe, ricotta is drained in cheesecloth for several hours, then baked. What I thought would happen is the cheese would lose a small but significant portion of water during the draining stage, and then it would brown a little in the oven.

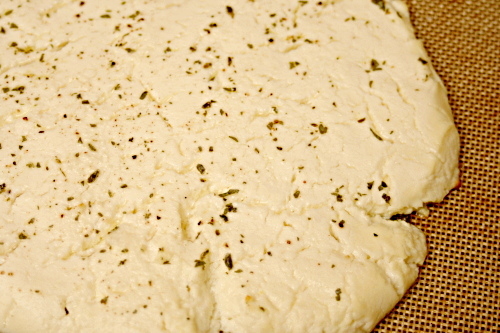
I was wrong. My ricotta actually gave off no liquid during straining, and I’m thinking now that the baking isn’t so much to brown the ricotta as to concentrate flavor by evaporating even more liquid.

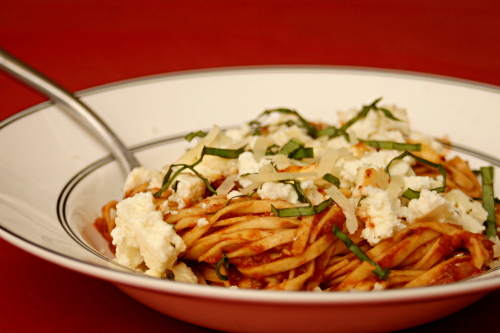
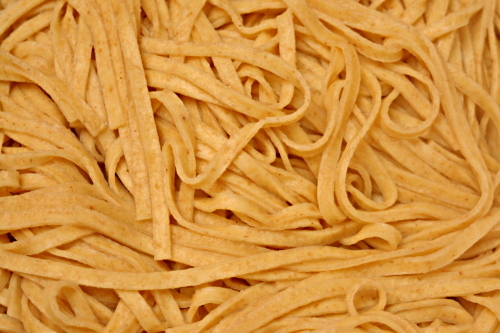
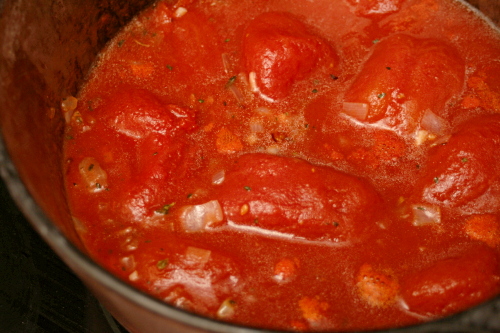
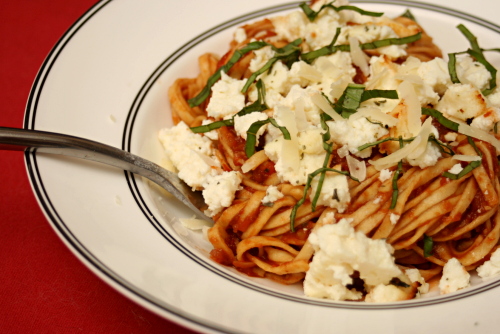
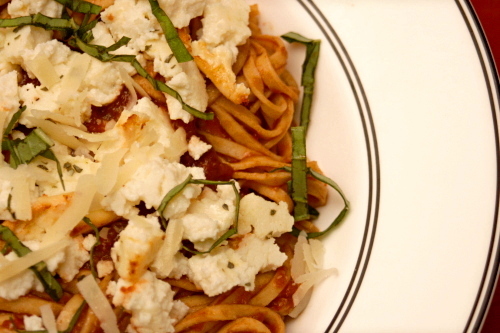
The sauce to accompany the baked ricotta is a simple tomato sauce that is sweetened with balsamic vinegar. I used fresh pasta, which when topped with the sauce, ricotta, a handful a parmesan and a sprinkling of basil, made for a great adaptation of a classic pasta and tomato sauce dish.

One year ago: Pot Roast
Two years ago: Comparison of 4 Vanilla Frosting

Printer Friendly Recipe
Pasta with Sweet Tomato Sauce and Baked Ricotta (adapted from Jamie Oliver via Cate’s World Kitchen)

I used one pound of (store-bought) fresh pasta instead of dried pasta, and it was so good that I think I’ll stick with fresh pasta for this recipe in the future as well.

Serves 4-6

1 (15-ounce) container ricotta
1 teaspoon plus 1 tablespoon olive oil, divided
salt and pepper
½ teaspoon dried oregano, divided
2 large shallots, finely chopped
2 cloves garlic, finely chopped
1 (28-ounce) can whole tomatoes in juice
3 tablespoon balsamic vinegar
1 pound wide pasta, such as pappardelle or fettucine
a handful of fresh basil, torn
½ cup (1 ounce) freshly grated parmesan

1. Line a fine-mesh strainer with several layers of cheesecloth. Spoon the ricotta into the strainer and refrigerate for several hours or overnight.

2. Adjust a rack to the upper-middle position and heat the oven to 450 degrees F. Line a baking sheet with parchment paper or a silicone baking mat. Spread the ricotta onto the baking sheet in a 1-inch layer. Season the ricotta with ¼ teaspoon dried oregano and a generous pinch of both salt and pepper. Rub 1 teaspoon of the olive oil over the seasoned ricotta. Bake for 15 minutes, until dry and slightly browned at the edges.

3. Heat the remaining tablespoon of oil in an 8 to 10-inch skillet over medium heat. Add the shallots and sauté, stirring occasionally, until the edges just start to brown, 6-8 minutes. Stir in the garlic and ¼ teaspoon oregano, and cook, stirring constantly, until fragrant, about 30 seconds. Add the tomatoes and ½ teaspoon salt; bring to a simmer, then lower the heat to medium-low and simmer, stirring occasionally, for 15 minutes. Use a spoon to crush the tomatoes, of, if you’d like a smooth sauce, transfer the mixture to a blender or use an immersion blender to puree the sauce. Stir the balsamic vinegar into the sauce.

4. Meanwhile, bring a large pot of water to a boil. Add 1 tablespoon salt and the pasta to the boiling water and cook according to the package instructions. Drain the pasta, reserving about a cup of the cooking water.

5. Combine the pasta and sauce, thinning the mixture with pasta cooking water if necessary. Fold in the basil and ricotta and top with the parmesan.

traditional pizza

Copy of IMG_0966

When it comes to cooking, I definitely have weaknesses. I’ve never cooked a perfect roast chicken. I can’t cook a steak with any sort of precision in doneness; if it’s somewhere between ‘moo’ and black, I consider it a success. And grilling? I’ve really never done it. Clearly there are holes in my culinary knowledge.

But pizza? Pizza, I know.

Copy of IMG_7570

I make pizza almost every week. I’ve tried all sorts of crusts, sauces, cheeses, and toppings. I’ve taken notes. And now, finally, I can make my perfect pizza. I’m not saying that my favorite will be your favorite; but it might give you somewhere to start and something new to try.

Copy of IMG_4671

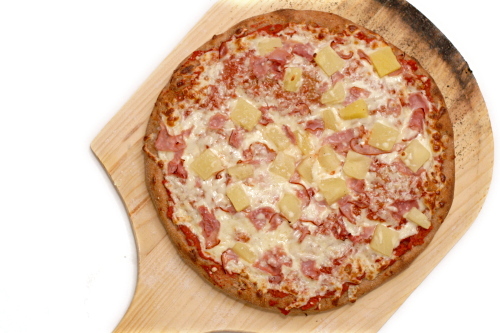
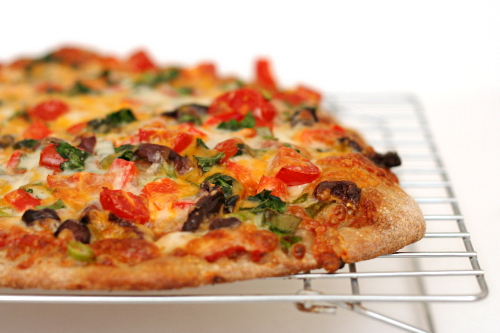
Toppings – I’m going to attack this from top to bottom, which has the advantage of progressing from the simplest decisions to the more complicated. I’m going to focus on traditional pizza – tomato sauce, Italian cheeses, toppings. Most any topping will work here. Use whatever toppings you want in whatever quantities you prefer. I vary it quite a bit, with my favorite combinations being ham and mushroom, as well as ham and pineapple.

Copy of IMG_3544

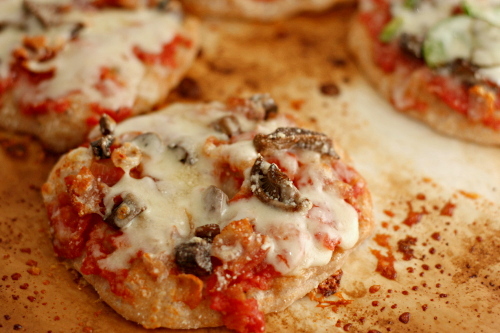
Cheeses – I like a ratio of 5 parts mozzarella to 1 part parmesan. If you have other cheeses around, cheddar or gouda or fontina, it can be fun to replace a portion of the mozzarella with those. I actually prefer part-skim mozzarella on pizza; it seems to melt more smoothly and it tastes just as good as whole milk cheese.

Copy of IMG_3676

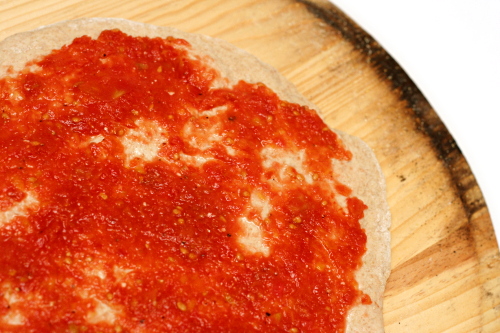
Sauce – My sauce is very (very very) simple, but you have to trust me that it’s just right. All I do is puree a drained can of diced tomatoes, strain them until they’re thick, then stir in salt and pepper. It’s easier than cooking a sauce, and I love the fresh flavor. It does complicate the addition of garlic and spices, but I get around that by adding the garlic as a topping and the herbs to the crust. (I don’t like raw garlic, so I toast the whole unpeeled cloves on the hot pizza stone for a few minutes.)

Copy of IMG_3554

Crust – I want a crust that is light and tender and flavorful, but, even more importantly, easy to work with. No one wants to fight with their pizza dough. This crust started with Cooks Illustrated’s popular pizza dough recipe, and then I started substituting white wine for a portion of the water, and after I made Peter Reinhart’s pizza dough, I became more committed to a cold overnight rise.

Copy of IMG_3550

Another important aspect of pizza crust is how you work with it. Be gentle with your dough. I need to stress that you really don’t want to use a rolling pin. Pull and stretch the dough. Pick it up, hanging the edges on your knuckles, and let gravity do the work. If it’s tearing or thinning unevenly, put it back down and just pull at the thicker parts. If it’s fighting you, walk away for five minutes to let it relax. (I use this technique when I fight with Dave too – ha!)

Copy of IMG_8407

I’m sorry to be so braggy, but this pizza really is just great. Most of it comes down to the crust, which is thin, crisp, and light. I love the sauce too, because it tastes exactly like what it is – tomatoes. The combination of cheeses provides just the right amount of richness and flavor. I start out nearly every weekend by making this pizza, and I can’t think of a better way.

Copy of IMG_5293

Update 3/16/10: I’ve successfully used this method to make this pizza crust whole wheat.  I made the pre-dough out of 11 ounces whole wheat flour, ¾ teaspoon salt, and 1 cup water .  After letting that sit overnight, I mixed it with the rest of the ingredients – 2 tablespoons olive oil, ½ teaspoon dried oregano, 11 ounces white bread flour, 1 teaspoon salt, 2 teaspoons instant yeast, 1 teaspoon granulated sugar, ¼ cup white wine, and ½ cup water.

Printer Friendly Recipe
Traditional Pizza

You can substitute up to 7 ounces (about 1½ cups) of whole wheat flour for the white bread flour, but expect longer rising times and a more stubborn dough. But if you’re patient during shaping, your crust will be just as light and crisp as dough made completely with white flour.

Dough:
2 tablespoons olive oil
½ teaspoon dried oregano
22 ounces (4 cups) bread flour
1¾ teaspoons salt
1 teaspoon sugar
2 teaspoons instant yeast
1/4 cup white wine
1½ cups water
cornmeal for dusting

Sauce:
1 (28-ounce) can diced tomatoes, drained
salt and pepper

Assembly:
3 cloves garlic, unpeeled
10 ounces (2½ cups) part-skim mozzarella, shredded
2 ounces (1 cup) parmesan, grated
toppings of your choice

1. For the dough: Heat the oil and oregano in a small saucepan until fragrant. Mix in the water and wine.

2. In the bowl of a stand mixer fitted with the dough hook, mix the flour, salt, sugar, and yeast. With the mixer on low speed, pour in the liquid mixture. Continue mixing on medium-low speed until the dough comes together, and then knead on medium-low speed for 8 minutes, until the dough is smooth and elastic. Add more flour or water as necessary to form a dough that is sticky but does not cling to the sides of the bowl. When the mixer is running on medium-low speed, the dough should not stick to the bottom of the bowl.

3. Spray a large bowl with nonstick spray. Rub your hands on the sprayed bowl to coat them with oil, then quickly form the dough into a ball. Place the ball of dough in the bowl and cover with plastic wrap.

4. Either set the dough aside to rise at room temperature, which will take 1½ to 2 hours, or refrigerate it until the next day. If it’s chilled overnight, it will take about 5 hours at room temperature to warm and finish rising. You can also reduce the yeast to ½ teaspoon and let the dough rise on the counter for about 8 hours after it has been chilled overnight.

5. For the sauce: Pulse the tomatoes in a food processor 10-12 times, until they’re pureed. Transfer them to a fine-mesh strainer set over a large bowl and let them drain, stirring occasionally for at least 10 minutes. (You can get away with less time if you actively stir and press the tomatoes through the strainer; if you wait longer, you can stir less.) Then discard the liquid in the bowl, transfer the tomatoes from the strainer to the now-empty bowl, and stir in a pinch of pepper and 1/8 teaspoon of salt.

6. Place a pizza stone on the bottom rack of the oven and preheat the oven to 500ºF. Place the garlic on the hot pizza stone for 3-4 minutes or until fragrant.

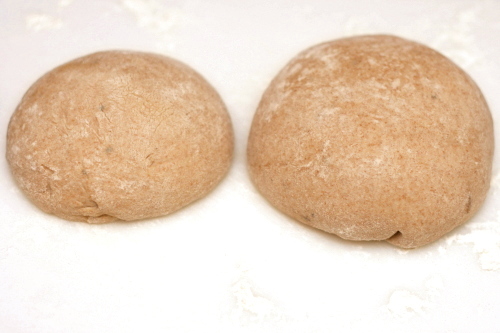
7. Divide the dough and shape each portion into a ball. You have a few options of how to divide it. It makes enough dough for three 12-inch pizzas. However, I always cut it in half and freeze half. Then I divide the remaining dough into two more parts, one twice the size of the other. I make the larger one into pizza and the smaller into cheese bread (no sauce or toppings). Let the balls of dough relax for 10-30 minutes.

8. Using tongs, remove the garlic from the oven and let it cool for a few minutes. Mince.

9. Work with one ball of dough at a time on a lightly floured surface. Flatten the dough, then pick it up and gently stretch it out, trying to keep it as circular as possible. Curl your fingers and let the dough hang on your knuckles, moving and rotating the dough so it stretches evenly. If it tears, just piece it together. If the dough stretches too much, put it down and gently tug on the thick spots.

10. Dust a pizza peel lightly with cornmeal and transfer the round of dough to the peel. Rearrange the dough to something reasonably circular; stab it several times with a fork. Add 1/3 of each of the garlic, sauce, and cheese, followed by toppings of your preference, then transfer the pizza to a hot pizza stone. Bake for 8-10 minutes, until the cheese is bubbling and the crust is spotty brown. Let the pizza cool on the peel for about 5 minutes before slicing and serving. Repeat with the remaining ingredients.

Copy of Copy of IMG_0960

pumpkin biscotti

Copy of IMG_0891

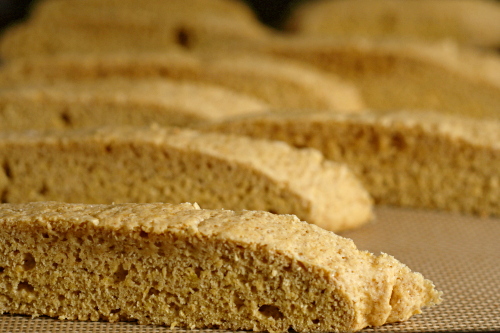
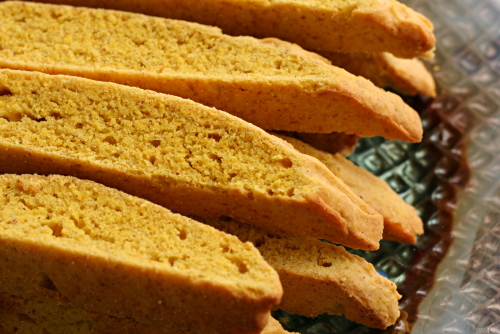
My less-baking-until-Thanksgiving goal is getting annoying. The deal was that for most of November, I would only bake biscotti for Dave, 100% whole wheat bread, and any recipes that were required for my blog. Well, I finished baking November’s Tuesdays with Dorie recipes last week, and my freezer is stocked with whole wheat bagels, pizza dough, and baguettes.

Copy of IMG_0514

So I’ve made a lot of biscotti for Dave this month. It’s been my way to cheat. I’ve been making half batches, not only because that way I get to make more again sooner, but I was a little uncertain about this recipe.

Copy of IMG_0510

The original version didn’t have any butter in it. I’ve made biscotti without fat before, and they were some of the worst biscotti I’ve had. The texture was not crunchy or crisp, but nearly crystalline. In this case, I guess I was hoping that the pumpkin would somehow make up for the lack of fat.

Copy of IMG_0520

It didn’t, and the first batch of these biscotti weren’t great. I added a few tablespoons of butter to the second batch (less than half of what a regular cookie recipe has), and the texture was what Dave and I prefer in our biscotti – crunchy but not teeth-breakingly so. But there was some metallic background taste that Dave and I couldn’t identify, which made our tongues tingle unpleasantly after a bite.

Copy of IMG_0847
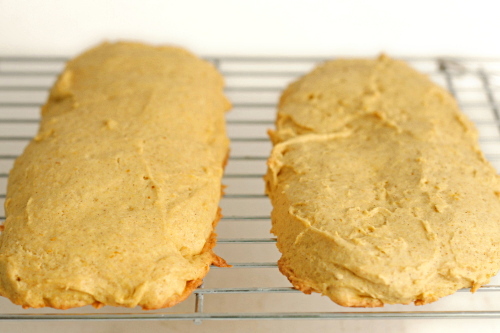
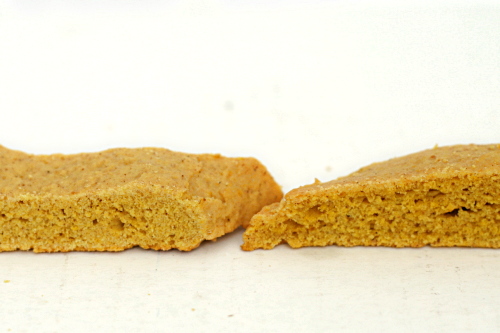
right – half the baking powder

What in the world was that? My guess was that there was too much baking powder, but the amount I used seemed on par with other biscotti recipes. So I tried one more time, this time making two half-batches of dough, one with half the amount of baking powder, one with the same amount.

Copy of IMG_0527

Well, I don’t know what was wrong with that second batch. Maybe I accidentally doubled the baking powder, because when I divided the amount in half, the biscotti didn’t rise correctly. It tasted good and the texture was fine, but it didn’t dome in the middle to make pretty shapes. The half-batch with the full amount of baking powder was perfect – crunchy, smooth and domed, and no metallic taste.

Copy of IMG_0889
left – half the baking powder

Which means I have no more excuses to experiment. I have half a carton of cranberries in my fridge, and I’m just about out of scones stored in my freezer, so I’m itching to make cranberry scones. And I have a friend with a birthday soon, and I want to send treats. But that’s breaking the rules, I suppose. Two more weeks until I get to bake again.

It’s cheating to let myself bake as long as it isn’t desserts for myself, right? Right?

Copy of IMG_0528
the first, butterless batch

One year ago: Bourbon Pumpkin Cheesecake

Printer Friendly Recipe
Pumpkin Biscotti
(adapted from Simply Recipes)

2½ cups (12 ounces) all-purpose flour
1 cup (7 ounces) granulated sugar
1 teaspoon baking powder
1 teaspoon cinnamon
½ teaspoon nutmeg
pinch ginger
pinch cloves
½ teaspoon salt
2 eggs
6 tablespoons butter, melted
½ cup pumpkin purée
1 teaspoon vanilla extract

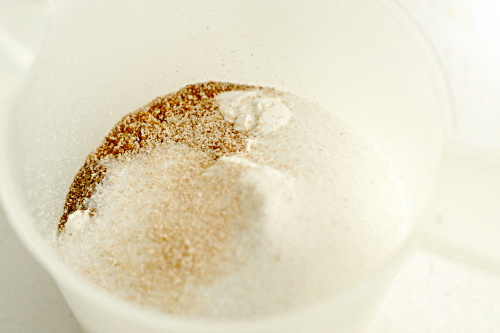
1. Preheat oven to 350°F. Sift together the flour, salt, sugar, baking powder, and spices into a large bowl.

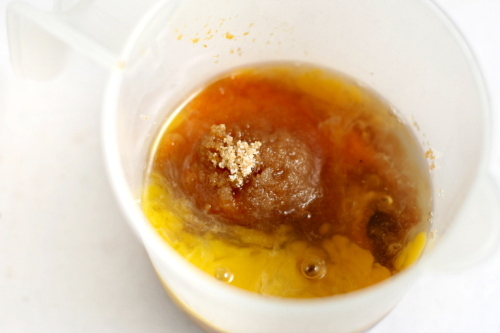
2. In another bowl, whisk together the eggs, melted butter, pumpkin purée, and vanilla extract. Pour the pumpkin mixture into the flour mixture. Give it a rough stir to generally incorporate the ingredients, the dough will be crumbly.

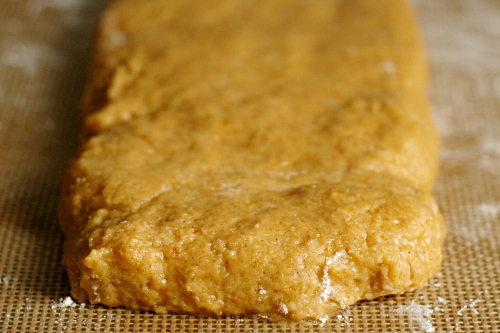
3. Flour your hands and a clean kitchen surface and lightly knead the dough. Lightly grease a baking sheet or line it with parchment paper. Form the dough into a large log, roughly about 15-20 inches by 6-7 inches. The loaves should be relatively flat, only about ½ inch high. Bake for 22-30 minutes at 350ºF, until the center is firm to the touch. (Feel free to also form two smaller logs for cute two-bite biscotti; just cut the baking time to 18-24 minutes.)

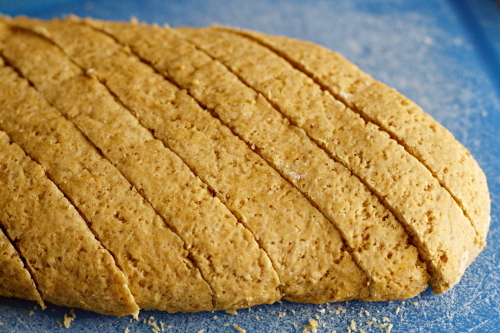
4. Let biscotti cool for 15 minutes and then using a serrated knife cut into 1 inch wide pieces. Turn the oven to 300ºF and bake for an additional 15-20 minutes. Cool completely.

Copy of IMG_0894

risotto with swiss chard

Copy of IMG_6075

Although I think that adding green pepper is the easiest way to ruin otherwise perfectly good pizza, I’m not in general a picky eater. There are no common ingredients that I refuse to eat, I’m game to try just about anything, and I think even green pepper has its place. (Caveat: margarine and the like – gross. But that stuff doesn’t count.)

On the other hand, sometimes I do have problems wrapping my mind around certain things. For example, I love sushi, love it, and make an opportunity to eat it once every week or two, but somewhere, in the back of my mind, when I eat tuna sashimi, I’m still thinking “ew, raw fish.”

Copy of IMG_6060

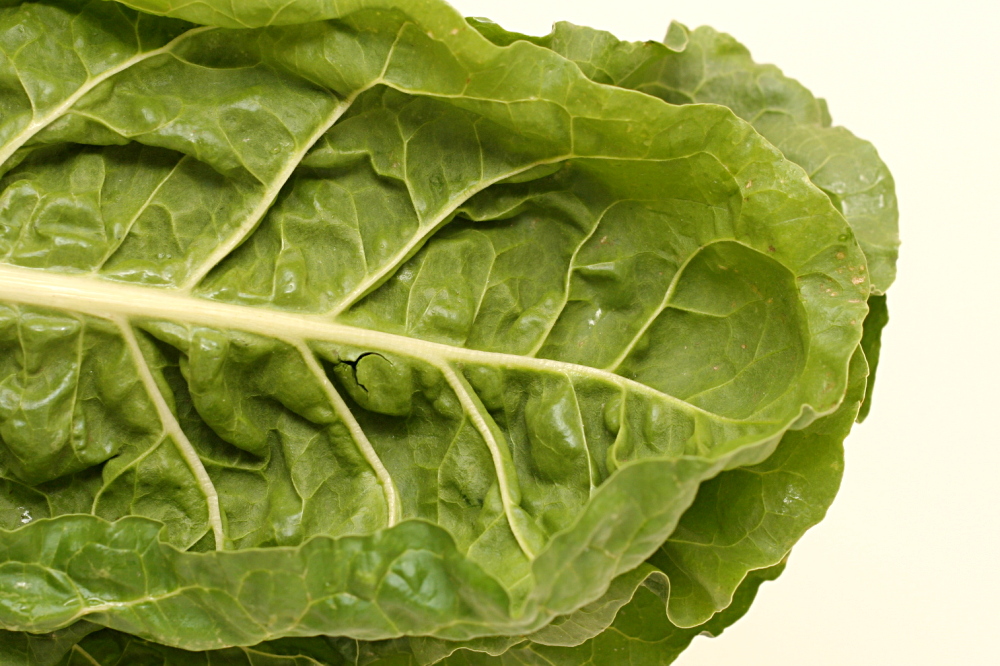
A year or two ago, I realized that I really like kale, and you might think that would lead me to believe I’d also enjoy other hearty greens, like swiss chard. But I had it in my head that swiss chard would be bitter and mushy. It took me a long time to convince myself to try it.

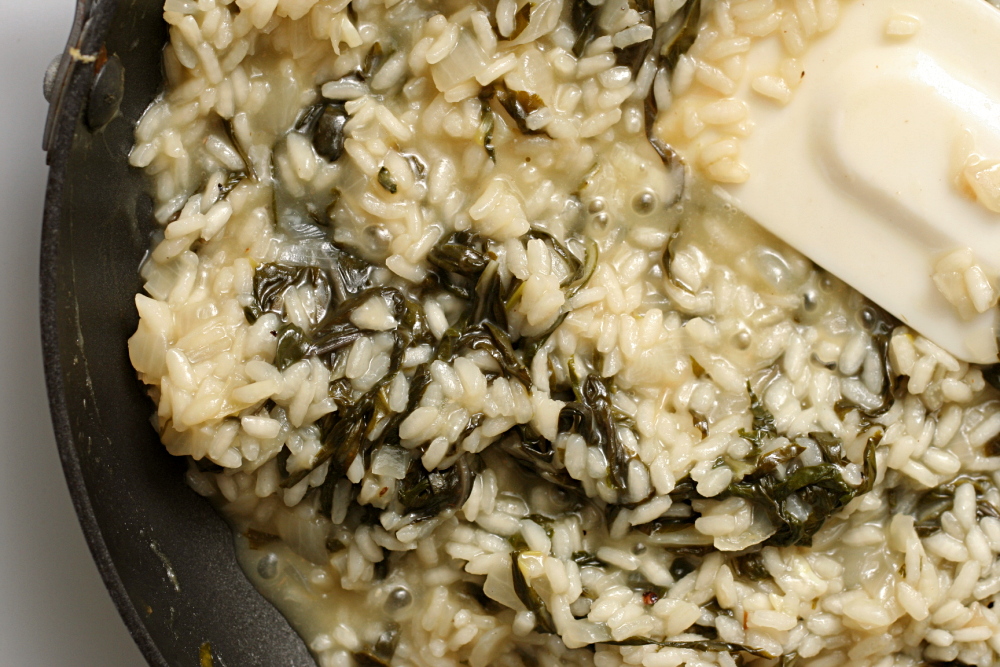
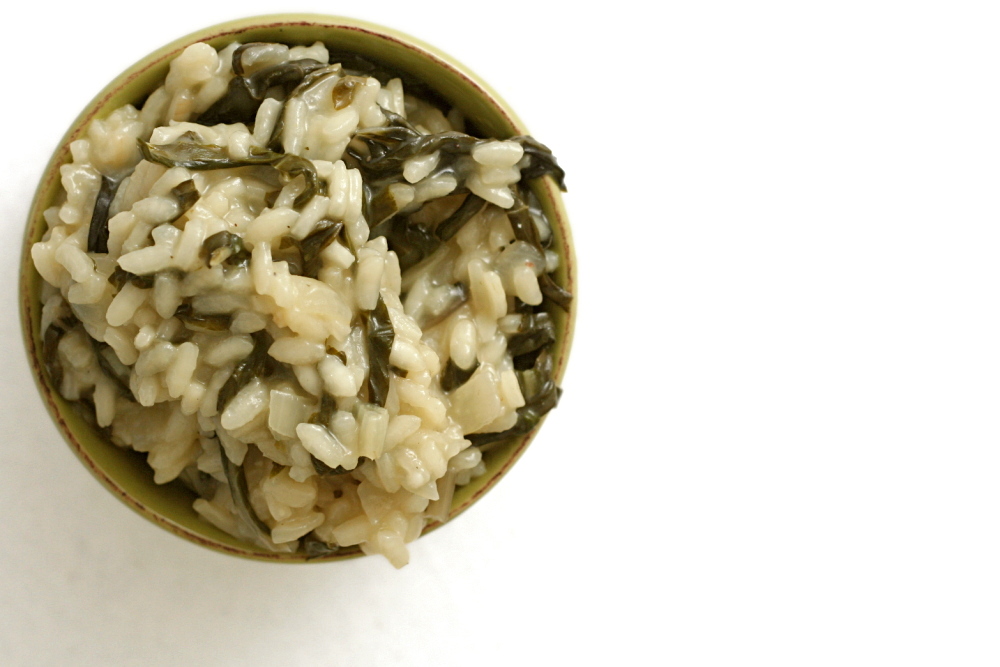
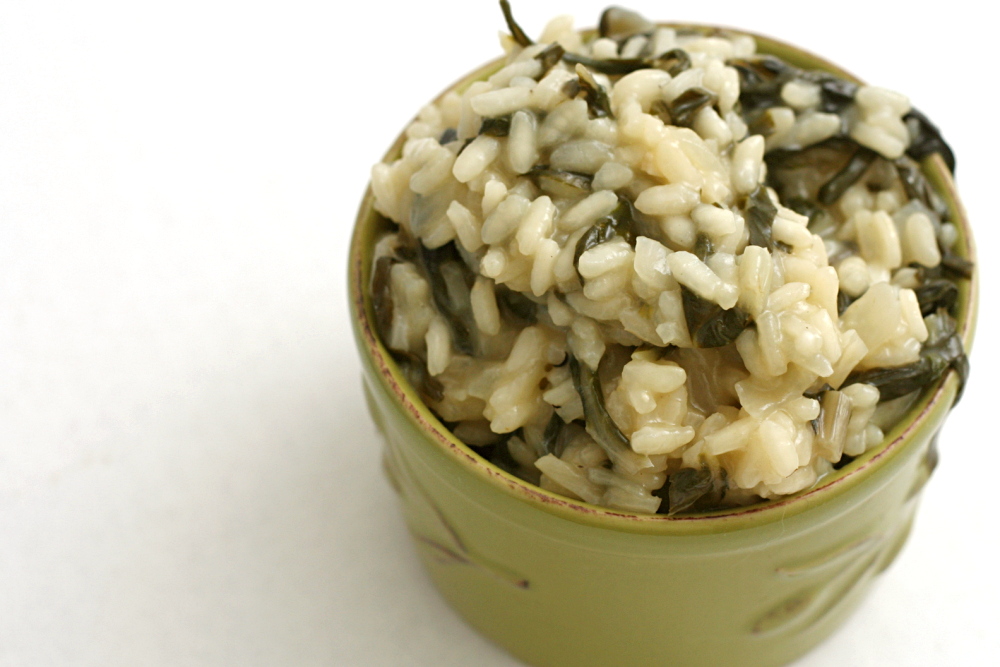
Risotto is a really good way to introduce new vegetables. For one thing, it’s so freakin’ good on its own, and the flavors go with a lot of different ingredients. For another, it makes a convenient side dish to a nice piece of meat, because it often incorporates both a starch and vegetables, so you only need to make one side instead of two.

Copy of IMG_6064

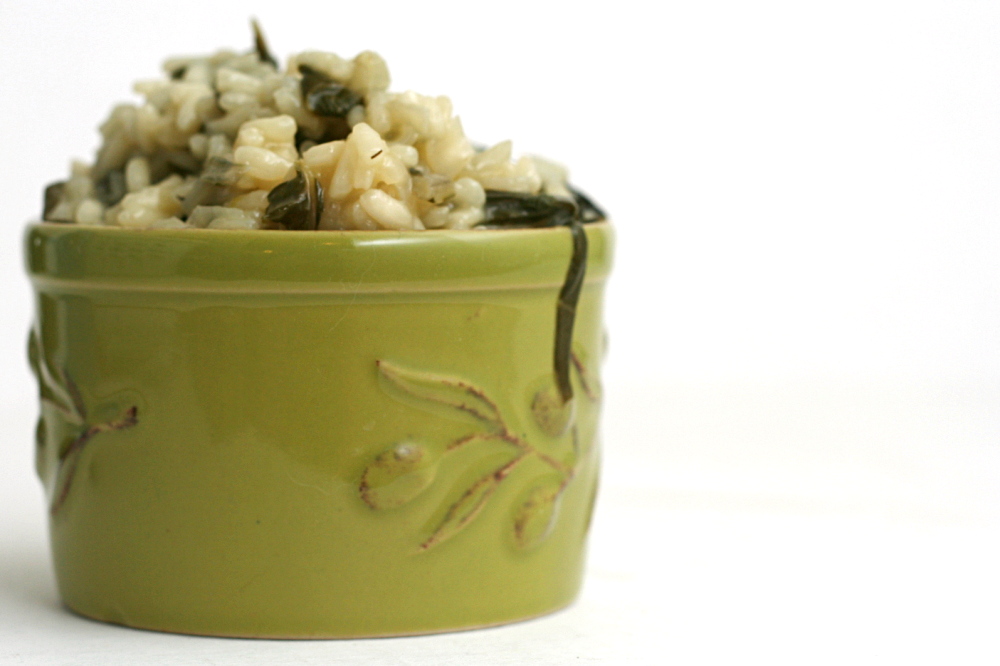
I did look at a recipe for risotto with swiss chard, but ultimately decided to just add chard to my standard risotto recipe. I tried adding it with the rice at first, but I was worried that it was overcooking, and even though the final result was actually very good, I had hoped to hold on to the bright green color that the chard turns midway through cooking. I tried again, this time adding the greens later, with the broth. And it made no difference that I could tell. Once cooked, chard turns a dark olive green, and there’s no getting around it.

Copy of IMG_6074

The earthiness of swiss chard goes really well with risotto. And one thing that’s satisfying about eating hearty greens like this is that they lose so much volume during cooking that I feel like it’s easy to eat a whole lot of greens! As usual, I’m glad I tried and managed to accept a new ingredient. Maybe raw oysters will be next?

Copy of IMG_6080

One year ago: Gazpacho

Printer Friendly Recipe
Risotto with Swiss Chard

6 servings

3½ cups low-sodium chicken broth
3 cups water
2 tablespoons olive oil
1 medium onion, diced fine
2 cloves garlic, minced
salt
2 cups Arborio rice
1 large bunch swiss chard, coarsely chopped (4-5 cups)
1 cup dry white wine
2 ounces (1 cup) parmesan cheese
pepper

1. Bring the broth and water to a simmer in a medium saucepan over medium-high heat. Cover; turn the burner off but keep the pot on the burner.

2. Heat the olive oil over medium heat until the foaming subsides. Add the onion and sauté until softened, about 5 minutes. Add the garlic and cook until fragrant, about 30 seconds. Add the rice, chard, and 1 teaspoon salt and cook, stirring constantly, until the rice is opaque, about 2 minutes. Add the wine and cook, stirring until the rice nearly completely absorbs all the liquid, about 1 minute.

3. Add 2 cups of the hot stock and stir occasionally until it’s mostly absorbed (the spoon will leave a trail on the bottom of the pan), about 6 minutes. Continue to add stock, 1 cup at a time, stirring frequently, until each addition is absorbed. Cook until rice is creamy but still somewhat firm in center (add more water in ½ cup increments if broth/water mixture runs out), 10 to 12 minutes longer.

4. Stir in the cheese. Season with salt and pepper, if necessary. Serve.
Copy of IMG_6079

casatiello

Copy of IMG_6617

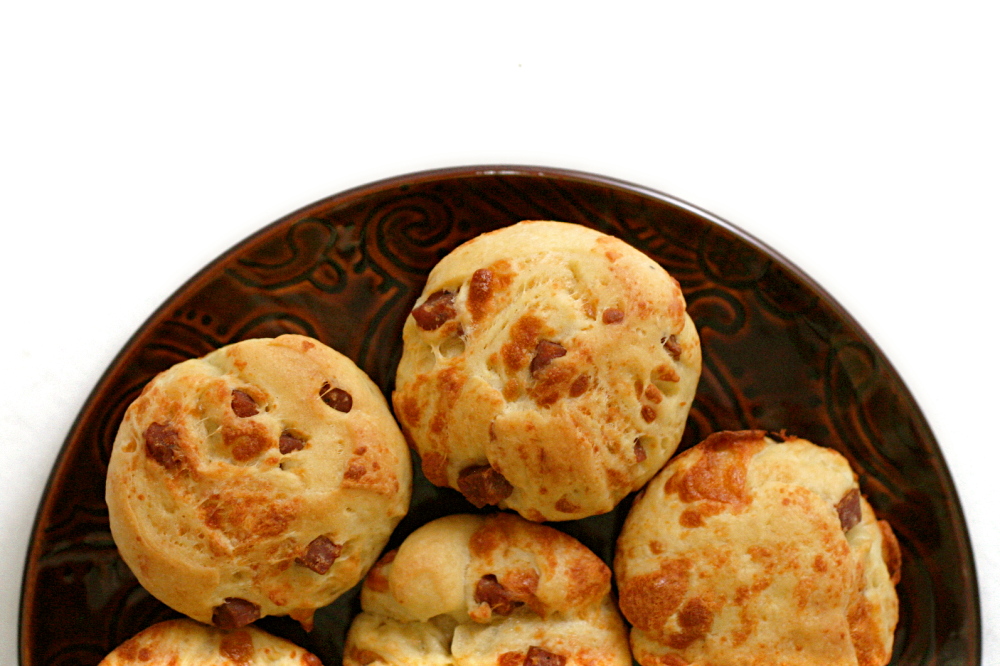
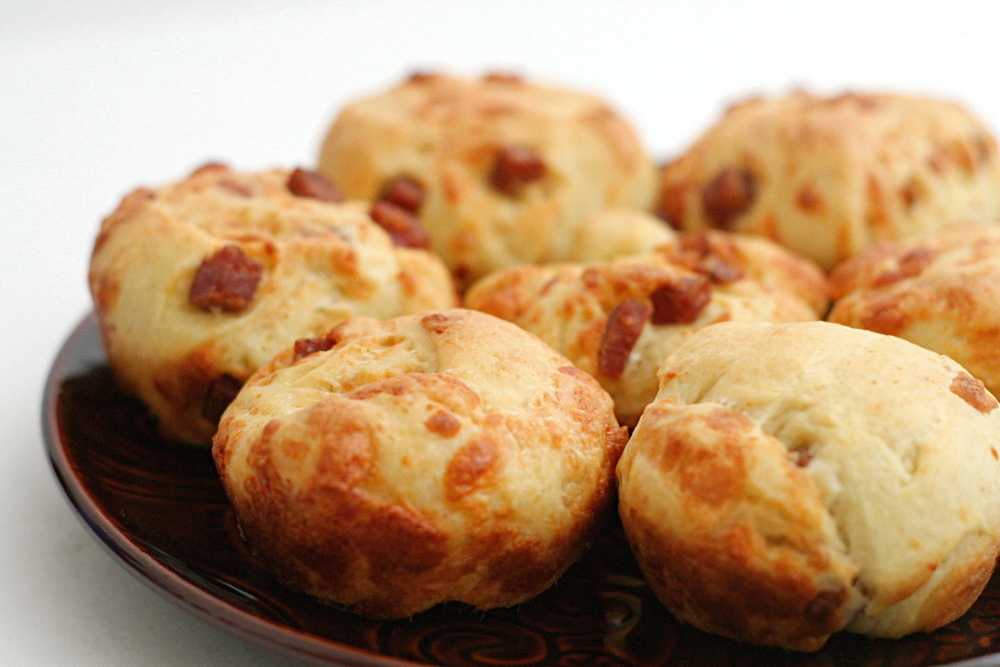
This is the third time I’ve made this bread, and the first two times just didn’t do it for me. It seems like a given, right? Bits of sausage and cheese dispersed in a tender buttery bread? What isn’t to like?
Copy of IMG_6589

The first time, it was the type of cheese I used that ruined it. I generally like provolone, but I’d accidentally grabbed an exceptionally sharp specimen, and it was way too intense. The next time…I don’t know. Maybe it just didn’t fit the occasion. I just remember it seeming a little too rich, maybe even greasy.

Copy of IMG_6593

Reinhart does compare this bread to brioche, and while not all brioche is as rich as the one I made a few weeks ago, you’ll never hear one described as lean. But once you add sausage and cheese to the bread, I don’t know that much butter in the dough is necessary.

Copy of IMG_6603

In fact, I didn’t add butter at all. I added bacon fat instead. Yeah, bacon fat doesn’t sound like much of a health improvement over butter, but I did use half the amount of fat called for in the recipe. I really prefer this slightly leaner version.

Copy of IMG_6611

Especially because I probably doubled the salami. I wasn’t so much measuring at this point, and I just figured that the more add-ins there were, the more the bread would resemble a built-in sandwich. Which – yum. I admit that I had trouble keeping all of the tasty bits from falling out of the dough, but I’m not complaining about the excess.

Copy of IMG_6613

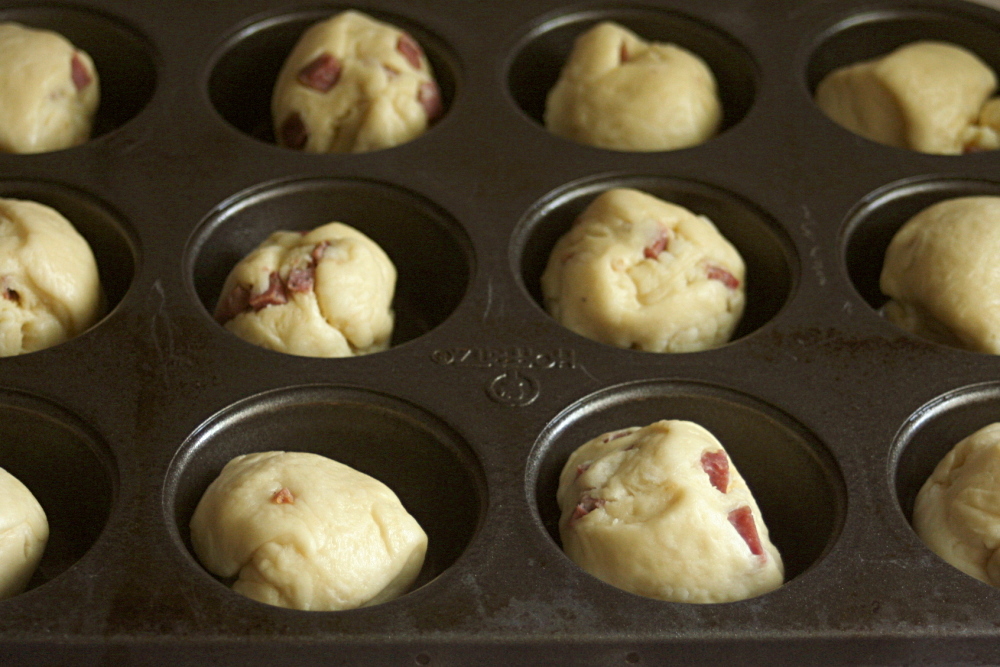
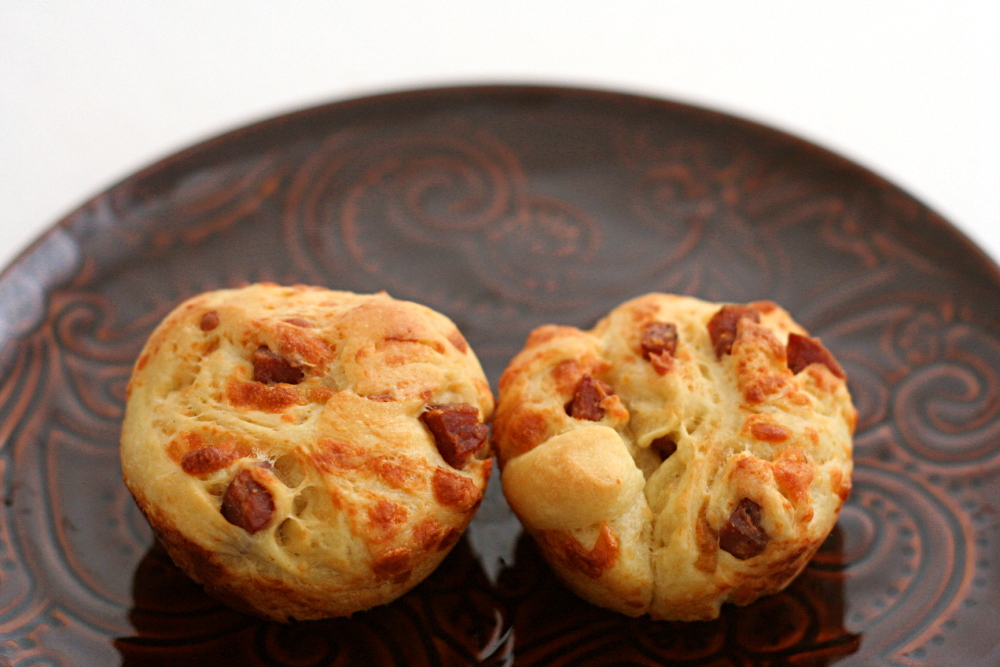
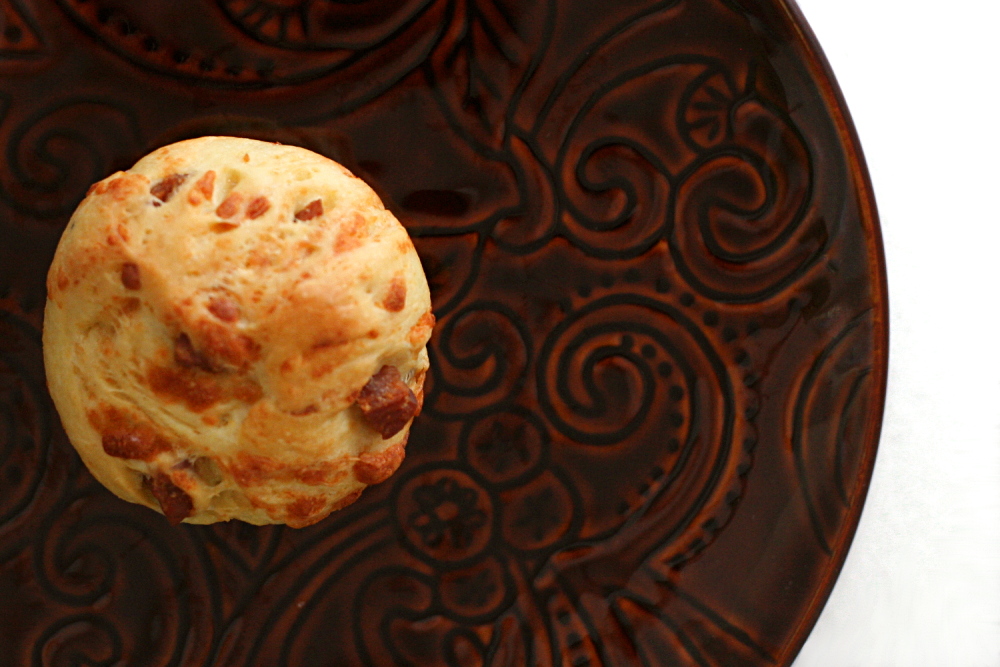
This was by far the best casatiello I’ve made. The bread was tender and light, but not greasy like I remembered from when I’ve made this before. We ate it on a roadtrip, and the muffin-size was perfect for a quick and easy on-the-road lunch. I have a few more casatiello rolls waiting in the freezer, and I think they’ll be great for a plane ride next week. These are my new favorite travel food.

Copy of IMG_6623

One year ago: Pain a l’Ancienne – another Reinhart recipe, and probably the one I make the most

Casatiello (from Peter Reinhart’s Bread Baker’s Apprentice)

I prefer this dough to be a little leaner, so I like to cut the fat in half. I also like both the sausage and the cheese chopped into about ¼-inch cubes.

Sponge:
½ cup (2.25 ounces) bread flour
1 tablespoon instant yeast
1 cup whole milk or buttermilk, lukewarm

Dough:
4 ounces Italian salami (or other similar meat)
3½ cups (16 ounces) bread flour
1 teaspoon salt
1 tablespoon sugar
2 eggs, slightly beaten
¾ cup (6 ounces) unsalted butter, room temperature
¾ cup coarsely shredded or grated provolone or other cheese

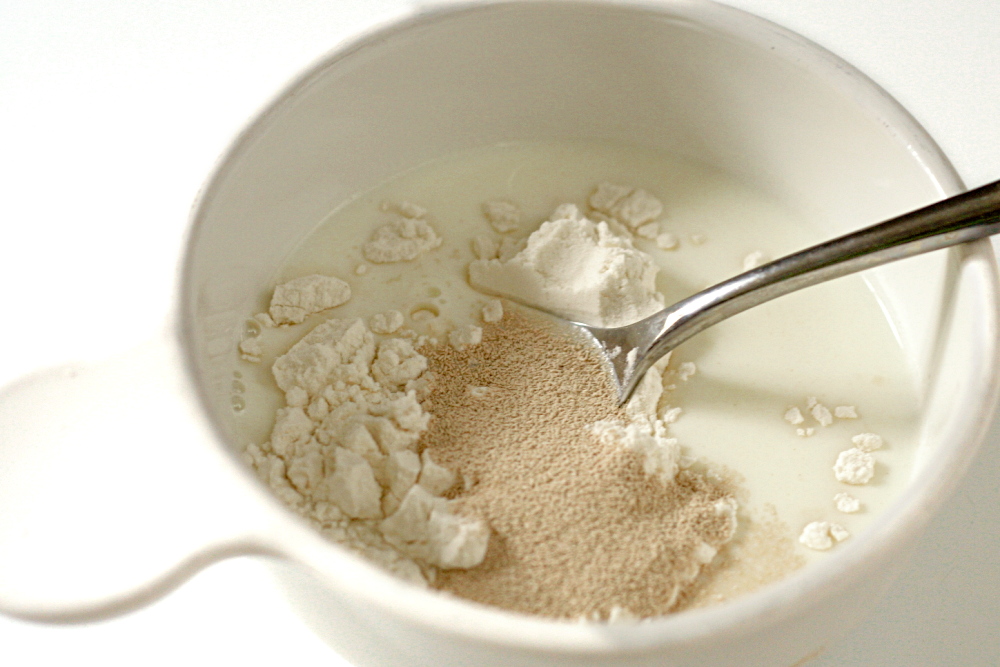
1. To make the sponge, stir together the flour and yeast in a bowl. Whisk in the milk to make a pancake-like batter. Cover with plastic wrap and ferment at room temperature for 1 hour.

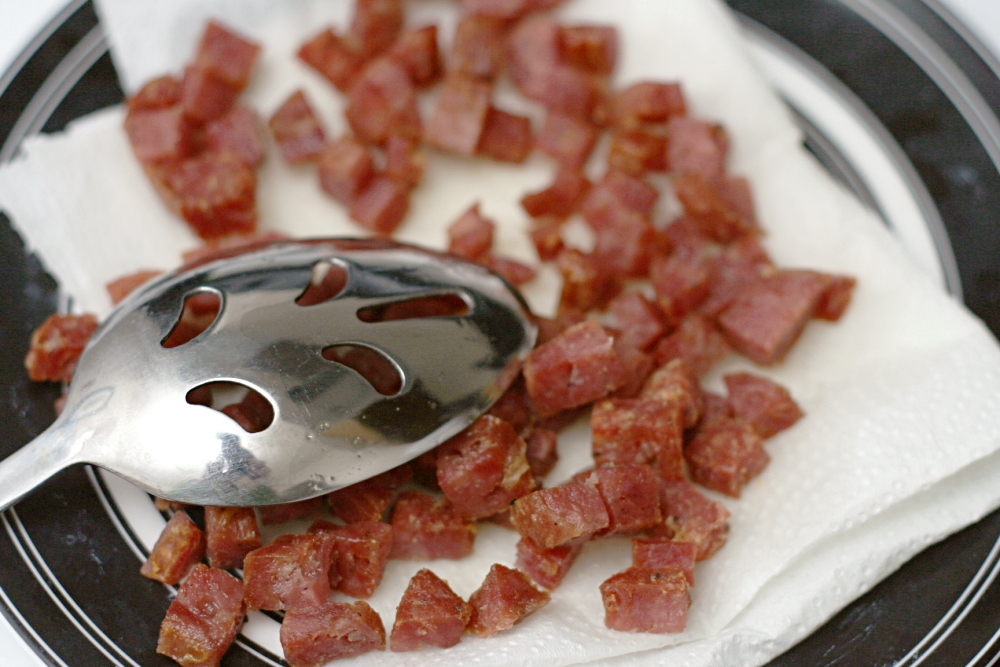
2. While the sponge is fermenting, dice the salami into small cubes and sauté it lightly in a frying pan to crisp it slightly.

3. Stir together the flour, salt, and sugar with a spoon. Add the eggs and the sponge until the ingredients form a coarse ball. If there is any loose flour, dribble in a small amount of water or milk to gather it into the dough. Mix for about 1 minute, then let rest for 10 minutes. Divide the butter in 4 pieces and work into dough, one piece at a time while mixing. After mixing about 4 minutes, the dough will change from sticky to tacky and eventually come off the sides of the bowl. If not, sprinkle in more flour to make it do so.

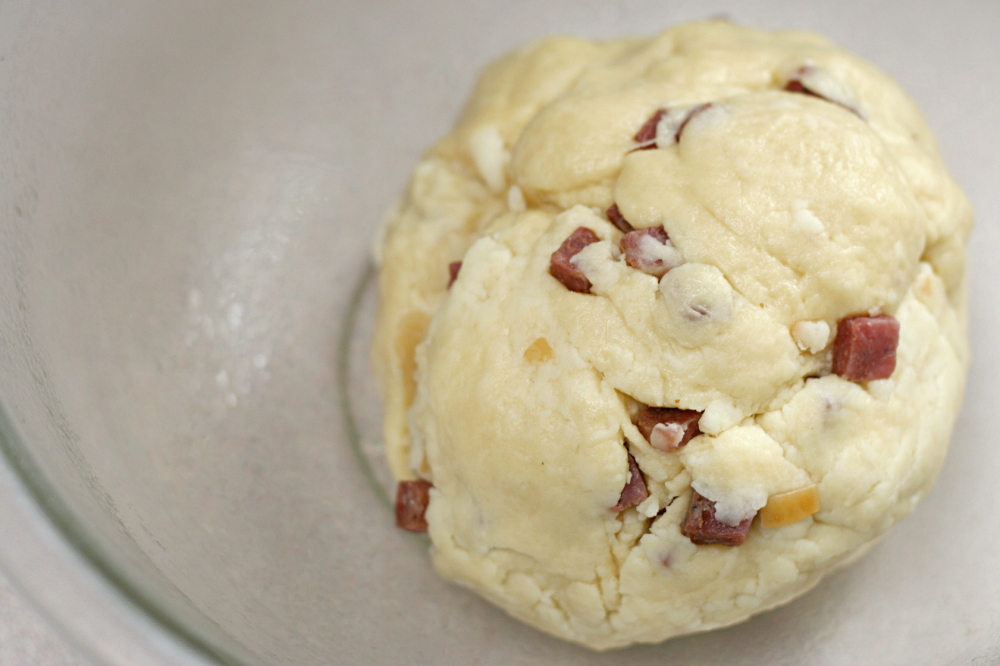
4. When the dough is smooth, add the meat pieces and mix until they are evenly distributed. Then gently mix in the cheese until it too is evenly distributed. Lightly oil a large bowl and transfer the dough to the bowl, rolling it around to coat it with oil. Cover the bowl with plastic wrap.

5. Ferment at room temperature for about 90 minutes, or until the dough increases in size by at least 1½ times.

6. Remove the dough from the bowl and leave as 1 piece for 1 large loaf or divide into 2 pieces for smaller loaves. Bake in 1 large or 2 small loaf pans by misting the pans with spray oil, shaping the dough, and placing it in the pans. Mist the top of the dough with spray oil and cover.

7. Proof for 60-90 minutes, or until the dough just reaches the top of the pans.

8. Place pans in a 350F oven and bake for 40-50 minutes until the center of the loaves registers 185-190F. The dough will be golden brown on top and on the sides, and the cheese will ooze out into crisp little brown pockets.

9. When the bread is done, remove the bread from the oven and from the pans and cool for at least 1 hour before slicing or serving.

Copy of IMG_6625

mushroom salad

copy-of-img_5931

I used to read cookbooks like novels. I don’t require pictures, and I don’t like to skip around – I’ll be annoyed making the chocolate cake from Chapter 10 if I’m still reading through Chapter 2’s salads. It feels like a spoiler; like when I was sad to see Gandalf die in The Fellowship of the Ring, and Dave tried to make me feel better by telling me that he comes back in the next book/movie. I hate spoilers.

copy-of-img_5920

These days, though, I can’t seem get through an entire cookbook. I think I need a new method – like accepting that it’s okay not to read every step in every recipe. I’m only on Chapter 3 (Eggs, Dairy and Cheese, yum) in Bittman’s How to Cook Everything Vegetarian, which I got for Christmas. I’m still very happy with the cookbook – everything I’ve made from it has been great, and the recipes get me excited to cook. But right now, it’s just sitting on my shelf while I focus on other things. Since I haven’t read much more than the soups and salads chapters, that’s all I ever make from the book.

copy-of-img_5925

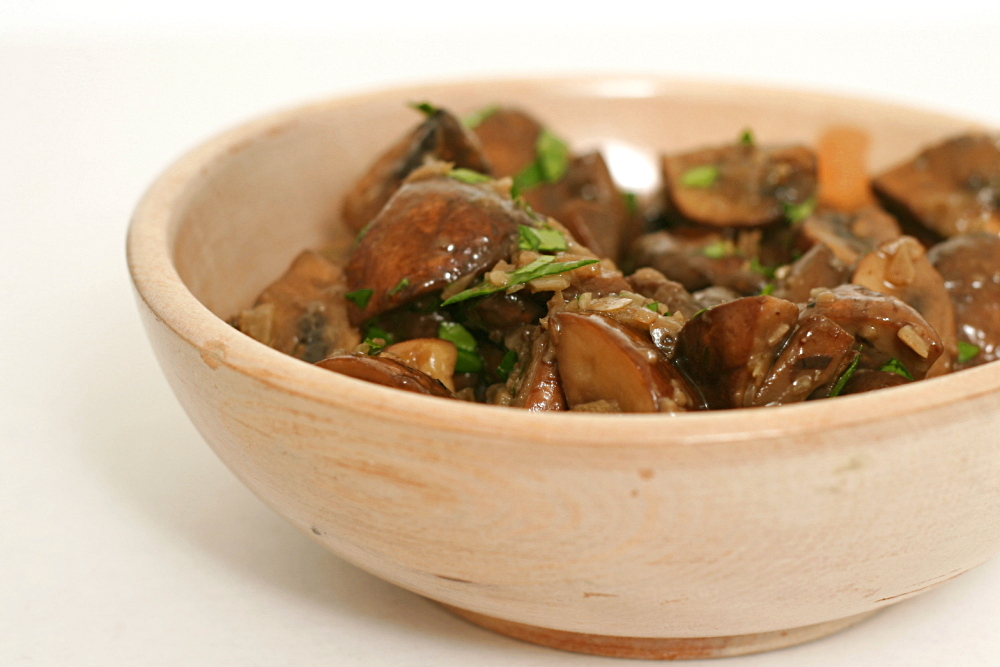
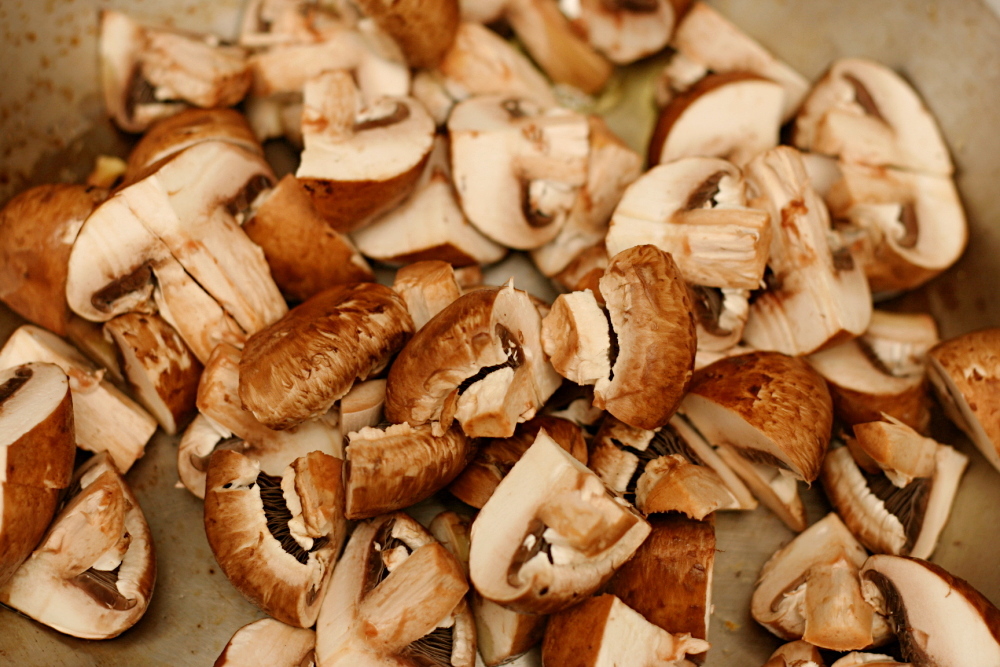
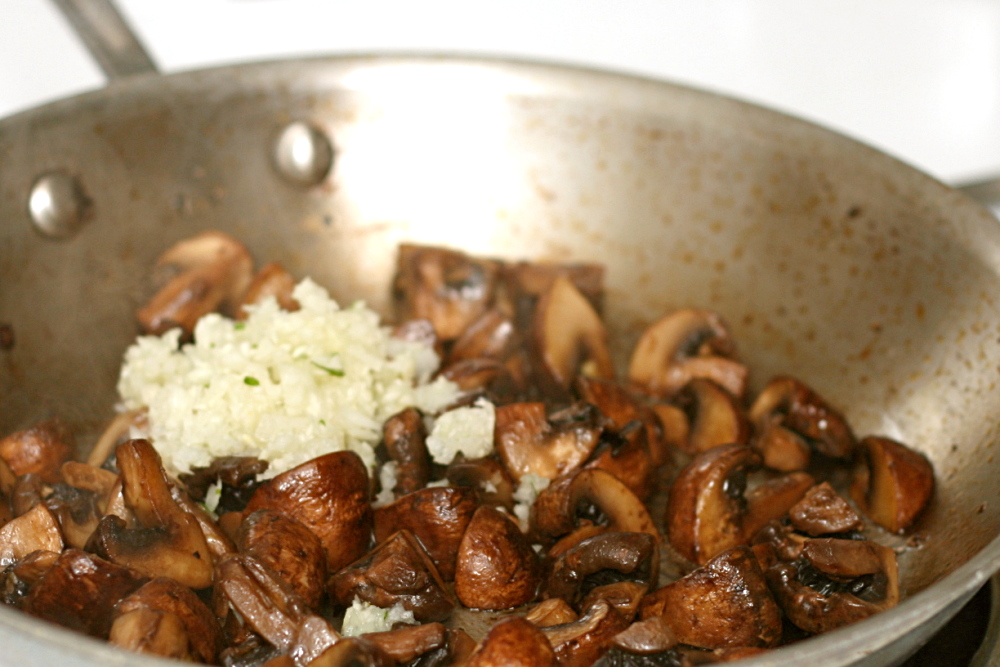
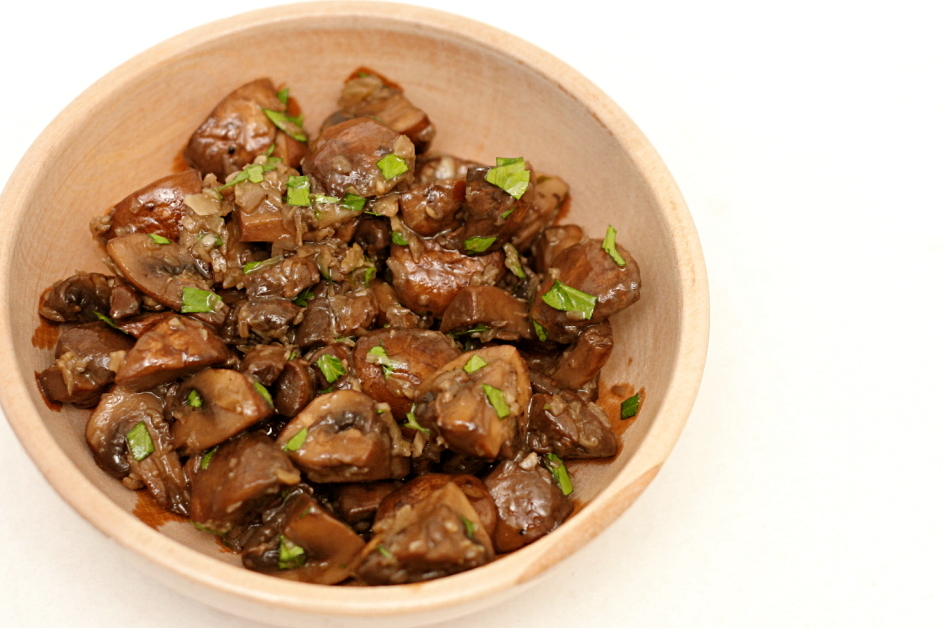
These mushrooms, from the salad chapter, made a handy side dish for meatball sliders. They’re nice and easy – after sautéing the quartered mushrooms with some aromatics, you mix them with vinegar and olive oil. Then just set them aside to marinate.

The simple mixture was surprisingly good. I was worried that Dave wouldn’t like them, because he doesn’t like pickled anything, but they weren’t sour, just a little tangy. It makes the big green cookbook on my shelf that much more enticing.

copy-of-img_5935

One year ago: Cappuccino Cream Puff Rings

Mushroom Salad, Italian-American Style (from Mark Bittman’s How to Cook Everything Vegetarian)

I didn’t actually measure anything, which is normal for me for a Bittman recipe. He presents his recipes more as ideas to get you started than rules to follow. I’m guessing I used less oil, and I just added vinegar to taste.

¼ cup extra virgin olive oil
1 pound butter or other mushrooms, trimmed and quartered
salt and freshly ground black pepper
¼ cup minced onion
1 tablespoon slivered garlic
½ cup red wine vinegar
½ cup chopped parsley leaves for garnish

1. Put 3 tablespoons oil in a wide skillet over medium heat. When hot, add the mushrooms, and cook, stirring occasionally and sprinkling with salt and pepper, until they give up their liquid and begin to brown, about 10 minutes. Lower the heat a bit and add the onion, then cook until the onion softens, another 5 minutes or so. Add the garlic and cool, stirring occasionally, about 2 minutes more. Turn off the heat.

2. Transfer the mushrooms to a bowl and stir in the vinegar and remaining tablespoon of oil. Let cool to room temperature for at least 30 minutes. Garnish and serve or let sit at room temperature for another hour or two before serving.