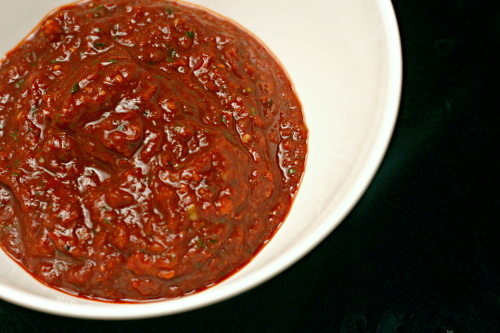
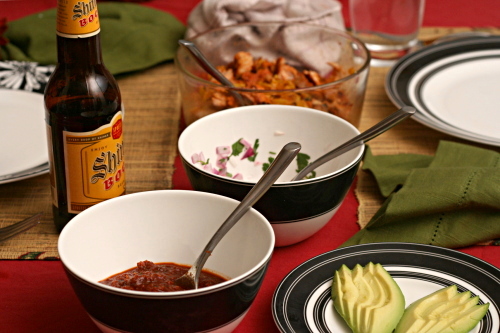
grapefruit margaritas

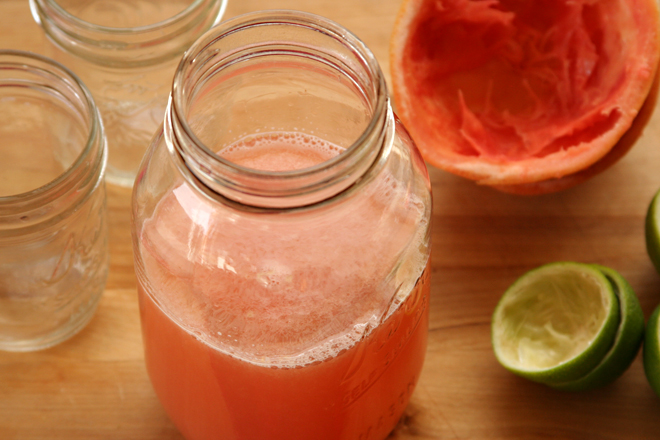
grapefruit margarita 4

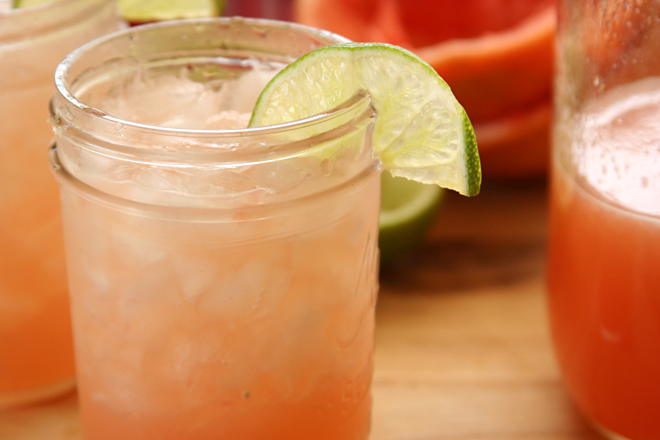
If 2010 was the year of the vodka gimlet, 2011 was dedicated to margaritas. It started with these, and then when grapefruits went out of season, we tried strawberry margaritas, pineapple margaritas, classic lime margaritas, and, most recently, cranberry margaritas. I love them all, but nothing holds a candle to the grapefruit version.

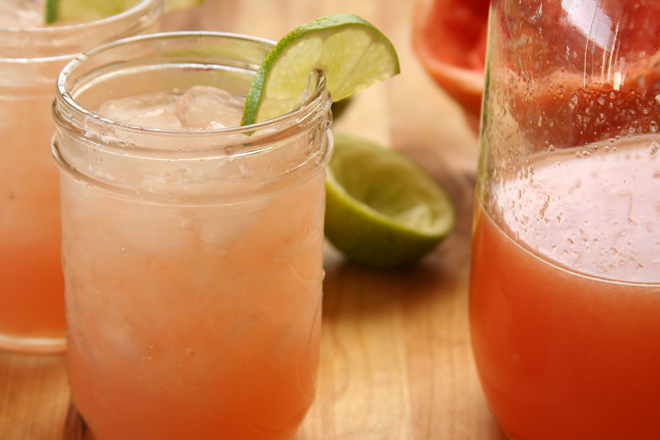
grapefruit margarita 2

It’s perfectly balanced – not too sweet, not too sour, not too strong. The light grapefruit mellows any harshness from the lime and alcohol, and the result is perfectly refreshing. As an added bonus, one grapefruit yields enough juice for four drinks – which is just the right amount to split between two people.

grapefruit margarita 3

One year ago: Feta and Shrimp Macaroni and Cheese
Two years ago: Apple Muffins
Three years ago: Twice Baked Potatoes with Broccoli, Cheddar, and Scallions
Four years ago: Maple Walnut Cupcakes

Printer Friendly Recipe
Grapefruit Margaritas (adapted from Confections of a Foodie Bride)

Technically 4 servings, but you’ll be sad if you only get one

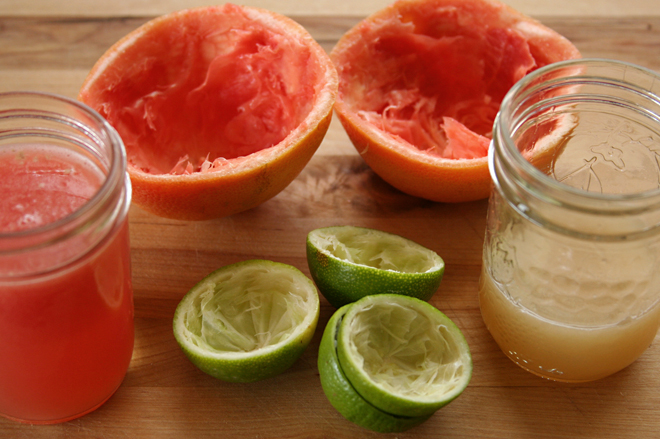
Of the many grapefruits I have juiced for margaritas, one grapefruit has always resulted in 4 shots of juice. Two limes will usually give two shots of juice, but not always, so it’s best to buy a third just in case.

As with all things, alcohol quality matters. I’ve used Cointreau, Gran Marnier, Gran Gala, Controy (which can only be purchased in Mexico), and Patron Citronge in these, all with good results. I’ve never used a bargain triple sec. For tequila, I tend to buy whatever is on sale in the $20-25 range.

2 shots lime juice
4 shots grapefruit juice
3 shots orange liqueur
3 shots tequila

In a pitcher or 4-cup measuring cup, mix all of the ingredients. Pour over crushed ice in individual glasses; serve immediately.
grapefruit margarita 5

dulce de leche cupcakes

dulce de leche cupcakes 10

This was not my first attempt at dulce de leche cupcakes. My first attempt resulted in cupcakes that rose out of their wells, spread over the top of the pan, and baked into one solid mass. And they tasted like pancakes.

dulce de leche cupcakes 1

They weren’t even really dulce de leche cupcakes. They were brown sugar cupcakes with cream cheese dulce de leche frosting. I’m sure that combination is wonderful, but it wasn’t what I wanted, which was cake that was flavored with dulce de leche. Also cake that didn’t explode in the oven.

dulce de leche cupcakes 2

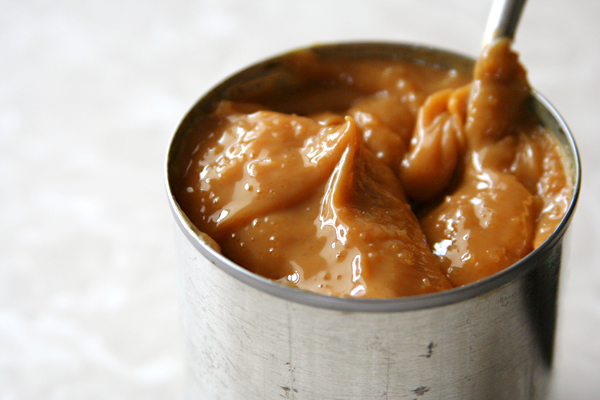
This is the cake that I wanted. It’s based on a yellow cake recipe (similar to Martha Stewart’s, which did well in this comparison), with dulce de leche replacing a portion of the milk. I had my doubts that the caramel flavor would be evident after baking, but I was very pleasantly surprised.

dulce de leche cupcakes 3

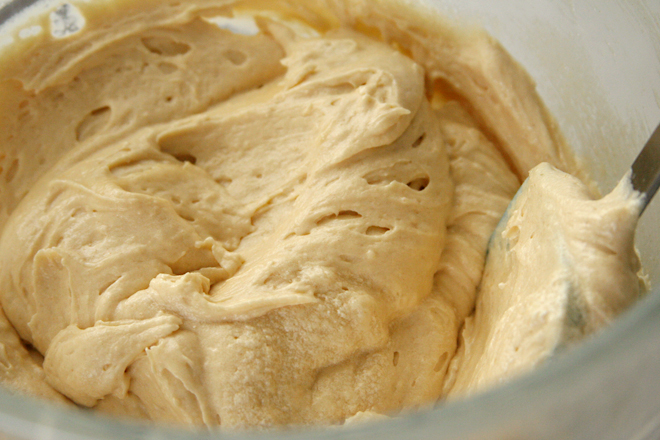
And then there’s the buttercream, which might be the best thing I’ve eaten in weeks. It’s so smooth and creamy, and so dulce de leche-y. With a drizzle of pure dulce de leche on top, these cupcakes were perfect, and a very far cry from my first attempt.

dulce de leche cupcakes 6

One year ago: Beer-Marinated Flank Steak
Two years ago: Zucchini Bread
Three years ago: Crawfish (or Shrimp), Roasted Tomato, and Farmer’s Cheese Pizza

Printer Friendly Recipe
Dulce de Leche Cupcakes (adapted from Confections of a Foodie Bride)

I made these twice; the first time, they seemed dry, so I replaced a portion of the butter with canola oil and increased the buttermilk.

1½ cups (7.2 ounces) all-purpose flour
1½ cups (6 ounces) cake flour
2 teaspoons baking powder
¼ teaspoon baking soda
12 tablespoons (1½ sticks) unsalted butter, softened
1⅓ cup (9.33 ounces) granulated sugar
¾ teaspoon salt
½ cup dulce de leche
4 large eggs, at room temperature
¼ cup canola oil
2 teaspoon vanilla extract
¾ cup buttermilk, room temperature
Dulce de Leche Swiss Meringue buttercream, recipe below

1. Adjust an oven rack to the idle position; heat the oven to 350 degrees. Line 24 muffin wells with paper cups. In a medium bowl, whisk together the flours, baking powder, and baking soda.

2. In a stand mixer fitted with the paddle attachment (or a large bowl if using a hand-held mixer), beat the butter, sugar, and salt on medium speed until light and fluffy, about 2 minutes, scraping down the sides of the bowl as necessary. With the mixer running, gradually add the dulce de leche; beat another minute, until thoroughly incorporated. Add the eggs one at a time, beating well after each addition, then mix in the oil and vanilla. Reduce the mixer speed to low; add the dry ingredients in three additions, alternating with the buttermilk and ending with the dry ingredients. Beat each addition just until incorporated.

3. Divide the batter between the prepared muffin cups, filling each cup about two-thirds full. Bake for 16-20 minutes, until a toothpick inserted into the center of a cupcake comes out clean. Transfer the pan to a wire rack to cool. Remove the cupcakes from the pan after 5 minutes. Cool completely before frosting.

Dulce de Leche Swiss Meringue Buttercream

4 egg whites
1¼ cups (8.75 ounces) granulated sugar
Pinch salt
24 tablespoons (3 sticks) unsalted butter, softened
⅓ cup dulce de leche
1 teaspoon vanilla extract

1. In the bowl of a stand mixer (or a large bowl if using a hand-held mixer), combine the egg whites, sugar, and salt. Set the bowl over a pot of simmering water, making sure the bottom of the bowl does not touch the water. Whisk constantly until the mixture reaches 160 degrees.

2. Fit the mixer with the whisk attachment; beat the egg white mixture on medium-high speed until stiff peaks form and it has cooled to room temperature, about 8 minutes. Reduce the mixer speed to medium and add the butter 2 tablespoons at a time, adding more once each addition has been incorporated. Increase the mixer speed to medium-high and beat until the buttercream is thick and smooth, 3-5 minutes. Add the dulce de leche and vanilla; mix until incorporated.

dulce de leche cupcakes 7

creamy taco mac

creamy taco mac 6

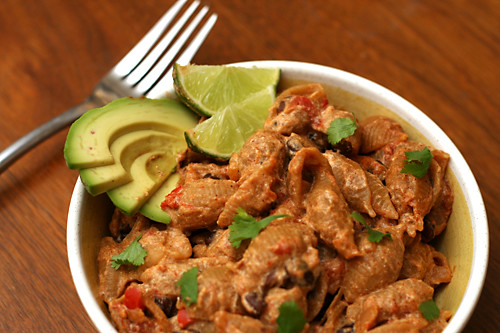
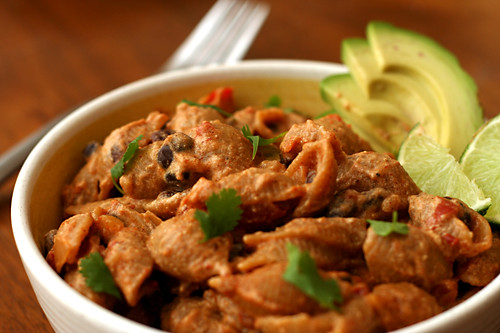
I rarely miss eating meat on weekdays. I was never big on “meat and three” types of meals, so vegetarian food suits me just fine. Besides, it’s usually easy to replace meat with a substitute, and by substitute, I don’t mean fake meat (“smeat”, as my friend calls it). I mean beans, especially black beans.

creamy taco mac 1

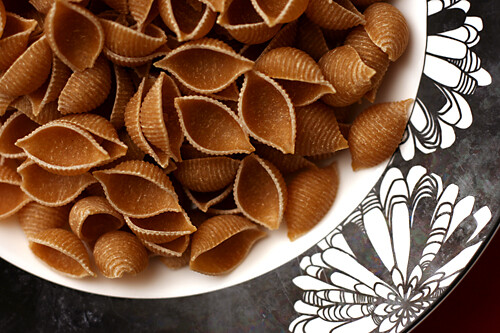
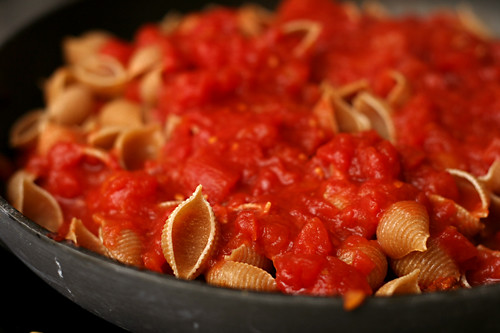
Making this recipe vegetarian was no problem, but I was also determined to make it all in the same pot. I’ve made Cooks Illustrated’s Skillet Lasagna many times, in which the pasta is cooked right in the simmering sauce, so I adapted the same cooking method for taco mac. The different ratios of pasta to tomatoes complicated finding the right ratio of liquid to pasta, but after a few tries, I landed on the right amount.

creamy taco mac 2

What really gave me fits was how to make the sauce creamy in a healthy way – and if this was going to be a weeknight dish, it needed to be healthy. First, I tried Cara’s method of stirring in pureed cottage cheese. This worked fine, but I knew I was too lazy to puree cottage cheese for such a simple meal. Both unpureed cottage cheese and ricotta cheese looked curdled and barf-like. In the end, the answer, like it so often is, was Greek yogurt. It perfectly mimics the sour cream called for in the original recipe but with dramatically less fat and more protein.

creamy taco mac 3

Finally then, this fills all my qualifications as a great weeknight dish. It’s vegetarian, it’s healthy, it’s nutritionally balanced – all that and the only dishes you need to dirty are a cutting board, knife, and the cooking pot. With meals as good as this, it’s no wonder I don’t crave meat on weekdays.

creamy taco mac 4

One year ago: Pasta with Asparagus and Goat Cheese
Two years ago: Pork Tenderloin with Rhubarb Sauce
Three years ago: Pigs in a Blanket

Update: I changed the recipe to use ½ more water. Two cups might be enough, but it cuts it close. If your sauce is too liquidy at the end, it’s simple to simmer it down for a few minutes.

Printer Friendly Recipe
Creamy Taco Mac
(adapted from Delish via Annie’s Eats and from Cook’s Illustrated’s Skillet Lasagna recipe)

6 servings

1 tablespoon olive oil
1 medium onion, chopped small
1 red pepper, chopped small
Table salt
3 medium cloves garlic, minced or pressed through a garlic press (about 1 tablespoon)
1 tablespoon ground chili powder
1 teaspoon ground cumin
¼ teaspoon ground cayenne
16 ounces dry pasta
1 (28-ounce) can diced tomatoes
2½ cups water
1 (30-ounce) can black beans, drained
1 (7-ounce) container Greek yogurt
2 tablespoons cilantro
1 avocado, diced (optional)

1. Heat the oil in a large nonstick skillet over medium heat until shimmering. Add the onion, pepper, and ½ teaspoon salt and cook until the onion begins to brown, about 5 minutes. Stir in the garlic and spices and cook until fragrant, about 30 seconds.

2. Add the pasta, diced tomatoes with juices, water, and beans. Cover and bring to a simmer. Reduce the heat to medium-low and simmer, stirring occasionally, until the pasta is tender, about 20 minutes.

3. In a small bowl, stir about half of the simmering pasta mixture into the yogurt. Stir this tempered yogurt into the pasta. Cover and simmer over low heat until heated, 2-3 minutes. Sprinkle with cilantro and avocado, if using. Serve.

pecan powder puffs

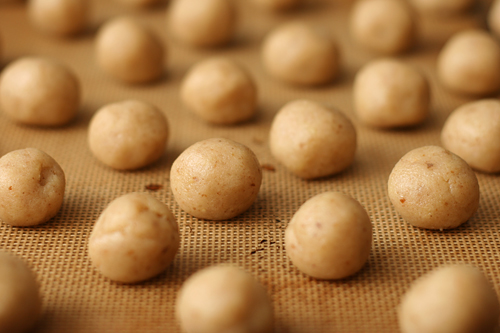
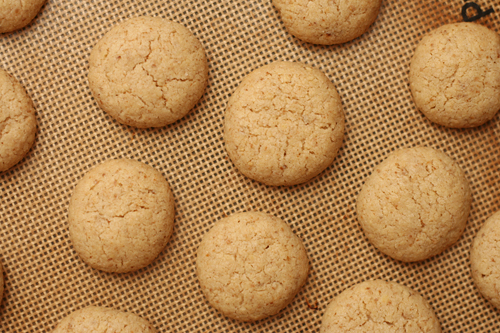
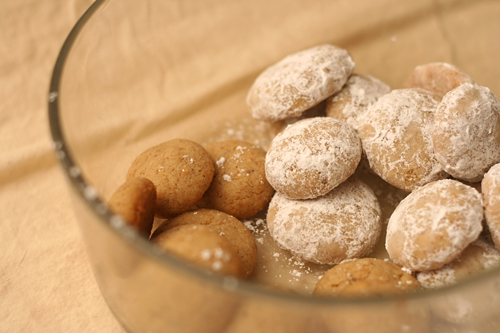
Every Christmas, my mom would take a plate of our colorful sugar cookies, tree-shaped cream cheese spritz, and chocolate-topped peanut butter blossoms over to the neighbors or a friend. She would return with a plate of their Christmas traditions, which seemed oddly shapen, bland, and stale compared to ours. Invariably, those plates would include these suspicious white blobs. I never knew if they were good or not, because I didn’t try one until last year.

Last year, my mom made her own Mexican wedding cookies (Russian tea cakes, pecan powder puffs, whatever you want to call them), and, oddly, they were some of my favorite cookies on the tray – and not just because I make the brown sugar cookies and cream cheese spritz regularly on my own. Crumbly soft, coated in sweet clouds of sugar, spiced and slightly bitter from the nuts, it’s very possible that I was missing out for years as a kid by ignoring those mysterious white balls the neighbors gave us. I’m making up for lost time now.

For the recipe, go to Tianne’s blog, because she chose these for Tuesdays with Dorie. I used walnuts instead of pecans.

One year ago: Coconut Tea Cake
Two years ago: Coconut Butter Thins
Three years ago: Gooey Chocolate Cakes

green chile mayonnaise

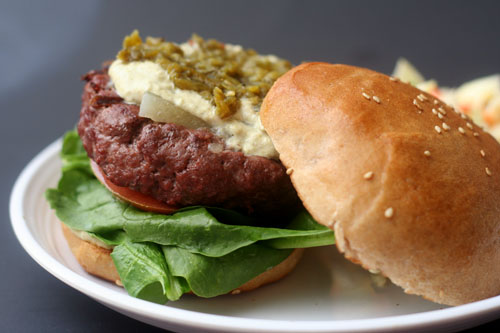
Jen calls this New Magic Awesome Sauce, but I would beg to differ. I like to think of it as New Mexico Awesome Sauce. After all, it’s based on our signature ingredient, the green chile.

To be honest, I was worried about Dave’s reception of this stuff. Dave and green chile is like me and chocolate chip cookie dough. When we were peeling our mountain of roasted chiles back in September, he had a one-for-the-freezer-one-for-my-belleh mentality.

When I mixed green chile with mayonnaise, garlic, and lime juice, I diluted it from its pure state. How dare I! I gave Dave a bit to taste, and his opinion was, of course, more green chile! In the end, I ended up doubling the green chile in the sauce, but this is really a to-taste kind of thing.

What I forgot to consider in my concern over Dave’s opinion was that he’s happy whenever green chile is added to something. The same goes with garlic. The lime juice rounds out the flavors in this gutsied up mayonnaise, and besides, what’s to stop us from smearing more green chile right on top our New Mexico Awesome Sauce to make the ultimate green chile cheeseburger?

One year ago: Buffalo Chicken Pizza, Glazed Lemon Cookies, Wheat Berries with Caramelized Onions and Feta
Two years ago: Gallitos, Wheatmeal Shortbread Cookies, Bacon-Wrapped Pork Tenderloin Medallions

Green Chile Mayonnaise (adapted from The Border Cookbook via Use Real Butter)

Makes about ½ cup

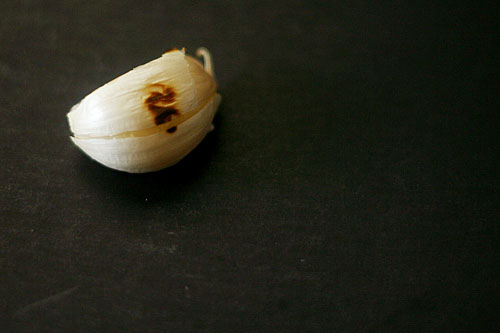
I realized when I went to mix up the sauce that I hadn’t roasted any garlic. Not interested in heating the oven for one or two cloves, I toasted it instead. Simply heat a dry not-nonstick pan over medium to medium-high heat and place the unpeeled garlic in it. Turn the cloves every few minutes until the peels are blackened in spots. It softens the flavor, although it won’t be as sweet as fully roasted garlic.

What, your local grocery store doesn’t sell bushels of Hatch green chiles in the fall, with a drum grill in the parking lot for roasting? Poor you. There are several good online sources, or you could perhaps try the little 4-ounce cans, or you could try using roasted and peeled Anaheim or poblano chiles instead. It won’t be the same, but it won’t be bad.

¼ cup roasted green chile, skinned and de-seeded
1 clove garlic, toasted and peeled
2 tablespoons fresh lime juice
½ cup mayonnaise

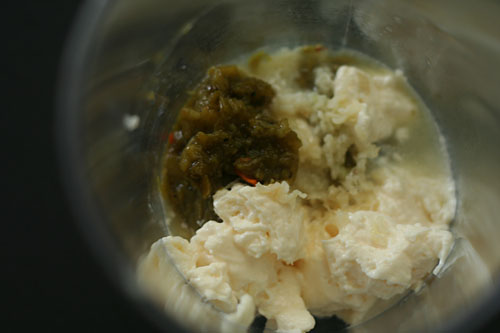
Add all of the ingredients into the bowl of a food processor or blender; puree. Chill for at least an hour before serving.

shredded beef tacos

The first few months when I moved out of my parents’ house and across the country were exciting and lonely and intense. I was lucky that I made some great friends right away. I remember the first time someone invited me over for dinner. I’d asked what he and his wife were serving, and I thought he said pea stew. I went, but I was so relieved when it was actually beef stew.

That meal turned into a weekly dinner tradition that lasted for as long as we all lived near each other. We took turns cooking and rarely made the same thing twice, but there was one favorite meal that was requested more than any other – tacos. My friend’s taco filling and accompaniments were good, but the real treat was the shells – freshly fried, still hot, and, frankly, a little greasy. I had never had home-fried taco shells before, and it was a revelation.

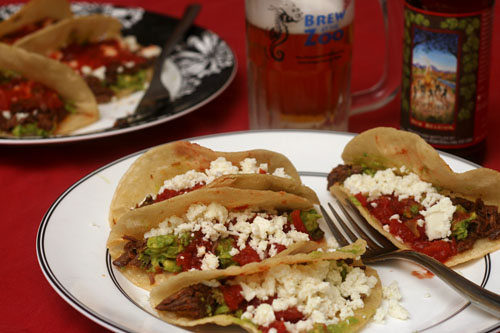
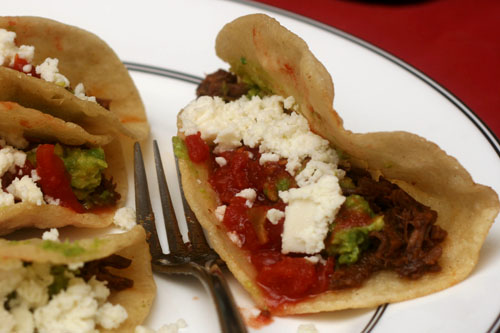
These days, tacos are still one of my favorite meals, but I can’t enjoy them as much without those fried shells. Even better is when they’re stuffed with this shredded beef. It’s marinated in vinegar, lime juice, and spices, then baked for hours until it falls into shreds. I’m thankful for those friends not just for helping me feel comfortable on my own, but for teaching me about the perfection of fried corn tortillas. Nothing else would be good enough accompany this intensely flavorful filling.

One year ago: Sandwich Rolls
Two years ago: Pumpkin Pancakes

Shredded Beef Tacos (slightly adapted from Use Real Butter who slightly adapted it from The Border Cookbook)

Jen discusses the cut of beef that is preferred for this recipe. Her recommended eye of chuck was not available, so I chose chuck steak. I have no complaints. Plus I didn’t need to slice it before marinating, which was a nice bonus.

You could always go with the classic cheddar-sour cream-lettuce combination for toppings, but I really love the queso fresco-avocado-salsa direction that Jen recommends.

6 servings

2 tablespoons vegetable oil
2 tablespoons white vinegar
2 tablespoons lime juice
1½ teaspoons ground cumin
1½ tsps chili powder
1 teaspoon salt
3 garlic cloves, peeled and smashed
1½ pounds chuck steak
1 cup vegetable oil
24 corn tortillas
toppings: lettuce, queso fresco, salsa, guacamole, etc.

1. In a gallon-size zip-top bag, combine the oil, vinegar, lime juice, salt, spices and garlic. Add the meat and squish the bag around to make sure the meat is fully coated. Refrigerate for at least 4 hours or overnight.

2. Adjust an oven rack to the middle position and heat the oven to 350 degrees. Dump the contents of the bag into a baking dish just large enough to fit the meat in a single layer. Cover the pan with foil; bake until the meat is tender enough to shred easily, about 2 hours. Use two forks to pull the meat into shreds. Lower the oven temperature to 250 degrees.

3. Heat the oil in an 8-inch skillet over medium heat. Slide a tortilla into the oil; use tongs to fold the tortilla in half and hold it partially open. Flip after about 1 minute. Fry for an additional minute, until the tortilla is slightly crisp. Continue with the remaining tortillas, storing the fried tortillas in the warm oven. Serve with shredded meat and desired toppings.

classic burritos

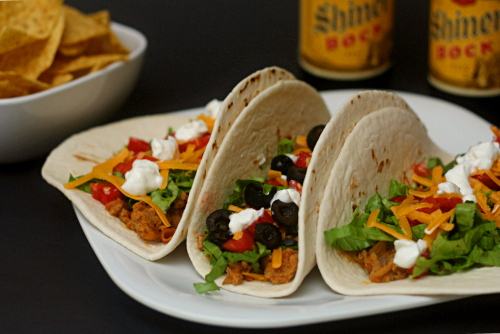
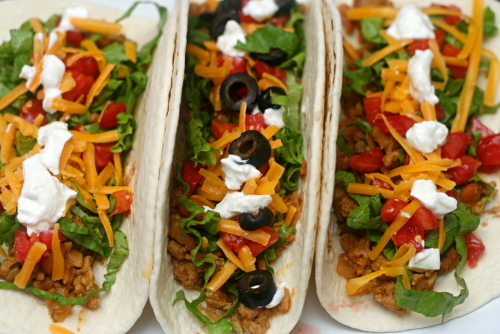
This is not my most gourmet meal. It’s mostly fancy Taco Bell. It kind of looks like dog food. It’s delicious and easy and kinda healthy. I like it.

It’s at least fancier than we made it when I was a kid. Back then, we (usually my brother) browned some ground beef, dumped in a packet of burrito seasoning and some water, and stirred in a can of refried beans. Then we glopped it on tortillas with fixin’s and were happy.

Then my brother started getting creative. He would add green chile to the mix or use shredded chicken instead of ground beef. I don’t like change. I just want my fancy Taco Bell.

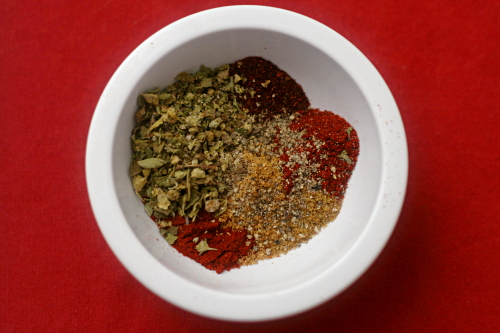
What I have changed is to get rid of the sodium and preservative-filled spice packet and the pasty canned refried beans for some good stuff – browned onions, fresh garlic, spices that I already have anyway, and pinto beans I mush up myself. Plus I use ground turkey instead of ground beef, because it tastes the same once it’s mixed in with everything else, and it’s a little healthier. Same goes for Greek yogurt instead of sour cream.

Sure, it’s just a regular old burrito, and it costs 79 cents at a fast food chain. But if you make it yourself, you can use high quality ingredients – lettuce that is actually crisp, cheese that has flavor, spices that are fresh – and it isn’t much harder than going through the drive-thru.

One year ago: Bran Muffins
Two years ago: Spinach Artichoke and Red Pepper Strata

Printer Friendly Recipe
Classic Burritos

4-6 servings

The filling also reheats really well, so I usually make enough for more than one meal and have an easy leftover night a few days later.

These are my favorite fillings for these very basic burritos. Obviously you can go wild here with whatever you like – salsa, hot sauce, green chile, guacamole…

Filling:
1 tablespoon vegetable oil
1 onion, diced
2 cloves garlic, minced
2 teaspoons ground cumin
2 teaspoons chile powder
1 teaspoon coriander
1 teaspoon dried oregano
¼ teaspoon black pepper
¼ teaspoon cayenne
1 pound ground turkey (or other ground meat of your choice)
1 teaspoon salt
1 (15-ounce) can pinto beans, rinsed and drained
1 cup water

Toppings:
flour tortillas
green leaf lettuce, sliced
tomatoes, diced
cheddar cheese, shredded
black olives, chopped
sour cream (or Greek yogurt)

Heat the oil in a large nonstick skillet over medium heat. Add the onion and sauté, stirring occasionally, until just browned around the edges, about 8 minutes. Add the spices and garlic and cook, stirring constantly, for about a minute, until fragrant. Add the meat and salt and cook, stirring occasionally to break up large chunks, until no longer pink. Clear a space in the middle of the pan and add the beans to it; use a potato masher to break up the beans slightly. Stir in the water and simmer over medium heat until the liquid mostly evaporates. Serve the filling with toppings of your choice.
taco pasta salad

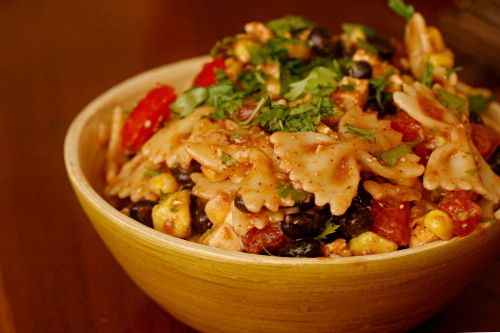
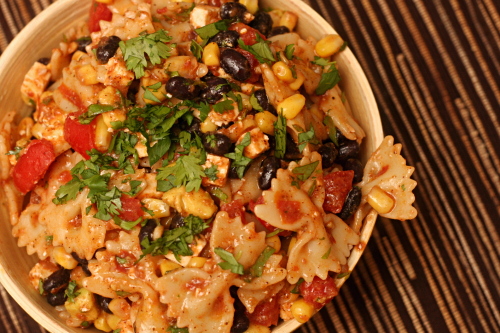
My inclination to overthink was very clearly exhibited with this recipe. I’ve heard approximately eight thousand raving reviews of this pasta salad. And still, I doubted. Salsa mixed with pasta? Cheddar cheese in pasta salad? I wasn’t convinced.

I asked Cara for advice. Really? Salsa? She said she never thinks twice about it, because this dish is always a hit. Shredded yellow cheese? Yes, she said. Stop asking questions and just go make it, she probably wanted to say.

I started slowly, adding only a third of the salsa called for, thinking I’d just mix in extra fresh tomatoes and some red onions and a jalapeno separately if I didn’t like the salsa. And then I realized – yes, salsa mixed with pasta. And I stirred in the rest of the salsa.
Right after those two ingredients were mixed is when I started nibbling. And then I added black beans… cilantro… avocado… tomatoes… cheese… corn… dressing… and I just kept nibbling and nibbling as I went. And the salad just kept getting better and better.  Forget instincts. I should just trust the recipe.

One year ago: Risotto with Swiss Chard
Two years ago: Gazpacho

Printer Friendly Recipe
Taco Pasta Salad (adapted slightly from Cara’s Cravings)

Serves 8-12

Apparently there’s no wagon wheel pasta in my little town. Bowties worked just fine.

I toasted the spices before mixing them into the dressing. Just heat a small not-nonstick pan over medium heat for a few minutes, then add the spices and stir them around just until they start to smoke, no longer than a minute.

1 pound wagon wheel pasta
salt
1 (10-ounce) package frozen corn
1½ cups salsa
1 (15-ounce) can black beans, drained and rinsed
2 medium tomatoes, diced
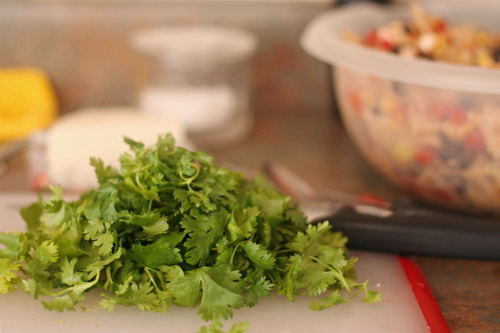
½ cup chopped fresh cilantro
8 ounces (2 cups) shredded cheddar cheese
3-4 tablespoons lime juice
1 large (or 2 small) avocado, peeled, seeded, and diced
1 tablespoon cumin
2 teaspoon chili powder
¼ teaspoon freshly ground pepper
2 garlic cloves, minced
¼ cup olive oil

1. Bring a large pot of water to a boil. Add 1 tablespoon salt and the pasta. Cook according to the package directions. Drain; stir the frozen corn into the pasta to cool the pasta and defrost the corn. Stir the salsa into the pasta and corn, then add the beans, tomatoes, cilantro, and cheese.

2. Squeeze the lime juice into a small bowl and add the avocado; stir to coat the avocado. Remove the avocado from the lime juice and stir it into the pasta mixture. Add the spices, garlic, and ½ teaspoon salt to the lime juice, then slowly whisk in the oil. Stir the dressing into the salad. Serve immediately or chill for up to 1 day (longer if you don’t add the avocado).

grilled corn salad

It’s green chile season! My sister recently told me that, for her, fall in New Mexico means green chiles roasting, the state fair, and the Balloon Fiesta. Fall isn’t so bad out here, even without rolling hills of trees that turn brown, red, pink, maroon, orange, yellow. I will miss the crisp air, pumpkins, apples, and chill days of fall on the East coast, but when I was out there, I missed green chile. So I win either way.

The only problem is that I tend to get into a hoarding pattern with my annual green chile supply. I buy them every fall when they come into season, roast them, and freeze them to last until the following September. And then, aside from the occasional huevos rancheros, I mostly ignore them, because what if I run out? This is a mindset I’m determined to get out of. Not only is that not the kind of life I want to lead, but, as Jen warns, they seem to get hotter as they’re frozen for longer periods.

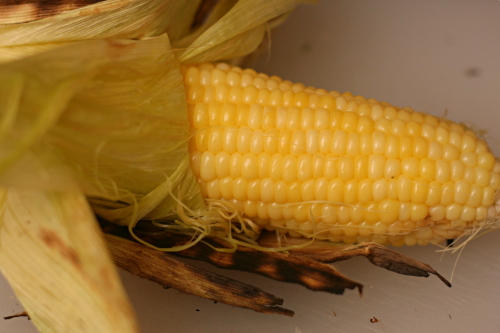
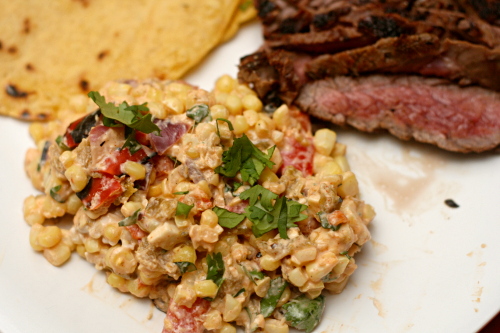
This corn salad doesn’t even call for green chile, but I had some leftover from the previous day’s burgers, so I went ahead and added them. They’ve been in the freezer for about a year, and maybe that’s why the dish ended up so, um, kind of painful to eat, actually. The heat was somewhat dulled by the dairy in the recipe, and once I smooshed the corn into a tortilla with some flank steak, it was downright edible. Not that the corn even needed extra flavor, what with having been grilled and mixed with chili powder, cilantro, lime juice and salty cotija. But I need to use up some of these chiles in my freezer to make room for the new crop!

One year ago: Pickled Coleslaw
Two years ago: Sausage and Red Pepper Hash

Printer Friendly Recipe
Grilled Corn Salad (from Bobby Flay via Savory Spicy Sweet)

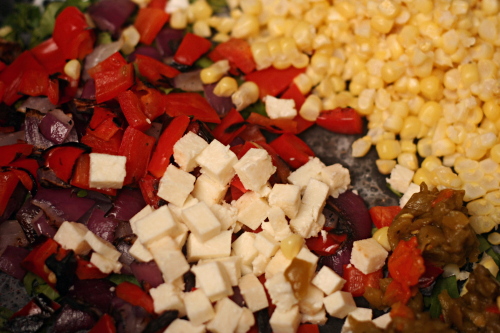
I used a not-nonstick skillet on the stove instead of a cast iron pan on the grill, and I substituted greek yogurt for the crème fraiche. And I added an ounce or two of very spicy diced Hatch green chiles, plus some diced red pepper and red onion.

8 ears fresh corn, silks removed, husk on, soaked in cold water 30 minutes
canola oil
salt and freshly ground black pepper
¼ cup creme fraiche
2 limes, juiced and 1 zested
1 tablespoons ancho chili powder
¼ cup chopped fresh cilantro leaves
¼ cup grated cotija cheese

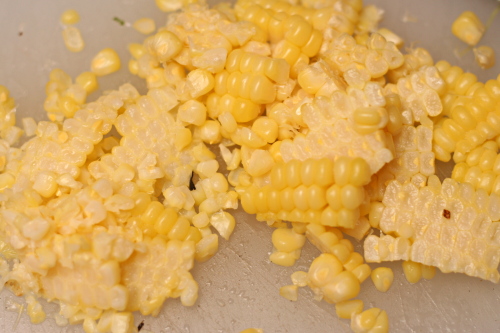
1. Heat grill to high. Grill corn until charred on all sides, 10 or so minutes. Take off the grill and remove the kernels with a sharp knife. While you are cutting the corn, put a cast iron skillet on the grill to heat.

2. Add the corn and the remaining ingredients to the hot pan and cook, stirring occasionally, until creamy and heated through. Serve.

tacos al pastor

I try not to be picky. I like to call myself ‘particular’ – about the quality of ingredients and the care put into the preparation of a dish; Dave calls it persnickety. But eliminating whole categories of food from my diet because of a random childhood prejudice seems like a perfect way to cheat myself out of great food; not to mention how annoying pickiness is to the people around you. I’ve known people who wouldn’t eat hot liquids, eggs, anything with vinegar, seafood, mushrooms, you name it. I will eat pretty much anything – even green peppers, if I have to.

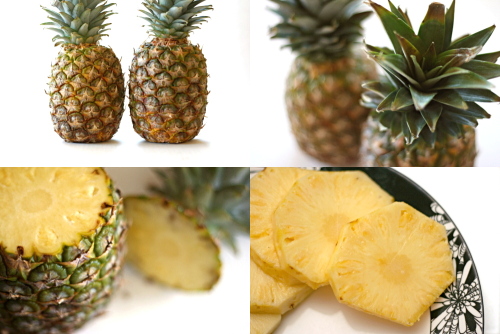
But there are some things I have trouble with (even besides green peppers), and fruit with meat is one of them. Those chicken salads with grapes in them don’t sound appetizing at all, and other than the occasional strawberry and spinach salad, fruit with lettuce doesn’t tempt me. But pineapple with pork is a combination I can hardly get enough of, especially when the pineapple is prepared to its maximum potential – grilled.

There is one thing to beware of when it comes to pineapple and meat though. Pineapple makes meat mushy. It has an enzyme in it that doesn’t just tenderize meat, it nearly dissolves it. The original recipe recommended marinating the pork for up to a day, but I, and the epicurious reviewers, knew better. I left the pineapple out of the marinade until we started heating up the grill. It was perfect, resulting in pork so tender it reminded me of dark chicken meat, but without even a hint of mush.

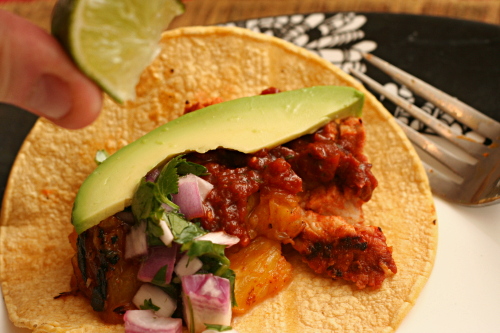
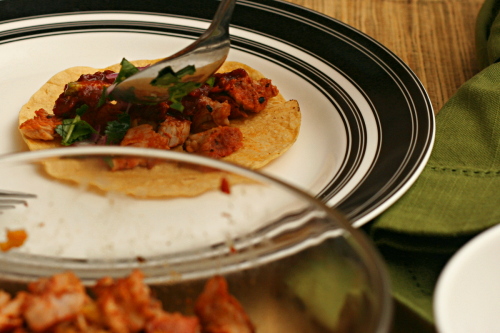
With a smorsgasbord of toppings, each bite of taco hit every flavor note: sweet pineapple-marinated pork, spicy salsa, tart onions, creamy avocado, all combined on corn tortillas, because everything is better on a tortilla – even meat and fruit mixtures.

One year ago: Crockpot Chicken Broth
Two years ago: Chicken with Forty Cloves of Garlic

Printer Friendly Recipe
Tacos al Pastor
(adapted slightly from Bon Apetit via epicurious)

I can never get corn tortillas to be soft and malleable enough to fold into tacos without deep-frying them. Heating them on the grill made them soft enough to fold, but they were too chewy. Maybe if I wrapped them in foil and heated them in the grill? Or brushed them with oil before heating them? Enlighten me.

1 pineapple, peeled, cut crosswise into ½-inch-thick rounds
1 large onion, halved
½ cup fresh orange juice
¼ cup distilled white vinegar
¼ cup guajillo chile powder
3 garlic cloves, halved
2 teaspoons coarse kosher salt
1 teaspoon dried oregano (preferably Mexican)
1 teaspoon ground cumin
1 large or 2 small chipotle chiles and 1 to 2 teaspoons adobo from canned chipotle chiles in adobo
2½-to 3-pounds boneless pork loin, cut into ½-inch slices

Garnishes:
½ red onion, finely chopped
2 tablespoons lime juice from 1-2 limes
½ cup minced cilantro
Smoky Two-Chile Salsa (recipe follows)
1 avocado, sliced, mashed (with salt and lime juice), or diced
corn tortillas
lime wedges

1. Coarsely chop 2 pineapple slices, removing core; thoroughly puree in a blender. Pour the pineapple juice into a storage container and chill until ready to use. Cover and chill the remaining pineapple.

2. Coarsely chop half the onion; place chopped onion in blender. Add the orange juice, vinegar, chile powder, garlic, salt, oregano, cumin, and chipotle chiles; puree marinade until smooth. Place the sliced pork in a large resealable plastic bag. Add the marinade and the seal the bag, releasing excess air. Chill at least 4 hours and up to 1 day. About half an hour before the grill is ready, add the reserved pineapple juice to the marinating meat.

3. Mix the onion and lime juice; set aside. Just before serving, stir in the cilantro.

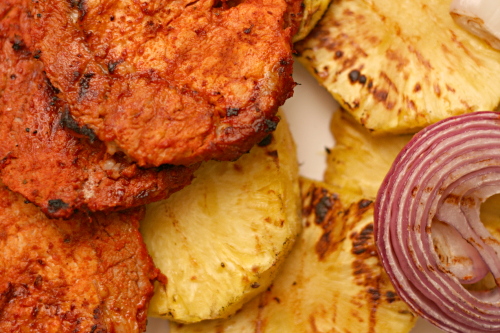
4. Heat a grill to medium-high heat. Grill the pineapple slices until warm and slightly charred, 4 to 6 minutes per side. Grill the pork, with some marinade still clinging to it, until it’s slightly charred and cooked through, 2 to 4 minutes per side. Grill some onion until charred. Transfer the pineapple and pork to a work surface; chop pineapple into ½-inch cubes, discarding cores. Chop (or shred) the pork. Transfer the pork and pineapple to a platter or serving bowl; toss to combine. Grill the tortillas until warm and slightly charred, about 10 seconds per side.

5. Serve the pork and pineapple with the pickled onion mixture, Smoky Two-Chile Salsa, avocado, warm tortillas, and lime wedges.

Smoky Two-Chile Salsa

8 large dried guajillo chiles or New Mexico chiles, stemmed, seeded, coarsely torn
2 cups hot water
½ medium onion, halved lengthwise through core end
3 garlic cloves, peeled
1 teaspoon adobo from canned chipotles in adobo
¼ cup chopped fresh cilantro
2 teaspoons fresh lime juice from 1 lime
coarse kosher salt

1. Place the torn chiles in a bowl. Add the hot water and soak for at least 2 hours or overnight. Drain the chiles, reserving the soaking liquid.

2. Heat a small nonstick skillet over medium heat. Add the onion and garlic to the dry skillet; cook until browned in spots, about 6 minutes for garlic and 10 minutes for onion. (I grilled the onion instead of browning it in a skillet, which I recommend as long as you have time to make the salsa right before serving.) Trim the core from the onion; place the onion and garlic in a blender. Add the drained chiles, 1 cup soaking liquid, 1 chipotle chile, 1 teaspoon adobo, cilantro, and lime juice; puree until smooth. Transfer to a bowl, seasoning to taste with coarse salt.