lenox almond biscotti

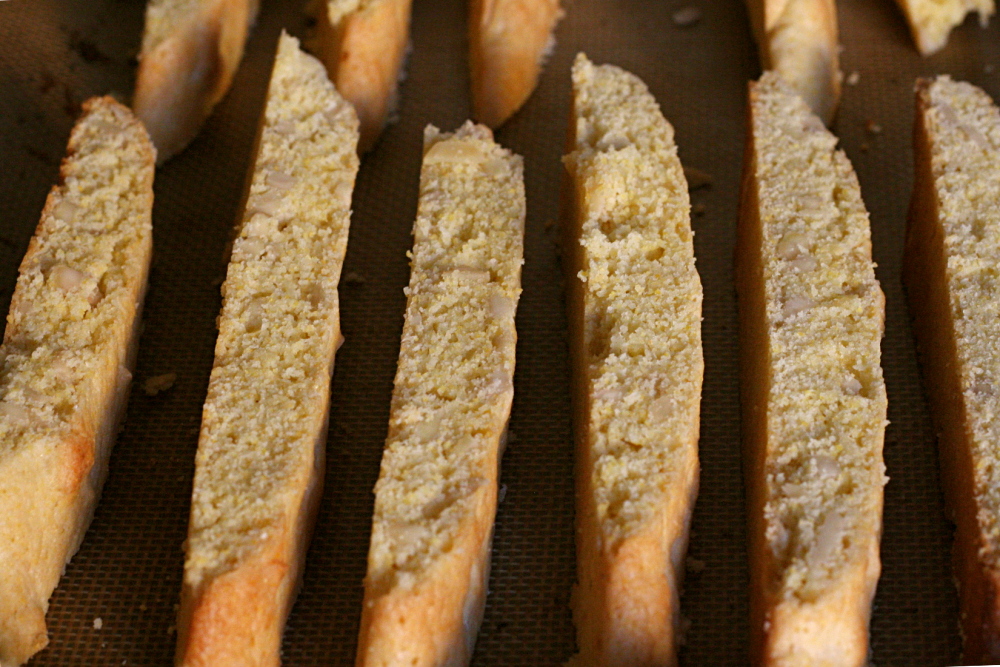
Dave loves biscotti, especially almond biscotti, so he was really happy about Gretchen’s pick for TWD this week. I do like biscotti, but I have trouble figuring out where it should fit into my routine. They’re too snack-like for dessert, but too unhealthy for a snack. Plus they’re kind of a hassle to make, with the slicing and the double-baking and all.

Ah, but almond extract, how I love it. The dough for this biscotti tasted really good.

There was some confusion among TWD members about what Dorie meant by “standing the biscotti slices up like a marching band” for the second baking, but looking at it now, I’m thinking she means that they should bake on the flat non-cut side of each slice. I laid them on a cut side instead, oops. I didn’t bother to flip them, but both sides seemed evenly browned regardless.

There is a reason why I do a lot of side-by-side comparisons of recipes. Not only is it the best way to spot small differences, but Dave, who is actually pretty good at picking out subtle differences in recipes, has a very bad memory for food. Whenever I ask him how one recipe compares to another, he says he’d need to taste them side-by-side.

Not so this biscotti. He knew immediately that he preferred the last biscotti recipe I made, even though I hadn’t made it in over 6 months. He likes that the other recipe is crunchier. Dorie’s biscotti were more tender than most that I’ve tried, which I don’t necessarily mind, but I’m not the main biscotti-eater around here. The reason for the difference is easy to see from a quick comparison of the recipes – Dorie’s uses almost twice as much butter.

So it looks like I’ll be sticking with my old biscotti recipe for now. If you’d like to check out Dorie’s recipe, Gretchen has it on her blog.

caramel peanut-topped brownie cake

I have a hard time believing that anyone who owns Dorie’s Baking book has flipped past the photo of this cake without their mouth watering at least a little. When most recipes for TWD are announced, I have to look them up to get an idea of what we’ll be making. But when Tammy chose this cake, I could picture exactly what it was. Dark chocolate cake with peanuts and dripping caramel is hard to ignore.

Although I think my 4-inch diameter springform is ridiculously cute, I wish the sides were a little higher. A 4-inch diameter circle has exactly one quarter the area of an 8-inch diameter circle, but my pan can’t fit one quarter of the batter because the sides are about an inch shorter. Plus I actually made a third of the recipe, not a quarter. The batter didn’t seem like it filled the pan very much, but it rose higher than I was expecting.

It did rise higher than the sides of the pan, but fortunately it didn’t spill over. I managed to overcook the cake part somehow, which is a bummer because a brownie-type cake had the potential to be amazing. It was still good, but definitely too dry.

The caramel portion of this recipe went smoothly for me, which was a relief because I hadn’t worked with caramel since the debacle with the filbert cake. Plus, Dorie specifically says that it’s difficult to work with less sugar than the recipe calls for, but I only made a third of the recipe anyway.

Before adding the peanut caramel topping, I carved off the top somewhat burned part of the cake. I didn’t put the cake back into the springform ring before adding the caramel – since my cake was higher than the sides anyway, I don’t think it would have made a difference. However, I can see why she recommends doing so – it gives the caramel a chance to set a little, so it doesn’t all drip down the sides and pool on the plate.

Even with overcooked cake and drippy caramel, this was a fun dessert. The ratio of caramel to peanut to cake was spot on. The cake was nice and chocolately, and the high rise made it attractively tall. For the recipe, go to Tammy’s blog.

chocolate chunkers

Just about every week, I’m reminded of why I enjoy being a member of TWD so much. The Chocolate Chunkers Claudia chose this week are no exception. I am always impressed by Dorie’s creativity.

That being said, Dorie and I do often differ on taste preferences. For example, what is with all the raisins? She puts them in everything. I do not approve. Also, peanuts. I like them, but I rarely want them in dessert. Also, this phrase: “You’ll have more crunchies than dough.” But…I love dough. Even more than crunchies.

This recipe is far more involved than my normal cookie recipes. It has quite the substantial ingredient list, and a good number of those ingredients need to be prepped in some way. At least I was able to use up my little-bits-of-leftover-chocolate stash.

She doesn’t call these “chunkers” for nothing. More crunchies than dough indeed. There’s just enough of the brownie-like batter to hold the mix-ins together. But – it works. Yes, I’d rather have a plain, rich, moist, perfect brownie, but for something super-fun and different, I like these cookies.

Claudia has the recipe posted. I substituted dried cherries (which I chopped up a bit) for the raisins and walnuts (not toasted, but they should have been) for the peanuts.

chunky peanut butter and oatmeal chocolate chipsters

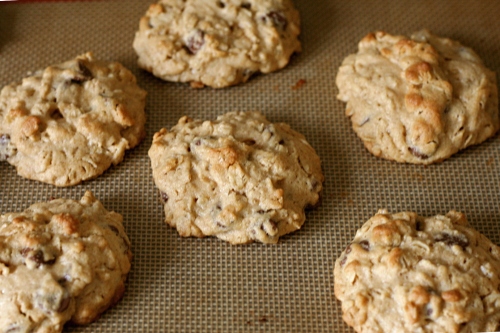
I didn’t realize how picky I was about cookies until they started getting chosen for TWD recipes. First the all-too-nutritious granola grabbers, and now Stefany chooses oatmeal cookies. I’m not sure why I have a prejudice against oatmeal cookies, but I suspect it’s the raisins. I don’t hate raisins, but I don’t want them where chocolate chips should be.

But, these cookies do have chocolate chips instead of raisins. And they have peanut butter, which is never a bad thing.

What do you know, these were great! I’m think I’m over my oatmeal prejudice – there was absolutely nothing unpleasant about the oatmeal in these cookies. I also loved how the peanut butter flavor was noticeable but not overpowering.

Ever since the NY Times article about chocolate chip cookies, I’ve been experimenting with chilling cookie dough overnight before I bake it. This recipe especially lent itself to a comparison in resting-before-baking times because Dorie encourages the baker to chill the dough for 2 hours before baking. I expected ugly flat cookies from those that were baked immediately, but I was surprised to see that they baked up perfectly. Dave and I actually didn’t notice a significant difference between the cookies baked immediately and those chilled for 2 hours. In contrast, the cookies from the dough that was chilled overnight were more evenly chewy. I preferred the chewier cookies, but Dave didn’t agree with me. We don’t remember any noticeable difference in flavor.

Whether baked immediately or from chilled dough, these offer fun variety from my routine of more traditional cookies. The recipe is provided on Stefany’s site.

banana nutella crepes

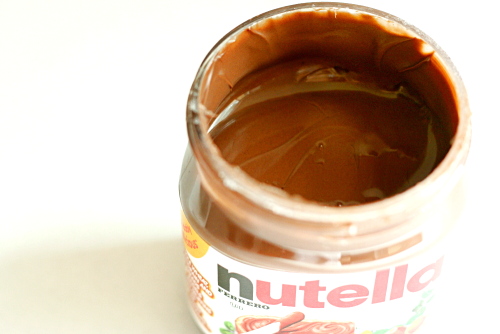
I ate Nutella, a chocolate hazelnut spread, for the first time just about a month ago. I’d been hearing great things about it for years, but I never got around to trying it until a friend sent me some. (Along with a jar of Marmite, which is so good.) I can see what all the hype about Nutella is for – this stuff basically tastes like milk chocolate, so of course everyone likes it!

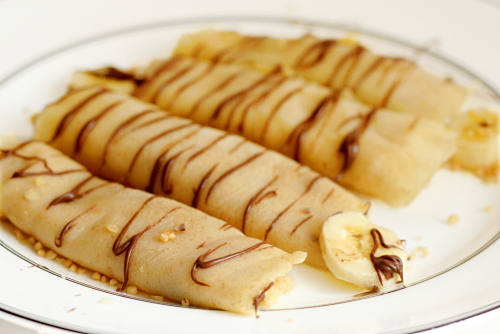
I’ve been putting it on all kinds of things, but mostly I eat it on bananas to break up the monotony of my daily banana. And how much better would bananas and Nutella be if they were wrapped up in a crepe?

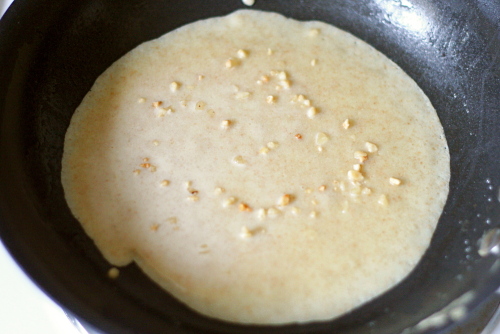
Crepes are one of those recipes that seem scarier than they really are. I’m always hearing stories about how the first crepe will have to be thrown out, and they’re so delicate, and all these things, but I’ve never had any problems cooking crepes. Maybe that means I’m doing something wrong, like making them too thick, but since I’m happy with the way they turn out, I see no reason to change anything.

I used Jess’s crepe recipe, as she describes her family as quite the experts in crepe-making. But, I didn’t trust the 100% whole wheat flour idea, so I used half white and half whole wheat. I also had to make them tiny, because I was between medium-sized nonstick pans at the time.

This seems like a great crepe recipe! The bananas and Nutella were really good, and I sprinkled over some hazelnut praline I had leftover from the filbert cake. I’m eager to see what else I can come up with to put in crepes. Sweet variations are almost too easy, and I know sausage and maple syrup are delicious in crepes. What about savory options? I need to do some exploring.

Whole Wheat Crepes (adapted from hogwash)

Jess implores her readers to eat the crepes as soon as they come out of the pan, but I didn’t. I stored them in a 200 degree oven until they were all cooked, so that Dave and I could eat together.

6 servings

2 cups milk (plus more, if needed)
2 large eggs
8 tablespoons unsalted butter, melted, plus more for the pan
1½ tablespoons sugar
½ teaspoon salt
1⅔ cups (8⅓ ounces) whole wheat flour (or a mix of white and whole wheat)

6 bananas, sliced
6 tablespoons Nutella

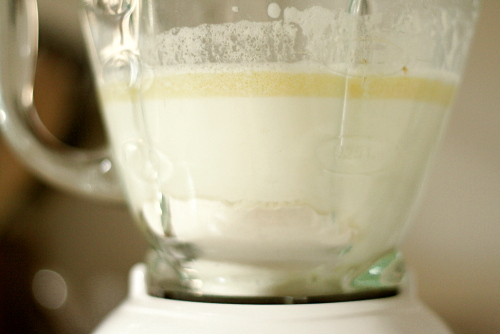
1. Combine the milk, eggs, melted butter, sugar, salt and 1 cup flour in a blender, and whirl until smooth, scraping down the sides of the glass, if necessary. Add all or most of the remaining flour, a bit at a time, until the batter has roughly the consistency of drinkable yogurt (very thin for pancake batter, but not runny). Let the batter sit at least 30 minutes at room temperature, or overnight in the refrigerator. (Bring the batter back to room temperature before continuing.)

2. Before cooking, thin the batter with a bit more milk, if it seems substantially thicker.

3. Preheat a crepe pan or large nonstick skillet over medium-high heat. When hot, grease with a dollop of butter (using a stick of butter to smear some directly on the skillet works nicely), and add enough batter to coat the skillet in a thin, even layer when you swivel the skillet around in your hand. Cook for a couple minutes, until you see bubbles in the center of the crepe and the bottom side is nicely browned. Flip carefully and cook another couple minutes on the other side. Fill as desired (in this case, with the sliced bananas and Nutella) and serve immediately. Repeat with the remaining batter.

granola grabbers (twd)

No classic cookie recipes have been chosen for TWD since I joined. I like making cookies, so I was looking forward to Michelle’s choice for this week.

With all of the ingredients in this recipe, I thought at first that they’d be similar to Magic Cookie Bars. And then I looked closer at the recipe – 3 cups of granola and almost 3 more cups of other healthy-ish stuff compared to only 1 cup of flour. These were some sort of melding of granola bars and cookies. Hmm…that sounds…healthy.

And it tasted healthy. Too much granola! Too many raisins (any raisins in cookies is too many), too many nuts. I added 1 cup of chocolate chips to the recipe, and it was the saving grace. It also might have caused some problems – the cookies were a little crumbly, I think because there was just too many add-ins, and not enough dough to hold them together.

Dave and some other friends are going backpacking this weekend, so I baked (most of) the cookies as bar cookies, which hold up better with being squashed at the bottom of a pack. Unfortunately, in a rare move for me, I made the whole recipe. I was only able to pawn about half of that off on the backpackers, so I threw the rest in the freezer until further notice. I have a feeling they’re going to get sent to Iraq, which I feel kind of bad about, but I just don’t know what else to do with them. They’re not bad, they’re not good enough to bother eating. Plus, they’re not healthy – they just taste like it.

If you’d like to check out the recipe, Michelle has posted it.

filbert gateau with praline buttercream (daring bakers)

There were a lot of similarities between the Filbert Gateau that Chris chose for this month’s Daring Baker challenge and the opera cake we made a few months ago. This works out well for me, because I could definitely use the cake-building practice. And I don’t know if I’m getting better at this whole baking thing or what, but this cake came together quite nicely for me.

I made the entire opera cake, from start to finish, in one day. I thought it would be fun, and while there were fun aspects, by the end, I never wanted to bake again (for two days). This time I got smart and did at least a small portion of the recipe ahead of time. There was still a good amount of baking to be done on the final day – most of the cake, the buttercream, the ganache, and the assembly, but it was manageable and fun.

The only part of the recipe that gave me fits was the praline. I have made caramel so many times before with nary a problem. But this time, I screwed it up four times in a row. I tried different methods, but each time, sugar crystals formed, interrupting my smooth caramel. I never did get it right – on the last attempt, there were only a few crystals in the liquid, and I decided that it would be a good learning experience for me to see what a screwed-up caramel was like. (How’s that for justification?) It turns out that screwed-up caramel is opaque and looks milky instead of being shiny and amber-colored and jewel-like. The taste was fine though, and I was grinding a good portion of it into paste anyway.

Everything else went smoothly. This was my most successful experience with these light egg-leavened cakes. But cutting the cake into layers created a lot of crumbs. I think I’ve heard that if I refrigerate or partially freeze the cake (wrapped well with plastic, I assume), it makes this process easier with no detrimental effects on the cake? Is this true?

This is the first time I’ve covered a cake with chocolate ganache. It’s not as smooth on the sides as I’d prefer, which I think is because my cake had fallen in the middle just a bit, so a lot of the ganache pooled there and there wasn’t as much to cover the sides. Even with my less-than-perfect coating, I think ganache makes for an impressive presentation.

Dave and I both enjoyed the flavor of the cake as well. The unsweetened whipped cream in between layers kept the cake from being too sweet, and the bittersweet chocolate was the perfect contrast to the sweet cake and buttercream. The cake wasn’t as praliney as I might have liked though. I wonder if I could mix in more praline paste with the buttercream? In the end though, this was a great learning experience and a lot of fun, with tasty results.

Filbert Gateau with Praline Buttercream (from Great Cakes, by Carol Walter)

Makes 1 10-inch cake, about 12 servings

1 Filbert Genoise
1 recipe sugar syrup, flavored with dark rum
1 recipe Praline Buttercream
½ cup heavy cream, whipped to soft peaks
1 recipe Apricot Glaze
1 recipe Ganache Glaze, prepared just before using

Filbert Genoise
Because of the amount of nuts in the recipe, this preparation is different from a classic genoise.

1½ cups hazelnuts, toasted/skinned
⅔ cup (2.65 ounces) cake flour, unsifted
2 tablespoons cornstarch
7 large egg yolks
1 cup (7 ounces) sugar, divided ¼ and ¾ cups
1 teaspoon vanilla extract
½ teaspoon grated lemon rind
5 large egg whites
¼ cup warm, clarified butter (100 – 110 degrees)

Position rack in the lower 3rd of the oven and preheat to 350 degrees. Grease and flour a 10″ X 2″ inch round cake pan.

Using a food processor, process nuts, cake flour, and cornstarch for about 30 seconds. Then, pulse the mixture about 10 times to get a fine, powdery mixture. You’ll know the nuts are ready when they begin to gather together around the sides of the bowl. While you want to make sure there aren’t any large pieces, don’t over-process. Set aside.

Put the yolks in the bowl of an electric mixer, with the whisk attachment, and beat until thick and light in color, about 3-4 minutes on med-high speed. Slowly, add ¾ cup of sugar. It is best to do so by adding a tablespoon at a time, taking about 3 minutes for this step. When finished, the mixture should be ribbony. Blend in the vanilla and grated lemon rind. Remove and set aside.

Place egg whites in a large, clean bowl of the electric mixer with the whisk attachment and beat on medium speed, until soft peaks. Increase to med-high speed and slowly add the remaining ¼ cup of sugar, over 15-20 seconds or so. Continue to beat for another ½ minute. Add the yolk mixture to the whites and whisk for 1 minute.

Pour the warm butter in a liquid measure cup (or a spouted container). Put the nut meal in a mesh strainer (or use your hand – working quickly) and sprinkle it in about 2 tablespoons at a time – folding it carefully for about 40 folds. Be sure to exclude any large chunks/pieces of nuts. Again, work quickly and carefully as to not deflate the mixture. When all but about 2 tablespoons of nut meal remain, quickly and steadily pour the warm butter over the batter. Then, with the remaining nut meal, fold the batter to incorporate, about 13 or so folds.

With a rubber spatula, transfer the batter into the prepared pan, smoothing the surface with the spatula or back of a spoon. (If collected butter remains at the bottom of the bowl, do not add it to the batter! It will impede the cake rising while baking.)

Tap the pan on the counter to remove air bubbles and bake in the preheated oven for 30-35 minutes. You’ll know the cake is done when it is springy to the touch and it separates itself from the side of the pan. Remove from oven and allow to stand for 5 minutes. Invert onto a cake rack sprayed with nonstick coating, removing the pan. Cook the cake completely.

*If not using the cake right away, wrap thoroughly in plastic wrap, then in a plastic bag, then in the refrigerator for up to 3 days. If freezing, wrap in foil, then the bag and use within 2-3 months.

Sugar Syrup
Makes 1 cup, good for one 10-inch cake – split into 3 layers

1 cup water
¼ cup (1.75 ounces) sugar
2 tablespoons dark rum or orange flavored liqueur

In a small, yet heavy saucepan, bring the water and sugar to a boil and simmer for 5 minutes. Remove from heat, add the liqueur. Cool slightly before using on the cake. *Can be made in advance.

Praline Buttercream
1 recipe Swiss Buttercream
⅓ cup praline paste
1½-2 tablespoons Jamaican rum (optional)

Blend ½ cup buttercream into the paste, then add to the remaining buttercream. Whip briefly on medium-low speed to combine. Blend in rum.

Swiss Buttercream
4 large egg whites
¾ cup sugar
1½ cups (3 sticks) unsalted butter, slightly firm
1½-2 tablespoons Grand Marnier or liqueur of your choice
1 teaspoon vanilla

Place the egg whites in the bowl of a electric mixer and beat with the whisk attachment until the whites are foamy and they begin to thicken (just before the soft peak stage). Set the bowl over a saucepan filled with about 2 inches of simmering water, making sure the bowl is not touching the water. Then, whisk in the sugar by adding 1-2 tablespoons of sugar at a time over a minutes time. Continue beating 2-3 minutes or until the whites are warm (about 120 degrees) and the sugar is dissolved. The mixture should look thick and like whipped marshmallows.

Remove from pan and with either the paddle or whisk attachment, beat the egg whites and sugar on medium-high speed until it’s a thick, cool meringue – about 5-7 minutes. (Do not overbeat). Set aside.

Place the butter in a separate clean mixing bowl and, using the paddle attachment, cream the butter at medium speed for 40-60 seconds, or until smooth and creamy. (Do not overbeat or the butter will become too soft.)

On medium-low speed, blend the meringue into the butter, about 1-2 tablespoons at a time, over about 1 minute. Add the liqueur and vanilla and mix for 30-45 seconds longer, until thick and creamy.

Refrigerate 10-15 minutes before using.

Wait! My buttercream won’t come together! Reheat the buttercream briefly over simmering water for about 5 seconds, stirring with a wooden spoon. Be careful and do not overbeat. The mixture will look broken with some liquid at the bottom of the bowl. Return the bowl to the mixer and whip on medium speed just until the cream comes back together.

Wait! My buttercream is too soft! Chill the buttercream in the refrigerator for about 10 minutes and rewhip. If that doesn’t work, cream an additional 2-4 tablespoons of butter in a small bowl – making sure the butter is not as soft as the original amount, so make sure is cool and smooth. On low speed, quickly add the creamed butter to the buttercream, 1 tablespoon at a time.

Refrigerate in an airtight container for up to 5 days, or can be frozen for up to 6 months. If freezing, store in 2 16-oz. plastic containers and thaw in the refrigerator overnight or at room temperature for several hours.

Praline Paste
1 cup (4½ ounces) hazelnuts, toasted/skinless
⅔ cup (4.65 ounces) sugar

Line a jelly roll pan with parchment and lightly butter.

Put the sugar in a heavy 10-inch skillet. Heat on low flame for about 10-20 min until the sugar melts around the edges. Do not stir the sugar. Swirl the pan if necessary to prevent the melted sugar from burning. Brush the sides of the pan with water to remove sugar crystals. If the sugar in the center does not melt, stir briefly. When the sugar is completely melted and caramel in color, remove from heat. Stir in the nuts with a wooden spoon and separate the clusters. Return to low heat and stir to coat the nuts on all sides. Cook until the mixture starts to bubble. (Remember – extremely hot mixture.) Then onto the parchment lined sheet and spread as evenly as possible. As it cools, it will harden into brittle. Break the candied nuts into pieces and place them in the food processor. Pulse into a medium-fine crunch or process until the brittle turns into a powder. To make paste, process for several minutes. Store in an airtight container and store in a cook dry place. Do not refrigerate.

Apricot Glaze
Good for one 10-inch cake

⅔ cup thick apricot preserves
1 tablespoon water

In a small, yet heavy saucepan, bring the water and preserves to a slow boil and simmer for 2-3 minutes. If the mixture begins to stick to the bottom of the saucepan, add water as needed.

Remove from heat and, using a strainer, press the mixture through the mesh and discard any remnants. With a pastry brush, apply the glaze onto the cake while the cake is still warm. If the glaze is too thick, thin to a preferred consistency with drops of water.

Ganache Glaze
Makes about 1 cup, enough to cover the top and sides of a 9 or 10 inch layer or tube cake

6 oz. (good) semisweet or bittersweet chocolate, like Lindt
6 oz. (¾ cup heavy cream
1 tablespoon light corn syrup
1 tablespoon Grand Marnier, Cointreay, or dark Jamaican rum (optional)
¾ teaspoon vanilla
½ – 1 teaspoon hot water, if needed

Blend vanilla and liqueur/rum together and set aside.

Break the chocolate into 1-inch pieces and place in the basket of a food processor and pulse until finely chopped. Transfer into a medium sized bowl and set aside.

Heat the cream and corn syrup in a saucepan, on low, until it reached a gentle boil. Once to the gently boil, immediately and carefully pour over the chocolate. Leave it alone for one minute, then slowly stir and mix the chocolate and cream together until the chocolate is melted and incorporated into the cream. Carefully blend in vanilla mixture. If the surface seems oily, add ½ – 1 teaspoon hot water. The glaze will thicken, but should still be pourable. If it doesn’t thicken, refrigerate for about 5 minutes, but make sure it doesn’t get too cold!

Assembling Cake

Cut a cardboard disk slightly smaller than the cake. Divide the cake into 3 layers and place the first layer top-side down on the disk. Using a pastry brush, moisten the layer with 3-4 tablespoon of warm sugar syrup. Measure out 1 cup of praline buttercream and set aside.

Spread the bottom layer with a ¼-inch thickness of the remaining buttercream. Cover with ½ of the whipped cream, leaving ¼-inch border around the edge of the cake. Place the middle layer over the first, brush with sugar syrup, spreading with buttercream. Cover with the remaining whipped cream.

Moisten the cut side of the third layer with additional sugar syrup and place cut side down on the cake. Gently, press the sides of the cake to align the layers. Refrigerate to chill for at least 30 minutes.

Lift the cake by sliding your palm under the cardboard. Holding a serrated or very sharp night with an 8-inch blade held parallel to the sides of the cake, trim the sides so that they are perfectly straight. Cut a slight bevel at the top to help the glaze drip over the edge. Brush the top and sides of the cake with warm apricot glaze, sealing the cut areas completely. Chill while you prepare the ganache.

Place a rack over a large shallow pan to catch the ganache drippings. Remove the gateau from the refrigerator and put it the rack. With a metal spatula in hand, and holding the saucepan about 10 inches above the cake, pour the ganache onto the cake’s center. Move the spatula over the top of the ganache about 4 times to get a smooth and mirror-like appearance. The ganache should cover the top and run down the sides of the cake. When the ganache has been poured and is coating the cake, lift one side of the rack and bang it once on the counter to help spread the ganache evenly and break any air bubbles. (Work fast before setting starts.) Patch any bare spots on the sides with a smaller spatula, but do not touch the top after the “bang”. Let the cake stand at least 15 minutes to set after glazing.

Garnish.

pecan honey sticky buns (twd)

My experience with sticky buns is limited; I guess we were more of a cinnamon roll family. Madam Chow’s TWD choice for this week would be something new for me then.

Dorie is insistent that you don’t cut the brioche dough in half. But, I did anyway. (Actually, I made a third of the recipe.) It would have been the same amount of effort to make the whole thing, and it freezes well, but do I really need this incredibly buttery bread dough to be conveniently at my fingertips? Nah. I admit I had to get a little creative with my mixer since I was making such a small amount – I mixed with the paddle for a while after adding the butter, then switched to the dough hook for the last few minutes of kneading.

I had the same problem that a number of other TWD members did with this recipe – 2 hours of rising in the morning, plus putting the rolls together and baking makes for a long wait until breakfast. I think it would work to form the rolls the night before, put them in the fridge overnight, and let them rise in a warmed oven the next morning. That should cut the waiting time in half.

The brioche made for a really light and airy base for sticky buns. But, I wonder if all that butter is worth it once it’s drowned in glaze? I’m thinking my base for cinnamon rolls would work just fine, with only about a third of the butter.

Overall, I thought these were great. The bread was light and tender, the glaze wasn’t too sweet, and they weren’t nearly as sticky as I was expecting. I almost wish I had made some extra to store in the freezer!

Pecan Honey Sticky Buns (from Dorie Greenspan’s Baking: From My Home to Yours)

Makes 15 buns

For the Glaze:
1 cup (7 ounces) packed light brown sugar
1 stick (8 tablespoons) unsalted butter, cut into 4 pieces
¼ cup honey
1½ cups pecans (whole or pieces)

For the Filling:
¼ cup (1.75 ounces) sugar
3 tablespoons (packed) light brown sugar
1 tablespoon ground cinnamon
3 tablespoons unsalted butter, at room temperature

For the Buns:
½ recipe dough for Golden Brioche loaves (see below), chilled and ready to shape (make the full recipe and cut the dough in half after refrigerating it overnight)

Generously butter a 9 by 13-inch baking pan (a Pyrex pan is perfect for this).

To make the glaze: In a heavy-bottomed saucepan, bring the brown sugar, butter, and honey to a boil over medium-low heat, stirring frequently to dissolve the sugar. Pour the glaze into the buttered pan, evening it out as best you can by tilting the pan or spreading the glaze with a heatproof spatula. Sprinkle over the pecans.

To make the filling: Mix the sugars and cinnamon together in a bowl. If necessary, in another bowl, work the butter with a spatula until it is soft, smooth and spreadable.

To shape the buns: On a flour-dusted work surface, roll the chilled dough into a 16-inch square. Using your fingers or a pastry brush, spread the softened butter over the dough. Sprinkle the dough with the cinnamon sugar, leaving a 1-inch strip bare on the side farthest from you. Starting with the side nearest you, roll the dough into a cylinder, keeping the roll as tight as you can. (At this point, you can wrap the dough airtight and freeze it for up to 2 months . . . . Or, if you want to make just part of the recipe now, you can use as much of the dough as you’d like and freeze the remainder. Reduce the glaze recipe accordingly).

With a chef’s knife, using a gentle sawing motion, trim just a tiny bit from the ends of the roll if they’re very ragged or not well filled, then cut the log into 1-inch thick buns. (Because you trim the ragged ends of the dough, and you may have lost a little length in the rolling, you will get 15 buns, not 16.) Fit the buns into the pan cut side down, leaving some space between them.

Lightly cover the pan with a piece of wax paper and set the pan in a warm place until the buns have doubled in volume, about 1 hour and 45 minutes. The buns are properly risen when they are puffy, soft, doubled and, in all likelihood, touching one another.

Getting ready to bake: When the buns have almost fully risen , center a rack in the oven and preheat the oven to 375 degrees F.

Remove the sheet of wax paper and put the pan on a baking sheet lined with parchment or a silicone mat. Bake the sticky buns for about 30 minutes, or until they are puffed and gorgeously golden; the glaze will be bubbling away merrily. Pull the pan from the oven.

The sticky buns must be unmolded minutes after they come out of the oven. If you do not have a rimmed platter large enough to hold them, use a baking sheet lined with a silicone mate or buttered foil. Be careful – the glaze is super-hot and super-sticky.

Golden Brioche Loaves

2 packets active dry yeast (each packet of yeast contains approx. 2 1/4 teaspoons)
1/3 cup just-warm-to-the-touch water
1/3 cup just-warm-to-the-touch whole milk
3 1/3 cups all-purpose flour
2 teaspoons salt
3 large eggs, at room temperature
1/4 (1.75 ounces) cup sugar
3 sticks (12 ounces) unsalted butter, at room temperature but still slightly firm

What You’ll Need for the Glaze (you would brush this on brioche loaves, but not on the sticky buns):
1 large egg
1 tablespoon water

To Make The Brioche: Put the yeast, water and milk in the bowl of a stand mixer and, using a wooden spoon, stir until the yeast is dissolved. Add the flour and salt, and fit into the mixer with the dough hook, if you have one. Toss a kitchen towel over the mixer, covering the bowl as completely as you can – this will help keep you, the counter and your kitchen floor from being showered in flour. Turn the mixer on and off a few short pulses, just to dampen the flour (yes, you can peek to see how you’re doing), then remove the towel, increase the mixer speed to medium-low and mix for a minute or two, just until the flour is moistened. At this point, you’ll have a fairly dry, shaggy mess.

Scrape the sides and bottom of the bowl with a rubber spatula, set the mixer to low and add the eggs, followed by the sugar. Increase the mixer speed to medium and beat for about 3 minutes, until the dough forms a ball. Reduce the speed to low and add the butter in 2 tablespoon-sized chunks, beating until each piece is almost incorporated before adding the next. You’ll have a dough that is very soft, almost like batter. Increase the speed to medium-high and continue to beat until the dough pulls away from the sides of the bowl, about 10 minutes.

Transfer the dough to a clean bowl (or wash out the mixer bowl and use it), cover with plastic wrap and leave at room temperature until nearly doubled in size, 40 to 60 minutes, depending upon the warmth of your room.

Deflate the dough by lifting it up around the edges and letting it fall with a slap to the bowl. Cover the bowl with the plastic wrap and put it in the refrigerator. Slap the dough down in the bowl every 30 minutes until it stops rising, about 2 hours, then leave the uncovered dough in the refrigerator to chill overnight. (After this, you can proceed with the recipe to make the brioche loaves, or make the sticky buns instead, or freeze all or part of the dough for later use.)

The next day, butter and flour two 8½ by 4½-inch pans.

Pull the dough from the fridge and divide it into 2 equal pieces. Cut each piece of the dough into 4 equal pieces and roll each piece into a log about 3½ inches long. Arrange 4 logs crosswise in the bottom of each pan. Put the pans on a baking sheet lined with parchment or a silicone mat, cover the pans lightly with wax paper and leave the loaves at room temperature until the dough almost fills the pans, 1 to 2 hours. (Again, rising time with depend on how warm the room is.)

Getting Ready To Bake: Center a rack in the oven and preheat the oven to 400 degrees F.
To Make the Glaze: Beat the egg with the water. Using a pastry brush, gently brush the tops of the loaves with the glaze.

Bake the loaves until they are well risen and deeply golden, 30 to 35 minutes. Transfer the pans to racks to cool for 15 minutes, then run a knife around the sides of the pans and turn the loaves out onto the racks. Invert again and cool for at least 1 hour.

snickery squares

Sometimes when I cook, I want to make absolutely the best version of that dish possible. I want to coax the maximum potential from every single ingredient, and I’m willing to do whatever it takes to make it happen.

Other times, I just want to use up the container of dulce de leche in the fridge.

I only made a quarter of the Florida Pie recipe, which left me with leftover sweetened condensed milk. I made it into dulce de leche, thinking it would preserve better that way and that I’d have more options on how to use it. Half a Snickery Squares recipe called for almost exactly the amount of dulce de leche I needed to use up. (Um, I think. There was no measuring.)

I didn’t want to get out and then wash all of my food processor parts for half a recipe of shortbread crust, so I mixed that by hand. I didn’t want to bother with half an egg yolk, so I used heavy cream. I made the caramel peanuts as instructed, and that was fun. Caramel always fascinates me, and the peanuts sounded like plastic pieces once they cooled. Due to laziness and ingredient availability, I tweaked the chocolate topping ingredients just a bit. Everything seemed to come together nicely, even with the shortcuts.

I didn’t expect to love this dessert. I don’t dislike Snickers bars, but neither am I a fan. And I’ve heard a few reviews saying that these bars are really rich, so I was expecting another over-the-top Dorie creation.

Holy smokes, this is the best treat I’ve made in months. It’s certainly my favorite of the recipes I’ve made from Dorie’s Baking book. The shortbread crust is sturdy but tender, the dulce de leche adds complexity, the peanuts provide crunch, and the bittersweet chocolate ties everything together and keeps it from being too sweet.

There are a few tiny changes I would make to the recipe next time. I’d reduce the sugar in the crust. I was surprised by how sweet it was when I tasted it plain, and I think it would make a better contrast to the filling if it weren’t so sweet. I’ll probably use heavy cream in the crust in the future, like I did this time, because it seemed to work fine and it’s easier than dealing with an egg yolk. And I’d reduce the peanuts from 1½ cups to 1 cup, because I really couldn’t fit them all in the pan. I’d correspondingly reduce the sugar in the filling to ¼ cup (for a full recipe).

But really, this is nitpicking. The squares are amazing how they are, and after two days of them beckoning me from the kitchen, begging for nibbles to be taken and already-clean edges to be shaved off, I’m relieved but sad to have just sent the last square off to work with Dave.

Snickery Squares (from Dorie Greenspan’s Baking: From My Home to Yours)

Bridget notes: Next time I’ll reduce the granulated sugar in the crust to 3 tablespoons and the powdered sugar to 1 tablespoon. I’ll reduce the peanuts to 1 cup, the sugar in the filling to ¼ cup, and the water in the filling to 2½ tablespoons. However, these changes aren’t to say that the bars aren’t amazing how they are.

For the Crust:
1 cup (5 ounces) all-purpose flour
¼ (1.75 ounces) cup sugar
2 tablespoons (0.5 ounce) powdered sugar
¼ teaspoon salt
8 tablespoons (1 stick) unsalted butter, cut into small pieces and chilled
1 large egg yolk, lightly beaten

For the Filling:
⅓ cup (2.33 ounces) sugar
3 tablespoons water
1½ cups salted peanuts
About 1½ cups store-bought dulce de leche

For the Topping:
7 ounces bittersweet chocolate, coarsely chopped
4 tablespoons (½ stick) unsalted butter, cut into 8 pieces, at room temperature

Getting Ready: Preheat oven to 350F. Butter an 8-inch square pan and put it on a baking sheet.

To Make the Crust: Toss the flour, sugar, powdered sugar and salt into a food processor and pulse a few times to combine. Toss in the pieces of cold butter and pulse about 12 times, until the mixture looks like coarse meal. Pour the yolk over the ingredients and pulse until the dough forms clumps and curds – stop before the dough comes together in a ball.

Turn the dough into the buttered pan and gently press it evenly across the bottom of the pan. Prick the dough with a fork and slide the sheet into the oven. Bake the crust for 15-20 minutes, or until it takes on just a little color around the edges. Transfer the pan to a rack and cool to room temperature before filling.

To Make the Filling: Have a parchment or silicone mat-lined baking sheet at the ready, as well as a long-handled wooden spoon and a medium heavy bottomed saucepan.

Put the sugar and water in the saucepan and cook over medium-high heat, stirring, until the sugar dissolves. Keeping the heat fairly high, continue to cook the sugar, without stirring, until it just starts to color. Toss the peanuts and immediately start stirring. Keep stirring, to coat the peanuts with sugar. Within a few minutes, they will be covered with sugar and turn white-keep stirring until the sugar turns back into caramel. When the peanuts are coated with a nice deep amber caramel, remove the pan from the heat and turn the nuts out onto the baking sheet, using the wooden spoon to spread them out as best you can. Cool the nuts to room temperature.

When they are cool enough to handle, separate the nuts or break them into small pieces. Divide the nuts in half. Keep half of the nuts whole or in biggish pieces for the filling, and finely chop the other half for the topping.

Spread the dulce de leche over the shortbread base and sprinkle over the whole candied nuts.
To Make the Topping: Melt the chocolate in a heatproof bowl set over a saucepan of barely simmering water. Remove chocolate from the heat and gently stir in the butter, stirring until it is fully blended into the chocolate.

Pour the chocolate over the dulce de leche, smoothing it with a long metal icing spatula, then sprinkle over the rest of the peanuts. Slide the pan into the fridge to set the topping, about 20 minutes; if you’d like to serve the squares cold, keep them refrigerated for at least 3 hours before cutting.

Cut into 16 bars.

Also – I just got a new camera. This is the first post I’ve used it on, and I guess I was little excited, huh?

peanut butter torte (twd)

I’m spending the first week of June on a beach. And since I spent February overeating and April underexercising, I can’t spend May eating super rich desserts. Unless…it’s peanut butter cream cheese mousse on an oreo cookie crust covered with a layer of ganache and sprinkled with peanuts, which is what Elizabeth chose for this week’s TWD recipe. Even if each slice, according to Dorie’s serving size recommendation, has 1250-1650 calories. I think it’s safe to say that Dorie’s serving sizes are wacko.

Because Dave and I can only eat so much crazy-rich peanut butter torte, I made a quarter of the recipe in a 4-inch pan. A springform pan is really necessary for neat slices, but I don’t have a tiny one that will fit a quarter of the recipe and wasn’t willing to buy one.

For the first week since I joined TWD, no one had any real problems with this recipe. The crust ended up being too thin and most people had to grind up a few more oreos. (Based on everyone’s reviews, it sounds like you’ll need 32-40 oreos for a full recipe, depending on how thick you like your crust.) The peanut butter mousse involves nothing more than beating softened cream cheese and peanut butter together, then folding in some flavorings and whipped cream. There were some complaints that the mousse was too salty, as Dorie calls for chopped salted peanuts to be mixed in. I used half salted and half unsalted and had no problems, although I prefer my mousses to be totally smooth, uninterrupted by bits of peanut and chocolate. The ganache is a classic mixture of chocolate and hot cream. It’s a relatively small amount of work for an impressive dessert, especially if the people you’re serving it to don’t realize that basically every ingredient in it is primarily fat.

Actually, Dave and I got eight servings just out of our mini torte – so 32 servings for a whole recipe. It was a nice, and necessary, compromise between treating ourselves and controlling ourselves.

Peanut Butter Torte (from Dorie Greenspan’s Baking: From My Home to Yours)

1¼ cup finely chopped salted peanuts (for the filling, crunch and topping)
2 teaspoons sugar
½ teaspoon instant espresso powder (or finely ground instant coffee)
¼ teaspoon ground cinnamon
Pinch of freshly grated nutmeg
½ cup mini chocolate chips (or finely chopped semi sweet chocolate)
24 Oreo cookies, finely crumbed or ground in a food processor or blender
½ stick (4 tablespoons) unsalted butter, melted and cooled
Small pinch of salt
2½ cup heavy cream
1¼ cup confectioners’ sugar, sifted
12 ounces cream cheese, at room temperature
1½ cup salted peanut butter – crunchy or smooth (not natural; I use Skippy)
2 tablespoons whole milk
4 ounces bittersweet chocolate, finely chopped
Getting ready: center a rack in the oven and preheat the oven to 350°F. Butter a 9-inch Springform pan and place it on a baking sheet lined with parchment or a silicone mat.

Toss ½ cup of the chopped peanuts, the sugar, espresso powder, cinnamon, nutmeg and chocolate chops together in a small bowl. Set aside.

Put the Oreo crumbs, melted butter and salt in another small bowl and stir with a fork just until crumbs are moistened. Press the crumbs evenly over the bottom and up the sides of the spring form pan (they should go up about 2 inches on the sides). Freeze the crust for 10 minutes.

Bake the crust for 10 minutes, then transfer it to a rack and let it cool completely before filling.

Working with a stand mixer fitted with the whisk attachment or with a hand mixer in a large bowl, whip 2 cups of the cream until it holds medium peaks. Beat in ¼ cup of the confectioners’ sugar and whip until the cream holds medium-firm peaks. Scrape the cream into a bowl and refrigerate until needed.

Wipe out (do not wash) the bowl, fit the stand mixer with the paddle attachment if you have one, or continue with the hand mixer, and beat the cream cheese with the remaining 1 cup confectioners’ sugar on medium speed until the cream cheese is satiny smooth. Beat in the peanut butter, ¼ cup of the chopped peanuts and the milk.

Using a large rubber spatula, gently stir in about one quarter of the whipped cream, just to lighten the mousse. Still working with the spatula, stir in the crunchy peanut mixture, then gingerly fold in the remaining whipped cream.

Scrape the mouse into the crust, mounding and smoothing the top. Refrigerate for at least 4 hours, or overnight; cover with plastic wrap as soon as the mousse firms.

To Finish The Torte: Put the chopped chocolate in a heatproof bowl and set the bowl over a saucepan of simmering water. Leave the bowl over the water just until the chocolate softens and starts to melt, about 3 minutes; remove the bowl from the saucepan.

Bring the remaining ½ cup cream to a full boil. Pour the cream over the chocolate and, working with a a rubber spatula, very gently stir together until the ganache is completely blended and glossy.

Pour the ganache over the torte, smoothing it with a metal icing spatula. Scatter the remaining ½ cup peanuts over the top and chill to set the topping, about 20 minutes.

When the ganache is firm, remove the sides of the springform pan; it’s easiest to warm the pan with a hairdryer, and then remove the sides, but you can also wrap a kitchen towel damped with hot water around the pan and leave it there for 10 seconds. Refrigerate until ready to serve.