roasted chicken thighs with root vegetables

I am highly susceptible to the Sunday Sads. I start out every weekend thinking that I have infinite time before going back to work to catch up on chores, hobbies, and sleep. I make pizza and drink beer the first night. Make something fancy for dinner and drink wine the second night. Sunday, though, turns into a mad rush to catch up chores from the previous week while preparing for the upcoming week. I still want something fantastic for dinner, but not something that’s going to keep me in the kitchen all day.

This one-dish meal is the perfect antidote to the Sunday Sads. The original recipe had a long staggered cooking method, in which the chicken roasted, then the vegetables, and then they’re combined to finish cooking. I don’t have that kind of patience on Sunday, so I cooked the whole thing in one dish at the same time. While it baked unattended, Dave and I shared a bottle of our favorite champagne – my other foolproof method of dissolving the Sunday Sads.

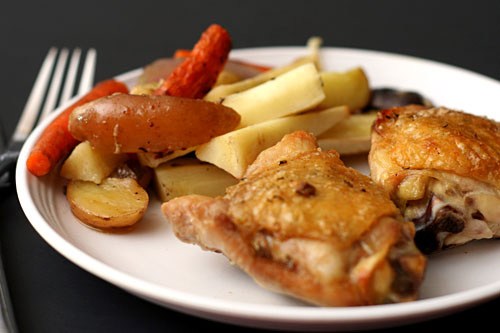
An easy meal is one thing, but what busy Sundays really need is something that tastes delicious. This mixture of browned potatoes, caramelized vegetables, and moist chicken that takes next to no time to put together eases the blow of facing another busy work week.

One year ago: Lamb Stew
Two years ago: German Apple Pancake

Printer Friendly Recipe
Roasted Chicken Thighs with Root Vegetables and Potatoes
(adapted from Bon Appétit)

Serves 4

The chicken thighs provide plenty of fat, probably too much, to coat the vegetables so they cook evenly. I think this would probably work with bone-in, skin-on breasts as well, or at least a mixture (with the breasts cut in half cross-wise so they cook in the same time as the thighs).

If you aren’t a fan of parsnips, replace them with more carrots or another root vegetable.

nonstick spray
1 pound medium carrots, peeled, cut into 2-inch-long, ½-inch-thick spears
1 pound parsnips, peeled, cut into 2-inch-long, ½-inch-thick spears
1½ pounds unpeeled medium Yukon Gold potatoes, scrubbed, cut into 2-inch-long, ½-inch-thick spears
1 onion, cut into 8 wedges
8 large chicken thighs with skin and bones
1 tablespoon coarse kosher salt
2 teaspoons dried thyme
1½ teaspoons freshly ground black pepper
¼ teaspoon freshly grated or ground nutmeg

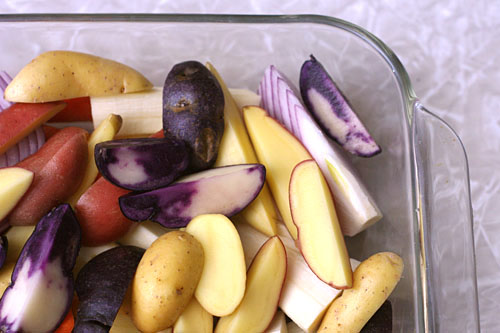
1. Preheat oven to 450°F. Mix salt, thyme, 1½ teaspoons pepper, and nutmeg in small bowl. Spray a 9×13-inch baking pan with nonstick spray. Place the carrots, parsnips, potatoes, and onion in the pan and spray with a light coating of nonstick spray. (The chicken will provide plenty of cooking fat, but you want to make sure every vegetable has at least a light coating.) Stir half of the salt mixture into the vegetables. Lay the chicken, skin-side up, over the vegetables. Rub the remaining salt mixture on the chicken and under its skin.

2. Bake until the chicken is golden and cooked through, 35-45 minutes. Serve.
taco pasta salad

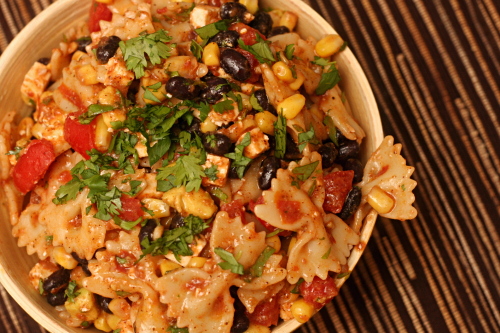
My inclination to overthink was very clearly exhibited with this recipe. I’ve heard approximately eight thousand raving reviews of this pasta salad. And still, I doubted. Salsa mixed with pasta? Cheddar cheese in pasta salad? I wasn’t convinced.

I asked Cara for advice. Really? Salsa? She said she never thinks twice about it, because this dish is always a hit. Shredded yellow cheese? Yes, she said. Stop asking questions and just go make it, she probably wanted to say.

I started slowly, adding only a third of the salsa called for, thinking I’d just mix in extra fresh tomatoes and some red onions and a jalapeno separately if I didn’t like the salsa. And then I realized – yes, salsa mixed with pasta. And I stirred in the rest of the salsa.

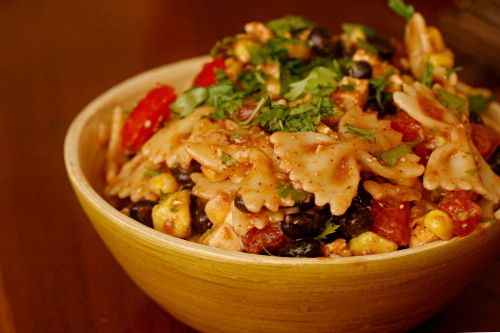
Right after those two ingredients were mixed is when I started nibbling. And then I added black beans… cilantro… avocado… tomatoes… cheese… corn… dressing… and I just kept nibbling and nibbling as I went. And the salad just kept getting better and better.  Forget instincts. I should just trust the recipe.

One year ago: Risotto with Swiss Chard
Two years ago: Gazpacho

Printer Friendly Recipe
Taco Pasta Salad (adapted slightly from Cara’s Cravings)

Serves 8-12

Apparently there’s no wagon wheel pasta in my little town. Bowties worked just fine.

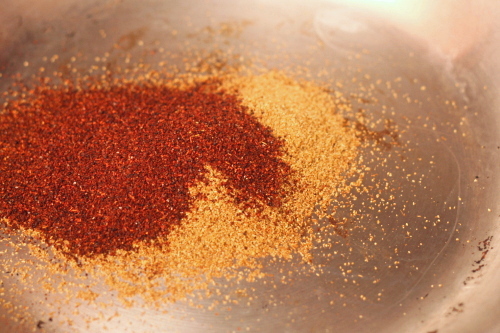
I toasted the spices before mixing them into the dressing. Just heat a small not-nonstick pan over medium heat for a few minutes, then add the spices and stir them around just until they start to smoke, no longer than a minute.

1 pound wagon wheel pasta
salt
1 (10-ounce) package frozen corn
1½ cups salsa
1 (15-ounce) can black beans, drained and rinsed
2 medium tomatoes, diced
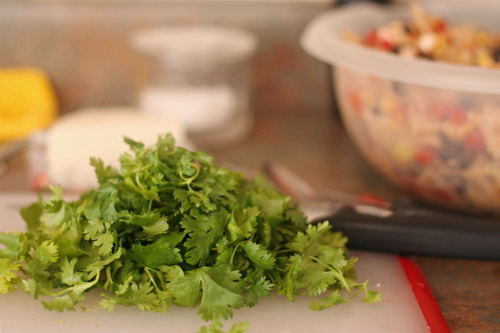
½ cup chopped fresh cilantro
8 ounces (2 cups) shredded cheddar cheese
3-4 tablespoons lime juice
1 large (or 2 small) avocado, peeled, seeded, and diced
1 tablespoon cumin
2 teaspoon chili powder
¼ teaspoon freshly ground pepper
2 garlic cloves, minced
¼ cup olive oil

1. Bring a large pot of water to a boil. Add 1 tablespoon salt and the pasta. Cook according to the package directions. Drain; stir the frozen corn into the pasta to cool the pasta and defrost the corn. Stir the salsa into the pasta and corn, then add the beans, tomatoes, cilantro, and cheese.

2. Squeeze the lime juice into a small bowl and add the avocado; stir to coat the avocado. Remove the avocado from the lime juice and stir it into the pasta mixture. Add the spices, garlic, and ½ teaspoon salt to the lime juice, then slowly whisk in the oil. Stir the dressing into the salad. Serve immediately or chill for up to 1 day (longer if you don’t add the avocado).

pasta with asparagus and goat cheese

I feel like I used to have this room (my life), and it had some stuff in it; mostly stuff I liked (cooking, reading, teaching, gardening), although of course there were things I didn’t (cleaning). My main problem was that it was too empty. There was too much space, and I could never get it arranged in any pleasing way. It made me frustrated and unhappy, and I took less enjoyment even from the things I did like.

Then I added this huge, I don’t know, piece of furniture or some other room-dominating thing (a full-time job). And now the room is too full. I like it more overall, I just don’t know where to put everything. Some things I’m willing to give up (hours mindlessly spent searching the internet), but the rest I’m trying to rearrange. Where does exercise go? What about blogging? Keeping in touch with friends, spending quality time with my husband, learning new things? I know there’s room for them all, I just have to find out how to make it work.

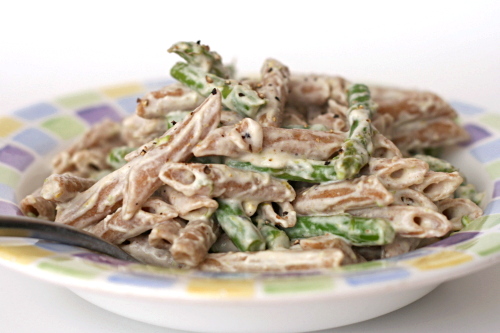
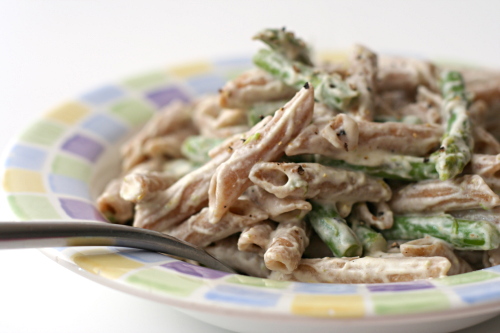
I’m not going to stop cooking, obviously. But I will change the way I cook most nights of the week, keeping things simple. This dish, with only a handful of ingredients and one ingredient to chop, is a perfect example of how easy meals can still be tasty meals. This meal definitely fits into my crowded new room, and it leaves me plenty of space for exercise, a full day of work, a long chat with a friend, and even a batch of brownies. A life too full is certainly better than a life too empty.

Two years ago: Kung Pao Shrimp

Printer Friendly Recipe
Asparagus, Goat Cheese and Lemon Pasta
(adapted from Smitten Kitchen)

Serves 6

16 ounces pasta
salt and pepper
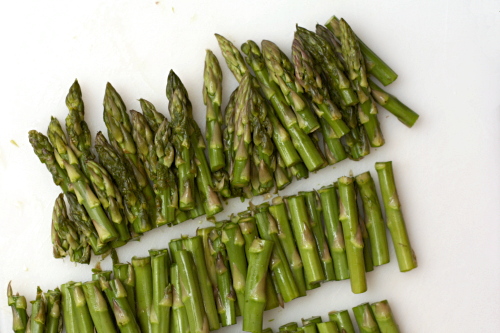
2 pounds slender asparagus spears, trimmed, cut into 1- to 1½-inch pieces
2 tablespoons extra virgin olive oil
1 lemon
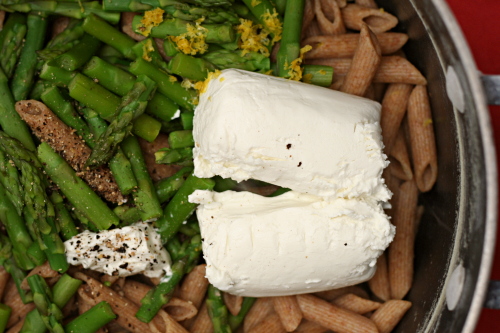
8 ounces soft goat cheese

1. Bring at least 6 quarts of water to a rolling boil over high heat. Add the pasta and 1 tablespoon of salt and cook the pasta until it is almost tender, about 2 minutes short of the package instructions. Add the asparagus and cook until it is crisp-tender, about 2 minutes. Reserving 1 cup of the pasta cooking water, drain the pasta and asparagus.

2. Return the pasta and asparagus to the pot and add the oil, zest from the whole lemon, juice from ½ the lemon, goat cheese, a generous grinding of pepper, and ½ cup pasta cooking water; stir until the goat cheese melts. Taste and add salt (you’ll probably need some), freshly ground black pepper, and more lemon juice if necessary. If the sauce becomes thick and sticky, stir in more pasta cooking water.

home corned beef

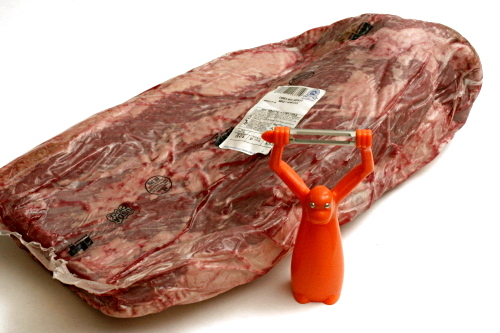
Can someone explain to me why the only way I can buy brisket in my tiny town is to get the whole brisket? (And why are there no dried currants? Or mini-cupcake liners?) I didn’t even know what a whole brisket looked like before last month. First off, it’s huge. Who needs to buy 15 pounds of meat at a time? Second, half of that 15 pounds is fat. I actually weighed the fat after I spent an entire hour aaaargh! trimming it off the brisket. An inch-thick layer of fat, yum.


monkey peeler for scale

And why is brisket so much more expensive to buy than prepared corned beef anyway? Corned beef is just seasoned brisket. I didn’t corn my own beef because I have a problem with the store-bought versions of corned beef; it’s just that…I can’t help myself. Homemade corned beef sounded fun.

I tried it a few years ago (back in the glorious days when I could buy pre-trimmed brisket in reasonable sized roasts), using Cooks Illustrated’s dry rub recipe. In that one, a mixture of salt and other seasonings is rubbed onto the brisket and left to set for several days. It was good, because it’s salty brisket, but I didn’t think it was significantly better than what I could buy.

I started out this time using Alton Brown’s recipe, which is a wet brine similar to what is often used for chicken. However, I balked when I was supposed to add 2 pounds of ice to 2 quarts of water to make the brine for four pounds of brisket. That seemed like an excessive amount of liquid per meat; I’m not sure I have the fridge space for all that. So I halved the liquid, but that means that my brine was far more concentrated, and the resulting corned beef was not-quite-inedibly salty.

I tried again (after all, I still had plenty of brisket in the freezer), dialing back the amount of salt by half. And what do you know? Perfection. Dave is already requesting more reubens, so it looks like I’ll use up 15 pounds of brisket after all.  Maybe next time I can get the butcher to trim it for me.

One year ago: Roasted Baby Artichokes
Two years ago: Red Beans and Rice

Printer Friendly Recipe
Corned Beef (adapted from Alton Brown)

6 to 8 servings

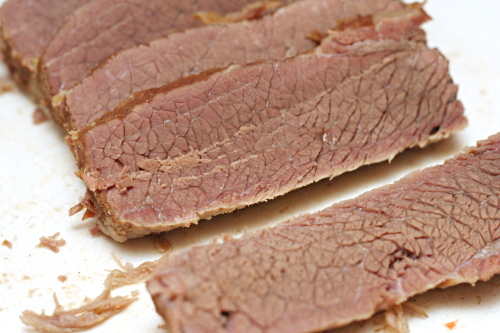
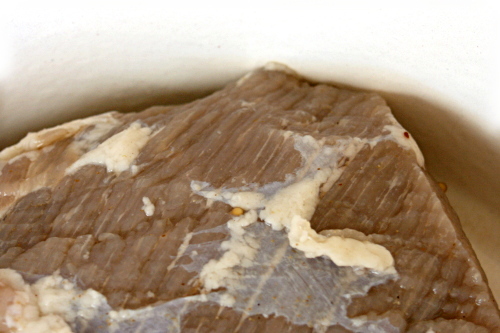
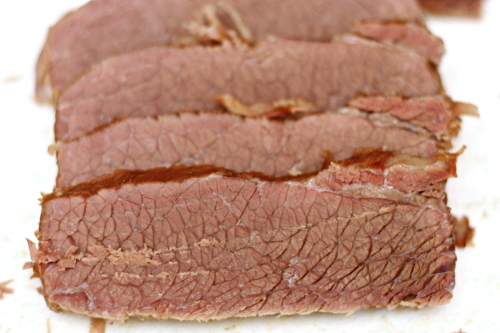
The use of saltpeter (potassium nitrate) is up to you. Its purpose is to make the meat pink; without it, it turns the purpley gray that you see in my pictures. Cooks Illustrated’s corned beef write-up reported chemical flavors whenever they used saltpeter, and I couldn’t find it anyway, so I left it out, and truthfully, I quite like the color of the meat at the end of cooking.

4 cups water
½ cup kosher salt
6 tablespoons brown sugar
1 tablespoon saltpeter (optional)
½ cinnamon stick, broken into several pieces
1 teaspoon mustard seeds
1 teaspoon black peppercorns
4 whole cloves
4 whole allspice berries
6 whole juniper berries
2 bay leaves, crumbled
¼ teaspoon ground ginger
4 quarts ice
1 (4 to 5 pound) beef brisket, trimmed

Place the water in a 5-quart pot along with the salt, sugar, saltpeter (if using), and spices. Cook over high heat until the salt and sugar have dissolved. Add the ice and let set the mixture until the ice is mostly melted. Once the liquid is cold, place the brisket in a 1-gallon zip-top bag and add the brine. Seal and lay flat inside a 9×13-inch pan. Refrigerate for 5 days, turning occasionally. After 5 days, remove the meat from the brine and rinse it under cool water. Cook using your favorite recipe. (I like to keep it very simple, just simmering the brisket in water for a few hours until it’s tender, adding potatoes, carrots and cabbage near the end.)

lighter chicken and dumplings

Aargh, I hate when I choose a recipe specifically because of one step that I find interesting, and then I screw up that step! In this chicken and dumplings recipe, Cooks Illustrated uses chicken wings to thicken the broth, instead of starch. I’m always fascinated by how homemade stock is gelatinous when it’s cold, so I was eager to try out the idea of thickening a broth with natural collagen.

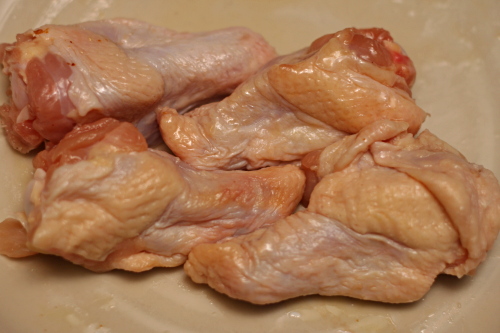
But then I didn’t quite buy chicken wings. Drummettes were more easily available, and they’re from wings, so I figured it was close enough. Too late, I read the recipe description closer and saw that they specifically refer to the joints in wings as having a lot of collagen. D’oh! My little drummettes didn’t have joints.

So much for that trick. I ended up dissolving about 2 tablespoons of cornstarch in about ¼ cup of water and stirring that into the broth near the end of cooking. That worked fine, although it wasn’t as fun.

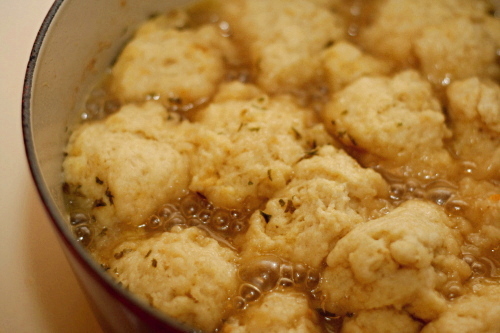
Regardless, the resulting chicken and dumplings were really delicious. I particularly liked the idea of putting a kitchen towel under the lid of the pot while the dumplings cook, so that they’re tops don’t get soggy. I also like that it only has a bit of fat in it, so this meal is light enough to make again soon – correctly this time.

One year ago: Chopped Salad
Two years ago: Oatmeal

Printer Friendly Recipe
Lighter Chicken and Dumplings (from Cooks Illustrated)

Stew:

6 bone-in, skin-on chicken thighs (about 2½ pounds), trimmed of excess fat
table salt and ground black pepper
2 teaspoons vegetable oil
2 small onions, chopped fine (about 1½ cups)
2 medium carrots, peeled and cut into ¾-inch pieces (about 2 cups)
1 medium celery rib, chopped fine (about ½ cup)
¼ cup dry sherry
6 cups low-sodium chicken broth
1 teaspoon minced fresh thyme leaves
1 pound chicken wings
¼ chopped fresh parsley leaves

Dumplings:
2 cups (10 ounces) unbleached all-purpose flour
½ teaspoon baking soda
1 teaspoon sugar
1 teaspoon table salt
¾ cup buttermilk
4 tablespoons (½ stick) unsalted butter, melted and cooled slightly
1 large egg white

1. For the stew: Pat chicken thighs dry with paper towels and season with 1 teaspoon salt and ¼ teaspoon pepper. Heat oil in large Dutch oven over medium-high heat until shimmering. Add chicken thighs, skin-side down, and cook until skin is crisp and well browned, 5 to 7 minutes. Using tongs, turn chicken pieces and brown on second side, 5 to 7 minutes longer; transfer to large plate. Discard all but 1 teaspoon fat from pot.

2. Add onions, carrots, and celery to now-empty pot; cook, stirring occasionally, until caramelized, 7 to 9 minutes. Stir in sherry, scraping up any browned bits. Stir in broth and thyme. Return chicken thighs, with any accumulated juices, to pot and add chicken wings. Bring to simmer, cover, and cook until thigh meat offers no resistance when poked with tip of paring knife but still clings to bones, 45 to 55 minutes.

3. Remove pot from heat and transfer chicken to cutting board. Allow broth to settle 5 minutes, then skim fat from surface using wide spoon or ladle. When cool enough to handle, remove and discard skin from chicken. Using fingers or fork, pull meat from chicken thighs (and wings, if desired) and cut into 1-inch pieces. Return meat to pot.

4. For the dumplings: Whisk flour, baking soda, sugar, and salt in large bowl. Combine buttermilk and melted butter in medium bowl, stirring until butter forms small clumps; whisk in egg white. Add buttermilk mixture to dry ingredients and stir with rubber spatula until just incorporated and batter pulls away from sides of bowl.

5. Return stew to simmer; stir in parsley and season with salt and pepper to taste. Using greased tablespoon measure (or #60 portion scoop), scoop level amount of batter and drop over top of stew, spacing about ¼ inch apart (you should have about 24 dumplings). Wrap lid of Dutch oven with clean kitchen towel (keeping towel away from heat source) and cover pot. Simmer gently until dumplings have doubled in size and toothpick inserted into center comes out clean, 13 to 16 minutes. Serve immediately.

asian-style chicken noodle soup

I don’t get sick very often, which I chalk up mostly to luck (or I guess good genes). It probably also helps that I try to eat bunches of fruits and vegetables, drink a lot of water, get plenty of sleep, and exercise regularly.

Of course, over the holidays, I tend to grab a cookie instead of a piece of fruit for a snack, and I sleep less, and I drink wine instead of water, and I spend a lot of time indoors, and…blah, this year, I got the Cold From Hell right after Christmas. I spent the better part of three days sitting on the couch with a book, a mug of tea, and a blanket (which sounds nice, yet wasn’t). I did, however, find enough energy to make chicken soup.

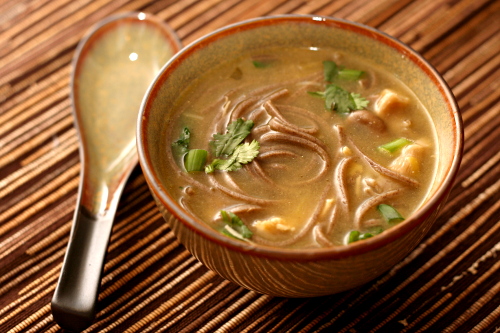
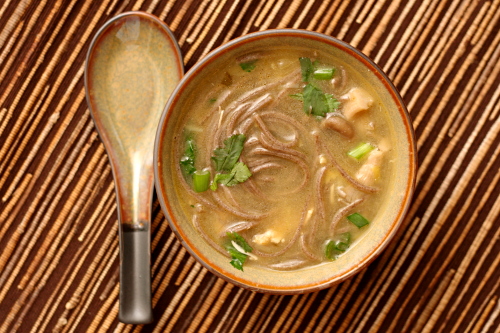
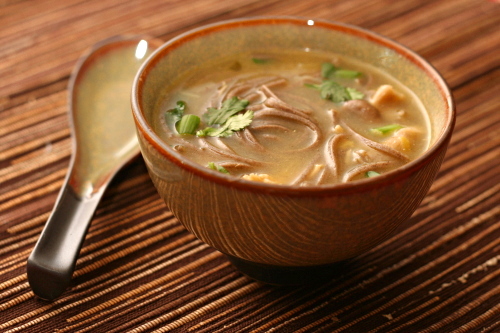
I wasn’t in the mood for a traditional version, which just seemed too hearty for how I was feeling. I wanted a gently flavored broth with ginger and leeks instead of more assertive aromatics like onions and carrots. Mushrooms were a light addition and Japanese soba noodles made the soup into a balanced meal.

It definitely hit the spot, which was good because we didn’t eat much besides this and tomato soup for a few days. It seems to have worked, because this morning – finally! – I’m breathing through my nose. I forgot how wonderful that feels.

Two years ago: Pad Thai
One year ago: Pasta with Broccoli, Sausage, and Roasted Red Peppers

Printer Friendly Recipe
Asian Chicken Noodle Soup

6 main dish servings (probably 12 first-course servings)

My small-town grocery store didn’t have shiitakes, which was very sad, so I used oyster mushrooms. You can use really any type of mushroom, including white button.

2 skin-on, bone-in chicken breasts, 12 to 16 ounces each
2 teaspoons vegetable oil
2 leeks, white and light green parts only
1 tablespoon peeled and minced ginger
2 garlic cloves, minced
4 cups water
4 cups chicken broth
8 ounces soba noodles, broken in half
12 ounces shiitakes, stemmed discarded, caps sliced thin
2 tablespoon rice vinegar
4 tablespoons soy sauce
1 teaspoon chili oil (optional)
1 tablespoon toasted sesame oil
¼ cup chopped cilantro
2 scallions, chopped

1. Adjust an oven rack to the lower-middle position; heat the oven to 450 degrees. Heat the oil in 5-quart Dutch oven over medium-high heat; swirl to coat the pot evenly with oil. Brown the chicken breasts skin side down until deep golden, 3 to 4 minutes; turn the chicken breasts and brown until they’re golden on the second side, 3 to 4 minutes longer. Place the pot with the chicken in the oven; roast until the thickest part of a breast registers 160 degrees on instant-read thermometer, 18 to 25 minutes. Transfer the chicken to a platter and set aside until it’s cool enough to handle, then shred it, discarding the bones and skin.

2. Discard all but about 1 tablespoon of the fat in the Dutch oven. Without rinsing the pot, sauté the leeks, ginger and garlic over medium heat until the leeks are softened, 3-4 minutes, scraping up any browned bits from the bottom of the pot. Add the water and broth; bring to a boil over medium-high heat, then cover the pot and reduce the heat to medium-low. Simmer for 15 minutes.

3. Add the mushrooms, chicken, and soba to the broth mixture and simmer for about 6 minutes, until the noodles are tender. Stir in the rice vinegar, soy sauce, chile oil, sesame oil, cilantro and scallions. Serve.
sweet potato hash

Copy of IMG_0431

While I can be, shall we say, particular about preparation, I think keeping an open mind is so important when it comes to both ingredients and certain dishes.

Copy of IMG_0397

For example, stuffing. There’s nothing unpleasant about bread, seasonings, aromatics, and broth baked until the flavors are blended and the top is crispy. When people say they don’t like stuffing, I really think they just didn’t like the stuffing they had when they were young. They just need to try a different recipe (add bacon!) to enjoy it more.

Copy of IMG_0399

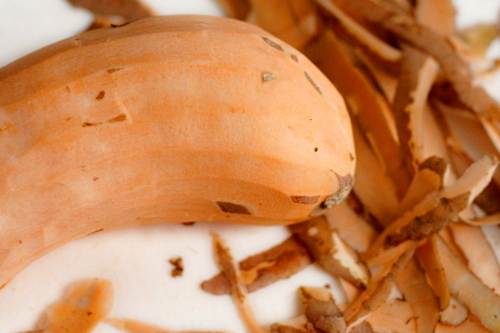
As far as ingredients that often inspire pickiness, sweet potatoes have a bad name. For a lot of people, one of the only ways they’ve seen sweet potatoes prepared is in that sugary, marshmallow-topped weirdness at Thanksgiving. Hey! Let’s take something already sweet, cook it in sugar, top it with more sugar, and serve it with dinner! Blech.

Copy of IMG_0413

Because I don’t like those sweet potatoes and wasn’t exposed to them prepared other ways, I always assumed I didn’t like sweet potatoes at all. But now I know better! I like them quite a bit in more savory preparations.

Copy of IMG_0416

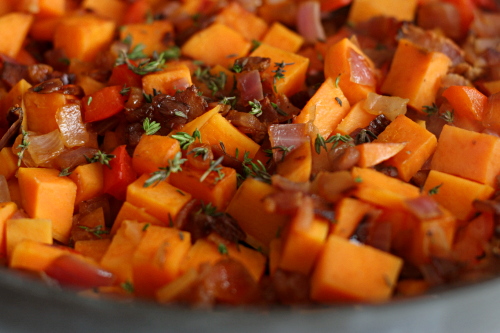
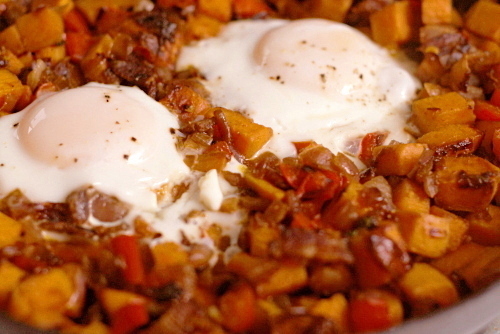
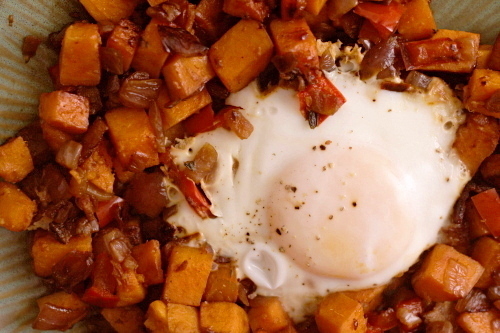
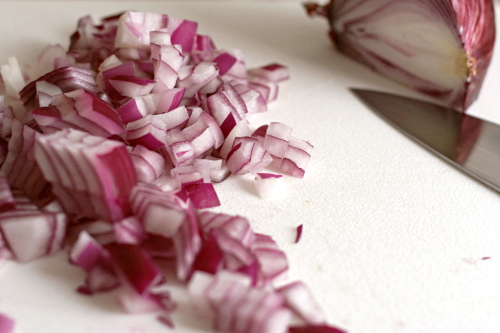
Take this dish. Salty bacon, flavorful slightly caramelized vegetables, and browned sweet potatoes. What is there not to like, especially when the whole thing is topped with an egg? It goes to prove that I could miss out on some great meals if I don’t remember that just because I don’t like an ingredient prepared one way doesn’t mean I won’t like it in other dishes.

Copy of IMG_0422

One year ago: Peter Reinhart’s Pizza Dough

Printer Friendly Recipe
Sweet-Potato Hash with Bacon (adapted from epicurious/Gourmet)

Serves 4

These are the same ingredients in the same proportions as the original recipe, but I’ve tweaked the preparation a bit because a number of reviewers complained that the original was too greasy. Adding eggs on top is also my addition, but Dave and I tried it with and without the eggs, and while it was good without, it was even better with.

½ pound sliced bacon, cut into ¼-inch strips
2 medium onions, chopped
1 large red bell pepper, cut into thin strips
salt and pepper
2 pound sweet potatoes, peeled and cut into ½-inch cubes
1 teaspoon chopped fresh thyme
4 eggs (optional)

1. Cook the bacon in a 12-inch nonstick skillet over medium heat until it renders some fat and begins to brown. Drain off all of the fat except for a thin coating on the pan, then add the onions, red pepper, ½ teaspoon salt, and ½ teaspoon pepper. Cook uncovered, stirring occasionally, until the vegetables are softened, 7-8 minutes.

2. Stir in the potatoes and ½ teaspoon salt. Cover the pan and cook, stirring occasionally, until the potatoes are tender and starting to brown, 10 to 14 minutes. Stir in the thyme and season to taste.

3. If you’re adding the eggs, create four indentions in the hash and break an egg into each. Season the eggs and cover the pan. Lower the heat to medium-low and cook without removing the lid for at least 6 minutes, when you can start testing for doneness. I like my eggs without any runniness at all in the white but with gooey yolks, and it takes around 8 minutes.

Copy of IMG_0432

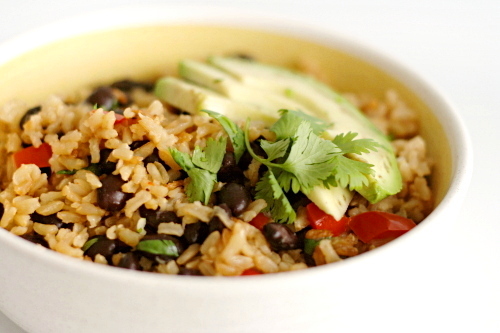
brown rice with black beans

Copy of IMG_0357

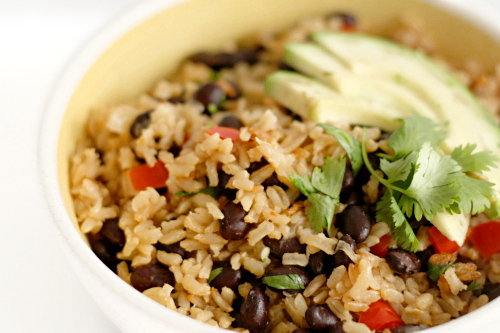
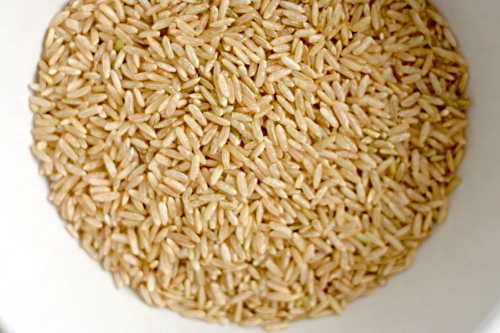
Of all the whole grains, brown rice has been the hardest for me to accept. I realize now that I’d been cooking it wrong for years. I just couldn’t seem to cook it through all the way, and I tried a bunch of different recipes, but it was always crunchy.

Copy of IMG_0345

Then sometime last year, Cooks Illustrated sent me a recipe to test for them for brown rice with andouille, and not only does it have andouille, which, come on, andouille, delicious, but at the time I was religiously making every recipe they sent for me to test. (It got to the point where I’d get the magazines and I’d already have made half the recipes. I’ve since slacked off.) So I only made the recipe because I felt like I had to, plus of course the andouille. But it was fantastic, just so, so good. It was a revelation for me, because it was the first brown rice I’d made that was not just edible, but delicious.

Copy of IMG_0344

But that isn’t the recipe I’m telling you about today. Ha! When the magazine issue came out, it had a few other variations, and one is just perfect for me. Brown rice, black beans and a bunch of aromatics, how healthy and tasty does that sound?

Copy of IMG_0347

The first time I made it, I followed the directions fairly closely, just adding the scraped-off kernels of one cob of corn at the end of cooking. That was a great addition, especially visually. Corn isn’t in season anymore, so I skipped it this next time. I doubled the black beans the second time, because you can never go wrong with more black beans. I also added an avocado and wow! I mean, it goes without saying that avocado improves almost anything, but it was particularly complimentary with this.

Copy of IMG_0354

If you’ve ever had doubts about brown rice, this recipe will make a believer out of you. And if you’re already a convert, this dish will be a great addition to your repertoire.

Copy of IMG_0355

One year ago: Sushi Bowls

Printer Friendly Recipe
Brown Rice with Black Beans and Cilantro
(from Cooks Illustrated)

I like to double the black beans. Corn, either cut off of the cob or 1 cup frozen and defrosted, is a good addition stirred in with the black beans. One diced avocado is delicious added with the cilantro. I used red pepper, because I like them better than green.

Serves 4 to 6

4 teaspoons olive oil
1 medium onion, chopped fine (about 1 cup)
1 green bell pepper, chopped fine
3 garlic cloves, minced
1 cup low-sodium chicken broth
2¼ cups water
1½ cups brown rice, long-grain
1 teaspoon salt
1 (15.5-ounce) can black beans, drained and rinsed
¼ cup chopped fresh cilantro leaves
¼ teaspoon ground black pepper
1 lime, cut into wedges

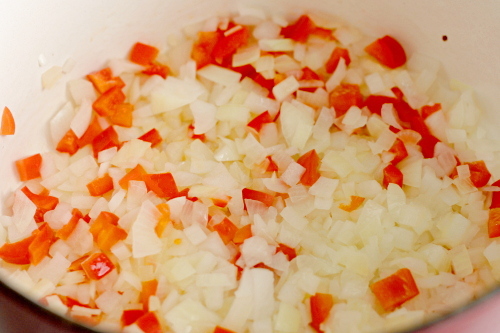
1. Adjust oven rack to middle position; heat oven to 375 degrees. Heat oil in large Dutch oven over medium heat until shimmering. Add onion and pepper and cook, stirring occasionally, until well browned, 12 to 14 minutes. Stir in garlic and cook until fragrant, 30 seconds.

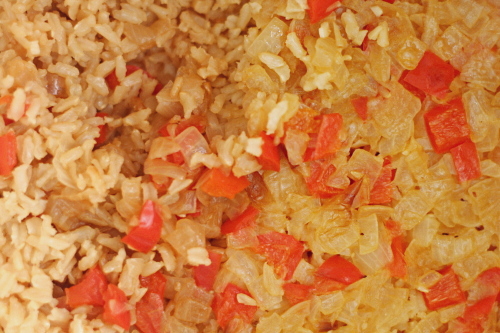
2. Add broth and water; cover and bring to boil. Remove pot from heat; stir in rice and salt. Cover and bake rice until tender, 65 to 70 minutes.

3. Remove pot from oven, uncover, fluff rice with fork, stir in beans, and replace lid; let stand 5 minutes. Stir in cilantro and black pepper. Serve, passing lime wedges separately.

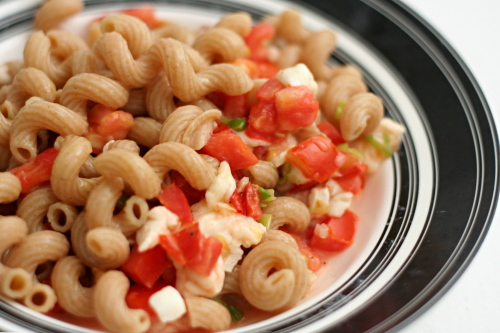
pasta with no-cook tomato sauce and fresh mozzarella

Copy of IMG_8005

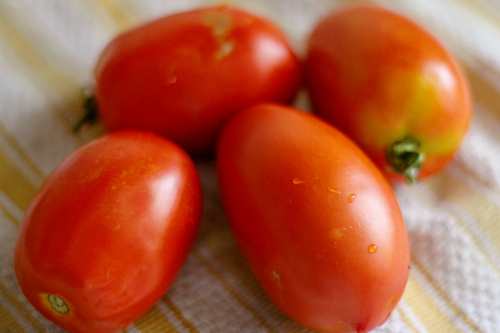
I know I’ve been harping on my love of summer lately, and I did the same thing last year. Honestly, while summer is undoubtedly my favorite season, fall is a not-too-distant second, and really, there are aspects I like about every season. But summer doesn’t just have sunlight and warmth and lightning bugs and beach trips and fireworks and…well, all of those other things I love, but very importantly, it has tomatoes.

Copy of IMG_7989

I love fresh summer tomatoes so much that, other than the very occasional container of cherry tomatoes, I don’t bother buying fresh tomatoes any other time of the year. Why set myself up for disappointment? Why bother with those dry, mealy, flavorless winter tomatoes? I’d rather just wait for the real thing.

Copy of IMG_7995

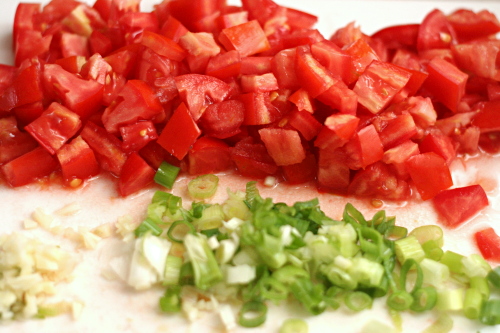
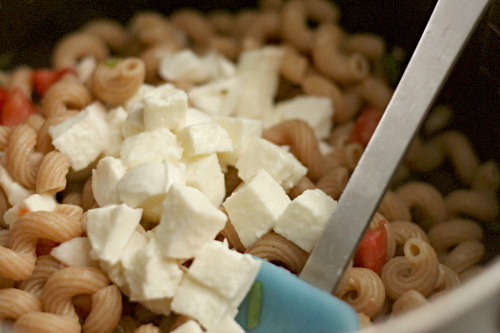
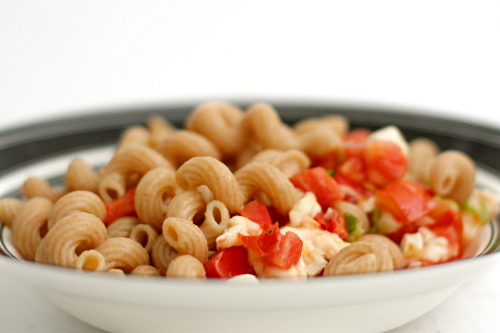
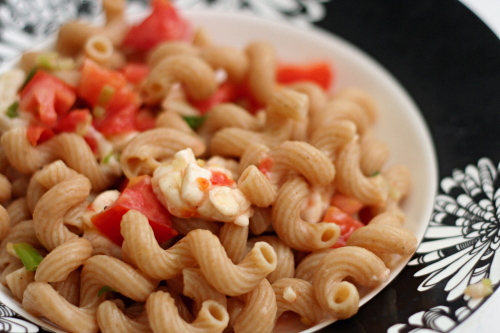
And then – then I go crazy. Gazpacho, BLTs, maybe a potato tomato tart, and this pasta. Oh this pasta. It’s a perfect meal. Super simple, it can be made in the time it takes to boil the noodles. The sauce, uncooked, retains the brightness of tomatoes at their peak, accented with smooth fresh mozzarella, tangy green onions, and fruity extra virgin olive oil.

Copy of IMG_7999

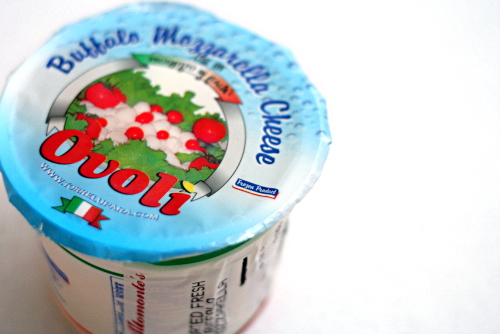
With almost no cooking and so few ingredients, you need to make sure you’re using the best ingredients you can get. Summer tomatoes, of course. Use whatever your favorite mozzarella is – this time I used buffalo mozzarella, but I’ve also tried the little balls my grocery sells in its olive bar, as well as the shrink-wrapped balls that I’m guessing are more widely available. Also, be careful of your garlic – I once made this (for a large group, no less) with some incredibly strong garlic, and it really ruined the whole dish. I recommend toasting the unpeeled cloves, either in a dry skillet or in the oven if it’s already on.

Copy of IMG_8001

Fall is closing in fast (pumpkin and cider and football and colorful trees and crisp air!) but there’s still time! We still have at least a month of wonderful tomatoes left! What are your favorite ways to use them?

Copy of IMG_8006

One year ago: Blueberry Sour Cream Ice Cream

Pasta with No-Cook Tomato Sauce and Fresh Mozzarella (from Cooks Illustrated)

This is the recipe directly from Cooks Illustrated. I do make a few small changes. First, I don’t seed the tomatoes, which does make the pasta a little wetter, but I just can’t throw away so much precious summer tomato flavor. I also use less oil, because, you know, fat and all that. And sometimes I reduce the amount of pasta.

Also, you’ll probably want to warm your serving bowl for this recipe.  I usually put the bowl in the oven, turn the oven on to warm for a few minutes, then turn the oven off, leaving the bowl in there until I’m ready for it.

salt
1 pound pasta (a short, curly type is best)
1½ pounds ripe tomatoes, cored, seeded, and cut into ½-inch dice
¼ cup extra virgin olive oil
1 medium garlic clove, minced or pressed through a garlic press
3 medium scallions, sliced thin
ground black pepper
8 ounces fresh mozzarella cheese, cut into ½-inch cubes

1. Bring 4 quarts water to a rolling boil in a large pot. Add 1 tablespoon salt and the pasta to the boiling water, stir to separate the noodles, and cook until al dente. Drain and return the pasta to the pot.

2. While the pasta is cooking, prepare the sauce. Combine the tomatoes, oil, garlic, scallions, ½ teaspoon salt, and ¼ teaspoon pepper in a medium bowl. Add the tomato mixture and mozzarella to the pasta in the pot and toss to combine. Adjust the seasonings with salt and pepper to taste and serve immediately.

Copy of IMG_8002

potato tomato tart

Copy of IMG_8028

Dave and I have this conversation nearly once a week:

Me (whining, after baking all day): I’ve been cooking all day and I’m tired and I haven’t even stupid started dinner. Stupid stupid stupid.

Dave: Okay. We’ll order pizza.

Me: We can’t order pizza! I bought ingredients for dinner! If we don’t use them tonight, they’ll go to waste!

Copy of IMG_8007

Once the week’s menu is set, it does not change.

But last week something went haywire, and I needed to come up with an extra meal on short notice.

Copy of IMG_8012

I had two potatoes that I’d bought and never got around to using (see! they almost went to waste!) and there was a pile of tomatoes leftover from tomato picking. But I couldn’t find any recipes that fit all of my requirements – used plenty of both tomatoes and potatoes, didn’t require any ingredients I didn’t have, and actually sounded good. So I <gasp> came up with something on my own.

Copy of IMG_8020

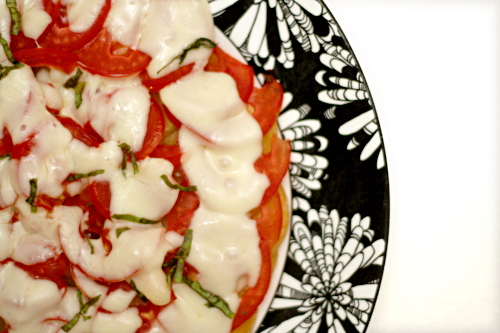
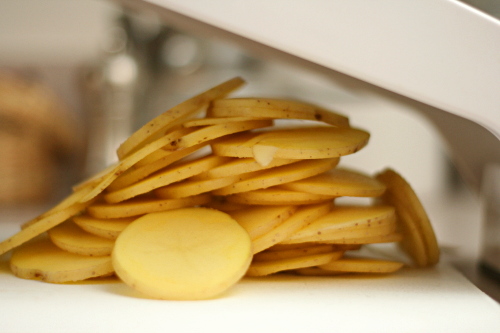
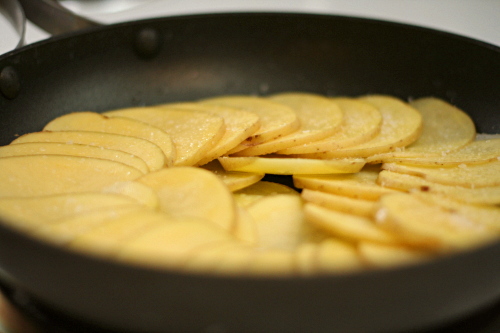
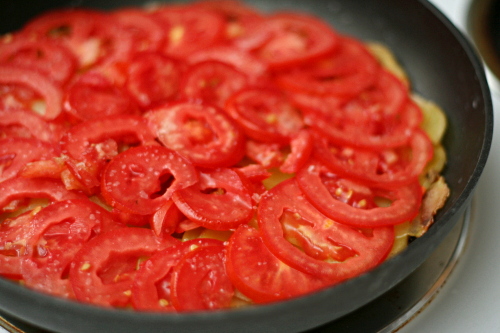
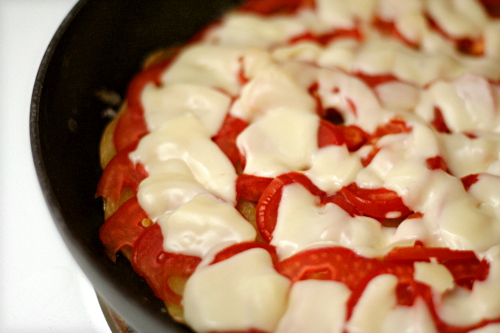
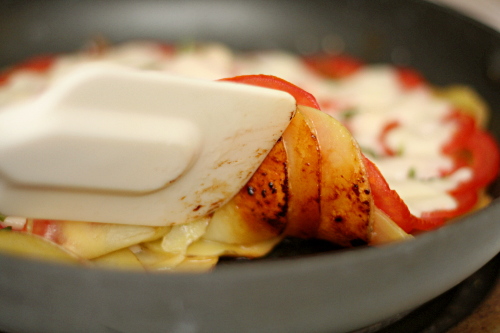
I sliced the potatoes thin and arranged them in a skillet. Once they were crisped on the bottom and mostly cooked through, I arranged sliced tomatoes over the top. Once those were softened, I arranged sliced mozzarella on top of that. It melted almost immediately, so I quickly picked a few leaves from my pathetic sun-starved basil plant, and sprinkled them over the tart.

Copy of IMG_8023

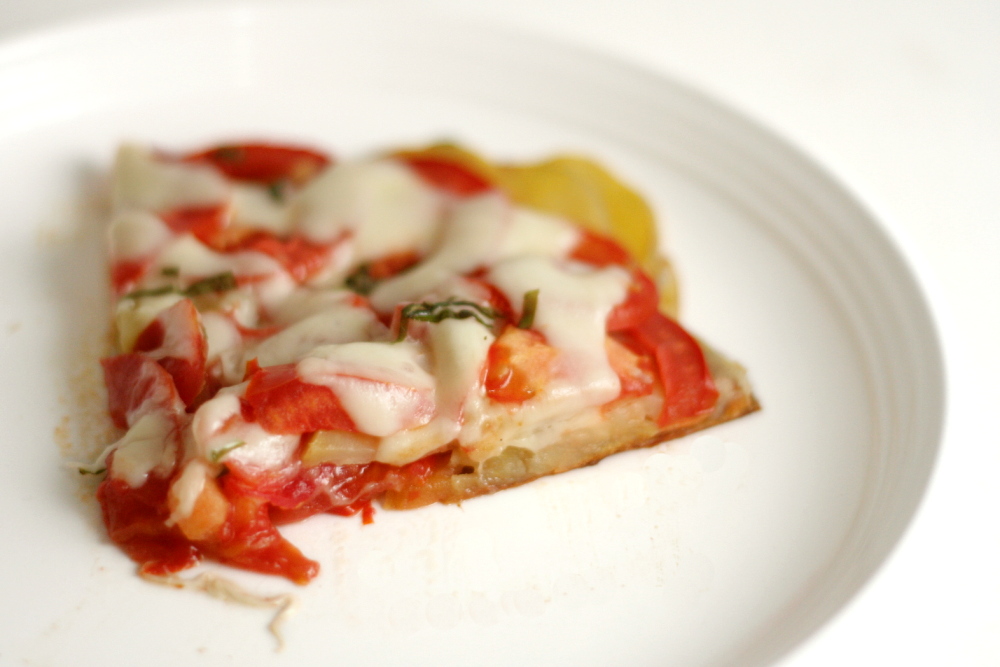
It was pizza-like, which is always a plus. The potatoes were browned and crisp on the bottom.  It was pretty. It was easy. It was tasty. It used up ingredients I didn’t know what else to do with. Perfect.

Copy of IMG_8027

One year ago: Banana Coconut Muffins

Potato Tomato Tart

Serves 2 for a light meal

I used a mandoline set at 1/8-inch to slice the potatoes and tomatoes.

1 tablespoon olive oil
2 medium Yukon gold potatoes, sliced thin
salt and pepper
2 large (or maybe 3 small) plum tomatoes, sliced thin
2½ ounces mozzarella cheese, sliced thin (or just over ½ cup shredded)
3-4 basil leaves, sliced thin

1. Heat the oil in a medium nonstick skillet over medium heat. Arrange the potatoes in one layer on the bottom of the skillet, overlapping each slice. Season with pepper and a generous pinch of salt. Cover the pan, reduce the heat to medium-low, and cook for 20 minutes, until the potatoes are almost tender and are lightly browned on the bottom.

2. Arrange the tomatoes in one layer of overlapping slices over the potatoes. Cover and cook for 5 minutes, until the tomatoes are slightly softened. Evenly disperse the mozzarella over the tomatoes and cook a few minutes, until it’s melty. Sprinkle the top of the tart with basil.

3. Serve. I was able to move the tart once, by sliding it from the pan to a serving plate. Then I realized it would be easier to cut the tart if it was on a cutting board, but moving it from the serving plate wasn’t nearly as easy as moving it from the pan. By which I mean that the whole thing mostly fell apart. So don’t try to move it around too much.
Copy of IMG_8030