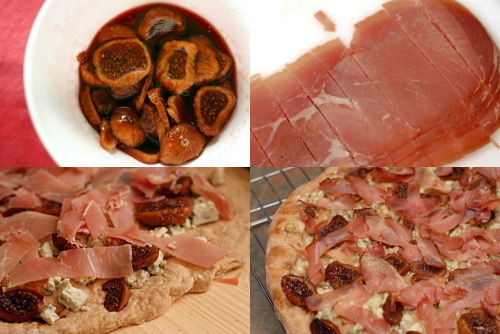
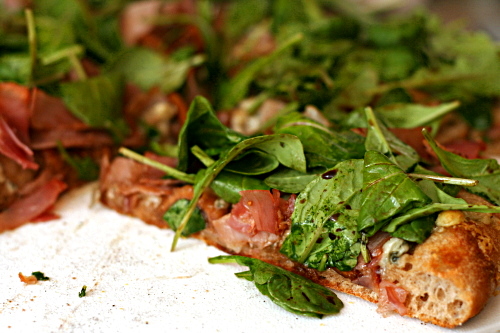
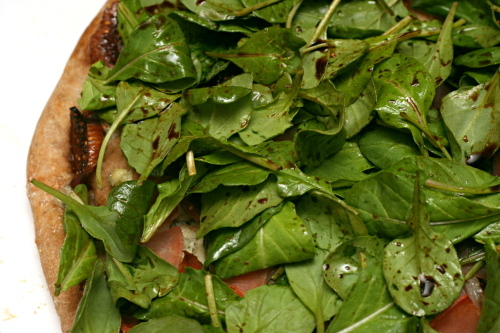
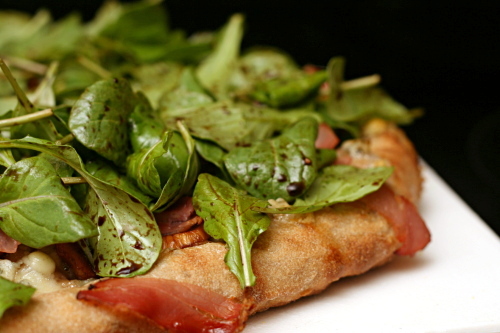
pizza with figs, prosciutto, gorgonzola, balsamic, and arugula

I went to dinner at a fancy pizza place with my parents and Dave a few months ago, and my dad ordered a pizza that seemed appropriate for him – cheeseburger.  Because the more meat, the better!  Hold the vegetables please, is generally his motto.  Oh, I laughed and laughed when his pizza arrived covered in lettuce.  He scraped it right off.

Not that I’ve been much better about the idea of salad on pizza.  It’s a pretty popular concept, but so far I’ve wanted to keep my bread and cheese unadulterated by large amounts of greenery.

I guess when you’re already putting figs on pizza (oh, how I’d love to see my dad’s face if there were figs on his pizza!), arugula doesn’t seem so weird by comparison.  It turns out that the figs and arugula work really well together.  The figs add sweetness, the prosciutto saltiness, the arugula freshness, and the blue cheese…um…stinky-feetiness?  But in a good way.  In a very, very good way, in fact.

One year ago: Brandied Berry Crepes
Two years ago: Breakfast Strata with Sausage, Mushrooms, and Monterey Jack

Printer Friendly Recipe
Pizza with Figs, Prosciutto, Gorgonzola, Balsamic, and Arugula (adapted from Bon Appetit via epicurious)

The original recipe calls for fresh figs; since I used dried, I soaked them in port for a while to plump them.  However, I’m not sure this is necessary.

Makes 1 12-inch pizza, serving about 3 people

6 small fresh figs, cut into thin slices
2 tablespoons balsamic vinegar, divided
cornmeal (for sprinkling)
12 ounces (¾ pound) pizza dough (⅓ of this recipe), after its first rise
1 cup crumbled Gorgonzola cheese (about 4 ounces)
3 ounces thinly sliced prosciutto, cut into strips
2 teaspoons extra-virgin olive oil
3 ounces stemmed arugula

1. Place a pizza stone on the bottom rack of the oven and preheat the oven to 500ºF. Put the figs in a medium bowl and drizzle 1 tablespoon of the vinegar over them. Set aside.

2. Gently flatten the dough, then pick it up and stretch it out, keeping it as circular as possible. Curl your fingers and let the dough hang on your knuckles, moving and rotating the dough so it stretches evenly. If it tears, piece it together. If the dough stretches too much, put it down and gently tug on the thick spots.

3. Dust a pizza peel with cornmeal and transfer the round of dough to the peel. Rearrange the dough to something reasonably circular; stab it several times with a fork. Top the pizza with the cheese, figs, and prosciutto.

4. Transfer the pizza from the peel to the hot stone. Bake for 8-10 minutes, until the crust is spotty brown. Let the pizza cool on the peel for about 5 minutes.

5. Meanwhile, whisk the remaining 1 tablespoon vinegar with the oil and a pinch of salt and pepper; toss the arugula with the dressing. Spread the salad evenly over the pizza. Slice and serve.
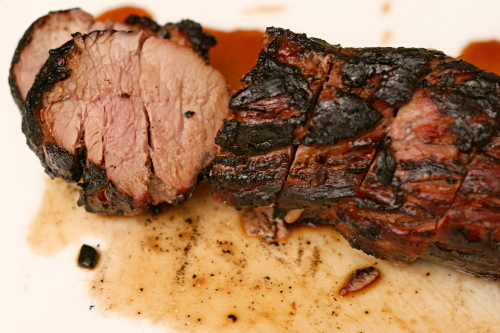
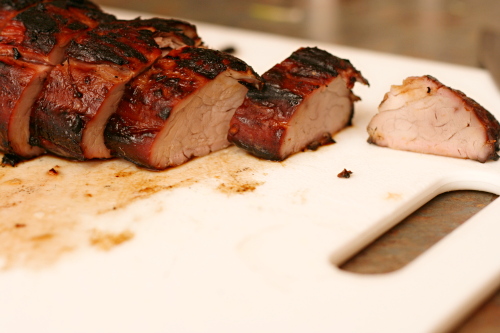
honey ginger pork tenderloin

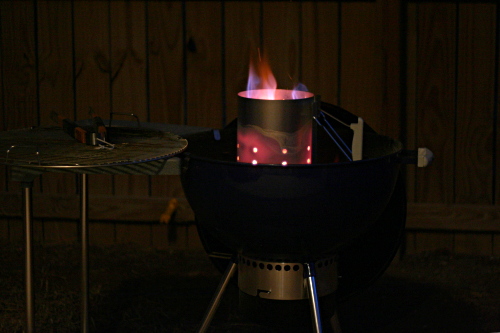
So is the rest of the country grilling yet? Dave and I bought a grill in the middle of January, which, in southern New Mexico, is not at all bad grilling weather. And if you’re feeling jealous about our 70-degree sunshine because you’ve been buried in snow for months, keep in mind that the average high in July is 96 degrees. But it’s a dry heat!

For years, I’ve had to ignore the majority of food magazines in July and August because all of the recipes are designed for grilling. My apartment lifestyle didn’t mesh with my desire to cook outside.

Not anymore! Dave and I have grilled every weekend since we got the grill, and I think that we could possibly be getting the hang of it. Maybe.

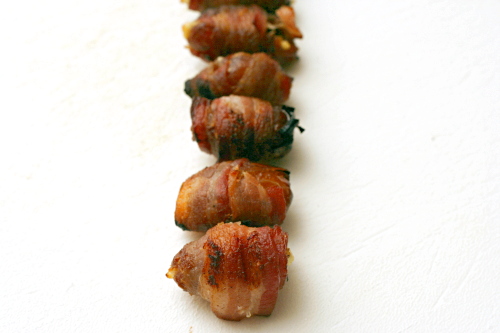
After my lifelong grilling drought, I’ve been trying to make as many different recipes as possible – fish, steaks, burgers, boneless skinless chicken, bone-in skin-on chicken, lamb roasts, bacon-wrapped dates, all sorts of vegetables and potatoes, bread, and on and on. We’re grilling machines. This recipe knocked our socks off enough to make it two weekends in a row.

It’s simple too – you mix up a few ingredients, add the pork, and set it in the fridge while you go enjoy your perfect-hiking-weather-in-January. Then you get back from hiking, shower, drink a glass of wine (or take a nap, in Dave’s case), and fire up the grill. While it heats, skewer up some potatoes and vegetables. Spend 20 minutes cooking outside, then sit down to a fantastic, easy, smoky, flavorful meal with some more wine. Toast to the weekend and to winters in the desert.

One year ago: Spinach Bread
Two years ago: Classic Pound Cake (but, I think I’ll stick to this other pound cake from now on, with or without bourbon)

Printer Friendly Recipe
Honey-Gingered Pork Tenderloins (adapted from Gourmet via epicurious.com)

Serves 4-6

¼ cup honey
¼ cup soy sauce
¼ cup oyster sauce
2 tablespoons packed brown sugar
1 tablespoon plus 1 teaspoon minced peeled fresh gingerroot
1 tablespoon minced garlic
1 tablespoon ketchup
¼ teaspoon onion powder
¼ teaspoon cayenne
¼ teaspoon cinnamon
two ¾-pound pork tenderloins, trimmed of silver skin

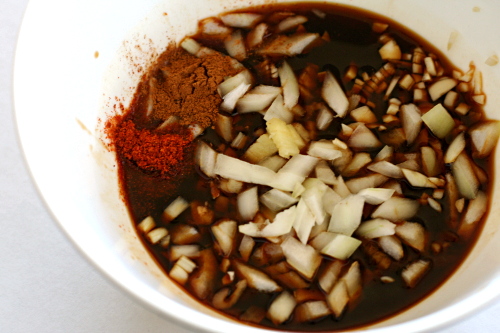
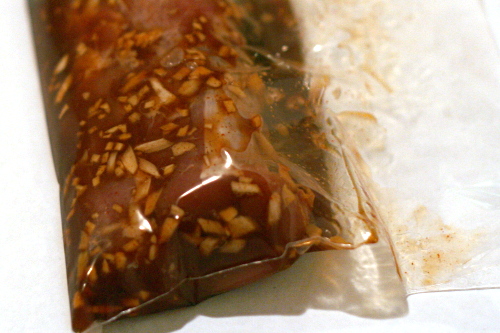
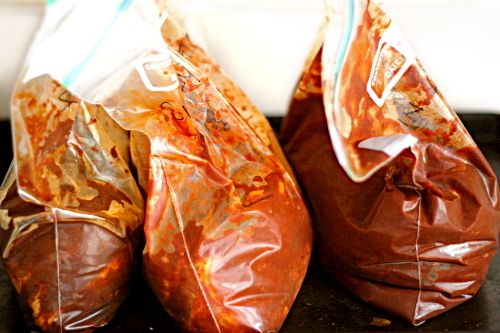
1. In a small bowl, whisk together all of the ingredients except the pork. Add the pork and the marinade to a gallon-size zipper-top bag and refrigerate for at least 8 hours or up to 1 day.

2. Prepare a medium-hot grill. (You should be able to hold your hands 5 inches above the grate for 3 to 4 seconds.) Remove the pork from the marinade, reserving the marinade.

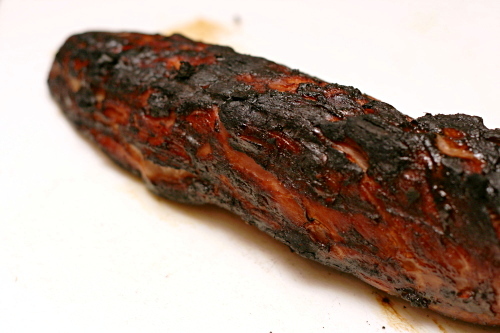
3. Grill the pork, basting with the reserved marinade, for 12 minutes, turning a quarter turn every 3 minutes. Discard marinade. Continue to cook pork, turning every minute or so, until an instant-read thermometer inserted into the thickest part of the tenderloin measures 145 degrees or the meat is slightly pink at the center. Let the pork rest 5 minutes before slicing.

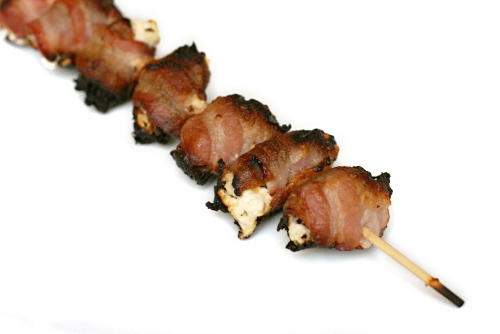
bacon-wrapped goat-cheese-and-almond-stuffed dates

Stuffed dates are part of one my favorite days recently – one of those that, for whatever reason, just ended up being particularly awesome. Some great friends visited us in Philadelphia shortly before we moved. After walking around the famous historical sites and before seeing one of my favorite musicians play; before walking up the famous steps to the art museum and much before eating cheesesteaks at 2am, we ate dinner at Alma de Cuba.

While we all loved our entrees, our drinks, and the ceviche, the star of the show was the bacon-wrapped almond-stuffed dates. Is transcendent too over-the-top a description? It seems appropriate for something that caused each of us to close our eyes and exclaim with every bite.

I had kind of assumed that my bacon-wrapped almond-stuffed date days were behind me when we moved from Philadelphia. I don’t know why it never occurred to me that I could make them myself. I certainly never thought it would be so easy.

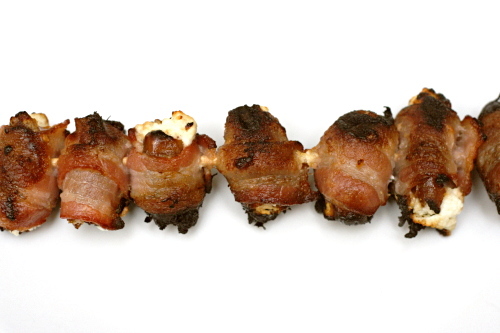
And just as good! I mean, it’s missing the friends-visiting, concert-going, downtown-exploring mystique, but it retains other important things – salty bacon, sweet dates, tangy goat cheese, crunchy almonds. And now it isn’t a once in a lifetime treat, like those standout days are.

One year ago: Honey Yogurt Dip
Two years ago: Salmon Cakes with Hashed Brussels Sprouts and Flaky Biscuits

Printer Friendly Recipe
Bacon-Wrapped Goat-Cheese-and-Almond-Stuffed Dates (rewritten from Beantown Baker)

Makes 32 appetizers

32 dates, pitted
4 ounces goat cheese
32 almonds (about ⅓ cup)
16 slices (about 1 pound) bacon, halved lengthwise

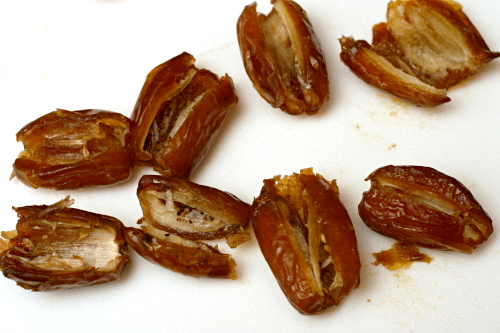
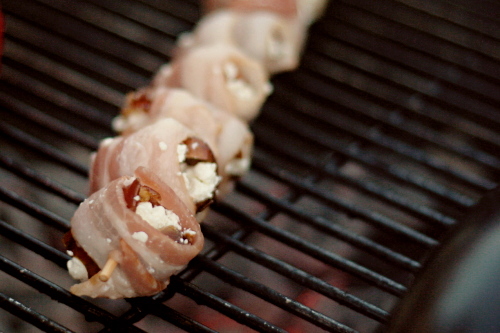
1. With a paring knife, cut through one long edge of each date; unfold the dates to open them up. Use your fingers to stuff both sides of the date with goat cheese. Push an almond into the goat cheese; close up the dates. Wrap each stuffed date with a piece of bacon and secure with a toothpick or skewer.

2. If you’re broiling the dates, put them on a rimmed baking sheet. Grill the dates over medium-hot coals or broil them 5 inches from the heating unit until the bacon is cooked through, about 5 minutes per side. Serve immediately or at room temperature.

bacon-wrapped scallops with port reduction

Copy of IMG_0154

I don’t consider myself a picky eater, but I’m been having some problems with shellfish lately. And I hate that it’s a textural issue, because then I know it’s all in my head. With scallops, I think to myself that if it’s so soft, it must be undercooked, right? And then I spend the whole meal worrying about it.

Copy of IMG_0105

Which, geez, people eat scallops raw, I think I can handle them medium-rare, you know? Plus overcooked scallops are terrible, so it’s better to err on the side of less cooked.

Copy of IMG_0132

But while I sat and squirmed while I ate my scallops, trying not to think about whether they could have used a few more minutes on the stove, Dave gushed over them. Dave loves scallops. And bacon.

Copy of IMG_0146

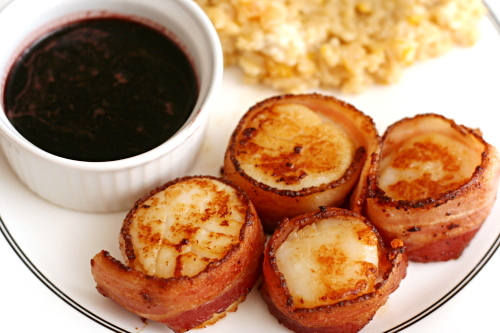
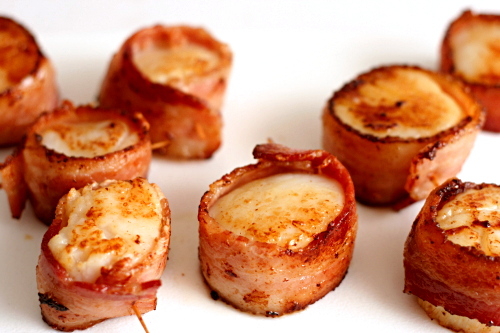
Fortunately, the flavors really are fantastic. The subtle sweetness of the scallops goes nicely with the salty bacon, and the rich port sauce is a perfect accompaniment. The sauce is intense, so I liked to dip just the smallest corner of a scallop into it. Mmm. Especially tasty on the crispy browned bites. Because those are the only ones that I trust are cooked enough.

Copy of IMG_0149

One year ago: Roasted Brussels Sprouts

Printer Friendly Recipe
Bacon-Wrapped Scallops with Port Reduction (adapted from Gourmet, but really epicurious)

8 first-course servings or 4 main-course servings

I had a lot of random extra bacon scraps, because the scallops were too big for half a piece of bacon to wrap around each and too small for a full piece.

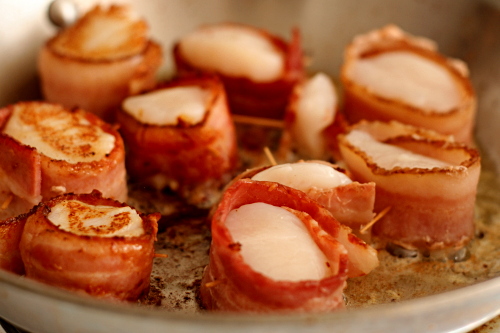
You see how some of my bacon strips are taller than the scallops? You don’t want that. Trim the edges of the bacon if you need to, because otherwise the scallop doesn’t sit against the pan evenly and it doesn’t get as nicely browned.

The scallops can be wrapped in bacon 4 hours ahead and chilled, covered. Sauté just before serving. The port reduction can be made 1 day ahead and chilled, covered. Reheat before serving.

Port reduction:
2 cups ruby port
½ cup granulated sugar
1½ teaspoons whole black peppercorns
1 sprig rosemary

Scallops:
16 thin slices (about 16 ounces) bacon
16 sea scallops (about 1 pound), tough side muscle discarded if attached
1 tablespoon extra-virgin olive oil
2 tablespoons unsalted butter

1. For port reduction: Bring port, sugar, peppercorns, and rosemary to a simmer in a 2-quart saucepan over moderately low heat, stirring until sugar is dissolved. Remove from heat, then carefully ignite port with a kitchen match, letting flames die down (this will take a few minutes). Simmer over moderately low heat until sauce is thickened and reduced to about ½ cup, about 30 minutes.

2. For scallops: Heat a 12-inch heavy skillet over moderate heat, then cook the bacon until some fat has rendered and the edges of the bacon start to brown, about 1½ minutes per side. Transfer the bacon to paper towels to drain.

3. Pat the scallops dry and season them with salt and pepper. When the bacon is cool enough to handle, wrap a piece of bacon around each scallop and pierce scallop with a toothpick to secure.

4. Heat the oil and butter in a clean skillet over moderately high heat until hot but not smoking. Sauté the scallops, turning them once, until the bacon is browned and the scallops are opaque, about 5 minutes total. Transfer to a plate and serve with port reduction for dipping.

chicken empanadas

Copy of IMG_1318

Dave got yelled at over these empanadas. I’m not much of a yeller normally; I’m more of a silent treatment and glower type of person. But there was no time for that; action needed to be taken immediately.

Copy of IMG_9781

It’s all because I made the filling a couple of days before I planned to form and bake the empanadas. The filling isn’t the most simple thing to make. There’s all kinds of chopping, browning, simmering, and meat shredding. And I was a little short on chicken, so I didn’t end up with as much filling as I’d hoped.

Copy of IMG_9780

That night, Dave needed to heat something up for himself for dinner, so I told him there was some extra brown rice with black beans in the fridge. I walked away for a few minutes, and when I came back, he had dumped my precious empanada filling onto a plate, microwaved it, and was scooping it up with a fork.

Copy of IMG_9973

Hey, guess what there is none of in this filling? 1) Brown rice. 2) Black beans.

“Damn!” he exclaimed. “This is good!”  That’s when I yelled, because I just needed him to stop eating it right away.

And then he was so apologetic and I felt like a jerk. He kept saying, “It really was tasty!” as if that was supposed to make me feel better about it.  Yes. I know it’s tasty.  I spent some good time making sure it was.

Copy of IMG_9987

And what can you do to make something so delicious even better? Wrap it in pastry and bake it until it’s browned and flaky and crisp. Oh wow, these are good. And apparently that’s true whether they’re wrapped in pastry and baked or just dumped onto a plate and microwaved.

Copy of IMG_1331

One year ago: Comparison of 2 chocolate cake recipes
Two years ago: Cream cheese chocolate chip cookies (and my very first blog entry)

Printer Friendly Recipe
Chicken Empanadas (adapted from Smitten Kitchen and epicurious)

Makes about 18 empanadas

I didn’t actually measure anything in the filling. I had to leave the olives out because Dave hates them.

As I formed each empanada, I put it in the freezer while I worked with the rest. That way the dough didn’t get too soft and it baked up flaky.

After forming the empanadas, I baked about half of them immediately. I froze the rest for a couple of months, then baked them straight from the freezer. They were perfect.

Dough:
4½ cups (21.6 ounces) unbleached all-purpose flour
3 teaspoons salt
16 tablespoons (2 sticks) cold unsalted butter, cut into ½-inch cubes
2 large eggs
⅔ cup ice water
2 tablespoons distilled white vinegar

Filling:
3 whole chicken legs, including thighs (2 to 2¼ pounds total)
1 teaspoon salt
¼ teaspoon black pepper
1 tablespoon extra-virgin olive oil
2 large onions, halved lengthwise, diced
2 large garlic cloves, minced
2 Turkish bay leaves or 1 California
⅓ cup (1½ ounces) finely diced Spanish chorizo
½ teaspoon Spanish smoked paprika (not hot)
¼ cup chopped pitted green olives
¼ cup golden raisins
½ cup dry white wine
½ cup reduced-sodium chicken broth

Egg wash:
1 egg
water
salt

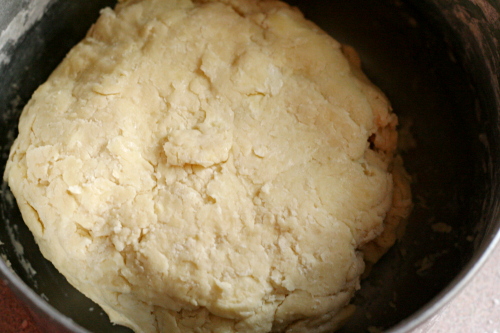
1. For the dough: Mix the flour and salt in a large bowl; blend in the butter with your fingertips or a pastry blender until the mixture resembles coarse meal with some roughly pea-sized butter lumps. Beat together the egg, water, and vinegar in a small bowl. Add it to the flour mixture, stirring until just incorporated. The mixture will look shaggy. Turn out the mixture onto a lightly floured surface and gather it together, kneading gently with heel of your hand once or twice, just enough to bring the dough together. Form the dough into two flat rectangles and chill them, each wrapped in plastic wrap, at least 1 hour or overnight.

2. For the filling: Pat the chicken dry and season it with salt and pepper. Heat 1 tablespoon oil in a 12-inch heavy skillet over medium-high heat until hot but not smoking, then add the chicken, skin-side down. Cook it without moving for about 3 minutes, until dark golden brown, then turn it and continue cooking for another 3 minutes. Remove the chicken from the pan and set it aside.

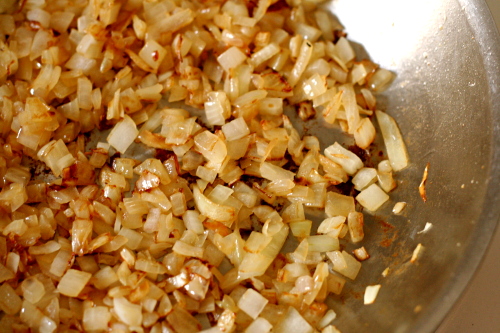
3. Add the onions, garlic, and bay leaves to the skillet and sauté, stirring frequently, until the onions are softened, 4 to 5 minutes. Add the chorizo and paprika and cook, stirring, for 1 minute. Add the olives, raisins, wine, and broth and bring the mixture to a boil, stirring and scraping up any brown bits. Return the chicken to the skillet along with any juices accumulated on the plate, then reduce the heat to medium-low and simmer, covered, turning the chicken once, until the chicken is tender, 25 to 30 minutes total.

4. Transfer the chicken to a clean plate. The sauce remaining in the skillet should be the consistency of heavy cream; if it isn’t, briskly simmer until it’s slightly thickened, about 5 minutes. When the chicken is cool enough to handle, discard the skin and bones and coarsely chop the meat. Stir the chicken back into the sauce. Discard the bay leaves and season the filling with salt and pepper. Let the filling cool for 30 minutes, uncovered.

5. To form and bake the empanadas: Adjust an oven rack to the middle position and preheat the oven to 400°F. Line a baking pan with a parchment paper or a silicone mat. Divide the dough into 24 equal pieces and from each into a disc. Keeping remaining pieces covered, roll out 1 piece on a lightly floured surface with a lightly floured rolling pin into a 5-inch round (about 1/8 inch thick).

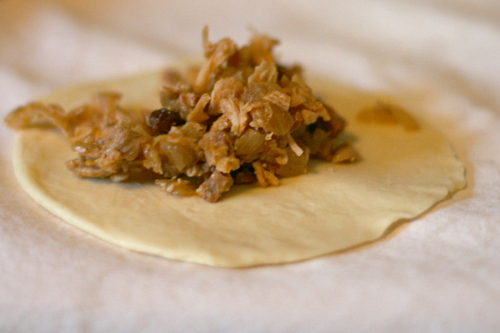
6. Spoon about 2 tablespoons filling onto the center of each round of dough and fold the dough in half, enclosing the filling. Press the edges together to seal, then crimp decoratively with your fingers or the tines of a fork. Transfer the empanada to the prepared pan. Repeat with the remaining dough. You might have extra dough.

7. Beat the egg with 1 tablespoon of water and a pinch of salt. Brush the empanadas with the egg wash, then bake one sheet at a time until the empanadas are golden brown, about 25 minutes. Transfer them to a cooling rack and let them cool for at least 10 minutes. Serve warm.

Copy of IMG_1320

carne adovada

Copy of IMG_5067

A carne adovada comparison post is a very bad idea because:

1. I don’t love cooking with meat, with the constant hand-washing and being careful not to contaminate cooked meat tools with raw meat tools.

Copy of IMG_7465

2. My limited counter space makes working with large roasts difficult.

3. The oven was on for four hours – in July.

Copy of IMG_7470

4. One of the recipes includes the warning “Don’t breathe the fumes!”

5. Another warning, this time from my sister: “My coworker said to be careful because red chile can give some people the runs if they aren’t used to eating it.”

Copy of IMG_4864

6. Carne adovada is red. Deep, dark red, and yes, of course it stains.

7. Who, outside of New Mexico, has even heard of carne adovada?

Copy of IMG_7487

Oh, and then, the outcome?

8. Dave thought all three recipes tasted the same anyway.

Copy of IMG_4879

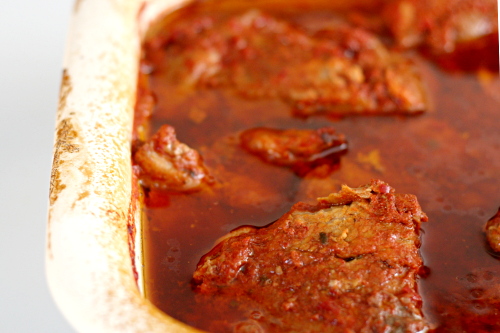
Carne adovada is pork marinated in red chile sauce, then slow roasted. It isn’t something that I’ve eaten a lot of; my dad made it once when I was young and it was crazy ridiculously painfully spicy, and I’ve pretty much been scared of it since. Of course now I realize that the level of spiciness will vary with the heat of the chiles.

Copy of IMG_4881

Unable, as usual, to decide on a recipe, I decided to compare a few. The meat in all recipes is marinated and cooked using the same method and cooking time; the difference is in the red chile sauce. At its most simple, the red chiles are soaked in hot water to rehydrate them, then blended with onions, garlic, and salt. Jen’s method is only slightly more complicated, with the added step of toasting the dried chiles before soaking them.

Copy of IMG_4871

Kate’s recipe is a little more complicated – and uses far, far more red chiles. It’s similar but significantly more fussy, with a soak followed by a simmer instead of just a soak, and then the blended ingredients need to be pushed through a sieve, a step I find tedious in most recipes that call for it.

Copy of IMG_7463

I let the meat marinate for about 24 hours, but if you can swing longer, up to 2 full days, I really think that’s the way to go. The more red chile flavor, the better.

Copy of IMG_7505

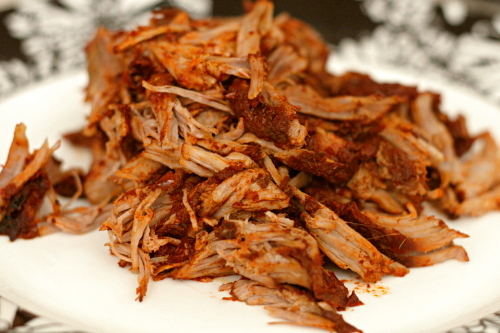
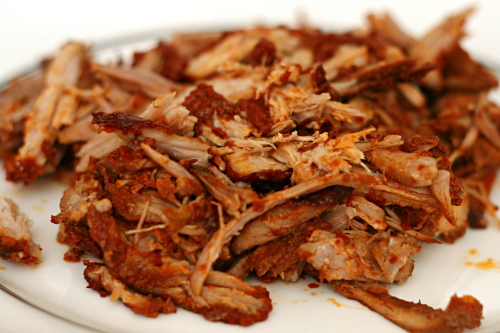
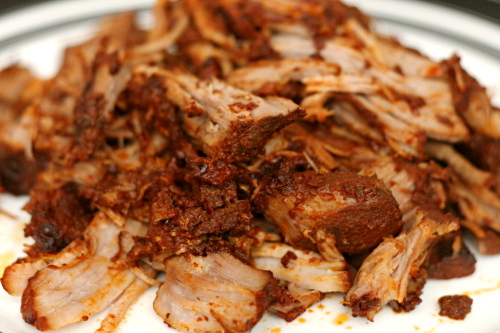
After finding enough properly-sized baking pans, jigsawing the pans into the oven, roasting the meat for hours, letting it cool slightly, and shredding all three pans of meat while trying to keep straight which was which so I could identify the photos, Dave and I decided that they were very, very similar.

Copy of IMG_7514

Dave would say identical. I would say that they’re oh-so-slightly different, but equally good. Kate’s recipe, which used so much more chiles, was spiciest. The recipe that did not require toasting the chiles tasted lighter and fresher, while the recipe with toasted chiles had a deeper flavor.

Copy of IMG_7523

My favorite was probably the simplest recipe; I liked that fresh flavor. Plus, if they all taste essentially the same, I might as well make the easiest, right? I guess a comparison was necessary, just so I know that, in this case, simple works just fine.

Copy of IMG_4929

Update: I thought I should add that neither of us had any, ah, digestive issues after eating the red chile, despite the concerns of my sister and her coworker.

One year ago: Baked Eggs with Spinach and Mushrooms

Serving suggestions: Burritos, stuffed sopaipillas (shown in the top photo), quesadillas, tacos, breakfast burritos.  You can also add potatoes to the mixture before cooking, and then serve the potatoes and meat as a main dish with beans and rice as sides.

Printer Friendly Recipe
Carne Adovada
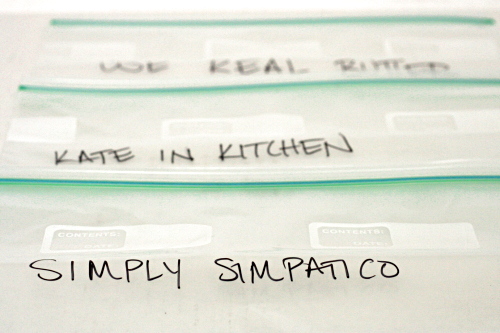
(adapted from Simply Simpatico, by the Junior League of Albuquerque)

16-18 dried red chile pods
hot water
3 cloves garlic
2 teaspoons salt
1 tablespoon dried oregano
4 pounds pork shoulder, trimmed of thick layer of fat and sliced ½-inch thick

1. Remove stems and seeds from the chile pods. Place the pods in a large bowl or pot and pour in enough hot water to cover them. Soak for 1 hour. Strain, reserving the soaking liquid.

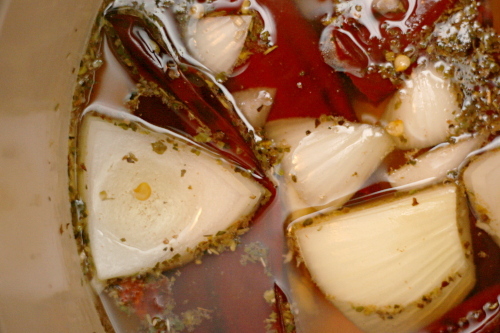
2. Place the chiles, garlic, and salt in a blender and add enough soaking liquid to just cover. Making sure there’s about two inches of headspace, blend until the skins disappear and the mixture is smooth, 2-3 minutes. Pour the sauce over meat, cover tightly, and marinate in the refrigerator for 24-28 hours.

3. Adjust a rack to the middle position and heat the oven to 350ºF. Place the meat and chile sauce marinade in a baking pan and cover tightly with foil. Bake the carne adovada until the meat is falling apart tender, about 4 hours. (You can also cook the carne adovada in a crockpot on low heat for 7-9 hours.) When the meat is done, shred it or cut it into 1-inch pieces. Serve.
Copy of IMG_7527

Printer Friendly Recipe
Carne Adovado
(adapted from Jen at Use Real Butter, who adapted it from Sante Fe Recipe)

16 dried red chile pods
1 tablespoon salt
4 cloves garlic
2 teaspoons oregano
5 pounds pork shoulder, trimmed of thick layer of fat and sliced ½-inch thick

1. Adjust an oven rack to the middle position and heat the oven to 325ºF. Remove the stems from the chile pods; place the pods in a pan and bake for 5-10 minutes, stirring occasionally, until the chiles are lightly roasted. Leave the oven door open, and don’t breathe the fumes! Shake the seeds out of the pods and discard them.

2. Place the chiles in a medium bowl and cover them with boiling water. Let them sit for 30 minutes. Drain the water, reserving about 2 cups. Place the chiles in a food processor or blender; add the salt, garlic, and oregano. Cover the mixture with the reserved chile water, and blend or process for 2 minutes or until the skins disappear.

3. Pour the sauce over meat, cover tightly, and marinate in the refrigerator for 24-28 hours.

4. Adjust a rack to the middle position and heat the oven to 350ºF. Place the meat and chile sauce marinade in a baking pan and cover tightly with foil. Bake the carne adovada until the meat is falling apart tender, about 4 hours. (You can also cook the carne adovada in a crockpot on low heat for 7-9 hours.) When the meat is done, shred it or cut it into 1-inch pieces. Serve.

Copy of IMG_7526

Printer Friendly Recipe
Carne Adovada
(adapted from Kate in the Kitchen , who adapted it from Sante Fe Hot and Spicy Recipes)

12 ounces dried red chile peppers
1 large onion, chopped
8 cloves fresh garlic, smashed with skins removed
2 teaspoons dried oregano
2 teaspoons ground cumin
2 teaspoon kosher salt
3-4 pounds pork shoulder, trimmed of thick layer of fat and sliced ½-inch thick
4 teaspoons red pepper flakes
2 sticks cinnamon

1. De-stem and de-seed chile peppers; place in a large stock pot and cover with hot water. Soak for 30 minutes. Add the remaining ingredients to the pot; bring to a boil. Reduce the heat to low and simmer for 30 minutes.

2. Strain, reserving liquid. Allow to cool slightly, then process solids in batches in a food processor using reserve liquid for proper consistency. Strain through a wire sieve, pressing on the solids to extract the liquids.

3. Pour the sauce over meat, add the cinnamon and red pepper flakes, cover tightly, and marinate in the refrigerator for 24-28 hours.

4. Adjust a rack to the middle position and heat the oven to 350ºF. Remove the cinnamon stick. Place the meat and chile sauce marinade in a baking pan and cover tightly with foil. Bake the carne adovada until the meat is falling apart tender, about 4 hours. (You can also cook the carne adovada in a crockpot on low heat for 7-9 hours.) When the meat is done, shred it or cut it into 1-inch pieces. Serve.

Copy of IMG_7524

pork chops loco moco

Copy of IMG_9853

I feel a little guilty when Dave and I spend most of the weekend sleeping in, watching football, reading books, and, in my case, cooking. We are booooring.

Copy of IMG_9835

But then I figure that someday, if everything goes as planned, we’ll have kids and then we won’t be able to spend all weekend being lazy. I don’t think I’ll be cooking from Cooks Illustrated’s Restaurant Favorites at Home very often when we have kids, which is a shame, because it’s a fun cookbook and I haven’t used it as much as I should. I better take advantage while I can.

Copy of IMG_9837

Although really, this meal didn’t take nearly as long to prepare as I thought it would based on the length of the recipe. It’s true that there are five parts – rice, pork chops, scrambled eggs, mushroom gravy, and fried onions. Fortunately, the rice, meat and eggs are as simple as they could get, and the sauce is pretty quick as well. That means that only the onions take some time.
Copy of IMG_9846

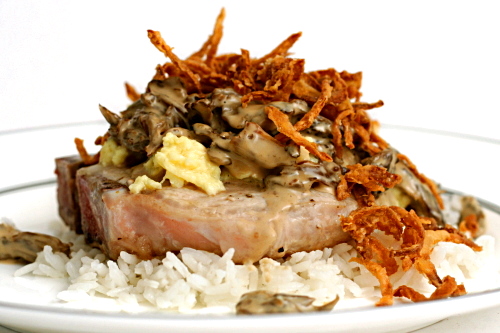
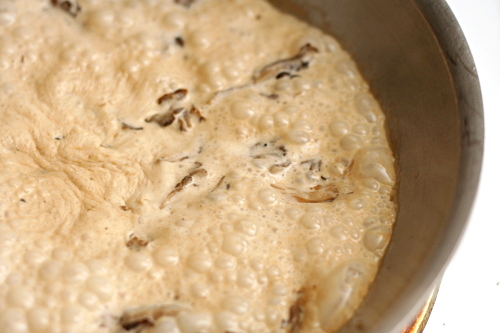
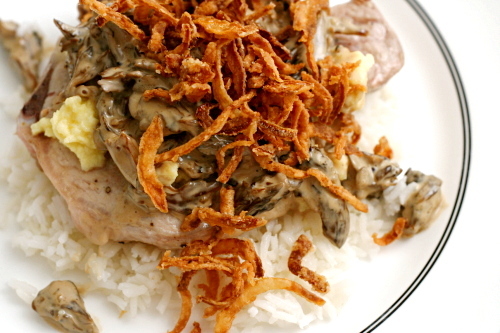
Loco moco is a Hawaiian dish that, as its most basic, is rice, a hamburger patty, gravy, and a fried egg. For their cookbook, Cooks Illustrated adapted the recipe from Sam Choy’s, who replace the hamburger with a pork chop, the fried egg with scrambled, and the brown gravy with a mushroom cream sauce, in addition to adding the fried onions.

Copy of IMG_9841

Hoo boy, I like this kind of meal anyway, where a bunch of different stuff all meshes together, but this in particular was fantastic. So many textures – the meat, the rice, soft eggs, crunchy onions. So many flavors – nutty white rice, sweet fried onions, savory pork, all coated in a rich mushroom sauce. Even if it had taken most of a day to make, which it didn’t, it would have been worth it. Especially since I would have just been lounging around in my pajamas anyway.

Copy of IMG_9854

One year ago: Pumpkin Pancakes

Printer Friendly Recipe
Pork Chops with Rice, Eggs, Onions, and Gravy
(from Cooks Illustrated’s Restaurant Favorites at Home)

This is the recipe straight from the cookbook. However, next time I plan to use a boneless pork chop. I think it will brown better in the pan, plus it was a little hard to see where the bone was versus the meat once the pork was covered in sauce and other goodies.

Also, I think it makes more sense to cook the pork chop before the eggs. And, in step 3, I don’t see why you’d want to dirty an extra dish by transferring the sauce to a measuring cup; just cover the pan you cooked it in. Finally, the recipe calls for both the eggs and the pork chops to be cooked on high heat, but I’ve had better luck with medium-high heat for both.

Fried Onions:
3 cups vegetable oil
½ cup all-purpose flour
1 teaspoon salt
½ tablespoon ground black pepper
1 small yellow onion, halved and sliced thin

Rice:
2 teaspoons vegetable oil
1 cup long-grain white rice
½ teaspoon salt

Sauce:
1 teaspoon cornstarch
1 tablespoon vegetable oil
4 ounces fresh shiitake mushrooms, stemmed and sliced thin
1 cup heavy cream
2 teaspoons soy sauce
1 teaspoon oyster sauce
salt and ground black pepper

Eggs:
4 large eggs
¼ cup whole milk
pinch ground black pepper
1 tablespoon unsalted butter

Pork chops:
1 tablespoon vegetable oil
4 thin bone-in center-cut loin pork chops, about ½ inch thick
salt and ground black pepper

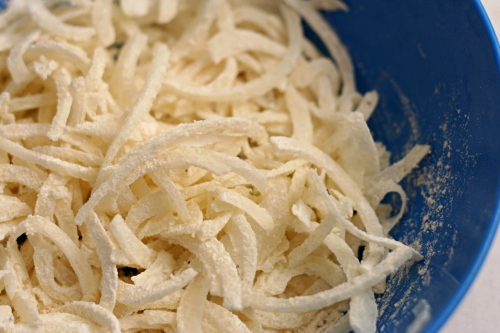
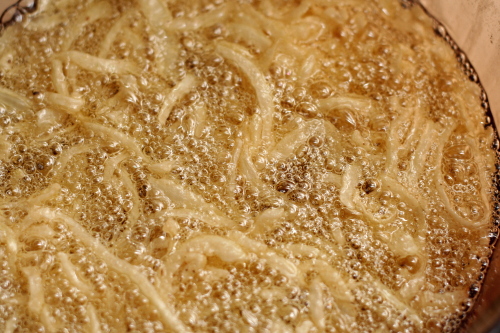
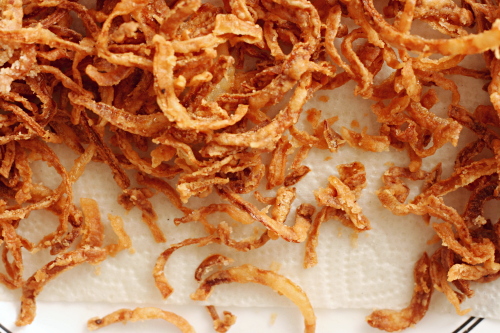
1. For the fried onions: Heat the vegetable oil in a Dutch oven over medium-high heat until it reached 350 degrees. (Use an instant-read thermometer that registers high temperatures or clip a candy/deep-fat thermometer onto the side of the pan before turning on the heat.) Meanwhile, mix the flour, salt, and pepper together in a large bowl. Add the onion to the flour mixture and toss thoroughly to coat. Transfer the floured onion to a large strainer (or colander) set over another bowl (or the sink) and shake vigorously to remove the excess flour. Add the onion to the oil and fry until golden brown, 2 to 2½ minutes, adjusting the heat as necessary to maintain the cooking temperature. Remove the onion from the oil using a spider or slotted spoon, tapping the handle several times on the rim of the pot to drain any excess oil, then transfer to a large plate lined with several layers of paper towels. Set aside.

2. For the rice: Heat the vegetable oil in a small saucepan over medium heat until shimmering. Add the rice and cook, stirring constantly, until transparent, 2 to 3 minutes. Add 1½ cups water and the salt. Bring to a boil, swirling the pan to blend the ingredients. Reduce the heat to low, cover tightly, and cook until the liquid is absorbed, about 15 minutes. Remove from the heat and cover the pan with a clean dish towel and then the lid. Let the rice stand, covered, to finish cooking, about 15 minutes longer. Fluff with a fork and set aside.

3. For the sauce: Mix the cornstarch and 1 teaspoon water together in a small bowl and set aside. Heat the vegetable oil in a large saucepan over medium-high heat until shimmering. Stir in the shiitakes, cover, and reduce the heat to low. Cook until the mushrooms release their moisture and begin to brown, about 5 minutes. Stir in the cream, soy sauce, and oyster sauce, increase the heat to medium-high, and bring to a boil. Whisk in the cornstarch mixture and return to a boil, whisking constantly. Cook, whisking constantly, until the sauce is slightly thickened, about 30 seconds. Remove the sauce from the heat and season with salt and pepper to taste. Transfer the sauce to a liquid measuring cup, cover tightly with plastic wrap, and set aside.

4. For the eggs: Crack the eggs into a medium bowl and add the milk, salt and pepper. Beat with a fork until the streaks are gone and the color is pure yellow; stop beating while the bubbles are still large. Melt the butter in a 12-inch nonstick skillet over high heat until foaming, swirling it around and up the sides of the pan. Before the form completely subsides, pour in the beaten eggs. Using a heatproof spatula, push the eggs from one side of the pan to the other, slowly but deliberately lifting and folding the eggs as they form curds, until the eggs are nicely clumped into a single mound but remain shiny and set, about 2 minutes. Transfer to a medium bowl and cover to keep warm.

5. For the pork chops: Wipe the nonstick skillet clean with a wad of paper towels. Add the vegetable oil and heat over high heat until smoking. Season the pork chops generously with salt and pepper. Lay the pork chops in a single layer in the skillet and cook until golden brown, 2 to 3 minutes. Turn and cook on the second side until lightly brown and cooked through, 1 to 2 minutes longer.

6. To serve: Divide the rice among 4 individual plates. Lay a pork chop on top of the rice and top with equal portions of scrambled eggs. Pour about 3 tablespoons of the sauce over the egg and pork on each plate, and sprinkle with the fried onions. Serve immediately.

sweet potato hash

Copy of IMG_0431

While I can be, shall we say, particular about preparation, I think keeping an open mind is so important when it comes to both ingredients and certain dishes.

Copy of IMG_0397

For example, stuffing. There’s nothing unpleasant about bread, seasonings, aromatics, and broth baked until the flavors are blended and the top is crispy. When people say they don’t like stuffing, I really think they just didn’t like the stuffing they had when they were young. They just need to try a different recipe (add bacon!) to enjoy it more.

Copy of IMG_0399

As far as ingredients that often inspire pickiness, sweet potatoes have a bad name. For a lot of people, one of the only ways they’ve seen sweet potatoes prepared is in that sugary, marshmallow-topped weirdness at Thanksgiving. Hey! Let’s take something already sweet, cook it in sugar, top it with more sugar, and serve it with dinner! Blech.

Copy of IMG_0413

Because I don’t like those sweet potatoes and wasn’t exposed to them prepared other ways, I always assumed I didn’t like sweet potatoes at all. But now I know better! I like them quite a bit in more savory preparations.

Copy of IMG_0416

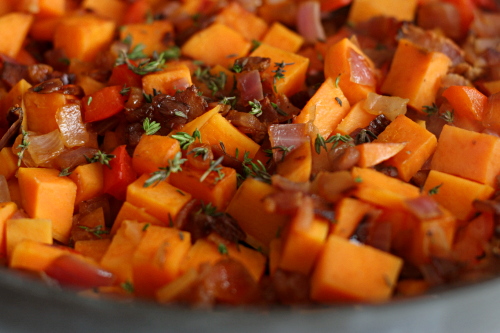
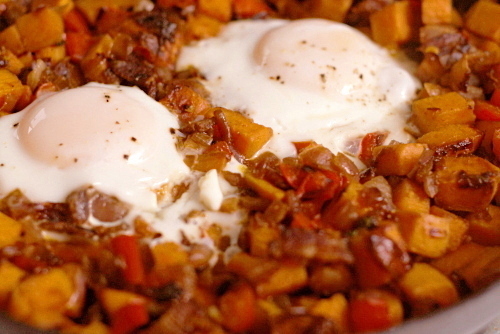
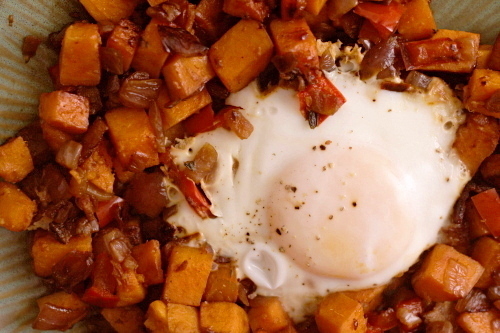
Take this dish. Salty bacon, flavorful slightly caramelized vegetables, and browned sweet potatoes. What is there not to like, especially when the whole thing is topped with an egg? It goes to prove that I could miss out on some great meals if I don’t remember that just because I don’t like an ingredient prepared one way doesn’t mean I won’t like it in other dishes.

Copy of IMG_0422

One year ago: Peter Reinhart’s Pizza Dough

Printer Friendly Recipe
Sweet-Potato Hash with Bacon (adapted from epicurious/Gourmet)

Serves 4

These are the same ingredients in the same proportions as the original recipe, but I’ve tweaked the preparation a bit because a number of reviewers complained that the original was too greasy. Adding eggs on top is also my addition, but Dave and I tried it with and without the eggs, and while it was good without, it was even better with.

½ pound sliced bacon, cut into ¼-inch strips
2 medium onions, chopped
1 large red bell pepper, cut into thin strips
salt and pepper
2 pound sweet potatoes, peeled and cut into ½-inch cubes
1 teaspoon chopped fresh thyme
4 eggs (optional)

1. Cook the bacon in a 12-inch nonstick skillet over medium heat until it renders some fat and begins to brown. Drain off all of the fat except for a thin coating on the pan, then add the onions, red pepper, ½ teaspoon salt, and ½ teaspoon pepper. Cook uncovered, stirring occasionally, until the vegetables are softened, 7-8 minutes.

2. Stir in the potatoes and ½ teaspoon salt. Cover the pan and cook, stirring occasionally, until the potatoes are tender and starting to brown, 10 to 14 minutes. Stir in the thyme and season to taste.

3. If you’re adding the eggs, create four indentions in the hash and break an egg into each. Season the eggs and cover the pan. Lower the heat to medium-low and cook without removing the lid for at least 6 minutes, when you can start testing for doneness. I like my eggs without any runniness at all in the white but with gooey yolks, and it takes around 8 minutes.

Copy of IMG_0432

casatiello

Copy of IMG_6617

This is the third time I’ve made this bread, and the first two times just didn’t do it for me. It seems like a given, right? Bits of sausage and cheese dispersed in a tender buttery bread? What isn’t to like?

Copy of IMG_6589

The first time, it was the type of cheese I used that ruined it. I generally like provolone, but I’d accidentally grabbed an exceptionally sharp specimen, and it was way too intense. The next time…I don’t know. Maybe it just didn’t fit the occasion. I just remember it seeming a little too rich, maybe even greasy.

Copy of IMG_6593

Reinhart does compare this bread to brioche, and while not all brioche is as rich as the one I made a few weeks ago, you’ll never hear one described as lean. But once you add sausage and cheese to the bread, I don’t know that much butter in the dough is necessary.

Copy of IMG_6603

In fact, I didn’t add butter at all. I added bacon fat instead. Yeah, bacon fat doesn’t sound like much of a health improvement over butter, but I did use half the amount of fat called for in the recipe. I really prefer this slightly leaner version.

Copy of IMG_6611

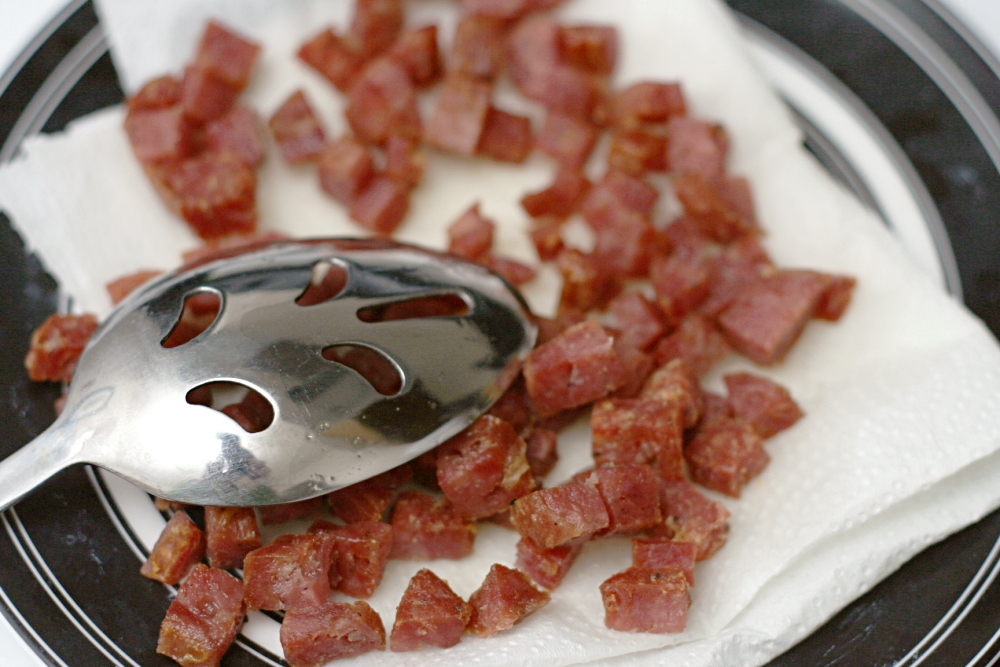
Especially because I probably doubled the salami. I wasn’t so much measuring at this point, and I just figured that the more add-ins there were, the more the bread would resemble a built-in sandwich. Which – yum. I admit that I had trouble keeping all of the tasty bits from falling out of the dough, but I’m not complaining about the excess.

Copy of IMG_6613

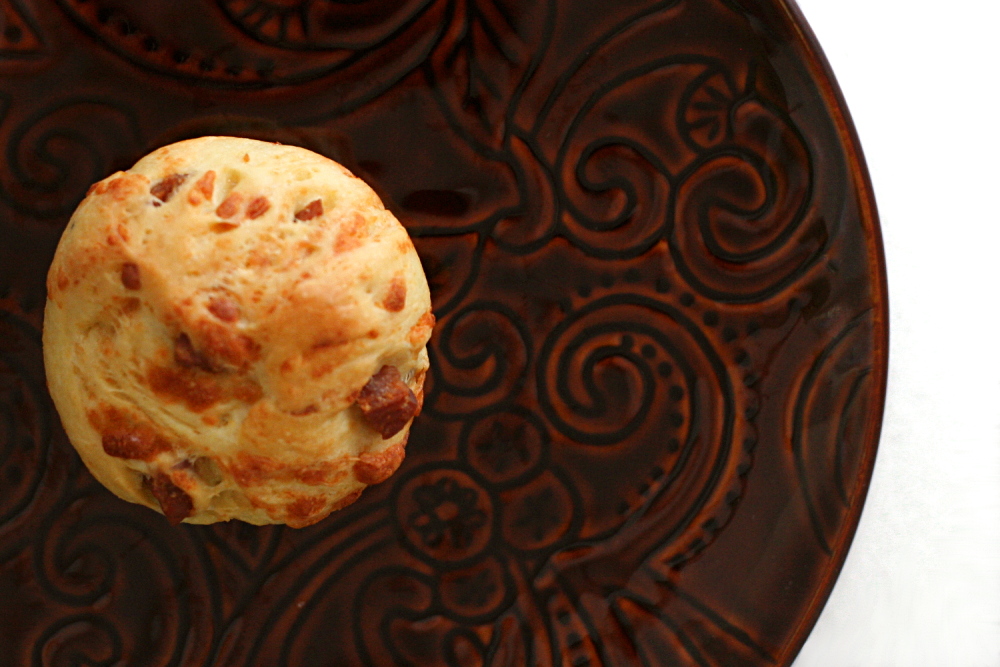
This was by far the best casatiello I’ve made. The bread was tender and light, but not greasy like I remembered from when I’ve made this before. We ate it on a roadtrip, and the muffin-size was perfect for a quick and easy on-the-road lunch. I have a few more casatiello rolls waiting in the freezer, and I think they’ll be great for a plane ride next week. These are my new favorite travel food.

Copy of IMG_6623

One year ago: Pain a l’Ancienne – another Reinhart recipe, and probably the one I make the most

Casatiello (from Peter Reinhart’s Bread Baker’s Apprentice)

I prefer this dough to be a little leaner, so I like to cut the fat in half. I also like both the sausage and the cheese chopped into about ¼-inch cubes.

Sponge:
½ cup (2.25 ounces) bread flour
1 tablespoon instant yeast
1 cup whole milk or buttermilk, lukewarm

Dough:
4 ounces Italian salami (or other similar meat)
3½ cups (16 ounces) bread flour
1 teaspoon salt
1 tablespoon sugar
2 eggs, slightly beaten
¾ cup (6 ounces) unsalted butter, room temperature
¾ cup coarsely shredded or grated provolone or other cheese

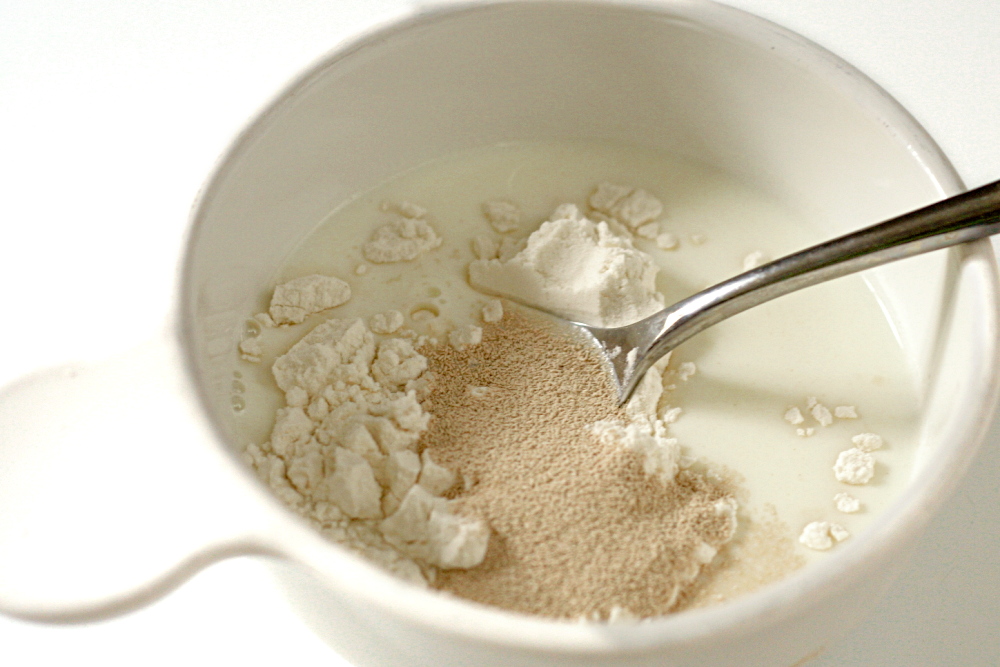
1. To make the sponge, stir together the flour and yeast in a bowl. Whisk in the milk to make a pancake-like batter. Cover with plastic wrap and ferment at room temperature for 1 hour.

2. While the sponge is fermenting, dice the salami into small cubes and sauté it lightly in a frying pan to crisp it slightly.

3. Stir together the flour, salt, and sugar with a spoon. Add the eggs and the sponge until the ingredients form a coarse ball. If there is any loose flour, dribble in a small amount of water or milk to gather it into the dough. Mix for about 1 minute, then let rest for 10 minutes. Divide the butter in 4 pieces and work into dough, one piece at a time while mixing. After mixing about 4 minutes, the dough will change from sticky to tacky and eventually come off the sides of the bowl. If not, sprinkle in more flour to make it do so.

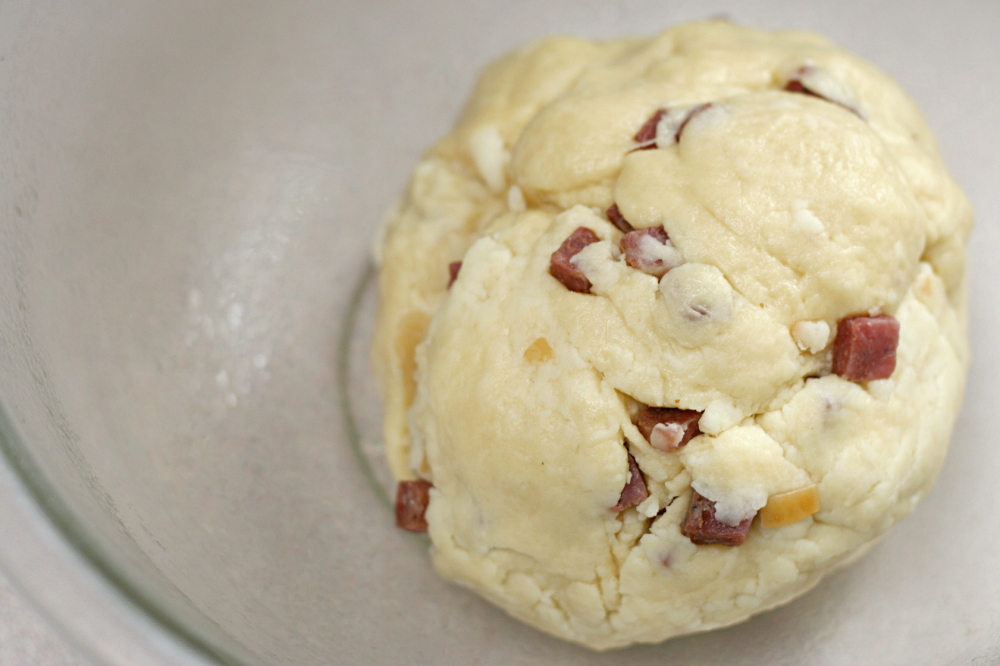
4. When the dough is smooth, add the meat pieces and mix until they are evenly distributed. Then gently mix in the cheese until it too is evenly distributed. Lightly oil a large bowl and transfer the dough to the bowl, rolling it around to coat it with oil. Cover the bowl with plastic wrap.

5. Ferment at room temperature for about 90 minutes, or until the dough increases in size by at least 1½ times.

6. Remove the dough from the bowl and leave as 1 piece for 1 large loaf or divide into 2 pieces for smaller loaves. Bake in 1 large or 2 small loaf pans by misting the pans with spray oil, shaping the dough, and placing it in the pans. Mist the top of the dough with spray oil and cover.

7. Proof for 60-90 minutes, or until the dough just reaches the top of the pans.

8. Place pans in a 350F oven and bake for 40-50 minutes until the center of the loaves registers 185-190F. The dough will be golden brown on top and on the sides, and the cheese will ooze out into crisp little brown pockets.

9. When the bread is done, remove the bread from the oven and from the pans and cool for at least 1 hour before slicing or serving.

Copy of IMG_6625

pork tenderloin with rhubarb sauce

copy-of-img_6083

For years, before I had a food blog, I primarily cooked Cooks Illustrated recipes. I did worry about whether I was relying on them too much and if I was creative enough, but because I was making great food and learning useful tricks, I didn’t think too much of it. The main problem I had was that CI’s schtick is to perfect common recipes, so while I was making very good versions of familiar foods, I rarely tried unfamiliar flavor combinations.

copy-of-img_6056

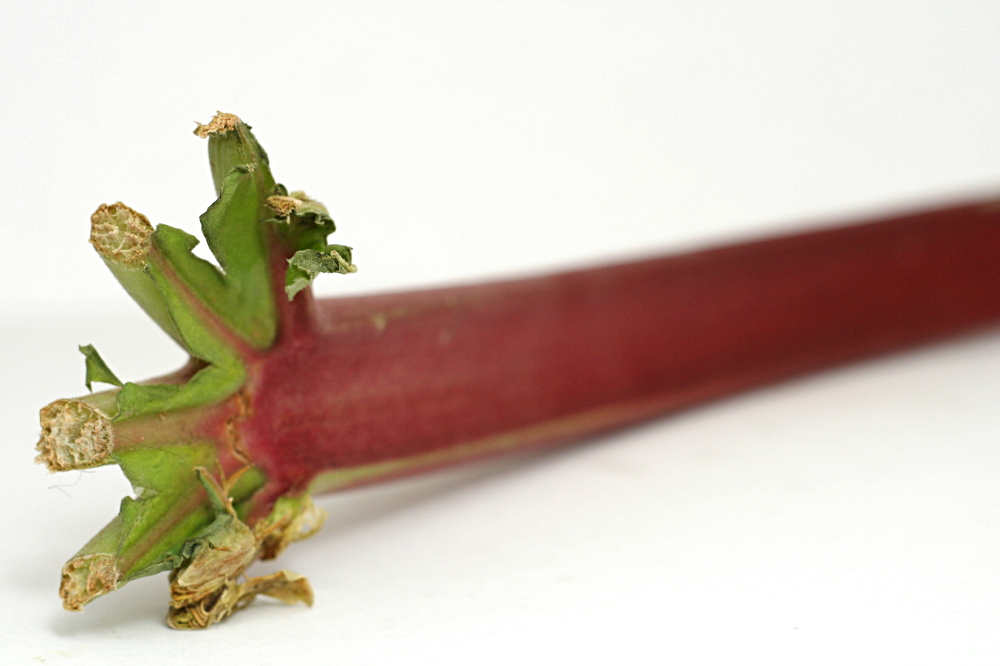
To solve this problem, I bought their Restaurant Favorites at Home cookbook. And then I started a food blog, found other fun recipes to try, and this cookbook mostly got ignored. Feeling uninspired recently, I did a quick flip through it and lucked into something perfect – an opportunity to use rhubarb while it’s in season, plus a type of meat that I underutilitize.

copy-of-img_6057

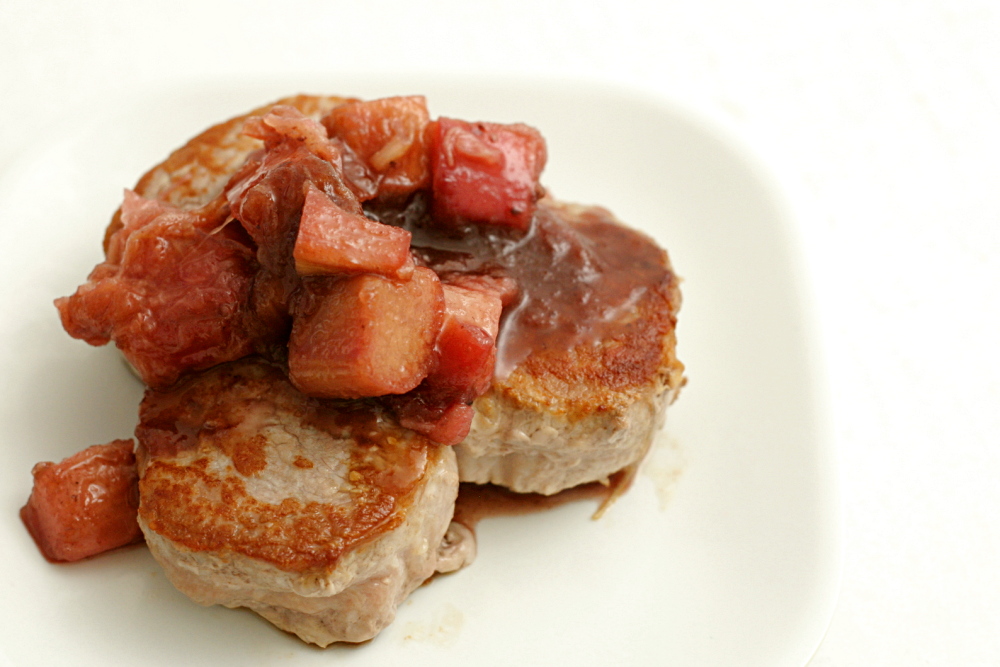
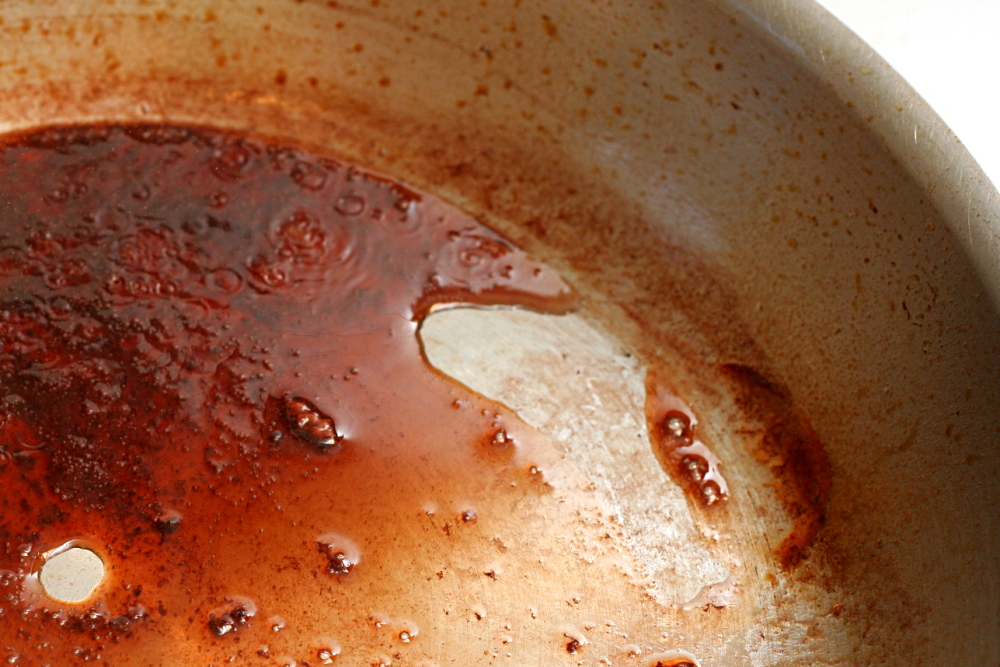
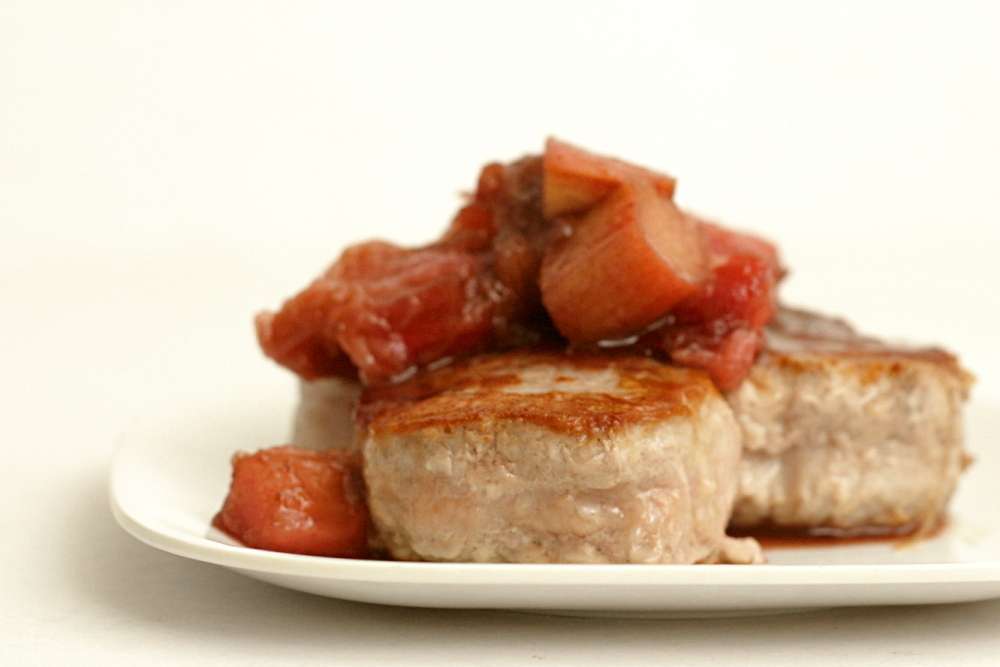
Pork tenderloin seems underappreciated, considering that it’s the pig version of filet mignon. Plus one tenderloin is such a perfect serving size for two people, and it’s easy to cook. Season, set in a hot pan, flip. Then maximize flavor by using the fond in a sauce – a sauce with reduced port and rhubarb.

copy-of-img_6070

As much as I do like sweet sauces with pork, the ratio of rhubarb to meat was too much for me. I’d prefer about half of the amount of sauce because it overpowered the meat. The other, less important, change I needed to make was to cook the rhubarb for a lot less time, previous to adding it to the rest of the sauce ingredients. Reaching the recommended “softened but still retains its shape” texture took about half the time as the recipe implies.

copy-of-img_6081

With those very easy adjustments, this was a simple and elegant seasonal main dish. I love rhubarb, so I’m happy with any chance I get to eat it, and especially with one of my favorite cuts of meat.

copy-of-img_6087

One year ago: La Palette’s Strawberry Tart

Pork Tenderloin with Rhubarb Sauce (from Cooks Illustrated’s Restaurant Favorites at Home)

6 servings

This is the original recipe. Next time I make it, I’ll halve the rhubarb and the sugar (using 3 stalks of rhubarb and 6 tablespoons of sugar) and keep a close eye on the rhubarb while it cooks in Step 1, counting on it being tender after about 15 minutes of cooking. Also, I found it unnecessary to pound the meat – I just squashed it down a bit.

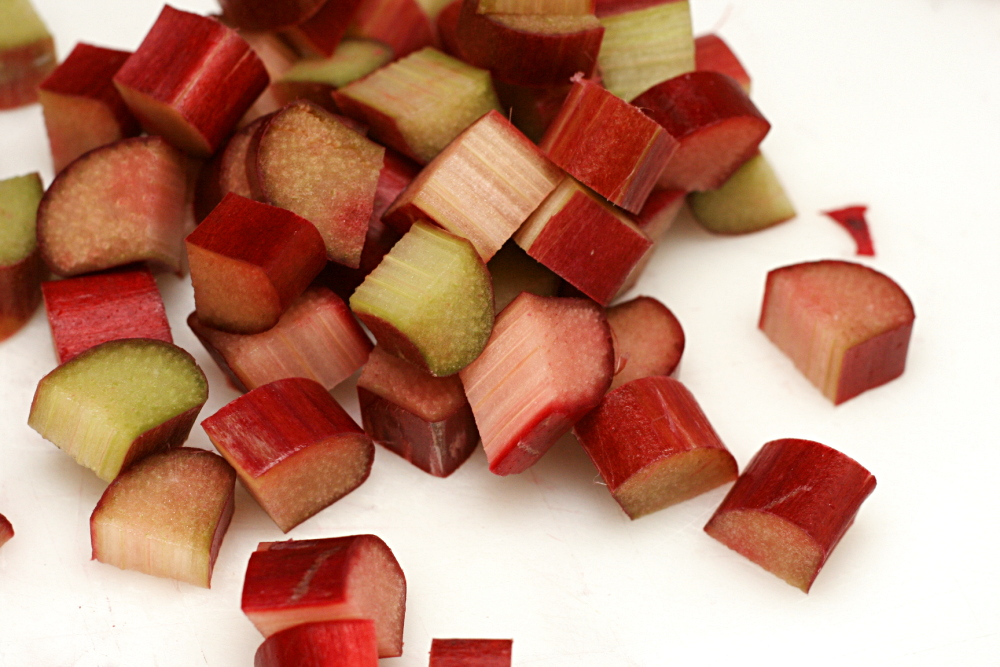
6 large rhubarb stalks, cut into ½ inch dice (about 4 cups)
¾ cup sugar
3 small pork tenderloins (12-16 ounces each, for a total of 2.5-3 pounds), trimmed of silver skin and excess fat
salt and ground black pepper
2 tablespoons vegetable oil
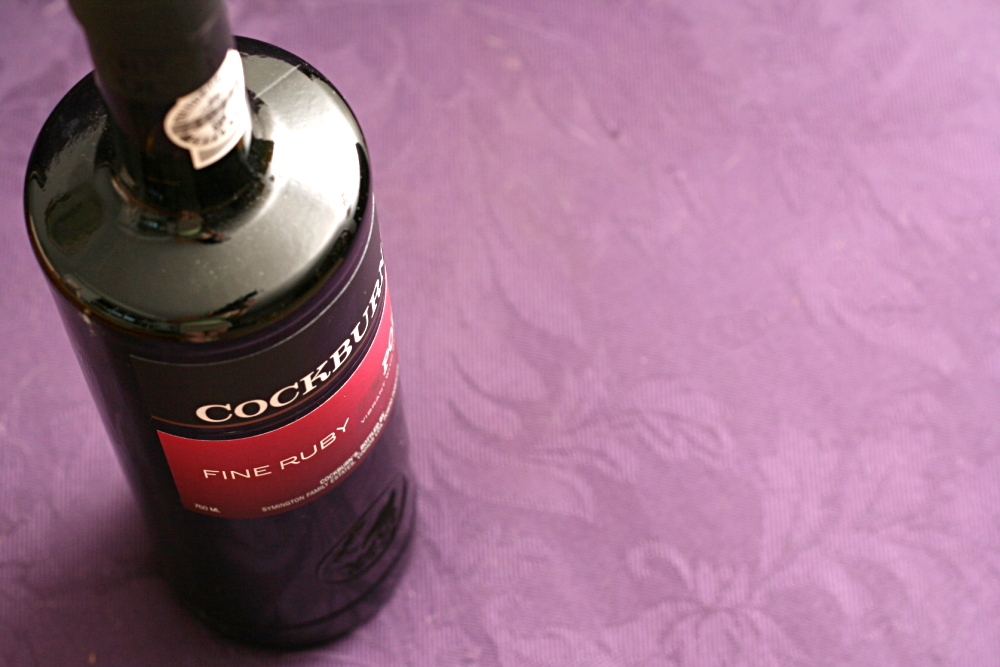
½ cup ruby port
1 cup low-sodium chicken broth

1. Cook the rhubarb and sugar together in a medium, heavy-bottomed saucepan over low heat until the rhubarb has softened but still retains its shape, 25-35 minutes.

2. Cut each pork tenderloin crosswise into six 2-inch-thick slices. With a cut side facing up, lightly pound each slice into a round ¾-inch-thick medallion. Season the medallions generously with salt and pepper.

3. Adjust an oven rack to the middle position and heat the oven to 200 degrees. Heat 1 tablespoon vegetable oil in a 12-inch skillet (not nonstick) over medium-high heat until just smoking. Lay 9 medallions in the pan and cook until lightly browned, 3 to 4 minutes. Flip the medallions and cook on the second side until lightly browned and nearly cooked through, 3 to 4 minutes longer. Transfer to a clean plate and keep warm in the oven. Add the remaining 1 tablespoon vegetable oil to the skillet and repeat with the remaining 9 medallions. Transfer to the plate in the oven.

4. Add the port and bring to a simmer. Simmer until the port is thick and syrupy, about 2 minutes. Stir in the broth and any accumulated rhubarb juices and return to a simmer. Simmer until the mixture is thick and has reduced to about ½ cup, about 12 minutes. Stir in the rhubarb mixture and any accumulated juices from the pork medallions and heat through, about 30 seconds. Season with salt and pepper to taste. Arrange 3 pork medallions on each of 6 individual plates and spoon about ¼ cup of the rhubarb sauce over the top. Serve immediately.