toasted vegetable subs

I wouldn’t say that I get tired of pizza, but with nothing to break our Friday night pizza routine lately, I thought a break might be in order. I considered some of my other favorite take-out options that I could make at home and decided, mm, big cheesy toasted sandwiches.

As much as I love a bunch of different spicy meats (my god, I cannot avoid the innuendos around here lately) on a sandwich, Dave and I had a lot of meat plans (ack) for the weekend already. Plus, I was pretty sure I could make a vegetarian sandwich every bit as good as my favorite carnivorous version.

Maybe you don’t need a recipe for a veggie sandwich – just put your favorite vegetables on bread, right – but I looked around for one anyway and found several. Most were based on eggplant and zucchini, which…eh. I don’t know. Maybe that’s a little too earnest for a Friday night. I wanted a meatier vegetarian sandwich.

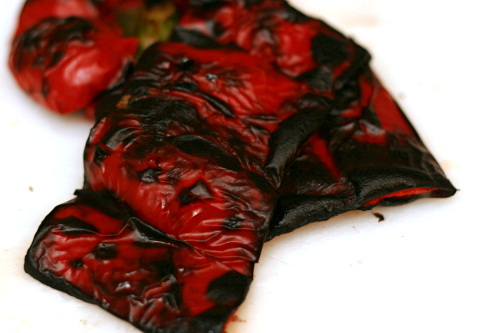
So mushrooms were in, of course, as well as caramelized shallots and roasted red peppers. I added the out-of-season mealy tomatoes simply because it seems traditional on a toasted sub, but I think chopped sun-dried tomatoes mixed with the other vegetables would be more flavorful.

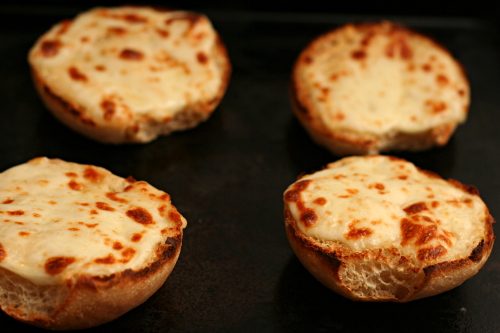
Bread topped with melted cheese, tomatoes, and vegetables is the perfect way to take a break from pizza, isn’t it? But with a sandwich this good, I didn’t miss my normal Friday night pizza at all.

One year ago: Crispy Bagel Sushi Roll
Two years ago: Queso, Sun-Dried Tomato Dip

Printer Friendly Recipe
Toasted Vegetable Subs

Serves 4

2 red bell peppers
2 tablespoons olive oil
6 large shallots, peeled and sliced 1/8-inch thick
salt
8 ounces mushrooms, sliced 1/8-inch thick
ground black pepper
4 large sub/hoagie rolls, halved lengthwise
mayonnaise
mustard
1 roma tomato, sliced then or 8 sun-dried tomatoes, diced small
4 ounces sliced provolone

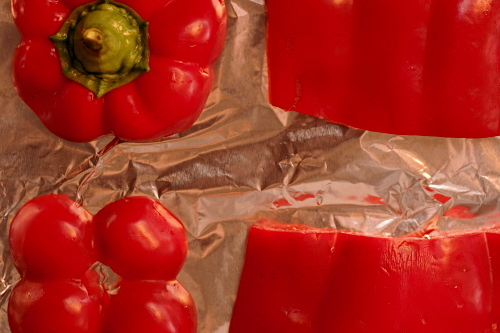
1. Adjust a rack to the upper-middle position and heat the broiler. Line a baking sheet with foil. Cut a ½-inch slice from the top and bottom of the red peppers. Remove the seeds; cut the middle section of the pepper in half from top to bottom; cut out the veins. Place the pepper skin-side up on the prepared baking sheet and broil until the skin is blistered and black, about 15 minutes. Remove the peppers from the oven and place them in a medium bowl. Cover the bowl and let the peppers steam for at least 10 minutes to loosen the skin. Leave the broiler on.

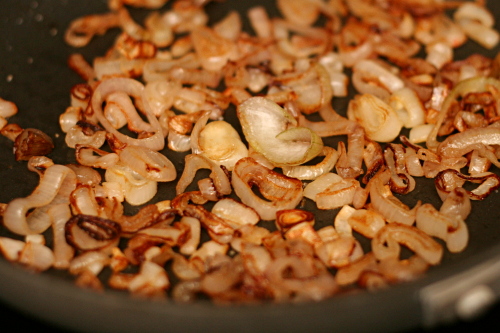
2. Meanwhile, heat 1 tablespoon oil in a medium nonstick skillet over medium-high heat. Add the shallots and ½ teaspoon salt; sauté, stirring constantly, until the shallots just start to brown. Reduce the heat to medium-low and continue to cook, stirring occasionally, until the shallots are golden to dark brown, about 15 minutes. Scrape them from the skillet to a medium bowl.

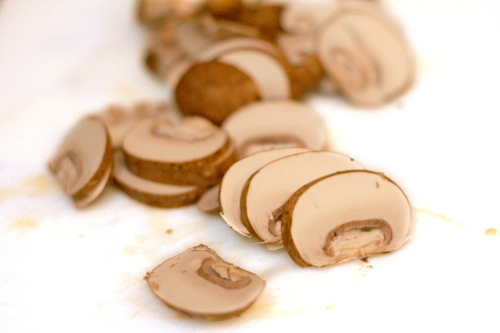
3. Heat the remaining 1 tablespoon oil in the same skillet (there’s no need to wash it) over medium-high heat. Add the mushrooms and ½ teaspoon salt and sauté, stirring constantly, until browned, about 3 minutes. Scrape them into the bowl with the shallots. Season the mixture with ground black pepper.

4. Peel the skin from the red pepper’s flesh and cut the flesh into 1/8-inch slices. Add it to the bowl with the mushrooms and shallots. If you’re using sun-dried tomatoes, add those to the bowl as well.

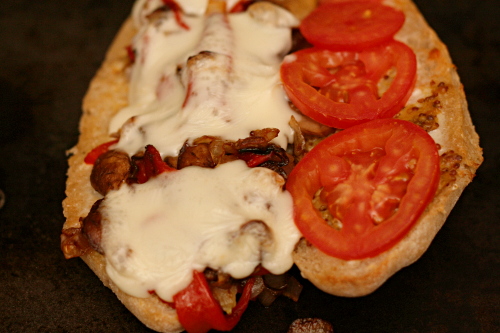
5. Spread a thin layer of mayonnaise, then mustard, over both sides of the rolls. Divide the vegetable mixture evenly between the bottom pieces of the rolls; top with the cheese. Arrange the slices of fresh tomato, if using, on the top piece of the sandwich bread. Place the sandwiches on a baking sheet, with the tomato and cheese facing up.

6. Broil until the cheese is melted and the bread is slightly toasted, 3-5 minutes. Let the sandwiches cool for a few minutes before serving.

sandwich rolls

Copy of IMG_4632

Allright, so. NaBloPoMo. National Blog Posting Month, or in my case, Clean Out the Crazy-Full Pending Folder Month. I remember it being pretty tough last year, and it’s looking like it’s going to be even more challenging this year, because we finally (!!!) got a move date, and it’s the first week of December. That means November will include not just travel for Thanksgiving, but flying across the country to look for houses, and packing packing packing!

Copy of Copy of IMG_4568

Keeping with NaBloPoMo tradition, I’m starting with the oldest recipe in my Pending folder – from six months ago, yeesh. Please don’t take the delay as a sign of its quality! Truthfully, I’m just lazy and it’s a time-consuming entry.

Copy of Copy of IMG_4605

I’ve been battling with finding or developing the perfect sandwich roll recipe for years, and I finally nailed it. My grocery store makes great sandwich rolls – fluffy and with a soft crust so your filling doesn’t squoosh out the other end when you try to bite into your sandwich. The problems with these rolls are twofold: First, they’re completely white bread, and I always like at least a little whole wheat flour in my bread. Second, they’re a bit too big for grilled cheese with tomato soup. And I suppose there’s a third problem: Our grocery store isn’t moving to New Mexico with us. So sad.

Copy of IMG_4620

My initial attempts to make sandwich rolls tended to be either too dense, with a crust too tough, or misshapen. I had difficulty getting round rolls without deflating the risen dough. Or the dough didn’t have enough structure so the rolls turned into pancakes as they expanded instead of balls.

Copy of IMG_4622

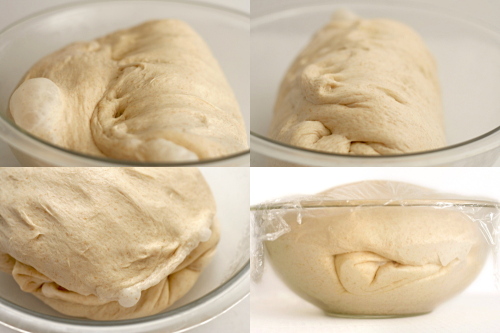
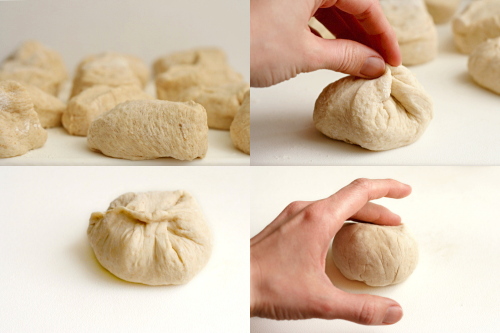
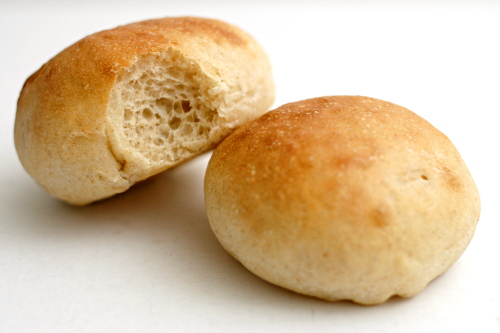
I believe I’ve solved all of those problems with this recipe. A slow overnight cold rise improves flavor, and then two turns of the rising dough gives it plenty of strength, so that when it rises, it rises up and not out. To shape the rolls into even circles, I pulled the edges around and pinched them together to increase the surface tension of the doughballs. This is a bit risky, because you have to be gentle and just tug at the very edges of the dough without deflating the dough. Then just roll it around a bit to even out the edges.

Copy of IMG_4629

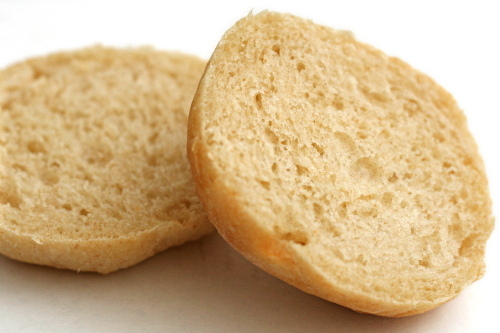
Perfect! Light and fluffy, tall, with a soft crust, and completely adaptable with regards to size and degree of whole wheatiness. And I figured it out just in time – before moving far, far away from my trusty favorite grocery store and their wonderful sandwich rolls.

Copy of IMG_4636

One year ago: Mushroom Phyllo Triangles and Crawfish Phyllo Triangles

Printer Friendly Recipe
Sandwich Rolls

Makes 12

Feel free to substitute whole wheat flour for some of the unbleached flour. If you use 1 cup whole wheat and 3 cups white flour, you’ll hardly notice a difference in flavor, texture, or rising time. At 2 cups whole wheat flour and 2 cups white flour, the difference will be more significant but the rolls will still be excellent. If you want to use even more whole wheat flour, I would adapt 100% whole wheat sandwich bread into rolls.

If it works better for your schedule, go ahead and skip the overnight chill.

4 cups (19.2 ounces) unbleached all-purpose flour, plus
2 teaspoons instant yeast
2 tablespoons granulated sugar
1 teaspoon salt
1½ cups water
2 tablespoons olive oil
2 tablespoons milk for brushing the rolls

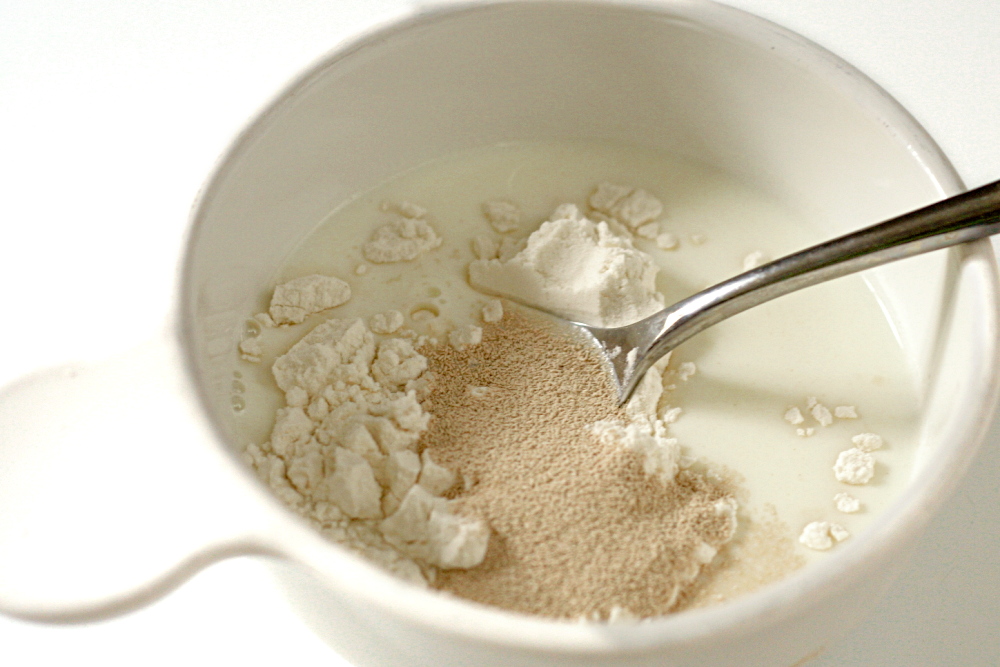
1. Stand mixer: Mix the flour, yeast, sugar, and salt in the bowl of a stand mixer fitted with the dough hook. With the mixer on low speed, gradually add the water and oil. Continue mixing on medium-low until the dough is elastic and supple, about 8 minutes. You may need to add a little more flour or water to get the correct consistency – soft but not really sticky. Transfer the dough to an oiled bowl and cover with plastic wrap. Refrigerate overnight.

By hand: Mix the flour, yeast, sugar, and salt in a large bowl. Make a well in the middle of the dry ingredients and pour in the water and oil. Stir the mixture until the dough comes together. Transfer it to a floured board or countertop and knead, incorporating as little flour as possible, for about 10 minutes, until the dough is elastic and supple. You may need to add a little more flour or water to get the correct consistency – soft but not really sticky. Transfer the dough to an oiled bowl and cover with plastic wrap. Refrigerate overnight.

2. Remove the dough from the refrigerator and let it warm and rise at room temperature until it’s double the original volume, 2-4 hours (depending on the temperature of the ingredients you started with and the room temperature).

3. Give the dough one turn, by folding it into thirds like a sheet of paper going into an envelope, than in half the other direction (as shown in the photos above). Allow the dough to rise again, which should take about an hour. Give it another turn, then let it rise again, which will probably take less than an hour.

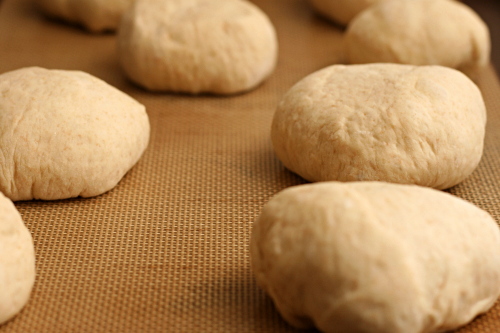
4. Once the dough has doubled in size for the third time, cut it into 12 pieces. Very gently pull the edges of each dough ball around to one side and pinch them together, as shown in the photos above. Roll the dough between the palm of your hand and a board, lightly floured if necessary. Place the formed rolls, pinched side down, on 2 baking pans lined with parchment paper or silicone baking mats.

5. Adjust an oven rack to the middle position and preheat the oven to 400ºC. Let the rolls rise until puffy and about one and a half times their original size, 30-45 minutes. Brush them with milk and bake for 12 minutes, until golden brown and an instant thermometer inserted into the center of one measures 185-200ºC. (I suggest baking just one pan of rolls at a time. An extra 15 minutes of rising won’t ruin your rolls.) Let cool until room temperature before serving, about 45 minutes.

white bean avocado sandwich

Copy of IMG_8653

I believe that people are what they think they are, which is just a less fancy way of saying that you can do just about anything you think you can do. I remember in high school, I consistently got an 89% in my classes, and I always wondered why I hadn’t worked just a bit harder to get an A. But I knew myself as a B+ student, so I worked just hard enough to get a B+.

Copy of IMG_8622

Early on in college, more by luck than design, I got straight A’s one semester. And then I knew I could do it – from then on, I was a pretty solid A student.

Copy of IMG_8627

Lately I’ve been thinking of myself as an indulgent eater. I see so many people on strict diets – raw food, clean food, low carb, vegan. I don’t, and never plan to, follow any of these eating philosophies. I eat refined flours and sugars, red meat and full-fat cheeses, butter and alcohol. When I compared myself to these people, I felt lax in my eating habits. And once I started believing I ate poorly, my eating habits did, indeed, decline.

Copy of IMG_8634

But the truth is, more of the time, I eat very healthfully. All of those treats above? You’ve heard it before – moderation. Most of my snacks are fresh fruit and vegetables. My tiny daily bagel is 100% whole grain. We rarely eat meat on weekdays, and I don’t drink alcohol on weekdays. I do eat dessert every single day, but we’re talking one, maybe two, small cookies.

Copy of IMG_8638

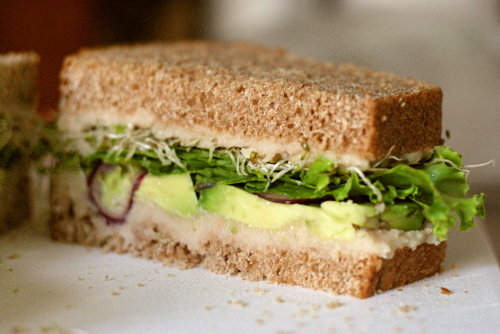
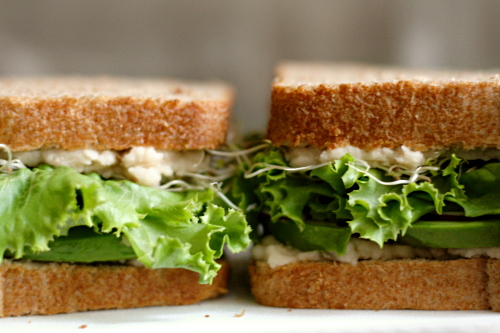
I need to remember that I do follow a good diet regularly, so that making healthy choices is easier. This sandwich, introduced to me by the same friend whose recipes for pumpkin muffins and peanut dip I love, is a perfect example of how I like to eat. Whole grains, beans, and lots of vegetables. It’s easy, filling, portable, and most importantly – delicious.

Copy of IMG_8641

One year ago: Green Chile Rellenos

Printer Friendly Recipe
White Bean Avocado Sandwich

Serves 4

I’ve tried mushing the beans up with a potato masher, but I really do prefer the creamy smooth texture a food processor provides. Also, one thing I’ve learned after making this a few times is to overseason the beans. The seasonings in the beans are flavoring the entire sandwich, so add the lemon juice, salt, and pepper until just past how you’d normally prefer them. Because I’m apparently salt-crazy, I also give the avocado slices a light sprinkling of salt, as well as squeeze some more lemon juice over them.

1 (15-ounce) can white beans, drained and rinsed
1 lemon
salt and pepper
8 slices hearty whole-grain sandwich bread
1 avocado, quartered, peeled, and sliced thin
a few leaves of leaf lettuce, torn into sandwich-sized pieces
some alfalfa sprouts
a bit of red onion, sliced thin

1. In a food processor, puree the beans until they’re completely smooth. Season with lemon juice, salt and pepper to taste (see note).  I took notes on about how much of everything to add and then lost them, but I think a reasonable place to start is 2 tablespoons lemon juice, ¼ teaspoon salt, and ⅛ teaspoon pepper.

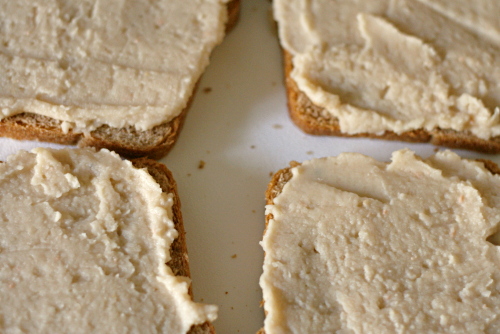
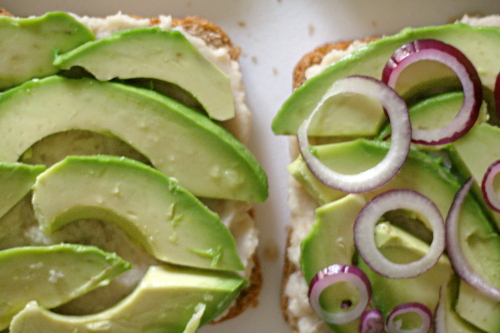
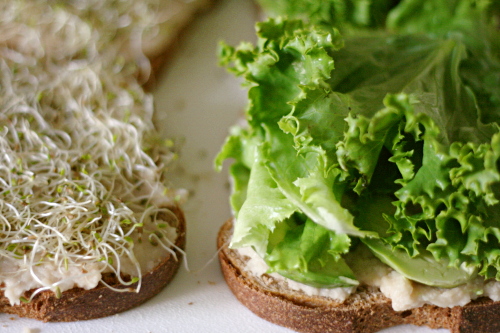
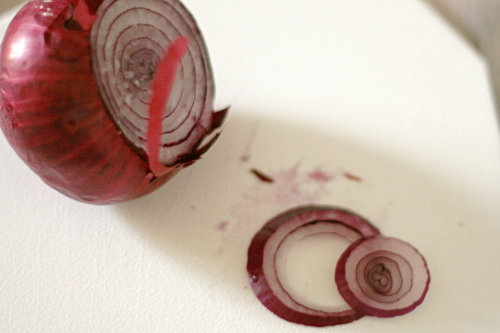
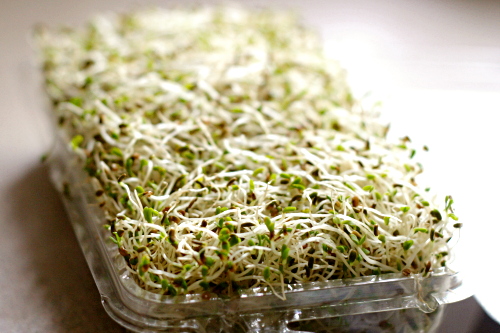
2. Thickly spread one side of each piece of bread with the bean mixture. Top four of the bread slices with slices of avocado, a bit of onion, and plenty of lettuce. Press some sprouts into the bean mixture on the other four slices of bread. Place the sprout-bread, spout side down (duh) on the other-stuff-bread, slice the sandwich in half if you want, and enjoy.

Copy of IMG_8649

casatiello

Copy of IMG_6617

This is the third time I’ve made this bread, and the first two times just didn’t do it for me. It seems like a given, right? Bits of sausage and cheese dispersed in a tender buttery bread? What isn’t to like?

Copy of IMG_6589

The first time, it was the type of cheese I used that ruined it. I generally like provolone, but I’d accidentally grabbed an exceptionally sharp specimen, and it was way too intense. The next time…I don’t know. Maybe it just didn’t fit the occasion. I just remember it seeming a little too rich, maybe even greasy.

Copy of IMG_6593

Reinhart does compare this bread to brioche, and while not all brioche is as rich as the one I made a few weeks ago, you’ll never hear one described as lean. But once you add sausage and cheese to the bread, I don’t know that much butter in the dough is necessary.

Copy of IMG_6603

In fact, I didn’t add butter at all. I added bacon fat instead. Yeah, bacon fat doesn’t sound like much of a health improvement over butter, but I did use half the amount of fat called for in the recipe. I really prefer this slightly leaner version.

Copy of IMG_6611

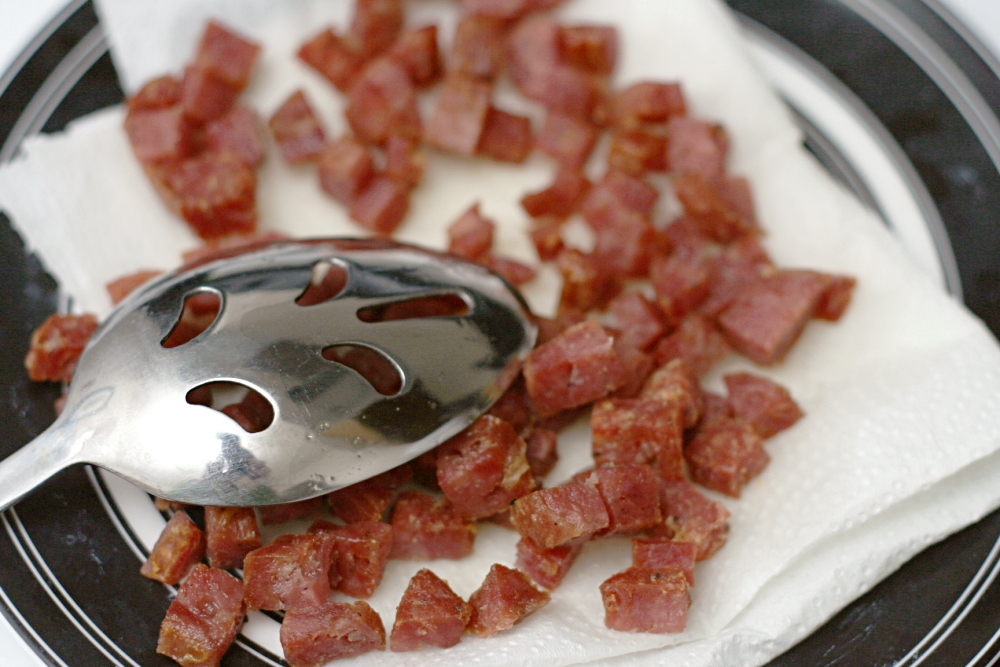
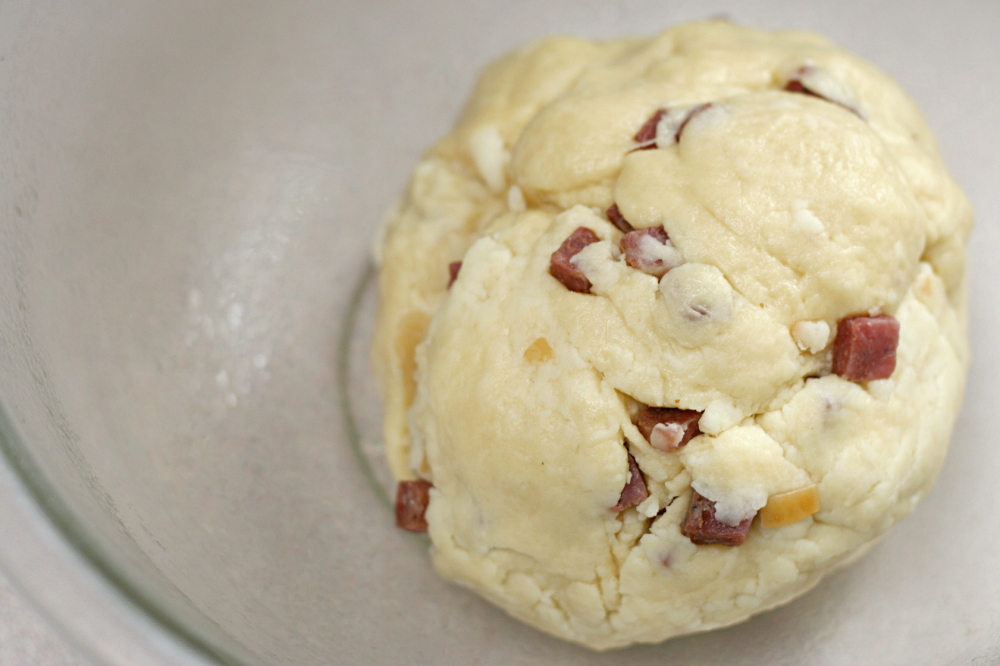
Especially because I probably doubled the salami. I wasn’t so much measuring at this point, and I just figured that the more add-ins there were, the more the bread would resemble a built-in sandwich. Which – yum. I admit that I had trouble keeping all of the tasty bits from falling out of the dough, but I’m not complaining about the excess.

Copy of IMG_6613

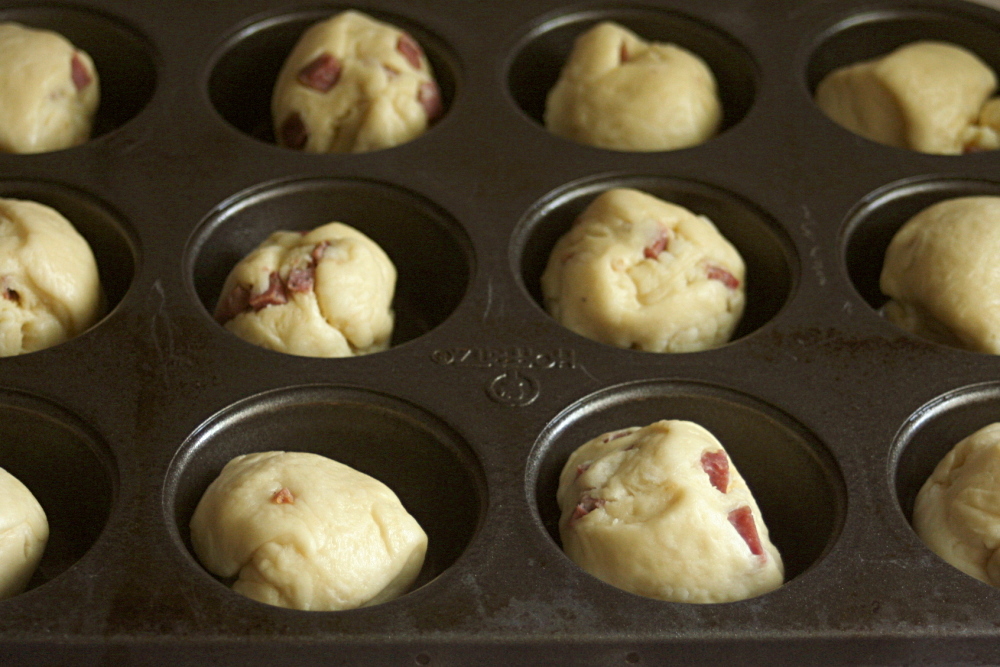
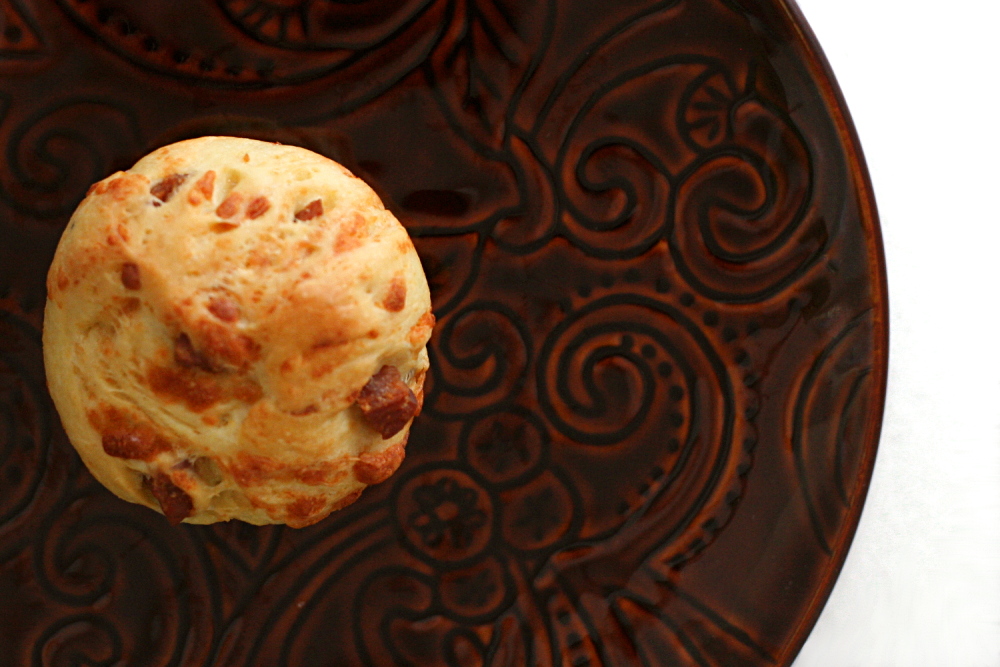
This was by far the best casatiello I’ve made. The bread was tender and light, but not greasy like I remembered from when I’ve made this before. We ate it on a roadtrip, and the muffin-size was perfect for a quick and easy on-the-road lunch. I have a few more casatiello rolls waiting in the freezer, and I think they’ll be great for a plane ride next week. These are my new favorite travel food.

Copy of IMG_6623

One year ago: Pain a l’Ancienne – another Reinhart recipe, and probably the one I make the most

Casatiello (from Peter Reinhart’s Bread Baker’s Apprentice)

I prefer this dough to be a little leaner, so I like to cut the fat in half. I also like both the sausage and the cheese chopped into about ¼-inch cubes.

Sponge:
½ cup (2.25 ounces) bread flour
1 tablespoon instant yeast
1 cup whole milk or buttermilk, lukewarm

Dough:
4 ounces Italian salami (or other similar meat)
3½ cups (16 ounces) bread flour
1 teaspoon salt
1 tablespoon sugar
2 eggs, slightly beaten
¾ cup (6 ounces) unsalted butter, room temperature
¾ cup coarsely shredded or grated provolone or other cheese

1. To make the sponge, stir together the flour and yeast in a bowl. Whisk in the milk to make a pancake-like batter. Cover with plastic wrap and ferment at room temperature for 1 hour.

2. While the sponge is fermenting, dice the salami into small cubes and sauté it lightly in a frying pan to crisp it slightly.

3. Stir together the flour, salt, and sugar with a spoon. Add the eggs and the sponge until the ingredients form a coarse ball. If there is any loose flour, dribble in a small amount of water or milk to gather it into the dough. Mix for about 1 minute, then let rest for 10 minutes. Divide the butter in 4 pieces and work into dough, one piece at a time while mixing. After mixing about 4 minutes, the dough will change from sticky to tacky and eventually come off the sides of the bowl. If not, sprinkle in more flour to make it do so.

4. When the dough is smooth, add the meat pieces and mix until they are evenly distributed. Then gently mix in the cheese until it too is evenly distributed. Lightly oil a large bowl and transfer the dough to the bowl, rolling it around to coat it with oil. Cover the bowl with plastic wrap.

5. Ferment at room temperature for about 90 minutes, or until the dough increases in size by at least 1½ times.

6. Remove the dough from the bowl and leave as 1 piece for 1 large loaf or divide into 2 pieces for smaller loaves. Bake in 1 large or 2 small loaf pans by misting the pans with spray oil, shaping the dough, and placing it in the pans. Mist the top of the dough with spray oil and cover.

7. Proof for 60-90 minutes, or until the dough just reaches the top of the pans.

8. Place pans in a 350F oven and bake for 40-50 minutes until the center of the loaves registers 185-190F. The dough will be golden brown on top and on the sides, and the cheese will ooze out into crisp little brown pockets.

9. When the bread is done, remove the bread from the oven and from the pans and cool for at least 1 hour before slicing or serving.

Copy of IMG_6625

deli-style rye bread

copy-of-img_2344

Last week I was at the grocery store with my parents, trying to choose a dessert to bring home to share. My dad wanted strawberry cake, and my mom wanted German chocolate cake. I wasn’t going to get in the middle of this, and honestly, I don’t know why my dad even offers his opinion. Dessert is a decision that my mom will always get to make.

copy-of-img_2314

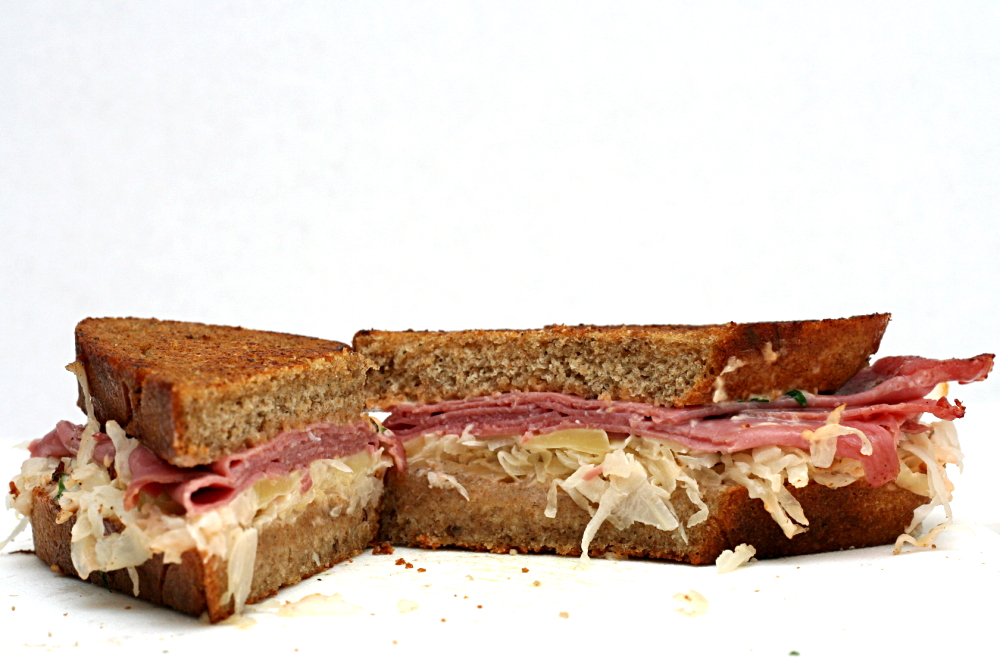
Apparently that apple doesn’t fall far from the tree, because Dave and I were recently choosing a menu item to split to go with our pot of mussels – he wanted a reuben, and I wanted smoked duck salad. Of course we got salad, but only after I promised to make Dave a reuben at home.

copy-of-img_2321a

First I had to make rye bread. I was inundated with recipes – Peter Reinhart has several, and King Arthur’s Flour has far too many to choose between. I thought that Cooks Illustrated’s recipe would be a safe bet for my first time making rye bread.

copy-of-img_2324

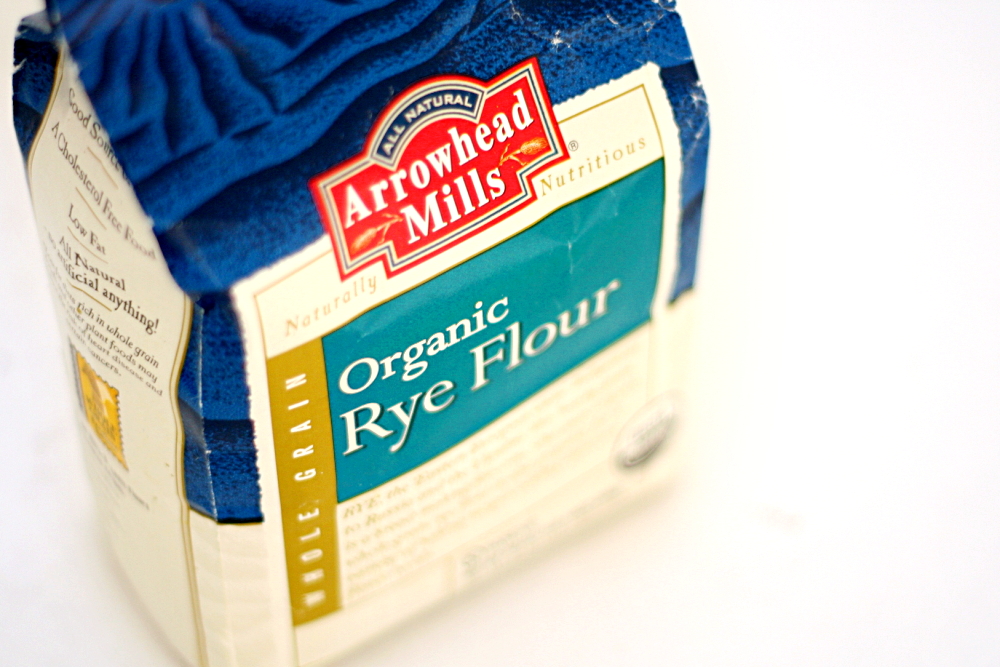
One of the reasons I like CI for my first time attempting something is the specific instructions they offer. Not just rye flour, but medium or light rye flour. If only I had had so many options. After searching my grocery store, the only rye flour I could find was organic and whole grain, and forget the rye flakes that the recipe also recommends.

copy-of-img_2326

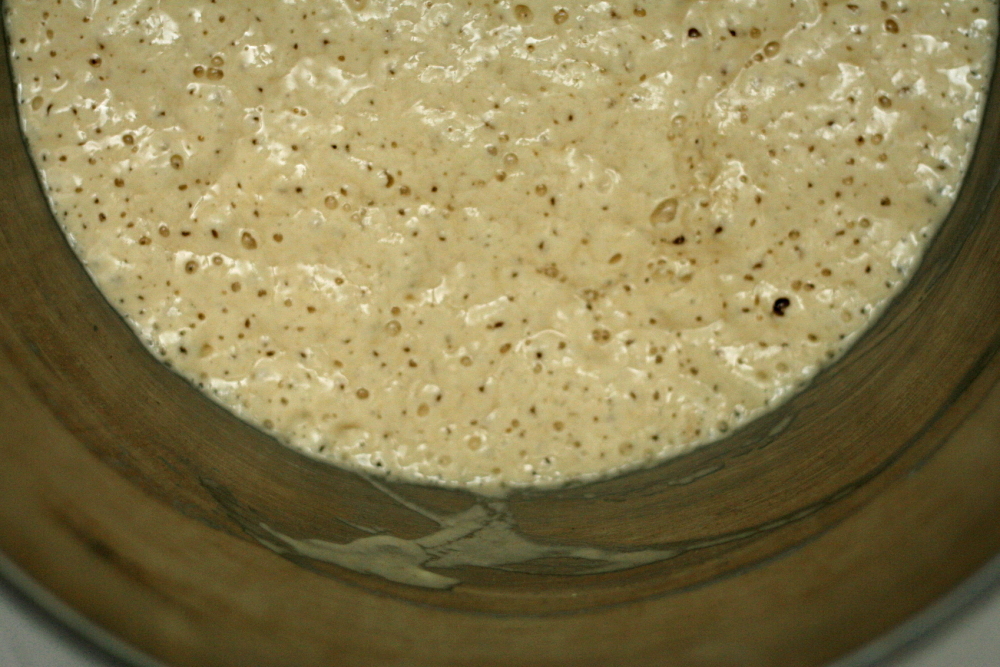
I was concerned that my bread would be a flop due to the whole grain flour, and it didn’t help that the dough’s texture was different from what I’m used to. It seemed heavier and less elastic. The rising times were longer than what the recipe indicates, which I’m attributing to the whole grain flour.

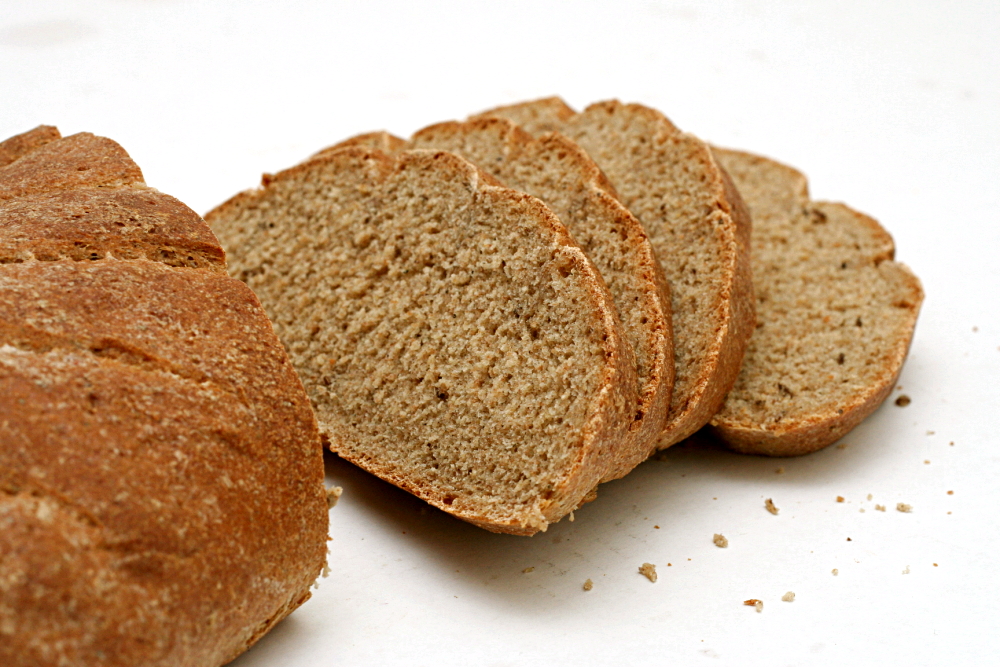
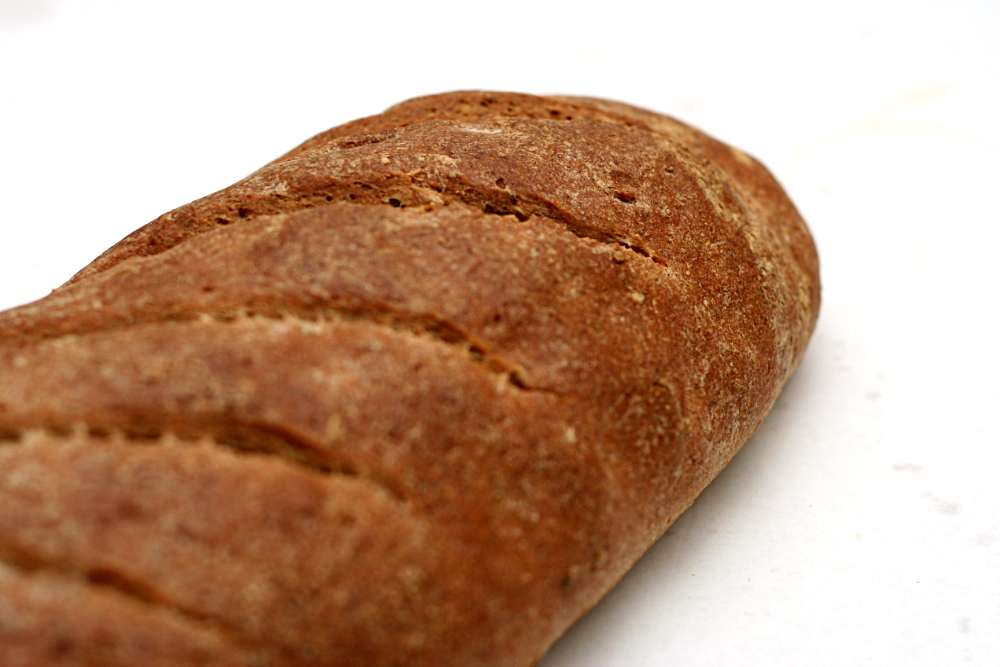
Fortunately, it all worked out, and this made some very good bread – a little bitter from the rye and scented from the caraway seeds, and firm enough to hold up to a sandwich without being unpleasantly dense.  It made for some exceptionally good reubens.

copy-of-img_2347

One year ago: Lemon Poppy Seed Muffins – I have a batch of these in my freezer right now.  I had one yesterday.

Deli-Style Rye Bread (from Cooks Illustrated)

Makes 1 large loaf

This is half of Cooks Illustrated’s original recipe. I have no idea why their original recipe makes such a huge amount of bread. This seems more practical.

Sponge:
⅓ cup rye flakes (optional)
1⅞ cups water, at room temperature
¾ teaspoon instant yeast
1 tablespoon honey
1½ cups (7½ ounces) unbleached all-purpose flour

Dough:
¾ cups (3¾ ounces) unbleached all-purpose flour, plus more for dusting the work surface
1¾ cups (6.125 ounces) medium or light rye flour
1 tablespoon caraway seeds
1 tablespoon vegetable oil
1½ teaspoon salt

Glaze:
1 egg white
1 tablespoon milk

1. For the sponge: Heat the oven to 350 degrees; toast the rye flakes, if using, on a small baking sheet until fragrant and golden brown, 10-12 minutes. Cool to room temperature. Mix the water, yeast, honey, rye flakes, and flour in the mixing bowl of a standing mixer to form a thick batter. Cover with plastic wrap and let sit until bubbles form over the entire surface, at least 2½ hours. (The sponge can stand at cool room temperature overnight.)

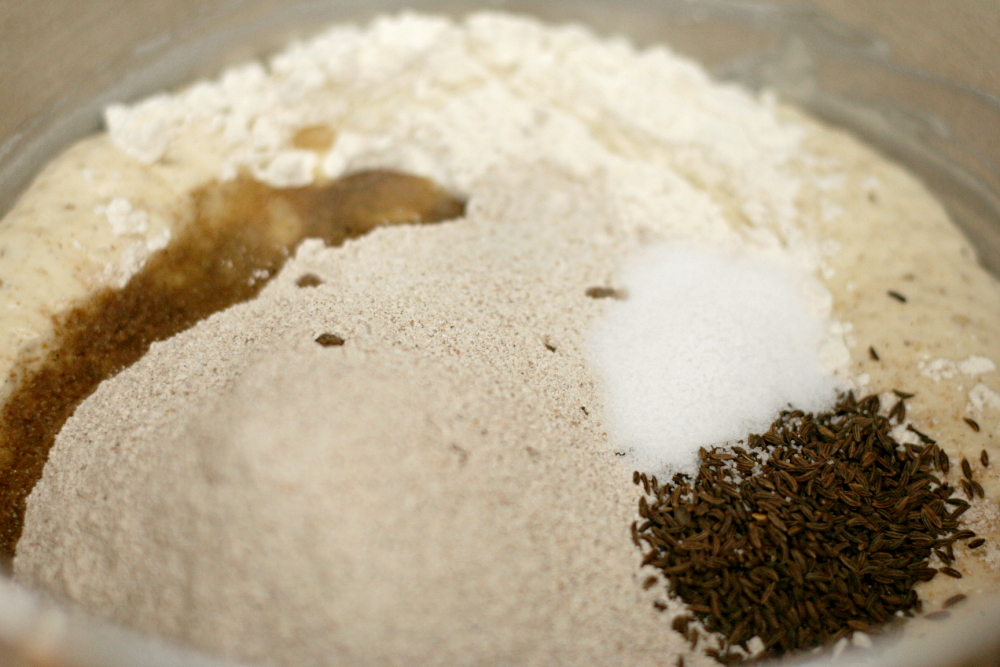
2. For the dough: Stir the all-purpose flour, 1 ½ cups of the rye flour, the caraway seeds, oil, and salt into the sponge. Attach the dough hook and knead the dough at low speed, adding the remaining rye flour once the dough becomes cohesive; knead until smooth yet sticky, about 5 minutes. With moistened hands, transfer the dough to a well-floured work surface, knead into a smooth ball, then place it in a very lightly oiled large bowl or straight-sided container. Cover with plastic wrap and let rise at warm room temperature until doubled in size, 1½ to 2 hours.

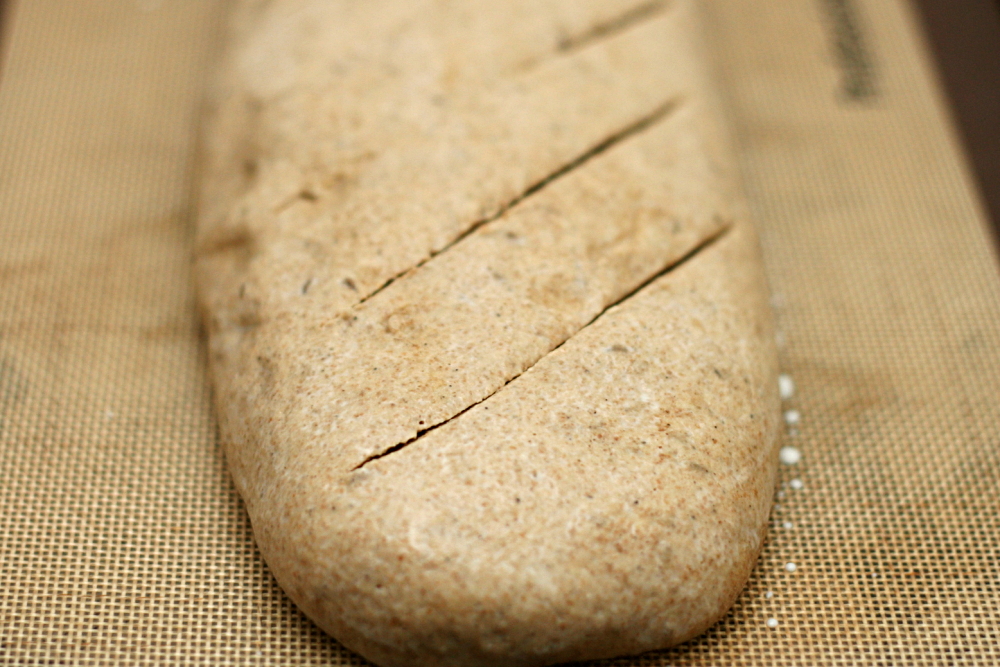
3. Generously sprinkle the cornmeal on a large baking sheet. Turn the dough onto a lightly floured work surface and press it into a 6 by 9-inch rectangle. With the long side facing you, roll the dough into a 9-inch log, seam-side up. Pinch the seam with your fingertips to seal. Turn the dough seam-side down, and, with your fingertips, seal the ends by tucking them into the loaf. Carefully transfer the shaped loaf to the prepared baking sheet, cover loosely with oiled plastic wrap, and let rise until the dough looks bloated and dimply and starts to spread out, 60-75 minutes. Adjust an oven rack to the lower-middle position and heat the oven to 425 degrees.

4. For the glaze: Whisk the egg white and milk together and brush over the sides and top of the loaf. Right before baking, make 6 or 7 slashes, ½-inch deep, in the top of the dough with a single-edge razor blade or a very sharp knife. Bake for 15 minutes, then lower the oven temperature to 400 degrees and bake until golden brown and an instant-read thermometer inserted in the center of the loaf reads 200 degrees, 15-20 minutes. Transfer to a wire rack and cool to room temperature.

copy-of-img_2332

pot roast

copy-of-img_1993
Dave and I don’t eat a lot of beef; in fact, this is only the fourth beef recipe on my site. To us, there are environmental factors to consider with eating beef, as well as humanitarian, health, and cost issues. Plus we just plain like vegetarian food. So when we had pot roast in some form or another for dinner three out of four days last week, Dave was starting to question me. I blamed Kevin, who not only made a delicious-looking pot roast recently, but then made sandwiches and soup out of the leftovers, both of which I wanted to try.

copy-of-img_1933

I got the pot roast recipe from Cooks Illustrated. I hadn’t made one of their recipes in a while, and I found that I missed pulling out their huge cookbook and turning the pictureless pages full of recipes that promise to teach me something as well as taste wonderful.

copy-of-img_1938

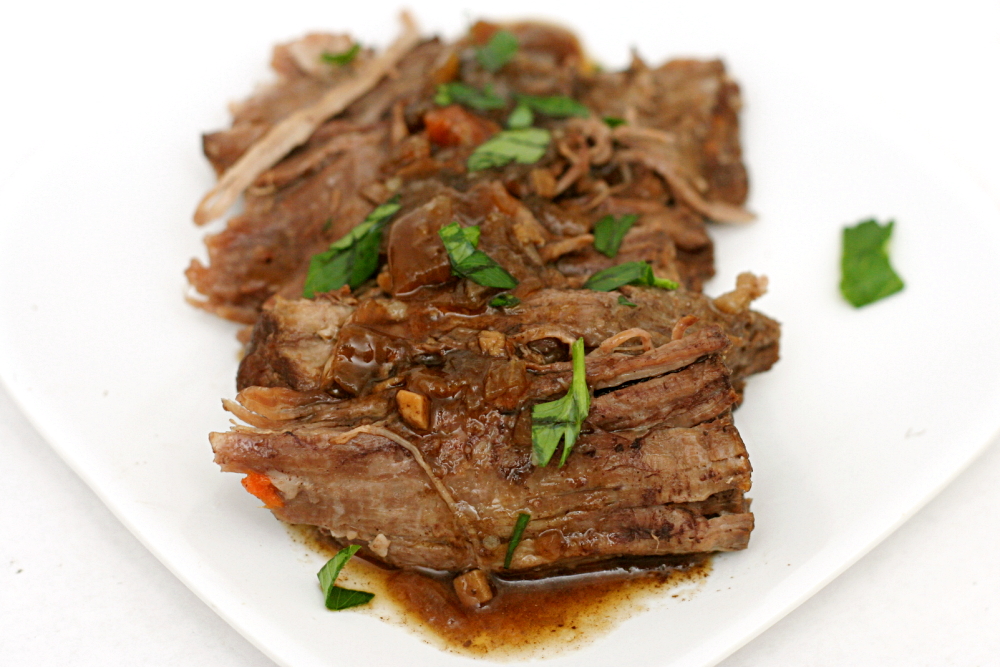
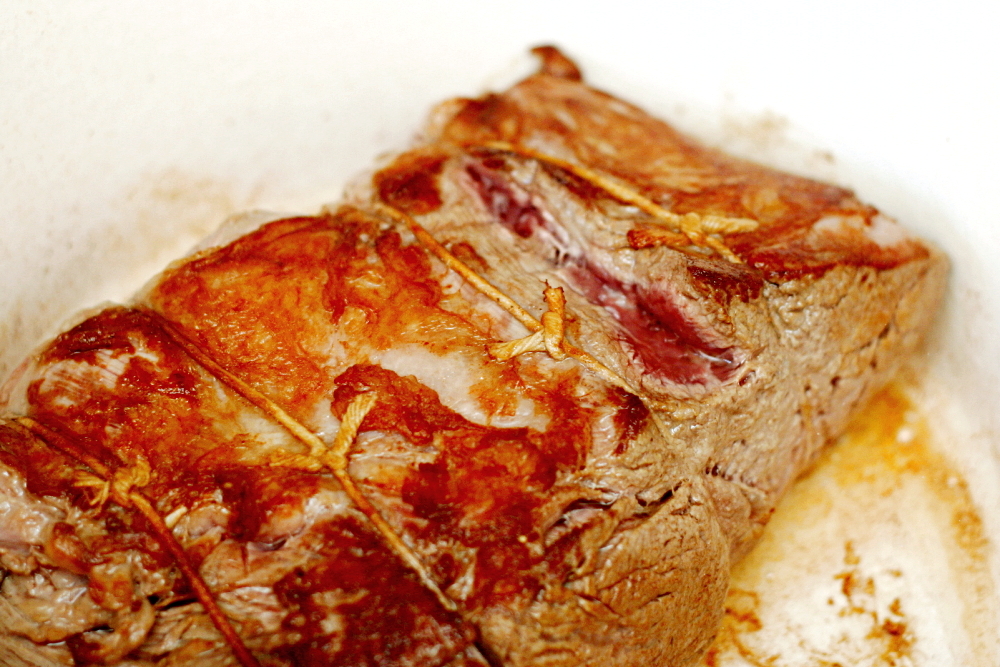
For their pot roast, they brown the meat in a very hot Dutch oven, then sauté some vegetables and use broth to deglaze the pan. Then everything is cooked in the oven for four hours. They mention in their discussion about the development of the recipe that they tried adding red wine with the broth and found that it was good, but it wasn’t really pot roast. True – it’s beef in Barolo (or it would be if you were to use Barolo, which I never would because it’s too expensive), which I happen to love. So I added some red wine with the broth. When the roast is so soft it’s falling apart, it’s removed from the pot and the remaining liquid is boiled down to a sauce.

copy-of-img_1988

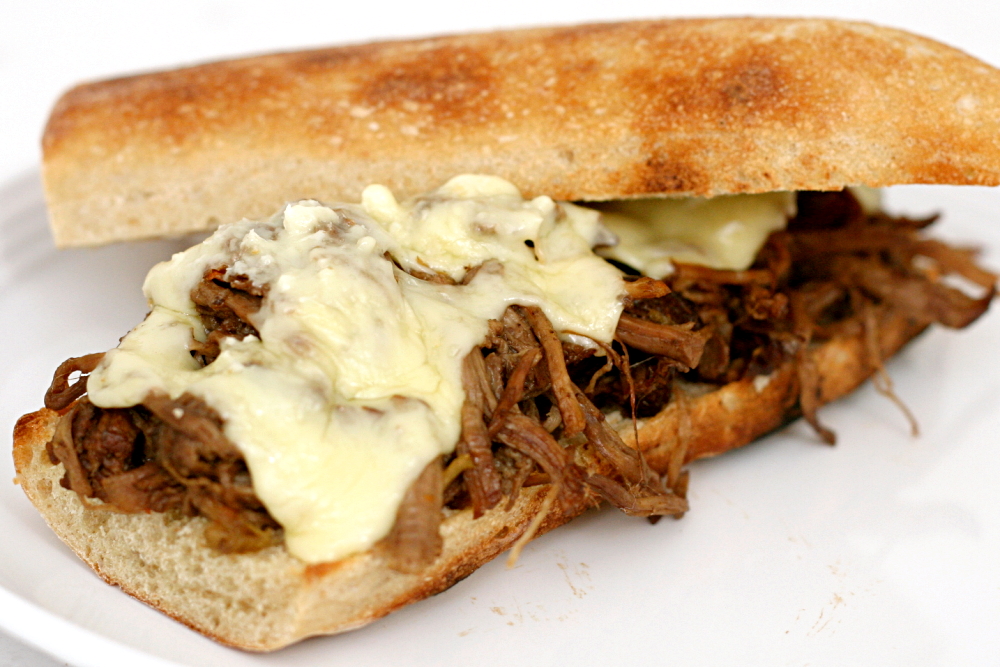
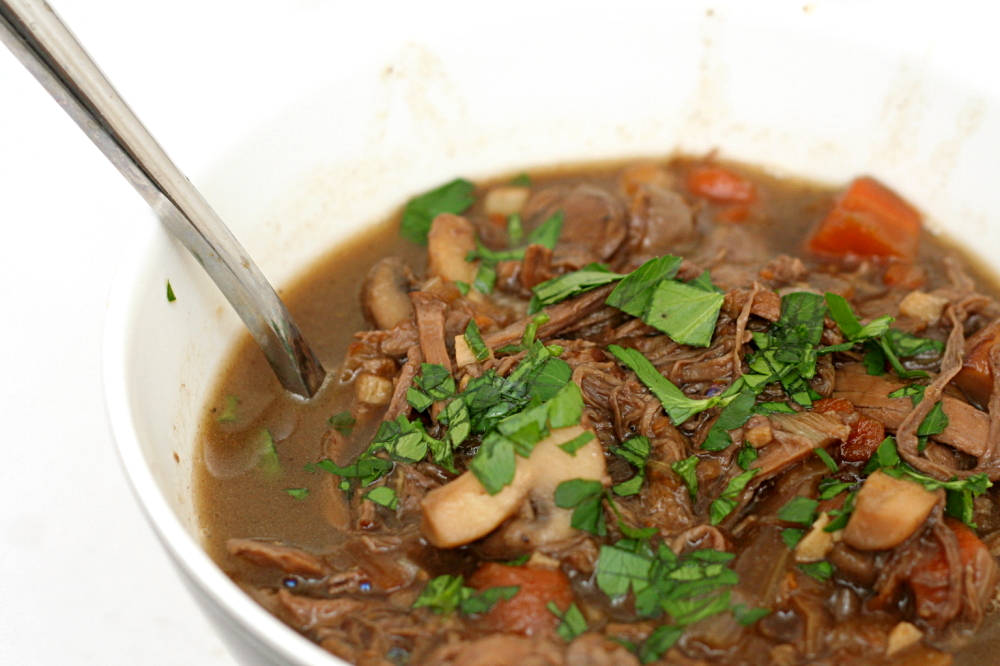
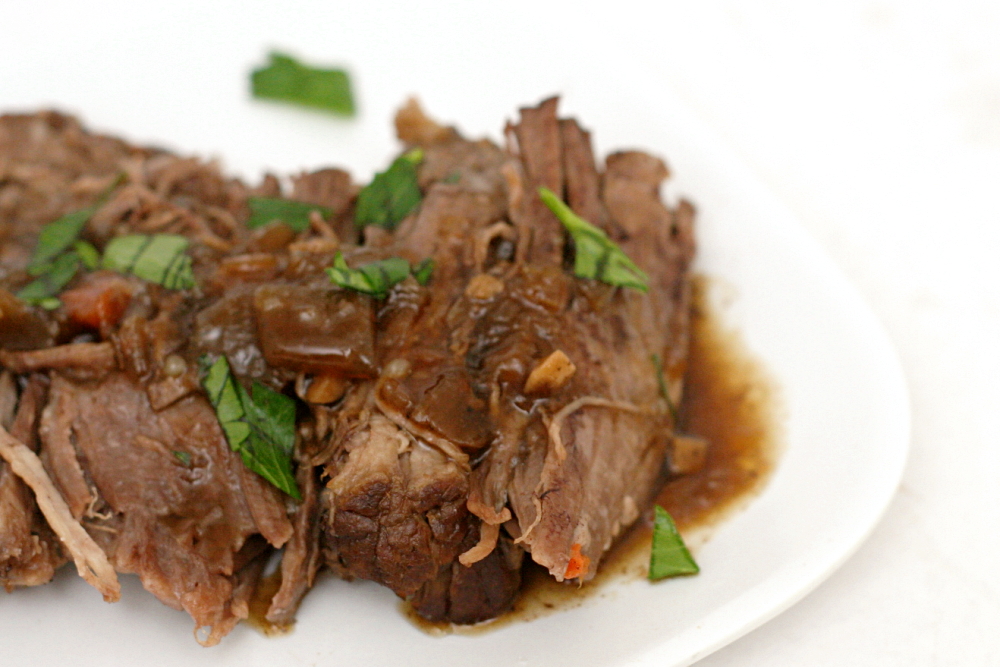
Oh my gosh, it was so good. I served it with boiled new potatoes and glazed carrots, and it was a meal that I couldn’t get enough of. Two days later, I put the meat and some sauce on pain a l’ancienne with swiss cheese and horseradish to make great sandwiches. The day after that, I added it, along with the rest of the sauce and some diluted chicken broth, to a pan of sautéed onions and mushrooms for a really good pot roast soup.

Because we don’t eat beef often, when we do, we like it to be a treat. This certainly was.

copy-of-img_2000

One year ago: Salmon Pesto Pasta

Pot Roast (from Cooks Illustrated)

Serves 6-8

Cooks Illustrated recommends a chuck-eye roast, which is what I used. I’ve found that it can be difficult to find though.

I added about 1/4 cup red wine with the broths.

1 boneless chuck roast (about 3½ pounds)
salt and pepper
2 tablespoons vegetable oil
1 medium onion, chopped
1 small carrot, chopped
1 small celery rib, chopped
2 cloves garlic, minced
2 teaspoons sugar
1 cup canned low sodium beef broth
1 cup low-sodium chicken stock
1 sprig fresh thyme
¼ cup dry red wine

1. Adjust an oven rack to the middle position and heat oven to 300F. Thoroughly pat the roast dry with paper towels; sprinkle generously with salt and pepper.

2. Heat the oil in a large heavy-bottomed Dutch oven over medium-high heat until shimmering but not smoking. Brown roast thoroughly on all sides, reducing heat if fat begins to smoke, 8-10 minutes. Transfer the roast to a large plate; set aside.

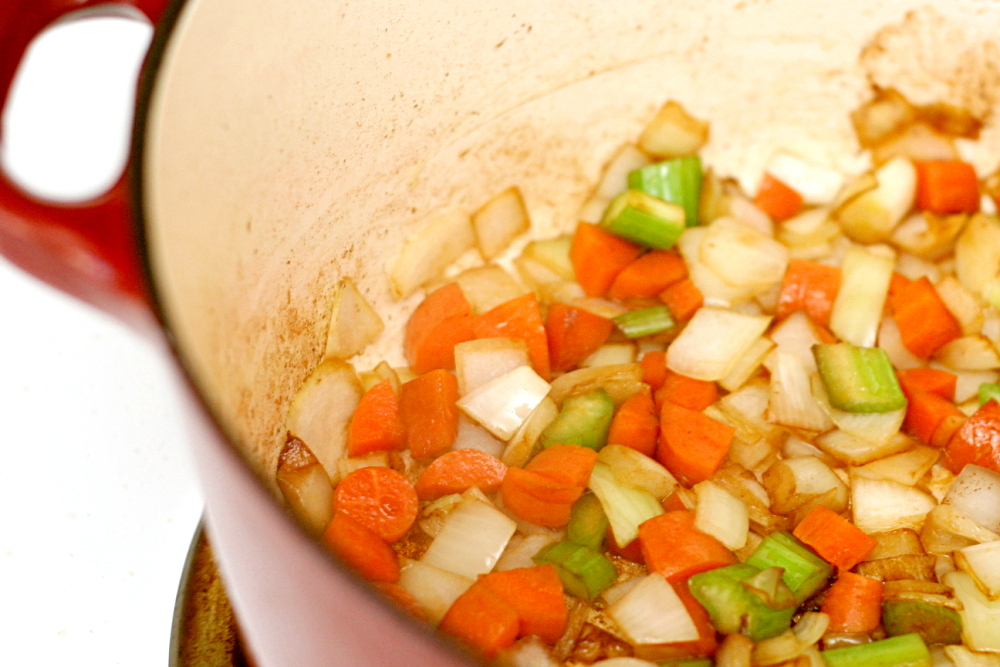
3. Reduce the heat to medium; add onions, carrots, and celery to pot and cook, stirring occasionally, until beginning to brown, 6-8 minutes. Add the garlic and sugar; cook until fragrant, about 30 seconds. Add the chicken and beef broths and thyme, scraping the bottom of the pan with a wooden spoon to loosen the browned bits. Return the roast and any accumulated juices to the pot; add enough water to come halfway up the sides of the roast. Bring the liquid to a simmer over medium heat, then cover tightly and transfer the pot to oven.

4. Cook, turning the roast every 30 minutes, until fully tender and a meat fork slips in and out of meat very easily (3½-4 hours). Transfer the roast to a carving board and tent with foil to keep warm.

5. Allow the liquid in the pot to settle about 5 minutes, then use a wide spoon to skim fat off the surface; discard thyme sprig. Boil over high heat until reduced to about 1½ cups, about 8 minutes. Add the red wine and reduce again to 1½ cups, about 2 minutes. Season to taste with salt and pepper.

6. Cut the meat into ½-inch slices, or pull apart in pieces; transfer the meat to a warmed serving platter and pour about ½ cup sauce over the meat. Serve, passing remaining sauce.

copy-of-img_1991

red velvet whoopie pies

copy-of-img_0149a

These days, most things I bake turn out well. So whenever I visit my parents in Albuquerque, I’m always disgruntled by the problems I have with recipes. I don’t have enough experience adapting to the high altitude. On my most recent trip, I was frustrated when my snickerdoodles ended up flat and crispy and stuck to the pan. When I made scones the next morning, I remembered to decrease the baking powder, and they came out delicious and tender, but not quite as pretty as when I made them at my nearly sea-level apartment in Pennyslvania.

copy-of-img_0081

My mom and I saw these red velvet whoopie pies in a magazine and could not resist them. Of course we forgot to adapt the recipe for the altitude at first. Apparently (according to my mom, who has more experience with these things), reducing the butter (sacrilege!) helps, but the butter and sugar were creaming before we thought of it, so we added some extra flour and hoped for the best.

copy-of-img_0134

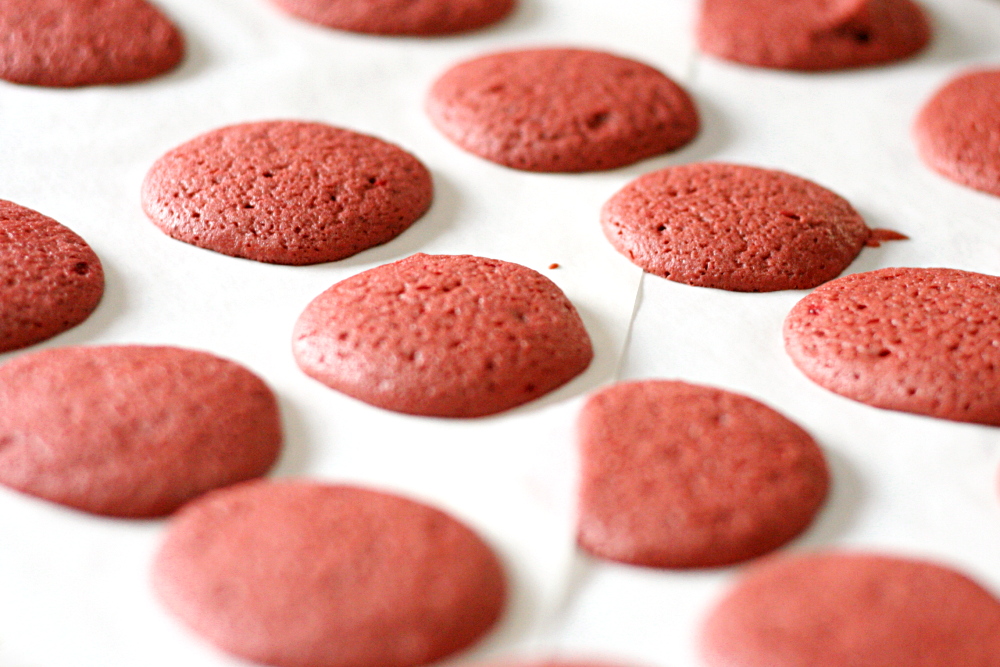
They spread too much and stuck to the parchment a little, so they’re not quite as pretty and tall as many mini whoopie pies. Don’t let that turn you away from this recipe, because they were amazing even so! The cake was tender and moist with just a touch of chocolate flavor. And I’m confident that, made at lower altitudes, the little cakes will be just as delicious, but prettier as well. And they’re sandwiching a dollop of cream cheese frosting – <drool>.

copy-of-img_0145

One year ago: Slice-a-Fancy Cookies –  My mom just made these while I was visiting.  The ingredients are so simple, but the cookies taste good.

Red Velvet Whoopie Pies (cake recipe from Better Homes and Gardens December 2008, with a little more detail; cream cheese frosting from my mom’s carrot cake recipe)

We opted for a traditional cream cheese frosting instead of the one suggested with the recipe, which used marshmallow creme.

Makes 30 sandwiches

Cake:
2 cups (9.5-10 ounces) unbleached flour*
2 tablespoons cocoa powder (not Dutch processed)
½ teaspoon baking powder
¼ teaspoon salt
8 tablespoons (1 stick) butter, softened
1 cup (7 ounces) packed light brown sugar
1 egg, preferably room temperature
1 teaspoon vanilla extract
½ cup buttermilk, preferably room temperature
1 ounce (2 tablespoons) red food coloring

Filling:
4 ounces cream cheese, softened
4 tablespoons (½ stick) butter, softened
2 cups (8 ounces) powdered sugar
½ teaspoon vanilla

1. Adjust oven rack to middle position; preheat oven to 375F. Line baking sheets with parchment paper. In medium bowl, whisk together flour, cocoa, baking soda and salt.

2. In large mixing bowl, beat butter on medium-high speed for 30 seconds, until smooth. Add brown sugar and beat until light and fluffy, about 2 minutes. With mixer at medium speed, add egg and beat until thoroughly combined, then beat in vanilla. Add about one-third of flour mixture followed by half of buttermilk mixture, mixing until incorporated after each addition (about 15 seconds). Repeat using half of remaining flour mixture and all of remaining buttermilk mixture. Scrape down sides of bowl and add remaining flour mixture; mix at medium-low speed until batter is thoroughly combined, about 15 seconds. Remove bowl from mixer and fold batter once or twice with rubber spatula to incorporate any remaining flour.

3. Spoon (or pipe) batter in 1-inch diameter rounds about ½-inch high on prepared baking sheets, allowing 1 inch between each round.

4. Bake 7 to 9 minutes, or until tops are set. Cool cookies on cookie sheets.

5. To make filling: Add cream cheese and butter to mixer bowl and beat until smooth. Gradually add powdered sugar, alternating with vanilla. Beat until smooth.

6. To fill, dollop (or pipe) cream cheese filling on flat sides of half the cookies. Top with remaining cookies, flat sides down.

To store: Refrigerate in airtight container up to 4 days. Let stand at room temperature 15 minutes before serving.
*Cooks Illustrated uses 5 ounces for 1 cup of flour, and for the last couple of years, that’s what I’ve used when making recipes that only provide volume measurements. (I never measure flour by volume for baking – I think it’s a hassle.) However, I’m coming to realize that 5 ounces for 1 cup of regular flour is pretty high. I heard somewhere that Dorie Greenspan uses 4.8 ounces. Until I figure out what I want to use for recipes that call for flour by volume, I’ll have to be wishy-washy.

copy-of-img_0150

stuffed sandwich rolls (aka monsters)

copy-of-img_8071

This is a recipe that has drastically changed throughout the years. Six years ago, I got the idea for sandwich filling sealed in biscuits from a book of backpacking recipes. I originally followed the recipe exactly, making biscuits with whole wheat and soy flour. They were so dense that they earned the name “monsters” with my group of backpacking friends. Every time I’ve made them since, I’ve adjusted the biscuit recipe slightly, making it lighter and adding flavor. Still, the biscuits always seem dry and dense.

copy-of-copy-of-img_7731

I finally had an epiphany this last time – the fundamental flaw in this recipe is that biscuits are used at all. Biscuits are best fresh out of the oven, not carried around in a backpack for three days. I’m guessing the backpacking recipe book developed the recipe with biscuits because they assumed that the average backpacker wasn’t comfortable baking with yeast. But as far as food preparation goes, I am not the average backpacker.

copy-of-img_7735

That led to Monsters 2.0 – meat and cheese sealed in my favorite sandwich bread. These were far better than the original Monsters. They stayed sealed better – the biscuit versions tended to pop open. They’re healthier, since biscuits usually contain high amounts of fat. And although yeast bread requires more patience than biscuits, I don’t think this new version involves any more actual effort than the biscuit version.

copy-of-img_7943

But the main advantage was, of course, in the eating. We ate these four days after I made them, and they still tasted fresh. And while food always tastes better in the woods, I think Monsters have their place at home as well. You can make a batch, bake them, freeze them, and then have a delicious sandwich ready whenever you need it.

copy-of-img_8066

Monsters 2.0 (Stuffed Sandwich Rolls) (bread recipe pieced together from Betty Crocker, Cooks Illustrated, and Peter Reinhart)

Makes 12 sandwiches

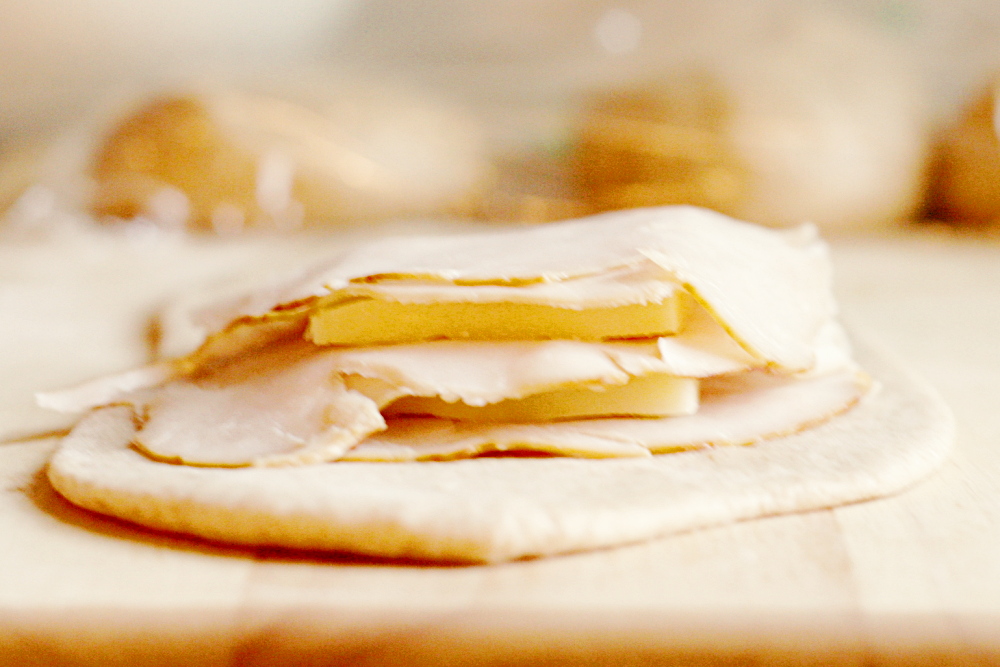
I apologize for the vagueness of “sandwich fillings” as an ingredient. You can use whatever you want, although cheese and meat is the obvious choice. I think ham makes the best filling because it keeps well. That being said, I always use turkey because one of my friends who I often make these for doesn’t eat red meat. I don’t know how we get away with eating turkey that hasn’t been refrigerated for days, but no one has ever had a problem with it. As far as how much to use – as much as possible. I’ll update this next time I make these with something more precise, but I never use enough filling. Definitely use more than you see in the photos.

3-3½ cups (15-17½ ounces) unbleached flour, plus extra for work surface
1½ teaspoons table salt
1 cup water, warm (110 degrees)
1 egg
2 tablespoons vegetable oil or unsalted butter, melted
¼ cup (1.75 ounces) granulated sugar or 3 tablespoons honey
1 package (2¼ teaspoons) rapid-rise yeast (also called instant)
Sandwich fillings (see note above)
2 tablespoons milk

1. Adjust an oven rack to middle position and heat the oven to 200 degrees. Once the oven temperature reaches 200 degrees, maintain heat for 10 minutes, then turn off the oven.

2. Mix flour, salt, and yeast in the bowl of a standing mixer fitted with the dough hook. Mix water, egg, butter, and honey in 1-quart Pyrex liquid measuring cup. Turn machine to low and slowly add liquid. When dough comes together, increase speed to medium (setting number 4 on a KitchenAid mixer) and mix until dough is smooth and satiny, stopping machine two or three times to scrape dough from hook if necessary, about 10 minutes. Turn dough onto lightly floured work surface; knead to form smooth, round ball, about 15 seconds.

3. Place dough in very lightly oiled bowl, rubbing dough around bowl to lightly coat. Cover bowl with plastic wrap; place in warm oven until dough doubles in size, 40 to 50 minutes.

4. Divide the dough into 12 equal pieces. Form the pieces into smooth balls. Cover the balls with plastic wrap and allow them to rest for 10 minutes.

5. On a lightly floured work surface, roll out each ball to form an oval ⅛-inch thick. Layer sandwich filling on one side of each oval, leaving a ½-inch border. Fold dough over filling, stretching it a bit if absolutely necessary. Seal the edges with the tines of a fork.

6. Cover the rolls loosely with plastic wrap. Let rise until puffy, 30-45 minutes.

7. Heat oven to 350F. Use the tines of a fork to re-seal the edges of the rolls. Using a pastry brush, brush the rolls with the milk.

8. Bake until rolls are golden, 25-40 minutes. Transfer the rolls to a cooling rack. Wait at least 30 minutes before serving.
banana and peanut butter stuffed french toast

Up until very recently, whenever someone mentioned Elvis’ favorite sandwich, I thought to myself “well, no wonder he died young!” Once I actually took a moment to consider it though, the sandwich really isn’t so bad. The basic Elvis sandwich is just bananas and peanut butter, fried like a classic grilled cheese. I’d say that the grilled cheese sandwich is far worse for you. Oh, except sometimes Elvis liked to add bacon, which, okay, is a little over the top.
I realized a few months ago that I like bananas a lot more if they’re served with a bit of peanut butter (or Nutella). That reminded me of Elvis’s favorite sandwich, but I wasn’t interested in pan-frying it. Instead, I thought it would be great as French toast.

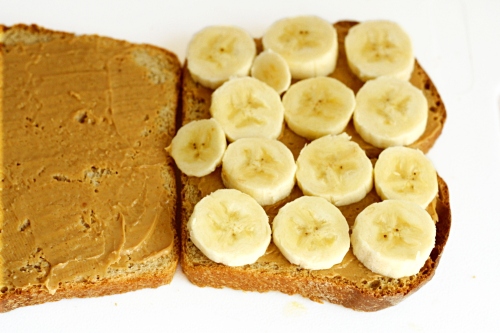
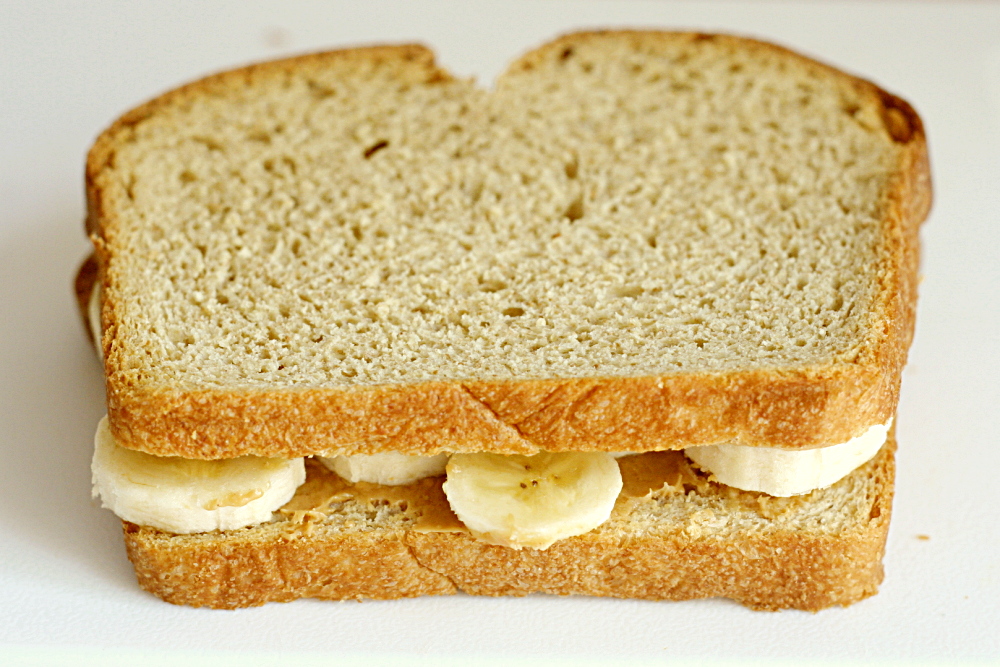
I had never made stuffed French toast, but there are plenty of recipes for different versions of it, so I was confident that it would work. First I made the basic sandwich by smearing one side of each bread slice with a thin layer of peanut butter. I wanted peanut butter on both slices so it would glue the bananas to the bread, keeping the sandwich together. I recommend a very thin layer because peanut butter can be overpowering, as well as sticky in your mouth. I used my favorite French toast recipe for the batter, but made it a little thinner because it would only be absorbed through the non-peanut butter side of the bread slices.

It worked out pretty well. I should have let the sandwich soak in the batter a little longer, and I should have cooked them on higher heat, but the flavors were really good. And there’s really nothing unhealthy about it except for a bit of butter to fry the sandwiches. I’m guessing the drug dependency was a bigger influence on Elvis’ early demise than banana sandwiches.

Elvis French Toast (adapted from Cooks Illustrated’s French Toast recipe)

4 slices sandwiches bread (I used Country Crust Bread)
2 tablespoons peanut butter (approximately)
1-2 bananas, sliced ¼-inch thick
1 large egg
1 cup milk
2 teaspoons vanilla extract
2 tablespoons granulated sugar
¼ teaspoon table salt
1 tablespoon butter

1. Spread a thin layer of peanut butter on one side of each slice of bread. Place slices of banana in a single layeron peanut butter-covered sides of two bread slices. Top with the remaining bread, peanut butter side down.

2. Heat medium nonstick skillet over medium heat for 5 minutes. Meanwhile, beat egg lightly in shallow pan or pie plate; whisk in milk, vanilla, sugar, and salt and salt, continuing to whisk until smooth. Soak sandwiches without oversaturating, about 1 minute per side. Pick up bread and allow excess batter to drip off; repeat with remaining sandwiches.

3. Swirl 1 tablespoon butter in hot skillet. Transfer prepared sandwiches to skillet; cook until golden brown, about 2 minutes on first side and 1 minute 15 seconds on the second. Serve immediately, dusting with powdered sugar.

fried egg and sausage ciabbata breakfast pizzas

By now it must be obvious that I like eggs on top of stuff. Poached are my favorite, but fried is fine too. With some potatoes or bread to soak up the creamy yolk and any number of other additions, a lot of my favorite breakfasts are based around eggs on stuff.

I’m not completely sure that this particular breakfast deserves its own recipe, although I apparently needed one to give me the idea. All it really is some crusty bread, halved horizontally, brushed with oil and topped with green onions, cheese, and cooked sausage. The pizzas are cooked until the cheese melts, then topped with a fried egg and more green onions.

I kept the basic structure of the recipe the same, but varied the details. I used some extra pain a l’ancienne that I had in the freezer, plus cheddar instead of pepper jack and breakfast sausage instead of Italian. The recipe instructs that chopped green onions should be mixed with a half cup of olive oil, which is rubbed on the bread and then drizzled over the egg at the end. I’m sure I don’t have to tell you that is a heck of a lot of oil (even for eight servings). I used just enough to coat the bread before adding the other toppings, and I (meant to but forgot to) sprinkled more chopped green onions over the egg, leaving the oil behind.

Dave and I couldn’t quite figure out if we should eat these with silverware or hands. Dave tried using silverware, and it seemed like sort of a disaster. I ended up picking mine up to eat it with my hands, and it worked pretty well. I was thinking that the yolk might be a drippy mess, but it mostly soaked into the bread below. So disregard the silverware in the pictures – I’m pretty sure silverware is not the way to go here. It is pizza, after all.

You can vary the ingredients to use whatever seems good to you. Any crusty chewy bread will work, and any cheese or cooked meat. Any way you go about it, this should be an easy and fun breakfast to put together and eat.

Fried Egg and Sausage Ciabatta Breakfast Pizzas (from Bon Appétit January 2008, but really epicurious.com)

BA note: Make this recipe your own by using different sausages and cheeses. For a Middle Eastern spin, sub in lamb sausage and feta. Serve pizzas with hot sauce.

Bridget note: I used breakfast sausage, cheddar cheese, pane a l’ancienne, and far less oil.

Makes 8 servings

1 loaf ciabatta bread (about 1 pound)
1 cup chopped green onions
8 tablespoons olive oil, divided
8 ounces sliced hot pepper Monterey Jack cheese
1 pound spicy or sweet Italian sausages, casings removed
8 large eggs

Preheat oven to 450°F. Cut bread horizontally in half. Place bread halves, cut side up, on separate baking sheets. Mix onions and 6 tablespoons oil in small bowl. Season with salt and pepper. Reserve 2 tablespoons onion oil and spread remaining onion oil over bread. Top with cheese.

Sauté Italian sausages in large nonstick skillet over medium-high heat until cooked through, breaking up with spoon, about 7 minutes. Divide sausage among bread halves. Bake pizzas until cheese melts and bread begins to crisp, about 10 minutes.

Meanwhile, heat 1 tablespoon oil in each of 2 large skillets over medium-high heat. Crack 4 eggs into each skillet. Sprinkle with salt and pepper. Cook 2 minutes. Remove from heat and let eggs stand in skillets while pizzas bake.

Arrange 4 eggs atop each pizza. Spoon reserved onion oil over eggs. Cut each pizza between eggs into 4 pieces.