black bean-roasted zucchini-goat cheese enchiladas

zucchini goat cheese enchiladas 7

I had a tough week last week. One day I woke up to little ants crawling all over the kitchen. One afternoon I went to the dentist feeling smug about how often I’ve been flossing and left with an appointment to get three cavities filled. One morning I noticed blisters on my waist that were suspiciously familiar – because they’re exactly like the case of shingles* I had just a few weeks ago. The list goes on from there.

zucchini goat cheese enchiladas 3

I also learned that I definitely do not have time to make enchiladas on a weeknight, even if the sauce is made in advance. Mixing the filling, heating tortillas, rolling and baking is too much to fit in on top of the daily dose of exercise, laundry, and spraying the kitchen with Raid.

zucchini goat cheese enchiladas 5

I guess if all’s well that ends well, you could say I had a great week. After a series of challenging days, nothing could have been more relieving than a night spent sipping wine with friends – even if it’s for a wine appreciation class, we’re all furiously scribbling notes, and technically we’re not supposed to be swallowing the wine. And when I got home from class, a delicious dinner was ready, because I’d skipped a workout the day before to fill and roll and all Dave had to do was transfer the enchiladas to the oven while I was out drinking wine. Maybe last week wasn’t so bad after all.

zucchini goat cheese enchiladas 6

(*Getting shingles isn’t fun, but I’m extremely lucky that I only get mild cases.)

One year ago: Fried Eggs with Garlic Yogurt Sauce
Two years ago: Steak Sandwiches
Three years ago: Pumpkin Cupcakes (comparison of 3 recipes)
Four years ago: Pain Ordinaire

Printer Friendly Recipe
Black Bean-Roasted Zucchini-Goat Cheese Enchiladas (filling adapted from Sprouted Kitchen; sauce from America’s Test Kitchen’s Healthy Family Cookbook via Prevention RD)

I roasted the zucchini on a baking sheet immediately after dicing them, but because zucchini is so wet, I think they would benefit from being sprinkled with about a teaspoon of salt, then allowed to drain for half an hour or so before roasting. If you have one, spinning them dry in a salad spinner would also help them pick up more roasted brown color in the oven. On the other hand, the enchiladas were delicious without this extra step.

Serves 4

Enchiladas:
3 large zucchini, cut into ¼-inch dice
1 small onion, coarsely chopped
1 tablespoon extra virgin olive oil, divided
zest from 1 lemon
1 teaspoon kosher salt
1 (15-ounce) can black beans, rinsed and drained
5 ounces goat cheese, divided
12 corn tortillas

Sauce:
1 teaspoon canola oil
½ small onion, finely chopped
2 cloves garlic, minced
1½ tablespoons chili powder
½ tablespoon ground cumin
1 teaspoon sugar
¼ cup water
1 (8-ounce) can tomato sauce
black pepper, to taste

For serving:
2 avocados, diced
½ cup minced cilantro
lime wedges

1. Heat the oven to 450 degrees. On a large rimmed baking sheet, combine the zucchini, onion, oil, lemon zest, and salt. Roast, stirring occasionally, until the zucchini is softened and maybe slightly browned, about 30 minutes. Transfer to a large bowl; stir in the black beans and 4 ounces of goat cheese. Reduce the oven temperature to 350 degrees.

2. While the zucchini roasts, heat 1 teaspoon of canola oil in a medium saucepan over medium heat. Add the onion and cook until translucent and slightly browned around the edges, stirring occasionally, about 8 minutes. Add the garlic, chili powder, cumin, and sugar; cook, stirring constantly, until fragrant, about 1 minute. Add the water and tomato sauce. Increase the heat to medium-high, bring to a simmer, then reduce the heat to medium-low. Maintain a low simmer until slightly thickened, 5 to 10 minutes, stirring occasionally.

3. To soften the tortillas, brush or spray them with a light layer of oil. Arrange 6 tortillas in a single layer on a baking sheet; transfer to the oven and cook for about 3 minutes; flip the tortillas and continue baking for 2 more minutes, until the tortillas are pliable. Repeat with the remaining tortillas.

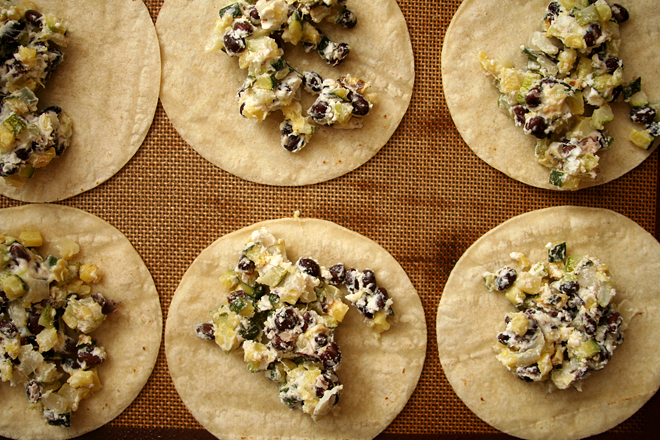
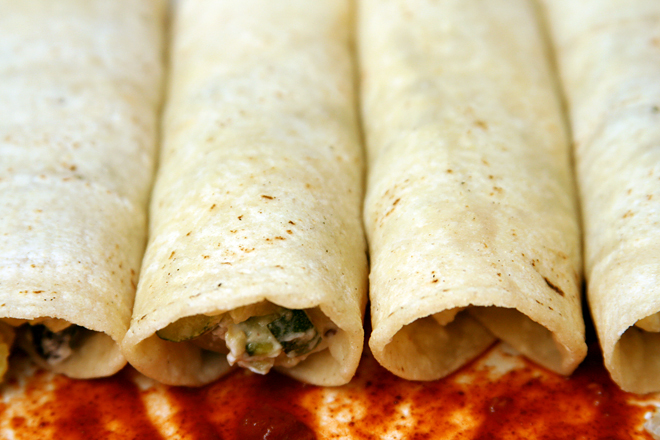
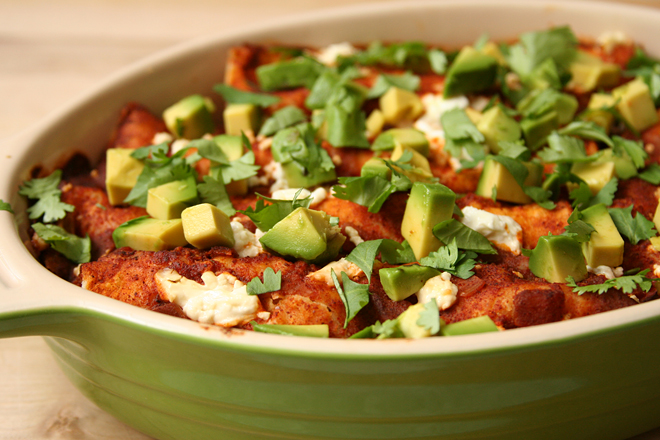
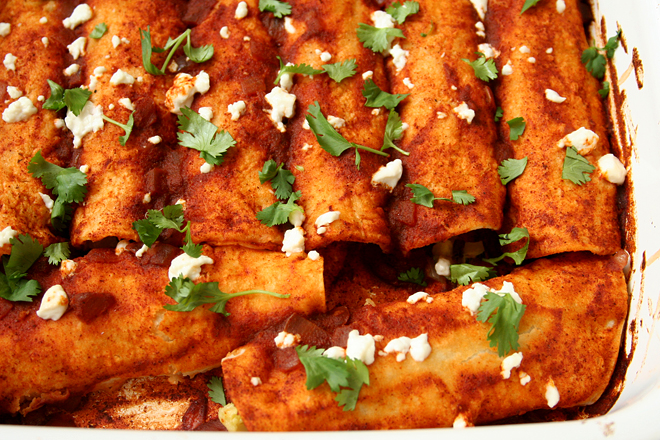
4. Spread a thin layer of sauce over the bottom of a 9-by-13-inch baking dish. Divide the filling evenly between the tortillas. Roll the tortillas over the filling, arranging the filled tortillas seam-side down in the baking dish. Cover the rolled tortillas with the remaining enchilada sauce. Sprinkle the remaining 1 ounce of goat cheese over the top of the sauce. Bake uncovered for 25-30 minutes, until the enchiladas are evenly heated. Let set for 5 minutes before serving with chopped avocado, cilantro, and lime.
zucchini goat cheese enchiladas 10

raspberry-swirled cheesecake cupcakes

raspberry swirl cheesecake cupcakes 6

I did a lot of things I’m proud of this weekend. I didn’t have to work Friday, so I kicked off the three-day weekend with the second-longest run I’ve ever done, and the longest run that wasn’t part of a big race. Then I made Dave give me hourly high-fives for the rest of the day.

raspberry swirl cheesecake cupcakes 1

The next day, I had my first-ever paid baking order. A coworker hired me to make a dozen each of two different types of cupcakes for her daughter’s wedding. Two dozen isn’t a lot of cupcakes, but I wanted to get them just right, with great taste and beautiful garnishes.

raspberry swirl cheesecake cupcakes 2

Less than an hour after I dropped those off, we had a bunch of people over to watch football – the first time Dave and I have entertained more than a couple friends at a time since we’ve been married. By keeping things casual (or at least, my version of casual), enlisting a lot of help from Dave, and being creative with what I already had around, I managed to entertain the way I like to – with a lot of food, of course – but without a lot of stress.

raspberry swirl cheesecake cupcakes 3

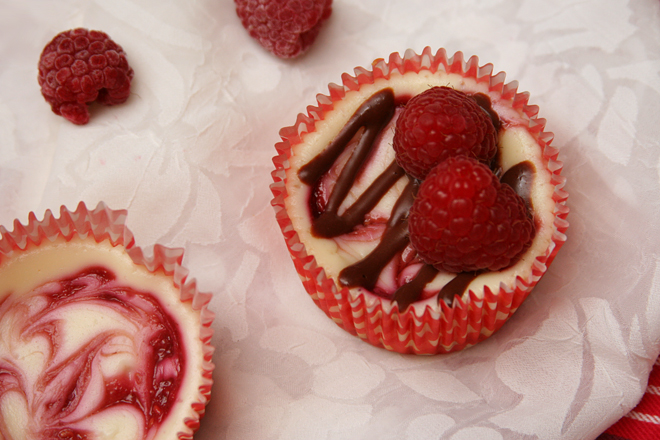
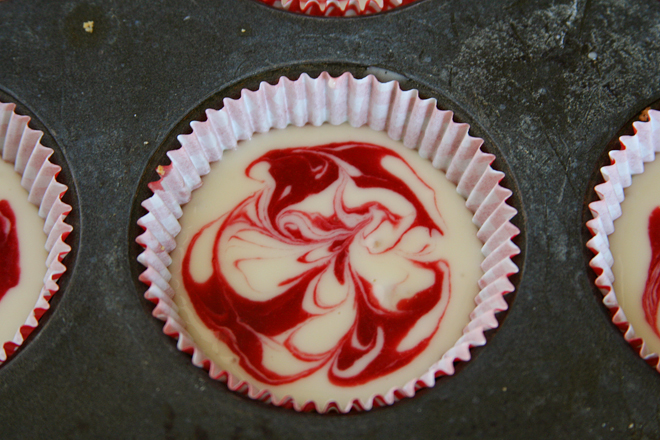
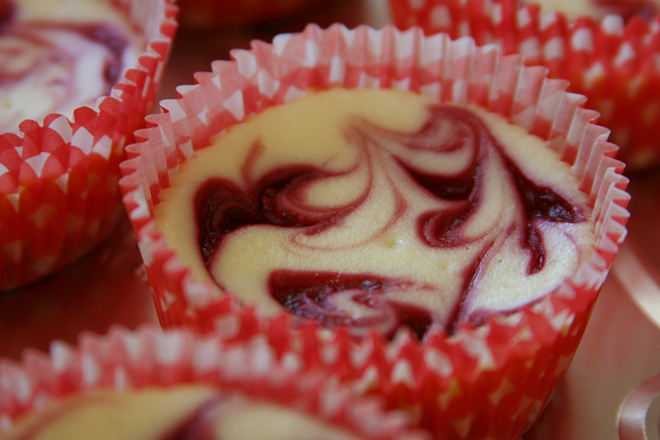
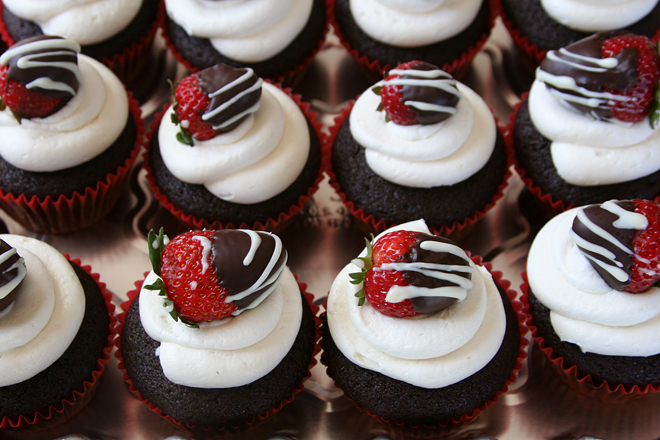
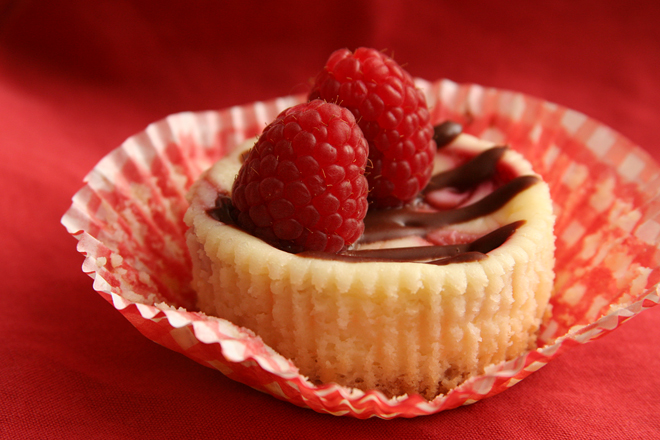
One of the ways I made the most of what I had available was to make extras of these cupcakes. The wedding’s colors were black, ivory, and red, so the bride chose these raspberry-swirled cheesecake cupcakes drizzled with chocolate and topped with raspberry truffles, as well as chocolate cupcakes with champagne frosting topped with chocolate-covered strawberries. While I was at it, I went ahead and made extra chocolate-covered strawberries and raspberry truffles for my friends too.

raspberry swirl cheesecake cupcakes 4

Both sets of cupcakes turned out every bit as good as I’d hoped, and that never happens! The swirls on the cheesecake were pretty and not sloppy, the drizzle didn’t cover up as much as the swirls as I was worried about, the fresh raspberries fit nicely onto the tops. The chocolate cupcakes rose into a perfect mound, and the swirls of frosting didn’t look too amateurish. My first time making chocolate-covered strawberries went just fine, even the stressful part that involved melting white chocolate. I dropped the cupcakes off and then entertained guests all evening, only spitting half-chewed chips on someone once! This is about as successful as my life gets.

raspberry swirl cheesecake cupcakes 7

One year ago: Croissants (Tartine Bread)
Two years ago: Coffee Break Muffins
Three years ago: Green Chile Huevos Rancheros
Four years ago: Pan-Seared Steak with Red Wine Pan Sauce

Printer Friendly Recipe
Raspberry-Swirled Cheesecake Cupcakes (adapted from Martha Stewart’s Cupcakes via Annie’s Eats)

Makes 32 cupcakes

The truffles and drizzle make for a nice presentation, but the swirled cupcakes are plenty tasty and pretty on their own.
For the crust:
1½ cups (about 8 full crackers) graham cracker crumbs
4 tablespoons unsalted butter, melted
3 tablespoons sugar

For the raspberry swirl:
6 ounces (¾ cup) frozen or fresh raspberries
2 tablespoons sugar
1 teaspoon cornstarch

For the filling:
4 (8-ounce) cream cheese, at room temperature
1½ cups (10.5 ounces) sugar
Pinch of salt
1 teaspoon vanilla extract
4 large eggs, at room temperature

1. Preheat the oven to 300 degrees. Line 32 muffin wells with paper liners.

2. For the crust: In a food processor, process the graham crackers and sugar until evenly ground. Add the butter and pulse to combine, scraping the sides of the bowl as needed. Press 1 tablespoon of the crumb mixture onto the bottom of each liner. Bake until fragrant, about 10 minutes. Cool on a wire rack, maintaining the oven temperature.

3. For the raspberry swirl: Combine the raspberries, sugar, and cornstarch in a blender or food processor. Process until smooth, then pour through a fine mesh sieve to remove the seeds. (Or press the raspberries through a food mill, stirring the cornstarch and sugar into the puree.)

4. For the filling: Beat the cream cheese on medium speed in the bowl of an electric mixer until smooth. Gradually add the sugar and salt, then the vanilla. Beat in the eggs one at a time, mixing well after each addition.

5. To assemble, spoon 3 tablespoons of the cheesecake batter over the crust in each cupcake liner. Dot ½ teaspoon of the raspberry puree in a few dots over the cheesecake filling. Use a toothpick or a wooden skewer to lightly swirl the puree.

6. Bake until the filling is set, about 30 minutes, rotating the pans halfway through baking. Transfer to a wire cooling rack and let cool to room temperature. Transfer to the refrigerator and let chill for at least 2 hours before serving.

Raspberry Truffles (seen on Annie’s Eats, but I didn’t use the same recipe)

6 ounces fresh raspberries
2 ounces bittersweet chocolate, finely chopped
2½ tablespoons heavy cream

1. Gently wash and dry the raspberries.

2. In a small heavy saucepan, bring the cream to a simmer over medium-high heat. (Do not rapidly boil.) Pour the cream over the chocolate. With a fork, gently stir, starting in the center and working toward the edge, until the ganache is smooth.

3. Let the mixture stand at room temperature until it’s thick enough to hold a shape, about 45 minutes, then, using a pastry bag with a small opening, pipe into the stemmed opening on the raspberries.

Chocolate Drizzle (adapted from Tartine’s Chocolate Friands)

I didn’t make this separately, I just stirred in more cream to the ganache leftover from the raspberry truffles. I’m offering it here separately as a good chocolate drizzle recipe.

2 ounces bittersweet chocolate, finely chopped
⅓ cup heavy cream

In a small heavy saucepan, bring the cream to a simmer over medium-high heat. (Do not rapidly boil.) Pour the cream over the chocolate. With a fork, gently stir, starting in the center and working toward the edge, until the ganache is smooth.

raspberry swirl cheesecake cupcakes 5

For the chocolate cupcakes, I used this recipe for the cupcake portion; this champagne buttercream for the frosting; and this method for the chocolate-covered strawberries.

tomato mozzarella tart with basil crust

tomato basil tart 5

I planted tomatoes in my garden this year with high hopes and low expectations. Last year I lost all of my precious tomato plants to fusarium wilt, and even though I didn’t do anything to rid the soil of the fungus, I couldn’t resist planting a few tomato plants this year too. They started strong but succumbed to the disease before setting fruit. At that point, I settled in for a tomato-less summer.

tomato basil tart 1

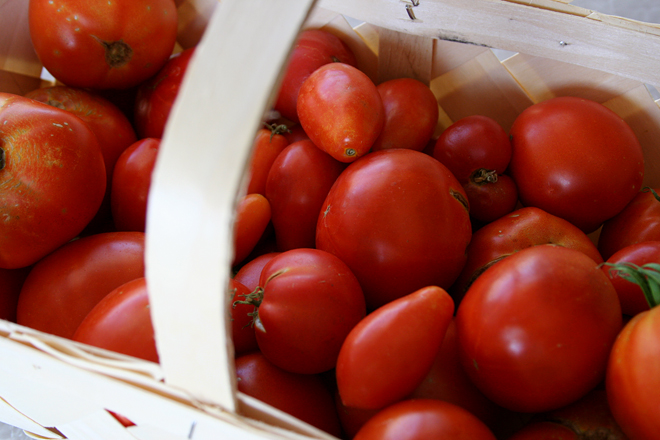
Instead, I’ve had what’s nearly been a landmark year! After describing my tomato woes to a coworker, she started bringing me some tomatoes from her garden. At first it was a trickle, just enough so I could make each of my favorite tomato dishes once. She also bought me a handful of zebra tomatoes while traveling. And then I bought myself a pound or so of tomatoes from our town’s little farmer’s market. And then the bonanza from my coworker – nearly ten pounds of beefsteak, romas, and cherries. This was enough to make all of my favorites again, plus try some new recipes.

tomato basil tart 2

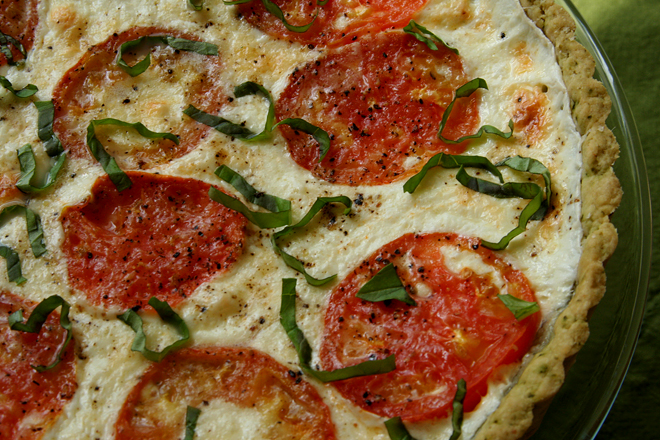
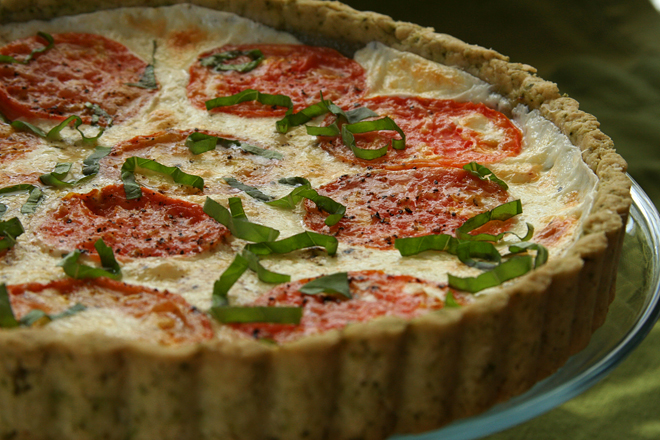
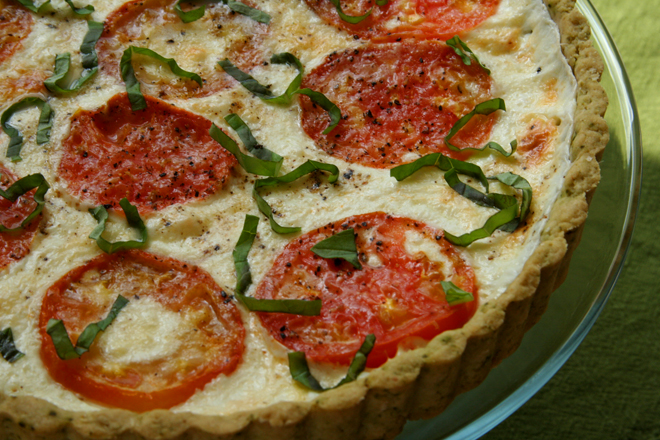
This was first on my list. It has all the ingredients of pizza, but rearranged and with a whole lot of butter added. How can that be bad?

tomato basil tart 3

The basil crust is fragrant, tender but sturdy enough to hold up the toppings. The mozzarella holds the toppings on. And the real star is those thin but deeply flavorful slices of tomatoes. There is nothing I like more than a landmark year for tomatoes. But next year, I’m determined to successfully plant my own – but maybe I’ll still take some off my coworker’s hands.

tomato basil tart 4

One year ago: Fresh Pasta
Two years ago: Pappa al Pomodoro
Three years ago: 100% Whole Wheat Sandwich Bread
Four years ago: Lemon Pancakes with Blueberry Syrup

Printer Friendly Recipe
Tomato Mozzarella Tart with Basil Crust (adapted from Jack Bishop’s The Complete Italian Vegetarian Cookbook via Ezra Pound Cake; crust adapted from Dorie Greenspan’s Sweet Tart Dough)

I used fresh mozzarella (as seen on Annie’s Eats) both times I made this, but when I removed the tart from the oven, I noticed a puddle of liquid skimming across the baked cheese. Once cooked, I don’t think fresh mozzarella seems so different from the firmer type, which isn’t as moist and won’t release liquid onto the surface of the tart, so in the future, I’ll use regular mozzarella instead of fresh. (Fortunately, the crust didn’t seem to get soggy from the extra liquid.)

The original crust recipe was for a flaky pie type of crust, which used ice water. It shrunk when I baked it, plus I wanted something sturdier, so I adapted a traditional tart crust to include basil. This is a tart after all!

Crust:
½ cup loosely packed basil leaves
1 clove garlic, peeled
1¾ cups (8.4 ounces) all-purpose flour
1 tablespoon cornstarch
½ teaspoon salt
8 tablespoons unsalted butter, cold, cut into ½-inch cubes
1 egg, lightly beaten

Tart:
8 ounces mozzarella, sliced
2 medium tomatoes, thinly sliced
salt
black pepper
parmesan
3-4 basil leaves, slivered

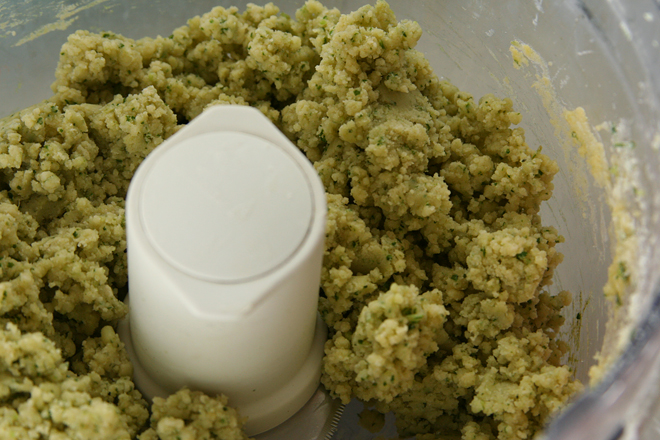
1. In a food processor fitted with the metal blade, process the basil and garlic until finely chopped. Add the flour, cornstarch, and salt; pulse to combine. Add the butter; process in 1-second pulses until the largest pieces of butter are the size of peas. Add about half the egg, pulse, then add the remaining egg. Process continuously until the dough forms clumps and curds. The sound of the food processor will change when it gets to this point.

2. Evenly press the dough onto the sides and bottom of a 9-inch tart pan with a removable bottom. Spray a 12-inch square of aluminum foil with cooking spray and press it, sprayed-side down, onto the tart crust. Freeze for at least 30 minutes.

3. Adjust a rack to the middle position and heat the oven to 375 degrees. Remove the tart crust from the freezer and spread pie weights over the bottom. Transfer the tart pan to a baking sheet and bake for 20 minutes. Remove the foil and bake another 5 minutes, until the crust is just starting to brown. Remove from the oven, maintaining the oven temperature.

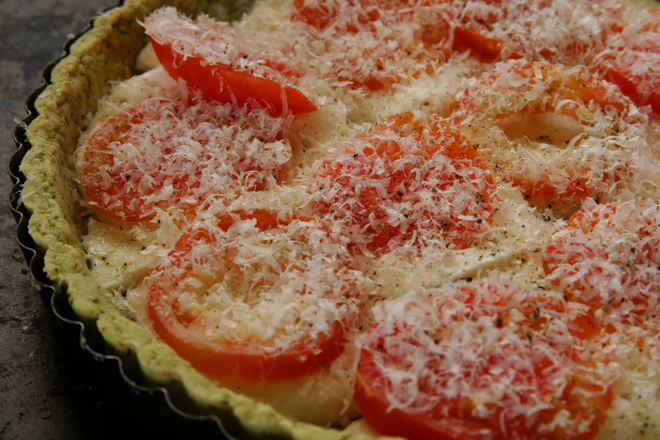
4. Line the crust evenly with slices of mozzarella, overlapping if necesary. Top the mozzarella with slices of tomatoes (do not overlap the tomatoes). Season with salt and pepper. Grate a generous layer of parmesan cheese over the tomatoes.

5. Bake the tart for 25-30 minutes, until the crust is brown and the cheese is melted and just starting to brown. Transfer to a cooling rack. Evenly distribute the slivered basil over the top of the tart. Let cool 5 minutes before serving.

tomato basil tart 6

pepper-crusted salmon with wasabi dipping sauce

wasabi salmon 4

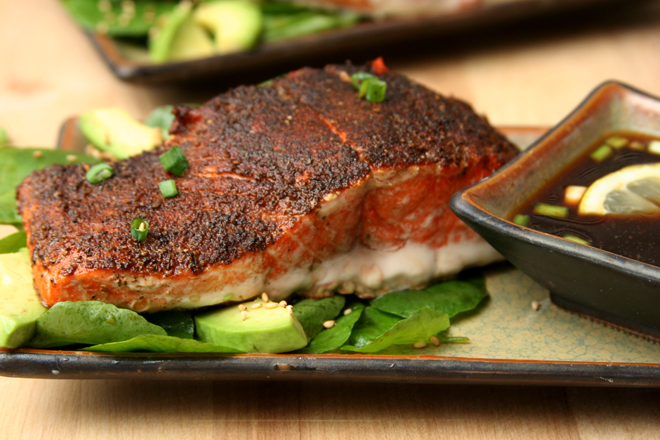
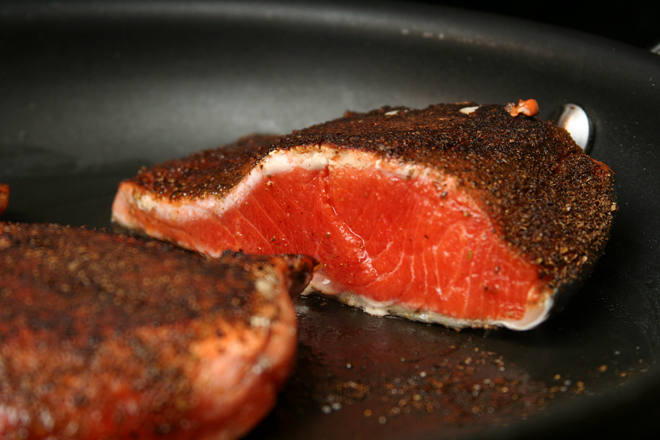
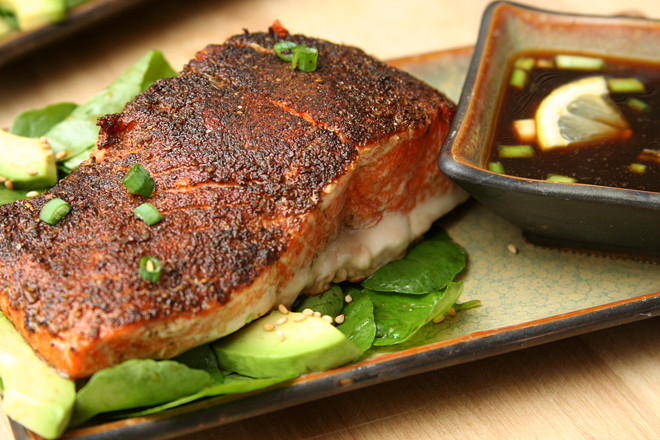
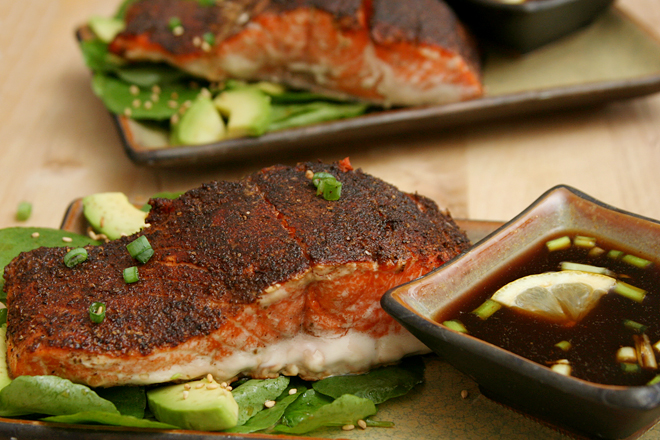
This is one of the best new meals I’ve made recently. The salmon was perfectly browned on top but still juicy in the middle. The Old Bay and lemon were interesting matches with the wasabi and ginger, but it definitely worked. The watercress and avocado salad I served the salmon with was the perfect bright balance to the umami-rich fish and soy sauce dip. The meal had a few of my favorite sushi components, with the fish, wasabi, and avocado, but it went a different direction with the salad and Old Bay.

wasabi salmon 1

It was an unusually light weekend dinner for us. Usually those tend to include a lot more carbs and red meat. It isn’t rare that they also require a serious investment of time in the kitchen, and this recipe differs from that routine as well.

wasabi salmon 2

In fact, there is absolutely no reason this wouldn’t fit right in with our weekday routine of healthy and quick meals. And that’s good news, because there are more weeknights than weekends, and that means more opportunities to make this dish.

wasabi salmon 5

One year ago: Dulce de Leche Cupcakes
Two years ago: Beer-Marinated Flank Steak
Three years ago: Zucchini Bread
Four years ago: Chocolate Whopper Malted Drops

Printer Friendly Recipe
Pepper-Crusted Salmon with Wasabi-Lemon Dipping Sauce (adapted from Steven Raichlen’s Planet Barbecue! via epicurious and from Cook’s Illustrated’s Glazed Salmon recipe)

Serves 4

I served this with Avocado and Watercress Salad (without the apple), and it was absolutely perfect.

For the sauce:
1 tablespoon wasabi powder
1 tablespoon water
1 tablespoon grated fresh ginger
juice of 1 lemon
½ cup soy sauce
1 scallion, white and green parts, minced

For the salmon:
2 tablespoons Old Bay seasoning
½ teaspoon kosher salt
1 teaspoon sugar
¼ teaspoon cornstarch
4 (8-ounce) salmon fillets
coarsely ground black pepper
1 tablespoon canola oil

1. Heat the oven to 300 degrees. In a small bowl, mix the wasabi powder and water until smooth. Set aside for 10 minutes to enhance the wasabi flavors, then add the remaining sauce ingredients.

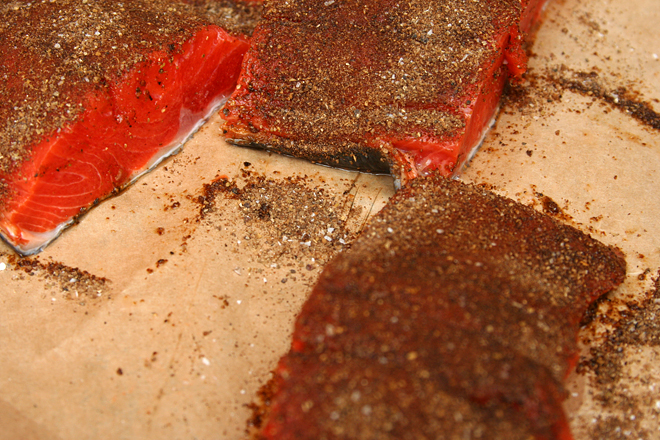
2. In a small bowl, combine the Old Bay, salt, sugar, and cornstarch. Rub into the flesh (not the skin) of the salmon. Season with a generous layer of coarsely ground black pepper, pressing the pepper into the salmon.

3. Heat the oil in a nonstick 12-inch oven-proof skillet over medium-high heat. Transfer the salmon to the pan, flesh-side down. Cook without moving for 1 minute, then flip and cook for another minute. Transfer the skillet to the oven; cook 8-10 minutes, or until the thickest part of the salmon reaches an internal temperature of 125 degrees. Serve immediately.

wasabi salmon 3

barbecue cowboy beans

cowboy beans 7

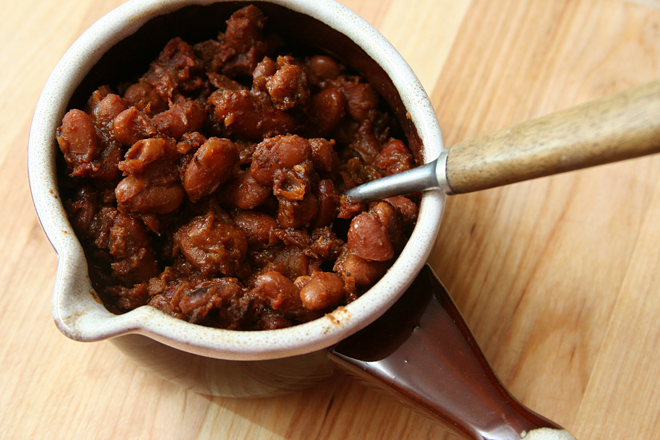
I feel like I should wait and do a comparison post with this recipe, because I have a friend who makes some seriously good cowboy beans. Hers are full of meat with a dominant sweet flavor. They’re always one of my favorite dishes on the potluck table.

cowboy beans 2

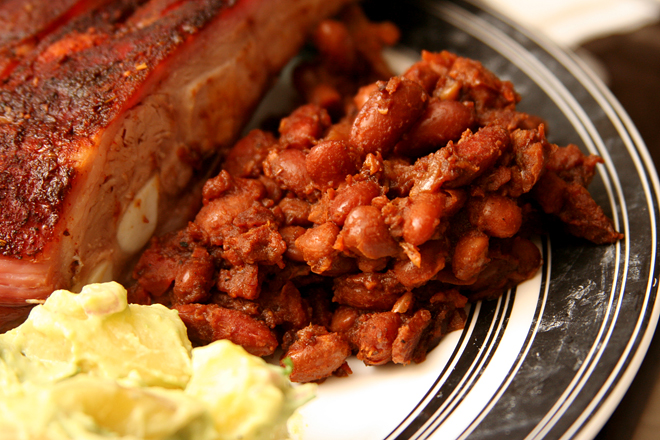
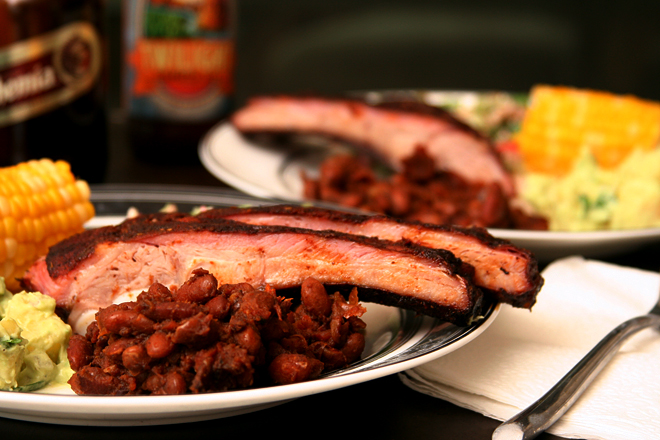
For my own version though, I wanted something lighter to serve as a side dish to barbecued ribs. When you’re spending hours cooking big slabs of meat, you don’t really need ground beef in your side dish. A few slices of bacon provide plenty of meaty depth, combined with sweet-bitter molasses and a slew of acidic ingredients like ketchup and beer.

cowboy beans 3

To be honest, I’m not sure what makes a pot of beans “cowboy” instead of just “baked.” A lot of recipes contain ground meat, but not all of them. This is the only one with spicy chiles. But honestly, I don’t much care. What matters most is that these are perfect along barbecued meat, and if I want a chile-less, meatier version, I can have that too.

cowboy beans 4

One year ago: Grilled Pita Breads
Two years ago: Whole Wheat Bagels
Three years ago: Amaretto Cheesecake
Four years ago: Blackberry Swirl Ice Cream

Printer Friendly Recipe
Barbecue Cowboy Beans (adapted from Something Edible)

Serves 6

If you don’t want to buy two kinds of beans, feel free to choose one or the other.

I didn’t use the liquid smoke because I didn’t have any, so I can’t attest to how it affects the beans. I doubt adding smoky flavor would be a bad thing though.

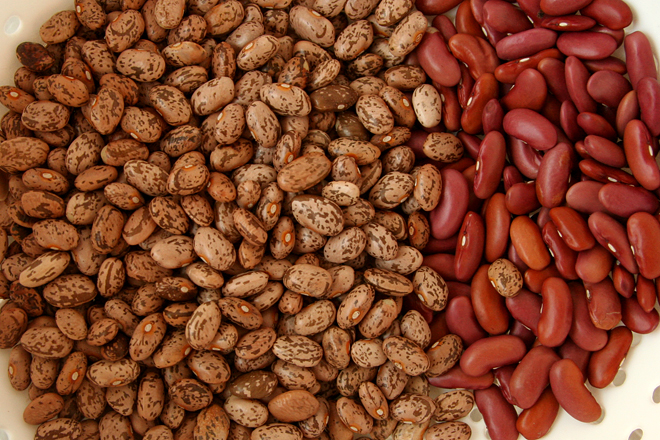
6 ounces (about 1 cup) dry pinto beans, rinsed and sorted
2 ounces (about ⅓ cup) dry kidney beans
salt
6 slices (about 6 ounces) bacon, chopped
½ medium onion, chopped
2 cloves garlic, minced
1 teaspoon allspice ground
½ teaspoon ground coriander
½ teaspoon ground black pepper
1 teaspoon dry mustard
¼ cup beer
1 (10-ounce) can diced tomatoes with chiles
¼ cup ketchup
¼ cup molasses
1 tablespoon cider vinegar
1 teaspoon hickory liquid smoke (optional)

1. Heat the oven to 300 degrees. Place the beans and 1 teaspoon salt in a 5-quart Dutch oven; add enough water to cover the beans by 1½ inches. Bring the water to a boil over medium-high heat, then cover the pot and transfer it to the oven. Cook for 75 minutes, until the beans are tender. Drain the beans. Increase the oven temperature to 400 degrees.

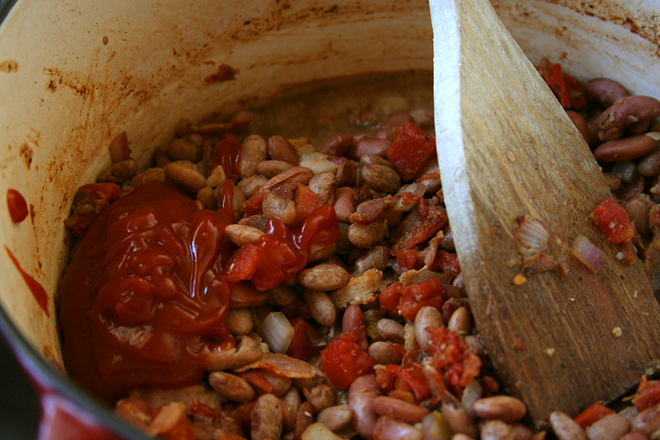
2. Add the bacon to the now-empty Dutch oven. Cook over medium heat until fat begins to render, 3-4 minutes. Add the onion and cook, stirring occasionally, until softened and translucent, 5-6 minutes. Add the garlic, allspice, coriander, black pepper, and mustard; cook, stirring constantly, until fragrant, about 1 minute. Add the beer and scrape the bottom of the pot to release the browned bits. Add the tomatoes and chiles with their juice, the ketchup, molasses, cider vinegar, liquid smoke (if using), and 1 teaspoon salt. Bring to a simmer over medium-high heat.

3. Cover and transfer the beans to the oven. Bake for 4 hours. Serve.

cowboy beans 5

chocolate oreo blackberry cake

blackberry oreo cake 6

I know there are bakers out there who are sad when their birthday rolls around and none of their friends offer to bake them a cake, because their friends are all used to the baker making the cakes. Or maybe their friends don’t feel like their cake could ever live up to one of the baker’s cakes. But even if the baker is the one known for their delicious and beautiful birthday cakes, a birthday cake is more than dessert, it’s a gift, so I understand why people are disappointed when no one makes them one.

blackberry oreo cake 8

But I am not one of those bakers. Without family or a large group of friends nearby, my opportunities to make dramatic layer cakes are few and far between. My birthday is one of those rare chances, and I soak it up for all its worth. For me, letting me bake my own cake is the gift.

blackberry oreo cake 9

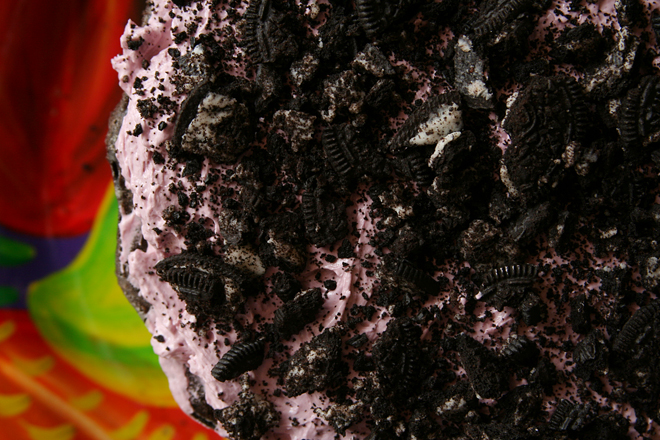
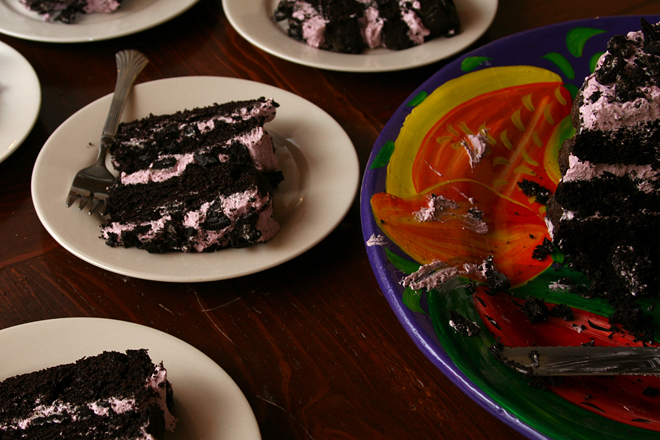
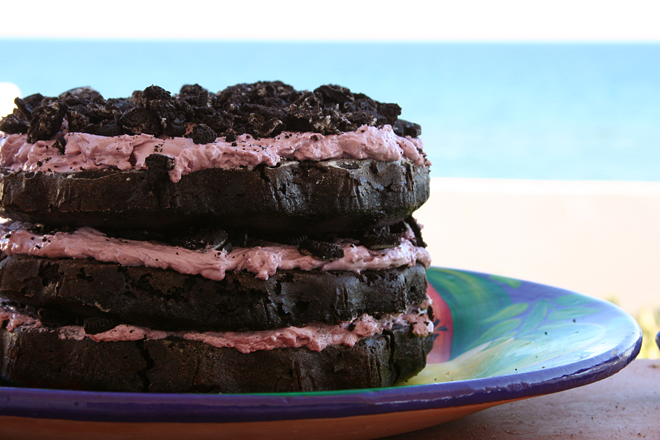
This year, I did have someone to share that cake with, when my family celebrated my birthday on vacation last week on the beach in Mexico. Vacation baking holds its own challenges, but I can adapt. I did as much as possible at home – mixing up the dry ingredients, measuring and crushing the oreos, and making and freezing the buttercream. The cake itself is an easy one to mix up, no mixer required, but the swiss meringue buttercream needed to be re-whipped after defrosting to restore its smooth and airy texture. My original intention was to smooth the buttercream over the top and sides of the cake and coat the cake with a glossy and dramatic chocolate glaze, but with the scalloped edges of the disposable pans I baked the cakes in, that seemed like a messy prospect. Fortunately, I love the look of an open-sided cake like this.

blackberry oreo cake 11

With eight people to share it with, this cake went fast! It probably doesn’t hurt that chocolate and berries are such a great flavor combination, not to mention that everyone loves moist cake and fluffy frosting. And the best part is that, since my family celebrated early and this cake was gone by my actual birthday, I get to make another cake just for me!

blackberry oreo cake 5

One year ago: Pesto
Two years ago: Banana Peanut Butter Muffins
Three years ago: Lemon Meringue Cake
Four years ago: Black (and Pink) and White Chocolate Cake

Printer Friendly Recipe
Chocolate Oreo Blackberry Cake (cake adapted from Dessert for Breakfast; buttercream adapted from Martha Stewart)

Makes one three-layer 8-inch cake

Note that the 8 ounces of blackberries is before straining. You should end up with about ¾ cup (which is 6 ounces both by weight and volume) of puree.

Cake:
2 cups (8 ounces) cake flour
2 cups (14 ounces) sugar
1 cup (4 ounces) Dutch-processed cocoa powder
1 teaspoon table salt
1 teaspoon baking powder
1 teaspoon baking soda
2 eggs, room temperature
½ cup vegetable oil
1 cup milk, room temperature
1 cup hot coffee

Buttercream:
8 ounces (by weight; about 1¼ cups) blackberries, pureed and strained
3 egg whites
1 cup (7 ounces) sugar
pinch salt
18 tablespoons (2¼ sticks) unsalted butter, at room temperature

For assembly:
18 Oreos, coarsely chopped or crumbled

1. For the cake: Adjust a rack to the middle position and heat the oven to 350 degrees. Grease and flour three 8-inch round pans.

2. In a large bowl, mix the flour, sugar, cocoa, salt, and baking powder, and baking soda. In a separate bowl, mix the eggs, oil, and milk. Pour the wet ingredients into the dry ingredients and whisk until evenly distributed. Pour in the coffee and mix until smooth.

3. Divide the batter evenly between the prepared pans. Bake for 25 to 35 minutes, until a toothpick inserted into the center of a cake comes out clean. Transfer to a wire rack and let the cakes cool for 10 minutes. Use a knife to loosen the sides of the cakes from the pans, then invert the cakes onto the wire rack and remove the pans. Cool completely before frosting.

4. For the buttercream: Combine the egg whites, sugar, and salt in a heatproof mixer bowl set over a pot of simmering water. Whisk until the sugar dissolves and the mixture registers 160 degrees on an instant-read thermometer. Remove the bowl from heat and attach it to a mixer fitted with the whisk attachment. Beat on medium-high speed until stiff peaks form and the mixture has cooled to room temperature, about 8 minutes. Reduce the speed to medium and add the butter, 2 tablespoons at a time, beating after each addition. With the mixer on low, add the strained blackberry puree, mixing just until incorporated. Use immediately, or cover and refrigerate for up to 3 days. (Bring to room temperature, and beat on low speed until smooth before using.)

5. To assemble the cake: If necessary, trim the top of each layer to make a flat, even surface. Transfer one layer to a cake plate or large platter. Spread one-third of the buttercream over the cake, then distribute one-third of the crushed cookies evenly over the buttercream. Repeat the layering of cake, buttercream, and oreos twice more. Serve immediately or loosely cover for up to 8 hours.

blackberry oreo cake 7

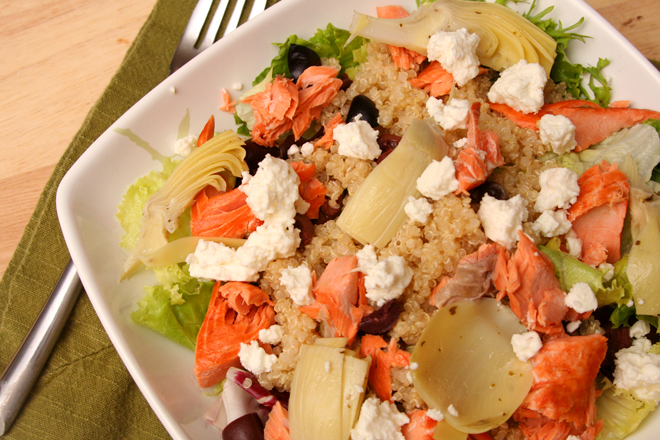
mediterranean salmon salad

mediterranean salmon salad 6

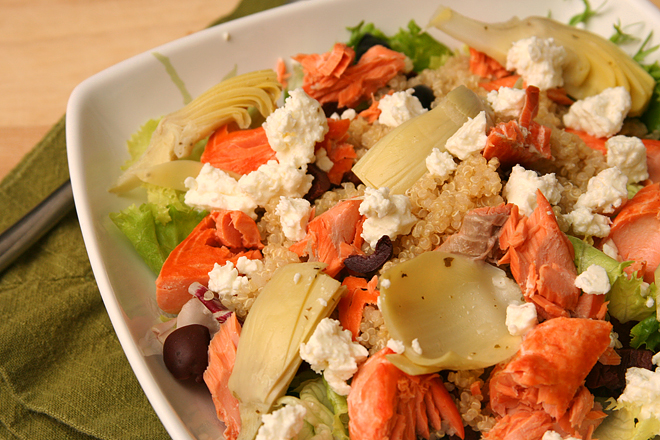
This salad ended up being something really special, one of those that I raved about all through dinner. But I can’t pinpoint exactly what made it stand out so much. I like all the ingredients, quite a bit actually, but I could say the same for a lot of salads that I like but don’t gush over like I did this one.

mediterranean salmon salad 1

It might have been the wild sockeye salmon my store has been stocking, or the fancy block of feta. You can rarely go wrong with artichoke hearts and quinoa. I was worried the bite of raw onion would be distracting, but it blended in perfectly, and the occasional briny kalamata olive was a treat (for me; not so much for Dave the olive-hater). I think I have a new favorite salad.

mediterranean salmon salad 3

One year ago: Peaches and Cream Scones
Two years ago: Mint Brownies
Three years ago: Crockpot Chicken Broth
Four years ago: Chicken with Forty Cloves of Garlic

Printer Friendly Recipe
Mediterranean Salmon Salad (adapted from Weekly Bite via Prevention RD)

Serves 4

Dressing:
3 tablespoons red wine vinegar
2 tablespoons extra virgin olive oil
1 teaspoon mustard
salt and pepper to taste

Salad:
1 cup uncooked quinoa, rinsed
salt
24 ounces (1½ pounds) salmon filet
oil
8 cups spring mix, lightly packed
½ cup kalamata olives, halved
1 small red onion, thinly sliced
1 (14-ounce) can marinated quartered artichoke hearts, drained
1 cup (4 ounces) crumbled feta

1. In a small bowl, whisk all of the dressing ingredients together.

2. Bring 1 1/4 water and 1/4 teaspoon salt to a boil in a medium saucepan. Add the quinoa, reduce the heat to low, and cover; cook for 15 minutes, then remove the pan from the heat and let set, still covered, for another 10 minutes. Add 2 tablespoons of the dressing, using a fork to fluff the quinoa and evenly distribute the dressing.

3. Adjust an oven rack to the top position, about 3 inches from the broiler. Line a baking sheet with aluminum foil. Transfer the salmon to the foil-lined pan; season with salt and either spray or brush with a light layer of oil. Broil until the salmon is lightly browned and opaque in the center, about 10 minutes. Remove from the oven and let rest for a few minutes, then use two spoons to flake the salmon flesh into bite-sized pieces, leaving the skin stuck to the foil. Toss the flaked salmon with 1 tablespoon of dressing.

4. Add the lettuce to a large bowl; pour the remaining dressing over it and toss to evenly distribute. Mix in the quinoa, salmon, olives, onion, artichokes, and feta. Serve immediately.

mediterranean salmon salad 4

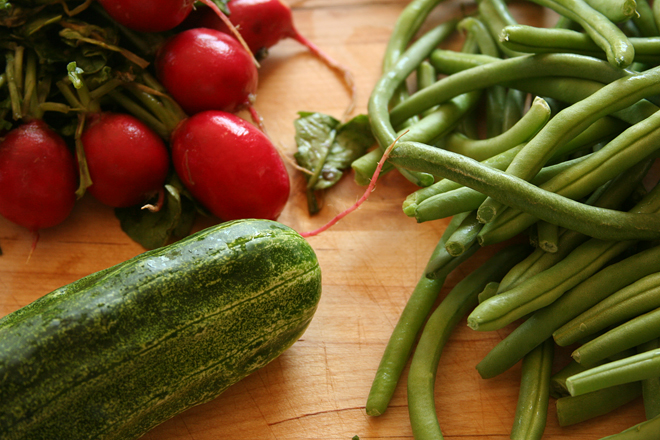
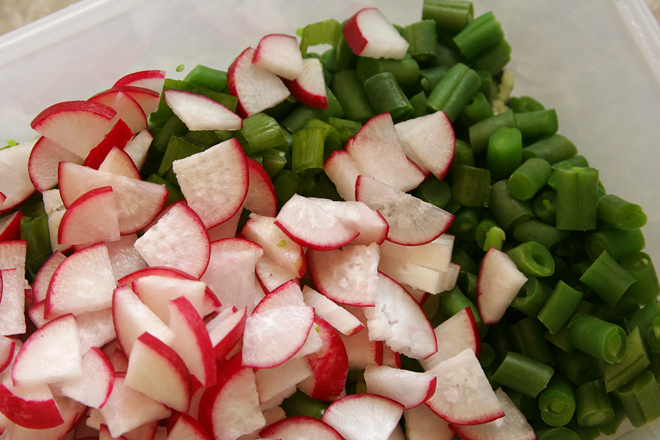
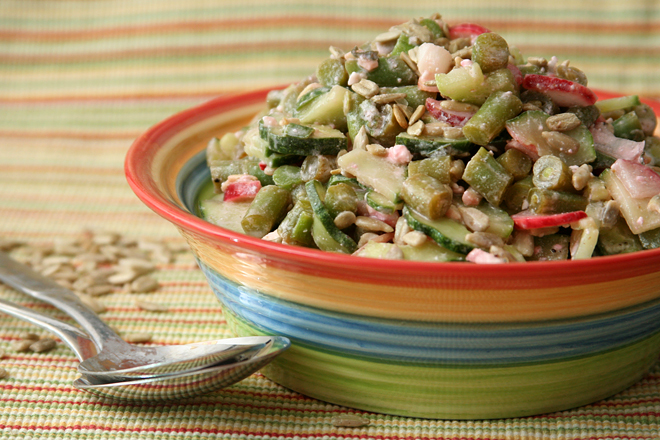
summer chopped salad with feta

summer chopped salad with feta 7

I wore out coleslaw. It was too convenient and easy and good and healthy, so I made it whenever we had pulled pork or burgers or barbecue. And that was fine for a while, for over a year, in fact, but now I’ve had enough. I needed something new to catch my fancy.

summer chopped salad with feta 1

I found it. This is my new favorite side salad for a number of reasons. For one thing, it passes the no-lettuce test; delicate lettuce-based salads seem so out of place next to a hearty burger. It goes without saying that a side salad should be healthy and easy, and this one is.

summer chopped salad with feta 3

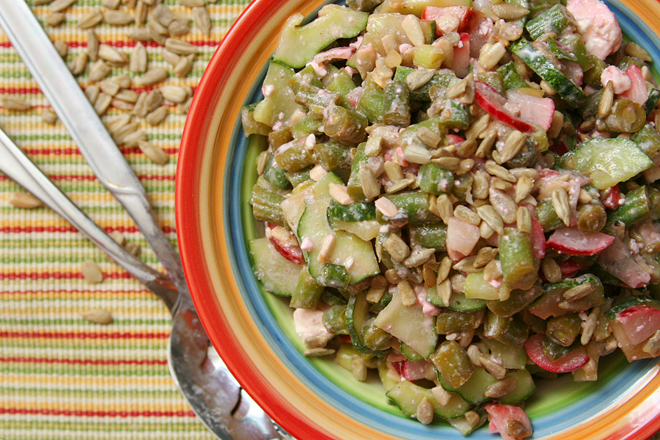
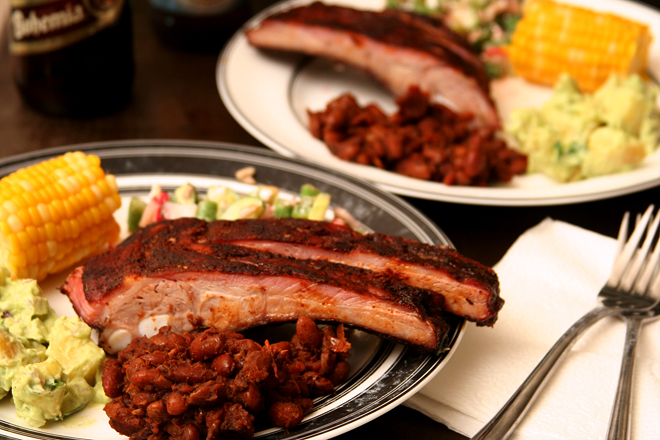
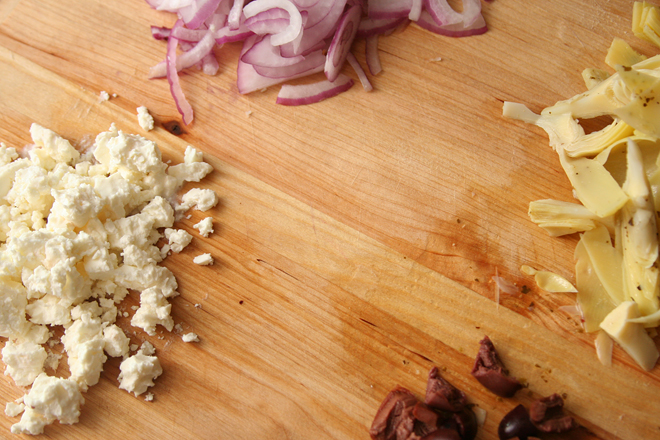
And maybe most importantly, it’s adaptable. I’ve been making coleslaw nearly the exact same way for well over a year, but this salad can be made with different vegetables, different types of citrus juice, and different seasonings to match the meal you’re serving it with. The original recipe used lime juice and cumin for a southwestern vibe, but I wanted something more Mediterranean, so I went with lemon juice this time.  It went perfectly with spareribs.  Coleslaw has been relegated from my favorite summer side to just my favorite pulled pork topping.
summer chopped salad with feta 6

One year ago: Chocolate Chocolate Chunk Muffins
Two years ago: Tarte Noire
Three years ago: Seafood Lasagna
Four years ago: Salmon Clubs with Avocado Butter

Printer Friendly Recipe
Summer Chopped Salad with Feta (adapted from Smitten Kitchen)

Serves 8 as a side dish

I steamed the green beans for about 1 minute, then did not blanch them (dip them into ice water to stop the cooking). If you do plan to blanch your beans, cook them for another minute or two. My beans looks olive green instead of bright green in the photos because I took these pictures the day after I made the salad, and the citrus juice had darkened the beans.

16 ounces green beans, lightly cooked, chopped into ¼-inch pieces
2 cups (7 ounces) radishes, halved and thinly sliced
1 hothouse or 3 English cucumbers (5 ounces total), halved lengthwise and sliced
4 scallions, thinly sliced
1 cup (4 ounces) crumbled feta
¾ cup toasted sunflower seeds, salted or unsalted
¼ cup fresh lemon juice
½ teaspoon salt
freshly ground black pepper, to taste
2 tablespoons thinly sliced fresh mint leaves
2-4 tablespoons extra virgin olive oil

Mix everything except the olive oil.  Add the oil and more salt to taste.

summer chopped salad with feta 8

barbecued spareribs

barbecued ribs 9

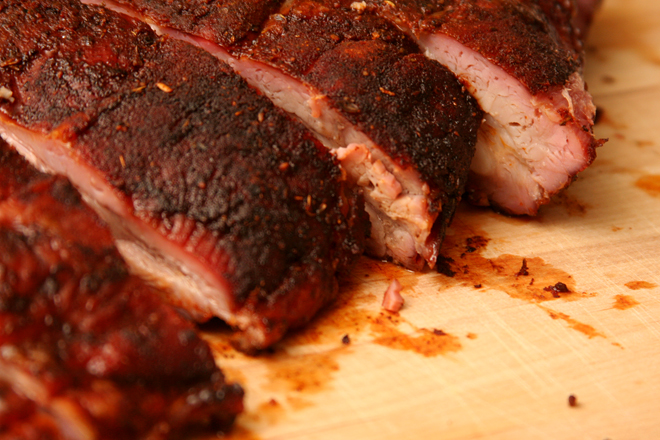
Last year’s barbecued pulled pork went so well that I assumed slow-cooking other meats on the grill would be just as easy, but ribs has proved me wrong. I tried baby backs first, mostly because they’re more famous, but also because they’re what I remember eating as a kid. Since they’re smaller than spareribs, I assumed they’d cook faster, and that didn’t hurt either.
barbecued ribs 5

A week after the baby back ribs spent 2 hours on the grill becoming jerky, I bought spareribs and, comparing Cooks Illustrated’s recipes for the two ribs, saw that they recommend nearly the same cooking time for the two very different types of ribs. Leaner, smaller baby backs supposedly need 2 hours on the grill with 4½ quarts of briquettes plus a second wave of fresh coals halfway through, while larger, fattier spareribs spend 2-3 hours on the grill with only 2½ quarts of charcoal and no refresher. That doesn’t sound right.

barbecued ribs 6

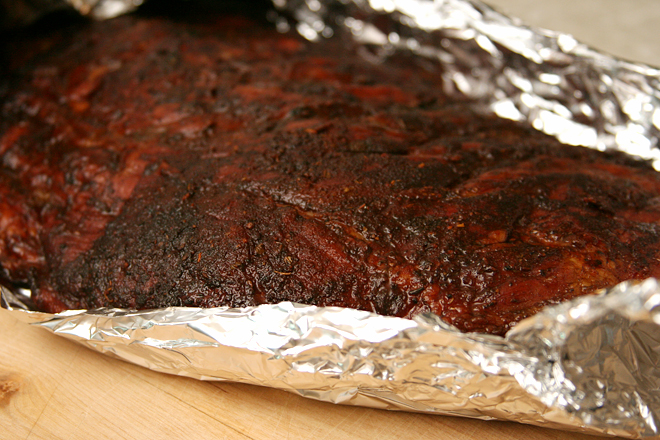
It certainly didn’t work right, as the poor baby backs were desiccated at the end of their two hours. The spareribs, however, fared much better, juicy and smoky and tender, just like ribs should be. In fact, this method – less charcoal, basically – worked so well that I want to try the same thing with baby back ribs now – although I won’t cook the smaller ribs as long as I did the larger ones, which seems like it should be obvious.

barbecued ribs 7

One year ago: Sour Cream Chocolate Cake Cookies
Two years ago: Rum-Drenched Vanilla Cake
Three years ago: Coconut Roasted-Pineapple Dacquoise
Four years ago: Kung Pao Shrimp

Printer Friendly Recipe
Barbecued Spareribs (from Cooks Illustrated’s The New Best Recipe)

Serves 4 (according to CI, but this would serve at least 6 people with my appetite)

At the end of about 2 hours, the coals were completely extinguished. Fortunately, the meat seemed cooked and tender by then. I didn’t bother with barbecue sauce; the dry rub contributes plenty of flavor.

Dry rub:
3 tablespoons paprika
1½ tablespoons chili powder
1½ tablespoons ground cumin
1½ tablespoons dark brown sugar
1½ tablespoons salt
2¼ teaspoons dried oregano
2¼ teaspoons sugar
2¼ teaspoons ground black pepper
2¼ teaspoons ground white pepper
¾-1½ teaspoon cayenne pepper

2 full racks spareribs (about 6 pounds total)
2 (3-inch) wood chunks or 2 cups wood chips
2 cups barbecue sauce (optional)

1. Rub both sides of the rib with the dry rub and let stand at room temperature for 1 hour. (For stronger flavor, wrap the rubbed ribs in a double layer of plastic wrap and refrigerate for up to 1 day.)

2. Soak the wood chunks in cold water to cover for 1 hour and drain, or place the wood chips on an 18-inch square of aluminum foil, seal to make a packet, and use a fork to create about 6 holes to allow smoke to escape.

3. Meanwhile, light a large chimney starter filled a bit less than halfway with charcoal briquettes (about 2½ quarts, or 40 coals) and allow to burn until covered with a thin layer of gray ash. Empty the coals into one side of the grill, piling them up in a mound 2 or 3 briquettes high. Keep the bottom vents completely open. Place the wood chunks or the packet with the chips on top of the charcoal. Put the cooking grate in place, open the grill lid vents completely, and cover, turning the lid so that the vents are opposite the wood chunks or chips to draw smoke through the grill. Let the grate heat for 5 minutes and clean it with a wire brush.

4. Position the ribs over the cool part of the grill. Barbecue, turning the ribs every 30 minutes, until the meat starts to pull away from the bones and has a rosy glow on the exterior, 2 to 3 hours. (The initial temperature inside the grill will be about 350 degrees; it will drop to 250 degrees after 2 hours.)

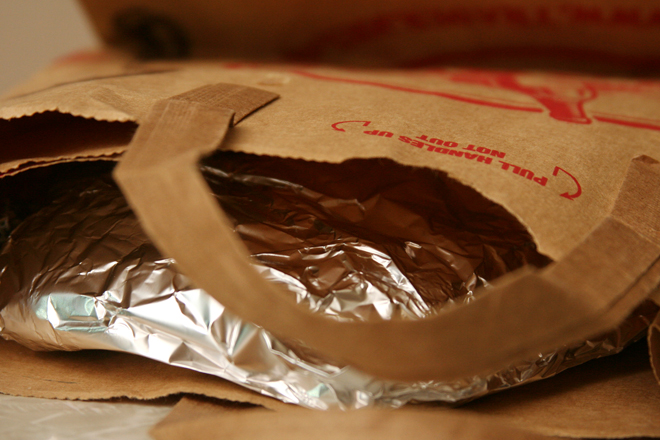
5. Remove the ribs from the grill and wrap each slab completely in aluminum foil. Put the foil-wrapped slabs in a brown paper bag and crimp the top of the bag to seal tightly. Allow to rest at room temperature for 1 hour.

6. Unwrap the ribs and brush with the barbecue sauce, if desired. Cut the ribs between the bones and serve immediately.

barbecued ribs 8

watermelon agua fresca

watermelon agua fresca 7

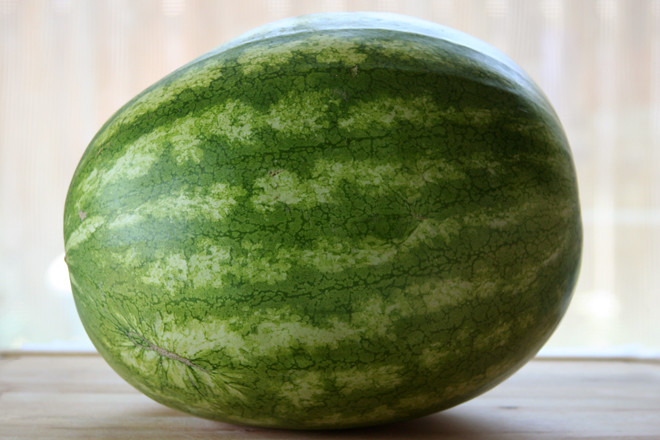
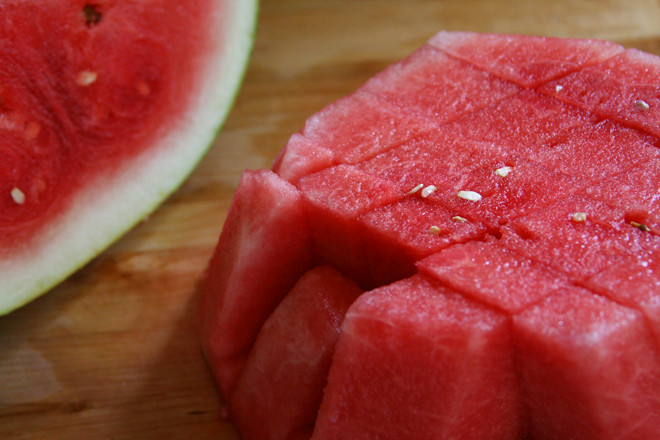
This is the first watermelon I’ve ever bought. The thing is, I don’t actually like watermelon. Because it tastes like water. And if I want water, I’ll just drink some; no need to eat faintly sugary overly soft fruit.

watermelon agua fresca 1

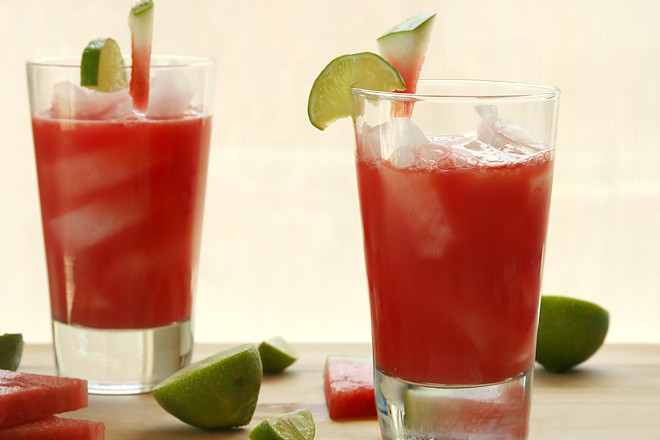
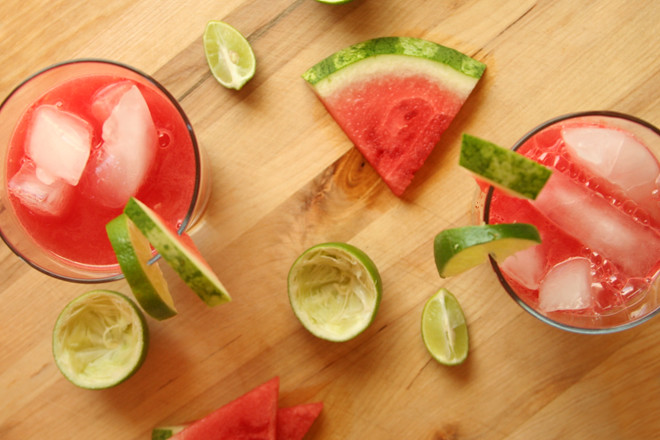
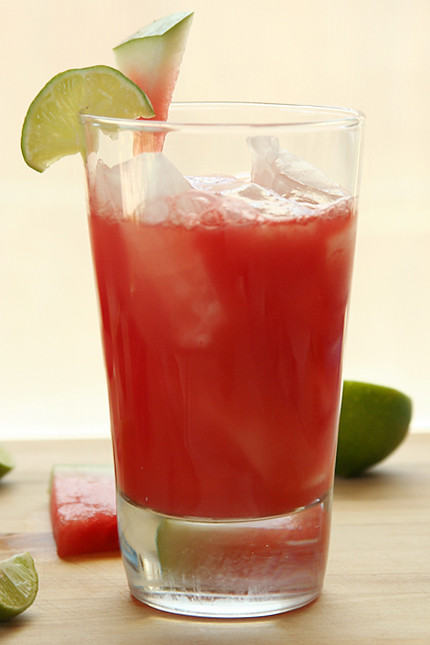
But, I see now – sugary water, isn’t that the perfect base for a drink? It isn’t quite enough on its own; after all, watermelon is bland. But with some tart lime juice to brighten it up and maybe some mint, now we’re talking. Basically, think of the most supremely refreshing ingredients you can, then blend them up and serve them over ice.

watermelon agua fresca 3

This is so good that Dave had to verify with me that there was no alcohol in it. Yes, a refreshing summer citrusy drink without tequila or rum! I will be buying many, many more watermelons.

watermelon agua fresca 8

One year ago: Strawberry Cream Cake
Two years ago: Turkey Burgers
Three years ago: Potato Galette
Four years ago: Pecan Honey Sticky Buns

Printer Friendly Recipe
Watermelon Agua Fresca (adapted slightly from sunny vegan)

6 servings

8 cups cubed, seeded, peeled watermelon (about a third of a medium watermelon)
6 tablespoons lime juice
4 sprigs mint (optional)
ice
sparkling water

In a blender or food processor, puree the watermelon, lime juice, and mint. Pour the mixture into a fine-mesh strainer (or a colander lined with a single layer of cheesecloth); set aside for 30 minutes for the liquid to drain, stirring occasionally. Discard the solids in the strainer. Serve the remaining liquid over ice, topped off with sparkling water.

watermelon agua fresca 6