squash kale pizza

squash kale pizza 6

This recipe knocked me out of a months-long pizza rut. At about two homemade pizza dinners a month, that’s a lot of green chile-turkey pepperoni-mushroom pizza. Not that anyone around here was complaining.

squash kale pizza 1

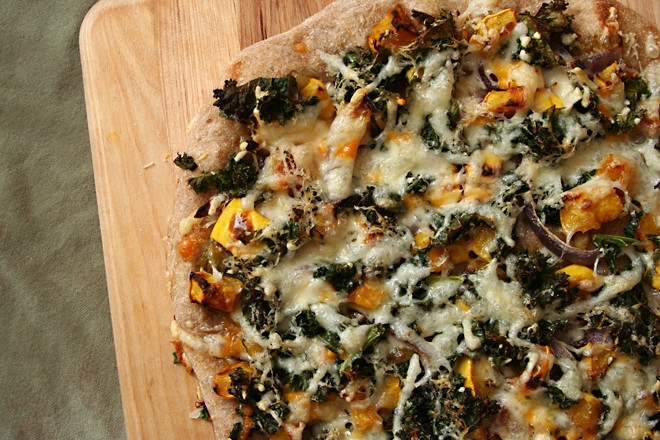
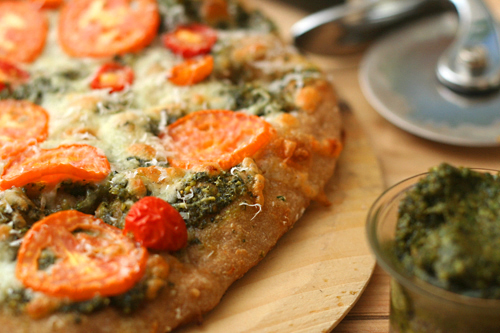
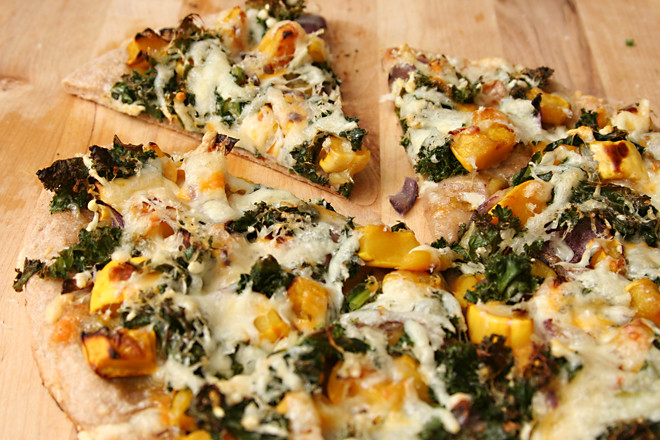
It’s the complimentary earthy flavor that squash and kale both have, combined with the contrasting sweetness of the squash and slight bitterness of the kale that make this pizza work so well. Onions with savory centers and caramelized tips bridge the gap, then the whole thing is topped with plenty of cheese, which is what really matters. I don’t know if it’s going to rival green chile-turkey pepperoni-mushroom for our next rut, but it was definitely a nice diversion.

squash kale pizza 3

One year ago: Beef in Barolo
Two years ago: Steak au Poivre
Three years ago: Red Velvet Whoopie Pies

Printer Friendly Recipe
Kale and Butternut Squash Pizza (from Bev Cooks via Cate’s World Kitchen)

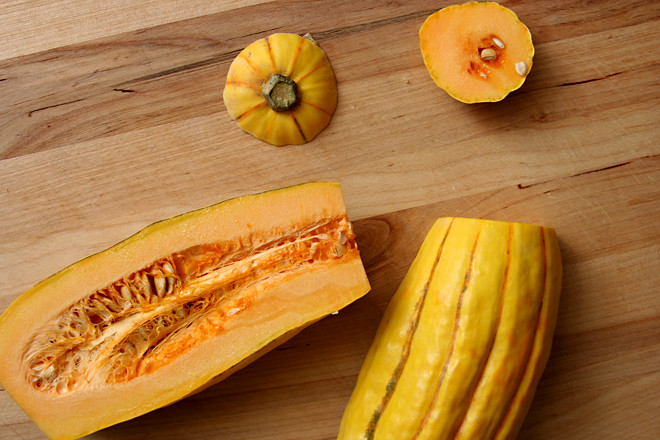
I used acorn squash the first time I made this and delicata squash the second time. So technically, I haven’t made butternut squash and kale pizza yet!

Dough for two 10-inch pizza crusts (half of this recipe)
1½ tablespoons olive oil, divided
salt and freshly ground pepper
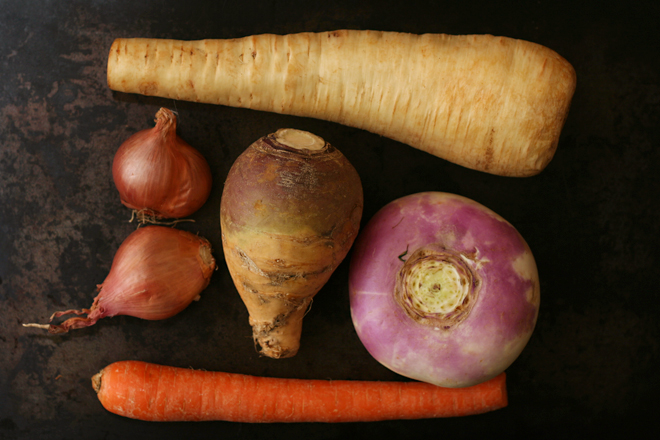
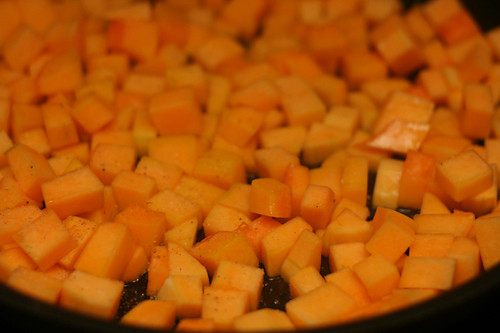
1 medium butternut squash, peeled, seeded and cut into bite-sized cubes
2 small red onions, cut into wedges
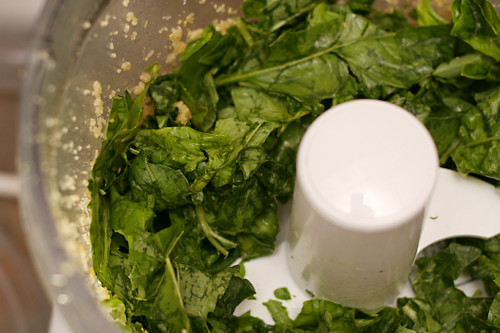
3 cups kale (from about 1 bunch), cut in thin ribbons
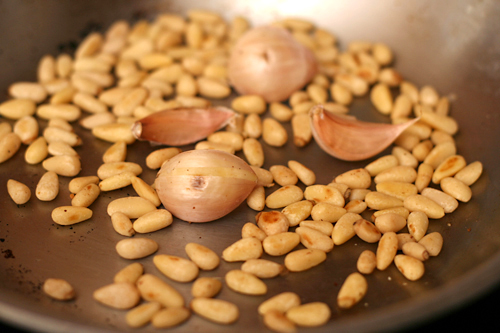
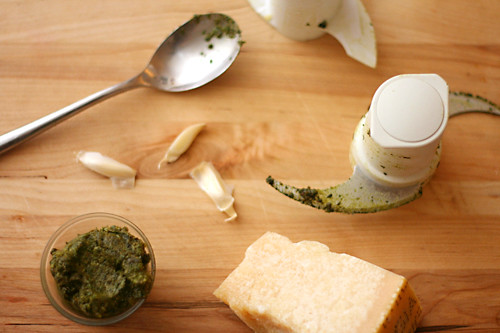
2 garlic cloves, sliced
2 cups (8 ounces) shredded mozzarella cheese

1. Place a pizza stone on the bottom rack of the oven and preheat the oven to 400 degrees. Divide the dough in two and shape each portion into a ball. Set the balls of dough aside for 10 to 30 minutes, loosely covered, to allow the gluten to relax.

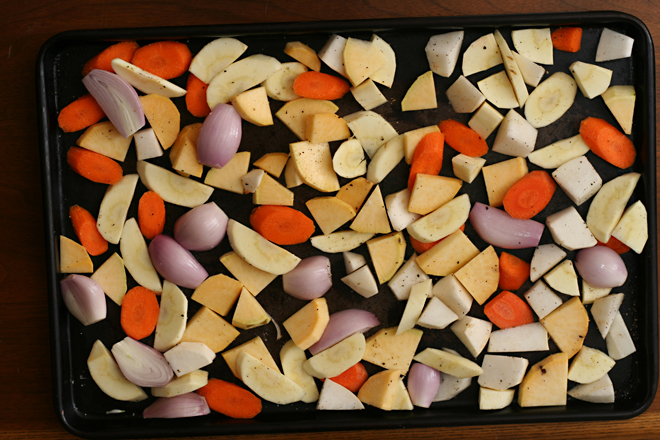
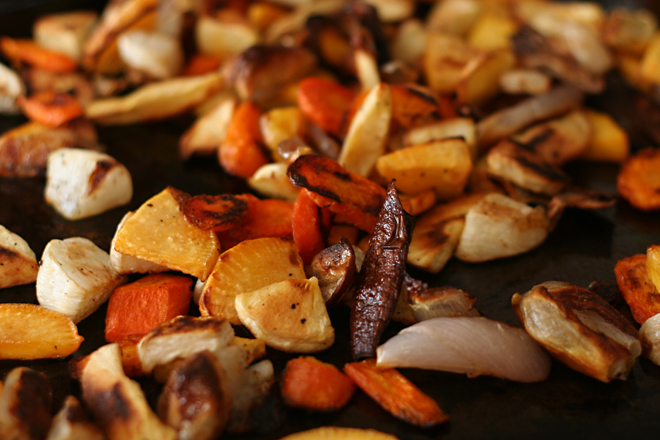
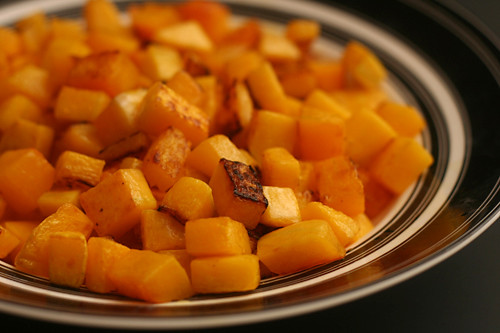
2. Transfer the squash and onions to a large baking sheet; season with a generous pinch of salt and pepper and coat with 1 tablespoon of oil. Bake, stirring once halfway through, until softened and browned, about 30 minutes.

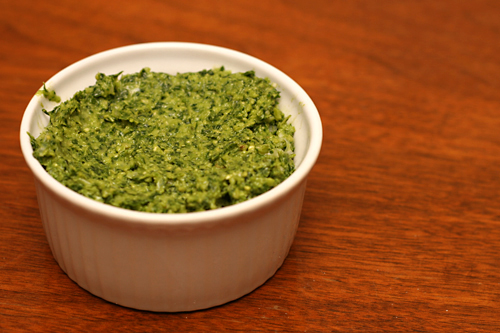
3. Heat the remaining ½ tablespoon of oil with the garlic in a large skillet; add the kale and a pinch of salt; cook, stirring constantly, until wilted, about 2 minutes. Remove from the heat.

4. Work with one ball of dough at a time on a lightly floured surface or a damp cloth. Flatten the dough, then pick it up and gently stretch it out, trying to keep it as circular as possible. Curl your fingers and let the dough hang on your knuckles, moving and rotating the dough so it stretches evenly. If it tears, piece it together. If the dough stretches too much, put it down and gently tug on the thick spots. Transfer the round of dough to a large square of parchment paper; slide onto a pizza peel.

5. Top the dough with half of each of the roasted vegetables, kale, and cheese. Slide the pizza with the parchment onto the hot baking stone. Bake for 8-10 minutes, until the crust is browned around the edges. Transfer the pizza to a cooling rack without the parchment. Let the pizza rest for 5 minutes before serving. Repeat with the remaining ingredients.

squash kale pizza 4

lentil marinara

lentil marinara 5

When my coworker came back to work after spending weeks in the hospital (and in my small town, that means a hospital over two hours away from home) with his sick newborn baby, I figured they could use a home-cooked meal. I thought tomato soup, homemade bread, and some nice cheese to make grilled sandwiches would be the perfect comfort food. Unfortunately, it would require a trip to the store and a couple free hours to cook, and when I saw how exhausted my friend was, I figured getting something to him soon was more important than getting the perfect meal to him.

lentil marinara 1

So I made extras of what I was having for dinner that night. Spaghetti is warm and familiar, so fits the comfort food bill, and who doesn’t like the pasta and tomato sauce combination? The lentils, though, might seem strange to some people.

It makes perfect sense to me, because lentils are a great protein source, and while I can’t claim that they taste like beef, there is something meaty-like about them. Besides, what’s more comforting than knowing that your dinner is not only delicious, it’s healthy?

lentil marinara 2

And now I have another friend who needs comfort food after the death of her father on Thanksgiving day. Unfortunately, I can’t just bring her my leftovers, because she lives a thousand miles away. I don’t think virtual comfort food is quite the same, but at least she’ll know I’m thinking about her and her family and wishing them the best during a difficult time.

lentil marinara 3

One year ago: Pasta with Brussels Sprouts and Pine Nuts
Two years ago: Thai-Style Chicken Soup
Three years ago: Pumpkin Ginger Muffins

Printer Friendly Recipe
Lentil Marinara (adapted from Branny Boils Over)

6-8 servings

I simmered this for 30-45 minutes, but, if you have the time, I suspect that a longer simmering time while covered would really help the lentils absorb the tomato flavor.

I like canned whole tomatoes for sauce because they break down better, but if you don’t mind larger tomato chunks in your sauce, diced tomatoes will work fine. I chop canned whole tomatoes by sticking kitchen shears into the can and snipping away.

Update 4/23/12 – I’ve made this a couple more times, and I’ve decided that it’s probably too heavy on the lentils.  Using up a whole bag at once is nice, but 8 ounces of lentils for 2 cans of tomatoes will make a tastier sauce.

2 tablespoons oil
1 onion, diced
4 garlic cloves, minced
¼ teaspoon red pepper flakes
½ teaspoon oregano
¼ cup white or red wine
2 (28-ounce) cans whole tomatoes, coarsely chopped
1 (1-pound) bag brown lentils, rinsed and picked over
3 cups water
1 teaspoon salt

1. In a large saucepan over medium heat, heat the oil until it flows like water when the pan is tilted. Add the onion and a pinch of salt and cook, stirring occasionally, until the onion just starts to brown around the edges, about 8 minutes. Add the garlic and red pepper flakes and cook, stirring constantly, until fragrant, about 30 seconds.

2. Add the wine, scraping any browned residue on the bottom of the pan. Increase the heat to medium-high and add the remaining ingredients. Bring to a simmer, then reduce the heat to medium-low and cook, stirring occasionally, about 30 minutes, until the lentils are tender and the sauce is thickened.

lentil marinara 4

cauliflower with mustard-lemon butter

mustard cauliflower 3

While you don’t want to serve plain steamed vegetables on Thanksgiving, maybe not every dish needs to be drowned in cream, you know? These cauliflower have enough flavor from spicy mustard and tart lemon to stand up to the rich foods at Thanksgiving, but they’re also light enough to serve with any weeknight chicken dish.

mustard cauliflower 2

It’s almost too simple to provide a recipe for, as this is nothing more than roasted cauliflower topped with mustardy, lemony butter. Fortunately, that means it’s easy. Whether you’re making this for a busy holiday or on a busy weeknight, the cauliflower can be chopped in advance and the flavorings can be mixed. That means it takes even less time to make than green bean casserole – but it tastes a lot better and has a fraction of the calories.

mustard cauliflower 4

Two years ago: Pumpkin Biscotti
Three years ago: Bourbon Pumpkin Cheesecake

Printer Friendly Recipe
Cauliflower with Mustard-Lemon Butter (adapted from Bon Appétit via epicurious)

6 servings

If you aren’t a fan of cauliflower, I don’t see any reason that this method wouldn’t work just as well with broccoli or Brussels sprouts.

1 small head of cauliflower (about 1¾ pounds), cut into 1-inch florets
1 teaspoon kosher salt
2 tablespoons butter
2 tablespoons fresh lemon juice
4 teaspoons Dijon mustard
1 teaspoon finely grated lemon peel
1 tablespoon chopped fresh parsley

1. Heat the oven to 400 degrees. Arrange the cauliflower in a single layer on the prepared baking sheet; sprinkle with salt. Roast until the cauliflower is slightly softened, about 15 minutes.

2. Meanwhile, melt the butter in a small saucepan over medium heat. Whisk in the lemon juice, mustard, and lemon peel.

3. Scrape the mustard-lemon butter evenly over the cauliflower; toss to evenly coat the cauliflower and roast until crisp-tender, about 10 minutes longer. Transfer the cauliflower to a serving dish; sprinkle with parsley and serve warm.

mustard cauliflower 5

roasted root vegetable stuffing

root vegetable stuffing 6

When I was creating my Thanksgiving menu last year, it occurred to me that most of the traditional Thanksgiving courses are based on carbs – stuffing, potatoes, rolls. The only traditional non-carb sides are the green bean casserole that nobody likes and the sugar-laden cranberries. I have nothing against carbs, and I know all about splurging for a holiday, but I actually like vegetables. Plus, if you include lower calorie food in the menu, you can eat more before filling up!

root vegetable stuffing 1

I would go so far as to almost call this healthy, although it depends on the cornbread you use. It’s mostly vegetables – vegetables whose natural sugars are intensified through roasting. The sweet earthy root vegetables meld perfectly with similarly flavored cornbread.

root vegetable stuffing 2

Beyond the parsnips and rutabaga, it’s a typical dressing recipe with eggs and broth binding the ingredients together before the mixture is baked until it’s crisp on top (but maybe not dry and burned like mine). The result is a dressing that’s almost too good to be topped with white wine gravy.

root vegetable stuffing 4

Two years ago: Glazed Lemon Cookies
Three years ago: Wheatmeal Shortbread Cookies

Printer Friendly Recipe
Cornbread Dressing with Roasted Root Vegetables (adapted from Bon Appétit via epicurious)

Serves 6

6 ounces shallots, peeled, halved if small, quartered if large
8 ounces carrots, sliced ¼-inch thick on the diagonal
8 ounces parsnips, sliced ¼-inch thick on diagonal
8 ounces rutabaga, cut into ½-inch cubes
salt and pepper
olive oil
4 large garlic cloves, unpeeled
1 tablespoon fresh thyme
1 tablespoon chopped fresh rosemary
2 teaspoons minced fresh sage
2 cups ½-inch cubes of cornbread
2 large eggs, lightly beaten
2 tablespoons unsalted butter, melted
1 cup low-salt chicken broth (or Golden Turkey Stock)

1. Preheat the oven to 425 degrees. Spread the shallots, carrots, parsnips, and rutabaga in a single layer on a rimmed baking sheet. Season with a generous sprinkling of salt and pepper and drizzle with just enough olive oil to coat. Roast for about 45 minutes, stirring every 15 minutes, until the vegetables are soft and browned around the edges. Add the garlic during last 15 minutes. Set the roasted garlic aside; transfer the other vegetables to a large bowl.

2. Spread the cornbread cubes over the now-empty baking sheet. Bake until dry, 10-15 minutes, stirring about halfway through the cooking time.

3. Spray a baking dish with nonstick spray. Mince the garlic; add it to the vegetables along with the herbs and cornbread cubes. In a medium bowl, whisk the eggs, then whisk in the broth and butter; pour the egg mixture over the vegetable mixture and gently fold to combine.

4. Transfer the mixture to the prepared baking dish. Cover the pan with foil; bake until heated through, about 30 minutes. Uncover and bake until browned and crisp, about 15 minutes longer.

root vegetable stuffing 5

butternut squash pie

squash pie 7

The winter squashes are a multifaceted group. Pumpkin is obviously perfect with sweet flavors and can be used in custards, pies, cakes, quick breads, cookiesthe whole dessert (or breakfast!) spectrum. Pumpkin does take well to savory dishes, but it’s more common that you’ll see butternut squash used in dinner instead – despite their very similar flavor.

squash pie 3

Furthermore, pumpkin in desserts is nearly always pureed. Squash in dinner is often diced, sometimes pureed. This pie, with its diced butternut squash, did not follow the rules.

squash pie 4

My brain had some trouble deciding if this was dessert or dinner, is what I’m saying. The pears and raisins were obviously sweet, but the big chunks of squash had a strong earthy tone. I think with more sugar and smaller chunks of squash, they would blend into the other pie ingredients, and the whole thing would seem more dessert-like. It isn’t bad as it is, but, perhaps, a little confusing.

squash pie 9

Valerie chose this for Tuesdays with Dorie, and she has the recipe posted. Instead of steaming the squash, I roasted all of the filling ingredients except the orange juice in the oven until the squash was softened, mostly because my oven was already on but also to potentially get some delicious caramelization.  Because roasting drove off some liquid, I didn’t feel I needed to add the breadcrumbs to the filling.

Two years ago: Buffalo Chicken Pizza
Three years ago: Gallitos (Costa Rican Breakfast Tacos)

squash pie 6

butternut squash risotto

butternut squash risotto 7

The first time I made this risotto, all the smoke from the chicken I was roasting set off the fire alarm in my apartment building. Everyone had to go stand outside in the cold (this is back when I lived somewhere where it actually got cold), but I didn’t want to leave the stove because I needed to stir my risotto! So Dave was the one who had to go confess to everyone that the alarm was my fault. He loved that.

butternut squash risotto 2

And I loved this risotto. It isn’t nearly as rich as the pumpkin risotto I made a couple years ago; that one has twice the cooking fat and a generous dollop of mascarpone. All that cheese mutes the flavor of the squash, and squash is what I want to highlight in a squash risotto.

butternut squash risotto 3

This recipe has a trick (it’s a Cooks Illustrated recipe; of course it has a trick) to eeking out all of the possible flavor from squash, and that’s to sauté to fibers and seeds, then use them as a base for the liquid used to cook the rice. It’s almost like making a squash broth, which is the perfect way to incorporate squash flavor into the entire risotto, not just in the chunks of squash distributed throughout the rice.

butternut squash risotto 4

The risotto was much better than that alarm-raising chicken. It involves some annoying steps with straining the broth and of course the tedious peeling and chopping of squash, but it isn’t anything as bad as explaining to your neighbors why they have to stand out in the cold on a Sunday night.

butternut squash risotto 6

One year ago: Pomegranate-Glazed Salmon
Two years ago: Brown Rice with Black Beans
Three years ago: Sushi Bowls

Printer Friendly Recipe
Butternut Squash Risotto (from Cooks Illustrated)

Serves 4 as a main course and 6 as a first course

2 tablespoons olive oil
1 medium butternut squash (about 2 pounds), peeled, seeded, and cut into ½-inch dice (about 3½ cups), seeds and fibers reserved
¾ teaspoon salt
¾ teaspoon pepper
4 cups low-sodium chicken broth
1 cup water
4 tablespoons unsalted butter
2 small onions, chopped very fine (about 1½ cups)
2 cloves garlic, minced
2 cups Arborio rice
1½ cups dry white wine
¾ cup (1½ ounces) finely grated Parmesan cheese
¼ teaspoon grated nutmeg
2 tablespoons minced fresh sage leaves

1. Heat the oil in a 12-inch skillet over medium-high heat until shimmering but not smoking. Add about 3½ cups of the squash in an even layer and cook without stirring until the squash is golden brown, 4-5 minutes; stir in ¼ teaspoon salt and ¼ teaspoon pepper. Continue to cook, stirring occasionally, until the squash is tender and browned, about five minutes longer. Transfer the squash to a small bowl and set aside.

2. Return the skillet to medium heat; add the reserved squash fibers and seeds and any leftover diced squash. Cook, stirring frequently to break up the fibers, until lightly browned, about 4 minutes. Transfer to a large saucepan and add the chicken broth and water; cover the saucepan and bring the mixture to a simmer over high heat, then reduce the heat to medium-low to maintain a bare simmer.

3. Melt 3 tablespoons of butter in the now-empty skillet over medium heat; when the foaming subsides, add the onions, garlic, remaining ½ teaspoon salt, and remaining ½ teaspoon pepper. Cook, stirring occasionally, until the onions are softened, 4 to 5 minutes. Add the rice to the skillet and cook, stirring frequently, until the grains are translucent around the edges, about 3 minutes. Add the wine and cook, stirring frequently, until fully absorbed, 4 to 5 minutes.

4. Meanwhile, strain the hot broth through a fine-mesh strainer set over a medium bowl, pressing on the solids to extract as much liquid as possible. Return the strained broth to the saucepan and discard the solids in the strainer; cover the saucepan and set over low heat to keep the broth hot.

5. When the wine is fully absorbed, add 3 cups of the hot broth and half of the reserved squash to the rice. Simmer, stirring every 3 to 4 minutes, until the liquid is absorbed and the bottom of the pan is almost dry, about 12 minutes.

6. Stir in about ½ cup of hot broth and cook, stirring constantly, until absorbed, about 2 minutes; repeat with additional broth 2 or 3 more times, until the rice is al dente. Off the heat, stir in the remaining tablespoon of butter, the Parmesan, sage, and nutmeg. Gently fold in the remaining cooked squash. If desired, add an additional ¼ cup of broth to loosen the texture of the risotto. Serve immediately.

butternut squash risotto 5

banh mi

banh mi 4

For me, taste will trump authenticity every time. Spaghetti and meatballs is more Italian-American than Italian, most of my favorite sushi rolls didn’t originate in Japan, and Vietnamese banh mi sandwiches include a whole mess of ingredients that aren’t available to me. I don’t want to miss out on any of these foods just because they don’t closely resemble the versions in their original countries.

banh mi 1

I’m not saying that I have no interest in more authentic versions of banh mi. I’m just saying that a sandwich made of grilled meat, pickled vegetables, fresh herbs, and spicy tangy sauce is too good to wait around for daikon radish to show up at my grocery store, because it never will. Regular radishes will have to stand in for the daikon radish. And I’m sure pâté is a particularly luscious addition, but still not one that’s worth the trouble of searching southern New Mexico for it.

banh mi 2

Besides, the mixture of storebought mayo, sriracha, and fish sauce is good enough to make any sandwich tempting. One with tangy pickled vegetables and tender grilled pork, all piled on an airy baguette, has become one of my favorite sandwiches ever. It may be a far cry from its origins, but it’s too good to care.

banh mi 3

One year ago: Cheesecake (comparison of 3 recipes)
Two years ago: Twice-Baked Potato Cups
Three years ago: Banana and Peanut Butter Stuffed French Toast

Printer Friendly Recipe
Vietnamese-Style Grilled Pork Sandwiches (from America’s Test Kitchen Feed)

I used a mixture of Greek yogurt and mayonnaise, heavy on the yogurt, instead of just mayonnaise in the sauce.

Sliced cucumbers are a nice addition, and as you can see, the carrots and radishes work just fine if they’re thinly sliced instead of julienned. (I haven’t figured out how to julienne things on my mandoline.)

Serves 4

½ cup rice vinegar
3 tablespoons sugar
2 tablespoons sriracha
4 tablespoons fish sauce
1 (6-inch) piece daikon radish, peeled and julienned
1 carrot, peeled and julienned
¾ cup mayonnaise
1 pork tenderloin (about 1 pound)
2 teaspoons five-spice powder
1 (24-inch) baguette, cut into 4 pieces and split partially open lengthwise
1 cup fresh cilantro leaves

1. Combine vinegar and sugar in microwave-safe bowl. Heat until sugar has dissolved, about 90 seconds. Add 1 tablespoon sriracha, 2 tablespoons fish sauce, daikon, and carrot to bowl and toss to combine. Set aside for 15 minutes.

2. Meanwhile, whisk mayonnaise, remaining 1 tablespoon sriracha, and remaining 2 tablespoons fish sauce together in second bowl.

3. Rub pork with five-spice powder. Grill over hot fire until browned on all sides and pork registers 145 degrees, 12 to 14 minutes. Transfer to cutting board, tent with foil, and let rest 5 minutes. Grill bread until lightly toasted, about 1 minute.

4. Slice pork crosswise into thin slices. Drain vegetables. Spread mayonnaise on inner sides of bread halves. Arrange slices of pork on bread and top with vegetables and cilantro. Serve.

sweet corn hash

sweet corn hash 5

I went to the local farmer’s market for the first time in over a year this morning and was sadly reminded why I hadn’t gone to the local farmer’s market for over a year. Apparently a farmer to the locals is someone who makes little crafts, not someone who grows stuff. The only vegetable for sale was zucchini, and we already have plenty of that.

sweet corn hash 2

So I’ve been buying my summer corn at the grocery store, which just seems wrong, doesn’t it? Ears of corn should be bought out of the back of a truck on the side of the road. That doesn’t seem to be an option here, but it would be a shame to go the whole summer without eating corn just because I can’t find a local vendor selling it.

sweet corn hash 1

It doesn’t take much more than the word “hash” to get me excited about a recipe. It’s hard to go wrong with a dish based on browned potatoes topped with eggs. Buying corn at the grocery store instead of the farmers market might not feel as satisfying, but it works just fine, especially once the corn is mixed with lightly caramelized onions, browned potatoes, and crisp bacon.

sweet corn hash 7

One year ago: Whole Wheat Challah
Two years ago: Potato Tomato Tart
Three years ago: Fruit Bruschetta

Printer Friendly Recipe
Sweet Corn Hash (adapted from Joy the Baker)

Serves 4

Joy roasted her potatoes, but I thought it would be easier to brown them in the skillet with the rest of the ingredients. She also adds butter at the end to increase the richness of the dish, but I figured a couple slices of bacon would have the same affect, while contributing great flavor of its own.

We also stirred in some chopped roasted green chile, because ‘tis the season.

4 slices bacon, chopped
4 medium red potatoes, cubed
1 onion, chopped
4 ears corn, kernels removed
¼ cup parsley, minced
salt and ground black pepper
4 eggs

1. In a large nonstick skillet over medium heat, cook the bacon until almost crisp. While the bacon cooks, put the potatoes in a medium microwave-safe bowl; spoon a couple teaspoons of rendered bacon fat from the skillet into the bowl; stir. Cover the potatoes loosely and microwave on high for 3 minutes, stirring twice.

2. Add the onions and potatoes to the skillet with the bacon; cook, stirring occasionally, until browned, about 8 minutes. Stir in the corn and most of the parsley. Lower the heat to medium-low. Using the back of a spoon, create 4 wells in the hash. Break one egg into each well; season with salt and pepper. Cover the pan and cook, without stirring, until the white is set, about 8 minutes. Garnish with the remaining parsley; serve immediately.

sweet corn hash 6

carrot spice muffins

carrot spice muffins 4

I am against vegetables in cake, but I am pro vegetables in muffins. I am against raisins in cake, but I am pro raisins in muffins. The same goes with nuts. Basically, carrot cake is an abomination, or at best just a vehicle for cream cheese frosting, but carrot muffins are awesome.

carrot spice muffins 1

Awesome to eat, that is; they’re a bit of a pain to make, what with the carrot shredding and nut toasting and spice measuring. But they’re worth it in the end, hearty and moist and studded with sweet raisins and bitter pecans. I have to confess to wondering if they would be even better topped with cream cheese frosting though.

carrot spice muffins 2

Nancy chose these for Tuesdays with Dorie, and she has the recipe posted. I reduced the oil to ½ cup, replaced 1 cup of all-purpose flour with whole wheat pastry flour, doubled the salt, and increased the carrot slightly.

One year ago: Chocolate Ganache Ice Cream
Two years ago: Banana Bundt Cake
Three years ago: Blueberry Sour Cream Ice Cream

carrot spice muffins 5

pesto

pesto 4

Pesto is super simple, right? Just dump some ingredients into the food processor, and thirty seconds later, you have pesto. And while that’s true, with a few extra simple steps, you can ensure that your pesto will live up to its maximum potential every single time.

pesto 1

Traditionally, pesto was made in a mortar and pestle, which smashes the ingredients into each other instead of cutting them like the food processor does. It sounds horribly tedious. You don’t want to do that.

pesto 2

However, it is important to do more than slice basil with the food processor blade. Consider that when you want to smell an herb, what do you do? You rub it between your fingers, not tear it in half, because bruising the leaves is what produces flavor. So to maximize the flavor of your basil, you need to bruise the leaves before cutting them.

pesto 3

You can do this with almost no extra effort using a trick I picked up from Jamie Oliver – just put the basil in the food processor, but with the plastic dough blade instead of the knife blade. It takes only a few seconds longer and produces just one more small utensil to clean, but it makes a big difference in flavor. Before I started using this trick, sometimes my pesto would taste grassy, but now it always tastes basil-y.

pesto 8

You probably also know that toasting nuts brings out their flavor, and it isn’t hard to do on the stovetop. I also like to toast the garlic, because I am not a fan of the tongue-stinging sharpness of raw garlic. Toasting the unpeeled cloves in a dry skillet tames garlic’s bite with very little effort. And that’s it – you’ve maximized the potential of every ingredient in pesto, ensuring dependably outstanding pesto, and it only took an extra minute or two.

pesto 7

One year ago: Yogurt-Marinated Lamb Kebabs
Two years ago: Tortellini Soup with Carrots, Peas, and Leeks
Three years ago: Summer Rolls

Printer Friendly Recipe
Pesto

2 ounces pine nuts
2 cloves garlic, unpeeled
Salt
1 large bunch (6 ounces) basil leaves, washed and dried
1-3 tablespoons extra virgin olive oil
½ ounce (¼ cup) freshly grated parmesan

1. Heat a small empty not-nonstick skillet over medium heat for several minutes. Add the pine nuts and cook, stirring constantly, for about a minute, until they’re golden brown and fragrant. Pour the nuts into a food processor bowl fitted with the knife attachment. Add the garlic to the skillet and toast, without stirring, for about 1 minute. When the first side is dark brown, turn the garlic cloves onto another flat side and continue toasting for another minute. Peel the garlic and transfer it to the food processor with the pine nuts.

2. Add ¼ teaspoon salt to the garlic and pine nuts. Process until the nuts and garlic are finely ground, 10-15 seconds. Replace the knife attachment with the plastic dough blade. Add the basil to the food processor and pulse until the basil is bruised and fragrant, about ten 1-second pulses. Remove the dough blade from the bowl and return the knife attachment. Process until basil is finely chopped, a few seconds.

3. With the machine running, slowly pour the oil into the feed tube. Scrape the sides of the bowl; process until evenly mixed. Stir in the parmesan. Serve, refrigerate for a few days, or freeze for months.

pesto 5